Chevron Crack Initiation in Multi-Pass Drawing of Inclusion Copper Shaped-Wire
←
→
Page content transcription
If your browser does not render page correctly, please read the page content below
Journal of Metals, Materials and Minerals, Vol.21 No.1 pp.1-8, 2011

             Chevron Crack Initiation in Multi-Pass Drawing of Inclusion
                               Copper Shaped-Wire
                                    Somchai NORASETHASOPON

                 Department of Mechanical Engineering, Faculty of Engineering,
             King Mongkut’s Institute of Technology Ladkrabang, Chalong-krung Road,
                             Ladkrabang, Bangkok 10520, Thailand

                                                  Abstract

         In the copper superfine wire drawing, the internal cracks such as chevron cracks and breakage of the
wire were fatal to the success of quantitative drawing operations. This paper shows how the main process
parameters, the drawing pass numbers, influence the plastic deformation, hydrostatic stress, maximum
principal tensile stress and chevron cracks initiation investigated by FEM simulation. The effect of the
lateral and longitudinal sizes of a central cylindrical inclusion in the multi-pass copper shaped-wire drawing
was studied. The plastic deformation, plastic strain, hydrostatic stress and maximum principal tensile stress
of the copper shaped-wire containing an inclusion were obtained from simulation results. A ductile fracture
criterion was chosen from literature, a large number of ductile fracture initiation criteria, to predict the
chevron crack initiation of the drawn copper shaped-wire for this investigation. The problem of chevron
cracks initiation for the investigated material was solved. This investigation provided very good results.

Key words: Copper shaped-wire, Cracks initiation, Chevron cracks, Ductile fracture criterion

Introduction
                                                         with diameters of 0.1 mm or less, the product price
         Nowadays, various superfine wires are widely    increases exponentially with the decrease of the
used in commercial products such as a fishing line,      wire diameter (2). Raskin (3) reported the causes of
screw, pin, bolt, steel cord, sawing wire, cable,        wire breakage while copper wire drawing, and
spring, screen mesh, mesh of filter, wire rope,          based his report on a survey of 673 wire breaks.
stiffening wire, antenna, sensor, bonding wire,          The report concludes that 52%, 13%, 13%, 5%,
electronic wire, etc. Superfine steel wires are used     5%, and 12% are attributable to inclusion, central
for printing meshes, filters, steel cords, saw wires,    bursting or cupping, tension break, weld break,
wire ropes, precision springs, precision screws and      silver break and others, respectively, as shown in
precision pins. Superfine non-ferrous wires are          Figure 3. It can obviously be observed that the
used for ultra small motors, semiconductor bonding       most important problem of wire breakage while
wires, magnet wires, materials for electronic            copper wires drawing is wire breakage due to
components, and electrode wires for electrical-          inclusions (WC or sintered hard alloy). Figure 4
discharge processing as shown in Figure 1.               shows the wires fracture due to an inclusion while
Multiple research efforts have been made to              copper wire drawing.
develop ultra small motors in Japan. To further
improve the performance and the efficiency of
such motors, a cross-section of the magnet wire for
the motor needs to be changed from circular to
square as shown in Figure 2. At present, the size of
this shaped (square) wire is suggested to be in a
range of 300 to 500 micrometers (1).

         Superfine wire processing requires a large
number of drawing-passes and intermediate softening      Figure 1. Use of the superfine wires in the fields of
heat treatments. In some cases, internal or chevron                precision equipment and semiconductor:
cracks and breakage of wires occur. This results in                magnet wire for wristwatch (courtesy of
high manufacturing cost. In particular, for wire                   SEIKO Corp.).
2
NORASETHASOPON, S.
by failure of the remaining annulus of the wire
matrix usually on plane at 45° to the drawing
direction. Voids can initiate at inclusions or secondary
phase particles by de-cohesion of the particle-
matrix interface or fracture of the particle in the
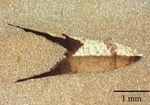
center of the neck region. The internal or chevron
cracks as shown in Figure 5 are typical ductile
fractures due to plastic deformation in wire
drawing. Figure 6 shows the chevron cracks that
Figure 2. The drawn copper (99.99 wt%) shaped- occur along the non-inclusion wire centerline on
wire. the longitudinal cross section of a copper wire.
While the inclusion was passing through the
reduction zone of the die, the highest tensile stress,
the tensile stress at the inclusion-leading-edge
strongly influenced this plastic deformation (11-14).
This crack initiation will occur if the tensile strain-
energy density reaches a critical value which can
be described by a ductile fracture criterion that was
proposed by Cockcroft and Latham (15).
Figure 3. Causes of wire breakage while copper
wire drawing (3).
Figure 5. Chevron cracks at the centerline of the
copper wire.
Figure 4. Wire breakage due to an inclusion.
Figure 6. Chevron cracks on the longitudinal cross
section of a copper wire.
The inclusion/metal system may be simplistically
considered as a composite material with the inclusions The wire breakage, defect and chevron
acting as the aggregate and the metal as the matrix cracks are fatal to industrial scale high-purity
(4-9)
. It is apparent that there are a number of factors copper superfine wire production (2-12). To reduce
that affect the performance of the whole. Among these unsatisfactory situations and thus increase
these are the volume percentage, shape, orientation, production quantity, the appropriate process parameters
and mechanical properties of the inclusions and the and high-purity material should be selected and
direction of the principal stresses with respect to used in copper superfine wire drawing (2-14). The
this orientation. The failure of the inclusion wire objective of this investigation was to determine
during drawing can be attributed to ductile fracture how the main process parameters, the drawing pass
that initiates after necking begins. Ductile fracture numbers, influence the plastic deformation,
in wire matrix is a multi-step mode of material hydrostatic stress, maximum principal tensile stress
failure that is known to be the void initiation, and internal or chevron cracks initiation occurring
growth and coalescence (10). The coalescence of the by FEM simulation.
voids forms a continuous fracture surface followed3
Chevron Crack Initiation in Multi-Pass Drawing of Inclusion Copper Shaped-Wire
Basic Theory derived from a plasticity theory for porous
materials, assuming that the volumetric strain has a
Wire Drawing critical level. The Cockroft & Latham (15) criterion
considers the effect of the maximum principal
The wire drawing process is classified as stress over the plastic strain path.
an indirect compression process, in which the
major forming stress results from the compressive Cockcroft and Latham have proposed that
stress as a result of the direct tensile stress exerted a criterion (15) for the fracture of a ductile material
in the drawing. A converging die surface in the in tension is that in which the tensile strain energy
form of a truncated cone is used. Analytical or reaches a critical value for a given condition of
mathematical solutions (16) are obtained by a free loading as follows (16):
body equilibrium method. By summing up the
ε
forces in the wire drawing direction of a free body
∫ σ * dε = (3)
f
C
equilibrium diagram at an element in the reduction 0
zone, the longitudinal stress is obtained. By
summing up the forces in the radial direction, the where⎯ε is equivalent strain, εf is fracture strain,
radial or die-breaking stress is obtained. Then σ* is maximum principal tensile stress attained in
combining those results, integrating the resulting the specimen under axial loading, and C is constant
differential equation, and simplifying, the equation for a material at a given temperature and strain rate
for the average drawing stress is obtained as shown as determined from an uniaxial tension test. A
in equation (1). material will fracture when it achieves a strain-
energy density equal to the above integral. C may
be determined from independent test data such as
σ x 1+ B ⎡ ⎛ Df ⎞ ⎤
2B
= ⎢1 − ⎜⎜ ⎟⎟ ⎥ (1) for the tensile test using Bridgman’s analysis (16).
σ B ⎢ ⎝ Do ⎠ ⎥
⎣ ⎦
This criterion can be successfully applied
Where Do and Df are the original and final to cold working processes (16, 18), such as to predict
diameters, respectively, and B is equal to μ cot α the incidence of cracking along the centerline in
cold rod drawing and extrusion for a small
The same approach can be used to yield reduction which causes chevron crack formation
equations of essentially the same form for such where tensile stresses prevail.
similar operations as drawing of a wide strip
through a wedge-shaped die. In the case of the The goal of this research is to predict the
drawing of a strip through a wedge-shaped die in internal or chevron cracks initiation of the drawn
plane-strain, the following equation (1) is obtained: copper shaped-wire. A ductile fracture criterion,
Cockcroft and Latham criterion, was chosen for
σx 1 + B ⎡ ⎛ hf ⎞
B
⎤ this investigation.
= ⎢1 − ⎜ ⎟⎟ ⎥ (2)
S B ⎢ ⎜⎝ ho ⎠ ⎥⎦
⎣ Finite Element Analysis
where S is the yield stress (2σo/√3) in a plane-strain The finite element method is a powerful
compression test according to the von Mises tool for the numerical solution of wire drawing.
criterion, σo is the yield stress in uniaxial tension, With the advance in computer technology, wire
ho is the initial thickness and hf is the final drawing can be modeled with relative ease. In this,
thickness. FEM have the following six steps. In the first step,
Shape Functions, the finite element method, expresses
Ductile Fracture Criteria the unknown field in terms of the nodal point
unknown by using the shape functions over the
The plastic work criterion is based on the domain of the element. In the second step, Material
assumption that the material can only absorb a Loop, the finite element method, expresses the
certain amount of energy. This energy criterion dependent flux fields such as the strain or stress in
was proposed in this form by Freudenthal (17). The terms of the nodal point unknowns. In the third
Rice & Tracey criterion is based on a theoretical step, Element Matrices, the finite element method,
study of the growth of a void in an infinite rigid, equilibrates each element with its environment. In
perfect plastic matrix. The Oyane criterion is the fourth step, Assembly, the finite element method,4
NORASETHASOPON, S.
assembles all elements to form a complete structure and analysis type were set as quadrilateral, isotropic
in such a manner as to equilibrate the structure (elastic-plastic), rigid, Coulomb and plane strain
with its environment. In the fifth step, Solving (large deformation), respectively. The authors
Equations, the finite element method, specifies the assumed that the wire and the inclusion matrix
boundary conditions, namely, the nodal point were joined at the boundary during the process.
values on the boundary, and the system equations In this analysis, the wire was considered to be a
are partitioned. In the sixth step, Recover, the finite copper shaped-wire with a hard inclusion subjected
element method, recovers the stresses by substituting to steady deformation. It is also assumed that the
the unknown nodal values found in the fifth step inclusion can completely transfer the axial tensile
back into the second step to find the dependent flux stresses. The longitudinal inclusion size ratio (Li/Do)
fields such as strain, stress, etc. equal to 0.05, 0.1, 0.2, 0.3 and 0.4 was used. The
lateral inclusion size ratio (Di/D0) equal to 0.1, 0.2,
A two-dimensional finite element method 0.3, and 0.4 was also used. The die half-angle (α),
was used for analyzing the effects of a central and reduction per pass (R/P) and coefficient of friction
non-central inclusion on stresses, strains and (µ) were set at 8 degrees, 20 %, and 0.05,
plastic deformation in copper shaped-wire drawing. respectively.
Figure 7 shows the analytical model used. The
black part was an inclusion in a copper shaped- Results and Discussion
wire. The authors assumed that the inclusion was a
sintered hard alloy (WC). Table 1 shows the material Stresses, Strains and Plastic Deformation Behaviour
properties and the drawing conditions that were
used in this analysis. The stresses, strains and plastic deformation
behaviour of the copper shaped-wire that contained
a central inclusion for Di/Do equal to 0.1 and 0.3
where Li/Do was equal to 0.05 during five passes of
drawing were obtained by FEM simulation. Figure
8 shows the distribution of hydrostatic stress and
plastic deformation of the copper shaped-wires
containing a central inclusion during multi-pass
drawing for Di/Do = 0.1 and 0.3 and Li/Do = 0.05
where Re = 20% and α = 8°.
For the first pass drawing, the inclusion
was slightly deformed because of its hardness,
Figure 7. 2-D FEM model used in this copper resulting in large copper deformation. The inclusion
shaped-wire drawing simulation. deformation occurred when copper shaped-wire
was repeatedly drawn. The necking behavior and
Table 1. Material properties and drawing conditions the relationship between the lateral neck size and
used for FEA. the lateral inclusion size are the same as described
in the case of the single-pass drawing of copper
Copper (wire) WC (inclusion) shaped-wire containing a central and non-central
cylindrical inclusion. While drawing the wire
Young's modulus, E (MPa) 120000 1000000 containing a central inclusion, it was found that the
hydrostatic and maximum principal tensile stresses
Yield stress, σY (MPa) 150 1000
in front of the inclusion-leading-edge increased as
Poisson's ratio, ν 0.3 0.22 Di/Do increased.
Die half-angle, α (°) 8
The highest value of the hydrostatic and
Reduction, Re (%) 17.4, 20 maximum principal tensile stresses in front of the
Coefficient of friction, μ 0.05 inclusion-leading-edge occurred where the inclusion-
leading-edge exited and was outside the die. When
The model solution was obtained by using comparing between the lateral and longitudinal
the MSC.MARC program. The element type, wire inclusion sizes effects, the maximum tensile stress
and inclusion material, die material, friction model was stronger influenced by Li/Do than Di/Do. The5
Chevron Crack Initiation in Multi-Pass Drawing of Inclusion Copper Shaped-Wire
wire deformation, inclusion deformation and maximum Internal or Chevron Cracks Initiation
tensile stress also increased as the drawing pass
numbers increased. The Cockcroft & Latham criterion was
selected and used as the damage value to estimate
if and where an internal or chevron crack will
occur during the copper shaped-wire drawing. For
the FEM simulation, the Cockcroft & Latham
criterion can be written as follows:
n
∑ (σ
i =1
*
Δε ) i = C (4)
where n is the number of steps in the simulation,
Δε is the incremental effective strain
( Δε = ε i − ε i −1 ), σ* is the maximum principal
tensile stress in the element, and C is the material
constant or the critical damage value. The critical
damage value (C) of the material, copper, used in
this investigation was determined to be 0.664 in the
tensile test by a universal tensile testing machine at
room temperature.
The results of the analysis described in
section 4.1 showed that the maximum tensile stress
over the entire FEM mesh in all cases of those
simulations occurred in front of the inclusion-
leading-edge. If the summation of equation (4), C,
exceeds the critical damage value, an internal crack
or chevron crack should therefore occur in front of
the inclusion-leading-edge.
Figure 9. Influence of the lateral inclusion size and
Figure 8. Distribution of hydrostatic stress and drawing pass number on chevron crack
plastic deformation of the copper initiation in the multi-pass drawing of
shaped-wires containing a central the copper shaped-wire containing a
inclusion during multi-pass drawing for central cylindrical inclusion for Li/Do =
Di/Do = 0.1 and 0.3 and Li/Do = 0.05 0.05 where Re/P = 20%.
where Re = 20% and α = 8°.6
NORASETHASOPON, S.
wire drawing when the initial lateral inclusion size
was equal to 0.648 for Li/Do = 0.05. Chevron
cracks initiation was found in the first pass of the
copper shaped-wire drawing when the initial
longitudinal inclusion size (inclusion length) was
equal to 0.283 for Di/Do = 0.1.
Figure 10. Influence of the longitudinal inclusion
size and drawing pass number on
chevron crack initiation in the multi-
pass drawing of the copper shaped-
wire containing a central cylindrical
inclusion for Di/Do = 0.1 where
Re/P = 20%.
The influence of the lateral and longitudinal Figure 11. Influence of the lateral inclusion size
inclusion size on the chevron crack initiation in the and total reduction of cross-sectional
multi-pass drawing of the copper shaped-wire containing area on chevron crack initiation in the
a central cylindrical inclusion was obtained. Figure multi-pass drawing of the copper
9 shows the critical lateral inclusion sizes, 0.648, shaped-wire containing a central
0.134, 0.038, 0.009 and 0.001, in the first, second, cylindrical inclusion for Li/Do = 0.05
third, fourth and fifth passes, respectively, for Li/Do where Re/P = 20%.
= 0.05 where Re/P = 20%. Figure 10 shows the
critical longitudinal inclusion sizes, 0.283, 0.072,
0.023, 0.006 and 0.001, in the first, second, third,
fourth and fifth passes, respectively, for Di/Do =
0.1 where Re/P = 20%.
These critical lateral and longitudinal inclusion
sizes can also be plotted as a function of the total
reduction of cross-sectional area as shown in
Figures 11 and 12. The “inclusion size” as indicated in
Figures 9 to 12, the initial inclusion size, means the
size of an inclusion in an undrawn wire.
When the initial inclusion sizes (lateral and
longitudinal inclusion sizes) are very small, a large
number of drawing passes can be performed
without chevron cracks initiation. As the results, Figure 12. Influence of the longitudinal inclusion
more than five passes of the copper shaped-wire size and total reduction of cross-
drawing can be performed without chevron cracks sectional area on chevron crack
initiation when the initial inclusion size is less than initiation in the multi-pass
0.001. The number of the drawing passes that can drawing of the copper shaped-wire
be performed without chevron cracks initiation containing a central cylindrical
rapidly decreased as the initial inclusion size inclusion for Di/Do = 0.1 where Re/P =
increased. In this case, chevron cracks initiation 20%.
was found in the first pass of the copper shaped-7
Chevron Crack Initiation in Multi-Pass Drawing of Inclusion Copper Shaped-Wire
Conclusions 2. Yoshida, K. (2000). Technological trend and
problem of wire drawing of various super
1. Necking occurred on the copper shaped- fire wires J. Jpn. Soc. Technol. Plast. 41:
wire surface in front of the inclusion-leading-edge 194-198.
near the inclusion boundary.
3. Raskin, C. (1997) In: Proceedings of the WAI
International Technical Conference. Italy.
2. Inclusion deformation occurred when
copper shaped-wire was repeatedly drawn. The highest 4. Amstead, B. H., Ostwald, P. F. & Begeman, M. L.
value of the hydrostatic and maximum principal (1987). Manufacturing processes. Singapore,
tensile stresses in front of the inclusion-leading- Wiley: 1-687.
edge occurred where the inclusion-leading-edge
exited and was outside the die. The drawing pass 5. Johnson, H. V. (1984). Manufacturing processes.
numbers strongly influenced the wire deformation, Bennett & McKnight: 14-581.
inclusion deformation and maximum principal tensile
stress in multi-pass copper shaped-wire drawing. 6. Kutz, M. (1998). Mechanical engineers’ handbook.
New York, NY: Wiley: 3-1205.
3. A large number of drawing passes can
7. Colangelo, V. J. & Heiser, F. A. (1989). Analysis of
be performed without chevron cracks initiation when
metallurgical failures. Singapore: Wiley:
the initial inclusion sizes, lateral and longitudinal
240-322.
inclusion sizes, were very small. This initial inclusion
size inversely and strongly influenced the number 8. Avitzur, B. (1968). Metal forming: Processes
of the drawing passes that can be performed and analysis. New York, NY: McGraw-
without chevron cracks initiation. More than five Hill: 153-258.
passes of the copper shaped-wire drawing can be
performed without chevron cracks initiation when 9. Avitzur, B. (1971). Study of flow through conical
the initial inclusion size is less than 0.001. converging dies. In A. L. Hoffmanner (Ed.).
Metal forming: Interrelation between theory
The internal or chevron cracks may occur and practice. New York, NY: Plenum
when the inclusion size is larger than the critical Press: 1-46
inclusion size and finally, wire breaks may also occur.
10. Garrison Jr., W. M. & Moody, N. R. (1987).
Ductile fracture. J. Phys. Chem. Solids
Acknowledgments
48(11): 1035-1074.
The author wishes to express his appreciation 11. Campos, H. B. & Cetlin, P. R. (1998). The
to the Director of the National Metal and Materials influence of die semi-angle and of the
Technology Center (MTEC), National Science and coefficient of friction on the uniform
Technology Development Agency, Thailand, for tensile elongation of drawn copper bars. J.
his support and assistance in many details of the Mater. Process. Tech. 80-81(1): 388-391.
finite element program "MSC.MARC" for this
problem simulation. The author would like to thank 12. De Castro, A. L. R., Campos, H. B. & Cetlin, P. R.
Ido R., and Shinohara T., Department of Precision (1996.) Influence of die semi-angle on
Mechanics, School of Engineering, Tokai University, mechanical properties of single and multiple
Japan, and Nissapakul, P., Tangsri, T., and Pramaphant, P., pass drawn copper. J. Mater. Process.
Department of Mechanical Engineering, Faculty of Tech. 60(1-4): 179-182
Engineering, King Mongkut’s Institute of Technology
Ladkrabang, Thailand, for giving him valuable 13. Norasethasopon, S. & Yoshida, K. (2006).
discussion and comments. Influences of inclusion shape and size in
drawing of copper shaped-wire. J. Mater.
Process. Tech. 172(3): 400-406
References 14. Norasethasopon, S. & Yoshida, K. (2006). Finite-
element simulation of inclusion size effects
1. Nikkei-Mechanical (2000). The motor efficiency on copper shaped-wire drawing. Mat. Sci.
competition. Tokyo, Nikkei: 40-44. Eng. A-Struct. 422(1-2): 252-258.8
NORASETHASOPON, S.
15. Cockcroft, M. G. & Latham, D. J. (1968). Ductility
and workability of metals. J. Inst. Met. 96: 33-
39.
16. Edward, M.M. (1991). Metalworking science and
engineering. New York, NY: McGraw- Hill:
397-462
17. Freudenthal, A. M. (1950). The inelastic behavior of
solids. New York, NY: Wiley.
18. Clift, S.E, Hartley, P., Sturgess, C.E.N. & Rowe,
G.W. (1990). Fracture prediction in plastic
deformation processes. Int. J. Mech. Sci. 32(1):
1 –17.You can also read

