Disinfection & Cleaning - Protocol for Carestream Dental Equipment JUNE 2020
←
→
Page content transcription
If your browser does not render page correctly, please read the page content below

Adapting to the New Normal

Disinfection & Cleaning
Protocol for Carestream
Dental Equipment
JUNE 2020

Hygiene and Disinfec on
INDEX
03
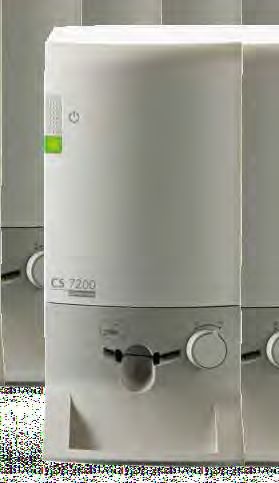
OPG and CBCT
06
Imaging Plate System
08
Intraoral Sensor
10
Intraoral Scanner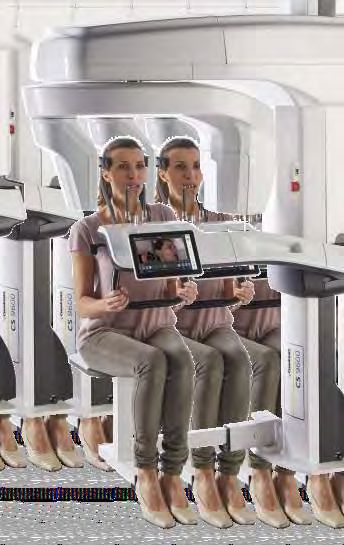
OPG and CBCT
Hygiene & Disinfection
Follow These Steps for Cleaning the Equipment

      Switch off the unit.

      Remove all visible soil, if any, with disposable cloth or paper wipe.
      Note: No disassembly shall be performed on the unit

      Dampen (not soak) a lint-free cloth with soap and running water.

      Thoroughly clean all accessible parts of the unit, including the
      temporal head clamps, with the dampened lint-free cloth.

      Dry the unit with hygienic disposable cloth.

      Dampen (not soak) a lint-free cloth with a low-level disinfectant that is
      recognized by your Local Authority (for example, quaternary
      ammonium compounds and some phenolics).

      Wipe thoroughly all accessible parts of the unit with the dampened lint-
      free cloth. You must follow the disinfectant manufacturer’s
      instructions for use, especially with respect to contact time.

      Allow to dry in the open air for a minimum of five minutes.

      Visually inspect the unit for signs of deterioration. If any damage is
      noted, do not use the unit and contact a service technician.

CAUTION
Avoid applying any cleaning liquid to the inside parts of the unit
Accessories
Hygiene & Disinfection
Cleaning and disinfecting accessories that have contact with mucous
membranes
CAUTION
You MUST cover all bite blocks with FDA-cleared or CE-mark protective
sheaths for each patient
The following accessories must first be cleaned and then steam-sterilized
between each patient:
OPG: TMJ nose rest, standard and Frankfort guide bite blocks, bite blocks
for edentulous patient, all chin rests
CBCT: 3D bite blocks, Face Scan and Radiology Kit (CS 9600), all chinrests
Cephalometric Unit: Nasion support, Frankfort tool, carpus support
(available only with carpus exam option in CS 8100 Family)
CLEANING
To clean accessories that have contact with mucous membranes, follow
these steps:
     Remove and discard the protective sheath from the accessory.

     Remove all visible soil with a disposable cloth or paper wipe.

     Rinse at least one minute under running water to thoroughly clean
     the accessory from any excess soil.
     Using a soft brush, apply medical enzyme detergent solutions
     (basically, with a multi-enzymatic formula) to all surfaces of the
     accessory. Detergent manufacturer's directions must be
     strictly adhered to.
     Rinse thoroughly under running water for at least one minute to
     remove detergent residue.
     Dry the accessory with compressed air or a hygienic disposable
     cloth.
     Visually inspect the accessory for residual soil. If soil is visible,
     either repeat steps two to five, or safely dispose the accessory.
Note: Thoroughly clean the ear cones manually with the
dampened lint-free cloth.
CAUTION
If an accessory is visible contamination with blood, you must clean
the accessory with intermediate level disinfectant that is recognized
by your Local Authority to fight against hepatitis B after cleaning.
The disinfectant's manufacturer’s instructions for use must always
be followed, especially with respect to contact.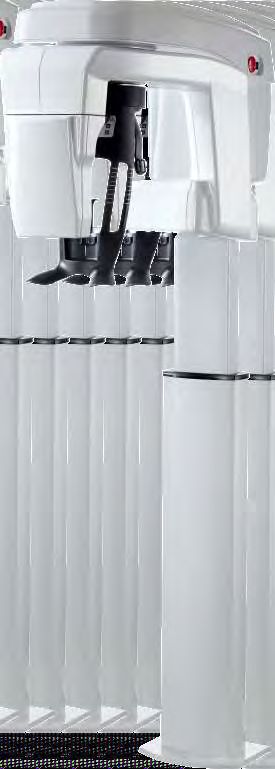
Steam Autoclave
Hygiene & Disinfection
To steam autoclave the accessory, once cleaning is complete, follow these steps:

CAUTION
You must use a medical autoclaving equipment cleared by the FDA or that is recognized by your Local
Authority. You must always follow the operating parameters recommended by the manufacturer of the
autoclaving equipment.

Use FDA-cleared or CE-mark standard packaging material.

     Wrap the cleaned accessory using a standard packaging material for autoclaving.

     Steam autoclave at 132°C (270°F) for four minutes or depending on your local regulation you can steam
     autoclave at 134°C (273°F) for 18 minutes.

     Visually inspect the accessory for signs of deterioration. If any damage is noted, do not use the accessory
     and contact your representative.

     Once disinfected, the accessory can be used immediately or stored in a dry and dust-free location.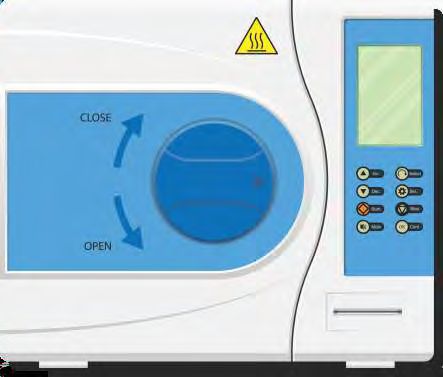
Imaging Plate System
Hygiene & Disinfection
Cleaning and Disinfecting the Imaging Plate

WARNINGS:
To prevent damage to the imaging plates and the possibility of
image artifacts, avoid contact between the imaging plates and
the following materials/solutions/solvents: Isopropyl alcohol,
hydrogen peroxide and other peroxides, citrus-based
cleaners, hand lotions and waterless hand sanitizers, as well
as surfactants and lubricants.

Do not soak the hygienic sheath in any cleaning or
disinfecting solutions. Hygienic sheaths must be discarded
after use (single use component).

Cleaning the Imaging Plate

If the imaging plate is visibly contaminated with dirt, dust particles
or finger prints, you must clean the imaging plate before
disinfecting it with clean, dry, non-abrasive, lint-free wipes or
cloths. DO NOT leave the imaging plate TO air-dry. Apply pressure
to remove persistent dirt, if necessary.

Disinfecting the Imaging Plates

The imaging plate must be disinfected after each scan. To
disinfect, use a commercially prepared product that adheres to the
following specifications and restrictions:

A commercially prepared equivalent solution of diluted bleach that
does not contain any ingredients (Isopropyl alcohol, hydrogen
peroxide and other peroxides, citrus-based cleaners, hand lotions
and waterless hand sanitizers, as well as surfactants and
lubricants) that can cause damage to the hygienic sheaths and
imaging plates.
Imaging Plate System
Hygiene & Disinfection
Follow the disinfectant manufacturer's instructions for
disinfecting the sheaths and imaging plates:
     The sheaths and plate should be kept visibly wet for the full
     Contact time specified on the disinfectant label.

     Wipe with a non-abrasive, lint-free cloth after keeping the
     plate wet for the specified amount of time.

Note: Do not soak the sheath or imaging plate in disinfectant
solution.

Disposing of the Image Plate

WARNING: The imaging plate contains Barium and should be
considered hazardous or special waste in specific conditions
during its useful service life. For disposal or recycling
information, contact local authorities

Scanner Care

Cleaning the Scanner Body
Use disinfectant wipes for medical equipment to clean the scanner
body thoroughly from all sides.

Cleaning the Detachable Insertion Panel
To clean and disinfect the insertion panel, follow these steps:

      Remove the installed insertion panel.
      Use disinfectant wipes for medical equipment to clean the
      detachable insertion panel thoroughly from all sides including
      the slot.
      Install the cleaned and disinfected insertion panel.

WARNING: Do not autoclave the insertion panel. Do not use
chemical autoclave for disinfecting the detachable insertion
slot panel.
Intraoral Sensor
Hygiene & Disinfection
Cleaning the Sensor Head
Warning
Disinfect the sensor head after each patient. Never place a
sensor in an autoclave as this could result in serious damage
to the sensor. Do not move the sensor using its cable when
you remove the protective hygienic sleeves. You must first
clean the RVG sensor before disinfecting it. You must use the
disinfectant according to the manufacturer’s instructions.

You must first clean the RVG sensor before disinfecting it. To do
so, follow these steps:

      Remove the protective hygienic sleeves

      Remove the debris or organic matter from the sensor
      surface with a disposable wipe or surface brush.

      Inspect the sensor for debris. Repeat cleaning if there is any
      debris left

      Disinfect the sensor head with disinfecting wipes or soak it
      in a disinfecting solution with intermediate-level hospital
      disinfectant with label claims of tuberculocidal activity (for
      example: A chlorine-containing product, a quaternary
      ammonium compound with alcohol, a phenolics, an
      iodophors, an Environmental Protection Agency
      (EPA)–registered chlorine–base product). You must follow
      the manufacturer instructions for use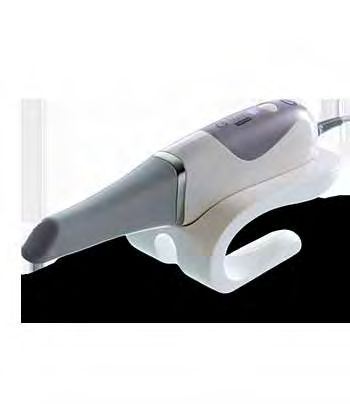
Intraoral Sensor
Hygiene & Disinfection
Cleaning the Sensor Cable
The cable must be cleaned with disposable disinfecting wipes with
intermediate-level hospital disinfectant with label claims of
tuberculocidal activity.
Ÿ Cleaning and disinfecting positioning accessories
Ÿ Positioning Accessories daily maintenance tasks

Accessory RVG Holder
Ÿ Maintenance Tasks
Ÿ Cleaning the RVG holder
Ÿ You must clean the RVG sensor holder before you disinfect it.
Ÿ Top clean the sensor holder, follow these steps

     Remove all debris and organic matter with a disposable wipe.

     Rinse under running water
     Using a soft brush, scrub with warm tap water and soap or detergent
     Rinse under running water
     Dry with compressed air or hygienic disposable cloth
     Visually inspect the RVG sensor holder for residual debris, repeat
     steps from one to five if you see residual debris

Disinfec ng The RVG Holder
Warnings
·        You must use medical autoclaving equipment cleared by the FDA
         in the USA or one that is recognized by your local Authority
·        DO NOT USE a chemical autoclave to disinfect the RVG sensor
         holder.
·        You must always follow the opera ng parameters recommended
         by the manufacturer of the autoclaving equipment.
·        Use FDA-cleared or CE-marked standard packaging
         material
To Disinfect the RVG Sensor Holder after Cleaning it,
Follow these Steps:
     Steam autoclave at 134◦C (273◦ F) for 3minutes using distilled
     water
Intraoral Scanner
Hygiene & Disinfection
Perform the following maintenance activities on your scanner and
accessories regularly. To ensure maximum hygienic safety for the
patient, carefully follow the instructions to prepare the scanner for use.
After each patient, clean and sterilize the tip.
To minimize the risk for cross-contamination, after each patient:
Clean and disinfect the scanner.
Clean and sterilize the scanner tip.
Cleaning and Disinfecting the Scanner
General Warnings
WARNINGS
Scanner tips received from the manufacturer are NOT sterilized.
You must sterilize the tips before the first use.
You must wear gloves while cleaning and disinfecting the
scanner.
The scanner must be disinfected with a U.S. Environmental
Protection Agency (EPA) registered or CE-marked
intermediate-level disinfectant solution with tuberculocidal
activity between patients.
DO NOT use a disinfectant containing phenolics or iodophors;
doing so will damage the surface coating of the scanner.
Never put the scanner in an autoclave device or immerse it in
water or a disinfectant solution. Excessive fluids can damage the
scanner.
Do not use cotton, cloth, or tissues soaked with disinfectant to
disinfect the scanner.
Cleaning The Scanner
If the scanner is visibly contaminated with blood and/or body fluids, you
must clean it before disinfecting it.
To clean the scanner, follow these steps:
Dampen (do not soak) a lint-free cloth with lukewarm water.
Remove the blood and/or body fluids with the dampened lint-
free cloth.Intraoral Scanner
Hygiene & Disinfection
Disinfecting the Scanner
After each patient, the scanner must be thoroughly disinfected.
To adequately disinfect the scanner, follow the disinfectant
manufacturer's instructions for the appropriate contact time.
To disinfect the scanner, follow these steps:
Ÿ Remove the reusable tip.
Ÿ Remove all visible soil
Use a commercially prepared intermediate level disinfectant wipe.
Follow the manufacturer's instructions for contact time.
Ÿ Approved disinfectant wipes: Mikrozid AF Jumbo Wipes,
CaviWipes, Oxivir Tb Wipes, Clorox Healthcare Bleach
Germicidal Wipes, PDI Sani-Cloth Bleach Germicidal Wipes.
Ÿ Important: If the scanner is visibly soiled, it must be
thoroughly cleaned prior to disinfecting. A disinfectant that
has not been approved may cause damage to the scanner.
Thoroughly wipe all surfaces of the scanner.
Allow to air dry.
After the scanner has dried, use a clean, lint-free cloth
dampened with water to remove residual disinfectant from
the surface of the scanner.
Cleaning and Sterilizing the Scanner Tips
Scanner tips received from the manufacturer are NOT sterilized.
You must sterilize the tips before the first use. The removable
scanner tips are autoclavable up to 20 cycles. After 20 cycles,
discard the tip. If you limit the exposure time at 134°C to no
more than four minutes, you can autoclave the tip up to 60
cycles.Intraoral Scanner
Hygiene & Disinfection
Cleaning the Scanner Tips
To manually clean the scanner tips, follow these steps:
Rinse excess soil from the tip.
Using a soft brush, apply an enzymatic detergent solution to all
surfaces.
Rinse under clean, running water. Load the tip into the
washer/disinfector equipment if you are using an automatic
washer of disinfector.
Inspect the tip. If the tip is not clean, repeat the steps.
Use a lens tissue or lint-free cloth to remove any dust from the
mirror in the tip.
Using a cotton swab, carefully insert the folded gauze into the
tip window.
Place the tip in an FDA-cleared or CE-mark sealed sterilization
pouch. The pouch should be sealed airtight. Use either a
self-adhesive pouch or a heat-sealed pouch.
Sterilizing the Scanner Tips
To sterilize the scanner tips, follow these steps:
Place the cleaned tips, each prepared with a piece of folded
gauze in the tip window, in an FDA-cleared or CE-mark sealed
sterilization pouch.
Place the tips in a steam autoclave for the following times:
Pre-Vacuum Autoclave
Exposure Time at 132 C Exposure Time at 134 C Minimum Drying Time
Minimum 4 Minutes Minimum 3 Minutes 20 - 30 Minutes
Gravity Autoclave
Exposure Time at 132 C Exposure Time at 134 C Minimum Drying Time
Minimum 15 Minutes Minimum 10 Minutes 15 - 30 Minutes
Important: Never autoclave a tip that does not have gauze
covering the mirror and is not wrapped, as this will leave stains
on the mirror that cannot be removed.We Care For You!
We are committed to support you- Today, Tomorrow and Always
Please Contact Remote
Service Team to take
additional measures for
monitoring of Dental
Equipment and Adapting
to the New Normal
Contact for Further assistance
(022) 6292 7888
www.carestreamdental.com/en-in/about/contact-us/
tech_india@csdental.comYou can also read