Dreamweaver Template Tutorial - How to create a website from a template
←
→
Page content transcription
If your browser does not render page correctly, please read the page content below

Dreamweaver Template Tutorial - How to create a website from a
template
In this tutorial you will create a website using Dreamweaver’s premade templates. You are going to learn
how to style them using CSS. You should do this tutorial is you created a banner and button combination.

Preparatory Step

   1. Inside your folder create a new folder and name it template_layout.
   2. Inside the layout folder create a new folder and name it images.
   3. Copy or move the banner and buttons you created inside this folder.
   4. Open Dreamweaver. Go to Site>New Site and create a new site named template_layout
      yourname.
   5. Click the folder icon to set the root folder. Select the template_layout folder.
   6. Click the folder icon to set the images folder. Select the images folder inside the template_layout
      folder.
   7. Click OK. Then Done.

Step One: Select the Template

   1. Choose File > New.
   2. Scroll down the layout list looking at various layouts. Some have fixed columns while others have
      fluid columns. There are still
      some that are a combination of
      both. You can view them in the
      preview window. Choose a 2
      column elastic, right sidebar,
      header and footer layout.
   3. Set the Layout CSS option to
      Create New File, since your
      web will have more than one
      page using the style settings.
   4. Click Create, name the style
      sheet style and press Save.
   5. Save the file as index.html
      inside your template_layout
      folder and title it Template
      Layout Home Page.

                                                                                                            1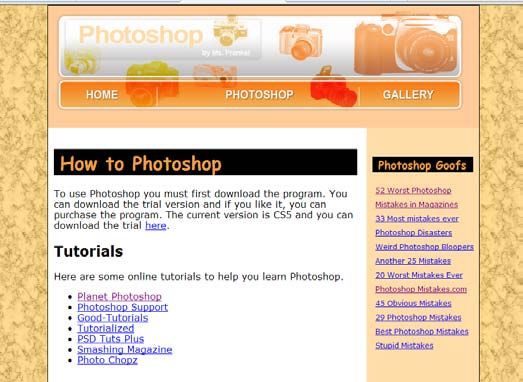
Step Two: Edit the CSS Styles for the Body

   1. On the CSS Styles Panel make sure ALL is selected.
   2. Double-click Body to open the CSS style settings for
      the body.

   3. Choose the Background Category.
   4. Click the color selector next to
      background color and choose a
      background for the body of your
      website. You can click apply to see
      if the color is a good choice.
   5. Once you have decided on a color,
      click OK.
   6. Choose File > Save ALL.
   7. Press F12 to preview your site.
   8. Your image will vary depending on
      the color you chose.

                                                             2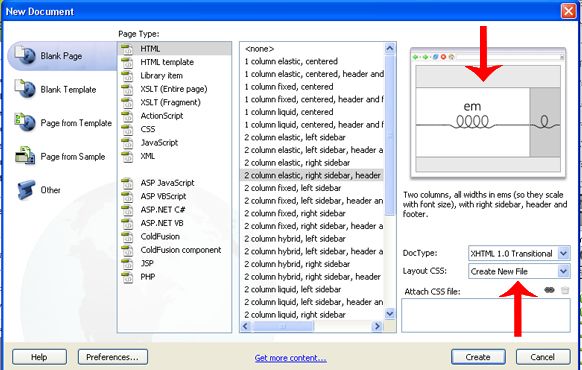
Step Three: Edit the CSS Styles for the Header

   1. In Design View click on the box that contains the header. You will know you have it selected when
      its contents are highlighted.
   2. Look at the Property Inspector. Notice that in the Div ID box it shows header. In the Class box it
      shows twoColElsRtHdr.

   3. On the CSS Styles panel double-click twoColElsRtHdr #header to display the CSS Styles dialog
      box.
   4. Select a background color that you like.
   5. Once you have decided on a color, click OK.
   6. Choose File > Save ALL.
   7. Press F12 to preview your site.
   8. Your image will vary depending on the color you chose.

                                                                                                      3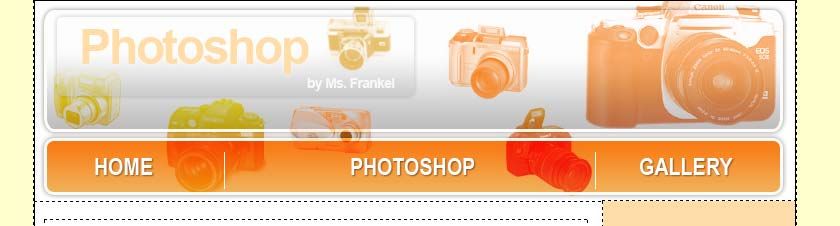
Step Four: Edit the CSS Styles for the sidebar1 Content

   1. In Design View click on the box that contains the sidebar1. You will know you have it selected
      when its contents are highlighted.
   2. On the CSS Styles panel double-click twoColElsRtHdr #sidebar1 to display the CSS Styles
      dialog box.
   3. Select a background color that you like.
   4. Once you have decided on a color, click OK.
   5. Choose File > Save ALL.
   6. Press F12 to preview your site.
   7. Your image will vary depending on the color you chose.

                                                                                                       4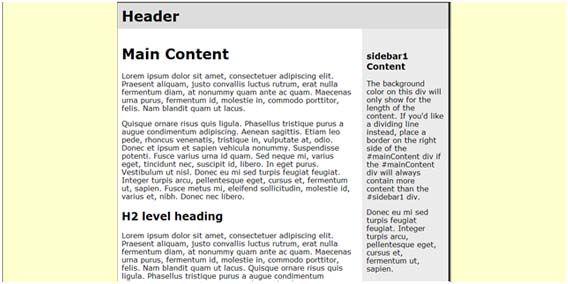
Step Five: Edit the CSS Styles mainContent and footer.

   1. To edit the main content double-click
      twoColElsRtHdr #mainContent
   2. To edit the footer content double-click
      twoColElsRtHdr #footer
   3. Play with the the settings until you find
      something you like.
   4. Choose File > Save ALL.
   5. Press F12 to preview your site.
   6. Your image will vary depending on the
      color you chose.

Step Six: Insert Your Banner in the Header.

Because you are going to create image map links you have to insert the banner image instead of using CSS
to set it as a background image.

   1.   Delete the word Header from the header area.
   2.   Select Insert > Image.
   3.   Navigate to your image folder and select your banner.
   4.   Click OK.
   5.   You will need to adjust the banner to fit into the space provided.
   6.   Now Save All and press F12 to view your page to see if your banner displays correctly.

                                                                                                       5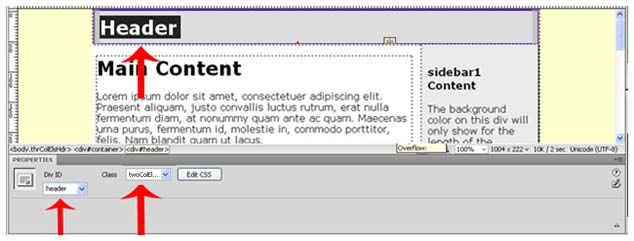
Step Seven: Edit the CSS Styles for the Headings in the Sidebars.

   1.   Select the heading in sidebar1.
   2.   On the CSS Styles panel and click on the New CSS Rule icon.
   3.   Verify the Selector Type: Compound
   4.   Verify Selector Name: .twoColElsRtHdr #container #sidebar1 h3
   5.   Verify Define in: style.css
   6.   Click OK

        .

   7. Select your font, size, color you want (you can get the stripe in the back by selecting a background
       color).
   8. Play with the the settings until you find something you like.
   9. Choose File > Save ALL.
   10. Press F12 to preview your site.
   11. Your image will vary depending on the color you chose.

                                                                                                             6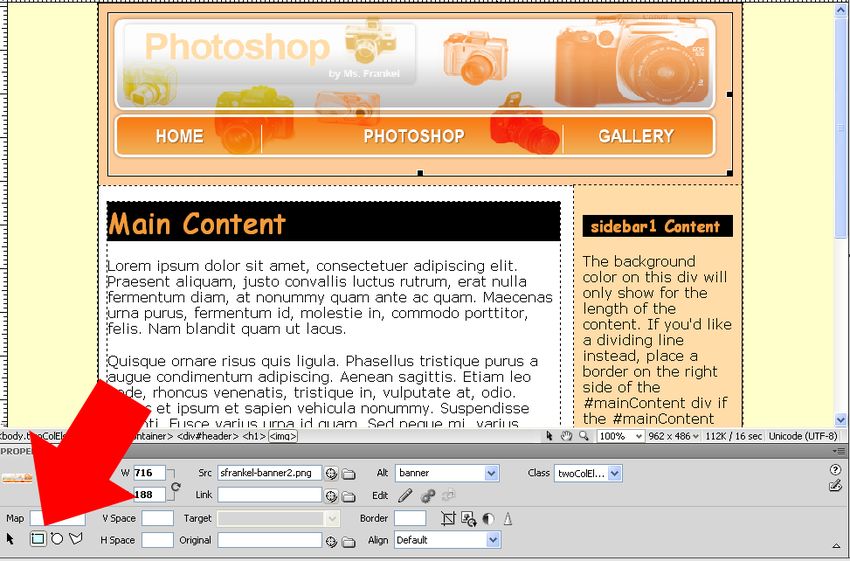
Step Eight: Edit the CSS Styles for the Headings in the MainContent.

   1.   Select the heading in Main Content.
   2.   On the CSS Styles panel and click on the New CSS Rule icon.
   3.   Drop down the Selector Type: Compound
   4.   Verify Selector Name: .twoColElsRtHdr #container #mainContent h1
   5.   Verify Define in: style.css
   6.   Click OK

   7. Select your font, size, color you want (you can get the stripe in the back by selecting a background
       color).
   8. Play with the the settings until you find something you like.
   9. Choose File > Save ALL.
   10. Press F12 to preview your site.
   11. Your image will vary depending on the color you chose.

                                                                                                             7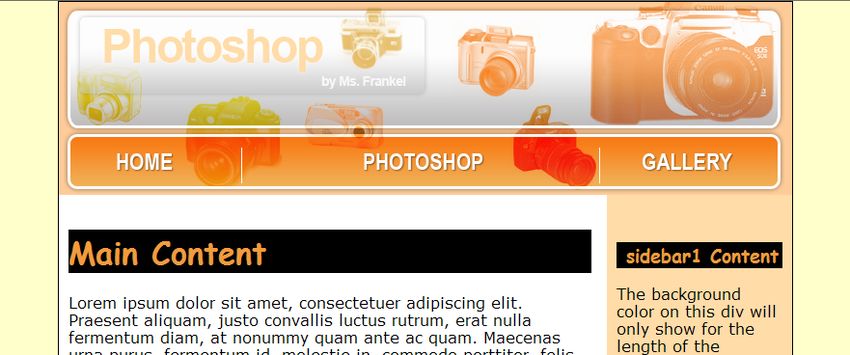
Step Nine: Additional Pages

By now you should have the idea of how to format each of the different sections. You can do the footer on
your own. The Latin text that is there act as a placeholder for the text you will replace it with. Now we will
add additional pages and attach the style sheet you created.

   1. Select File > New.
   2. Make sure you have the same template you chose originally selected.
   3. In the Layout CSS drop down box select Link to Existing File.
   4. Click the Link button just below it.
   5. In the Attach External Style Sheet dialog box click the Browse button.
   6. Select the style.css file.
   7. Click OK.
   8. Dreamweaver will display the new page with the styles you created.
   9. You can save the page and give it a title.
   10. You can repeat this process for as many pages as you need.
   11. You will create image map links on the header to link the pages together.

                                                                                                             8
Step Ten: Navigation

My three pages are named index.html, photoshop.html and gallery.html. Your names will be different than
mine. We are going to create image map links so that when you click on the navigation it goes to the
correct page.

   1. Make sure you are on
      your index.html page.
   2. Click on your banner and
      select the image map
      rectangle on the
      property inspector.
   3. Use your mouse to drag
      the rectangle around the
      word HOME on your
      banner.
   4. When the message box
      pops up click OK.

   5. On the property inspector
      click the browse folder
      button to the right of the
      link box.
   6. Navigate to your template
      layout folder and choose
      index.html and in the alt
      box type home.
   7. Repeat this process to link
      the two remaining pages. I
      will link my Photoshop
      button to photoshop.html
      and my gallery button to
      gallery.html.
   8. You should create your footer
      navigation now too. Type the
      names of your pages and use
      the link box on the property
      inspector to link them.

                                                                                                          9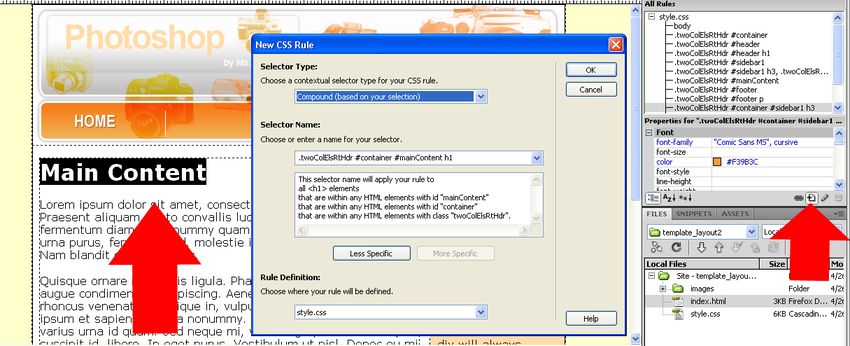
Step Eleven: Save Navigation as Library Item and Insert on Other Pages.

   1. Click on your banner and change to Split View.
   2. Select the code appearing between  and

   3. On the Assets Panel click the New Library Item button and name it navigation.
   4. Go to each of your other pages one at a time.
   5. Delete the banner in the header area.
   6. Click the Insert button on the assets panel to insert the navigation.
   7. You may need to delete a space after the image.
   8. You should create a library item for your footer navigation and insert it on the other pages the same
      way.
   9. Save all pages and test your links in a browser.

Step Twelve: Adding a Background Image (if you want one)

I decided to use a cool pattern I found for my
background instead of a color. I saved the image
into my images folder and named it bg.jpg.

   1. On the CSS Styles Panel double click
      body to edit the settings.
   2. Click on the background category and
      click the browse button next to
      background image.
   3. Navigate to your images folder and
      select your background image.
   4. Click OK. Now Save All and press F12
      to view your page to see if your banner
      displays correctly.

                                                                                                         10
You are to create and publish website (3 page minimum) about a hobby you enjoy.
The index page should introduce your hobby
The 2nd page should teach someone how to do your hobby. You should research your hobby online. You
can create links to useful sites as well as type information and directions you would like to include.
The 3rd page should be samples of your hobby. You can take pictures of yourself doing your hobby or of
finished products if you produce things with your hobby.
Your final assignment must have:
• 3 pages linked together with links in both the header and the footer area
• All pages must be titled and be without spelling errors.
• You must create and use banner/buttons in Photoshop for your pages.
• The navigation in the header should work properly.
• The navigation in your footer should work properly.
• You should have a contact me link that links to your email.
• Your navigation must be saved to you assets panel as a library item.
• You must have styles applied to the header.
• You must have styles applied to the footer.
• You must have styles applied to the sidebar.
• You must have styles applied to the main content area.
• All pages must have a relevant title.
• All images must have alt text.
• You must have content on every page.
• All content should be readable.
• All links to outside pages should work.
• The site should be published to your web space.
• All pages should be working properly.
Content
• Your site should be free of spelling errors, all links should work, all pictures should show.
• Use the rubric to make sure you have included everything.
• You will upload all files to your web host when you are complete.
11Project Rubric
Requirement Student Check Off (Check off Point Value Teacher Score
if you completed the
requirement)
1. You created 3 pages that are linked
3
together.
2. Inserted the navigation and banner
3
you created in Photoshop.
3. The navigation in the
3
header/sidebar works properly.
4. The navigation in the footer works
3
properly.
5. You have a working contact me link
3
to your email.
6. Your sidebar/header navigation
was saved to you assets panel as a 3
library item.
7. You applied styles to the header. 3
8. You applied styles to the footer. 3
9. You applied styles to the sidebar. 3
10. You applied styles to the Main
3
Content Area.
11. All pages have a relevant title. 3
12. All images have alt text. 3
13. You have content on every page. 3
14. All content is readable. 3
15. All links to outside pages work. 3
16. Your page is free of spelling errors. 3
17. The site is published to your web
3
space.
18. All pages are working properly. 3
19. You have completed this rubric. 3
20. Your work on this site reflects your
3
best effort.
Total Score 60
12You can also read