DRIVER'S MANUAL TRAIN SIM WORLD: NORTHERN TRANS-PENNINE - Steam
←
→
Page content transcription
If your browser does not render page correctly, please read the page content below

TRAIN SIM WORLD®: NORTHERN TRANS-PENNINE

DRIVER’S MANUAL

                   1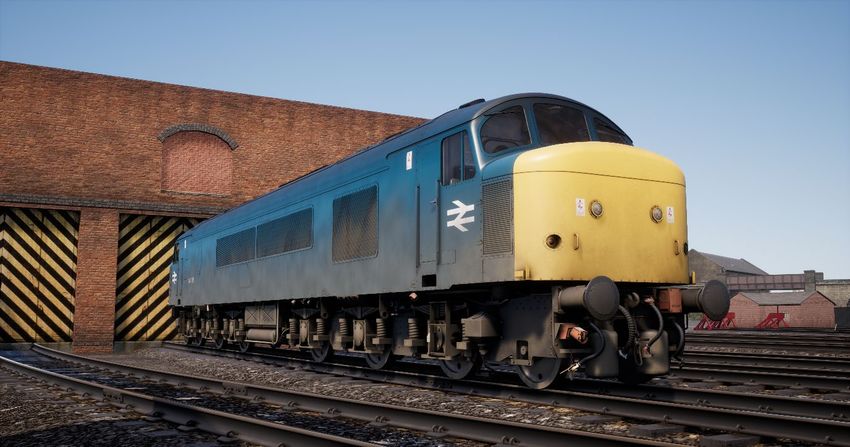
© 2018 Dovetail Games, a trading name of RailSimulator.com Limited (“DTG”). All rights
    reserved. "Dovetail Games", “Train Sim World” and “SimuGraph” are trademarks or
 registered trademarks of DTG. Unreal® Engine, © 1998-2018, Epic Games, Inc. All rights
reserved. Unreal® is a registered trademark of Epic Games. Portions of this software utilise
  SpeedTree® technology (© 2014 Interactive Data Visualization, Inc.). SpeedTree® is a
 registered trademark of Interactive Data Visualization, Inc. Permission to use the Double
    Arrow Logo Trade mark is granted by the Secretary of State for Transport. All other
copyrights or trademarks are the property of their respective owners. Unauthorised copying,
  adaptation, rental, re-sale, arcade use, charging for use, broadcast, cable transmission,
 public performance, distribution or extraction of the product or any trademark or copyright
    work that forms part of this product is prohibited. Developed and published by DTG.
            The full credit list can be accessed from the TSW “Options” menu.

                                             2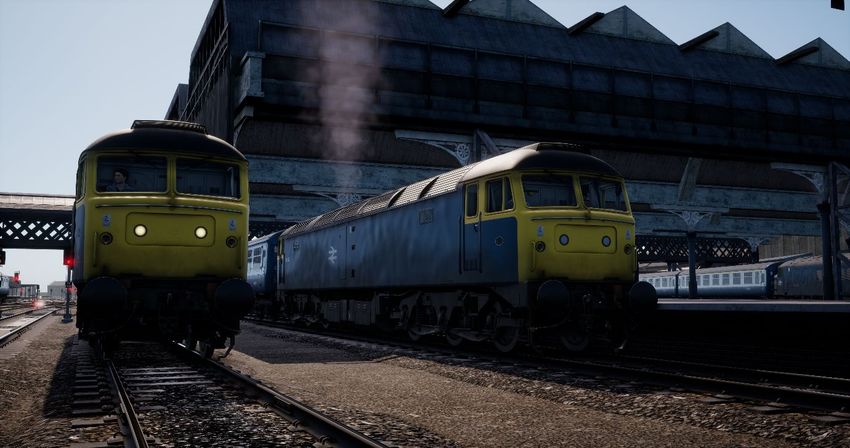
Contents

      Topic                                                                                                      Page

  1. An Introduction to Northern Trans-Pennine ........................................................... 4
  2. Northern Trans-Pennine Map & Key Locations ...................................................... 5
  3. The Game Modes .................................................................................................. 6
  4. An Introduction to the BR Class 45 ........................................................................ 7
  5. Quick Start Guide: BR Class 45............................................................................. 7
  6. An Introduction to the BR Class 47 ........................................................................ 9
  7. Quick Start Guide: BR Class 47............................................................................. 9
  8. Stopping at Stations in the BR Class 45 and BR Class 47 ....................................10
  9. An Introduction to the BR Class 101 .....................................................................12
  10. Driver Setup Guide: BR Class 101 .......................................................................12
  11. Driving the BR Class 101......................................................................................14
  12. Coasting in the BR Class 101 ...............................................................................14
  13. Down Shifting in the BR Class 101 .......................................................................14
  14. Stopping at Stations in the BR Class 101 .............................................................15
  15. Safety Systems: Automatic Warning System (AWS).............................................16
  16. Passenger Door Controls .....................................................................................16
  17. Default English Keyboard Controls .......................................................................17
  18. Default Xbox/PS4 Controller Controls ...................................................................18
  19. Controlling the Camera & Camera Modes ............................................................19
  20. Customising the HUD ...........................................................................................20
  21. Dovetail Live Account ...........................................................................................21
  22. Troubleshooting Guide & How to Get Support ......................................................22

                                                           3
An Introduction to Northern Trans-Pennine

What exists today as the line between Manchester and Leeds dates back to 1849, when the
Manchester, Stockport and Leeds Railway opened between Huddersfield and Stalybridge.
This stretch was soon extended, and eventually incorporated into the larger London and
North Western Railway network.

The line was built following the success of the Leeds – Liverpool canal, which since 1816
transported coal and materials between Yorkshire and Lancashire in order to power the
revolutionised industries of the era, such as textiles. The canal was running at capacity,
competition on the waters was near-impossible, and the quantity of moved goods was not
sufficient. It was time for the rails to take charge.

While some railway routes took the easier, lower paths through the Pennines, the line via
Huddersfield would tackle the hillside directly, consequently following smaller canals such as
the Huddersfield Narrow Canal through the summit of the route at Standedge Tunnel. The
railway tunnel itself ran parallel to the canal tunnel (the deepest, longest, and highest of its
kind in Britain), and was engineered by Thomas Nicholson (1784-1861), who also worked on
the famed Woodhead Tunnels.

The railway opened to traffic in July 1849, and saw over 1,000 passengers on its first day of
operation. This number would only increase, and today, the line is one of the busiest in West
Yorkshire.

An interesting feature of the route in the 1980s is that it was not fitted with AWS or other
modern safety systems until much later and following the electrification of the East Coast
Main Line in the days just before privatisation in 1992. The route featured in Train Sim World
also replicates this and will provide an interesting perspective of what it was like to drive
trains without any of the modern protections every driver or railfan takes for granted today.
Do you have what it takes to remain totally focussed on the road ahead?

                                               4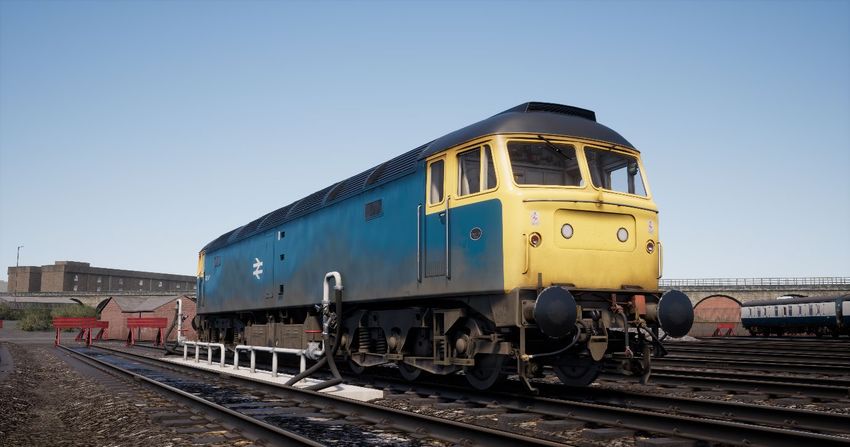
Northern Trans-Pennine Map & Key Locations

                          5
The Game Modes
Tutorials
Tutorials give you the knowledge you need to get the most from your locomotives and trains
via interactive lessons that teach you key concepts. If you’re new to Train Sim World, we
recommend you start here to learn the fundamentals.
Scenarios
These provide a selection of operations over the Northern Trans-Pennine route. Scenarios are
objective-based activities which provide unique experiences undertaking the tasks of a driver
in the British Rail era.
Services
These provide a host of activities throughout an entire 24-hour time period, Service Mode is a
new way to play. There’s always something to do with a large variety of services to take control
of or ride along with. Sit back and enjoy the action and capture amazing screenshots, hop on
or off and ride along with the various services as they go about their duties or take control and
carry out the duties yourself. Featuring many individual services, you’ll always find something
going on.
6An Introduction to the BR Class 45
Built by BR’s Derby and Crewe Works between 1960 and 1962, the Sulzer Type 4 diesel
locomotive were the main passenger locomotives on the Midland Main Line from their
introduction until their withdrawal in the early 1980s.
When initially put into service, the ‘Peaks’ – their nickname inherited from their Class 44
predecessors – were fitted with multi-unit working and steam heating boilers for passenger
services. However, in the early 1970s, 50 of the 183 built were fitted with the more modern
electric train supply in place of steam heating boilers and renumbered as Class 45/1.
With a top speed of 90mph (145 km/h), the ‘Peaks’ also worked the Northern Trans-Pennine
route from Manchester to Liverpool, becoming a common and popular sight until HSTs and
more modern units took over in the 1980s.
Quick Start Guide: BR Class 45
1. On the exterior of the loco, ensure the Battery Isolation Switch is set to the Closed
position
2. Enter the rear cab (the opposite end of where you’ll be driving from) and check the
following:
a. Master Key is Off.
b. Handbrake is Released.
c. Driver’s Brake is in the Neutral/Shutdown position.
d. Reverser is Off.
e. Cab Changeover Lever (under the driver’s seat) is Off.
f. AWS Isolation Lever (under the driver’s seat) is Isolated.
g. If running light loco, set Tail Light Left and Tail Light Right to On.
h. All cab access doors and windows are closed when leaving the cab.
3. Enter the forward cab (the driving position) and check the following:
a. Master Key is On.
7b. Handbrake is Applied.
c. Marker Light is On.
4. On the back wall behind the driver’s seat, ensure the Brake Selection Switch is set to
the Air Brake - Passenger setting (which is appropriate for Mk 2 coaching stock) and
check the appropriate indication is shown on the Secondman’s side of the cab.
5. If you want AWS:
a. Under the driver’s seat, move the AWS Cab Changeover Lever to On,
b. Under the driver’s seat, move the AWS Isolation Lever to Unisolated.
6. Sit in the driver’s seat
7. If you enabled AWS:
a. As you move the reverser past the Reverse setting, the AWS Alarm will self-
test, press the AWS Reset Switch to clear it.
8. Move the Drivers Brake to the Full-Service position.
9. Press the Engine Start button and wait for the Engine Stopped light to extinguish.
10. Wait for the Fault light to extinguish, which happens when the brakes are fully
charged.
11. If required, set the Instrument Lights to On.
12. If running with passenger coaches, set the ETH (Electric Train Heating) Switch to On
and the Left Side Demister (if required) is set to On. Both are located on the
Secondman’s side of the cab.
13. When ready to proceed, move the reverser to Forwards.
14. Move the Drivers Brake to the Running position.
15. Move throttle to the On position until you’re rolling, then apply throttle as required.
8An Introduction to the BR Class 47
As the steam-era was quickly drawn up for an abrupt end by the mid-to late 1960s, the
British railway network needed a vast and swift conversion to diesel traction, nation-wide.
While the Western Region had opted for diesel-hydraulic options, the British Transport
Commission was doubtful this would be the best approach for the railway’s future and
started exploring diesel-electric traction.
The new locomotives needed to be both lightweight, and easily attain a “Type 4” locomotive
status (meaning they had to produce between 2500 and 2999 horsepower). Two prototypes
were built for testing purposes, their names being Lion and Falcon. Each was built by a
different manufacturer and featured differing engine types, however before any testing could
begin, the necessity for new engines was too great and an initial batch of new locomotives
started production.
The new locomotives, combined with the trialled Lion, would eventually lead to a much larger
batch of locomotives, which would be built by Brush Traction. In all, between 1962 and 1968,
a grand total of 512 “Brush Type 4” locomotives would roll out of Loughborough and Crewe
Works – numbered from D1500 to D1999, and D1100 - D1111. The Type 4’s quickly went to
work, replacing steam locomotives on both passenger and freight duties.
In the 1970s, the Brush Type 4 locomotives were sorted with the new TOPS classification
system and became the Class 47. TOPS allowed for sub-classes to be used in further
sorting locomotives, and three variants of the Class 47 existed at the time, those with steam
heating, those with no heating, and others with dual or electric train heating; these became
the Class 47/0, 47/3 and 47/4 respectively. Further modification, to fit additional fuel tanks,
also brought about the somewhat unofficial 47/8 subclass.
9Quick Start Guide: BR Class 47
1. Enter the rear cab (the opposite end of where you’ll be driving from) and check the
following:
a. Master Key is Off.
b. Handbrake is Released.
c. Driver’s Brake is in the Neutral/Shutdown position.
d. Reverser is Off.
e. Cab Changeover Lever (rear cab wall) is Off.
f. AWS Isolation Lever (rear cab wall) is Isolated.
g. If running light loco, set Tail Lights to On.
h. All cab access doors and windows are closed when leaving the cab.
2. Enter the forward cab (the driving position) and check the following:
a. Master Key is Off.
b. Handbrake is Applied.
c. Marker Lights is On.
3. On the back wall behind the driver’s seat, ensure the Battery Isolation Switch is set to
the Closed position
4. On the back wall behind the driver’s seat, ensure the Brake Selection Switch is set to
the Air Brake - Passenger setting (which is appropriate for Mk 2 coaching stock).
5. If you want AWS:
a. On the back wall near the top, move the AWS Isolation Lever to Unisolated,
b. On the back wall near the top, move the AWS Cab Changeover Lever to On.
6. If you want DSD
a. On the back wall near the top by the side wall, turn the DSD Isolating Switch
to Unisolated.
7. Sit in the driver’s seat.
8. Turn the master key to the On position.
9. Move the reverser to the Engine Only position.
10. If you enabled AWS:
a. As you move the reverser past the Reverse setting, the AWS Alarm will self-
test, press the AWS Reset Switch to clear it.
11. Move the Driver’s Brake to the Full Service position.
12. Press the Engine Start button and wait for the Engine Stopped light to extinguish.
13. Wait for the Fault light to extinguish, which happens when the brakes are fully
charged.
14. Turn the Desk Light switch on.
15. When ready to proceed, move the reverser to Forwards.
16. Move the Driver’s Brake to the Running position.
17. Move Throttle to the On position until you’re rolling, then apply throttle as required.
Stopping at Stations in the BR Class 45 and BR Class 47
1. On approach to the station, you should always manage your speed appropriately.
The timing of the brake applications will need to be timed properly to ensure a
smooth and stable stop. As such, you will need to think and act well ahead. Begin
approximately 1 to 1.5 miles from the station by applying a reduction of 14.5 PSI (1
Bar) with the Driver’s Brake. Note this ‘braking point’ distance is influenced by
10numerous factors, such as the current speed of the train, the weight of the consist,
the current grade and the conditions of the rails – it will be necessary for you to
adjust your braking point accordingly.
2. The aim is to apply sufficient brake pressure once and only adjust it once you reach
the start of the platform. As a general rule, you should always aim to be at no more
than 25 mph depending on the platform length. For short platforms, you should aim
to be at no more than 15 mph when you reach the start of the platform. Avoid fanning
(moving the handle back and forth) the Driver’s Brake handle.
3. Move the Driver’s Brake and reduce further to around 29 PSI (2 Bar).
4. As your speed reduces below 7 mph, move the Driver’s Brake to reduce the brake
pressure to 14.5 PSI (1 Bar) in preparation for the stop. This will prevent the wheels
locking up and causing the train to judder.
5. Once the train has reached a full stop, move the Driver’s Brake to the Full Service
position to secure the train.
11An Introduction to the BR Class 101
The Class 101 was one of the largest classes of first-generation Diesel Multiple Units on the
British railway network. Built by Metro-Cammell Works in Birmingham from 1956, the Class
101 was made up from a number of sub-classes, making them the most numerous and
possibly most successful and well known of first generation DMUs.
Sets were supplied in two, three and four car sets, depending on the service they were
intended for, and passenger accommodation was provided in first and standard class
configuration.
More than 500 units of the Class 101 were built and could be seen on routes across the
country and saw service many years into the privatisation of Britain’s railways. The final five
units survived 47 years of service, finally being withdrawn on 24 December 2003, but thanks
to their longevity many units have been preserved on the country’s heritage railways.
Driver Setup Guide: BR Class 101
1. Before you enter the forward driving cab, go to the driving cab of the rear-most
trailing unit and set the following:
a. Left and Right Marker Lights (Red),
b. Destination Light to On,
c. Destination Blind to the appropriate destination,
d. Train Lights to on,
e. Optional – AWS Isolation Lever to Unisolated.
2. Whilst in the rear cab, check the following:
a. Control Circuit Key is Off,
b. Handbrake is Off,
c. Driver’s Brake Valve is in the Lap position,
d. Reverser is in the Off position,
e. Gear Selector is in the Neutral position,
12f. All cab access doors and windows are closed when leaving the cab.
3. Head to the forward driving cab. If there are intermediate cabs (like in a four or six-
car train), set or check the following in each cab:
a. Destination Blind to the appropriate destination,
b. Control Circuit Key is Off,
c. Handbrake is Off,
d. Driver’s Brake Valve is in the Lap position,
e. Reverser is in the Off position,
f. Gear Selector is in the Neutral position,
g. All cab access doors and windows are closed when leaving the cab.
4. Enter the forward driving cab and set the following:
a. Control Circuit Key to On,
b. Handbrake is On,
c. Marker lights (white),
d. Destination Light to On,
e. Destination Blind destination.
5. Check that the air pressure in the brake system reads greater than 75 lbs/in.
6. Set the Reverser, which determines the direction of travel, to the Forward position.
7. If the engines have not been started, move the Throttle handle to notch 2 and press
the Engine Start – Back and Engine Start – Front buttons one at a time to start them
8. Check that the Air Lights are lit for all engines and cars in the consist.
9. Move the Throttle handle to the Idle position.
10. Next, it is necessary to perform a brake test. Move the Driver’s Brake Valve to the
left-most position (full apply) and check that the Train Pipe gauge reads 0 inches of
vacuum.
Steps 11 and 12 are only required if the engines were not running when you took over the
train. If the engines are running, continue with Step 13:
11. Leave the forward cab and head to the rear cab and check that the Train Brake
gauge also reads 0 inches of vacuum.
12. Return to the forward cab.
13. Move the Driver’s Brake Valve to the right-most position (full release) and check that
the Train Pipe gauge reads 21 inches of vacuum.
Steps 14 and 15 are also only required if the engines were not running when you took over
the train. If the engines are running, continue with Step 16.
14. Return to the rear cab and check that the Train Brake gauge also reads 21 inches of
vacuum.
15. Return to the forward cab. The brake continuity test is now complete.
16. Finally, move the Driver’s Brake Valve to the left-most position (full apply) and return
the Driver’s Brake Valve handle to the Lap position. The brake test has now been
completed.
17. Set the Handbrake to Off.
18. The train is now ready to move.
13Driving the BR Class 101
1. Await the Guard’s Right Away. This is typically two clear buzzes.
2. Acknowledge the Guard’s Right Away by pressing the Guard Buzzer twice so that it
reproduces the same two clear buzzes received from the Guard.
3. Move the Driver’s Brake Valve to the right-most position (full release).
4. Move the Gear Selector to Gear 1 and pause for 2 seconds to allow the gearbox time
to engage the selected gear.
5. Move the Throttle handle to full power (position 4) steadily and one notch at a time.
6. Watch the Engine RPM gauge and pause until the needle reaches the Up arrow
marked on the gauge.
7. Move the Throttle handle to the Idle position and then move the Gear Selector to
Gear 2.
8. Pause for 2 seconds and then move the Throttle handle to the full power position,
steadily and one notch at a time.
9. Repeat steps 6 to 8 to change up successive gears.
Coasting in the BR Class 101
1. Move the Throttle handle to the Idle position and pause for 2 seconds.
2. When Coasting in the BR Class 101, you should always select Gear 4. If the Gear
Selector is not in the Gear 4 position, select Gear 4 now.
3. The train is now coasting.
4. If it becomes necessary to reapply power, you will need to move the Gear Selector to
the appropriate gear. Select the most appropriate gear for your speed if it is between
the change down and change up speeds shown on the table below. Make sure that,
once you have selected the new gear, you pause for 2 seconds before moving the
Throttle lever, again, steadily and one notch at a time.
Select Gear Change Down Speed Change Up Speed
1 0 mph 15 mph
2 15 mph 26 mph
3 26 mph 39 mph
4 39 mph 75 mph
Down Shifting in the BR Class 101
1. When the Engine RPM gauge needle shows that it is necessary to change down a
gear (the needle will point at the Down position on the Engine RPM gauge), move the
Throttle handle to the Idling position and pause for 2 seconds for the Engine RPM to
fall.
2. Select the next lowest gear with the Gear Selector. For example, if you are in Gear 4,
move the Gear Selector to the Gear 3 position and pause for 2 seconds.
143. Move the Throttle handle to the full power position, steadily and one notch at a time.
4. Repeat steps 1 to 3 to further reduce down in gears until the Engine RPM gauge
holds steady or begins to increase.
Stopping at Stations in the BR Class 101
1. On approach to the station, you should always manage your speed appropriately.
The timing of the brake applications will need to be timed properly to ensure a
smooth and stable stop. As such, you will need to think and act well ahead. Begin
approximately 1 to 1.5 miles from the station by applying 15 inches of vacuum with
the Driver’s Brake Valve. Note this ‘braking point’ distance is influenced by numerous
factors, such as the current speed of the train, the weight of the consist, the current
grade and the conditions of the rails – it will be necessary for you to adjust your
braking point accordingly.
2. The aim is to apply sufficient brake pressure once and only adjust it once you reach
the start of the platform. As a general rule, you should always aim to be at no more
than 25 mph depending on the platform length. For short platforms, you should aim
to be at no more than 15 mph when you reach the start of the platform.
3. Move the Driver’s Brake Valve and reduce the vacuum in the Train Brake to around 8
inches of vacuum.
4. As your speed reduces below 7 mph, move the Gear Selector to the Neutral position
and Move the Driver’s Brake Valve to increase the vacuum to 15 inches of vacuum in
preparation for the stop.
5. Once the train has reached a full stop, move the Driver’s Brake Valve to the full left-
most position (full apply) to secure the train.
15Safety Systems: Automatic Warning System (AWS)
What It Is
The Automatic Warning System is used to provide indications in the cab based on the
upcoming conditions on the line. Alarms sound in the cab when approaching aspects other
than green or when approaching some other fixed reason for ensuring the driver is forced to
acknowledge their location and situation such as some diverging junctions.
How to Activate/Deactivate
1. On the back wall near the top, move the AWS Isolation Lever to Unisolated
2. On the back wall near the top, move the AWS Cab Changeover Lever to ON.
3. The AWS self-test may now be going off, press the AWS Reset Switch to clear it.
How to Use
As you approach a signal you will observe you go over a yellow “ramp” in the middle of the
track, this is an AWS Ramp.
If the signal aspect you are approaching is GREEN then you will hear a bell in the cab, you
need take no further action.
If the signal aspect you are approaching is not green, then you will hear an alarm in the cab.
You must acknowledge this by pressing the AWS Reset Switch within a couple of seconds
or all the train brakes will apply.
Note: Unlike some European systems there are no speed restrictions monitored with this
system, it is left entirely to the driver to ensure that they will not pass a red signal and the
AWS is used to provide repeated warning and driver acknowledgement of the upcoming
situation on the line.
There are also fixed AWS Ramps which will always cause an alarm in the cab usually
because of something nearby ahead on the line, and some AWS ramps may only trigger
when the train is routed in a particular direction.
Simply put, if the alarm goes off, acknowledge it, understand why it went off and react
accordingly.
Note: Northern Trans-Pennine is not fitted with AWS as the route pre-dates the introduction
of the system. The above instructions are provided if you choose to use the included
locomotives on routes that are fitted with AWS.
Passenger Door Controls
In Train Sim World: Northern Trans-Pennine, you can control the passenger entry and exit
doors on each side independently i.e. either left side or right side. A simple method of control
has been implemented for the included trains. Simply press the TAB key to call up the menu
and select on which side of the train you wish to lock/unlock the doors.
On the included trains you cannot directly interact with the passenger car doors because this
is normally controlled from the passenger cars themselves, so you must use the TAB key to
cause the doors to open/close.
16Default English Keyboard Controls
Keyboard
Name Increase / Press Decrease
Throttle A D
Train Brake ‘ ;
Straight Air Brake [ ]
Brake to Lap
/
(Class 101 Only)
Gear Ctrl + A Ctrl + D
Reverser W S
Headlights H Shift + H
Marker Lights K
High Horn Space
Master Key CTRL + W
AWS Reset Q
Cab Light L Shift + L
Instrument Lights I Shift + I
Handbrake \ Shift + \
Emergency Brake Backspace
Wipers V Shift + V
Toggle AWS Shift + Enter
Toggle DSD Ctrl + Enter
Uncouple Ctrl + Shift + C
Flashlight
L
(When Walking)
Note: the above keys can be redefined in the in-game settings menu.
17Default Xbox/PS4 Controller Controls
Xbox
Name Increase / Press Decrease
Throttle Right Trigger Right Bumper
Brake Left Trigger Left Bumper
Reverser Left Stick Up Left Stick Down
Hold D-Pad Right
Also: Tap D-Pad
Headlights Hold D-Pad Right
Right to cycle
headlight settings
Marker Lights
High Horn Left Stick Click
Master Switch
AWS Reset B Button
Cab Light
Instrument Lights
Handbrake
Emergency Brake
Wipers D-Pad Up
Toggle AWS
Toggle DSD
Uncouple
Flashlight
(When Walking)
18Controlling the Camera & Camera Modes
Train Sim World: Northern Trans-Pennine includes several cameras for you to control, here’s
an outline of those cameras and some examples of use:
1 Key - First Person Camera or Cab Camera
Use this camera to operate your locomotive, flip switches and handle all your
cab controls.
2 Key - Boom Camera
Just like the camera from Train Simulator, your camera extends outward on an
invisible pole, you can rotate it around your focussed vehicle. Use Ctrl and the
left & right cursor keys to switch between vehicles or press the 2 key again to
switch between the front and rear of your consist.
3 Key - Floating Camera
A new camera that allows you to freely look in all directions, useful for coupling
and changing switches. Press it once to view the front of your consist and again
to view the rear. Freely move your view using the cursor keys.
8 Key - Free Camera
Freely move around without limits using this camera. Use this camera to
navigate your way around a busy yard, change switches or position it to get the
perfect screenshot.
19Customising the HUD
Train Sim World: Northern Trans-Pennine includes many options for you to customise the
Head Up Display (HUD):
CTRL+1 Toggles the in-world objective marker.
CTRL+2 Toggles the in-world next speed limit marker.
CTRL+3 Toggles the in-world next signal marker.
CTRL+4 Cycles the next speed limit / signal information panel in top right.
CTRL+5 Toggles the speedometer panel (or clock/compass while walking).
CTRL+6 Toggles the score display.
CTRL+7 Toggles the passenger stop marker on the track.
CTRL+8 Cycles the centre dot transparency (off, 50/50, white).
20Dovetail Live Account
The Dovetail Forums are your one-stop destination for everything Train Simulator and Train
Sim World related. We have an ever-growing and vibrant community of train enthusiasts from
all over the world, ranging from experienced railroad veterans to new players getting into the
world of train simulation. So, if you haven’t already, why not sign up for an account today and
join our community – we’d love to have you on board!
See more at: https://forums.dovetailgames.com
Dovetail Live is an online destination which enables players to interact with Dovetail’s products
and each other in an environment tailored specifically to fans of simulation entertainment.
Dovetail Live will evolve to become central to Train Sim World®, enriching the player
experience in every way from offering rewards, building a community of like-minded players
and helping every player find the right content to create their own perfect personal experience.
Signing up for Dovetail Live is completely voluntary. However, users that do sign up for it will
receive exclusive benefits in the future.
See more at: https://live.dovetailgames.com
21Troubleshooting Guide & How to Get Support
I have a problem downloading the Steam client, how do I contact them?
You can contact Steam Support by opening a customer service ticket at
support.steampowered.com/newticket.php. You will need to create a unique support account
to submit a ticket (your Steam account will not work on this page) and this will enable you to
track and respond to any tickets you open with Steam.
How do I install any secondary programs that the game may need?
Train Simulator World: Northern Trans-Pennine requires certain secondary programs to
operate properly. These are standard programs that most up-to-date computers already have
installed on them, such as DirectX. These programs can be found at the following location:
Local Disk (C:) > Program Files (x86) > Steam > SteamApps > common > TSW >
CommonRedist
How do I change the language of TSW: Northern Trans-Pennine?
This is an easy process and will allow you to play Train Sim World: Northern Trans-Pennine
in English, French, German, Spanish, Russian and Simplified Chinese. To change the
language of Train Sim World: Northern Trans-Pennine, right-click on the Steam icon on your
PC desktop, left click on ‘Library’, right click on ‘Train Sim World’, left click on ‘Properties’, and
finally left click on the Language tab and select your preferred language.
How do I reset my display screen size settings?
It is possible to change the display screen size settings for Train Sim World: Northern Trans-
Pennine from within the game. Changing display screen size settings is done from the Settings
menu in the Display tab.
For any questions not covered here, visit our knowledgebase at
https://dovetailgames.kayako.com
22You can also read