MACBOOK PRO ESSENTIALS - FOR MACBOOK PRO WITH THUNDERBOLT 3 - ETILIZE
←
→
Page content transcription
If your browser does not render page correctly, please read the page content below
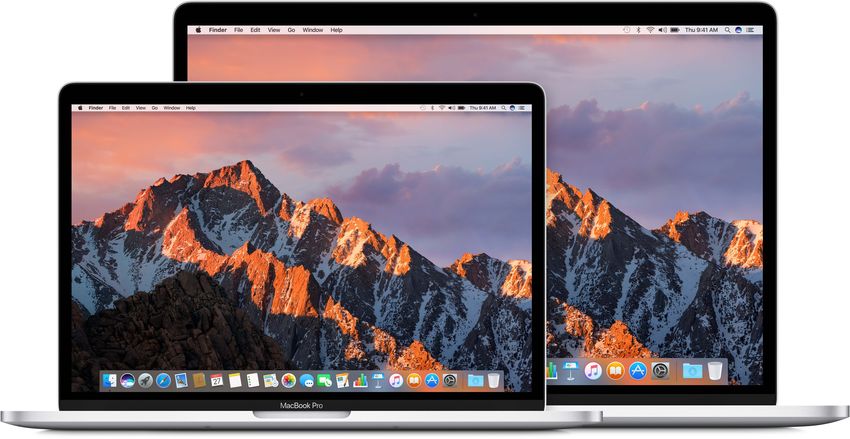
MacBook Pro
    Essentials
for MacBook Pro with Thunderbolt 3
Contents

4    Chapter 1:  MacBook Pro at a glance
4    Say hello to MacBook Pro
5    Take a tour
6    What’s included
6    Keyboard
7    Keyboard with the Touch Bar and Touch ID
10   Trackpad
11   Charge the battery
12   Accessories
12   Use an external display

14   Chapter 2:  Get started
14   Set up
16   Find your way around
23   Unlock your MacBook Pro with Apple Watch
24   Quickly open apps
25   Multitask on your desktop
25   Access your content anywhere with iCloud
27   Use your MacBook Pro and iOS devices together
30   Apple Pay
31   AirDrop
32   AirPrint
32   AirPlay
33   Migrate your data
34   Save space on your MacBook Pro
35   Back up and restore

36   Chapter 3:  Apps
36   Included apps
37   Safari
39   Mail
40   Notes
41   Messages
43   Calendar
44   Photos
45   iTunes
46   FaceTime
47   Maps
49   iBooks

		                                                   2
50   Pages
52   Numbers
53   Keynote
55   iMovie
56   GarageBand
58   App Store

59   Chapter 4:  Find answers
59   Mac Help
60   Common questions
61   Keyboard shortcuts
62   More resources, service, and support

63   Chapter 5:  Safety, handling, and support
63   Important safety information
66   Important handling information
67   Understanding ergonomics
68   Regulatory information
68   FCC regulatory compliance
69   Canadian regulatory compliance
69   EU compliance statement
70   ENERGY STAR® compliance statement
70   Apple and the environment
70   Regional disposal and recycling information
71   Software License Agreement

     Contents                                      3
MacBook Pro at a glance
1
Say hello to MacBook Pro
This guide provides the essential information you need in order to get the most from your
MacBook Pro. The sections described below cover the hardware features, the software setup
process and highlights, what you can do with apps on your Mac, and how to find more
information about any topic.
Take a look around. Want a quick intro to the features of your MacBook Pro? Go to the next
section, Take a tour.
Get started. Start your MacBook Pro by lifting the lid or connecting it to power, or by pressing
the power button or Touch ID. Follow the Setup Assistant prompts, and you’re up and
running. For details, see Set up. To migrate your information from an older computer, see
Migrate your data.
Make the most of shortcuts. If your MacBook Pro has a Touch Bar, shortcuts for common tasks
are right at your fingertips. Change settings, use typing suggestions for text and messages, add
an emoji, edit photos, and much more, with just a touch. See Meet the Touch Bar and Touch ID.
Stay in sync. Access your documents, photos, music, apps, contacts, and calendars across all
your devices with iCloud. And use your MacBook Pro with your iOS devices to make and receive
phone calls and texts, copy and paste across devices, or create an Instant Hotspot. Learn more in
Access your content anywhere with iCloud and Continuity.
Unleash your creativity. Plan events and share info and photos with Notes; organize and listen to
music, books, movies, and more with iTunes; create presentations with Keynote; and check out all
the apps available on the App Store, to express yourself in as many ways as you have ideas.
Dig deeper. Explore your MacBook Pro and get your questions answered. Go to Mac Help.
4Take a tour
This guide is for MacBook Pro models with Thunderbolt 3 (USB-C). (Not all features are available
on all models.)
Thunderbolt 3 (USB-C)
•• Thunderbolt 3 (USB-C) ports: Charge your computer, transfer data at Thunderbolt speeds
(up to 40 Gbps), connect to a display or projector, and more.
3.5 mm headphone jack
Thunderbolt 3 (USB-C)
•• 3.5 mm headphone jack: Plug in stereo headphones or external speakers to listen to your
favorite music or movies.
•• Microphones: Talk with friends or record audio (models with the Touch Bar have three
microphones; other models have two microphones).
Touch ID
Touch Bar FaceTime HD camera (power button)
Microphones Force Touch trackpad
•• Touch Bar: Some models include a Touch Bar at the top of the keyboard, which dynamically
adapts to the app you’re using. The Touch Bar is an extension of the keyboard that presents
intuitive shortcuts and application controls exactly when and where you need them. You
can use familiar gestures like slide and tap in the Touch Bar. For more information, see
Meet the Touch Bar and Touch ID.
•• FaceTime HD camera: Make FaceTime video calls or take pictures and video. If the light is
glowing, the camera is on. For more information, see FaceTime.
•• Touch ID (power button): To learn more about how to use Touch ID, see Meet the Touch Bar and
Touch ID. If your keyboard doesn’t have the Touch Bar, you can learn more about the power
button in Keyboard.
•• Force Touch trackpad: Control your MacBook Pro with gestures. The entire trackpad surface acts
as a button so you can easily click anywhere. For more about using gestures, see Trackpad.
Chapter 1 MacBook Pro at a glance 5What’s included
To use your MacBook Pro, you need these two accessories, included in the box:
USB-C Charge Cable: To charge your MacBook Pro, connect one end of
the USB-C Charge Cable to any Thunderbolt 3 port on your MacBook Pro,
and the other end to the 61W Power Adapter (for 13-inch MacBook Pro
models) or the 87W Power Adapter (for 15-inch MacBook Pro models).
61W or 87W USB-C Power Adapter: After the power adapter is connected
to MacBook Pro with the USB-C Charge Cable, fully extend the electrical
prongs on the AC plug, and plug the adapter into an AC power outlet.
Automatically start up your MacBook Pro. Connect your 61W or 87W USB-C Power Adapter and
USB-C Charge Cable and lift the lid to turn on and start up your MacBook Pro. Log in and get
right to work.
Keyboard
The system function keys on the keyboard provide shortcuts for common functions, such as
increasing the volume or screen brightness.
Note: If your MacBook Pro has the Touch Bar, the system function keys are in the Touch Bar. See
Meet the Touch Bar and Touch ID.
Function keys (F1 to F12) Power button
Function (Fn) key
•• Power button: Press and hold for 3 seconds to turn your MacBook Pro on or 6 seconds to
turn it off. Press to put it to sleep.
•• Brightness keys (F1, F2): Press or to increase or decrease the brightness of the screen.
•• Mission Control key (F3): Press to view what’s running on your MacBook Pro, including all
your spaces and open windows.
•• Launchpad key (F4): Press to instantly see all the apps on your MacBook Pro. Click an app to
open it.
•• Keyboard illumination keys (F5, F6): Press or to increase or decrease the brightness of
the keyboard.
Chapter 1 MacBook Pro at a glance 6•• Media keys (F7, F8, F9): Press to rewind, to play or pause, or to fast-forward a song,
movie, or slideshow.
•• Mute key (F10): Press to mute the sound from the built-in speakers or 3.5 mm
headphone jack.
•• Volume keys (F11, F12): Press or to increase or decrease the volume of sound from the
built-in speakers or 3.5 mm headphone jack.
•• Function (Fn) key: Each function key (on the top row) can also perform other standard
functions—for example, the F12 key can open Dashboard. Hold down the Fn key while you
press a function key to trigger the action associated with the key.
Set keyboard preferences. Use the Keyboard pane of System Preferences (choose Apple menu >
System Preferences, click Keyboard, then click the buttons at the top to see the available options).
Keyboard with the Touch Bar and Touch ID
Meet the Touch Bar and Touch ID
Note: Read the following sections if your MacBook Pro has the Touch Bar.
The Touch Bar at the top of your keyboard displays dynamically changing tools, depending on
your current activity. The Touch ID (power button) is located on the right side of the Touch Bar.
After you set up Touch ID, you can use your fingerprint to unlock your MacBook Pro and make
purchases on the App Store, iBooks Store, iTunes Store, and websites using Apple Pay.
Touch Bar Touch ID (power button)
Function (Fn) key
Use the Touch ID (power button). Press to turn on your MacBook Pro (or just lift the lid). When
you first start up or restart, you need to log in by typing your password. You set up Touch ID
during setup or later in the Touch ID pane of System Preferences. After setup, whenever you’re
asked for your password after you first log in, you can place your finger lightly on the Touch ID
sensor to authenticate instead of typing your password.
You can also use Touch ID to make purchases online securely with Apple Pay. For more
information about Touch ID, see Set up. For more information about Apple Pay, see Apple Pay.
Note: Press and hold the Touch ID (power button) for a few seconds to turn off your
MacBook Pro. To put your MacBook Pro to sleep, choose Apple menu > Sleep.
Chapter 1 MacBook Pro at a glance 7Use the Touch Bar. The Touch Bar is integrated into many macOS apps to give you handy
shortcuts for the tasks you do most, based on your current app and activity. Use familiar
gestures—like tap and slide—in the Touch Bar while you work.
The buttons at the right end of the Touch Bar are the Control Strip—you use them to expand or
collapse the Control Strip, change the brightness and volume, or use Siri. The other buttons in
the Touch Bar depend on the app you’re using.
Tap to expand
the Control Strip.
These buttons are
always available.
Expand or collapse the Control Strip. Frequently used system controls, like volume and
brightness, are located in the Control Strip on the right side of the Touch Bar. Tap to expand the
strip, then tap buttons or sliders for the settings you want to change. Tap when you finish, or
leave the Control Strip open to keep the buttons available.
Customize the Control Strip. Use the Keyboard pane of System Preferences (choose
Apple menu > System Preferences, then click Keyboard) to customize the Control Strip.
Display the function keys. Press and hold the Function (Fn) key to display the function keys
F1 through F12 in the Touch Bar, then tap a function button to use it.
Tap instead of type. In apps where you compose text, like Notes, Messages, TextEdit, and Mail,
the Touch Bar can display typing suggestions to help you save time by presenting words and
emoji you can tap instead of type. Tap in the Touch Bar to see typing suggestions, if they’re
not already showing.
Express yourself with emoji. In some apps, you can choose an emoji instead of words for a fun
way to make your point. Tap to display the emoji. Swipe to scroll through options, organized
by category, such as “Frequently Used,” “Smileys & People,” “Travel & Places,” and more. Tap to
select the emoji you want.
Chapter 1 MacBook Pro at a glance 8Explore and experiment. Tap around to see what you can accomplish quickly and efficiently. It’s often easier to tap the Touch Bar than to click or select items onscreen in order to accomplish a task or apply a setting. For example, open Calculator and do quick calculations with the number keys and the functions on the Touch Bar—no more moving your cursor, clicking, and typing onscreen. Keep using the Touch Bar to find the best ways to achieve the results you want. Move seamlessly between the Touch Bar, your keyboard, and the trackpad to get the job done. See Included apps and the sections for each app for information about their Touch Bar features. To learn more about the Touch Bar, see the Apple Support article support.apple.com/HT207055. Customize the Touch Bar In the Finder and in many apps, such as Mail and Safari, you can customize the buttons in the Touch Bar. You can also customize the Control Strip. Choose View > Customize Touch Bar to add, delete, or rearrange items in the Touch Bar. When you’re customizing the Touch Bar, the buttons jiggle, and you see the Done button. For example, here’s the Calculator Touch Bar, ready to be edited: Add buttons to the Touch Bar. Drag controls to the bottom of your screen and into the Touch Bar to add them. When you finish, tap Done in the Touch Bar or click Done on the screen. Rearrange buttons in the Touch Bar. While customizing the Touch Bar, drag buttons to a new location. When you finish, tap Done. Remove buttons from the Touch Bar. While customizing the Touch Bar, drag a button from the Touch Bar to the screen to remove it. When you finish, tap Done. Trackpad You can do a lot on your MacBook Pro using simple trackpad gestures—scroll through webpages, zoom in on documents, rotate photos, and more. Chapter 1 MacBook Pro at a glance 9
With the Force Touch trackpad, pressure-sensing capabilities add another level of interactivity.
The trackpad provides feedback—when you drag or rotate objects, you feel a subtle vibration
when they’re aligned, allowing you to work with greater precision.

Here are some common gestures:

                                       Click: Press anywhere on the trackpad. Or enable “Tap to click” in Trackpad
                                       preferences, and simply tap.
                                       Force click: Click and then press deeper. You can use force click to look up
                                       more information—click a word to see its definition, or an address to see
                                       a preview that you can open in Maps.
                                       Secondary click (right click): Click with two fingers to open shortcut
                                       menus. If “Tap to click” is enabled, tap with two fingers.
                                       Two-finger scroll: Slide two fingers up or down to scroll.

                                       Pinch to zoom: Pinch your thumb and finger open or closed to zoom in or
                                       out of photos and webpages.

                                       Swipe to navigate: Swipe left or right with two fingers to flip through
                                       webpages, documents, and more—like turning a page in a book.
                                       Open Launchpad: Quickly open apps in Launchpad. Pinch closed with
                                       four or five fingers, then click an app to open it.

                                       Swipe between apps: To switch from one full-screen app to another,
                                       swipe left or right with three or four fingers.

Customize your gestures. Choose Apple menu > System Preferences or click the System
Preferences icon in the Dock, then click Trackpad. In Trackpad preferences you can:
••   Learn more about each gesture
••   Set the pressure you prefer to use
••   Decide whether to use pressure-sensing features
••   Customize other trackpad features

   Tip: If you find you’re force clicking when you don’t intend to, try adjusting the click pressure
to a firmer setting in Trackpad preferences. Or change the “Look up and data detectors” option
from the “Force Click with one finger” default setting to “Tap with three fingers.”

For more information and examples of force click options, see the Apple Support article
support.apple.com/HT204352.

Chapter 1    MacBook Pro at a glance                                                                                  10
Charge the battery The MacBook Pro battery recharges whenever your MacBook Pro is connected to power. Charge the battery. Connect your MacBook Pro to a power outlet using the included USB-C Charge Cable and 61W or 87W USB-C Power Adapter. You can charge your MacBook Pro using any of the Thunderbolt 3 ports on your computer. The battery charges more quickly when the computer is off or in sleep. Check the battery’s charge. Look at the battery status icon at the right of the menu bar to see the battery level or charging status. The icon displays a lightning bolt when your MacBook Pro is connected to power. Click the icon to show how much charge you have left if you keep using your MacBook Pro as you’re currently using it. Charging Charged Conserve battery power. To extend battery life on a given charge, you can reduce the display brightness, close apps, and disconnect peripheral devices you’re not using. You can change your power settings in Energy Saver preferences (click the System Preferences icon in the Dock, then click Energy Saver). If your MacBook Pro is in sleep when a device is connected to it, the device’s battery may drain. For more information about the internal rechargeable battery in your MacBook Pro, and for conservation and performance tips, go to www.apple.com/batteries. Chapter 1 MacBook Pro at a glance 11
Accessories
The following Apple accessories are available to connect your MacBook Pro to power, external
devices and displays, and more.

                                       Thunderbolt 3 (USB-C) to Thunderbolt 2 Adapter: Connect your
                                       MacBook Pro to Thunderbolt 2 devices or a Thunderbolt display.
                                       USB-C to USB Adapter: Connect your MacBook Pro to standard USB
                                       accessories or connect a USB cable to sync and charge your iPhone, iPad,
                                       or iPod touch.
                                       USB-C Digital AV Multiport Adapter: Connect your MacBook Pro to an
                                       HDMI display, while also connecting a standard USB device and a USB-C
                                       charge cable to charge your MacBook Pro.

                                       USB-C VGA Multiport Adapter: Connect your MacBook Pro to a VGA
                                       projector or display, while also connecting a standard USB device and a
                                       USB-C charge cable to charge your MacBook Pro.

Adapters and other accessories are sold separately at apple.com or your local Apple Store.
Review the documentation or check with the manufacturer to make sure you’re choosing the
right adapter for your MacBook Pro.

Use an external display
The Thunderbolt 3 port on your MacBook Pro supports video output. You can use an external
display, a projector, or an HDTV with your MacBook Pro.

Chapter 1    MacBook Pro at a glance                                                                              12
•• Connect a VGA display or projector: Use a USB-C to VGA adapter to connect the display to a
Thunderbolt 3 port on your MacBook Pro.
•• Connect an HDMI display or HDTV: Use a USB-C to HDMI adapter or a USB-C to Digital AV
adapter to connect an HDMI display or HDTV to a Thunderbolt 3 port on your MacBook Pro.
•• Connect a USB-C display: Connect the display to a Thunderbolt 3 port on your MacBook Pro.
•• Connect a Thunderbolt display: Use a Thunderbolt 3 (USB-C) to Thunderbolt 2 Adapter to
connect the Thunderbolt display to a Thunderbolt 3 port on your MacBook Pro.
Adapters and other accessories are sold separately at apple.com or your local Apple Store.
If you have an HDTV connected to an Apple TV, you can also use AirPlay to mirror your
MacBook Pro screen on your TV screen in up to 1080p HD. See AirPlay for details.
Chapter 1 MacBook Pro at a glance 13Get started
2
Set up
The first time your MacBook Pro starts up, Setup Assistant walks you through the simple steps
needed to begin using your new Mac. If you want to transfer your data from another computer,
see Migrate your data for details.
Be sure to connect to Wi-Fi, turn on Bluetooth® wireless technology, get an Apple ID, then sign in
to iCloud. Activate Siri during setup, if you want. If your MacBook Pro has the Touch Bar, you can
also set up Touch ID and Apple Pay.
You can do these steps quickly and easily with Setup Assistant—but if you want to do them later,
here’s how:
Connect to Wi-Fi. Click the Wi-Fi status icon in the menu bar, then choose a Wi-Fi network
and enter the password, if necessary.
Turn Wi-Fi on or off. Click the Wi-Fi status icon in the menu bar, then choose Turn Wi-Fi On or
Turn Wi-Fi Off.
Turn Bluetooth on or off. Click the Bluetooth icon in the menu bar, then choose Turn
Bluetooth On or Turn Bluetooth Off.
Tip: If you don’t see the Wi-Fi status icon or Bluetooth icon in the menu bar, you can add
them. For Wi-Fi, choose Apple menu > System Preferences, then click Network. Click Wi-Fi in the
list on the left, then select “Show Wi-Fi status in menu bar.” For Bluetooth, choose Apple menu >
System Preferences, click Bluetooth, then select “Show Bluetooth in menu bar.”
14Get an Apple ID. Your Apple ID is the account you use for everything you do with Apple— including using the App Store, the iTunes Store, iCloud, iMessage, and more. Your Apple ID consists of an email address and a password. You need only one Apple ID to use any Apple service, on any device—whether it’s your computer, iOS device, or Apple Watch. It’s best to have your own Apple ID and not share it—create separate Apple IDs for each family member. If you don’t already have an Apple ID, you can create one (it’s free). Go to appleid.apple.com. Important: If you forget your Apple ID password, you don’t need to create a new Apple ID. Just click the Forgot link in the login window to retrieve your password. Set up iCloud on your MacBook Pro. With iCloud, you can store all of your content—documents, movies, music, photos, and more—in the cloud, and access it anywhere you go. To set up iCloud, choose Apple menu > System Preferences, then click iCloud. In the window that appears, enter your Apple ID and password. Then select the features you want to use. For more about iCloud, see Access your content anywhere with iCloud. Important: Be sure to use the same Apple ID for iCloud on all your devices. Set up Siri. You can enable Siri on your MacBook Pro when prompted during setup. To learn how to turn on Siri later and for information about using Siri on your Mac, see Siri. Set up Touch ID. If your MacBook Pro has the Touch Bar and Touch ID, you can add a fingerprint to Touch ID during setup. To set up Touch ID later or to add additional fingerprints (up to five total), click the System Preferences icon in the Dock, or choose Apple menu > System Preferences. Then click Touch ID. To add a fingerprint, click and follow the onscreen instructions. You can also set options for how you want to use Touch ID on your MacBook Pro: to unlock your Mac instead of entering your password, to use Apple Pay (see Apple Pay), or to purchase items on the iTunes Store, App Store, and iBooks Store. Tip: If two or more users use the same MacBook Pro, each one can add a fingerprint to Touch ID to quickly unlock, authenticate, and log in to the MacBook Pro. For more information on Touch ID, see the Apple Support article support.apple.com/HT207054. Chapter 2 Get started 15
Set up Apple Pay. If you have a MacBook Pro with the Touch Bar, you can set up Apple Pay for
one user account on your MacBook Pro during setup. Other users can still pay with Apple Pay,
but they must complete the purchase using their iPhone or Apple Watch that’s been set up
for Apple Pay (see Apple Pay for more details). Follow the onscreen prompts to add and verify
your card. If you already use a card for iTunes purchases, you might be prompted to verify this
card first.
To set up Apple Pay or add additional cards later, click the System Preferences icon in the
Dock, or choose Apple menu > System Preferences. Then click Wallet & Apple Pay and follow the
onscreen prompts to set up Apple Pay.
Note:  The card issuer determines whether your card is eligible to use with Apple Pay, and may
ask you to provide additional information to complete the verification process. Many credit and
debit cards can be used with Apple Pay. For information about Apple Pay availability and current
credit card issuers, see the Apple Support article support.apple.com/HT204916.

Find your way around
The desktop
The first thing you see on your MacBook Pro is the desktop, where you can quickly open apps,
search for anything on your MacBook Pro and the web, organize your files, and more.
                  The desktop          Finder window
  Apple menu               Help menu      Menu bar        Wi-Fi icon    Ask Siri.

        Finder icon                           System Preferences icon      Dock

   Tip: Can’t find the pointer? To magnify it temporarily, move your finger rapidly back and forth
on the trackpad. Or if you’re using a mouse, slide it back and forth quickly.

Chapter 2    Get started                                                                          16
Finder The Finder is an app that’s always open. Use the Finder to organize and locate your files. Force click a file icon to get a quick look at its contents, or force click a filename to edit it. Open a Finder window. Click the Finder icon in the Dock at the bottom of the screen. Use the Touch Bar. Tap buttons to move back and forth through items you’ve viewed, set view options, and quickly look at, share, or tag an item. Tap to see buttons for viewing and sorting options: Tap to see sharing options: Tap to see tags you can apply: Chapter 2 Get started 17
The Dock
The Dock, at the bottom of the screen, is a convenient place to keep the apps and documents
you use frequently.
                                    Apps go on the left side of the line;
                                      files and folders go on the right.

        Go to the Finder.                 Open System Preferences.

Open an app or file. Click its icon in the Dock.
Add an item to the Dock. Drag the item and drop it where you want it. Place apps to the left of
the line in the Dock, and files or folders to the right.
Remove an item from the Dock. Drag it out of the Dock until you see the word Remove. The
item isn’t removed from your MacBook Pro—just from the Dock.
See all open windows in an app. Force click an app in the Dock to access Exposé and view all
the app’s open windows.

    Tip: You can make the Dock larger or smaller, add or remove items, move it to the left or right
side of the screen, or even set it to hide when you’re not using it. To change how the Dock looks,
click the System Preferences icon in the Dock, or choose Apple menu > System Preferences.
Then click Dock.

System Preferences
System Preferences is where you personalize your MacBook Pro settings. For example, use
Energy Saver preferences to change sleep settings. Or use Desktop & Screen Saver preferences
to add a desktop picture or choose a screen saver.
Customize your MacBook Pro. Click the System Preferences icon in the Dock, or choose
Apple menu > System Preferences. Then click the type of preference you want to set.

Chapter 2    Get started                                                                          18
Menu bar
Use the menus and icons along the top of the screen to open new windows, connect to a Wi-Fi
network, check your Wi-Fi status , change the volume , check your battery charge ,
query Siri, and more. The menu items change, depending on which app you’re using.
For more information about using Siri, see Siri.
Ask Siri.
Search Mac Help. Open Spotlight.
View Notifications.
Spotlight
Spotlight is an easy way to find anything on your MacBook Pro, such as documents, contacts,
calendar events, and email messages. Spotlight Suggestions offer info from Wikipedia articles,
Bing search results, news, sports, weather, stocks, movies, and other sources.
When you search with Spotlight, the preview area on the right provides search results you can
interact with—make a call, send an email message, play a song, get directions, even convert
currencies. Spotlight can provide answers to math questions or define words, all on your desktop.
Search for anything. Click at the top right of the screen, then start typing.
Tip: Type Command–Space bar to show or hide the Spotlight search field.
Get weather, stocks, sports, Interact with the
transit info, and more. preview in Spotlight.
Find your files quickly.
Chapter 2 Get started 19Preview your results. Click a search result and view it in the preview on the right. Sometimes that’s all you need to do—click items or links directly in the preview. You can also double-click a result to open it. Open an app. Type the app name in Spotlight, then press Return. Turn off Spotlight Suggestions. If you want Spotlight to search only for items on your MacBook Pro, you can turn off Spotlight Suggestions in Spotlight preferences. Click the System Preferences icon in the Dock, click Spotlight, then click to deselect Spotlight Suggestions. Make any other changes you want to the list of categories Spotlight searches. Note: Not all features of Spotlight Suggestions are available in all languages or regions, and some features may vary by region. Siri Now you can talk to Siri on your MacBook Pro and use your voice for many tasks simply by clicking the Siri button. For example, you can find files, schedule meetings, change preferences, get answers, send messages, place calls, and add items to your calendar. Siri can give you directions (“How do I get home from here?”), provide information (“How high is Mount Whitney?”), perform basic tasks (“Create a new list called Groceries”), and much more. Note: To use Siri, your MacBook Pro must be connected to the Internet. Siri may not be available in all languages or in all areas, and features may vary by area. Enable Siri. Click the Siri icon in the Dock, then click Enable when prompted. If you enabled Siri during setup, clicking the icon opens Siri. Or click the System Preferences icon in the Dock, click Siri, then select Enable Siri. You can set other preferences in the pane, such as Language and whether to show Siri in the menu bar. Note: If your MacBook Pro has the Touch Bar, tap the Siri button in the Control Strip to open Siri. Chapter 2 Get started 20
When you first open Siri on your Mac, you’ll see a list of suggestions about how to use Siri to save
time and typing. You can also ask Siri “What can you do” at any time, or click the help button .

Speak to Siri. Click Siri in the menu bar or the Dock and start speaking. Or press and hold the
Command key and the Space bar, and speak to Siri.
Find and open files. Ask Siri to find files and open them right from the Siri window. You can ask
by file name, by tags, or by description. For example, “Search for files Ursula sent last week,” or
“Open the spreadsheet I created last night.”
Drag and drop. Drag and drop images and locations from the Siri window into an email, text
message, or document. You can also copy and paste text.
Save Siri results. Save results from sporting events, Reminders, Clock, Stocks, Notes, Finder,
and general knowledge (Wikipedia, for example) to the Today view in Notifications. Click the
plus sign    in the top right of a Siri result to pin it to the Today view. To see it later, click the
Notification Center icon , then click Today. If you’re checking a sports score, for example, results
stay up to date.
Adjust the volume. Use the volume buttons on your MacBook Pro to increase or decrease the
volume while you’re interacting with Siri. If your MacBook Pro has the Touch Bar, adjust the
volume in the Control Strip.
Change the voice. Click the System Preferences icon       in the Dock, click Siri, then choose an
option from the Siri Voice menu.

You’ll find suggestions for things you can ask Siri throughout this guide—they look like this:

     Ask Siri. Say something like:
••   “Open the Keynote presentation I was working on last night.”
••   “What time is it in Paris?”
••   “What kinds of things can I ask you?”

Chapter 2    Get started                                                                              21
Notification Center Use Notification Center to view details about your day (calendar, stocks, weather, and more) and catch up on notifications you might have missed (email, reminders, app notifications, and more). Open Notification Center. Click the Notification Center icon at the top right of the screen. Tap Today to see what’s coming up, or Notifications to review what’s come in. Help Help for your MacBook Pro and macOS apps is always available. Get help. Click the Finder icon , then click the Help menu and choose Mac Help. Or type in the search field and choose a suggestion. To learn more, see Mac Help. Chapter 2 Get started 22
Unlock your MacBook Pro with Apple Watch
Use your authenticated Apple Watch to automatically unlock your sleeping MacBook Pro when
you’re close to your computer. Just wake your Mac and start using it—no need to enter a
password. Auto Unlock uses strong encryption to provide secure communication between your
Apple Watch and MacBook Pro.

Note:  Auto Unlock is a feature on Macs (mid-2013 and later) running macOS Sierra, and
Apple Watch running watchOS 3.

Set up two-factor authentication for your Apple ID. Auto Unlock works when your Apple ID
has two-factor authentication turned on. Go to Apple menu > System Preferences > iCloud >
Account Details, click Security, then select Set Up Two-Factor Authentication. For more
information, see the Apple Support article support.apple.com/HT204915.
Make sure “Disable automatic login” is also selected. (You won’t see this option if you’re using
FileVault, but you can still use the Auto Unlock feature.)
Set up Auto Unlock. Sign in to iCloud with the same Apple ID on all your devices, then click
the System Preferences icon in the Dock, or choose Apple menu > System Preferences. Click
Security & Privacy, then select “Allow your Apple Watch to unlock your Mac.”

Note:  Auto Unlock works only when your Apple Watch is authenticated with a passcode. You
authenticate your Apple Watch each time you put it on, so no extra steps are required after you
enter your passcode.
Skip the sign-in. Walk up to your sleeping MacBook Pro wearing your authenticated Apple
Watch on your wrist, and lift the cover or press a key to wake your MacBook Pro—Apple Watch
unlocks it so you can get right to work.

Chapter 2    Get started                                                                           23
Quickly open apps
Your MacBook Pro comes with apps for all the things you love to do—browse the web, check
email, share photos, enjoy movies, and more.
                                       Launchpad arranges your apps in
    Folder containing apps             a grid. Click an app icon to open it.

               Launchpad icon                                    App Store icon

Open an app. Click an app icon in the Dock, or click the Launchpad icon    in the Dock and click
the app you want. You can also search for an app using Spotlight, then open the app directly
from your Spotlight search results.

   Ask Siri. “Open Calculator.”
Organize apps in Launchpad. Launchpad organizes your apps in a grid. Drag an app to a new
location to rearrange apps. Drag an app onto another app to create a folder. Drag more apps to
the new folder to add them. To remove an app from a folder, drag it out.
Get more apps. Click the App Store icon   in the Dock and search for apps you want. Apps you
download from the App Store appear automatically in Launchpad. To quickly get updates for
apps and macOS, click Updates in the App Store.

Chapter 2    Get started                                                                      24
Multitask on your desktop
The Tabs feature is available in most apps that support multiple windows, such as Pages,
Numbers, Maps, and more. And while you’re browsing multiple tabs, you can watch a video using
Picture in Picture.
Note: Picture in Picture is not available for all videos.
Work in multiple Float a video over
files at once. another app.
Browse content with tabs. Open multiple tabs in an app to compare content—for example,
Numbers spreadsheets or Pages documents. Or copy and paste content from one tab to another.
Tabs also work with third-party apps.
To set tab preferences, choose Apple menu > System Preferences, then click Dock. Choose an
option for “Prefer tabs when opening documents.”
Watch while you work. Click the Picture in Picture button in a Safari or iTunes video. You can
drag the video to any corner of your desktop, and it stays put while you switch between apps
and spaces.
Access your content anywhere with iCloud
iCloud is the easiest way to make sure all your important content is everywhere you are. iCloud
stores your documents, photos, music, apps, contacts, and calendars, so you can access them any
time you’re connected to Wi-Fi.
An iCloud account is free, and it comes with 5 GB of free storage space. Purchases you make from
the iTunes Store, App Store, or iBooks Store don’t count toward your available space.
Chapter 2 Get started 25iCloud also keeps everything up to date on your devices. So if you have an iPhone, iPad, or iPod touch, just sign in to iCloud using the same account and you’ll have everything you need. Here are some of the things you can do with iCloud. Automatically store your desktop and Documents folder in iCloud Drive. Save files in your Documents folder or on your desktop, and they’re automatically available on iCloud Drive and accessible wherever you are. Working with iCloud Drive, you have access to files on your iPhone or iPad in the iCloud Drive app, on the web at iCloud.com, or on a Windows PC in the iCloud app. When you change your file in iCloud Drive, you’ll see your edits wherever you view the file. To get started, click the System Preferences icon in the Dock, click iCloud, select iCloud Drive, click Options, then select “Desktop & Documents Folders.” Share purchases with Family Sharing. Up to six members of your family can share their purchases from the iTunes Store, App Store, and iBooks Store—even if they use different iCloud accounts. Pay for family purchases with one credit card, and approve kids’ spending right from your MacBook Pro or iOS device. Plus, share photos, a family calendar, reminders, and locations. To set up Family Sharing if you didn’t when you set up your MacBook Pro, click the System Preferences icon in the Dock, click iCloud, then click Set Up Family. Share photos using iCloud Photo Library and iCloud Photo Sharing. Store your photo library in iCloud and see your photos and videos on all your devices. Share photos and videos with only the people you choose, and let them add their own photos, videos, and comments. To get started, click the System Preferences icon in the Dock, click iCloud, select Photos, then click Options. Enjoy your purchases anywhere. When you’re signed in to iCloud, purchases you’ve made from the iTunes Store, App Store, and iBooks Store are available at any time, no matter which computer or device you used to purchase them. So all your music, movies, books, and games are available wherever you go. Locate your MacBook Pro with Find My Mac. If your MacBook Pro is stolen, you can easily locate it on a map, lock its screen, or erase its data remotely if you have Find My Mac turned on. To turn on Find My Mac, click the System Preferences icon in the Dock, click iCloud, then select Find My Mac. For more information about what you can do with iCloud, go to Mac Help (see Mac Help) and search for “iCloud,” or go to www.apple.com/icloud. Chapter 2 Get started 26
Use your MacBook Pro and iOS devices together
Continuity
With Continuity, you can seamlessly move among your iOS devices and your MacBook Pro. Just
sign in to your iCloud account on your MacBook Pro and your iOS devices, and whenever they’re
near each other, they work together in great ways. Continuity features described in this section
include Handoff, Universal Clipboard, iPhone cellular calls, SMS messaging, and Instant Hotspot.

Other Continuity features include Auto Unlock (see Unlock your MacBook Pro with Apple Watch),
Apple Pay (see Apple Pay), and AirDrop (see AirDrop). For a list of system requirements for
devices that support Continuity, see the Apple Support article support.apple.com/HT204689.

Handoff
With Handoff, you can pick up on one device where you left off on another. Work on a
presentation on your MacBook Pro, then continue on your iPad. Or start an email message on
your iPhone, then finish it on your MacBook Pro. View a message on your Apple Watch, and
respond to it on your MacBook Pro. You don’t have to worry about transferring files. When your
MacBook Pro and devices are near each other, an icon appears in the Dock whenever an activity
is being handed off; to continue, just click the icon.
      Click to continue what you
      were doing on your iPhone.

Turn on Handoff on your MacBook Pro. Click the System Preferences icon in the Dock, click
General, then select “Allow Handoff between this Mac and your iCloud devices.”
Turn on Handoff on your iOS device. Go to Settings > General > Handoff, then tap to turn on
Handoff. If you don’t see the option, your iOS device doesn’t support Handoff.
Turn on Handoff on your Apple Watch. In the Apple Watch app on iPhone, go to Settings >
General, then tap to turn on Enable Handoff.

Note:  To use Handoff, you need an iPhone, iPad, or iPod touch with the Lightning connector and
iOS 8 (or later) installed. Make sure your MacBook Pro and iOS device have Wi-Fi and Bluetooth
turned on and are signed in to the same iCloud account.

Handoff works with Safari, Mail, Calendar, Contacts, Maps, Messages, Notes, Reminders, Keynote,
Numbers, and Pages.

Chapter 2    Get started                                                                          27
Universal Clipboard Copy content from one device, and paste it into another nearby device within a short period of time. The contents of your clipboard are sent over Wi-Fi and made available to all Mac and iOS devices logged in with the same Apple ID that have Handoff, Wi-Fi, and Bluetooth turned on. For more information, see Handoff. Note: To use Universal Clipboard, you need an iPhone, iPad, or iPod touch that has the Lightning connector and iOS 10 or later. Use across apps. You can copy and paste images, text, photos, and video between any apps that support copy and paste on your Mac, iPhone, iPad, and iPod touch. Phone calls You can take calls—and make them—right from your MacBook Pro. Note: A Wi-Fi connection is required in order to make or receive phone calls on your MacBook Pro. Take a call. When someone calls your iPhone, click the notification that appears on your MacBook Pro screen. Your MacBook Pro becomes a speakerphone. Make a call. Click a phone number in a Spotlight search, or in an app such as FaceTime, Contacts, Safari, or Calendar. A nearby device (iPhone, iPad) with a cellular connection is required in order to make phone calls. Chapter 2 Get started 28
Text messages Send and receive SMS and MMS text messages right from your MacBook Pro. When friends and family text you, you can respond with whichever device is closest. All messages appear on your MacBook Pro, iPhone, iPad, iPod touch, and Apple Watch. Note: To set up this feature, choose Messages > Preferences and click Accounts. Instant Hotspot Lost your Wi-Fi connection? Use the Personal Hotspot on your iPhone or iPad to connect your MacBook Pro to the Internet. Note: Personal Hotspot requires an iPhone or a cellular model iPad, with iOS 8 or later. Connect to your device’s Personal Hotspot. Click the Wi-Fi status icon in the menu bar, then choose your iPhone or iPad in the list of devices that appears. (You don’t need to do anything on your device—your MacBook Pro connects automatically.) Check the status of your connection. Look in the Wi-Fi status menu to see the strength of the cellular signal. When you’re not using the hotspot, your MacBook Pro disconnects to save battery life. To learn more about using Instant Hotspot, messages, phone calls, Universal Clipboard, and Handoff with your MacBook Pro, open Mac Help (see Mac Help). See the Apple Support article support.apple.com/HT204681 or go to www.apple.com/osx/continuity. Chapter 2 Get started 29
Apple Pay
You can make easy, secure, and private purchases on websites using Apple Pay on your
MacBook Pro. With Apple Pay, your credit or debit card information is never stored by Apple or
shared with the merchant. When you shop online using Safari, look for an Apple Pay button.
Confirm payment using your iPhone or Apple Watch. If your MacBook Pro has the Touch Bar and
you are the first user to go through setup, place your finger lightly on the Touch ID sensor to
authenticate and complete your purchase.

Note:  For information about Apple Pay, go to www.apple.com/apple-pay. For information about
current card issuers, see the Apple Support article support.apple.com//HT204916.

Set up Apple Pay. Apple Pay uses the credit or debit cards you’ve already set up on your iPhone
or Apple Watch, so no extra setup is required. You must be signed in to an iPhone or Apple
Watch that has Apple Pay set up with the same Apple ID you’re using on your MacBook Pro. The
default payment card, shipping, and contact information that is set on your iPhone or Apple
Watch is used for purchases on your MacBook Pro.
If your MacBook Pro has the Touch Bar, you’re prompted to configure Apple Pay during setup.
If you don’t choose to set up Apple Pay when you first start up, you can set it up later in the
Wallet & Apple Pay pane of System Preferences. Manage your payment cards there—add or
delete cards and make updates to contact information.
Make a purchase. Click the Apple Pay button on the website, then to confirm the payment, use
Touch ID or the passcode on your iPhone, or double-click the side button on your unlocked
Apple Watch. If your MacBook Pro has the Touch Bar, you can confirm the merchant name and
purchase amount on the Touch Bar. Then place your finger lightly on the Touch ID sensor to
authenticate and complete your purchase.

For more information about Apple Pay, see the Apple Support articles
support.apple.com/HT204506, support.apple.com/HT201239, and support.apple.com/HT205583.

Chapter 2    Get started                                                                          30
AirDrop
AirDrop makes it easy to share files with nearby Mac computers and iOS devices. The devices
don’t need to share the same Apple ID.

Note:  AirDrop for iOS requires devices that have the Lightning connector and iOS 7 or later.
Not all older Macs support AirDrop (for a list of supported Macs, see the Apple Support article
support.apple.com/HT203106).

Send a file from the Finder. Click the Finder icon in the Dock, then click AirDrop in the sidebar
on the left. When the person you want to send a file to appears in the window, drag the file to
him or her.
Send a file from an app. While using an app like Pages or Preview, click the Share button   and
choose AirDrop.
Control who can send items to you using AirDrop. Click the Finder icon in the Dock, click
AirDrop in the sidebar, then click “Allow me to be discovered by” and choose an option.

When you send a file to someone, the recipient can choose whether or not to accept the file.
When someone sends you a file, you can find it in the Downloads folder on your MacBook Pro.

    Tip: If you don’t see the recipient in the AirDrop window, make sure both devices have
AirDrop and Bluetooth turned on and are within 30 feet (9 meters) of each other. If the recipient
is using an older Mac, try clicking the “Don’t see who you’re looking for?” link.

To learn more about AirDrop, go to Mac Help (see Mac Help).

Chapter 2    Get started                                                                          31
AirPrint You can use AirPrint to print wirelessly to: •• An AirPrint-enabled printer on your Wi-Fi network •• A network printer or printer shared by another Mac on your Wi-Fi network •• A printer connected to the USB port of an AirPort base station Print to an AirPrint printer. When you print from an app, click the Printer pop-up menu in the Print dialog, then choose a printer in the Nearby Printers list. Can’t find the printer you’re looking for? Make sure it’s connected to the same Wi-Fi network as your MacBook Pro. If it’s connected and you still don’t see it, try adding it: Click the System Preferences icon in the Dock, click Printers & Scanners, then click Add . (You may have to temporarily connect the printer to your MacBook Pro using a USB cable.) For a list of AirPrint-enabled printers and other supported printers, see the Apple Support articles support.apple.com/HT201311 and support.apple.com/HT201465. To learn more about AirPrint, go to Mac Help (see Mac Help). AirPlay Show whatever’s on your MacBook Pro on the big screen using AirPlay Mirroring. To mirror the MacBook Pro screen on your TV screen or to use the HDTV as a second display, connect your HDTV to Apple TV and make sure the Apple TV is on the same Wi-Fi network as your MacBook Pro. You can also play web videos directly on your HDTV without showing what’s on your desktop—handy when you want to play a movie but keep your work private. Mirror your desktop using AirPlay Mirroring. Click the AirPlay icon in the menu bar, then choose your Apple TV. When an AirPlay display is active, the icon turns blue. In some cases, you can use an AirPlay display even if your MacBook Pro isn’t on the same Wi-Fi network as Apple TV (called peer-to-peer AirPlay). To use peer-to-peer AirPlay, you need an Apple TV (3rd generation rev A, model A1469 or later) with Apple TV software 7.0 or later. Play web videos without showing your desktop. When you find a web video with an AirPlay icon , click the icon, then select your Apple TV. Chapter 2 Get started 32
Tip: If the image doesn’t fit your HDTV screen when you mirror the screen, adjust the
desktop size for the best picture. Click the AirPlay icon , then choose an option under
“Match Desktop Size To.”

Apple TV is sold separately at apple.com or your local Apple Store.

To learn more about AirPlay, go to Mac Help (see Mac Help). To learn more about using a second
display with your MacBook Pro, see Use an external display.

Migrate your data
It’s easy to move your files and settings from another Mac or PC to your MacBook Pro. You can
transfer information from an old computer to your MacBook Pro wirelessly, from a Time Machine
or other USB storage device, or with an Ethernet cable and adapters.

  Tip: For best results, make sure your MacBook Pro is running the latest version of macOS. To
check for software updates, click the App Store icon    in the Dock, then click Updates in the
App Store toolbar.
Transfer wirelessly. To transfer the data when you first set up your MacBook Pro, use Setup
Assistant. To transfer data later, you can use Migration Assistant. Open a Finder window, go to
Applications > Utilities, then double-click Migration Assistant to do a wireless migration. Follow
the onscreen instructions.

   Tip: To transfer the information wirelessly from your old computer to your MacBook Pro, make
sure both computers are connected to the same network. Keep both computers near each other
throughout the migration process.

If you used Time Machine to back up your files from another Mac to a storage device (such
as an AirPort Time Capsule or an external disk), you can copy the files from the device to your
MacBook Pro. For more information about Time Machine backups, see Back up and restore.
Copy files from a USB storage device. Connect the AirPort Time Capsule or other storage device
to your MacBook Pro using an adapter, such as the USB-C to USB Adapter (see Accessories). Then
manually drag files to your MacBook Pro.

Chapter 2    Get started                                                                             33
Transfer using Ethernet. To migrate over Ethernet, use a USB-C to Ethernet adapter (available
separately) to connect the Ethernet cable to your MacBook Pro. Connect the other end of the
Ethernet cable to your other computer (you might need another adapter, if your computer
doesn’t have an Ethernet port). Before migrating your data using Ethernet, make sure your
MacBook Pro battery is fully charged.

For complete details about all the migration methods, see the Apple Support article
support.apple.com/HT204754.

Save space on your MacBook Pro
macOS Sierra frees up space if you’re running out of room on your MacBook Pro and helps you
save space as you work. You can set options to free up even more space on your MacBook Pro.
Optimize storage. Set options in the Recommendations pane. Go to Apple menu > About This
Mac, click Storage, then click Manage. When your Mac is low on storage, you’ll see an alert that
will open the Recommendations pane.

Set options to:
••   Store in iCloud:
     ••   Store files in iCloud, where they stay secure and available. You can turn on iCloud Drive to
          store files on your desktop and in your Documents folder in iCloud.
     ••   Turn on iCloud Photo Library to store items from the Photos app in iCloud.
     Even though your files are stored in the cloud, you can access them right where you left them
     on your MacBook Pro. For more information, see Access your content anywhere with iCloud.
••   Optimize Storage: Remove iTunes movies and TV shows you’ve watched, and keep only recent
     email attachments.
••   Erase Trash Automatically: Automatically erase items that have been in the Trash for more than
     30 days.
••   Reduce Clutter: Review documents and delete older ones stored on your MacBook Pro.

macOS Sierra also prevents you from downloading the same file twice in Safari, alerts you to
remove installer software when you finish installing a new app, clears logs and caches that are
safe to remove when you’re low on storage, and more, to help you save space as you work.

Chapter 2    Get started                                                                                 34
Back up and restore
To keep your files safe, it’s important to back up your MacBook Pro regularly. The easiest way
to back up is to use Time Machine—which is built into your MacBook Pro—with a wireless
AirPort Time Capsule (sold separately), or an external storage device connected to your
MacBook Pro.
Files stored in iCloud Drive and photos in iCloud Photo Library are automatically backed up to
iCloud and don’t need to be part of your Time Machine or other backup.
Set up Time Machine. Make sure your MacBook Pro is on the same Wi-Fi network as your
AirPort Time Capsule, or connect your AirPort Time Capsule or external storage device to your
MacBook Pro. Click the System Preferences icon in the Dock, click Time Machine, then click On.
Select the drive you want to use for backup, and you’re all set.
Time Machine:
•• Automatically backs up everything on your MacBook Pro, including system files, apps,
accounts, preferences, music, photos, movies, and documents.
•• Remembers how everything looked on any given day, so you can revisit your MacBook Pro as
it appeared in the past or retrieve an older version of a document.
•• Lets you restore your MacBook Pro from a Time Machine backup. So if anything happens to
your MacBook Pro, your files and settings are safe and sound.
To learn more about backing up and restoring your MacBook Pro, go to Mac Help (see Mac Help)
and search for “Time Machine,” “external storage device,” “backup,” or “restore.” To learn more
about AirPort Time Capsule, go to www.apple.com/airport-time-capsule.
AirPort Time Capsule is sold separately at apple.com or your local Apple Store.
Chapter 2 Get started 35Apps
3
Included apps
Your MacBook Pro comes with a collection of great apps for things you do every day, like surfing
the web, sending mail and messages, and arranging your calendar. It also comes with apps
like Photos, iMovie, GarageBand, Pages, Numbers, and Keynote—so you can be creative and
productive right from the start. The apps that come with your MacBook Pro are described in the
following sections.
Find even more apps. Click the App Store icon in the Dock to find apps for everything you
want to do. See App Store to learn more.
Use the Touch Bar. If your MacBook Pro has the Touch Bar, you can use it to perform shortcuts for
common tasks. Learn more in the sections that follow.
Get help for any app. Click the Help menu (in the menu bar at the top of the screen) when
you’re using the app.
36Safari
Safari is the fastest, safest, and most energy-efficient way to surf the web on your MacBook Pro.
Start searching. Click the Smart Search field at the top of the window to see websites you visit
most frequently. Or start typing a word or website address—Safari shows you matching websites,
as well as Safari Suggestions for news, Wikipedia articles, iTunes music, weather forecasts, sports
scores and player stats, stock prices, help from Apple, and nearby points of interest.
Type what you’re looking
for or click a favorite.
Spread the word. It’s easy to share a webpage on social media, save it to your bookmarks or
reading list, or add it to Notes or Reminders. Just click the Share button at the top of the
window and choose an option.
View multiple pages in one window. Click at the far right of the tab bar to open a new tab,
then enter an address. To keep a website handy, drag its tab left to “pin” it, and it stays put in the
tab bar.
Drag a tab to the left
to pin it in the tab bar.
Chapter 3 Apps 37See what’s open on each of your devices. You can see open webpages on all your devices that are signed in to the same iCloud account. Just click the Show All Tabs button at the top of the window and scroll down if necessary. Read without distraction. If the article you’re reading includes animations or flashy ads, you can use Reader view to strip out the distractions and focus on the text. Click the Reader button in the Smart Search field (if it’s available). Tip: In a webpage, force click a word to see its definition or a Wikipedia article, if one is available. Try force clicking text in other apps, like Messages or Mail, to get more info. Shop with Apple Pay. When you’re shopping online on a supported website, click the Apple Pay button to make a purchase. To complete the transaction, use Touch ID or the passcode on your iPhone, or double-click the side button on your unlocked Apple Watch. If your MacBook Pro has the Touch Bar, place your finger lightly on the Touch ID sensor to complete your purchase. Use the Touch Bar. Click the left or right arrow button in the Touch Bar to go backward or forward. Tap the tab scrubber in the Touch Bar to move between open tabs. Click to open a new tab. Tap the Search field in the Touch Bar, then tap a favorite to open it. When you finish, tap to return to the Touch Bar you started with. Customize the Touch Bar to add your favorite controls (choose View > Customize Touch Bar). For more information, see Customize the Touch Bar. Chapter 3 Apps 38
Mail
Mail lets you manage all your email accounts from a single app. It works with most popular email
services, such as iCloud, Gmail, Yahoo! Mail, and AOL Mail.
One-stop email. Tired of signing in to multiple websites to check your email accounts? Set
up Mail with all your accounts so you can see all your messages in one place. Choose Mail >
Add Account.

   Ask Siri. Say something like: “Any new mail from Laura today?”
Add events and contacts right from Mail. When Mail detects a new email address or event in
an email message, just click Add to add it to Contacts or Calendar. Force click an address to see a
preview of the location, which you can open in Maps.
                                                     Add names or events to
                                                   your contacts or calendar
                                                          with a single click.

Never miss an email. Check the Mail icon in the Dock to see the number of unread messages.
When you get new email, a notification also appears at the top-right of the screen so you can
quickly preview the new messages. (Don’t want notifications? To turn them off, click the System
Preferences icon in the Dock, then click Notifications.)
                         You have unread
                              messages.

Use the Touch Bar. Use the Touch Bar for many common tasks, like composing, replying,
archiving, marking as junk, and flagging messages.

Customize the Touch Bar to add your favorite controls (choose View > Customize Touch Bar). For
more information, see Customize the Touch Bar.

Chapter 3    Apps                                                                                 39
You can also read