Mothership Documentation - Release 0.13 IncludeOS - Read the Docs
←
→
Page content transcription
If your browser does not render page correctly, please read the page content below
Mothership Documentation
                Release 0.13

                 IncludeOS

                   Jan 14, 2019
Mothership documentation

1   Quick start                                                                                                                                                                                            3
    1.1 Dependencies . . . . .     .   .   .   .   .   .   .   .   .   .   .   .   .   .   .   .   .   .   .   .   .   .   .   .   .   .   .   .   .   .   .   .   .   .   .   .   .   .   .   .   .   .   3
    1.2 1. Clone Git repository    .   .   .   .   .   .   .   .   .   .   .   .   .   .   .   .   .   .   .   .   .   .   .   .   .   .   .   .   .   .   .   .   .   .   .   .   .   .   .   .   .   .   3
    1.3 2. Create user . . . . .   .   .   .   .   .   .   .   .   .   .   .   .   .   .   .   .   .   .   .   .   .   .   .   .   .   .   .   .   .   .   .   .   .   .   .   .   .   .   .   .   .   .   3
    1.4 3. Configure TLS . . .     .   .   .   .   .   .   .   .   .   .   .   .   .   .   .   .   .   .   .   .   .   .   .   .   .   .   .   .   .   .   .   .   .   .   .   .   .   .   .   .   .   .   4
    1.5 4. Launch Mothership       .   .   .   .   .   .   .   .   .   .   .   .   .   .   .   .   .   .   .   .   .   .   .   .   .   .   .   .   .   .   .   .   .   .   .   .   .   .   .   .   .   .   4
    1.6 5. Access Mothership       .   .   .   .   .   .   .   .   .   .   .   .   .   .   .   .   .   .   .   .   .   .   .   .   .   .   .   .   .   .   .   .   .   .   .   .   .   .   .   .   .   .   4

2   Upgrading Mothership                                                                                                                                                                                   5
    2.1 Keeping all data . . . . . . . . . . . . . . . . . . . . . . . . . . . . . . . . . . . . . . . . . . . . .                                                                                         5
    2.2 Pull changes . . . . . . . . . . . . . . . . . . . . . . . . . . . . . . . . . . . . . . . . . . . . . . .                                                                                         5
    2.3 Start the new Mothership . . . . . . . . . . . . . . . . . . . . . . . . . . . . . . . . . . . . . . . . .                                                                                         5

3   Mothership server                                                                                                                                                                                      7
    3.1 Configuration . . . . . . . . . . . . . . . . . . . . . . . . . . . . . . . . . . . . . . . . . . . . . . .                                                                                        7
    3.2 Start Mothership . . . . . . . . . . . . . . . . . . . . . . . . . . . . . . . . . . . . . . . . . . . . .                                                                                         8
    3.3 Bobs and Builders . . . . . . . . . . . . . . . . . . . . . . . . . . . . . . . . . . . . . . . . . . . .                                                                                          9

4   Accessing Mothership                                                                                                                                                                                   11
    4.1 cURL . . . . . . . . . . . . . . . . . . . . . . . . . . . . . . . . . . . . . . . . . . . . . . . . . . .                                                                                         11
    4.2 CLI . . . . . . . . . . . . . . . . . . . . . . . . . . . . . . . . . . . . . . . . . . . . . . . . . . . .                                                                                        11
    4.3 Website . . . . . . . . . . . . . . . . . . . . . . . . . . . . . . . . . . . . . . . . . . . . . . . . . .                                                                                        11

5   Using Mothership                                                                                                                                                                                       15
    5.1 Your first IncludeOS instance . . . . . . . . . . . . . . . . . . . . . . . . . . . . . . . . . . . . . .                                                                                          15
    5.2 Update your IncludeOS instance . . . . . . . . . . . . . . . . . . . . . . . . . . . . . . . . . . . . .                                                                                           21

6   Mothership CLI                                                                                                                                                                                         23
    6.1 Hypervisors . . . . . . . . . . . . . . . . . . . . . . . . . . . . . . . . . . . . . . . . . . . . . . . .                                                                                        23

7   Release notes                                                                                                                                                                                          25
    7.1 v0.12 March 12 2018 . . .          .   .   .   .   .   .   .   .   .   .   .   .   .   .   .   .   .   .   .   .   .   .   .   .   .   .   .   .   .   .   .   .   .   .   .   .   .   .   .   .   25
    7.2 v0.13 April 16 2018 . . .          .   .   .   .   .   .   .   .   .   .   .   .   .   .   .   .   .   .   .   .   .   .   .   .   .   .   .   .   .   .   .   .   .   .   .   .   .   .   .   .   28
    7.3 v0.14 October 8 2018 . .           .   .   .   .   .   .   .   .   .   .   .   .   .   .   .   .   .   .   .   .   .   .   .   .   .   .   .   .   .   .   .   .   .   .   .   .   .   .   .   .   33
    7.4 v0.15 October 29 2018 . .          .   .   .   .   .   .   .   .   .   .   .   .   .   .   .   .   .   .   .   .   .   .   .   .   .   .   .   .   .   .   .   .   .   .   .   .   .   .   .   .   37
    7.5 v0.16 December 18 2018 .           .   .   .   .   .   .   .   .   .   .   .   .   .   .   .   .   .   .   .   .   .   .   .   .   .   .   .   .   .   .   .   .   .   .   .   .   .   .   .   .   40

                                                                                                                                                                                                            i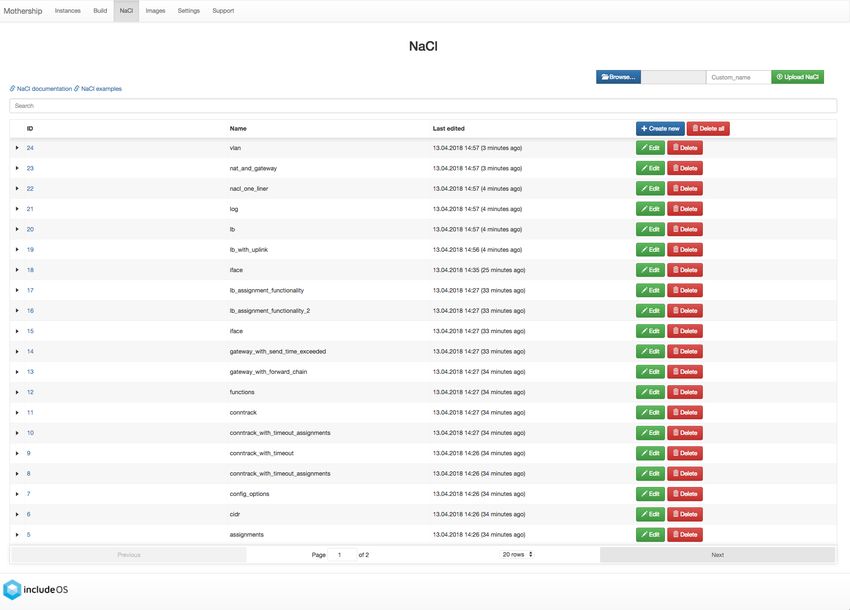
8    For developers                                                                                                                                                                      45
     8.1 Installing Mothership . . . . . . . . . .   .   .   .   .   .   .   .   .   .   .   .   .   .   .   .   .   .   .   .   .   .   .   .   .   .   .   .   .   .   .   .   .   .   45
     8.2 Installing GUI client . . . . . . . . . .   .   .   .   .   .   .   .   .   .   .   .   .   .   .   .   .   .   .   .   .   .   .   .   .   .   .   .   .   .   .   .   .   .   45
     8.3 Go Modules . . . . . . . . . . . . . .      .   .   .   .   .   .   .   .   .   .   .   .   .   .   .   .   .   .   .   .   .   .   .   .   .   .   .   .   .   .   .   .   .   46
     8.4 Makefile . . . . . . . . . . . . . . . .    .   .   .   .   .   .   .   .   .   .   .   .   .   .   .   .   .   .   .   .   .   .   .   .   .   .   .   .   .   .   .   .   .   46
     8.5 Tests . . . . . . . . . . . . . . . . . .   .   .   .   .   .   .   .   .   .   .   .   .   .   .   .   .   .   .   .   .   .   .   .   .   .   .   .   .   .   .   .   .   .   47
     8.6 Creating a release . . . . . . . . . . .    .   .   .   .   .   .   .   .   .   .   .   .   .   .   .   .   .   .   .   .   .   .   .   .   .   .   .   .   .   .   .   .   .   48
     8.7 Building IncludeOS Docker containers        .   .   .   .   .   .   .   .   .   .   .   .   .   .   .   .   .   .   .   .   .   .   .   .   .   .   .   .   .   .   .   .   .   48

9    Mothership server                                                                                                                                                                   49
     9.1 Start Mothership . . . . . . . . . . . . . . . . . . . . . . . . . . . . . . . . . . . . . . . . . . . . .                                                                      49

ii
Mothership Documentation, Release 0.13

Mothership is a management platform for IncludeOS applications currently in closed beta.

Mothership documentation                                                                              1

Mothership Documentation, Release 0.13

2                                        Mothership documentation

CHAPTER     1

                                                                                                     Quick start

1.1 Dependencies

                      Tool          Usage
                      docker        Building IncludeOS
                      qemu-img      Converting disk
                      htpasswd      Creating users. Often provided by the apache-utils package

1.2 1. Clone Git repository

$ git clone git@github.com:includeos/mothership-beta.git

To clone using a specified unique ssh key:

$ ssh-agent bash -c 'ssh-add mothership_beta.key; git clone git@github.com:includeos/
 ˓→mothership-beta.git'

1.3 2. Create user

Mothership comes with basic authentication enabled by default. It is therefore necessary to create a user:

$ touch config_files/.htpasswd                               # Create empty .htpasswd file
$ htpasswd -B config_files/.htpasswd myuser                  # Add the user myuser

                                                                                                               3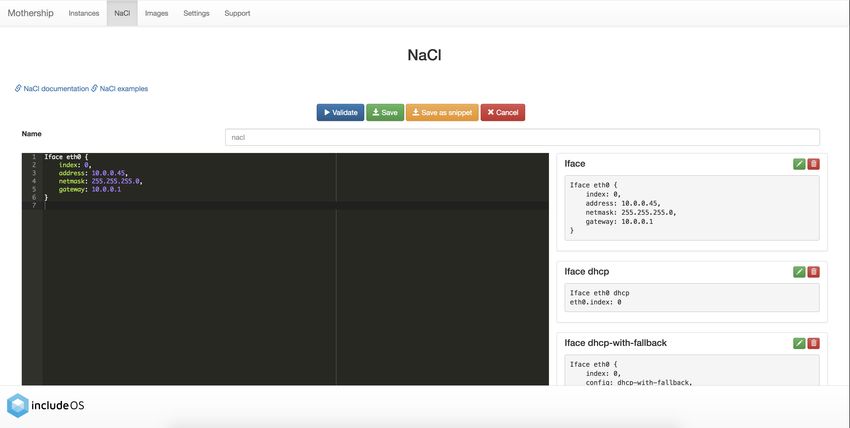
Mothership Documentation, Release 0.13

1.4 3. Configure TLS

TLS is also enabled by default. Mothership expects two files to be present in the folder config_files:
      cert.pem File containing your certificate
      key.pem File containing your private key
For instructions on how to generate a self-signed certificate for testing see: Create self-signed TLS certificate

1.5 4. Launch Mothership

Launch Mothership with the command:

$ ./ serve

To see all launch options run ./ serve -h or see Server options. To run Mothership
inside a Docker container see Running in Docker.
This will launch the Mothership server. Make sure there are no errors in the launch output and the following lines
indicate that basic auth and TLS are properly configured:

INFO[0014] 1 registered user
INFO[0014] Setting up hangar (uplink) with TLS on :9090
INFO[0014] Setting up server with TLS on :8080
 https server started on [::]:8080

1.6 5. Access Mothership

There are three ways to interact with the Mothership server.
Web GUI This GUI is available at: https://localhost:8080, for more information on this please see: Mothership GUI
API For more information on the various API endpoints, see the API documentation at https://localhost:8080/apidocs/
     apidocs.html
Command-line interface The binary mothership-linux-amd64 used to launch the server also works as a CLI
Using the CLI the following command will give you information about the running instances:

$ ./ --username  --password  instances
Instances:
Alias Status ID Image Tag Launched

4                                                                                             Chapter 1. Quick start
CHAPTER           2

                                                                                 Upgrading Mothership

2.1 Keeping all data

When upgrading to a new version of Mothership all configuration and runtime files are kept in two directories:
      config_files Contains all users and passwords, any TLS certificates and configuration files.
      runtime_files All the runtime data (images, NaCls, uplinks, logs) used by Mothership.
When stopping the Mothership make sure these two directories are kept intact.

2.2 Pull changes

Start with pulling the changes from GitHub. This can be done with:

$ git pull

or if you were using a specific ssh key:

$ ssh-agent bash -c 'ssh-add mothership_beta.key; git pull'

2.3 Start the new Mothership

To start Mothership with the new version use the same command as referenced in Launch command.
If Docker is in use make sure the Docker container is rebuilt before launching the new Mothership. See Running in
Docker

                                                                                                                 5
Mothership Documentation, Release 0.13

6                                        Chapter 2. Upgrading Mothership
CHAPTER            3

                                                                                          Mothership server

3.1 Configuration

All Mothership configuration files should be placed in the folder: config_files

3.1.1 Setup authentication

If you want to run your Mothership with authentication (this is default), you need to create a .htpasswd file with one
or more users within the config_files directory:

$ htpasswd -c -B config_files/.htpasswd myuser # create a .htpasswd file and add the
 ˓→user myuser

You will then be prompted to enter a password. Do this.
To add additional users or modify existing ones, leave out the -c option:

$ htpasswd -B config_files/.htpasswd anotheruser

3.1.2 Create self-signed TLS certificate

If you want to run your Mothership with TLS (this is default), you need to generate a certificate and a key file in your
Mothership directory:

$ openssl req -x509 -newkey rsa:4096 -keyout config_files/key.pem -out config_files/
 ˓→cert.pem -days 365 -nodes

Important: This should only be used for testing, and it will require you to confirm the certificate manually in the
web browser.

                                                                                                                      7
Mothership Documentation, Release 0.13
3.2 Start Mothership
$ ./ serve
If you want to start with a fresh Mothership, meaning you want to delete the images and files you created the last time
you ran your Mothership, you can add the --clean option:
$ ./ serve --clean
To exit the application, press Ctrl + c
The default settings when starting a Mothership is to start it with basic authentication and TLS enabled.
If you want to disable authentication and TLS (which you rarely want to), you can start your Motherhip with the
following command:
$ ./ serve --noservertls --nouplinktls --serverauth none
Then TLS will be disabled on both the API and uplink. You can choose whether you want to disable TLS on the
Mothership API or the uplink (the connection between Mothership and the IncludeOS instances) or both.
3.2.1 Server options
To provide options to Mothership there are two possibilities:
1. Launch parameters to mothership serve. Options use the -- format.
2. Options in config file, default location: config_files/config.yaml supplied in a key: value.
Notable options are:
--name string Name that Mothership reports back
--certfile string Certificate file for TLS
--clean clean everything
--keyfile string Private key file for TLS
--serverauth string server auth method (default "none")
--serverport string port number (default "8080")
--verboselogging verbose logging
--dockeroptions Options to use when building in Docker inside
˓→Mothership
--config Manually provided path to config file
3.2.2 Running in Docker
Mothership comes with a Dockerfile which includes necessary dependencies.
First build and the run the Mothership Docker container:
$ docker build -t mothership .
$ docker run \
--name mothership \
-p 8080:8080 \
-p 9090:9090 \
-v $PWD/config_files:/home/ubuntu/mothership/config_files \
-v mothership_storage:/home/ubuntu/mothership/runtime_files \
(continues on next page)
8 Chapter 3. Mothership serverMothership Documentation, Release 0.13
(continued from previous page)
-v /var/run/docker.sock:/var/run/docker.sock \
mothership serve
The options used are:
First are the Docker options:
--name mothership Give Docker container name
-p 8080:8080 Forward port 8080
-p 9090:9090 Forward port 9090
-v $PWD/config_files:/home/ubuntu/mothership/config_files Bind-mount config_
˓→files folder into mothership
-v mothership_storage:/home/ubuntu/mothership/runtime_files Mount named volume
˓→into mothership
-v /var/run/docker.sock:/var/run/docker.sock Mount hosts Docker process into
˓→container
Then the Mothership options:
mothership serve Start mothership server
If you want to run the Mothership in Docker but want to change some of the default settings mentioned above, you
just add serve at the end, followed by the Mothership options you want to change or add:
$ docker run --name mothership --publish 9090:9090 --publish 8080:8080 \
-v $PWD/config_files:/home/ubuntu/mothership/config_files \
-v mothership_storage:/home/ubuntu/mothership/runtime_files \
-v /var/run/docker.sock:/var/run/docker.sock \
mothership serve --verboselogging
Docker in Docker
Building IncludeOS images is performed by a Docker container. This is used to deliver a preconfigured build envi-
ronment and makes it more convenient to release new IncludeOS versions. In order to allow for the Mothership to
use Docker commands the servers Docker socket is mounted into the Docker container: -v /var/run/docker.
sock:/var/run/docker.sock.
Note: If you are experiencing problems with permissions for the mounted resources you might need to launch the
Docker container with --dockeroptions "--privileged" as a Mothership option as well.
3.3 Bobs and Builders
In order to build images with specific versions of IncludeOS there was a need to create a new system. In addition
there needed to be a way to manage these different Builders. Therefore the following terms have been introduced into
Mothership:
Builder A Builder is able to produce images with one specific version of IncludeOS. All Builders are by definition
ready to be used. The Builder is used to perform the following two actions:
1. Build IncludeOS images
2. Perform NaCl validation
Bob A Bob is an abstraction for a resource that can become a Builder. In order for the Bob to become a Builder it
needs to be prepared, this could mean it needs to be installed or downloaded.
3.3. Bobs and Builders 9Mothership Documentation, Release 0.13
BobProvider A BobProvider is a resource which provides Bobs. These Bobs can be prepared to become Builders.
Both Bobs and Builders have the following information:
ID ID of the Bob/Builder. Used in all API calls when it is required to specify a Bob/Builder.
Name Name of the Bob/Builder.
Version The version tag that IncludeOS images built with this Bob/Builder will report as its version.
VcsRef The Git commit that the IncludeOS version was built from
BuildDate The date of the last Git commit.
ProviderID Which provider the Bob/Builder comes from.
3.3.1 Usage and examples
Example 1: Preparing a Builder
In order to prepare a Builder the following tasks must be completed:
1. Get list of available BobProviders:
/v1/bobproviders
2. Update one of the Bobproviders, here DockerHub is chosen:
/v1/bobproviders/DockerHub/update
3. Get list of available Bobs from the DockerHub provider:
/v1/bobproviders/DockerHub/bobs
4. Prepare a specific Bob with ID idNum1 and turn it into a Builder:
/v1/bobproviders/DockerHub/prepare/bobs/idNum1
5. Check list of Builders:
/v1/builders
Example 2: Building and validating NaCls
To perform actions with a specific Builder the ID is required.
If we wanted to build with the Builder from example 1 we would have to call:
/v1/images/build/services/Starbase/builders/idNum1
To validate a NaCl the following endpoint would be called:
/v1/nacls/validate/builders/idNum1
10 Chapter 3. Mothership serverCHAPTER 4
Accessing Mothership
4.1 cURL
To perform authenticated requests with TLS using curl (which is default when starting Mothership), add the -u flag
to your curl commands:
$ curl -u : https://localhost:8080/images -k
4.2 CLI
To enable the CLI commands to send your credentials when making requests, you can either add the --username
and --password flags to your CLI commands, or perform ./mothership init to have the client prompt you
for your credentials and store them in a config file for future CLI commands.
$ ./ images --username --password
4.3 Website
When you have come this far, or if you want to connect to a public Mothership that is already running, you can open
your browser and go to the Mothership’s website.
If you are running a Mothership locally, you will find your Mothership’s website by going to https://localhost:8080 if
you have started your Mothership with TLS enabled.
If you have started your Mothership without TLS, you will find the website at http://localhost:8080.
Here, if the Mothership was started with authentication enabled, you will see a Login-page:
11Mothership Documentation, Release 0.13 When clicking on this, a popup will appear, asking you to fill in your username and password: This username and password must match one of the entries in the previously created mothership/config_files/.htpasswd file. If no authentication is required, you will be sent straight to the Instances page: 12 Chapter 4. Accessing Mothership
Mothership Documentation, Release 0.13

4.3. Website                                      13
Mothership Documentation, Release 0.13

14                                       Chapter 4. Accessing Mothership
CHAPTER          5

                                                                                      Using Mothership

5.1 Your first IncludeOS instance

5.1.1 1. Create a configuration for your instance

Go to the NaCl page
NaCl is a configuration language for IncludeOS. On the NaCl page you can find links to the language documentation
and examples.

Click on the Create new-button

                                                                                                              15
Mothership Documentation, Release 0.13 Click on the code snippet named Iface This will paste the NaCl you need for configuring an instance with one interface. Change the Iface values to fit your need and give your NaCl file a name. Click on the Validate-button to validate the NaCl content If there are any errors in your NaCl configuration, an error icon will be displayed in the left margin of the line containing the error. When hovering this icon, the reason for the error will be displayed: 16 Chapter 5. Using Mothership
Mothership Documentation, Release 0.13

Click on the Save-button
The newly created NaCl file is displayed in the list if the NaCl content doesn’t contain any errors:

5.1.2 2. Build your image

Go to the Images page
Click on the Create new-button.
Here you will see that your newly created NaCl is displayed in the drop-down list:

5.1. Your first IncludeOS instance                                                                       17
Mothership Documentation, Release 0.13

When building an image, information about the URL of the Mothership to connect to must be given. This is what we
call an uplink. The default uplink that is created when starting a Mothership is set to be the IP of your Mothership and
port 9090. You can view and edit the default uplink settings to your Mothership on the Settings page. Here you can
also create other uplinks.

On the Create new image-page you are asked if you want to use a custom uplink for this build. If the default uplink
on the Settings page is the uplink you want to use, you don’t need to check this. If you have another uplink you would
like to use, however, check the box and a drop-down list containing the names of all your uplinks will be displayed.
Choose one of these.
Click on the Build button
The status of the build is displayed on the right-hand side.

18                                                                                  Chapter 5. Using Mothership
Mothership Documentation, Release 0.13

If everything went well you will be sent back to the Images page and a confirmation box will appear saying that the
image was successfully created. You will see your newly created image on the page.

Download the image
Download the image by clicking on the image name.
You can click on the arrow to the left of each image for more information about it:

5.1. Your first IncludeOS instance                                                                              19
Mothership Documentation, Release 0.13

5.1.3 3. Boot

After you have downloaded the image, you can launch it on your preferred hypervisor (the ./mothership launch
--hypervisor   command is useful here - see our Hypervisors documenta-
tion), or you can boot it up locally:

$ boot Starbase-nacl-0 --create-bridge

On the Instances page, you will see your instance when it has successfully connected to the Mothership:

20                                                                               Chapter 5. Using Mothership
Mothership Documentation, Release 0.13

Note:
IP forwarding must be turned on for your instances to connect to public IP addresses. To make the instance above (with
address 10.0.0.45) connect to the Mothership on 192.168.0.13 f.ex., IP forwarding must be turned on. In addition, a
bridge must be set up so that the instance with IP 10.0.0.45 can reach other networks. The --create-bridge
option given to the boot command above sets up a bridge for you, but to enable IP forwarding you have to run the
following commands (on macOS):

$   echo   "nat on en0 from bridge43:network to any -> (en0)" > includeos-nat.conf
$   sudo   sysctl -w net.inet.ip.forwarding=1
$   sudo   pfctl -F all # flush all active rules
$   sudo   pfctl -f includeos-nat.conf -e # enable pf

An alternative to turning on IP forwarding in this case however (with a Mothership running on localhost), is
to create an uplink with URL 10.0.0.1:9090 and build an image with that. Then you only need to run boot
Starbase-nacl-0 --create-bridge, and the instance will connect to the Mothership. You only need to
add the --create-bridge option once.

5.2 Update your IncludeOS instance

If you want to update your instance on Mothership, click on the Manage button. There you will see an overview of
the instance with several tabs with more information. Below the overview section, you will see two more sections:
    1. Running on instance
    2. Update instance
The Running on instance-section will give you an overview of the image running on the instance, with information
about uplink, IncludeOS version and NaCl information if this is known to the Mothership.

5.2. Update your IncludeOS instance                                                                                21
Mothership Documentation, Release 0.13
Click on Update instance
In the Update instance-panel, you will be able to choose how you want to update your instance.
1. Build & deploy a new image
This section allows you to choose IncludeOS version, NaCl and add a name for your new image.
2. The Deploy a previously built image-section allows you to select a previously built image. Choose
an image from the drop-down list and click the Deploy-button.
22 Chapter 5. Using MothershipCHAPTER 6
Mothership CLI
6.1 Hypervisors
Mothership has built in support for launching a binary on multiple hypervisors. To do this it has dependencies on tools
for each particular hypervisor.
6.1.1 Vcloud
Dependencies
• Install ovftool (Requires a vmware account)
• Install Docker (Used to add grub bootloader)
Environment variables
The following environment variables will have to be set in order for Vcloud to function.
ovfToolLocation Location of the ovftool
vcloudUsername Username for vcloud
vcloudPassword Password for vcloud
Launch options
Mothership needs the following parameters set for launch
$ mothership launch --hypervisor vcloud
23Mothership Documentation, Release 0.13
--vcloud-net Name of the network in vcloud to connect to
--vcloud-address Address to vcloud
--vcloud-org Name of vcloud organization
--vcloud-vapp Name of vapp to generate (overwrites existing vapps with same name)
Launch command
The final launch command will look like this:
$ mothership launch --hypervisor vcloud \
--vcloud-net \
--vcloud-address \
--vcloud-org \
--vcloud-vapp \
Multiple network interfaces
To have multiple network interfaces in your application create a vm.json in the same folder that launch is called
from.
The following vm.json creates 3 interfaces:
{
"net" : [
{"device" : "vmxnet3", "mac" : "c0:01:0a:00:00:2a"},
{"device" : "vmxnet3", "mac" : "c0:01:0a:00:00:2b"},
{"device" : "vmxnet3", "mac" : "c0:01:0a:00:00:2c"}
]
}
24 Chapter 6. Mothership CLICHAPTER 7
Release notes
7.1 v0.12 March 12 2018
7.1.1 GUI
• Description field added per instance, which is persistent
• Search functionality on the Instances, Images and NaCl pages
– Image search targets:
* Checksum (ID)
* Name
25Mothership Documentation, Release 0.13
* OS version
* NaCl name
– Instance search targets:
* ID
* UUID
* Alias
* Description
* IP addresses
* Running image’s checksum (ID)
* Devices
– NaCl search targets:
* ID
* Name
* Content
26 Chapter 7. Release notesMothership Documentation, Release 0.13 • Pagination on the Instances, Images and NaCl pages (20 elements per page) 7.1. v0.12 March 12 2018 27
Mothership Documentation, Release 0.13

7.1.2 Internal improvements

     • Authentication, TLS and Docker builder are default when starting Mothership
     • Improved logging

7.2 v0.13 April 16 2018

Note: This release contains breaking changes, meaning an IncludeOS instance built with a previous version can not
be updated to run an image built with this release’s default IncludeOS version (Docker container v0.12.0-rc.4.1).
Any running instances need to be rebuilt with this release’s IncludeOS version and rebooted before new images can
be deployed to them.
Deploying an image to an instance with an incompatible IncludeOS version will result in an error.

28                                                                                    Chapter 7. Release notes
Mothership Documentation, Release 0.13
• TCP load balancer
NaCl example
Iface uplink {
index: 0,
address: 10.0.0.42,
netmask: 255.255.255.0,
gateway: 10.0.0.1
}
Iface outside {
index: 1,
address: 10.0.0.43,
netmask: 255.255.255.0,
gateway: 10.0.0.1
}
Iface inside {
index: 2,
address: 10.0.0.44,
netmask: 255.255.255.0,
gateway: 10.0.0.1
}
Load_balancer lb {
layer: tcp,
clients: {
iface: outside,
port: 80,
wait_queue_limit: 1000,
session_limit: 1000
},
servers: {
iface: inside,
algorithm: round_robin,
pool: [
{
address: 10.0.0.10,
port: 80
},
{
address: 10.0.0.11,
port: 80
},
{
address: 10.0.0.12,
port: 80
}
]
}
}
For more information, visit the NaCl documentation page.
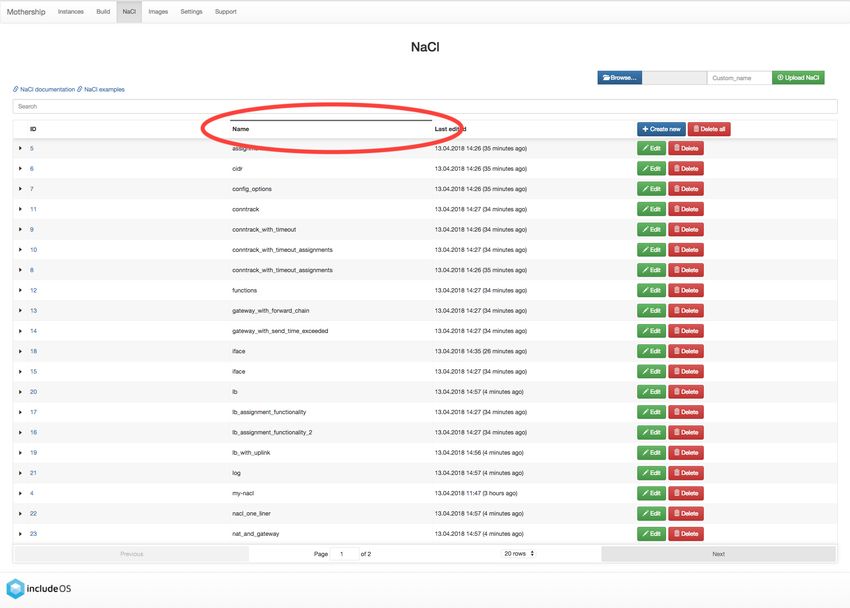
• New Instances, NaCl and Images tables, with sort functionality
7.2. v0.13 April 16 2018 29Mothership Documentation, Release 0.13 30 Chapter 7. Release notes
Mothership Documentation, Release 0.13

7.2. v0.13 April 16 2018                                      31
Mothership Documentation, Release 0.13
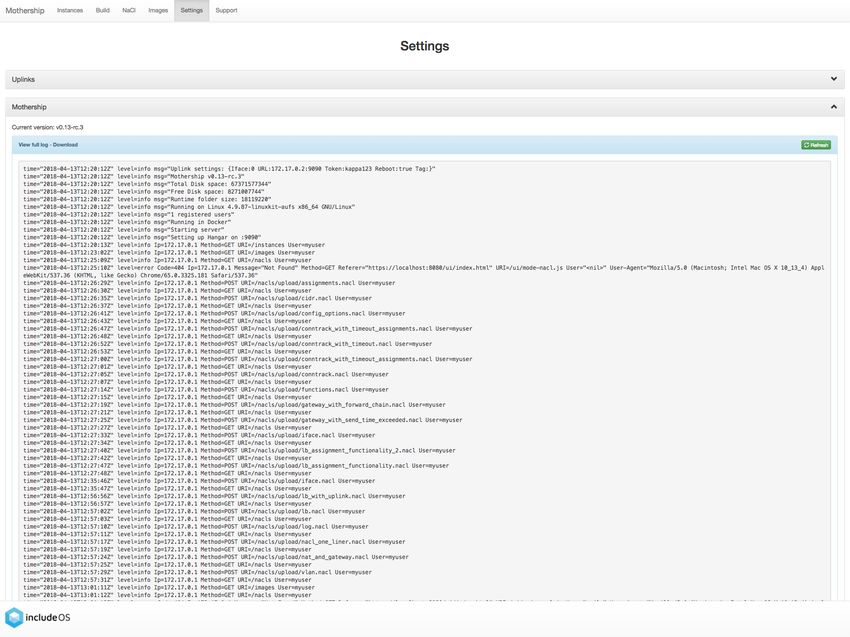
• New Mothership log view on the Settings page
32 Chapter 7. Release notesMothership Documentation, Release 0.13 • Internal stability improvements 7.3 v0.14 October 8 2018 Warning: It is recommended to DELETE all existing files before starting this Mothership version for the first time. For more info about migrating to this new release see: Migrating from old release Warning: With the release of IncludeOS version v0.13.0-rc.1 a change to Liveupdate means that all existing Starbases MUST be changed. This means that all running instances MUST be rebuilt and relaunched. Any attempt to deploy a new image to an instance running an old IncludeOS version is not guaranteed to work correctly. Warning: This Mothership release contains BREAKING CHANGES and will only work with IncludeOS ver- sion v0.12.0-645-g51f6fb3 or newer. If you need to build with a previous IncludeOS version, you need to checkout the previous release of Mothership. All running instances MUST be rebuilt and relaunched to be able to receive updates from this Mothership. • TLS on uplink 7.3. v0.14 October 8 2018 33
Mothership Documentation, Release 0.13

            TLS on uplink is now default and all uplink URLs MUST start with either https:// (secure /
            TLS) or http:// (not secure / no TLS). An instance running an image where the uplink URL
            starts with http:// will not be able to connect to a Mothership that has been started with TLS on
            uplink (default). And an instance running an image where the uplink URL starts with https://
            will not be able to connect to a Mothership that has been started with the --nouplinktls flag set.
     • New instance ID
            UUID is replacing MAC as instance ID
     • Persistent information about instances
            All information about an instance is now saved in runtime_files/instances. This means
            that if a Mothership is restarted, all instances registered on the Mothership before the restart will
            be visible after the restart as well. If an instance has status unknown after a Mothership restart, it
            means that it has not connected back to the Mothership.
     • Delete multiple instances
            On the Instances page you can select multiple (or all) instances and delete them. When deleting an
            instance, all information stored about the instance will also be deleted.
     • Overview of number of instances connected, disconnected, unknown and total
            On the Instances page you get an overview of how many instances have been connected to the Moth-
            ership in total, how many are connected now, how many have disconnected and how many we don’t
            know the status of (unknown)
     • Filter instances by status
            In the GUI you can now filter instances by: Connected, Disconnected, Unknown, Panicked
     • Warning icon if an instance has panicked
            A warning icon will be displayed in front of an instance’s alias on the Instances page if a panic has
            occurred. Go to the instance’s management page and click on the Panics tab to get more information
            about the panic(s).
     • Management of an instance
            The management page for every instance has been updated with one panel for displaying information
            about what is actually running on the instance and one panel for actions you can take to update the
            instance.
            In the “Update instance”-panel you can either deploy a previously built image to the instance, or you
            can “Save, build & deploy” a new one. “Save, build & deploy” means:
              1. Save the NaCl changes if any changes have been done (you can edit the NaCl the instance is
                 already running, load another already existing NaCl or create a new NaCl - that’s up to you).
              2. Build the image with the specified IncludeOS version, the specified image tag, the NaCl that is
                 shown in the editor and the uplink information that the instance is reporting to the Mothership.
              3. Deploy the built image to the instance.
            If you try to deploy an image with an uplink URL that doesn’t match the one that the instance is
            reporting, you will get a warning. Then you can choose if you want to deploy the image anyway or
            not. You will also get a warning if the image you try to deploy has been uploaded to the Mothership
            so that the Mothership doesn’t know what uplink URL the image has been built with.

34                                                                                      Chapter 7. Release notes
Mothership Documentation, Release 0.13
• Upgrade an instance (API endpoint)
A new API endpoint has been created where you can upgrade an instance, meaning you can build
an image for the instance and deploy that image in one go. Have a look in the Mothership API
documentation (produced by Swagger UI) for more information. A link to this information can be
found on your Mothership’s Support page.
• Create new image / Save, build & deploy an image
The Build page has been removed and moved into the Images page (Create new).
When building, you can now set a custom image name and this will then be used as the image tag.
This means that when an instance is running this specific image, the instance will report the tag you
have given it to Mothership.
• NaCl code snippets
You can now create your own custom NaCl code snippets when you are creating or editing a NaCl.
Write the NaCl snippet you want into the editor and click on the “Save as snippet”-button.
7.3. v0.14 October 8 2018 35Mothership Documentation, Release 0.13
• NaCl Timer
In every NaCl you can now (with IncludeOS version v0.12.0-645-g51f6fb3) create one or more Timer
objects that tell the instance running the NaCl to print different information at specific intervals. Have
a look at the NaCl Timer documentation here.
• NaCl Iface
The members buffer_limit and send_queue_limit have been added, and the Vlan type has been re-
moved and incorporated into Iface. See the updated Iface documentation here.
• When searching through images, also search through the image’s uplink information
7.3.1 Migrating from old release
Due to internal changes to how files are stored in this release of Mothership it is highly recommended to perform a
deletion of all old files. This will affect:
• NaCls
• Images
• Uplinks
• Issues
• Instance logs and history
If you need anything that is stored in your Mothership, take a backup of the runtime_files folder BEFORE
starting the Mothership. To upgrade from a previous Mothership version to v0.14 we recommend the following
procedure:
36 Chapter 7. Release notesMothership Documentation, Release 0.13
1. Perform a backup of all information that should be kept. Scripting this with the Mothership CLI is possible.
Example shows how all the existing NaCls are pulled and stored:
$ nacls=("$( nacls -o id)")
$ for i in ${nacls[@]}; do pull-nacl "$i"; done
2. Launch Mothership with the --clean option, this will erase all persistent information.
3. Upload any files from the backup that should be available on the new Mothership.
7.4 v0.15 October 29 2018
• Set and get name of Mothership
It is now possible to give Mothership a name that shows up in the GUI:
$ mothership serve --name example
This name will then be available from the /info/name API endpoint. It shows up in the Mother-
ship GUI as such:
• InfluxDB
It is now possible to send Mothership metrics and IncludeOS instance stats to InfluxDB, which en-
ables you to query and visualize metrics and stats using standard TICK Stack components. To enable
the InfluxDB integration, add --metricsreporter influxdb when starting your Mothership
server.
Note: Before enabling metrics and stats reporting to InfluxDB, you must create the required In-
fluxDB databases. Mothership writes stats to a database called instance_stats and metrics
to a database called mothership. Create these databases and set appropriate retention policies
on them before you start using --metricsreporter influxdb as part of your Mothership
startup command.
7.4. v0.15 October 29 2018 37Mothership Documentation, Release 0.13
The address and (optional) user name and password for the InfluxDB server are specified as environ-
ment variables.
The following variables can be specified:
INFLUXDB_ADDR
INFLUXDB_USERNAME
INFLUXDB_PASSWORD
If you have more than one Mothership, it is highly recommended to set the name of your Mothership
using the aforementioned --name command line option.
• Better file names when downloading images for hypervisor
When you build an image, for example an initial Starbase, and you use “Generate & download image”
to download a bootable image for a specific hypervisor, the filename now includes the image tag (if
set) and the IncludeOS version the image was built with.
• A NaCl Save as-option has been added
This is available when you are creating or editing a NaCl in the editor. It makes it possible to save
the NaCl editor-content as a new NaCl or as a snippet.
38 Chapter 7. Release notesMothership Documentation, Release 0.13
• The header on the Manage instance-page has been updated
The header now shows the status of the instance (connected / disconnected / connecting / unknown).
It also shows a red warning sign if the instance has panicked. The warning sign is visible immediately
after the Mothership has been notified about the panic.
• The statuses displayed above the list of instances on the Instances page are now updated dynamically
This means that the number of instances for every status that one of the instances have will be
displayed.
7.4. v0.15 October 29 2018 39Mothership Documentation, Release 0.13
• Internal improvements
Internal stability and performance improvements.
7.5 v0.16 December 18 2018
7.5.1 Before starting this release
Warning: It is recommended to DELETE all existing files in the runtime_files folder before starting this
Mothership version for the first time. Take a backup of the folder if there’s anything you need.
7.5.2 Mothership API 1.0
The Mothership API has been streamlined. All API endpoints are now served under the /v1 path prefix.
In general, almost all Mothership API calls return a JSON response. But for some resources, clients can get a binary
or textual representation of the requested resource by specifying the desired Content-Type using the HTTP “Accept”
header. For example, to get (JSON) information about an image, set the “Accept” header to “application/json”, but to
download the actual binary image, set the “Accept” header to “application/octet-stream”, etc.
Some endpoints have changed. See the interactive API documentation for details about individual API calls. A link
to this documentation can be found on the Support page of your Mothership.
Note: Fetching all instances now gives you a JSON array, not a map.
Note: All uplinks now have an ID.
Note: When building an image or validating a NaCl, you must now provide the ID of an IncludeOS builder. Builders
and Bobs are new concepts that are introduced in this release and enable users to build with different IncludeOS
versions at the same time. Each builder is a Docker container that contains a specific version of IncludeOS. For more
information, see Bobs and Builders.
7.5.3 GUI
New “Create new image” and “Update instance” sections
The NaCl page has been removed and a lot of the functionality has been moved into the Create new image-page:
40 Chapter 7. Release notesMothership Documentation, Release 0.13
The same functionality is available on the management page for each instance as well, in the Update instance-panel:
• Custom image name
At the top is a field where you can set the name of your image, which will also be a tag that the instance running this
image will report to the Mothership.
• The IncludeOS builder-panel
Below the custom name-field is an IncludeOS builder-panel. This panel contains a list of IncludeOS builders (Docker
containers that each contain a specific version of IncludeOS). There is no longer a global IncludeOS version, so every
user can select which builder to build an image with independent of what other users choose. For more information,
see Bobs and Builders.
7.5. v0.16 December 18 2018 41Mothership Documentation, Release 0.13
The IncludeOS-panel on the Settings page has been removed because of this.
• The NaCl panel
The content of the NaCl-panel is in large part the same as on the old NaCl page. Select a NaCl in the drop-down list
and the content of this will be displayed in the editor. Validate, save or revert your changes, or save the content of the
editor as a new NaCl or a new snippet.
Snippets are displayed on the right-hand side as before, but now take up a lot less space. Copy the snippet into the
editor or delete or edit it.
42 Chapter 7. Release notesMothership Documentation, Release 0.13
To delete NaCls, go to the NaCls panel on the Settings page.
On the management page for an instance, the NaCl that the instance is running will also be an option in the drop-down
list. This NaCl can not be edited directly (the content is built into the image that the instance is running), but you can
edit the content of the editor and save the content as a new NaCl (Save as).
• The Uplink panel
This will only be displayed on the Create new image-page because each instance will reuse its uplink on the manage-
ment page for the instance.
7.5. v0.16 December 18 2018 43Mothership Documentation, Release 0.13 44 Chapter 7. Release notes
CHAPTER             8

                                                                                        For developers

8.1 Installing Mothership

     • Install Go 1.11
     • Install htpasswd if you want to run your Mothership with authentication
With Go 1.11 there is no longer a need to use GOPATH. Dependencies are now handled by go modules.
$ git clone git@github.com:includeos/mothership.git
$ go build

8.2 Installing GUI client

$ git clone git@github.com:includeos/mothership_client.git # f.ex. in your HOME
 ˓→directory

MacOS:
$   brew install node
$   brew install npm
$   npm install -g webpack@2.6.1
$   npm install
$   ./copyfiles.sh

Ubuntu:
$ sudo apt install npm
$ sudo npm install -g n # webpack needs the node command as opposed to nodejs. The
 ˓→npm n tool should fix that.

$ sudo n stable
$ sudo npm install -g webpack@2.6.1
                                                                                           (continues on next page)

                                                                                                               45
Mothership Documentation, Release 0.13
(continued from previous page)
$ sudo npm install
$ ./copyfiles.sh
8.3 Go Modules
With Go 1.11 Go modules is the new official way of handling dependencies. It is available as an experimental feature
in Go 1.11 and will be enabled by default starting with Go 1.12.
One of the main visible benefits is being able to keep the source files outside the $GOPATH. If your Mothership repo
is outside the GOPATH then go modules will be enabled by default.
Go modules is implemented into all existing Go tools, so all commands you are used to using will still work, only now
with go modules being used on the backend.
8.3.1 Check if all dependencies are correct
The basic command to make sure you are in the correct state is:
go mod verify
8.3.2 Adding a new dependency
To add a new dependency we use same old syntax as we are used to with Go:
go get -u
8.3.3 Updating dependencies
Taken from here.
To view available minor and patch upgrades for all direct and indirect dependencies, run:
go list -u -m all
To upgrade to the latest version for all direct and indirect dependencies of the current module:
go get -u # to use the latest minor or patch releases
go get -u=patch # to use the latest patch releases
8.4 Makefile
The easiest way to build and test Mothership is by using the Makefile. This builds Mothership using Docker. The
available options are:
46 Chapter 8. For developersMothership Documentation, Release 0.13 make help usage: make [target] Tests: tests Run all the tests unit-tests Run only the unit tests in Docker integration-tests Run only the integration tests in Docker Tools: gofmt Run the gofmt check on the codebase, exits with 0 if OK errcheck Run the errcheck tool, outputs how many errors are not checked whitespace Run a whitespace check of the repo Miscellaneous: help Show this help. release Create a full release, set desired tag with -e TAG= clean Delete all release folders in release/v* run run mothership in Docker Building: build Build mothership binary in docker (mothership-linux-amd64) client Build client binary in Docker mothership Build mothership in a Docker container. Creates docker container ˓→named mothership 8.5 Tests Note: If you want to run the tests locally then you need to create a docker volume with the htpasswd and certificate config files. To create this volume run the command: docker run --rm \ -v $PWD/test/test_config_files:/source \ -v mship_test_config_files:/dest \ ubuntu:xenial cp -r /source/. /dest 8.5.1 Run the tests locally (Remember to clean your Mothership environment first by running ./mothership serve --clean) $ go test ./... -tags=all -p=1 The -tags option can be blank, all or integration, based on which tests you want to run. 8.5.2 Run the tests with Docker Run the tests using the Makefile: $ make tests # Run all tests $ make unit-tests # Run only unit tests $ make integration-tests # Run only integration tests 8.5. Tests 47
Mothership Documentation, Release 0.13

8.6 Creating a release

To create a release simply run make release -e TAG=. The release files will be available in
the directory ./release/. The files will then need to be moved to the desired release location.
The only difference between the files created by make release and make mothership is that the release creates
a mac binary in addition to the linux binary.

8.7 Building IncludeOS Docker containers

To build your own Docker container that can be used with Mothership use the following command:

docker build \
--label org.label-schema.build-date="$(git log -1 --format=%cd --date=iso8601-strict)
 ˓→" \

--label org.label-schema.vcs-ref="$(git rev-parse --short HEAD)" \
--label org.label-schema.version="$(git describe --tags --dirty)" \
--label org.label-schema.name="IncludeOS_builder" \
--label org.label-schema.vendor="IncludeOS" \
-t includeos/builder:"$(git describe --tags --dirty)" --target=build .

This will give you all the labels that are used by Motheship to identify a version of IncludeOS. The labels that are in
use are based on label-schema convention draft rc1 :
build-date The timestamp of the last commit made to the version you are building.
vcs-ref The commit sha of the last commit.
version The version tag that IncludeOS will report it is using over uplink. This corresponds to the git describe output.
      Be careful with a dirty git directory as the version tag will display this.
name This is the predefined name that Mothership uses to filter by when looking for suitable images locally.
vendor This gives the name of the organization that is providing this image.
The final thing that can be changed is the includeos/builder which is the name given to the image. When
uploading to Docker hub this is the name that is used to identify a Docker hub repository.

48                                                                                     Chapter 8. For developers
CHAPTER 9
Mothership server
9.1 Start Mothership
9.1.1 Locally
$ cd $GOPATH/src/github.com/includeos/mothership
$ ./mothership serve
If you want to start with a fresh Mothership, meaning you want to delete the images and files you created the last time
you ran your Mothership, you can add the --clean option:
$ ./mothership serve --clean
Images are built using Docker.
To exit the application, press Ctrl + c
The default settings when starting a Mothership is to start it with basic authentication and TLS enabled.
If you want to disable authentication and TLS (which you rarely want to), you can start your Motherhip with the
following command:
$ ./mothership serve --noservertls --nouplinktls --serverauth none
Then TLS will be disabled on both the API and uplink. You can choose whether you want to disable TLS on the
Mothership API or the uplink (the connection between Mothership and the IncludeOS instances) or both.
Note: If you want to disable authentication and TLS, you also need to update a constant in the mothership_client so
that a Login-button will not be displayed when you visit the Mothership website:
$ cd mothership_client
$
$
$ ./copyfiles.sh
49Mothership Documentation, Release 0.13
9.1.2 In a Docker container
$ cd $GOPATH/src/github.com/includeos/mothership
If you want Docker to handle everything for you, from the mothership_client to the IncludeOS installation, you can
do the following:
$ make mothership
$ docker run --name mothership --publish 9090:9090 --publish 8080:8080 \
-v $PWD/config_files:/home/ubuntu/mothership/config_files \
-v mothership_storage:/home/ubuntu/mothership/runtime_files \
-v /var/run/docker.sock:/var/run/docker.sock \
mothership
Exit the container by pressing Ctrl + c.
If you want to run the Mothership in Docker but want to change some of the default settings mentioned above, you
just add serve at the end, followed by the Mothership options you want to change or add:
$ docker run --name mothership --publish 9090:9090 --publish 8080:8080 \
-v $PWD/config_files:/home/ubuntu/mothership/config_files \
-v mothership_storage:/home/ubuntu/mothership/runtime_files \
-v /var/run/docker.sock:/var/run/docker.sock \
mothership serve --verboselogging
If you get a Conflict message when starting your Mothership in Docker, remove the previously created container:
$ docker rm mothership
Stop your Mothership container:
$ docker stop mothership # `docker kill mothership` is also an option if this doesn't
˓→work
List your running Docker containers:
$ docker ps
List all your Docker containers:
$ docker ps -a
Clean up your Docker environment:
$ docker system prune
$
9.1.3 Server options
To provide options to mothership there are two possibilities:
1. Launch parameters to mothership serve. Options use the -- format.
2. Options in config file: config_files/config.yaml supplied in a key: value.
50 Chapter 9. Mothership serverMothership Documentation, Release 0.13 Notable options are: --certfile string Certificate file for TLS --clean clean everything --keyfile string Private key file for TLS --serverauth string server auth method (default "none") --serverport string port number (default "8080") --verboselogging verbose logging 9.1. Start Mothership 51
You can also read