NMCRL-DVD Tutorial Version 1b 2012
←
→
Page content transcription
If your browser does not render page correctly, please read the page content below
2012

NMCRL-DVD Tutorial
     Version 1b

                     1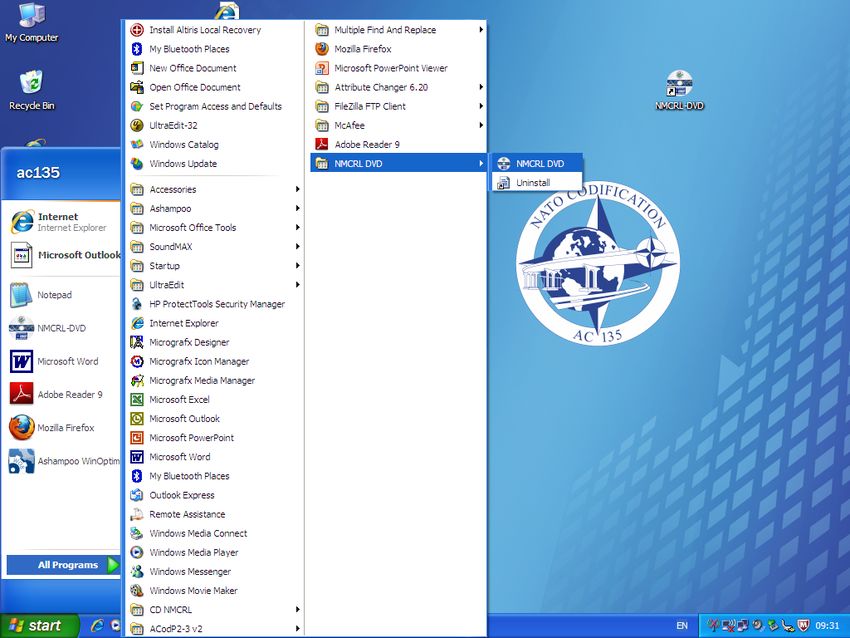
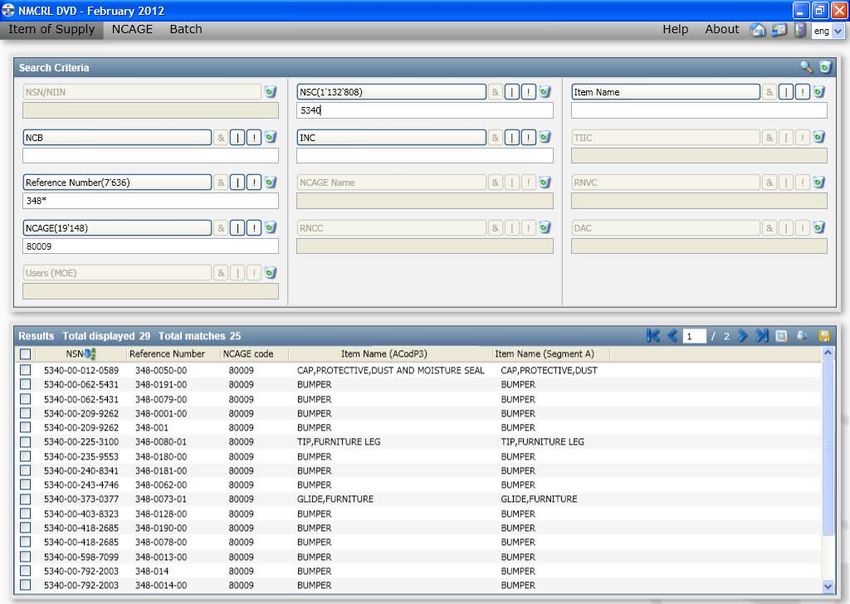
After successful installation, start application from Desktop menu
               START > All Programs > NMCRL DVD
  For your convenience you may also create a desktop shortcut
                                                                     2
NMCRL DVD application is initialized by showing above popup screen

                                                                     3
1        2       3

    Once started you have 3 module choices : ,  and .
              You can select from 13 different interface languages to view in.
                   1st module :  contains the following:              4
Tools options

Click on  tab: You have several different options of Search capabilities:
                    NSN/NIIN, NCB, Reference Number, NCAGE, etc….
          Your will need to know the tools options before starting your search:
                                                                                            5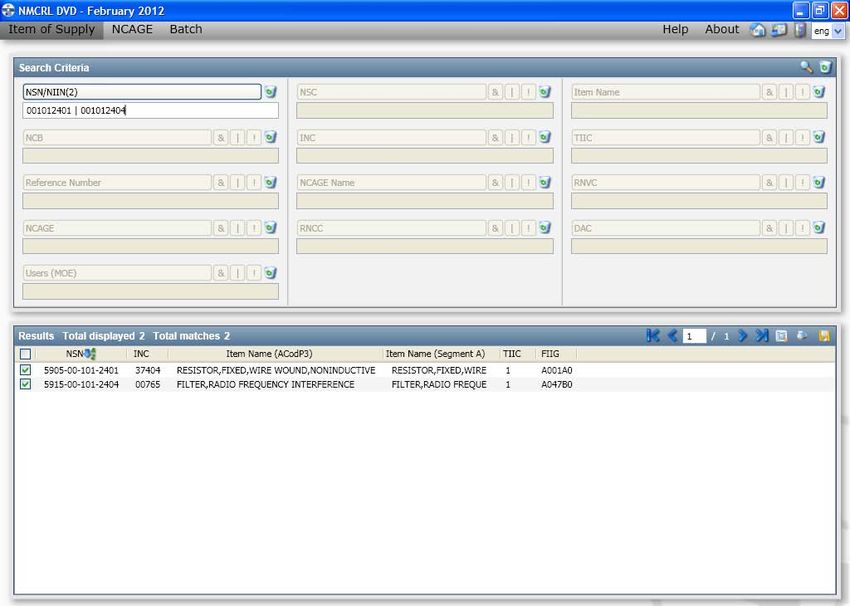
tab = this tutorial in PDF format
 tab = Information about DVD version, data locations and type of licences
                                                                                   6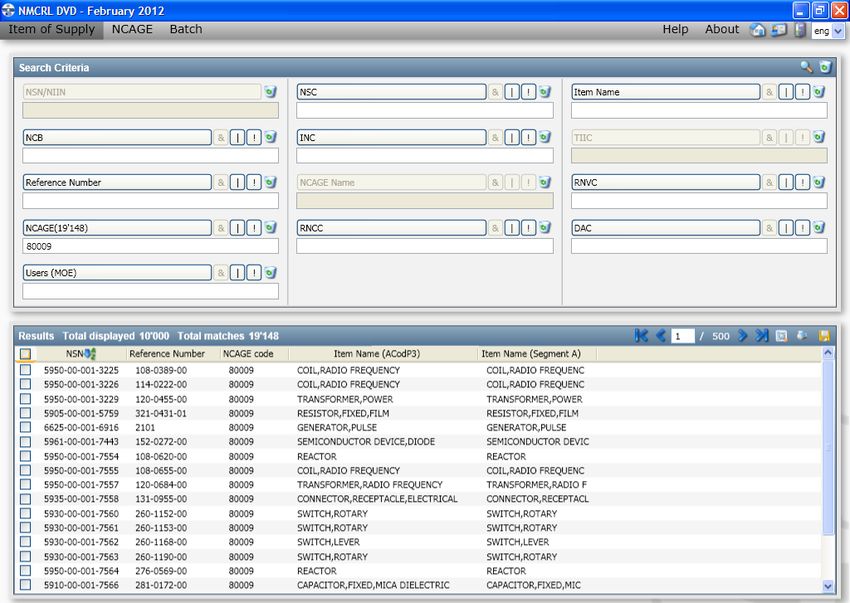
Home page

                                                                 Exit
                                                              application

                    icon = go back to Home /Welcome page
                icon = Paging options (may be changed by user)
                          icon = quit the application
 = select your preferred language (here “eng “ = English language)
                                                                                              7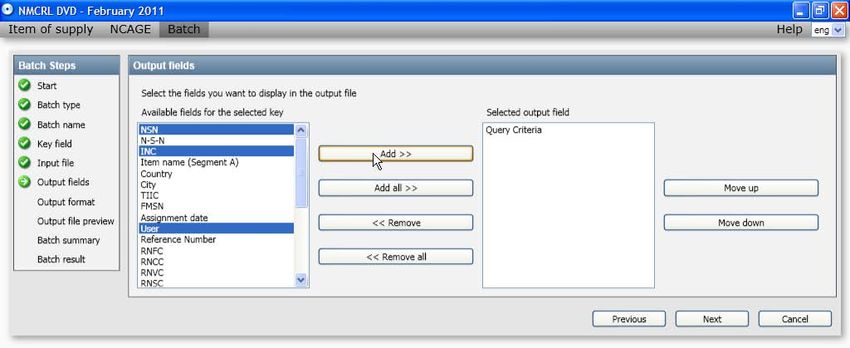
Search Criteria Bar:
“Looking Glass” = this is the Main Search icon
“Trash Can” = Clear All Screen icon
8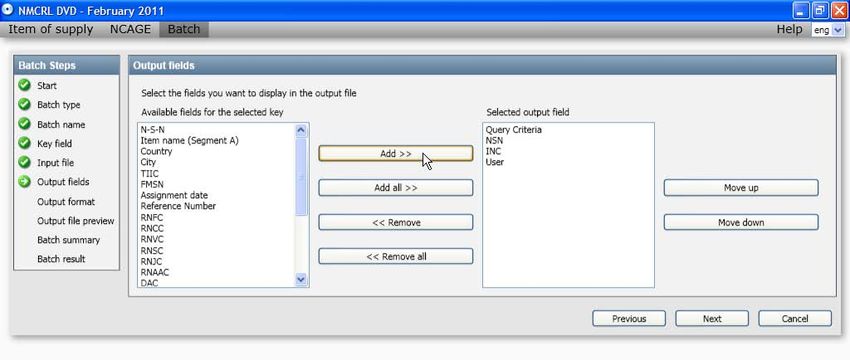
Searching by NSN/NIIN – You have a couple of options :
 By clicking on the NSN/NIIN field header opens NSN/NIIN Browse List. You now have an option of
searching using a wildcard (*) at the end of input data. In the above sample we know the first seven
 numbers to a NIIN, using the wildcard we will get all known NIINs, click on the looking glass icon.
     Note: If you know the NIIN you can just place it in the box and click on the search option.

                                                                                                  9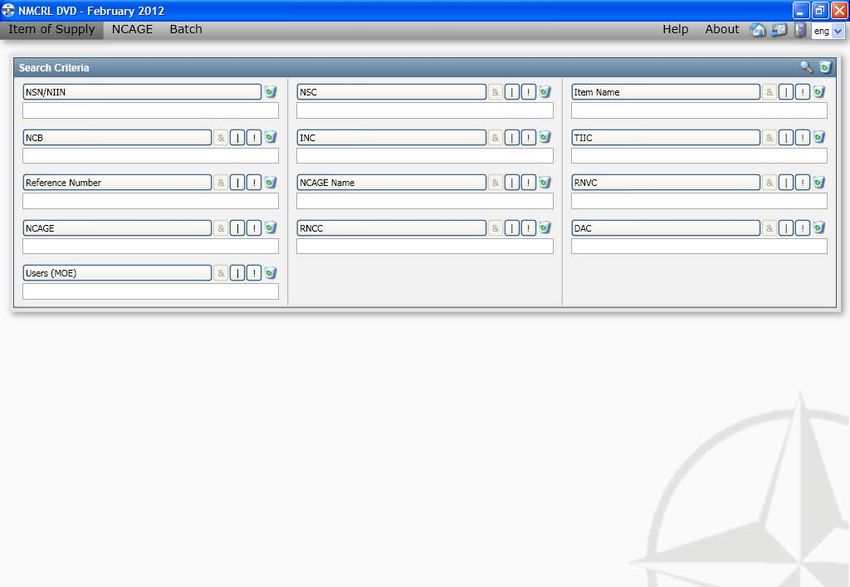
Your results are now shown, checkmark the box(es) of the NIIN or NIINs you wish to view
                             then click on button “Display”
                                                                                          10
Your selections will be displayed in the NSN/NIIN field,
Click on search (Magnifying or Looking Glass icon) for results.
11Your results are now shown at the bottom of the screen, checkmark the box(es) next to the NIIN or
NIINs you want displayed. Notice you now have some additional icons: White square box with
magnifying/looking glass inside is the Details icon (displays your results), next is the Printer icon
followed by the Yellow disk which allows Save Pick List /Saved tagged option. Click on Details icon
Note: If you know your NIIN and place it in the beginning search your results will show immediately.
12Your results are displayed ; to see the next NIIN, click on the > arrow in the right upper corner.
Note that Characteristics Data are not integrated and only available on NMCRL-WEB !
13Reference Number Category Code
Another feature is if you roll over the heading or data with your mouse under NSN
Details a description of what that item is will be displayed.
14Another feature down in the Reference data is the NCAGE additional data, by clicking on the NCAGE
Code you will get the NCAGE details popup screen.
“Back” button: by clicking on the Back button (NCAGE details screen must be closed) you will be taken
back to the initial screen on your first detail listing request 15If you are done with this search and wish to do another click on the waste basket icon, this is the
“Clear screen” icon and will clear all data to enable you to do a new search.
Note: Use of “Clear” icon behind search field will only clear data in that respective field
16Click on NCB header to open NCB Browse List. You can do a search by National Codification Bureau
(NCB) either by clicking in the box next to the country or country’s you wish to search, or you can put
in the first letter of the country in the search field. Click on search function and a list of all countries
with that letter will show up to select from. Scroll down to see remaining list of countries. Once you
select what country’s you need, click on button “Display “to continue search.
17In this case we wish to do a search for data using the country of “Greece”.
Place a checkmark in the box and click on button “Display”.
18The country is now listed (NCB criteria cannot be used alone), you must also select another field
of search and enter your data. This will be a Reference Number or Item Name Code etc….
19In this case we want to see all Reference Numbers beginning the numbers 13, using the * as
a wild card, that pertains to Greece. Select search key for results
20X
All NIIN’s assigned by Greece AND Reference No. beginning with 13 are now available for selection
(Total matches 399). With mouse scroll down to see remaining List of NIINs. From here just select
which items you wish to view and click on Details icon (White square box with magnifying/looking
glass inside ). To check all NSNs for viewing click single white square box in header left side . 21Symbols within the red blocks are called Boolean Operators, they are from left to right:
AND “&” (default) : Selection criteria must be included in the results (NSNs),
OR “|” : At least one selection criterion must be included in the results (NSNs),
NOT “! “ : The selection criterion must be Excluded in the results (NSNs).
Note: Boolean operators can also be used within all fields and in this case AND/NOT are inconsistent
within several fields (NSN,NCB,NSC,INC) for which the data is unique for each NSN and consequently the
result is null.
22Here is an example of a multiple search with some of the fields, in this case we wanted all the matches
for any reference number beginning with 348 with a NSC of 5340 and a NCAGE of 80009.
Note: You may use * or % as the wild card for all field searches.
23Results show 25 matches of Reference Numbers that all start out with 348. You can select 1 or all items for
review, then click on the Details icon (square white box with magnifying/looking glass inside ).
Notice however the fields will show the total number of items associated with each separate data element.
24The remaining search selections all operate basically the same as what we just reviewed
25NCAGE Search Module – Click on tab
26You will notice that all of the search options are the same as in the search.
27If you know the NCAGE you want data on just type it in and click on “Search” icon.
28The results are now available to view (click on NCAGE code to view the details). You will also see Search
icon (Related NSNs), Print and Save icon located at the right side. If there was a replacement NCAGE or
NCAGEs they will be listed (cf. RP1, RP2, etc..). Click on “Clear Screen” icon (looks like a trash can) to
start a new search. Note: the wildcard (*) can be used at any position within NCAGE field (A*B, A*, or *B)
29Clicking on the NCAGE header will activate NCAGE Browse : From here we can get a complete list of
all NCAGEs starting with 00000, you can also see what the NCAGE Status is under SCSD (NCAGE
Status Designator). You can also do a wildcard search if you know the first 1 to 4 letters or numbers
of the NCAGE. Using number 8 and wildcard * we will start our search for company “Tektronix Inc”
located in city “Beaverton”. Click on search in pop-up box.
30At beginning of Browse List, results show we have six items that are active; checkmark
those items and click on button“Display”.
31The NCAGE codes are placed in the appropriate field, click on the “Search” icon to continue.
32Your results show the six NCAGE data, click on the NCAGE code (NCAGE details) to find the one you need using Arrow forward (>) or backward (
Once you find the NCAGE you need and after having closed the NCAGE details popup screen,
checkmark the appropriate NCAGE code. Click on “Search” icon having a square box with blue
  border around and you will see all known NSN’s that list this NCAGE ( i.e. Related NSNs).
                                                                                              34
Results reveal 19,148 NSN’s that matched. To view any or all of these place a check in the individual
NSN’s or place a checkmark in the box above the list called NSN. Clicking the “Search” icon having a
square white box around will give you all the data details on the NSN’s you selected.
35You can scroll down/up to view remaining sections of data. When you are done and wish to do
another type search click on the “Clear” icon (looks like a trash can).
36You also have the option to search for NCAGEs by Country: Click on the Country header to browse or if
you know what countries you need you can use the “& -or-not” options and list the countries. At
“Country Browse” a drop-down list will appear, simply check the country’s you want and click on
“Display”. Note: For NATO countries you will see there 2-digit Country code and under title NCAGE
Matches gives you the total number of NCAGEs used within the country.
37When you selected “Display” on previous screen your selection or selections will be placed in the
box labeled [Country] . Click on “Search” icon for results.
38You now have a listing of all the NCAGE data of all the NCAGE codes created by the country or
country’s. In this sample we have a total of 29 NCAGEs created by ALBANIA showing the status and
or replacement NCAGEs, if applicable. Click on NCAGE code to see NCAGE details and use Arrows
(forward/backward) to see details for consecutive NCAGEs. When finished close NCAGE details 39
window and click on “Clear” icon to start a new search.City, physical address / City, postal address North American Industry Classification System
City, physical address / City, postal address Universal Standard Products and Services Classification
Economic Activities in the European Union Post Code, physical address (ZIP) / Post….. National Identification Number
The remaining Search engines operate the same as our first two sample (NCAGE – Country).
To see the definition of each remaining item just hover the mouse pointer above each field header
so that a temporary balloon (tooltip box) will popup revealing the header definition.
40BATCH Run Module
Click on Tab
41This will be the 1st screen giving you the concept of a BATCH run
Like the other search modules you can select from 13 different languages to view in
Click on “Enter” button
42If you have done any previous Batch Runs they will be displayed by checking option
“Load existing batch definition”.
Click on “Browse” to view and select the desired batch definition file (default file extension “bdf”).
If you are doing a new batch run, check option “New batch” .
This will be a new batch demo : Click on button “Next”.
43You will have two choices to determine if you want a
“Custom Batch” or “Predefined Batch”.
Custom Batch : You will determine what data elements to run
Predefined Batch : The system has a set of data elements pre-determined with no changes allowed.
44You have three types of Predefined Batch runs to select from labeled:
Batch A , Batch B and Batch C.
Batch A : your key search is based on NSN or NIIN, just below it you will see what the predefined
output fields are. This is the results data your batch will return.
45Batch B:
Your Key search is by the NCAGE and Reference Number. Notice in the Predefined output fields
that the return data elements do not change, they are the same as Batch A.
46Batch C:
Key search is by NCAGE, you now see the predefined output fields have changed.
Your results will be confined to data concerning just the NCAGE fields.
47Custom Batch:
If you select Custom Batch your Predefined output fields will be blank as you are saying you
will define your output data elements.
48DEMO :
Predefined Batch (Batch A) with key search of NSN or NIIN
Click on button “Next”
49On this screen you must enter a Batch Name and optional a small description of the
batch; this is anything you want to call it to be able to find it later.
Click the button “Next” when ready
50Under predefined Batch , the input key field (NSN or NIIN) is automatically selected
Just click on button “Next”
51Use “Browse” button to find your input file (.txt or .xls format).
Note: You must create the file prior to starting your batch process.
Select your Input file by clicking on button “Open”
52Select Fixed length text file for type of input file (max length cannot be changed)
Input file Preview displays a sample of your input to verify its proper layout (can be either NSN or
just NIIN format). If preview check is positive, click on button “Next”
53Again because we are using predefined batch method, this is just a viewing to show exactly
what your data element requests are and how it will be returned to you.
Click on button “Next”
54For Output Format : Delimited text file is for experience users see help files if needed, select Fixed
length text file or Excel file. Also select merge the results and errors in one output file.
You can use the remaining two options if needed.
Click on button “Next”
55You now see a sample of how your output file contents will look like : In the top section you see the
layout of the data. In Output File Summary you will see the output file type (fixed length), Output fields
order and Advanced options (display replacement NSN with data …) checked at previous page.
Click on button “Next”
56This is the final review of what your request entails. If you are satisfied and wish to process just click on
“Save batch definition” (only mandatory when you wish to re-apply same batch parameters later on).
Click on button “Next” to continue
57Your data is now being processed, this may take a certain time. Batch result file (*.txt) will be stored in
input file directory. Click to retrieve/see the results’ file (here viewed with Notepad).
The output data can be imported into database (e.g. Ms Access), spreadsheet (e.g. Ms Excel) or other
software for further processing or analysis.
58The remaining two Predefined batch types (Batch B / Batch C) will be done in the same manner as
previously shown with some minor changes of data elements.
59Custom Batch:
Select Custom batch then click on button “Next”
60Again you need to create a Batch Name and optional a small description of the batch; this is
anything you want to call it to be able to find it later (here single input key N-S-N – with dashes).
Click the button “Next” when ready
61Afterwards you need to select your Key Field, in this demo use N-S-N or N-I-I-N
Click on button “Next”
62Click on “Browse” button to find your input file (.txt or .xls format).
Select your Input file by clicking on button “Open”
63Select Fixed length text file for type of input file. Input file Preview displays a sample of your input to
verify its proper layout (here N-S-N structure with dashes).
If preview check is positive, click on button “Next” 64Output fields will let you choose which data elements you want return.
When selecting more then one element hold down the Ctrl key.
Once there highlighted and your done click on button “Add”.
65Your selections will be placed in the Selected output field area, the “Move up” and “Move down”
buttons allow you to change the order of how you want to receive your results.
When finished click on button “Next”
66Select your output format normally “Fixed length”, “Merge results and errors in one output file”
and in this case “Display all users in one line” .
Click on button “Next “when done.
67You will see a preview of what your return data will look like.
Click on button “Next” to continue
68This is the final review of your request. If you are satisfied and wish to process just click on “Save
batch definition” (this for memorizing and re-using same batch definitions later on).
If saved (not mandatory) click on button “Next” to continue
69Your data is now being processed, this may take a certain time. Batch result file (*.txt) will be stored in
input file directory. Click to retrieve/see the results’ file (here viewed with Notepad).
Note: The output data can be imported into database (e.g. Ms Access), spreadsheet (e.g. Ms Excel) or
other software for further processing or analysis.
70If finished with Batch processing, you may click on button “Previous” to change some initial
parameters or click on button “Cancel” to restart a new or existing Batch right from the beginning.
Click on or tab to launch a new Interactive Search.
EXIT (close) NMCRL-DVD application by clicking the “exit door” icon or
the red “cross” icon at right top bar.
This concludes NMCRL-DVD Tutorial
71You can also read