Power Supplies EV2000/EV3000 series - MANUAL HANDLEIDING ANLEITUNG - Consort bvba
←
→
Page content transcription
If your browser does not render page correctly, please read the page content below
Power Supplies
 EV2000/EV3000 series

                       MANUAL
                   HANDLEIDING
                     ANLEITUNG
                      Rev. 03/2021

        EV2230, EV2310, EV2320,
        EV2650, EV3020, EV3150,
        EV3330, EV3610, EV3620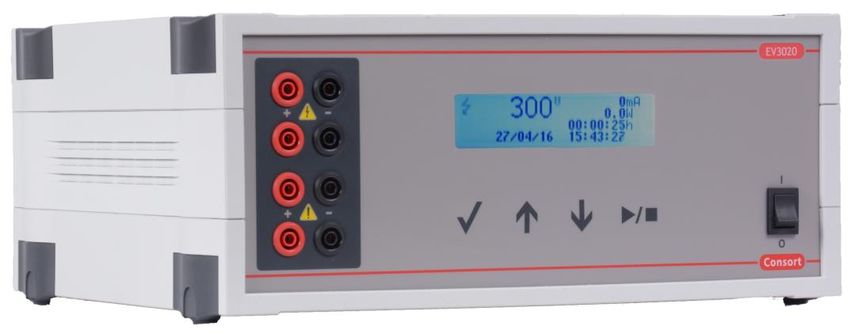
Models – Modellen - Modelle
Maxima

           Voltage    Current   Power
                (V)     (mA)      (W)
  EV2230    1500         200     150

  EV2310      300      1000      150

  EV2320    3000         100     150

  EV2650      600        500     150

           Voltage    Current   Power
                (V)     (mA)      (W)
  EV3020      300      2000      300

  EV3150    1200         500     300

  EV3330    3000         200     300

  EV3610      600      1000      300

  EV3620    6000         100     300
Contents – Inhoudsopgave – Inhaltsverzeichnis
 Models – Modellen - Modelle ............................................................................................................................................................................ I
     Maxima ................................................................................................................................................................................................................... I
 Contents – Inhoudsopgave – Inhaltsverzeichnis ................................................................................................................................... b
 English......................................................................................................................................................................................................................... 1
     General Information........................................................................................................................................................................................ 1
     Keyboard .............................................................................................................................................................................................................. 1
     Very important .................................................................................................................................................................................................. 2
     Use of the instrument ................................................................................................................................................................................... 2
     Procedure? ......................................................................................................................................................................................................... 3
     Setup ...................................................................................................................................................................................................................... 3
     Method programming ................................................................................................................................................................................... 7
     Manual programming ................................................................................................................................................................................... 9
     Running condition ......................................................................................................................................................................................... 10
     Alarm messages ........................................................................................................................................................................................... 12
     Troubleshooting ............................................................................................................................................................................................. 12
     RESET ................................................................................................................................................................................................................. 12
     USB Digital Port ............................................................................................................................................................................................ 13
     Frequently Asked Questions .................................................................................................................................................................... 14
 Nederlands............................................................................................................................................................................................................ 15
     Algemene informatie................................................................................................................................................................................... 15
     Toetsenbord .................................................................................................................................................................................................... 15
     Zeer belangrijk ............................................................................................................................................................................................... 16
     Gebruik van het instrument ..................................................................................................................................................................... 16
     Procedure? ...................................................................................................................................................................................................... 17
     Instellen.............................................................................................................................................................................................................. 17
     Methode programmatie ........................................................................................................................................................................... 21
     Manuele programmatie ............................................................................................................................................................................ 23
     Verloop van een procedure ..................................................................................................................................................................... 24
     Meldingen ......................................................................................................................................................................................................... 26
     TROUBLESHOOTING ................................................................................................................................................................................... 26
     RESET ................................................................................................................................................................................................................. 26
     USB Digitale Poort ....................................................................................................................................................................................... 27
     Veelgestelde vragen .................................................................................................................................................................................... 28
 Deutsch................................................................................................................................................................................................................... 29
     Allgemeine Informationen ........................................................................................................................................................................ 29
     Bedienfeld ......................................................................................................................................................................................................... 29
     Sehr wichtig ..................................................................................................................................................................................................... 30
     Verwendung des Geräts ........................................................................................................................................................................... 30
     Verfahren? ....................................................................................................................................................................................................... 31
     Einstellen ........................................................................................................................................................................................................... 31
     Methodenprogrammierung .................................................................................................................................................................... 35
     Manuelles Programmieren ..................................................................................................................................................................... 37
     Laufbedingungen ........................................................................................................................................................................................... 38
Fehlermeldungen .......................................................................................................................................................................................... 40
    TROUBLESHOOTING ................................................................................................................................................................................... 40
    RESET ................................................................................................................................................................................................................. 40
    USB Schnittstelle .......................................................................................................................................................................................... 41
    Häufig gestellte Fragen.............................................................................................................................................................................. 42
Certificate – Certificaat – Zertifikat ......................................................................................................................................................... 43
    Warranty .......................................................................................................................................................................................................... 44
    Garantie ............................................................................................................................................................................................................. 44
    Gewährleistung .............................................................................................................................................................................................. 44
EVHV_ADAPT....................................................................................................................................................................................................... 45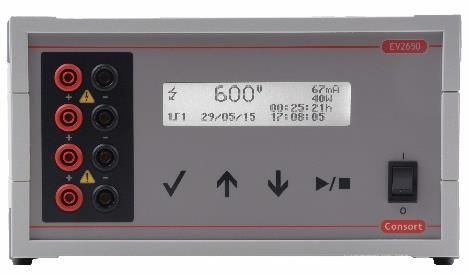
Manual EV2000/EV3000 series Electrophoresis Power Supply, rev. 03/2021
English
General Information
Introduction
This instrument is manufactured with the latest technology and needs no specific maintenance. Consort
certifies that this instrument was thoroughly inspected and tested at the factory prior to shipment and found
to meet all requirements defined by contract under which it is furnished. However, dimensions and other
physical characteristics may differ.
The normal operating temperature should be between 0° and 40°C.
Never use the instrument in a room with high humidity (>95 %) or at very low temperatures (condensation
water!).
Manufacturer
Consort bvba
Hertenstraat 56 / 9 Tel (+32)(0)14 41 12 79
2300 Turnhout Fax (+32)(0)14 42 91 79
Belgium E-mail info@consort.be
Warranty
This instrument (excluding all accessories) is warranted against defective material and workmanship for
period of thirty-six (36) months from the date of shipment ex-factory. Consort will repair all defective
equipment returned to it during the warranty period without charge, provided the equipment has been used
under normal laboratory conditions and in accordance with the operating limitations and maintenance
procedures in this instruction manual and when not having been subject to accident, alteration, misuse or
abuse. A return authorisation must be obtained from Consort before returning any product for warranty
repair on a freight prepaid basis!
Consort is not liable for consequential damages arising out of the use or handling of its products.
Servicing
In the event of this instrument being returned for servicing, the owner is requested NOT to send the following
items unless they are suspect:
• Manual
• Cables
• Accessories
If serious malfunctioning occurs, stop using the unit immediately and consult your local Consort dealer.
Keyboard
• During SETUP or programming a procedure:
= Buttons for entering a value or for selecting a function.
✓ = Button for programming and confirming the desired parameters.
Hold this button pressed to return to the main menu!
/ = Button to
• start the procedure (MANUAL or METHOD),
• cancel while entering a parameter (SETUP),
• return to the previous menu (SETUP).
• While running a PROCEDURE:
= Buttons for selecting a display configuration.
✓ = Button to modify the parameters.
/ = Button to stop or to pause the experiment.
Page 1Manual EV2000/EV3000 series Electrophoresis Power Supply, rev. 03/2021
Very important
This electrophoresis power supply is a high technology instrument available in several versions. As it is
capable of giving dangerous voltage levels by which high power is involved, we suggest that you take a few
moments to read this manual thoroughly. Although this instrument is equipped with all necessary safety
features against abuse and other accidental failures, caution should be exercised when working with high
voltage equipment.
Avoid to touch the outlets with any conducting object and make sure there is a second person
present for your safety in case of any severe electric shock.
Never touch any part of the assembly (power supply, leads or tank) before having switched off.
Never manipulate with wet hands.
Do not ground any of the outputs or the buffer in the tank.
Connect the outlets only to an insulated electrophoresis tank with safety cover.
Never make any other connections, such as e.g. putting several power supplies in series or in
parallel.
In order to prevent electric shock, never open the back plate nor remove the cover.
Do not expose the unit to rain or any other liquid.
Do not spill liquid or insert metal objects inside the unit.
Take care so that the power supply is not dropped to avoid damaging the cabinet which defeats
safeguards or injuring yourself. If the unit has been dropped or the cabinet has been damaged,
unplug it and have it checked by an authorised service technician to restore the safeguards.
The fact that the unit operates satisfactorily does not imply that the unit is properly earthed or that it
is completely safe. If in any doubt about the effective earthing of the unit, contact a qualified
electrician.
Never block the ventilation holes or place the unit in any enclosure unless proper ventilation is
provided.
Never place the unit near or over a radiator, heat register or stove.
Avoid locations where the instrument is exposed directly to the sunlight to prevent overheating.
Use of the instrument
• This instrument is especially designed to create the electrical field for the electrophoresis process. Do
not use it for other purposes than for which it is intended! The behaviour of the device might not be
suitable for it.
• The instrument will show the following information during the start-up:
- Model
- Version number
- Serial number
This information is required when contacting our service department (support@consort.be).
• Make use of the instrument while studying this manual.
Page 2Manual EV2000/EV3000 series Electrophoresis Power Supply, rev. 03/2021
Procedure?
This is the main menu that is shown after powering up the device and has 3 options:
PROCEDURE?
MANUAL
METHOD
SETUP
1. MANUAL
To start a regular procedure with fixed parameter limits for Voltage, Current, Power and Timer.
See Manual Programming.
2. METHOD
To start a procedure with multiple steps to vary the parameter limits automatically while
running. This method also allows Voltage Gradient settings. See Method Programming.
3. SETUP
To modify the settings of the system, detections and data-logging.
Setup
Use this menu to set the system settings of the power supply for language, display contrast, real time clock,
password, detections, data recording.
PROCEDURE?
MANUAL
METHOD
SETUP
System
Language
The power supply has several languages built-in for the communication with the user.
When in SETUP, follow these steps to select LANGUAGE and press ✓:
SYSTEM LANGUAGE
DETECTION CONTRAST
DATA DATE/TIME
INFO PASSWORD
Select the desired language and press ✓.
Page 3Manual EV2000/EV3000 series Electrophoresis Power Supply, rev. 03/2021
Contrast
According to the location where the device is installed, it might be required to adjust the display contrast.
When in SETUP, follow these steps to select CONTRAST and press ✓:
SYSTEM LANGUAGE
DETECTION CONTRAST
DATA DATE/TIME
INFO PASSWORD
Adjust the contrast setting and press ✓ to confirm.
Date/Time
This device has a precise real time clock built in. The real time clock is used for reports and data recording.
The date and the time can be adjusted.
1. When in SETUP, follow these steps to select DATE/TIME and press ✓:
SYSTEM LANGUAGE DATE/TIME
DETECTION CONTRAST MODIFY
DATA DATE/TIME 07/12/2015
INFO PASSWORD 13:08:47
2. Set consecutively the date, month, year, hour, minute and seconds. Confirm each with ✓ or stop
entering the other values by pressing /.
DATE/TIME
MODIFY
07/12/2015
13:08:47
Password
When desired, a password can be set which will be requested when trying to modify the setup or the
parameters of a procedure. Without a password will the user only be able to choose, run or stop an
experiment.
When in SETUP, follow these steps to select PASSWORD and press ✓:
SYSTEM LANGUAGE
DETECTION CONTRAST
DATA DATE/TIME
INFO PASSWORD
A question to activate the password will appear. Choose YES and confirm to enable a password, set
to NO to disable the password.
a. When enabled, the device will request twice the same combination of five keystrokes. This
combination will be required to modify any setting.
PASSWORD CONFIRMATION!
Enter the new Enter the new
password password
[- - - - -] [- - - - -]
An error will be given if the second password doesn’t correspond. The password setting will
be disabled, retry to enable.
Page 4Manual EV2000/EV3000 series Electrophoresis Power Supply, rev. 03/2021
Detection
Choose DETECTION to alter the actions when a low current or a power failure is detected.
Low Current
When a very low current is detected as soon as the Voltage limit has been reached, the power will shut down
the procedure. An audible error message will be given.
When in SETUP, follow these steps to select LOW CURRENT and press ✓:
SYSTEM DETECTION
DETECTION
DATA LOW CURRENT
INFO POWER FAIL
Decide whether or not the output Voltage should shut down at a too low output current and
press ✓.
Power fail
When the detection of a power failure is enabled, the power supply will continue to proceed the procedure if
the timer was still running at the moment that the power failure occurred. After powering it again, the power
supply will automatically proceed with the experiment for the remaining time.
When in SETUP, follow these steps to select POWER FAIL and press ✓.
SYSTEM DETECTION
DETECTION
DATA LOW CURRENT
INFO POWER FAIL
Decide whether or not the instrument should proceed with the experiment for the remaining time
after a power failure and press ✓.
Data
Starting from version 1.5 is this DATA menu available. Check our support website (www.consort.be/wiki) for
firmware updates of the instrument.
The instrument logs all experiments into its internal memory and will hold the last 250 experiments or less if
the memory size would be exceeded. Older data will be lost. The available data can be read using the DIS3
(USB-version) software which is freely distributed on our website.
Info
The menu in the instrument allows to show information about the memory status of the logged data.
When in SETUP, follow these steps to see the status of the data log memory:
SYSTEM DATA
DETECTION
DATA INFO
INFO ERASE
When the info appears, press ✓ to return.
Page 5Manual EV2000/EV3000 series Electrophoresis Power Supply, rev. 03/2021
Erase
The menu in the instrument allows to erase the data log memory.
When in SETUP, follow these steps when required to erase the data log memory:
SYSTEM DATA
DETECTION
DATA INFO
INFO ERASE
A question to erase the data will appear on the display. Choose YES and press ✓ to confirm that the
data should be erased.
Info
Choose INFO to find specific information about the device, the parameter limits, the firmware version and
more:
When in SETUP, follow these steps when required to erase the data log memory:
SYSTEM
DETECTION
DATA
INFO
The information is shown over several lines. Use the - keys to scroll. Use ✓ or / to return to
the previous menu.
Page 6Manual EV2000/EV3000 series Electrophoresis Power Supply, rev. 03/2021
Method programming
Method programming permits to store up to 9 different methods, each with 9 steps. Each step is able to
recall a next one, providing a flexible multiple step function for special techniques.
The method mode also permits to program a linear voltage gradient for any step provided the limiting current
or power is not attained.
Parameters can be changed temporarily without interrupting the run.
Verify if the instrument is switched off.
Connect the electrophoresis tank to the instrument.
Switch the instrument on.
If the timer is still running after switching on, the power supply will automatically proceed with a
procedure for the remaining time. A temporary menu is shown: Choose YES within 15 sec. to stop
the procedure. Choose NO or wait 15 sec. to continue the procedure for the remaining timer value.
Select METHOD and press ✓:
PROCEDURE?
MANUAL
METHOD
SETUP
Select the desired method and press ✓:
CHOOSE
METHOD
1
Choose YES to modify the name of the To modify the name, select each
procedure, NO to proceed with step 8. character from left to right, max. 12
characters.
Select the space character to end a
name with less than 12 characters
and return to point 6.
METHOD 1|1 METHOD 1|1
MODIFY NAME? ADJUST NAME
Method1
NO Method1
Selectable characters are:
‘a’ to ‘z’, ‘A’ to ‘Z’, ‘0’ to ‘9’, ‘_’, ‘,’ , ‘-‘, ‘.’
When previously multiple steps have Decide whether or not a linear voltage
been programmed, select the desired gradient has to be performed
step and press ✓: and press ✓:
METHOD 1|1 METHOD 1|1
STEP GRADIENT
1 NO
Page 7Manual EV2000/EV3000 series Electrophoresis Power Supply, rev. 03/2021
Enter the desired Voltage limit Enter the desired current limit
and press ✓ : and press ✓ :
METHOD 1|1 METHOD 1|1
VOLTAGE CURRENT
300 V 500 mA
When performing a Voltage gradient, This limit is automatically set to its
enter the desired end Voltage. The maximum and cannot be changed in
start Voltage is the end point of the case of a Voltage gradient step.
previous step. This is 0 V when
programming the first step as
gradient step.
Enter the desired power limit Enter the desired timer unit (h or kVh)
and press ✓: and press ✓ :
METHOD 1|1 METHOD 1|1
POWER TIMER UNIT
150 W h
This limit is automatically set to its h
maximum and cannot be changed in The timer will count in hours and
case of a Voltage gradient step. minutes.
kVh
The timer will run in kiloVolthours.
Enter the desired timer value Decide if the experiment should
and press ✓ : automatically proceed with a next step,
press ✓ :
METHOD 1|1 METHOD 1|1
TIMER END METHOD
00:30 h NO
The value format is hh:mm when Choose NO to resume at point 8 to
entering a value in hours (h). The proceed with the next step, choose
kiloVolthours (kVh) are entered as a YES to stop after this step.
value with two decimal places.
Press / to start the experiment.
• At any time, you can return to the main menu by holding ✓ pressed.
• At any time, you can avoid programming unnecessary parameters. Simply press / instead of ✓
after entering the last relevant value and the instrument will immediately start the experiment. The
other parameters are kept to their previous programmed values.
• To ensure that the desired parameter is kept constant, we recommend to preset all other
parameters to their maximum.
• The behaviour of the power supply during a procedure is described in the chapter Running Condition.
Page 8Manual EV2000/EV3000 series Electrophoresis Power Supply, rev. 03/2021
Manual programming
Manual programming permits to set voltage, current, power and time limits for a simple routine
electrophoresis run. Parameters can be changed temporarily without interrupting the run.
Verify if the instrument is switched off.
Connect the electrophoresis tank to the instrument.
Switch the instrument on.
Select MANUAL and press ✓: Enter the desired voltage limit
and press ✓ :
PROCEDURE? MANUAL
MANUAL VOLTAGE
METHOD
SETUP
300 V
Enter the desired current limit Enter the desired power limit
and press ✓ : and press ✓ :
MANUAL MANUAL
CURRENT POWER
500 mA 150 W
Enter the desired timer unit (h or kVh) Enter the desired timer value
and press ✓ : and press ✓ :
MANUAL MANUAL
TIMER UNIT TIMER
h 00:30 h
h h
The timer will count in hours and The value format is hh:mm.
minutes.
kVh kVh
The timer will count in kilovolthours. The format has a value with 2 decimal
places..
Set to 00:00 when required to
continue until / is pressed or the
device is switched off.
Press / to start the experiment.
• At any time, you can return to the main menu by holding ✓ pressed.
• At any time, you can avoid programming unnecessary parameters. To do so, simply press /
instead of ✓ after entering the last relevant value and the instrument will immediately start the
experiment keeping the other parameters to their previous values.
• To ensure that the desired parameter is kept constant, we suggest to preset all other parameters to
its maximum.
• The behaviour of the power supply during a procedure is described in the chapter Running Condition.
Page 9Manual EV2000/EV3000 series Electrophoresis Power Supply, rev. 03/2021
Running condition
Display
V
600
85 mA
51 W
00:29:33 h
Method1
1|2 17/12/15 10:36:18
When running an experiment, the display allows to see the actual parameters. It is divided into three fields:
• The upper left field shows:
o a flashing symbol to indicate there is a possible dangerous condition on the output
sockets. Avoid to contact the outlet sockets and cables!
o the highlighted measured parameter. Use the keys to choose another parameter in this
field.
• The upper right field shows the other 3 parameters.
• The bottom line shows date and time at the right and the actual combination of method and step at
the left when such a procedure is running, no indication when running a manual procedure. The
name of a method is given between the upper left field and the bottom line.
• The bottom line is also used for system or error messages when required.
More details to be read:
• The unit of the parameter that is being kept constant is given with flashing bold characters.
• The timer field counts down to show to the remaining time.
• The timer will count upwards when no timer value has been pre-set. The procedure will run
continuously until / is begin pressed or the device is switched off.
• When performing a method with multiple steps will the display show 2 different symbols in the
combination of the method and the step:
o / A step with Voltage gradient.
o A step with a pre-set fixed maximum Voltage.
Buttons
The keys can be used as follows:
• = Buttons for selecting another parameter in the upper left corner of the
display.
• ✓ = Button to modify the parameters.
• / = Button to stop or to pause the procedure.
Adjusting parameters
During the run
It is possible to modify the pre-set maximum parameters while running. These modifications are temporarily
and are not stored in the non-volatile memory. It is not possible to modify the settings of a Voltage gradient
step.
• Press ✓ to enter the mode to adjust:
V
600
500 mA
150 W
00:29:33 h
= ADJUST, ✓ = NEXT
• The display shows the values set for V, mA, and W. The timer remains counting down when a timer
value has been set.
• Choose the limit to adjust with the ✓ button.
• Adjust the value with the buttons.
Page 10Manual EV2000/EV3000 series Electrophoresis Power Supply, rev. 03/2021
• The display will return automatically to the normal run mode when no button is pressed for 5
seconds.
When paused
A procedure can be paused when a timer has been set. This allows also to check the migration during the
electrophoresis process.
• Press / to pause the running procedure.
• The device will show the descending Voltage at the output sockets until it is sufficiently lowered to a
safe value before proceeding.
• Press ✓ to continue. To stop the procedure completely, hold ✓ pressed until the main menu
appears.
• In case of a Method procedure is it possible to modify the settings of the next steps in the same
manner as during the programming of the method. The modifications will be stored in the non-volatile
memory.
• Press / to continue with the procedure.
End of a procedure
• The procedure will stop automatically when the timer has reached its end value. A signal will sound
for 10 seconds. The sound signal can be ended by pressing a button.
• The procedure can also be stopped by pressing /. The power supply will then be in a paused
condition. To stop the procedure completely, hold ✓ pressed until the main menu appears.
• The power supply will remain showing the display of the running condition until the voltage has
lowered to a safety value.
• When the procedure has finished, a report will be shown on the display. Scroll the display lines with
the buttons to see it completely. Press ✓ or / to return to the main menu.
Page 11Manual EV2000/EV3000 series Electrophoresis Power Supply, rev. 03/2021
Alarm messages
In case a problem or a hazardous situation is detected, the device will interrupt the experiment with one of
the following errors.
A sound will also be produced that can be stopped by pressing any key.
The hazardous situations require that the device needs to be switched off before starting the experiment
again.
See also the frequently asked questions at the end of this manual.
GROUND LEAKAGE
A dangerous ground leakage is present.
• Your power supply is NOT defective!
• This is a safety feature to protect the user.
• Check thoroughly the complete assembly: device, tank, connections, cables, … .
SHORT-CIRCUIT
The connected tank is short-circuited or has a very low resistance.
• Your power supply is NOT defective!
• This feature prevents damage to the device or tank.
• Check thoroughly the complete assembly: device, tank, connections, cables, buffer, … .
• When the fuses are blown, check the website on how to replace these.
OVERLOAD
The connected tank has a too low resistance.
• Your power supply is NOT defective!
• Check thoroughly the complete assembly: device, tank, connections, cables, buffer, … .
• Check also the best choice of power supply for the required application. e.g. It is not possible to
perform Electroblotting requiring high currents with a high Voltage device that is designed for IEF.
LOW CURRENT
The output current is very low or zero. Your power supply is NOT defective!
This can be caused by:
• an interruption of the external cables or tank,
• the cable connectors are not firmly or correctly placed into the sockets,
• erroneous procedure.
It is possible to disable this alarm in the SETUP menu. See Frequently Asked Questions at the end of this
manual.
TECHNICAL PROBLEM
The device has detected a possible failure in the electronics. Contact your supplier.
Troubleshooting
See our website: Consort Power Supply Troubleshooting.
RESET
A general RESET of the device might help to solve some errors.
• Switch the device on while holding ✓ pressed.
• Confirm the question on the display with YES to restore the original factory settings of the device.
• Attention! All procedure parameters, data and settings will be reset.
Page 12Manual EV2000/EV3000 series Electrophoresis Power Supply, rev. 03/2021
USB Digital Port
This power supply has a digital USB port allowing to interface with a computer. Programs can read and
control the power supply completely. More information can be found on our support website: Consort
Support.
Driver
The device has a USB port which requires that a driver is installed prior to connecting the USB cable between
the computer and the device.
The USB driver can be downloaded using the link for the USB drivers on our website: Consort Software.
DIS-3
A freely distributed program (for Windows) to read the logged information of the power supply can be
downloaded from our website: Consort Software Support.
Page 13Manual EV2000/EV3000 series Electrophoresis Power Supply, rev. 03/2021
Frequently Asked Questions
What are the relations between Voltage, Current, Power and Resistance?
Power (W) = Voltage (V) x Current (A)
Resistance () = Voltage (V) / Current (A)
How does a power supply react after pressing RUN?
The internal generator will start building up the high voltage at the output terminals while voltage and current
are constantly measured and power is calculated. When one of the preset parameters is exceeded, the
generator stops and will keep that parameter constant.
How important is the resistance of an electrophoresis unit?
The resistance of an electrophoresis unit depends on its size, gel thickness, amount of buffer, buffer
conductivity and temperature. This resistance will normally decrease in time due to a slowly increasing
temperature. Electrophoresis units which have a resistance below the minimum load resistance of a power
supply will trigger an alarm! Read the output voltage and current during a run to measure the resistance and
use above formula to calculate the value.
How to keep a constant voltage during a run?
Program the desired voltage and a higher current and power then the maximum expected values:
Current > Voltage / Resistance
Power > Voltage x Current
How to keep a constant current during a run?
Program the desired current and a higher voltage and power then the maximum expected values:
Voltage > Current x Resistance
Power > Voltage x Current
How to keep a constant power during a run?
Program the desired power and a higher voltage and current then the maximum expected values:
Voltage > Current x Resistance
Current > Voltage / Resistance
Why are my output values different from those of a similar experiment?
Either your programmed parameters are not equal to those described or the resistance of your
electrophoresis unit is different (see above). It cannot be due to e.g. another model of power supply as the
relations between Voltage, Current, Power and Resistance are monitored in the same way by any instrument
(the electrical laws cannot be disregarded!).
What about connecting more than one unit to the same power supply?
The outlets being in parallel each electrophoresis unit will be supplied with exactly the same voltage. However,
current and power may differ due to differences between them even when the same model, gel, buffers, etc...
are used. Therefore, it is recommended to run several electrophoresis units only in the constant voltage
mode on the same power supply.
Mind also that adding tanks will increase the current and the power. These parameters may be limited by the
power supply and cause it to switch over to constant current or constant power.
Page 14Manual EV2000/EV3000 series Electrophoresis Power Supply, rev. 03/2021
Nederlands
Algemene informatie
Inleiding
Dit toestel is gebouwd volgens de modernste technologie en hoeft niet speciaal te worden onderhouden.
Consort bevestigt dat dit toestel grondig werd nagekeken en getest alvorens te worden verstuurd, en
beantwoordt aan alle vereisten van het aankoopcontract. Er kunnen echter wel afwijkingen optreden in de
afmetingen en andere fysische eigenschappen.
De normale werktemperatuur moet tussen 0° en 40°C liggen.
Gebruik het toestel nooit in een ruimte met hoge vochtigheidsgraad (>95 %) of bij zeer lage temperaturen
(condenswater!).
Fabrikant
Consort bvba
Hertenstraat 56 / 9 Tel (+32)(0)14 41 12 79
2300 Turnhout Fax (+32)(0)14 42 91 79
Belgium E-mail info@consort.be
Waarborg
Dit toestel (uitgezonderd alle toebehoren) is gewaarborgd tegen defect materiaal of constructiefouten voor
een periode van zesendertig (36) maanden vanaf de verzenddatum af fabriek. Consort zal elk toestel gratis
herstellen, binnen de waarborgperiode, voor zover het werd gebruikt onder normale
laboratoriumomstandigheden volgens de werkvoorschriften en onderhoudsprocedures uit deze
gebruiksaanwijzing en wanneer de oorzaak van het defect niet een ongeluk, een aanpassing, verkeerd gebruik
of misbruik is. Er moet eerst een toelating van Consort verkregen worden vooraleer eender welk toestel
franco terug te sturen voor herstelling onder waarborg!
Consort kan niet aansprakelijk worden gesteld voor eventuele schadelijke gevolgen van het gebruik of
behandeling van zijn producten.
Onderhoud
Mocht dit toestel worden teruggestuurd voor onderhoud, gelieve volgende toebehoren NIET mee te sturen,
tenzij ze verdacht zijn:
• Handleiding
• Kabels
• Toebehoren
In geval van ernstige storing, stop onmiddellijk het gebruik van het toestel en raadpleeg uw plaatselijke
Consort verdeler.
Toetsenbord
• Tijdens het INSTELLEN of het programmeren van een procedure:
= Toetsen voor het ingeven van een getal of het kiezen van een functie.
✓ = Toets voor het programmeren en bevestigen van de gewenste parameters.
Houd deze toets ingedrukt om terug te keren naar het hoofdmenu!
/ = Toets om
• een procedure te starten (MANUEEL of METHODE),
• het ingeven van een parameter (INSTELLEN) stop te zetten,
• terug te keren naar het voorgaande menu (INSTELLEN).
• Tijdens het uitvoeren van een PROCEDURE:
= Toetsen om een andere uitlezing te kiezen.
✓ = Toets om het wijzigen van de huidige parameters te starten tijdens het experiment.
/ = Toets om het de lopende procedure te stoppen of te pauzeren.
Page 15Manual EV2000/EV3000 series Electrophoresis Power Supply, rev. 03/2021
Zeer belangrijk
Deze elektroforesevoeding maakt gebruik van de modernste technieken en is verkrijgbaar in verschillende
versies. Omdat het gevaarlijk hoge spanningen kan geven met een hoog vermogen, is het zeer belangrijk om
deze handleiding eerst grondig door te nemen. Niettegenstaande dit toestel voldoende beveiligd is tegen
verkeerd gebruik en mogelijke accidentele fouten, moet toch ten zeerste worden opgepast wanneer met hoge
spanningen wordt gewerkt.
1. Vermijd om de uitgangen met gelijk welk geleidend voorwerp aan te raken en zorg er steeds voor dat
een tweede persoon aanwezig is om voor uw veiligheid te zorgen in geval van een ernstige
elektrische schok.
2. Raak geen enkel deel van de opstelling (voeding, kabels of tank) aan zonder eerst het toestel
uitgeschakeld te hebben.
3. Werk nooit met natte handen.
4. Verbind nooit één van de uitgangen of de buffer in de tank met de aarde.
5. Verbind de uitgangen enkel met een goed geïsoleerde elektroforesekamer met veiligheidsdeksel.
6. Maak nooit andere verbindingen, zoals b.v. verschillende voedingen in serie of in parallel schakelen.
7. Om mogelijke elektrische schokken te vermijden, de achterwand of het deksel nooit verwijderen.
8. Stel het toestel niet bloot aan regen of enige andere vloeistof.
9. Mors geen vloeistoffen of steek geen metalen voorwerpen in het toestel.
10. Draag er zorg voor om de voeding niet te laten vallen zodat ze niet beschadigd wordt, de
veiligheidsvoorzieningen onklaar worden of uzelf gekwetst wordt. Indien men het toestel heeft laten
vallen of de kast beschadigd werd, het netsnoer verwijderen en het toestel door een erkend
technicus laten nakijken op zijn veiligheid.
11. Het feit dat het toestel naar wens werkt betekent niet dat het voldoende geaard is of dat het volledig
veilig is. Bij elke twijfel hieromtrent een bevoegd elektricien raadplegen.
12. De verluchtingsgaten nooit dicht maken of het toestel in een kast plaatsen zonder voldoende
ventilatie.
13. Plaats het toestel nooit nabij of op een radiator, kachel of verwarmingselement.
14. Vermijd plaatsen waar het toestel aan direct zonlicht wordt blootgesteld.
Gebruik van het instrument
• Dit toestel is special ontworpen om het elektrische veld te creëren van een elektroforeseproces.
Gebruik het niet voor andere doeleinden dan waarvoor het bestemd is! Het gedrag van het toestel
kan er niet op afgestemd zijn.
• Het toestel toont volgende informatie tijdens het opstarten:
- Model
- Versienummer
- Serienummer
Deze informatie is vereist bij het contacteren van onze technische diensten (support@consort.be).
• Maak gebruik van het toestel tijdens de studie van deze handleiding.
Page 16Manual EV2000/EV3000 series Electrophoresis Power Supply, rev. 03/2021
Procedure?
Dit is het hoofdmenu dat getoond worden na het opstarten van het toestel en heeft 3 opties:
PROCEDURE?
MANUEEL
METHODE
INSTELLEN
MANUEEL
Om een eenvoudige elektroforese procedure te starten met vaste parameter instellingen voor
Spanning, Stroom, Vermogen en een timer. Zie Manueel Programmeren.
METHODE
Om een procedure te starten met meerdere stappen om de parameter instellingen aan te passen
tijdens het verloop. Deze methode laat ook toe Spanningsgradiëntinstellingen uit te voeren. Zie
Methode Programmeren.
INSTELLEN
Om de instellingen te wijzigen van het systeem, de detecties en de dataopslag.
Instellen
Dit menu laat toe de systeeminstellingen te wijzigen van het toestel voor taal, contrast uitlezing, tijdsklok,
wachtwoord, detecties en dataopslag.
PROCEDURE?
MANUEEL
METHODE
INSTELLEN
Systeem
Taal
Er zijn meerdere talen ingebouwd voor de communicatie met de gebruiker.
Na het kiezen van INSTELLEN, volg deze stappen om de taal te kiezen en bevestig met ✓:
SYSTEEM TAAL
DETECTIE CONTRAST
DATA DATUM/TIJD
INFO WACHTWOORD
Selecteer de gewenste taal en bevestig met ✓.
Page 17Manual EV2000/EV3000 series Electrophoresis Power Supply, rev. 03/2021
Contrast
Naargelang de locatie waar het toestel is geïnstalleerd kan het vereist zijn om het contrast van de uitlezing bij
te stellen.
Na het kiezen van INSTELLEN, volg deze stappen om CONTRAST te kiezen en bevestig met ✓:
SYSTEEM TAAL
DETECTIE CONTRAST
DATA DATUM/TIJD
INFO WACHTWOORD
Pas het contrast aan en bevestig met ✓.
Datum/Tijd
Het toestel heeft een precieze tijdsklok ingebouwd. Deze klok wordt gebruikt voor rapportage en dataopslag.
Datum en tijd kunnen als volgt worden aangepast:
Na het kiezen van INSTELLEN, volg deze stappen om DATUM/TIJD te kiezen en bevestig met ✓:
SYSTEEM TAAL DATUM/TIJD
DETECTIE CONTRAST WIJZIGEN
DATA DATUM/TIJD 07/12/2015
INFO WACHTWOORD 13:08:47
Stel achtereenvolgend dag, maand, jaar, uur, minuten en seconden in. Bevestig elk met ✓ of stop het
ingeven van de overige door het drukken van /.
DATUM/TIJD
WIJZIGEN
07/12/2015
13:08:47
Wachtwoord
Indien vereist kan er een wachtwoord worden ingesteld. Dit wachtwoord is dan noodzakelijk voor het wijzigen
van de instellingen of de parameters van een procedure. Zonder het wachtwoord kan de gebruiker enkel een
experiment kiezen, starten of stoppen.
Na het kiezen van INSTELLEN, volg deze stappen om WACHTWOORD te kiezen en bevestig met ✓:
SYSTEEM TAAL
DETECTIE CONTRAST
DATA DATUM/TIJD
INFO WACHTWOORD
Er verschijnt de vraag om het wachtwoord te activeren. Kies JA om dit te activeren, kies NEE om het
wachtwoord uit te schakelen. Bevestig met ✓.
Indien geactiveerd zal het toestel tweemaal dezelfde te gebruiken combinatie van vijf toetsaanslagen
vragen. Deze combinatie van 5 toetsaanslagen zijn dan benodigd om een instelling te wijzigen.
WACHTWOORD BEVESTIGING!
Geef het nieuw Geef het nieuw
wachtwoord in: wachtwoord in:
[- - - - -] [- - - - -]
Indien het tweede wachtwoord niet overeenstemt wordt er een foutmelding gegenereerd. De
instelling van het wachtwoord blijft dan ongewijzigd zoals voor deze wijziging. Herbegin om het toch te
wijzigen.
Page 18Manual EV2000/EV3000 series Electrophoresis Power Supply, rev. 03/2021
Detectie
Kies DETECTIE om de acties te wijzigen als er een stroomuitval of een te lage stroom gedetecteerd wordt.
Lage stroom
De spanning wordt teruggeschroefd zodra er een te lage stroom gedetecteerd wordt bij het bereiken van een
ingestelde limiet (V, mA of W). Een foutmelding met geluid wordt gegeven. Zodoende kan een correcte
werking gecontroleerd worden.
Na het kiezen van INSTELLEN, volg deze stappen om LAGE STROOM te kiezen en bevestig met ✓:
SYSTEEM DETECTIE
DETECTIE
DATA LAGE STROOM
INFO STROOMUITVAL
Kies of het toestel de procedure al dan niet moet stopzetten zodra een te lage stroom wordt
gedetecteerd en bevestig met ✓.
Stroomuitval
Indien een stroomuitval gedetecteerd wordt kan het toestel automatisch zijn procedure verderzetten indien
er één actief was met een ingestelde timer. Na het heropstarten zal het toestel automatisch de procedure
verderzetten voor de resterende timerwaarde.
Na het kiezen van INSTELLEN, volg deze stappen om STROOMUITVAL te kiezen en bevestig met ✓:
SYSTEEM DETECTIE
DETECTIE
DATA LAGE STROOM
INFO STROOMUITVAL
Kies of het toestel al dan niet de procedure verder dient te zetten voor de resterende tijd na een
stroomuitval en bevestig met ✓.
Data
Deze DATA-menu is beschikbaar vanaf de toestelversie 1.5. Controleer op onze support-website voor de
laatste firmware voor het toestel.
Het toestel slaat alle uitgevoerde procedures op in zijn intern geheugen. De laatste 250 blijven bewaard,
mogelijk minder indien de limiet van het geheugen wordt bereikt. Oudere gegevens zijn automatisch verloren.
De beschikbare gegevens kunnen uitgelezen worden met het programma DIS3 (USB-versie) dat vrij te
downloaden is van de Consort website.
Info
Deze optie laat toe om de geheugenstatus van de opgeslagen gegevens na te kijken.
Na het kiezen van INSTELLEN, volg deze stappen om INFO te kiezen en bevestig met ✓:
SYSTEEM DATA
DETECTIE
DATA INFO
INFO WISSEN
Druk ✓ na het bekijken van de informatie om terug te keren.
Page 19Manual EV2000/EV3000 series Electrophoresis Power Supply, rev. 03/2021
Wissen
Deze optie laat toe om het geheugen van de dataopslag volledig te wissen.
Na het kiezen van INSTELLEN, volg deze stappen om WISSEN te kiezen en bevestig met ✓:
SYSTEEM DATA
DETECTIE
DATA INFO
INFO WISSEN
Er verschijnt een vraag om de gegevens te wissen. Kies JA en druk ✓ om te bevestigen dat de
opgeslagen gegevens moeten worden gewist.
Info
Kies INFO om specifieke informatie weer te geven over het toestel, maximum limieten, de firmwareversie en
meer:
Na het kiezen van INSTELLEN, volg deze stappen om INFO te kiezen en bevestig met ✓:
SYSTEEM
DETECTIE
DATA
INFO
De gegevens worden getoond over meerdere regels.
Gebruik de - toetsen om te bladeren.
Met ✓ of / kan je terugkeren naar het voorgaande menu.
Page 20Manual EV2000/EV3000 series Electrophoresis Power Supply, rev. 03/2021
Methode programmatie
Met de methode programmatie kunnen tot 9 verschillende methoden, elk met 9 stappen, in het geheugen
opgeslagen. Elke stap kan een volgende oproepen voor speciale technieken met meervoudige stapfunctie.
Voor elke stap kan ook een lineaire spanningsgradiënt geprogrammeerd worden indien de stroom- en
vermogens-limieten niet overschreden worden.
De parameters van de lopende stap kunnen tijdelijk gewijzigd worden zonder het experiment te onderbreken
(Zie Verloop van een procedure).
Ga na of het toestel wel degelijk uitgeschakeld is
Verbind de elektroforesekamer met het toestel.
Schakel het toestel aan. Indien na het aanschakelen de tijdsklok nog steeds loopt zal de voeding
automatisch verder gaan met een procedure voor de nog overblijvende tijd. Een tijdelijk menu wordt
afgebeeld. Kies JA binnen de 15 seconden om de lopende procedure te onderbreken. Kies NEE of
wacht 15 seconden om de lopende procedure verder te zetten.
Kies METHODE en druk op ✓:
PROCEDURE?
MANUEEL
METHODE
INSTELLEN
Kies de gewenste methode en druk ✓:
KIEZEN
METHODE
1
Kies JA om de naam van de procedure Om een naam in te stellen kunt u tot
te wijzigen, NEE om voort te zetten 12 karakters kiezen van links naar
met punt 8. rechts. Kies een spatie om een naam
met minder dan 12 karakters te
beëindigen en naar punt 6 terug te
keren.
METHODE 1|1 METHODE 1|1
WIJZIG NAAM? NAAM AANPASSEN
Method1
NEE Method1
Instelbare karakters zijn:
‘a’ tot ‘z’, ‘A’ tot ‘Z’, ‘0’ tot ‘9’, ‘_’, ‘,’ , ‘-‘, ‘.’
Indien voorheen meerdere stappen Beslis of al of niet een
werden geprogrammeerd, Kies de spanningsgradiënt moet uitgevoerd
gewenste stap en druk ✓: worden en druk op ✓:
METHODE 1|1 METHODE 1|1
STAP GRADIENT
1 NEE
Page 21Manual EV2000/EV3000 series Electrophoresis Power Supply, rev. 03/2021
Geef de gewenste spanningslimiet in Geef de gewenste stroomlimiet in en
en druk op ✓ : druk op ✓ :
METHODE 1|1 METHODE 1|1
SPANNING STROOM
300 V 500 mA
In het geval van een spanningsgradiënt Deze limiet staat automatisch op het
dient de gewenste eindspanning maximum en kan niet worden gewijzigd
ingegeven te worden. Het eindpunt van in het geval van een spanningsgradiënt.
de vorige stap is dan de beginwaarde
voor deze stap. Dit is 0 V indien in het
geval van de eerste stap.
Geef de gewenste vermogenslimiet in Kies de gewenste tijdseenheid (h of
en druk op ✓ : kVh) en druk ✓ :
METHODE 1|1 METHODE 1|1
VERMOGEN TIMER EENHEID
150 W h
Deze limiet staat automatisch op het h
maximum en kan niet worden gewijzigd De timer zal aftellen in uren en
in het geval van een minuten.
spanningsgradiënt. kVh
De timer zal aftellen in kiloVolturen.
Geef de gewenste timerwaarde in en Geef aan of de methode dient verder
druk ✓ : gezet te worden met een volgende stap
en druk ✓ :
METHODE 1|1 METHODE 1|1
TIMER EINDE METH.
00:30 h NEE
Het formaat is hh:mm indien een Kies NEE om te hervatten met punt 6
waarde met de eenheid h wordt om de volgende stap in te stellen.
ingegeven. Kies JA om te stoppen na het
Bij een instelling in kVh wordt een getal uitvoeren van deze stap.
met 2 cijfers na de komma
weergegeven.
Druk / om de methode te starten.
• Men kan steeds terug naar het hoofdmenu door ✓ ingedrukt te blijven houden.
• Men kan steeds uit de programmatieprocedure springen om het ingeven van onnodige parameters
te vermijden. Druk op / i.p.v. op ✓ na het ingeven van de laatste gewenste waarde en het toestel
begint onmiddellijk het experiment met alle andere parameters op hun voorgaande waarde.
• Om een bepaalde parameter constant te houden stelt men best alle andere parameters in op het
maximum.
• De werking tijdens het uitvoeren van de procedure is beschreven in Verloop van een procedure.
Page 22Manual EV2000/EV3000 series Electrophoresis Power Supply, rev. 03/2021
Manuele programmatie
Manuele programmatie laat toe om spanning, stroom, vermogen en timer in te stellen voor een standaard
elektroforese procedure. De parameters kunnen tijdelijk gewijzigd worden zonder de lopende procedure te
onderbreken.
Ga na of het toestel wel degelijk uitgeschakeld is
Verbind de elektroforesekamer met het toestel.
Schakel het toestel aan. Indien na het aanschakelen de tijdsklok nog steeds loopt zal de voeding
automatisch verder gaan met een procedure voor de nog overblijvende tijd. Een tijdelijk menu wordt
afgebeeld. Kies JA binnen de 15 seconden om de lopende procedure te onderbreken. Kies NEE of
wacht 15 seconden om de lopende procedure verder te zetten.
Kies MANUEEL en druk op ✓: Geef de gewenste spanningslimiet in en
druk op ✓ :
PROCEDURE? MANUEEL
MANUEEL SPANNING
METHODE
INSTELLEN
300 V
Geef de gewenste stroomlimiet in en Geef de gewenste vermogenlimiet in en
druk op ✓ : druk op ✓ :
MANUEEL MANUEEL
STROOM VERMOGEN
500 mA 150 W
Kies de gewenste tijdseenheid (h of Geef de gewenste timerwaarde in en
kVh) en druk ✓ : druk ✓ :
MANUEEL MANUEEL
TIMER EENHEID TIMER
h 00:30 h
h h
De timer zal aftellen in uren en Het formaat is hh:mm
minuten.
kVh kVh
De timer zal aftellen in kiloVolturen. Het formaat is een getal met 2 cijfers
na de komma.
Zet op 00:00 indien vereist is om
continu te bljven werken tot /
wordt ingedrukt of het toestel wordt
uitgeschakeld.
Druk / om de procedure te starten. Zie Verloop van een procedure.
• Men kan steeds terugkeren naar het hoofdmenu door ✓ ingedrukt te blijven houden.
• Men kan steeds uit de programmatieprocedure springen om het ingeven van onnodige parameters
te vermijden. Druk op / i.p.v. op ✓ na het ingeven van de laatste gewenste waarde en het toestel
begint onmiddellijk het experiment met alle andere parameters volgens hun voorgaande instelling.
• Om een bepaalde parameter constant te houden stelt men best alle andere parameters in op het
maximum.
• De werking tijdens het uitvoeren van de procedure is beschreven in Verloop van een procedure.
Page 23Manual EV2000/EV3000 series Electrophoresis Power Supply, rev. 03/2021
Verloop van een procedure
Schermweergave
V
600
85 mA
51 W
00:29:33 h
Method1
1|2 17/12/15 10:36:18
Tijdens het verloop van een procedure toont het scherm de actuele parameters. Deze aflezing is verdeeld in
drie gebieden:
• Het bovenste linkse gebied toont:
o Een knipperend -symbool om een mogelijke gevaarlijke situatie aan te geven.
Vermijd contact met de kabels en de uitgangsstekkers!
o Een parameter in groot formaat met zijn éénheid. Gebruik de -toetsen om deze
parameter te wisselen.
• Het bovenste rechtse gebied geeft de 3 andere parameters.
• De onderste regel geeft rechts de datum en tijd weer, links de huidige combinatie methode en stap
bij het uitvoeren van een methode of geen indicatie tijdens het verloop van een manuele procedure.
De ingegeven naam van de methode staat tussen de onderste lijn en het bovenste linkse gebied.
• De onderste regel geeft ook mogelijke systeem- of foutmeldingen weer.
Verdere af te lezen details:
• Een knipperende eenheid van de constante parameter verschijnt nadat de regeling volledig is.
• De tijdsklok telt steeds af om zo de resterende tijd weer te geven.
• De tijdsklok loopt op indien de timer op nul werd ingesteld. De procedure zal dan continu verder lopen
tot / wordt ingedrukt of het toestel wordt uitgeschakeld.
• Indien een methode met stappen wordt uitgevoerd kunnen er 2 verschillende scheidingssymbolen
worden weergegeven bij de methode-stap aflezing:
o / bij een stap met spanningsgradiënt.
o bij een stap met een vast ingestelde maximumspanning.
Toetsen
De toetsen kunnen tijdens het verloop als volgt worden gebruikt:
• = Het kiezen van de parameter in het bovenste linkse veld van de aflezing.
• ✓ = Het wijzigen van de ingestelde parameters.
• / = Het stoppen of pauzeren van de procedure.
Parameters aanpassen
Tijdens het verloop
Het is mogelijk om de parameters aan te passen tijdens het verloop van een procedure. Deze aanpassingen
zijn tijdelijk en worden niet opgeslagen in het permanente geheugen. Het is niet mogelijk om de instelling van
een stap met spanningsgradiënt aan te passen.
• Druk ✓ :
V
600
500 mA
150 W
00:29:33 h
= AANPASSEN, ✓ = VOLGENDE
• De aflezing toont de ingestelde waarden voor V, mA en W. De tijdsklok blijft aftellen indien een timer
werd ingesteld.
• Kies de aan te passen limietwaarde met ✓.
• Pas de waarde aan met .
• De aflezing zal automatisch terugkeren naar de gewone stand indien er geen toetsen ingedrukt
worden gedurende 5 seconden.
Page 24You can also read