SANTA CRUZ BICYCLES User Manual
←
→
Page content transcription
If your browser does not render page correctly, please read the page content below
SANTA
                                                    CRUZ
                                                BICYCLES
                                                    User Manual

57-18531   Copyright Santa Cruz Bicycles 2017          2017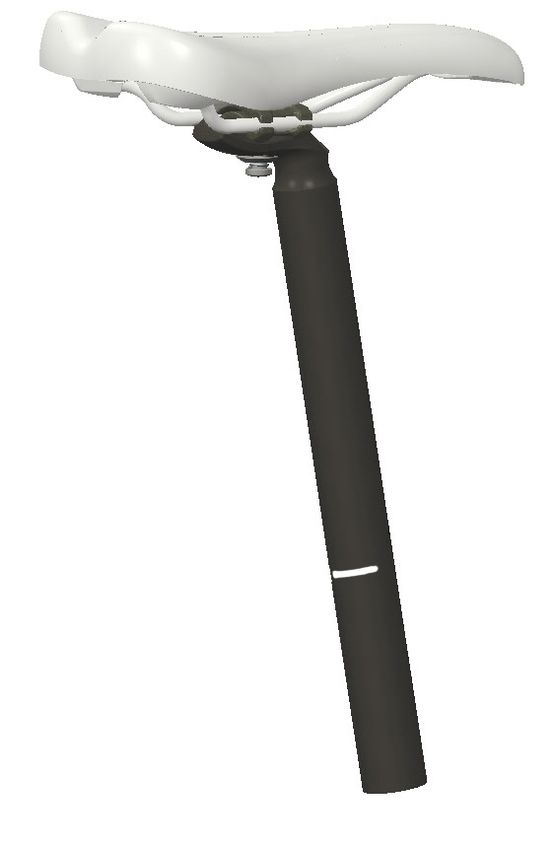
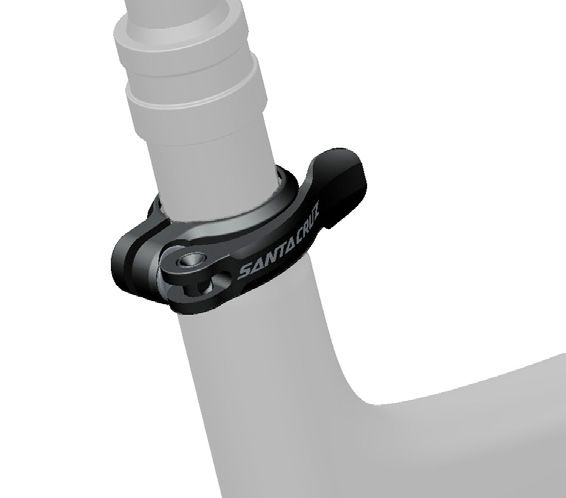
TABLE OF CONTENTS
ENGLISH............................................................................................................. 5
SAFETY INSTRUCTIONS................................................................................ 5
      RIDING SAFELY.............................................................................................................................5
      BICYCLE SAFETY ........................................................................................................................6
      FRAME.............................................................................................................................................7
      SUSPENSION................................................................................................................................7
COMPONENTS................................................................................................. 7
      WHEEL AND AXLE.......................................................................................................................7
      WHEEL MOUNTING SYSTEMS.................................................................................................8
      INSTALL THE COLLET THRU AXLE.........................................................................................9
      REMOVE THE COLLET THRU AXLE........................................................................................9
      BRAKES...........................................................................................................................................10
      SHIFTERS, DERAILLEURS, AND GEARS................................................................................11
      CHAIN..............................................................................................................................................11
      HANDLEBAR AND STEM...........................................................................................................11
      SADDLE AND SEATPOST..........................................................................................................12
      SEATPOST POSITION.................................................................................................................13
      SADDLE POSITION......................................................................................................................14
      SEATPOST ROUTING..................................................................................................................14
      TIRES................................................................................................................................................15
      REFLECTORS.................................................................................................................................15
      LUGGAGE CARRIERS..................................................................................................................15
GENERAL SERVICE AND CARE.................................................................. 16
      STORING.........................................................................................................................................16
      CLEANING......................................................................................................................................16
      INCIDENTAL DAMAGE................................................................................................................16
      TRANSPORT..................................................................................................................................16
      MAINTENANCE.............................................................................................................................16
      MAINTENANCE SCHEDULE......................................................................................................17
WARRANTY........................................................................................................ 18
      LIFETIME FRAME AND FORK WARRANTY............................................................................18
      LIFETIME BEARING WARRANTY..............................................................................................18
      FILE A WARRANTY CLAIM.........................................................................................................18
      LIMITATIONS, EXCLUSIONS, AND DISCLAIMERS...............................................................18

DEUTSCH........................................................................................................... 19
SICHERHEITSHINWEISE................................................................................. 19
      SICHERES FAHREN.....................................................................................................................19
SICHERHEITSHINWEISE................................................................................. 20
      FAHRRADSICHERHEIT ..............................................................................................................20
      RAHMEN.........................................................................................................................................21
                                                                                                                                                                ENGLISH

      FEDERUNG....................................................................................................................................21

                                                                                                                                                                 3
KOMPONENTEN............................................................................................... 21
LAUFRAD UND ACHSE...............................................................................................................21
LAUFRAD-BEFESTIGUNGSSYSTEME.....................................................................................22
EINBAU DER KRAGEN-STECKACHSE....................................................................................23
AUSBAU DER KRAGEN-STECKACHSE...................................................................................23
BREMSEN.......................................................................................................................................23
KETTE..............................................................................................................................................25
LENKER UND VORBAU...............................................................................................................25
SCHALTHEBEL, SCHALTWERK/UMWERFER UND ZAHNKRÄNZE.................................25
SATTEL UND SATTELSTÜTZE..................................................................................................26
SATTELSTÜTZENPOSITION......................................................................................................27
SATTELPOSITION.........................................................................................................................28
VERLEGUNG VON ZÜGEN/LEITUNGEN FÜR DIE SATTELSTÜTZE................................28
REIFEN.............................................................................................................................................29
REFLEKTOREN..............................................................................................................................29
GEPÄCKTRÄGER...........................................................................................................................29
ALLGEMEINE WARTUNG UND PFLEGE..................................................... 30
LAGERUNG....................................................................................................................................30
REINIGUNG....................................................................................................................................30
BEILÄUFIGE SCHÄDEN..............................................................................................................30
TRANSPORT..................................................................................................................................30
WARTUNG......................................................................................................................................30
WARTUNGSPLAN.........................................................................................................................31
GARANTIE.......................................................................................................... 32
LEBENSLANGE GARANTIE AUF RAHMEN UND GABEL...................................................32
ANMELDEN VON GARANTIEANSPRÜCHEN........................................................................32
BESCHRÄNKUNGEN, AUSSCHLÜSSE UND HAFTUNGSAUSSCHLÜSSE....................32
ENGLISH
4SAFETY INSTRUCTIONS
WARNING
RIDING SAFELY TYPE OF TERRAIN MAX MODELS
BICYCLE WEIGHT
Obey all local and federal bicycle laws and LIMIT**
regulations. Laws and regulations include, but are
not limited to, licensing a bicycle, wearing a helmet, Road Paved roads 275 lb Stigmata
riding with a child carrier, bicycle traffic laws, riding
with lights or reflectors, and riding on sidewalks, Cyclocross Paved roads, 275 lb Stigmata
bike paths, and trails. You are responsible for gravel roads, built with
understanding and obeying all laws and regulations. smooth trails knobby
700c tires
Wear a helmet that complies with CPSC or CE safety Cross- Rough trails with 300 lb Highball,
standards. Failure to wear a helmet when riding may country small features Tallboy,
result in serious injury and/or death. and small jumps Joplin
(hardtail (24”), or
and crash, which could result in serious injury and/
stunts
or death.
Trail and Rough trails, 300 lb 5010,
Use a proper front and rear lighting system and All- moderate Nomad,
reflectors for riding in conditions with poor visibility mountain/ technical features, Bronson,
Enduro moderate height Hightower,
or low light, such as fog, dusk, dawn, or night time. jumps (48”), or
prevent you from being able to see, and could
stunts
prevent you from being seen by other people.
Failure to use a proper lighting system or reflectors Downhill Downhill racing, 300 lb V10
in these conditions is extremely dangerous and may and lift-access riding,
result in serious injury and/or death. Freeride larger drops and
jumps, and stunts
(>178 mm
Wet, muddy, snowy, or loose surfaces will impair rear travel) Always wear
traction, steering, and braking ability. The risk of a protective
crash is dramatically increased in these conditions equipment, such
and can lead to serious injury and/or death. as body armor
and a full face
helmet
Watch for “toe overlap”, which is when your foot
makes contact with the front wheel, tire, or fender as Dirt Jump Dirt jumps, bike 300 lb Jackal
you turn the bicycle at slow speeds. This can cause parks, stunts
you to crash, which can result in serious injury and/or Always wear
death. Test your equipment at slow speeds without protective
pedaling to make sure your foot has clearance equipment, such
during slow speed turns. Check for toe overlap each as body armor
time you change your cranks, shoes, pedals, or tires. and a full face
helmet
Mountain biking and road riding is an inherently **Maximum weight limits include the rider weight
dangerous activity, and can result in injury even plus gear and luggage (helmet, clothing, backpack,
at slow speeds. Stunt riding, jumping your bicycle, luggage carrier, etc.). Make sure to adhere to your
riding at high speeds, lift-access, racing, and other suspension manufacturer’s recommended weight
types of extreme riding are considered extremely limits, as they may have lower weight limits than
dangerous, and increase your risk of injury and/or what is shown in the table above.
death. Even with the most advanced safety gear,
you could become seriously injured or killed when
stunt riding, jumping, riding at high speeds, or
ENGLISH
competing. To decrease your risk of injury, know
your limits, use your bicycle correctly, and always
wear an appropriate helmet style and appropriate
safety gear.
5SAFETY INSTRUCTIONS
WARNING
BICYCLE SAFETY
You must register your bicycle in order to make After any crash or impact, or if you have exceeded
a warranty claim (see the instructions on the the maximum weight limits, immediately contact
Warranty page). your dealer for inspection.
Keep this manual for your reference. It is critical Do not exceed 150°F (65°C) exposure to your
that you consult your dealer and component bicycle. High temperatures, such as an open flame
manufacturer’s instructions where indicated in this or other heat sources, may damage the adhesive
manual, as many tasks should only be done by that holds carbon fibers together or the joints that
your dealer. hold frame parts together.
Adhere to all torque and sizing specifications Excessive vibration or “harmonic oscillation” from
for press fits and thread fits. Over-tightening can imbalances of the wheels or frame indicates a serious
damage threads or cause parts to fail. Using the problem. Stop riding the bike immediately and consult
wrong size part can cause parts to fail and may your dealer.
cause a crash, which can result in serious injury
and/or death. Do not attempt to repair damaged carbon
composite. It is impossible to predict how forces
As with all mechanical components, the bicycle from a crash or impact have damaged a carbon
is subjected to wear and high stresses. Different frame or parts. Repairing a carbon frame can
materials and components may react to wear compromise your safety and will void the warranty.
or stress fatigue in different ways. If the design
life of a component has been exceeded, it may Do not place your hands near a moving drivetrain.
suddenly fail and may cause a crash, which can The areas where the chain contacts the front and
result in serious injury and/or death. Any form of rear sprockets or derailleurs can pinch fingers
crack, scratch, dent, delamination, unusual noise, and hands.
or change of coloring indicates that the life of the
component has been reached and it should be Do not place your hands near a moving wheel. A
replaced before riding. moving wheel can catch your hand between the
spokes and frame or other components and can
In the event of an impact or crash, damage to crush your hand.
composite components or frame may be invisible
to the user. Consult your dealer immediately Do not place your hands near sprocket teeth or
for inspection. Your bicycle requires regular disc brake rotors, which have sharp edges and can
maintenance, frequent inspection, and the cut skin.
replacement of parts to address any issues.
ENGLISH
6COMPONENTS
Special tools and knowledge are necessary for installation and adjustment of your
bicycle. For your safety, only an authorized dealer should install, adjust, or service
the frame or the components. Make sure to set up a maintenance schedule with
your dealer to keep your bicycle safe and performing its best. Consult your dealer
if you have any questions or concerns about proper setup and riding your bike.
Stop riding immediately and consult your dealer if you suspect any problems with
your bicycle.
WARNING
Changing the components on your bicycle can compromise
the safety of your bicycle, void the warranty, and can result in
injury and/or death. Not all components or accessories have
been tested for compatibility, reliability or safety on your bicycle.
Check with your dealer before making changes to your bicycle.
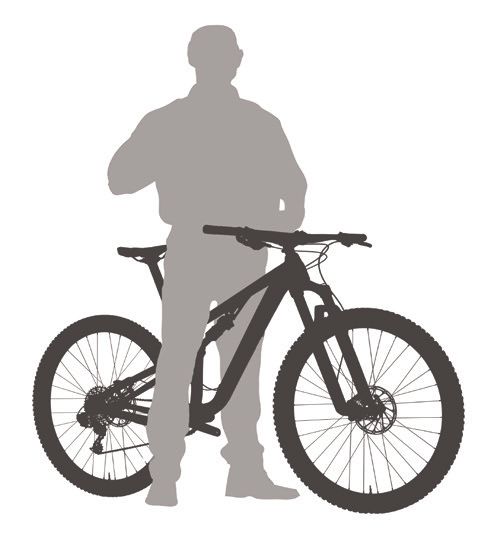
FRAME
Your dealer should help you determine the correct size for
you. A bicycle fits correctly when there is adequate space as
you stand over the top tube. For most bicycles, there should
be a minimum of 1 inch of stand-over clearance. For mountain
bicycles, there should be a minimum of 2-3 inches of stand-
over clearance.
STAND-OVER CLEARANCE
SUSPENSION
Suspension forks and shocks are designed to be adjusted to suit each rider’s
weight and riding style. Each suspension product has different recommended
settings. Visit www.santacruzbicycles.com, your suspension manufacturer’s
website, or consult your dealer for recommended start settings and instructions.
WARNING
Failure to properly set up your suspension can cause product
malfunction and increase your chances of losing control and
crashing, which can result in serious injury and/or death. Refer
to your suspension manufacturer’s instructions for all safety
instructions, warnings, set up, and proper use.
Inspect your suspension regularly for any visible damage. If oil
is leaking or you notice any damage to the surfaces or seals,
contact your dealer immediately.
WHEEL AND AXLE
The wheel is secured to the bicycle with a “thru axle” wheel mounting system.
The thru axle portion is a threaded axle that inserts through the hub and fork/
frame dropouts, and is clamped securely at the fork/frame dropouts. Your
bicycle may have two different axles for the front and rear wheels. Consult your
retailer to understand which type of wheel mounting system(s) you have, how to
ENGLISH
properly use each system, and which tools may be required.
7WHEEL MOUNTING SYSTEMS
Wheels are secured using various types of wheel mounting systems:
DT SWISS® RWS THRU AXLE
QUICK RELEASE (OVER-CENTER CAM) THRU AXLE
TOOLED THRU AXLE
COLLET THRU AXLE
ENGLISH
8WARNING
Do not ride your bicycle with an improperly secured wheel or
axle. This can allow the wheel to move or disengage from the
bicycle, and can cause you to crash, which may result in serious
injury and/or death.
The incorrect installation or placement of an axle lever could
cause the lever to get caught in the rotor of the disc brake or
interfere with the frame or other components, which can cause
you to crash and may result in serious injury and/or death.
INCORRECTLY INSTALLED AXLE
INSTALL THE COLLET THRU AXLE
Santa Cruz Bicycles manufactures one style of axle, the collet thru axle.
However, our bicycles come with various brands and models of axles like the
ones listed on the previous page. You may have a different style of axle included
on your bicycle. Consult your dealer for help with identifying which axle types
are on your bicycle. Axle technologies change rapidly, so refer to your axle
manufacturer’s instructions for the most current wheel and axle installation
procedure. The instructions below only apply to the collet thru axle.
1. Position the chain on the outermost cog.
2. Install the rear wheel into the rear dropouts.
3. Insert the axle through the dropouts and hub from the non-drive side.
4. Insert a 5mm hex wrench into the drive side rear dropout and turn the axle
counter-clockwise to 9 Nm (80in-lb) torque.
5. Use a 5mm hex wrench to turn the axle bolt on the non-drive side dropout
clockwise to 12.4 Nm (110 in-lb) torque.
REMOVE THE COLLET THRU AXLE
1. Position the chain on the outermost cog.
2. Use a 5mm hex wrench to turn the axle bolt on the non-drive side counter-
clockwise two turns.
3. Use a 5mm hex wrench, inserted into the drive side rear dropout to turn the
axle clockwise and remove it.
4. Slide the axle out of the dropouts and hub to release the rear wheel.
ENGLISH
9BRAKES
Brakes are designed to control speed, slow, and stop the bicycle. Pull each
lever to determine which brake operates which wheel, front or rear. Use your
brakes at slow speeds in a safe area to determine the maximum braking force
for each wheel at different speeds. Avoid “locking up” or completely stopping
the wheels while the bike is still moving forward, which can lead to loss of
control and a crash, resulting in serious injury and/or death. Practice shifting
your weight toward the rear wheel during powerful braking conditions (such
as descending), in order to prevent your body from going over the bars. Disc
brakes are extremely powerful, so make sure to practice in a safe area without
traffic and other obstacles, until you feel confident using them during rides.
Brake levers often feature a “reach” adjustment, which adjusts the distance
between the brake lever and the handlebar. Consult your dealer or refer to your
brake manufacturer’s instructions to install and adjust your brakes.
WARNING
If you are unable to reach the brake levers when your hands are
securely positioned on the handlebar, you must either adjust
the reach or replace the brake levers with a more appropriate
model. Riding with the brake levers out of reach can cause
you to lose control of your bicycle and crash, and may result in
serious injury and/or death.
WARNING
Adhere to the rotor size limitations for your fork manufacturer’s
instructions. A larger rotor than what is recommended can
interfere with the fork, frame, or other components and cause a
crash, which may result in serious injury and/or death.
MODEL MAXIMUM ROTOR SIZE
Stigmata 160 mm
All other models 203 mm (or fork manufacturer’s recommendation)
CAUTION
Do not touch disc brakes immediately after use. Disc brakes
and disc brake rotors can become very hot during use and
can burn skin. Make sure your brakes and rotors have cooled
completely before handling them.
NOTICE
Hydraulic disc brake pads wear over time and may become
misaligned. Refer to your brake manufacturer’s instructions
or consult your dealer to align your hydraulic disc brakes and
inspect or replace rotors and brake pads.
Do not squeeze the brake lever when the wheel is removed.
ENGLISH
This can alter the brake pad position and may prevent you from
reinstalling the disc brake and wheel.
10SHIFTERS, DERAILLEURS, AND GEARS
The right shifter controls the rear derailleur. Shift to larger cogs on the cassette
for easier gears. Shift to smaller cogs on the cassette for harder gears. You
must pedal forward in order to change gears. The left shifter controls the front
derailleur. Shift to a larger chainring for a harder gear. Shift to a smaller chainring
for an easier gear. You must pedal forward in order to change gears.
The position of the shift and brake levers on the handlebar should be adjusted
to fit the rider’s hand position. Consult your dealer to properly set up the shift
and brake levers within reach of the rider’s hands.
Over time, shifter cables can stretch and will need adjustment to keep shifting
operations working properly. The shifter cable tension can be adjusted at the
derailleur(s) and with a barrel adjuster on some types of shift levers. Contact
your dealer to adjust the shifter cable tension and the derailleur(s).
For instructions on shifter/derailleur cable routing for your frame, consult your
dealer or go to www.santacruzbicycles.com.
NOTICE
If the rear derailleur cannot be properly adjusted, it may indicate
that the derailleur hanger is bent. Consult your dealer to repair
or replace your derailleur hanger.
CHAIN
The chain must be properly sized and installed to fit your specific drivetrain.
Consult your dealer and the chain manufacturer’s instructions for information on
chain installation and adjustment. A chain that is not sized properly can interfere
with derailleur function or cause the chain to fall off the chainrings. Proper chain
tension is required for safe use. Consult your dealer about the proper chain
tension for your specific drivetrain and check your chain tension monthly.
HANDLEBAR AND STEM
Use the handlebar to steer the bicycle. The handlebar is connected to the bike
by the stem and the steerer tube of the fork. Adjust the handlebar rotational
position to your preference using the stem manufacturer’s instructions, or
consult your dealer.
Before your first ride, practice steering your bicycle at slow speeds in a safe
area without traffic and other obstacles until you feel confident.
WARNING
Do not adjust the handlebar height. Adjusting the handlebar
height requires special tools and knowledge for headset
bearing adjustment, and should only be done by your dealer.
An improperly installed headset, stem, or handlebar can damage
the fork steerer tube and may cause a crash, which could result in
serious injury and/or death.
Do not remove spacers from the fork steerer tube. Removing
STEM, SPACER, AND TOP CAP
spacers requires special tools and knowledge for headset
ENGLISH
bearing adjustment and minimum spacer requirements, and
should only be done by your dealer. For non-carbon fork
steerer tubes, there must be at least one 5 mm spacer below
the stem. For carbon fork steerer tubes, there must be at least
one 5 mm spacer below and above the stem. 11WARNING
Do not add spacers to the fork steerer tube because the stem
will not properly clamp the fork steerer tube. This may cause
loss of control and a crash, which could result in serious injury
and/or death.
Do not over-tighten the stem bolts. This can damage the steerer
tube of the fork and may cause a crash, which could result in
serious injury and/or death.
Use handlebar plugs to cover the ends of the handlebar. Failure
to cover the ends of the handlebar may cause the rider to be
punctured or cut during a crash, which could result in serious
injury and/or death.
SADDLE AND SEATPOST
Bicycles come equipped with either a fixed-bolt seatpost collar or a quick-
release (over-center cam) seatpost collar. The seatpost collar holds the seatpost
in place and prevents it from moving down or rotating while you are riding.
FIXED-BOLT SEATPOST COLLAR QUICK RELEASE SEATPOST COLLAR
Make sure you install the correct size seatpost collar for your seatpost
measurement (see the table below).
MODEL SEATPOST COLLAR DIAMETER SEATPOST DIAMETER
Stigmata, Highball 31.8 mm 27.2 mm
Jackal, V10 34.9 mm 30.9 mm
All other models 36.4 mm 31.6 mm
ENGLISH
12SEATPOST POSITION
The seatpost has a minimum insertion mark that must always
remain below the top of the seat tube. There must be a
minimum of 3.15 inches (80 mm) of the seatpost installed into
the frame.
The seatpost/saddle height should be adjusted to fit the
individual rider. A good starting point for seatpost/saddle
height is to have a 20-30 degree bend at the knee while the
rider is seated on the saddle in a normal pedaling position.
This measurement is taken with the foot at the bottom of the
pedal stroke.
1. For fixed-bolt seatpost collars: Use a 4 mm hex wrench to
loosen the seatpost collar binder bolt.
For quick-release seatpost collars: Move the quick-release
lever to the OPEN position.
2. Adjust the height of the seatpost to your preference. Make
sure the minimum insertion mark is not visible above the
frame. Make sure the saddle is straight and in-line with the MINIMUM INSERTION MARK
top tube of the bicycle.
3. For fixed-bolt seatpost collars: Use a 4 mm hex wrench
to tighten the seatpost collar binder bolt to the seatpost
manufacturer’s recommendations.
For quick-release seatpost collars: Move the quick-release
lever to the CLOSED position.
WARNING
The quick-release lever is an over-center cam. Tighten the
adjusting nut to increase clamping force when the lever is
closed. The force required to close the lever should leave an
imprint on your palm and will require you to wrap your hand
around the seatpost or frame for leverage. If the lever tension is
insufficient, open the lever and turn the adjusting nut clockwise
in small increments until tension is sufficient.
WARNING
Failure to tighten the seatpost collar binder bolt to the seatpost
manufacturer’s recommendation can cause damage to the
seatpost and can cause a crash, which may result in serious
injury and/or death.
ENGLISH
13SADDLE POSITION
The saddle angle can be adjusted to increase
comfort. The seatpost has saddle clamps that
adjust the angle, or tilt, of the saddle and the
fore-aft position. Although the saddle can be
moved along the rails, ensure that the saddle
clamp remains within the straight section of the
rails. This straight section should be indicated
by etched marks or a textured area along the
STRAIGHT SECTION OF
rails of the saddle. THE SADDLE RAILS
WARNING
A saddle that is not adjusted properly or does not fit your
anatomy may cause injury to soft tissues, nerves, and blood
vessels. Signs and symptoms include (but are not limited to)
pain, tingling, numbness, chafing, or saddle sores. Consult your
dealer or refer to your seatpost manufacturer’s instructions to
adjust your saddle position. Consult your dealer to change your
saddle or to request a bicycle fit.
SEATPOST ROUTING
“Dropper” seatposts are height-adjustable hydraulic or mechanical seatposts
that require cable/hose routing through the frame port(s). Carbon frames have
a single port (left image) and aluminum frames have three ports (both images).
For instructions on installing dropper seatpost routing for your frame, consult
your dealer or go to www.santacruzbicycles.com.
CARBON AND ALUMINUM FRAMES ALUMINUM FRAMES
ENGLISH
14TIRES
Do not over-inflate the tire. This can cause the tire to blow off of the rim. Inflate
the tire to the pressure listed on the sidewall of the tire or consult your dealer
for additional information.
Use the size listed on the sidewall of the tire when you purchase additional
tires, tubes, or rim strips. To repair a flat tire, use a patch kit, replace the tube,
or repair with sealant (for tubeless rims). Consult your dealer for information on
replacing or repairing a tire for your specific bicycle.
NOTICE
Do not use air hoses at gas stations to inflate tires. These air
hoses can have inaccurate pressure readings and inflate the
tire too quickly, which can cause damage or cause the tire to
blow off the rim.
WARNING
For front suspension forks, you must have at least 6 mm of tire
clearance when the air is released from the fork and the fork
is compressed completely. Measure around the edges of the
inflated tire and the crown, fork brace, and steerer. Failure to
leave at least 6 mm of tire clearance can cause the tire to stop
against the fork when the fork is compressed, which can result
in serious injury and/or death.
For road or cyclocross bicycles, there must be at least 10 mm
of tire clearance between the edges of the inflated tire and
the frame.
REFLECTORS
Reflectors must be kept in good working condition and properly secured to
the bicycle. The front reflector must face directly forward, and the rear reflector
must face directly back. Make sure the reflectors are visible at all times, and
watch for clothing or other items that may cover the reflectors accidentally.
LUGGAGE CARRIERS
Some Santa Cruz Bicycles are compatible with a front or rear mounted luggage
carrier or trailer. Consult your dealer or trailer/carrier manufacturer’s instructions
for mounting requirements, compatibility, proper installation, and safe use.
Consult your dealer to follow a maintenance schedule for any added products
or accessories.
WARNING
The use of luggage carriers or trailers can affect steering, the
performance of suspension and other components, and will
increase the braking distance required to stop or slow the
bicycle. Do not overload the bicycle (see weight limits, Safety
Instructions) . Make sure luggage and carrier parts do not cover
lights or reflectors or interfere with moving components, such
as wheels.
ENGLISH
15GENERAL SERVICE AND CARE
STORING
Store your bicycle where it will not be an obstruction and has protection from
dangerous conditions. Do not park your bicycle near electric motors; ozone
from motors can damage rubber and paint. Rain or snow can cause the metal on
your bicycle to corrode. Ultraviolet radiation from the sun can fade the paint and
crack the rubber or plastic on your bicycle. Before you put away your bicycle
for an extended time, clean and service it and apply frame polish. Hang your
bicycle off the ground with the tires at approximately half the recommended
inflation pressure. Before you ride your bicycle again, be sure it operates
correctly.
CLEANING
Clean your bicycle with a soft, moist cloth and bicycle cleaner or a solution of
dish soap and water. Do not use industrial solvents or harsh chemicals that can
damage the paint or moving parts. Do not use high-pressure water. Every three
months, clean and polish the frame finish. Some finishes do not require polish.
If you are not certain, consult your retailer.
INCIDENTAL DAMAGE
Do not let your bicycle fall. Do not set your bicycle down with the frame or
derailleur touching the ground. Use care with car racks and work stands.
Clamping devices, such as those found on a work stand or car carrier, can cause
damage to the paint or tubes of bicycle frames. To hold the bicycle for repairs,
clamp the seatpost. To hold the bicycle for transportation on a motor vehicle,
clamp the bicycle by the wheels or fork. If you accidentally apply a bending
force to the fork, do not ride the bicycle until your retailer has inspected the
fork for damage.
The finish, or paint, on your bicycle can be damaged by chemicals (including
some sports drinks) or abrasive contact. Dirt can scratch or remove paint (and
even frame material), especially where a cable rubs or a strap is placed around
a tube. Keep the bicycle clean. Use adhesive padding to prevent rubbing in
critical spots.
TRANSPORT
When packaging your bicycle for travel, use a hard case or carton that will
protect it from damage. Attach padding to all the frame and fork tubes, and use
a rigid block to protect the fork tips and maintain structural support of the fork
blades. If the bicycle is not packaged correctly, it could be easily damaged in
transit. If you are not sure, ask your retailer to package your bicycle for you.
MAINTENANCE
Bicycle service requires special knowledge and tools and should be performed
by a professional bicycle mechanic. This user manual is to be used in conjunction
with the manuals supplied by the component manufacturers. If you did not
receive the manual provided by the component manufacturer, download the
materials off the Internet or contact your local dealer. Consult your local dealer
ENGLISH
to create a maintenance plan and refer to the Maintenance Schedule on the
next page as a guide for frequent inspection, service, and replacement of parts.
16MAINTENANCE SCHEDULE
BEFORE EVERY RIDE WEEKLY MONTHLY EVERY 3 ANNUALLY
MONTHS
Check the frame and Check that all bolts Check the shifter Inspect the Annual servicing at your
fork for signs of stress: are tightened to and brake cables drivetrain for dealer: overhaul service
scratches, cracks, proper torque for wear wear and inspection of frame,
dents, deformation or specifications. Make suspension, and all other
discoloration. Inspect sure to include components. Repair,
the chainstay guard and pedals and any service, and/or replace
ensure it is correctly and accessories or parts as needed
securely attached luggage carriers.
Check that the wheels Check the rims and Check that the Inspect the crank Clean and lubricate all
are true spokes for damage bottom bracket arms and pedals parts as recommended
is tightened to by your component
proper torque manufacturer’s
specifications instructions or consult
your dealer
Check the tire pressure Clean the bicycle Check that Top off grease Check for service
the headset is ports in frame instructions and intervals
adjusted correctly lower links, if for your frame at www.
applicable santacruzbicycles.com
Check the brakes, Check the tires for Check that the Check tire sealant
including brake pads and damage and wear chain is tensioned levels
brake lines correctly
Check that both wheels Clean dust seals on Inspect
are secure suspension suspension parts
for wear
Check that the handlebar Check the
and stem are correctly chainstay guard
positioned and inspect for and bottom
signs of stress: scratches, bracket guard (if
cracks, dents, deformities, applicable) for
and discoloration wear
Check that the suspension
settings are at your
preferences
Check that the lighting
system and reflectors are
in good working order
Check that the saddle
and seatpost are correctly
positioned and tightened
Check for smooth shifting
operation
Lubricate the chain
This list provides some guidelines, but is not to be considered a complete inspection. Following these
guidelines will help maintain the performance of your bicycle and prevent more serious problems from
arising. It is important to remember that service intervals can vary depending on climate, trail conditions
and riding frequency. For service instructions for your specific components, visit the manufacturer’s
website. If you detect any problems with your bike, and you are not able to repair them, take your bike to
your authorized dealer for service.
ENGLISH
17WARRANTY
LIFETIME FRAME AND FORK WARRANTY
Santa Cruz Bicycles will repair or replace at its option any frame or rigid fork made by Santa Cruz
Bicycles it determines to be defective in materials or workmanship. The warranty will be in effect for
the lifetime of the frame or rigid fork and is available only to the original, registered owner. In order to
confirm that you are the original owner, please register using our Warranty Registration Form at the
time of purchase. Notwithstanding the foregoing, frames purchased prior to May 1, 2015 are covered
under the previously-existing warranty for five years from the original date of purchase.
LIFETIME BEARING WARRANTY
Santa Cruz Bicycles pivot bearings are warranted for life to the original owner of the bike. The return
process is simple: fill out the Warranty Bearing Replacement Form, upload a copy of your purchase
receipt, and we’ll get a new set of bearings out to you within 48 hours!
HANDLEBARS
Santa Cruz carbon handlebars are warranted against defects in materials and workmanship for a
period of five years from the original date of purchase.
NO-FAULT REPLACEMENT
Santa Cruz Bicycles will make replacement frame parts available to the original, registered owner
at a reduced charge in the event of a crash or other non-warranty situation for the life of the bike.
FILE A WARRANTY CLAIM
Something not right? Use our Warranty Claim Form to file a warranty claim. We’ll do everything we
can to get you back to riding as fast as possible.
If you have any other questions, or would like to follow up on a warranty claim, contact our Warranty
Department.
LIMITATIONS, EXCLUSIONS, AND DISCLAIMERS
The sole remedy available under the foregoing express warranty and all implied warranties is the
repair or replacement of defective parts with those of equal or greater value, as determined by
Santa Cruz Bicycles in its sole discretion. The warranty does not cover labor costs, custom finishes,
normal wear and tear, or damage from commercial use. The warranty is void if the part is modified
from its original condition in any manner or used outside normal intended use, as determined by
Santa Cruz Bicycles in its sole discretion. The warranty for damage arising from accidents, crashes
and other impacts is limited to offered replacement at a reduced charge as set forth above.
THE FOREGOING WARRANTY IS THE SOLE AND EXCLUSIVE WARRANTY OFFERED BY SANTA
CRUZ BICYCLES. TO THE MAXIMUM EXTENT PERMITTED BY APPLICABLE LAW, ALL OTHER
EXPRESS AND IMPLIED WARRANTIES (INCLUDING WITHOUT LIMITATION THE WARRANTIES OF
MERCHANTABILITY AND FITNESS FOR A PARTICULAR PURPOSE) ARE HEREBY DISCLAIMED. TO
THE MAXIMUM EXTENT PERMITTED BY APPLICABLE LAW, IN NO EVENT SHALL SANTA CRUZ
BICYCLES OR ANY OF ITS OWNERS, OFFICERS, EMPLOYEES, REPRESENTATIVES, AGENTS, OR
AFFILIATES (OR ANY OF THEIR RESPECTIVE SUCCESSORS OR ASSIGNS) BE RESPONSIBLE OR
OTHERWISE LIABLE FOR ANY DIRECT, INCIDENTAL OR CONSEQUENTIAL DAMAGES ARISING
FROM THE PURCHASE, USE, OR OWNERSHIP OF ITS PRODUCTS, INCLUDING WITHOUT
LIMITATION DAMAGES FOR PERSONAL INJURY, PROPERTY DAMAGE, OR ECONOMIC LOSSES,
WHETHER BASED ON CONTRACT, WARRANTY, NEGLIGENCE, PRODUCT LIABILITY, OR ANY
OTHER THEORY.
Some states and countries do not allow some or all of the foregoing exclusions or limitations, so
they may not apply to you. If any portion of the foregoing warranty (or the exclusions or limitations
thereto) is deemed invalid or unenforceable pursuant to applicable law, it shall be deemed modified
so as to be valid and enforceable to the maximum extent consistent with such law. This warranty
ENGLISH
gives you specific legal rights, and you may also have other rights which vary from state to state and
country to country.
To print the forms mentioned above and to view the most current warranty information please visit
http://www.santacruzbicycles.com/en-US/warranties.
18SICHERHEITSHINWEISE
WARNUNG
SICHERES FAHREN FAHRRAD- GELÄNDE HÖCHST- MODELLE
TYP GEWICHT**
Befolgen Sie alle geltenden Gesetze und Vorschriften für
Fahrräder. Gesetze und Vorschriften können insbesondere
die Registrierung von Fahrrädern, das Tragen von Helmen,
Rennrad Asphaltierte/ 125 kg Stigmata
das Fahren mit einem Kindersitz, Verkehrsregeln für
gepflasterte
Fahrräder, das Fahren mit Beleuchtung und Reflektoren
Straßen
sowie das Fahren auf Gehwegen, Radwegen und im
Gelände betreffen. Sie sind dafür verantwortlich, alle Gesetze Cyclocross Asphaltierte/ 125 kg Stigmata
und Vorschriften zu verstehen und zu befolgen. gepflasterte mit
Straßen, genoppten
Tragen Sie einen Helm, der die Anforderungen der CPSC- Schotterwege, 700c-
oder CE-Norm erfüllt. Das Fahren ohne Helm kann zu leichtes Gelände Reifen
schweren oder tödlichen Verletzungen führen.
Cross- Raues Gelände 136 kg Highball,
Achten Sie beim Fahren auf Gefahrenquellen wie Country mit kleinen Tallboy,
Schlaglöcher, Schienen, Viehgitter, Schmutz oder Unebenheiten und Joplin
(Hardtail und Sprüngen (Juliana)
Veränderungen der Fahrbahnbeschaffenheit. Diese
bis zu (< 60 cm)
Gefahrenquellen können Räder und Reifen beschädigen
110 mm
oder dazu führen, dass Sie die Kontrolle über das Fahrrad
hinterer Nicht für Lift-
verlieren und stürzen, sodass die Gefahr von schweren oder
Federweg) Access-Riding
tödlichen Verletzungen besteht.
(Downhill),
moderate
Verwenden Sie eine vorschriftsgemäße vordere und hintere bis größere
Beleuchtung und Reflektoren, um bei schlechter Sicht oder Sprunghöhen und
Dunkelheit zu fahren, z. B. bei Nebel, in der Dämmerung Drops
oder nachts. Unter diesen Bedingungen reichen Reflektoren (> 60 cm) oder
alleine nicht aus. Wenn Sie unter diesen Bedingungen Stunts verwenden
ohne Beleuchtung und Reflektoren fahren, kann Ihre
Sicht beeinträchtigt sein und Sie werden von anderen Gelände und Raues Gelände, 136 kg 5010,
Verkehrsteilnehmern möglicherweise nicht gesehen. Das All-Mountain/ mäßige technische Nomad,
Fahren ohne Beleuchtung und Reflektoren unter diesen Enduro Anforderungen Bronson,
Bedingungen ist äußerst gefährlich und kann zu schweren und moderate Hightower,
oder tödlichen Verletzungen führen. (120–170 mm Sprunghöhen Furtado
hinterer (< 1,2 m) (Juliana),
Beim Fahren auf feuchten, schlammigen oder verschneiten Federweg) Roubion
Oberflächen sind die Traktion, das Lenkvermögen und die Nicht für größere (Juliana)
Bremskraft herabgesetzt. Die Unfallgefahr ist unter diesen Sprunghöhen und
Bedingungen stark erhöht, sodass die Gefahr von schweren Drops
oder tödlichen Verletzungen besteht. (> 1,2 m) oder
Stunts verwenden
Achten Sie darauf, dass Ihre Füße beim Lenken mit niedriger
Geschwindigkeit nicht das Vorderrad, den Vorderreifen oder Downhill und Downhill-Rennen, 136 kg V10
das vordere Schutzblech berühren. Dies kann zu einem Freeride Lift-Access-Riding,
Unfall und schweren oder tödlichen Verletzungen führen. größere Drops und
Probieren Sie das Fahrrad bei niedriger Geschwindigkeit (>178 mm Sprunghöhen und
ohne zu treten aus, um sicherzustellen, dass Ihre Füße beim hinterer Stunts
Lenken mit niedriger Geschwindigkeit genügend Freiraum Federweg)
haben. Überprüfen Sie den Freiraum für Ihre Füße jedes Tragen Sie immer
Mal, wenn Sie Ihre Tretkurbeln, Schuhe, Pedale oder Reifen Schutzausrüstung
wechseln. wie einen Körper-
panzer und einen
Integralhelm!
Das Fahren im Gelände und auf der Straße birgt Gefahren und
kann auch bei niedrigen Geschwindigkeiten zu Verletzungen
führen. Stunts, Sprünge mit dem Fahrrad, schnelles Fahren, Dirt Jump Dirt Jumps, Bike- 136 kg Jackal
Lift-Access-Riding (Downhill), Radrennen und sonstiges Parks, Stunts
extremes Fahren sind äußerst gefährlich und erhöhen das
Risiko von schweren oder tödlichen Verletzungen. Auch mit Tragen Sie immer
modernster Schutzausrüstung können Sie beim Springen, Schutzausrüstung
bei Stunts, beim Fahren mit hoher Geschwindigkeit oder wie einen Körper-
bei Radrennen schwer oder tödlich verletzt werden. Um panzer und einen
Ihr Verletzungsrisiko zu minimieren, beachten Sie Ihre Integralhelm!
Grenzen, verwenden Sie Ihr Fahrrad ordnungsgemäß und
DEUTSCH
tragen Sie immer einen geeigneten Helm und geeignete ** Die Höchstgewichte beinhalten das Gewicht des Fahrers
Sicherheitsausrüstung. plus Ausrüstung und Gepäck (Helm, Kleidung, Rucksack,
Gepäckträger usw.). Stellen Sie sicher, dass Sie die vom
Hersteller Ihrer Federung empfohlenen Höchstgewichte
nicht überschreiten, da diese niedriger als die Werte in der
obigen Tabelle sein können.
19SICHERHEITSHINWEISE
WARNUNG
FAHRRADSICHERHEIT
Sie müssen Ihr Fahrrad registrieren, um Lassen Sie Ihr Fahrrad nach jedem Unfall oder Sturz
Garantieansprüche geltend machen zu können oder nach Überschreitungen des Höchstgewichts
(siehe Anweisungen im Abschnitt „Garantie“). von Ihrem Fachhändler überprüfen.
Bewahren Sie diese Anleitung zum Nachschlagen Das Fahrrad darf keinen Temperaturen über
auf. Befolgen Sie unbedingt die Anweisungen in 65 °C ausgesetzt werden. Hohe Temperaturen, z.
diesem Handbuch, sich an Ihren Fahrradhändler B. durch offenes Feuer oder andere Wärmequellen,
zu wenden oder die Anweisungen des können den Klebstoff, der die Kohlenstofffasern
Komponentenherstellers zu beachten. Viele zusammenhält, oder die Rahmenverbindungen
Arbeiten sollten nur von Ihrem Fachhändler beschädigen.
ausgeführt werden.
Übermäßige Vibrationen oder harmonische
Beachten Sie alle Drehmoment- und Maßangaben Schwingungen durch Unwucht in den Rädern oder
für Presspassungen und Schraubverbindungen. im Rahmen können auf ein ernsthaftes Problem
Übermäßiges Anziehen kann Gewinde hinweisen. Fahren Sie in diesem Fall nicht mit dem
beschädigen oder zum Versagen von Bauteilen Fahrrad und wenden Sie sich an Ihren Fachhändler.
führen. Die Verwendung von falsch bemessenen
Bauteilen kann zum Versagen von Bauteilen führen, Versuchen Sie nicht, beschädigtes Carbonfaser-
sodass die Gefahr von Unfällen und schweren oder Verbundmaterial zu reparieren. Es kann nicht
tödlichen Verletzungen besteht. vorhergesagt werden, wie ein Rahmen oder Teile
aus Carbon durch die Kräfte bei einem Unfall oder
Wie bei allen mechanischen Bauteilen sind die Sturz beschädigt wurden. Die Reparatur eines
Komponenten an Ihrem Fahrrad Abnutzung und Carbonrahmens kann Ihre Sicherheit gefährden
hohen Belastungen ausgesetzt. Verschiedene und führt zum Verfall der Garantie.
Materialien und Komponenten können
unterschiedlich auf Abnutzung oder Belastungen Halten Sie Ihre Hände von in Bewegung
reagieren. Wenn die vorgesehene Nutzungsdauer befindlichen Antriebskomponenten fern. In den
einer Komponente überschritten ist, kann sie Bereichen, in denen die Kette die Zahnkränze
plötzlich versagen, sodass die Gefahr von Unfällen und Kettenräder bzw. das Schaltwerk und den
und schweren oder tödlichen Verletzungen Umwerfer berührt, besteht Quetschgefahr für
besteht. Brüche, Kratzer, Riefen, Delaminierung, Finger und Hände.
ungewöhnliche Geräusche oder Verfärbungen
weisen darauf hin, dass die Nutzungsdauer der Halten Sie Ihre Hände von sich drehenden
Komponente überschritten ist und sie vor dem Laufrädern fern. Ihre Hand könnte sich zwischen
Fahren ersetzt werden sollte. den Speichen und dem Rahmen oder anderen
Komponenten verfangen, sodass Sie schwere
Nach Stürzen oder Unfällen sind Schäden an Quetschungen erleiden.
Komponenten oder Rahmen aus Verbundmaterial
für den Benutzer möglicherweise nicht sichtbar. Halten Sie Ihre Hände von Zahnkranzspitzen und
Lassen Sie Ihr Fahrrad unverzüglich von Ihrem Bremsscheiben fern. Diese Komponenten haben
Fachhändler überprüfen. Ihr Fahrrad erfordert eine scharfe Kanten, sodass Sie sich schneiden könnten.
regelmäßige Wartung, häufige Inspektionen und
den Austausch von Teilen, um mögliche Probleme
zu beheben.
DEUTSCH
20KOMPONENTEN
Für die Montage und Einstellung Ihres Fahrrads sind Spezialwerkzeuge und
Fachkenntnisse erforderlich. Zu Ihrer Sicherheit sollten der Rahmen und
Komponenten nur von einem Fachhändler montiert, justiert und gewartet werden.
Vereinbaren Sie einen Wartungsplan mit Ihrem Fachhändler, um Ihr Fahrrad in
einem sicheren und einwandfreien Betriebszustand zu halten. Wenden Sie sich an
Ihren Fachhändler, wenn Sie Fragen zu Einstellungen und zum Fahren mit Ihrem
Fahrrad haben. Wenn Sie Probleme an Ihrem Fahrrad vermuten, fahren Sie nicht
mit dem Fahrrad und wenden Sie sich unverzüglich an Ihren Fachhändler.
WARNUNG
Der Austausch von Komponenten an Ihrem Fahrrad kann die Sicherheit
des Fahrrads beeinträchtigen und zum Erlöschen der Garantie
sowie zu schweren oder tödlichen Verletzungen führen. Nicht alle
Komponenten oder Zubehörteile wurden auf Kompatibilität mit Ihrem
Fahrrad, Zuverlässigkeit und Sicherheit geprüft. Sprechen Sie mit Ihrem
Fachhändler, bevor Sie Komponenten an Ihrem Fahrrad ersetzen.
RAHMEN
Lassen Sie sich bei der Ermittlung der richtigen Rahmengröße
von Ihrem Fachhändler beraten. Ein Rahmen hat die richtige
Größe, wenn beim Stehen über dem Oberrohr ausreichend
Freiraum vorhanden ist. Bei den meisten Fahrrädern sollte der
Freiraum mindestens 2,5 cm betragen. Bei Mountainbikes sollte
der Freiraum mindestens 5 bis 7,5 cm betragen.
FREIRAUM ÜBER DEM OBERROHR
FEDERUNG IM STEHEN
Federgabeln und Dämpfer müssen auf das Fahrergewicht und den
jeweiligen Fahrstil eingestellt werden. Für jedes Federungsprodukt werden
unterschiedliche Einstellungen empfohlen. Besuchen Sie wegen der
empfohlenen Einstellungen www.santacruzbicycles.com oder die Website Ihres
Federungsherstellers oder wenden Sie sich an Ihren Fachhändler.
WARNUNG
Wenn Sie Ihre Federung nicht ordnungsgemäß einstellen, kann es zu
Fehlfunktionen des Produkts kommen, sodass Sie die Kontrolle über das Fahrrad
verlieren können. Dies kann zu einem Unfall und schweren oder tödlichen
Verletzungen führen. Beachten Sie alle Sicherheitshinweise und Warnhinweise
sowie die Anweisungen Ihres Federungsherstellers zur Einrichtung und zum
ordnungsgemäßen Gebrauch der Federung.
Überprüfen Sie Ihre Federung regelmäßig auf sichtbare Schäden. Wenn Öl
austritt oder Sie Schäden an Oberflächen oder Dichtungen feststellen, wenden
Sie sich unverzüglich an Ihren Fachhändler.
LAUFRAD UND ACHSE
Das Laufrad ist mit einem Steckachsen-Befestigungssystem fixiert. Die
Steckachse ist eine Achse mit Gewinde, die durch die Nabe und die Ausfallenden
DEUTSCH
in der Gabel bzw. im Rahmen geführt und in den Ausfallenden fest fixiert wird.
Ihr Fahrrad ist möglicherweise am Vorder- und Hinterrad mit unterschiedlichen
Achsen ausgestattet. Erkundigen Sie sich bei Ihrem Fachhändler, welche
Befestigungssysteme an Ihrem Fahrrad vorhanden sind, wie Sie die Systeme
ordnungsgemäß verwenden und welches Werkzeug Sie benötigen. 21LAUFRAD-BEFESTIGUNGSSYSTEME
Zur Fixierung von Laufrädern gibt es verschiedene Arten von Befestigungssystemen:
DT SWISS® RWS STECKACHSE
SCHNELLSPANN-STECKACHSE (MIT EXZENTER)
STECKACHSE MIT WERKZEUGAUFNAHME
KRAGEN-STECKACHSE
DEUTSCH
22WARNUNG
Fahren Sie nicht mit Ihrem Fahrrad, wenn Laufräder oder
Achsen nicht richtig befestigt sind. Andernfalls kann sich das
Laufrad bewegen oder vom Fahrrad lösen, was zu einem Sturz
und schweren oder tödlichen Verletzungen führen kann.
Die falsche Platzierung eines Achsen-Schnellspannhebels
kann dazu führen, dass sich der Hebel in der Bremsscheibe
verfängt oder an den Rahmen oder andere Komponenten
stößt. Dies kann zu einem Sturz und schweren oder tödlichen
Verletzungen führen.
FALSCH MONTIERTE ACHSE
EINBAU DER KRAGEN-STECKACHSE
Santa Cruz Bicycles stellt einen Achstyp her: die Kragen-Steckachse. Unsere
Fahrräder werden jedoch mit Achsen verschiedener Marken und Ausführungen
geliefert, wie z. B. die auf der vorhergehenden Seite genannten. An Ihrem
Fahrrad befindet sich möglicherweise eine Achse anderer Bauart. Erkundigen
Sie sich bei Ihrem Fachhändler, welche Art von Achsen an Ihrem Fahrrad
montiert ist. Da die Achstechnologien beständig weiterentwickelt werden,
entnehmen Sie die aktuellen Verfahren für die Achsen- und Laufradmontage
bitte den Anweisungen Ihres Achsenherstellers. Die folgenden Anweisungen
beziehen sich auf die Kragen-Steckachse.
1. Platzieren Sie die Kette auf dem äußersten Zahnkranz.
2. Setzen Sie das Hinterrad in die hinteren Ausfallenden ein.
3. Schieben Sie die Achse von der Nicht-Antriebsseite aus durch die
Ausfallenden und die Nabe.
4. Führen Sie einen 5-mm-Inbusschlüssel in das Ausfallende auf der
Antriebsseite ein und drehen Sie die Achse entgegen dem Uhrzeigersinn
mit 9 Nm fest.
5. Ziehen Sie die Achsschraube auf der Nicht-Antriebsseite mit einem 5-mm-
Inbusschlüssel im Uhrzeigersinn auf 12,4 Nm an.
AUSBAU DER KRAGEN-STECKACHSE
1. Platzieren Sie die Kette auf dem äußersten Zahnkranz.
2. Drehen Sie die Achsschraube auf der Nicht-Antriebsseite mit einem 5-mm-
Inbusschlüssel zwei Umdrehungen entgegen dem Uhrzeigersinn.
3. Stecken Sie am hinteren Ausfallende auf der Antriebsseite einen 5-mm-
Inbusschlüssel in die Achse und drehen Sie sie im Uhrzeigersinn, um sie
auszubauen.
4. Schieben Sie die Achse aus den Ausfallenden und der Nabe heraus, um
das Hinterrad freizugebenl.
BREMSEN
Die Bremsen haben die Aufgabe, Ihre Geschwindigkeit zu kontrollieren sowie
das Fahrrad zu verlangsamen und zu stoppen. Ziehen Sie nacheinander
DEUTSCH
beide Bremshebel, um zu ermitteln, welcher Hebel auf welches Laufrad
wirkt. Probieren Sie Ihre Bremsen in einem sicheren Bereich mit niedriger
Geschwindigkeit aus, um die maximale Bremskraft für jedes Laufrad bei
verschiedenen Geschwindigkeiten zu ermitteln. Vermeiden Sie es, die Räder
zum Blockieren zu bringen, wenn das Fahrrad sich noch in Bewegung befindet.
Dies kann dazu führen, dass Sie die Kontrolle über das Fahrrad verlieren, 23sodass die Gefahr von Unfällen und schweren oder tödlichen Verletzungen
besteht. Üben Sie, Ihr Gewicht bei starkem Bremsen (wie bei Abfahrten) auf das
Hinterrad zu verlagern, damit Sie nicht über den Lenker geschleudert werden.
Scheibenbremsen sind äußerst leistungsstark. Machen Sie sich in einem
sicheren Bereich ohne Verkehr und Hindernisse mit der Bremswirkung vertraut,
bis Sie sich sicher genug fühlen, um die Bremsen beim Fahren zu verwenden.
Bremshebel verfügen oft über eine Griffweiteneinstellung, mit der Sie den
Abstand zwischen dem Bremshebel und dem Lenker einstellen können.
Wenden Sie sich wegen des Einbaus und der Einstellung Ihrer Bremsen an
Ihren Fachhändler oder befolgen Sie die Anweisungen des Bremsenherstellers.
WARNUNG
Falls Sie die Bremshebel nicht erreichen, wenn Ihre Hände sicher
am Lenker platziert sind, müssen Sie entweder die Griffweite
einstellen oder die Bremshebel durch ein passenderes Modell
ersetzen. Wenn Sie mit Bremshebeln außerhalb Ihrer Griffweite
fahren, können Sie die Kontrolle über das Fahrrad verlieren
und stürzen, sodass die Gefahr von schweren oder tödlichen
Verletzungen besteht.
WARNUNG
Beachten Sie die Angaben Ihres Gabelherstellers zum
maximalen Bremsscheibendurchmesser. Eine größere
Bremsscheibe als empfohlen kann an die Gabel, den
Rahmen oder andere Komponenten stoßen und einen Unfall
verursachen, der zu schweren oder tödlichen Verletzungen
führen kann.
MODELL MAXIMALER BREMSSCHEIBENDURCHMESSER
Stigmata 160 mm
Alle anderen Modelle 203 mm (oder Empfehlung des Gabelherstellers)
VORSICHT
Berühren Sie Bremsscheiben nicht unmittelbar nach der Fahrt.
Scheibenbremsen und Bremsscheiben werden durch das
Bremsen sehr heiß und können Verbrennungen verursachen.
Stellen Sie sicher, dass Ihre Bremsen und Bremsscheiben
vollständig abgekühlt sind, bevor Sie sie berühren.
HINWEIS
Bremsbeläge von hydraulischen Scheibenbremsen nutzen sich
mit der Zeit ab und müssen möglicherweise von Zeit zu Zeit neu
ausgerichtet werden. Lesen Sie in der Bedienungsanleitung
Ihres Bremsenherstellers nach oder wenden Sie sich an
Ihren Fachhändler, um Ihre hydraulischen Scheibenbremsen
ausrichten zu lassen und Bremsscheiben und Bremsbeläge
überprüfen oder austauschen zu lassen.
DEUTSCH
Ziehen Sie den Bremshebel nicht, wenn das Laufrad ausgebaut
ist. Dies kann die Position der Bremsbeläge verändern und
dazu führen, dass sie die Scheibenbremse und das Laufrad
24 nicht mehr einbauen können.You can also read