Student Guide: How to Do a Science Fair Project
←
→
Page content transcription
If your browser does not render page correctly, please read the page content below
Massachusetts State Science & Engineering Fair

        Student Guide:
How to Do a Science Fair Project

     Authors:    Karen Martin-Myers ~ Upper Cape Regional Technical School
                 Mary Ellen Stephen ~ Plymouth South High School
                 Mary Young ~ North Quincy High School (retired)

     Editors:    Matthew Croft ~ Somerset Berkley Regional High School
                 Nancy Degon ~ Auburn High School (retired)
                 Elaine Rezendes ~ Somerset Berkley Regional High School

     Redesign:   Matthew Croft ~ Somerset Berkley Regional High School
TABLE OF CONTENTS
Section 1:    Why Do a Science Fair Project?............................................... Page 1

Section 2:    What is a Science Fair Project?............................................... Page 2

Section 3:    Selecting a Topic………………………………………………..…. Page 3

Section 4:    Keeping a Scientific Notebook or Log…………………………. Page 5

Section 5:    Researching the Topic……………………………………………. Page 7

Section 6:    Formatting a Hypothesis or Stating the Purpose……………. Page 8

Section 7:    Experimental Design or Research Plan……………………….. Page 9

Section 8:    Conducting the Experiment……………………………………… Page 11

Section 9:    Analyze the Experimental Data…………………………………. Page 13

Section 10:   Looking for Trends and Forming a Conclusion……………… Page 17

Section 11:   Writing the Paper………………………………………………….. Page 18

Section 12:   Writing the Abstract……………………………………………….. Page 23

Section 13:   Preparing Your Board and Visual Display…………………….. Page 24

Section 14:   Oral Presentation…………………………………….…………….. Page 26

1.0     WHY DO A SCIENCE FAIR PROJECT?
What do market analysts, forensic crime technicians, and backyard gardeners have in
common? They all apply the inquiry process to the research necessary in their careers.
Most professions have common skills that are required for success, such as critical and
creative thinking involving gaining, applying, and communicating knowledge. Working
collaboratively and contributing are common themes in education, science, and technology.
These common themes involve habits of mind such as curiosity, open-mindedness balanced
with skepticism, a sense of stewardship and care, respect for evidence, and persistence. All
these skills and themes are integral parts of doing a science fair project and help to prepare
you for a changing technological world.

Working on a science fair project requires using the skills gained in Social Studies, English,
Math, Technology, the Arts, and the Sciences, making a science fair project an
interdisciplinary activity. Science fair projects provide opportunities to collaborate with many
teachers, especially in Math and English, and implement cross-curriculum, or team
leadership and cooperation.

A science fair project allows you to pose your own question and answer it. Doing a science
fair project involves developing and “owning” the question; researching literature; forming a
hypothesis; designing an experiment; gathering and organizing the data; analyzing, graphing,
and discussing the data; making a conclusion; writing the literary and research reports; and
making an oral and visual presentation. Therefore, you develop and apply skills in literary
and laboratory research, statistical analysis, and public speaking, while gaining a sense of
empowerment and building self-esteem. Because science fair projects are actually cross-
curriculum projects that train you for real-life problem solving, the science fair project
integrates all aspects of your education and helps to prepare you for real-world job
assignments. Having completed a science fair project, you will have the skills necessary to
design future investigations in a variety of different fields. A science fair project may become
the impetus for a future career.

Science fair projects are fun and filled with self-discovery. When beginning the process, you
may feel overwhelmed at its enormity, however you will experience tremendous growth and
fulfillment as you progress through the steps and are evaluated by peers, teachers, and
judges. This experience builds self-confidence and often enables you to present ideas to
others in various situations, such as college and job interviews.

MSSEF How to Do a Science Fair Project Guide                                       1
2.0     WHAT IS A SCIENCE FAIR PROJECT?
A science fair project is simply your independent research of a science topic using the
scientific method. All work and ideas are yours, giving you “ownership” of the research
problem and results. By doing a science fair project, you will find yourself doing the job of a
practicing, professional scientist; giving you a taste of how the body of knowledge we call
science is accumulated.

2.1 STEPS TO DOING A SCIENCE FAIR PROJECT

1. Get a bound notebook to use as a logbook and number the pages.
2. Select a topic.
3. Narrow the topic to a specific problem, stated as a research question, with a single
    variable.
4. Conduct a literature review of the topic and problem and write a draft of the research
    report.
5. Form a hypothesis or state the purpose of the research.
6. Develop a research plan/experimental design.
7. Apply for approval. Fill out appropriate forms and get signatures of approval.
8. Write the research report.
9. Collect materials and equipment. Make a lab schedule.
10. Conduct the experiment. Record the quantitative and qualitative data.
11. Analyze data, applying appropriate statistics.
12. Repeat your experiment, as necessary, to thoroughly explore the problem.
13. Form a conclusion.
14. Write the laboratory report.
15. Write the abstract.
16. Create the visual display.
17. Make an oral presentation of the project to teacher and/or classmates.
18. Review and polish presentation and display for the science fair.

2.2 STEPS TO DOING AN ENGINEERING PROJECT AND SOME
    COMPUTER PROJECTS

Engineering Projects differ from most research projects. For an engineering project you still
need to have a log and do a literature search. However, the steps in the project might be as
follows:
1. Define a need.
                                                           THE ENGINEERING
2. Develop the design criteria.
                                                           PROJECT GOAL is to build a
3. Do a literature search to see what has already been
                                                           device or design a system to
     done.
                                                           solve a problem.
4. Prepare preliminary designs or algorithm (flow chart).
5. Build a prototype or write program.
                                                           THE COMPUTER PROJECT
6. Test the prototype/program.
                                                           GOAL is to solve a problem by
7. Retest and redesign, as necessary.
                                                           writing a computer program or
                                                           designing a computer system.

MSSEF How to Do a Science Fair Project Guide                                      2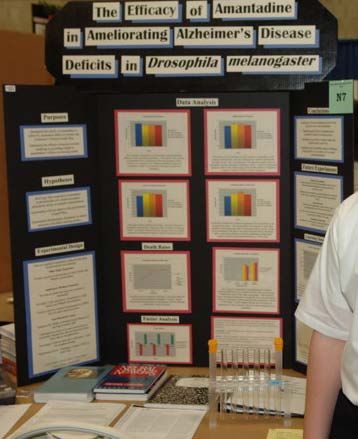
3.0     SELECTING A TOPIC
There are several factors that need to be considered
                                                             DO YOU HAVE ENOUGH
when selecting a topic. Often, the simplest of projects
                                                             INFORMATION?
present the greatest challenges to an imaginative and
intelligent student.
                                                             Information Sources
                                                             Before deciding on a topic,
Consider the following guidelines when selecting the topic
                                                             check these sources of
of your research project:
                                                             information:
                                                             • Libraries (school, public,
Choose a topic that interests you.
                                                                 and college)
• A hobby such as music, gardening, or model rocketry,
                                                             • Previous projects you or
   might give you something to investigate.
                                                                 others have done
• Sometimes your interest in a sport can provide ideas
                                                             • Students who have already
   for a science fair project.
                                                                 completed science fair
• Magazine or newspaper articles on science-related
                                                                 projects (see MSSEF
   events can spark your interest.
                                                                 abstract booklets)
• Find out if there is a sizable amount of information
                                                             • Local college or scientific
   and equipment available pertaining to the selected
                                                                 institution support (for
   topic.
                                                                 information, equipment,
• Science-based websites may inspire ideas.
                                                                 and facilities)
                                                             • Local research firms
Determine if the project is feasible.
                                                             • Verifiable Internet Sources
• Can the project be completed within the amount of
   time allowed? Have you considered the time needed
   for retrials or repeats of the experiment? For
   example, in plant projects, you will need a large         Finding Ideas for Projects
   sample of plants ready to go in two- or three-week        You may find ideas for a
   intervals.                                                science fair project from many
• Are there environmental concerns? For example, is it       varied sources, such as those
   the right time of year to make your observations or       listed here:
   collect samples?                                          • Science books
• Do you have adequate laboratory resources or               • Science lab manuals
   natural resources, or both, to carry out your             • Science fair books
   investigation?                                            • Encyclopedias
• What is the cost of completing the project? Is it within   • Science periodicals
   your budget? Do you need special equipment                • Science teachers
   beyond what is available? How will you get it? Have       • Newspaper
   you budgeted for retrials?                                • Educational TV
• Is the design of the experiment adequate? Are the          • Science museums
   effects measurable in an objective way?                   • Professionals
• Does the project conform to ALL state or federal laws      • Consumer Reports
   pertaining to scientific research? (See the current
   MSSEF Manual, Forms, and Safety Regulations)

Complete the necessary documentation for your project.
• Some documentation will require paperwork completed both before and after
  experimentation for all projects.
MSSEF How to Do a Science Fair Project Guide                                     3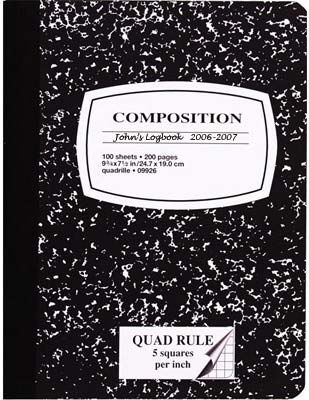
• If you chose to work with any of the materials or organisms listed below, you will need to
obtain approval from the MSSEF Scientific Review Committee (SRC) before
experimentation begins.
Potentially Hazardous Biological Agents (microorganisms, rDNA, human and
vertebrate animal tissue, blood, body fluids, etc.)
Vertebrate Animals
Human Subjects
Hazardous Chemicals, Activities or Devices
Controlled Substances
Obtaining approval involves additional certifications, permissions, and other paperwork. This
work is necessary for your protection, the protection of the environment, and certifies that you
have treated animals, including humans, properly, and have adhered to the laws of your local
town, state and the nation. Are you willing to complete this additional paperwork in order to
work in restricted areas?
If you are continuing a project, document new and different research (e.g., testing a new
variable requiring a new hypothesis).
• Repeating previous experiments or increasing sample sizes are not acceptable
continuation projects.
• A Student Checklist (1A), Research Plan, Form 1, Form 1B and Continuation Form (7)
need to be completed for each year’s work of a continuing research project before
experimentation begins.
• If you plan to work on your project over the summer, you must complete your Student
Checklist and Research Plan and any other required forms, and have your school
approve your paperwork before the school year ends. If you are attending a summer
institute or science-training program you must have a teacher, a qualified scientist, and
the MSSEF Scientific Review Committee approve the research plan before the actual
training at the institute or program begins. Again, your next year’s science teacher must
approve your paperwork before school ends!
• Do not discard ANY of your certification forms from previous years’ work when continuing
a research project. You will be required to submit these forms along with the current
year’s forms when registering for the fair.
• Use a new logbook to mark the beginning of your continuation project. Judges are asked
to evaluate your project on the merits of research completed during the current year and
not on material presented at previous science fairs.
MSSEF How to Do a Science Fair Project Guide 4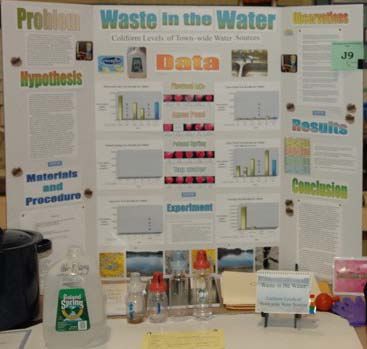
4.0 KEEPING A SCIENTIFIC NOTEBOOK OR LOG
One of the most important aspects of doing a science fair project is
documentation. Every experiment should be reproducible and the
entries in your notes should be sufficient for someone else to
reproduce the experiment.
The first thing to do when beginning a science fair project is to get
the notebook. You will work out your thinking and the development
of your problem in the notebook. The scientific notebook is a bound
or spiral book with pages that are not removable. The validity of
your documentation partly depends upon insuring the work has not
been tampered with or pages removed.
When preparing the notebook there are several things that need
to be done.
1. Write your name inside the front cover.
2. Every page in the notebook must be numbered from the Suggested Table of
start. If the book pages are not already numbered, Contents for a Logbook:
number every page in order at the upper corner along
the outside edge of the pages.
3. Divide the book into sections and start a table of
Choosing a Project
contents. Successful students typically divide their Literary Research
logbook into at least four sections (see box). Experimental Research
a. In the first section, begin your quest for ideas by Daily Log
listing topics or problems that you might investigate,
and your thoughts about each.
b. Make a section of the notebook for literary research. For each literary research
session, write the name of the library, the date, and the time visited at the top of a
new page. List the resources you examine. If you take notes from a text, head the
notes with all the information you will need to make a citation. Use the margins to
enter the page of the reference from which the notes were taken. This will give you
easy access to the “who,” “what,” “where,” and “when” that you’ll need when writing
your research paper.
c. The next section contains experimental research or engineering design including the
research plan, data collection, and data analysis.
d. The last section is the daily log where daily activities related to the research project
are recorded. After the experiment is recorded, head a new page with “Discussion”
or “Interpretation” before writing your inferences. Start a new page to write the
“Conclusion.” Remember, the better the records you keep, the easier it is to validate
your work.
4. When making a new entry, begin on a new page. Date each page as you use it.
5. The notebook must include all the steps of the scientific method, from the inception of the
project to its completion. Scientific notebooks include literary and experimental research,
the development of your idea or product and its evaluation, and all calculations. Entries
made by people other than you must be signed and dated by those people.
6. You can keep a log or daily journal in a section of your scientific notebook, or in a
separate book. If you plan to use a separate book for your log or daily journal, use the
MSSEF How to Do a Science Fair Project Guide 5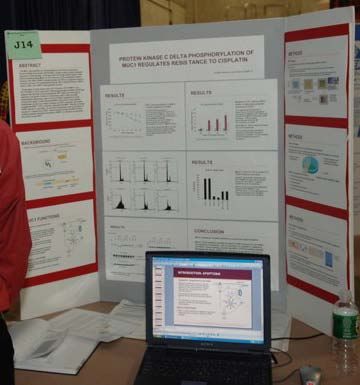
same type of bound book. The logbook is the chronological record of events during the
    experimentation.

When making entries in your notebook, follow these guidelines.
• Write the entry immediately after the work was performed.
• Write the date of the entry at the top of the outside margin of every page.
• Sign and date every entry.
• Mark and title each section clearly.
• Write legibly and in clear, understandable language.
• Use the active voice in the first person when making an entry so it clearly indicates who
   did the work. Your experimental entries should read like a story. Illustrate as necessary
   - a picture can be worth a thousand words!
• Record everything - no detail is insignificant.
• Title, label, and date all graphs and tables.
• Tape, staple, or paste computer print-outs, photographs, etc. into logbook.
• Have anyone who witnesses your work sign as a witness and date the entry.
• Never remove or obliterate an entry from your notebook. What you think is “a goof” may
   later turn out to be to be a great asset!

MSSEF How to Do a Science Fair Project Guide                                     6
5.0     RESEARCHING THE TOPIC
You have decided upon a topic and are thinking,
                                                              Periodicals
“Where do I begin?” The best place to begin is the
library. The library will have magazines, newspapers,
                                                              Many popular newsstand
books on the subject, scientific references, and
                                                              magazines written for the
electronic resources, each with information about some
                                                              general public may not have
aspect of your topic.
                                                              scientifically reliable information
                                                              appropriate for your background
You may think you should begin with an encyclopedia.
                                                              research, so these should not
Encyclopedias are quick references that will give you
                                                              be your main references. Some
basic background information, but not the specific
                                                              reliable periodicals for scientific
scientific information you may need, especially if you
                                                              research are listed below.
chose a cutting-edge field of science. It is acceptable to
begin with an encyclopedia for key terms, but do not
                                                              Air and Space Magazine
use general encyclopedias as the only source of your          American Biology Teacher
information, and do not include them in your list of          American Journal of Physics
references. However, good scientific encyclopedias,           Astronomy
such as The Encyclopedia of Chemical Technology, are          Chemical and Engineering News
acceptable resources.                                         Discover
                                                              Environmental Science Technology
You’re more likely to find what you need in large public      Journal of Chemical Education
libraries and college libraries. Scientific journals can be   Natural History
found at these libraries. Articles in scientific journals     Science
have some of the most up-to-date information on many          Science News
                                                              Scientific American
current hot topics in research. There are scientific
journals specific to every field in science. Articles in
journals will be found in three forms: as complete papers with short abstracts, as final notes
on projects, and as updates or communications about ongoing research.

You will be able to find texts on particular science topics in the 500s and 600s of the library
stacks. College texts have information that goes beyond what most high school texts offer.
Most libraries have databases on computers, which make the search for books and magazine
                                       articles much easier.
  Note-Taking Alternative
                                        The Internet is also a valuable tool for students doing
 Some students find it useful to        research. When conducting research on the Internet,
 use note cards to record               make sure that you use reliable sources. Information
 research and bibliography              you use will need the same citation data as a book or
 information in addition to             magazine article: author, title, publisher, and copyright.
 recording this information in the      It is best to download copies of everything you use,
 scientific notebook. These             including the website address.
 cards can be arranged and
 rearranged to help you find the        Remember, good literary research and documentation
 best sequence to present the           provides a solid foundation for your hypothesis and
 literature and experiment. (Use        experiment.
 a different color for each book,
 for easy recognition.)

MSSEF How to Do a Science Fair Project Guide                                         7
6.0     FORMING A HYPOTHESIS OR STATING THE PURPOSE
Once you have selected and researched your topic, you will need to identify the problem.
Phrase your problem as a question and phrase your hypothesis as a statement. Be specific
in stating your hypothesis or purpose, but don’t be overly wordy. Most scientists prefer a
hypothesis rather than a statement of purpose, although for engineering projects or computer
projects a statement of purpose is preferred.

6.1 HYPOTHESIS                            Sample Hypotheses

A hypothesis is a trial solution to a     •    The ingestion of caffeine increases the heart
research problem. The data you                 rate of Daphnia sp.
acquire through experimentation           •    Ascorbic acid concentration in orange juice
can be used to support or refute the           varies directly with temperature.
hypothesis. Sometimes your data           •    Hard materials are more effective at reducing
shows the hypothesis to be                     sound levels than soft materials.
incorrect, but this is not a problem      •    Radish seeds will not germinate as well when
as long as your background                     watered with acidic water compared with neutral
research justifies the hypothesis.             water.
Sometimes your data will neither          •    Juvenile horseshoe crabs prefer a mud bottom
support nor refute your hypothesis.            to a sand bottom.

6.2 STATEMENT OF PURPOSE

Some project work is best summarized with a statement of purpose. This is especially true
with computer or engineering projects. Rather than testing a supposition, these projects
often involve the development of new equipment, materials, procedures, or models.

                           Sample Statements of Purpose

                           •    The purpose of this computer program
                                is to model the flow of various
                                chemicals through the soil and into the
                                ground water.
                           •    The purpose of this project is to
                                develop a Remotely Piloted Vehicle
                                (RPV) that uses the cellular telephone
                                network as a transmission system.

MSSEF How to Do a Science Fair Project Guide                                        8
7.0 EXPERIMENTAL DESIGN OR RESEARCH PLAN
Enter all your design ideas and modifications in your logbook. Labeled diagrams or
schematics are a good way to present your ideas. These are essential in an engineering
project. With computer projects, include algorithms or flow charts.
When developing your experimental design you Steps of the Experimental
should consider the following questions. Design/Research Plan
• Will your design test your hypothesis or achieve
your purpose? • Variables-
• What variables affect your experiment? What Independent/Dependent
quantity are you testing for (dependent variable) • Control Set-up
and on what does this variable depend • Replication
(independent variable)? It is important to test only • Material availability/cost
one variable at a time and keep other variables that • Where experiment will be
might affect your results to a minimum. Keeping conducted
extraneous variables to a minimum is not always • Protocol (Research Plan)
easy to achieve. • Safety concerns
7.1 VARIABLES
Independent Variable: The quantity that you vary systematically. This variable is plotted on
the x-axis. The successive increments in the independent variable are often consistent. In
physics projects, time is frequently the independent variable.
Example: When measuring the speed of a runner over time, time is the
independent variable. Speed is the dependent variable.
Dependent Variable: This quantity changes as a result of your manipulations and depends
on the independent variable. The dependent variable is plotted on the y-axis.
7.2 CONTROL SET-UP
With a few exceptions, you will need to include a control set-up as well as an experimental
set-up in your experimental design. The control and experimental set-ups are exactly the
same except that the control set-up does not contain the independent variable.
Example: To test the hypothesis that plants grow better in green light than in
regular light, the experimental set-up would include plants grown in
green light and watered and fertilized in the same way as plants grown in
regular light (the control). All other variables, such as type of soil, the
amount of humidity, the air temperature, and the light exposure are kept
the same for both the experimental set-up and the control set-up.
7.3 REPLICATION
The more times you repeat an experiment and obtain the same results, the more statistically
valid are your results. With plant projects you should plan to have at least 24 plants in your
experimental group and 24 in your control group. Ideally your whole experiment should be
repeated several times. Most student scientific work produces data samples that are best
MSSEF How to Do a Science Fair Project Guide 9analyzed using a t distribution (n>30, where n is the number of samples).
Will the materials you need to perform your experiment be available?
Are they within your budget?
7.4 SCIENTIFIC PROTOCOL
Did you complete all required paperwork? (See MSSEF Manual - Research and Safety
Regulations)
All projects are required to have a Student Checklist (1A), Research Plan, Form 1, and
Form 1B, including dates and signatures, completed before experimentation begins. If
you chose to work with any of the following you will need to obtain approval from the MSSEF
Scientific Review Committee (SRC) before experimentation begins. This involves additional
certifications, permissions and other paperwork. Experiments dealing with human subjects
also require approval from an Institutional Review Board (IRB).
• Potentially Hazardous Biological Agents (microorganisms, rDNA, human and
vertebrate animal tissue, blood, body fluids, etc.)
• Vertebrate Animals
• Human Subjects
• Hazardous Chemicals, Activities or Devices
• Controlled Substances
See MSSEF website for all necessary forms.
7.5 SAFETY MANDATES
Any experiment that involves hazardous chemicals, activities or devices (including controlled
substances), potentially hazardous biological agents (including all soil and bacteria projects),
and vertebrate animals will need to be performed under supervision at school or in a
professional lab under the direction of a supervising scientist. This will require additional
paperwork before experimentation begins. Working with a professional mentor or in a
professional lab setting requires additional paperwork both before and after experimentation
(see MSSEF Manual - Research and Safety Regulations).
MSSEF How to Do a Science Fair Project Guide 108.0 CONDUCTING THE EXPERIMENT
Once your experimental design is complete, it is the time to perform the experiment. Plan
and organize the experiment. Perform the experiment under controlled conditions. Keep
careful records in the bound scientific notebook. The notebook is for your records and notes.
If anyone else writes in it, have that person sign and date his or her entry.
Document everything you do, whether talking to a person about the project, visiting a library
for research, or doing the lab work.
8.1 BEFORE YOU START YOUR EXPERIMENT
Organize all material and equipment to be ready for use as you need them. Organizing your
work before starting is important.
Outline the procedure and make a timeline. An outline of the proposed timeline to
complete each part of the experimentation is helpful.
• Can the entire experiment be completed at one time? Are multiple time slots needed for
completion of experimentation? If so, what plans need to be made for securing materials
between the experimentation sessions?
• What do you need to measure results? Are the measuring devices in metric units? Do
you know how to read them? Do the instruments give accurate measurements?
• Do you need other people with you while doing the experimentation? Have you talked to
those people about scheduling an appointment at a time convenient for everyone
involved so that the experimentation can be carried out?
Keep your scientific notebook/log and graph paper handy. Design and set up the tables
and graphs you expect to use prior to starting your experimentation. Include units where
appropriate.
Keep a camera on location. The camera is a useful tool for documenting your project.
Have another person take photos of you performing the experiment, and use the camera to
record the progress and the results of experimentation.
Complete all certification forms and compliance forms. Make certain you have
completed the Research Plan and all necessary forms for restricted areas and obtained
proper approvals before experimentation begins.
Observe safety rules. Cover safety issues with your teacher and, if appropriate, with the
research scientist and/or lab instructor at a research facility. Do not use any equipment that
is unfamiliar to you; learn to use it before beginning the experiment.
8.2 BEGIN EXPERIMENTATION
Make entries in your scientific notebook as you go. Record data, both quantitative and
qualitative, in your logbook. Sometimes what appears to be irrelevant or a failure on one day
may become important information at a later date.
MSSEF How to Do a Science Fair Project Guide 11Enter measurements in your tables. As you proceed with your project, make certain you
include the units and the degree of uncertainty of each measurement based on the exactness
of the measuring device. Record your error as a +/- to indicate the amount of uncertainty.
Make repeated measurements periodically. Some experiments (e.g., plant-growth
projects) require repeated measurements over an extended period. Take measurements
periodically (e.g., every day at 4:00 PM, every third day at noon) to reduce extraneous
variables, and make entries into the log when you make the measurements.
Repeat the experiment, if necessary. After completing the experiment, you may decide
you need to repeat the experiment for accuracy of your results. You may need to clarify or
even alter the hypothesis, redesign the experiment, and get ready to begin again. You may
learn more from the process of revision than you learn when all goes "perfectly." Remember,
do not discard or remove any data from your scientific notebook/logbook. These pieces of
data are often valuable later. Talk with your teacher or supervisor about improvements and,
if necessary, begin the experiment again.
When other people make entries or comments in the scientific notebook/logbook.
Material put in the scientific notebook/logbook by someone else must be acknowledged
clearly, and that person’s signature must be in clear view and dated.
Engineering/Computer Project Considerations
If you are doing an engineering project, after you
have defined the need, developed design criteria,
and done the literature search, you should:
• prepare preliminary designs
• build a prototype
• test the prototype
• retest and redesign as necessary
MSSEF How to Do a Science Fair Project Guide 129.0 ANALYZE THE EXPERIMENTAL DATA
Organize your data. In order to look for any trends, your
results should be organized in data tables. Computer Density of Sand Without Air
spreadsheet programs such as Microsoft Excel™ and Mass Volume Density
Vernier Graphical Analysis™ are useful because the (g) (mL) (g/mL)
program can graph your data from the spreadsheet. 26.38 10.0 2.64
26.23 10.0 2.62
Determine the precision of your data points. 26.18 10.0 2.62
134.90 50.0 2.70
9.1 ACCURACY VS. PRECISION, AND USING 132.88 50.0 2.66
SIGNIFICANT FIGURES 51.54 20.0 2.58
73.84 30.0 2.46
In everyday speech, accuracy and precision are often 31.52 12.0 2.63
used synonymously; however, these words do not mean
32.00 14.0 2.29
the same thing to scientists.
32.24 13.0 2.48
Accuracy refers to how close the result of an experiment 23.77 9.1 2.61
or a data point comes to the ”true value.” (See Percent 13.25 5.0 2.65
Error below.) 15.09 6.0 2.52
14.26 6.0 2.38
Precision refers to how many digits your measuring 15.67 6.0 2.61
instrument is able to determine in a measurement, or how Average 2.56
many significant digits your instrument can measure. A Standard deviation 0.12
good-quality measuring device can usually measure more
precisely, that is, give more digits, than a poorer quality device.
Example: If you determine the acceleration due to gravity (g) to be 11.9971 m/s2,
your data is precise but not very accurate. (The number 11.9971 is
precise to 6 digits. In other words, it has 6 significant digits.) A
measurement of 10 m/s2 is not very precise but it is quite accurate. (The
true value for g is about 9.81 m/s2.) Consult with your teacher or a
textbook on how to correctly make calculations that take into account the
number of significant digits in your data.
Precision is also used to discuss the variability of a set of data. This is discussed further
under Measurements of Variability (see below).
Example: One student obtained the following data when measuring the
acceleration due to gravity: 9.8 m/s2, 9.7 m/s2, 9.9 m/s2, 9.6 m/s2, and 9.8
m/s2. Another student obtained this data: 10.5 m/s2, 9.8 m/s2, 8.3 m/s2,
11.7 m/s2, and 7.9 m/s2. The first data set is very precise while the
second is not. Both data sets give similar mean values and appear to be
quite accurate.
Find the central tendency in your data.
MSSEF How to Do a Science Fair Project Guide 139.2 MEASURES OF CENTRAL TENDENCY
The statistics listed below are used as a measurement of the central tendency in a data set.
Most scientific calculators will calculate these statistics for you; learn how to use a scientific
calculator.
• Mean or average
• Median - the middle data point
• Mode - the most common data point
Mean or average: x=
∑ x +x 1 2 + x 3...+ xn
where x n = each data point
n and n = number of data points
Determine the variability in your data. Variability refers to how close together your data
€ curve (often a line).
points are or how close your data points are to given
€
9.3 MEASURES OF VARIABILITY
• Range - the smallest data point subtracted from the largest data point
• Standard Deviation - (S or ς for samples, σ for populations)
• Correlation Coefficients (R) - used for data that has been curve fitted
Standard Deviation
€
Since most student science involves samples and not a whole population the following
equation applies to samples:
n
∑(x i − x )2
i =1
ς= where x i = each data point
n −1
and n = number of data points
Graph your data
€
€ It is always a good idea to graph your data either on graph paper or using computer software
such as Microsoft Excel™, Vernier Graphical Analysis™, KaleidaGraph™, or Mathcad™.
The following are examples of common graph types:
• line graph
• bar graph
• pie graph
• pictogram
• histogram
• scatter plot
When both variables involve data that is continuous (decimal numbers can, in theory at least,
be found) most scientists prefer to use scatter plots. You will be able to infer the “true” shape
of the data with this type of graph. Scatter plots can be line- or curve-fitted.
MSSEF How to Do a Science Fair Project Guide 14Remember that each graph should have axes that are properly calibrated (i.e., each increment should represent the same numerical amount). Be sure to include the entire range of your data in the scales of your axes. The independent variable is plotted on the x-axis, and the dependent variable is plotted on the y-axis. Does your data vary directly with x (that is, as x increases, y increases)? Does your data vary inversely with x (that is, as x increases, y decreases)? If your data looks as if it might be describing a line, you can do a best-fit line using a clear plastic ruler or using computer software. The correlation coefficient (R) is a measure of how closely your data is fitted (R=1 means that all data points are exactly on the line or curve). When using a ruler, make sure that you have as many data points above the line as below, and that the distances of the data points to the proposed line on average are minimized. Other kinds of curves can also be fitted using mathematics or computer software. By fitting your data to an appropriate line or curve, you can obtain an equation that describes your data. Predictions can be made from this equation, which can be used to verify your results with further experimentation. Compare with accepted values to determine its accuracy. 9.4 MEASURES OF ACCURACY Percent Error If there is an accepted value associated with your data or if other scientists have data with which you can compare your data, the appropriate statistic for this comparison is percent MSSEF How to Do a Science Fair Project Guide 15
error. This statistic is used to assess the accuracy of your data.

            | your value - accepted value |
% Error =                                   × 100
                    accepted value

Hypothesis Tests
You may want to learn more about testing null hypotheses and how to determine confidence
  € for the credibility of your results. The t-test is a hypothesis test used for small samples.
levels

9.5 ANALYZING ERRORS

Ask yourself these questions:
• What were the limitations of your experiment?
• How were extraneous variables minimized?
• Comment on your percent error. Was this favorable or not favorable?
• What went wrong? What went right?
• How might you improve your experimental design in future studies?

MSSEF How to Do a Science Fair Project Guide                                       16
10.0 LOOKING FOR TRENDS AND FORMING A CONCLUSION Now is the time to look at the results of your experiment and the analysis of your findings. • Did you collect enough data? • Do you need to collect more data? • Were you variables and control properly designated? • Which variables are important? • How do your results compare with other studies? (Refer to your background information) • Do your results seem reasonable? • Are there any trends in your quantitative/qualitative data? • What might explain these trends? • How might the results of your work be relevant to society or to other scientists working in your field? • Do you need to do more experimentation? • Do your results support your hypothesis? If not, why not? Has your experiment tested your hypothesis? Ask and answer as many questions about the project as you can. This will help to direct your thoughts and help you to decide whether or not you need to modify, do retrials, or complete the project at this time. Remember one very important thing - keep an open mind about your findings. Never change or alter your results to coincide with what you think is accurate or with a suggested theory. Sometimes the greatest knowledge is discovered through so-called mistakes. MSSEF How to Do a Science Fair Project Guide 17
11.0 WRITING THE PAPER
Your report will provide interested readers with a comprehensive look at your topic and
research. Your paper should include information collected during the research as well as a
complete description of your experiment, data, and conclusion.
There are two types of science research papers, and they may be separate or combined.
The first type is a literature review. In the literature review, you compile and summarize large
amounts of scientific research done by others that cover the topic chosen for investigation.
You do not include your own laboratory investigations in the literature review. The review
should be extensive, citing as many sources as you can locate on the topic.
The second type of research paper describes the specific experimental project you have
completed. It should contain an abbreviated (abstract) or full literature review as part of the
background information as well as your hypothesis, experimental design (methods and
materials), experimental results, brief data summary, discussion and analysis of the results,
and bibliography.
You can do both types of paper
separately, or put them together in A good research paper should be written in the
one inclusive report. A thorough past tense and have the following components:
search of the scientific literature
published on the topic covered in the • Title and/or Title Page
project helps to make you an • Abstract, Summary Page/Index
"expert" in your particular field of • Introduction, including Literature Review
study, and prepares you to • Hypothesis or Statement of Purpose
confidently discuss the area of study • Materials and Experimental Methods
with others. • Data and/or Results
• Discussion and Analysis of Data or Results
Use scientific terminology in the • Conclusions
paper. It will help you to feel more • Acknowledgements
at ease with the topic. Your job is to • Bibliography
convey the facts and information you have gleaned in an organized, readable, and concise
manner.
Considerations for Engineering or Computer Projects
• Title Page
• Abstract or Summary Page
• Introduction - Background from reading about similar devices or systems, how they work,
their history etc.
• Statement of Purpose - What was the device, program or system designed to do?
• Materials and Experimental Methods
Describe the structure and parts. How does the device, system or program work?
Include a detailed schematic or algorithm.
Give measurable characteristics of the device or system (for example: dimensions,
weight, power supply, voltage generated, software and hardware requirements).
• Data or Results - How did you prove your device or system works?
• Discussion and analysis
MSSEF How to Do a Science Fair Project Guide 18 If the system was tested over a range of conditions, graphs can be used effectively.
What problems prevent the device or system from being fully successful?
Give suggested improvements.
• Conclusion – Did the device or system do what it was designed to do?
• Acknowledgements
• Bibliography
After you have gathered all your
information, you may find the following
steps helpful:
1. Produce a report outline that provides
a skeletal structure for the entire
paper. A good outline will give
direction, cohesiveness, and
orderliness to the paper, and convey
the information in a concise format.
Be descriptive but brief. Reduce large
quantities of information into brief
"bullet statements" for use throughout
the paper. Organize them into a step-
by-step description to walk the reader through the project in an orderly progression. Use
your sources to "work for you" and distill information into a reasonable length. When you
write from the outline, each paragraph should have a topic sentence and a concluding
sentence to direct the reader.
2. If you use note cards, organize these by sequencing them in a desired order.
3. Write an introductory paragraph that acquaints the reader with the research paper. Give
a preview of information that is covered in the paper. Briefly highlight the main points of
the paper (50 - 75 words).
4. Take material from the note cards and put it into written text.
5. Footnote or cite sources properly. Cite references directly within the paper with the
citation set off by parentheses, and cross-referenced in the Bibliography or List of
References. Use citations when you give facts such as numbers, data, and statistics,
quote a source directly, cite another researcher's results, or cite information received
from another expert in the field.
6. Integrate support material. Be certain that pictures, diagrams, tables, and graph axes are
properly labeled and include units of measure.
7. Write a summary paragraph as your conclusion. Make a concluding statement and bring
the paper to a close. It should state whether or not the results supported the hypothesis.
8. Be careful to acknowledge all borrowed material whether paraphrased or directly quoted.
9. Be careful to give proper credit. Use quotes and citations where appropriate.
10. Reference sources in the Bibliography, which may also be called the List of References,
References Cited, Literature Cited, or Sources Cited.
11. Check spelling, grammar, and punctuation. Do not rely on software alone to do these
checks.
12. Read the paper aloud and check for clarity and readability.
13. Have someone else read the paper.
14. Correct errors.
15. Use standard size (8½ x 11) white paper. Use standard margins. Type on one side only.
16. Have your report(s) with you as a part of your display when presenting your project.
MSSEF How to Do a Science Fair Project Guide 19Citing Sources; Avoiding Plagiarism in Scientific Work
When using the work of other scientists you must document their contributions by citing your
sources of information. Scientists use the American Psychological Association (A.P.A.)
Guidelines, which differ from those used in writing English, or History papers. There are no
footnotes at the bottom of the page. The acknowledgement of a direct quotation or your use
of some one else’s original idea is done within the text of the paper itself. Use citations to cite
a fact, quote directly from a source, or to cite information obtained personally from an expert.
The citation is set off using a “signal phrase” or with parentheses and is cross-referenced in
the Bibliography.
1. Book or Article: Author(s) last name(s), year of publication
“Many more worms were found in the dark compost than the light compost” (Martin and
Stephen, 2000).
OR
Martin and Stephen (2000) found that worms prefer dark colored compost.
OR
Worms prefer dark colored compost (Martin and Stephen, 2000).
2. Encyclopedia or CD-ROM: Author or if no author is listed article title, year,
encyclopedia or CD-ROM
(Worms, 2000, Encyclopedia Britannica)
3. Letter or Conversation with an Expert: Name of expert, state “personal comm.” (for
personal communication), date of the communication
Martin (pers. comm., September 13, 1952) said that worms prefer dark colored compost.
OR
Over 50% more worms were found in the dark compost than the light compost (Stephen,
pers. comm., September 13, 1952)
4. Internet source: Author, date, and state “Internet”
(Martin and Stephen, 2000, Internet) OR (Compost and Worms, 1952, Internet)
For more details you may want to consult A Writer’s Reference by Diana Hacker or Purdue
University’s APA Style Guide (http://owl.english.purdue.edu/).
Bibliography or References
Most scientists use the American Psychological Association (APA) system for citation and
references; guidelines are as follows:
1. Give the last name of the author followed by initials. Include all of the authors’ names in
full (not et al as is found when citing in text).
2. Alphabetize your entries by last name of author or editor. If there is neither, use the first
important word in the title.
3. With two or more works by the same author, use the author’s name for all entries and
arrange the entries by date, the earliest first.
4. Indent the second and additional lines of each entry five spaces.
5. Place the date of publication in parenthesis immediately after the last author’s name.
6. Underline or italicize the titles and subtitles of books; capitalize only the first word of the
title and subtitle (as well as all proper nouns).
MSSEF How to Do a Science Fair Project Guide 207. Before page numbers of newspaper articles and works in anthologies use “p.” or the
plural ‘pp.” before the page numbers. Do not use these before page numbers of articles
appearing in magazines and scholarly journals.
8. The publisher’s name may be given in short form as long as it is easily identifiable.
Note the punctuation in the samples below. Each item is separated by a period “.” A comma
“’,” precedes the pages. A colon “:” separates city of publication and publisher.
BOOKS
Author’s last name, Initials. (Year of Publication). Title of Book. City of Publication:
Publisher
Emery, K.O. (1997). A Coastal Pond Studied by Oceanographic Methods. Woods Hole,
MA: Oyster Pond Environmental Trust Inc.
JOURNALS, SERIALS OR MAGAZINE ARTICLES
If Author is Named:
Author’s last name, Initials. (Year of Publication). Title of article. Journal name (or
abbreviation). Volume (number), page numbers.
Weiss, P. (May 13, 200). Gravity gets measured to a greater certainty. Science News,
Volume 157, No. 20, 311-312
If No Author is Named:
Title of Article. (Year of Publication). Journal Name. Volume (number), page numbers.
Gravity gets measured to a greater certainty. (May 13, 2000). Science News, Volume 15,
No. 20, 311-312
NEWSPAPER
Author’s last name, Initials. (Year of Publication, month, day). Title of article. Name of
Newspaper, Page number(s)
Zuckoff, M. (2000, 10, 31). What’s killing the coral reefs? The Boston Globe, F1-F2
PERSONAL INTERVIEW, LETTER OR TELEPHONE CONVERSATION
Name. Title or position, Institution, Location. Type of communication, date(s) of interview(s)
Shore, S. Senior Scientist. Woods Hole Oceanographic Institution, Woods Hole, MA. Pers.
Comm., June 14, 1984.
MSSEF How to Do a Science Fair Project Guide 21ELECTRONIC INFORMATION
Give the same publishing information that you would give for any material and in addition give
the pertinent information about the electronic source (address). For material retrieved from
an online source, also provide the date that you accessed information.
CD-ROM
Author, A. (Date). Title of article. In Title of the database (Type of medium). Available:
Supplier/Database Identifier or Number (Version).
Lawrence, J. C. (1996). Algae. In The 1996 Grolier Multimedia Encyclopedia. (CD-ROM).
Available: Mindscape, Inc. (Version 8.0.3)
INTERNET SOURCES
If Author is Named:
Author, A. (Date). Title.
Smith, M. (Dec. 25, 2000). How to Do Your Science Project.
If No Author is Named:
Title. (Date).
How to Do Your Science Fair Project. (Dec.25, 2000).
MSSEF How to Do a Science Fair Project Guide 2212.0 WRITING THE ABSTRACT The abstract is the last part of the project report to be written. It is written after the project is completed. It is a short summary of your project that informs the reader what the project covered, and what has been accomplished. Often the abstract has to conform to a specified space or number of words. Making every word count is very important when you are completing an abstract. Only minimal, if any, reference to previous research and experimental work may be included. The abstract focuses on this year's work. It should not include acknowledgments or the work done by a mentor. An abstract should include: Four Paragraph Format • A statement of purpose or a hypothesis. • The experimental design, descriptive outline of 1. Brief Background and the procedures or methods. Statement of Purpose • A summary of results. 2. Method or Design • Your conclusion. 3. Results • Application of the research project, if you have 4. Conclusions and Applications space, and your ideas for future studies. The conclusion should include a summary and analysis of the results and answer the reader's questions of how the results related to the purpose. It should state the relevance or significance of the results and state practical applications of the research to everyday situations. Writing, editing, and rewriting to make every word count is a very important part of the abstract-writing process. Sample Abstract Effects of Marine Engine Exhaust Water on Algae Mary E. Jones, Hometown High School, Hometown, MA This project in its present form is the result of bioassay experimentation on the effects of two-cycle marine engine exhaust water on certain green algae. The initial idea was to determine the toxicity of outboard engine lubricant. Some success with lubricants eventually led to the formulation of "synthetic" exhaust water which, in turn, led to the use of actual two-cycle engine exhaust water as the test substance. Toxicity was determined by means of the standard bottle or "batch" bioassay technique. Scenedesmus quadricauda and Ankistrodesmus sp. were used as the test organisms. Toxicity was measured in terms of a decrease in the maximum standing crop. The effective concentration - 50% (EC 50) for Scenedesmus quadricauda was found to be 3.75% exhaust water; for Ankistrodesmus sp. 3.1% exhaust water using the bottle technique. Anomalies in growth curves raised the suspicion that evaporation was affecting the results; therefore, a flow-through system was improvised utilizing the characteristics of a device called a Biomonitor. Use of the Biomonitor lessened the influence of evaporation, and the EC 50 was found to be 1.4% exhaust water using Ankistrodesmus sp. as the test organism. Mixed populations of various algae gave an EC 50 of 1.28% exhaust water. The contributions of this project are twofold. First, the toxicity of two-cycle marine engine exhaust was found to be considerably greater than reported in the literature (1.4% vs. 4.2%). Secondly, the benefits of a flow-through bioassay technique utilizing the Biomonitor was demonstrated. MSSEF How to Do a Science Fair Project Guide 23
13.0 PREPARING YOUR BOARD AND VISUAL DISPLAY
The visual display on the board is meant to attract
attention and provide information. Your visual display
should challenge onlookers to want to know more
about your project.      Photographs, graphics, and
tables, along with the written text should be included.
A well-thought-out and interesting title can also attract
attention.

Only material from this year’s project can be placed
on your board. If your project is a continuing project,
a short background statement (1 to 2 paragraphs) can
summarize the preceding year’s work as background
only.

You should take pride in the assembly of the board and it should reflect your work as you
want it represented. Neatness, completeness, and clarity are very important. The board and
visual display should help you to present your project logically and serve as a prop for you to
illustrate what you have done.

Read the rules that govern what can and cannot be exhibited before you begin. Pictures can
often help you to show what you have used, and thus you do not need a lot of equipment or
glassware and chemicals in your display.

Be creative. Use color combinations that are pleasing to the eye. Arrange the board in
several ways before attaching all of your materials. Keep background spaces to a minimum.
However, do not crowd tightly so that everything seems too packed. Keep it simple. Make it
easy for the judges and others to assess what you have done.

   The following items are part of the board:

   •   Title - an attention grabber to make someone want to know more about the project
   •   Introduction or Background
   •   Problem or Purpose
   •   Hypothesis
   •   Procedure or Experimental Design
   •   Materials Used
   •   Results (Data, charts, diagrams, graphs, photographs of the results, etc.)
   •   Analysis
   •   Conclusions
   •   Bibliography (Optional; your bibliography may be placed in the notebook instead)
   •   Applications
   •   Future Applications or Future Research

Carefully check the safety and size before you cut your board to size. Poster board - which
may need to be reinforced so it can stand alone - mat board, and foam core boards are easy
MSSEF How to Do a Science Fair Project Guide                                      24
to work with and are lightweight.

Your project title and section headings on your board should be large enough to be easily
read from six feet away. The regular text displayed on your board should be readable from a
distance of three feet. Although you may be tempted to make your board larger, remember
that your board should not be mostly empty space. A smaller size board that is nicely laid out
and tells the story is far more attractive than a large on that is not filled.

Correctly and clearly label graphs, diagrams, and tables. Make certain that the graphs are
titled and have both axes labeled clearly and accurately. Use photographs to validate and
help explain parts of the project that would be difficult to explain, or that would require time to
explain. You must obtain informed consents from any people you show in the photographs.
Decide if photographs of this type would be better placed in your notebook or a photo album
rather than on your board. Also, you must have permission to use pictures from books or
other sources.

Acknowledgments should be placed in your log, not on the board.

Remember, an eye-catching display helps to showcase your project, but your personal
presentation is far more important. The board does not need to be expensive. Equipment
built by you, construction paper, markers, and poster board can be very effective and
inexpensive.

SAMPLE BOARD

                                                TITLE
     Introduction
                                                                               Conclusion

                                                                             Applications or
     Background                           Data & Results                       Relevance
      Problem or                         Graphs & Tables                        Future
       Purpose                                                                Applications
                                               Pictures
      Hypothesis                               (captioned)
                                                                              Bibliography
                                                                                 (optional)
      Methods &                                Analysis
       Design

MSSEF How to Do a Science Fair Project Guide                                          25
14.0 ORAL PRESENTATION Be ready to explain your project to another person — possibly a student, a parent, a teacher, or a judge. A description of each part of the project — from how the idea originated, through the literature search, the formation of the question or problem, the hypothesis, experimental design, results, analysis, conclusions, and future applications — is important to relay to the listener. Below are some key points to a good presentation. • Be positive and confident of your work. You have worked hard and know your project better than anyone else. Now present! • Practicing ahead of time in front of a mirror, family members, friends, your class, or others is very important. Sometimes practicing in front of a video camera can be helpful. While watching the video you may notice habits or ways of presenting that you wish to change. • Try not to read from a script. • Look interested in what you are doing. The judges or other interested people want to know what you have done and what you have learned. • Leave gum, CD Players/MP3 Players, Cell Phones, Laptops, and other distracting materials at home during the fair. • Dress appropriately and neatly. Wear comfortable shoes. Remember, you are representing yourself, your family, and your school at all times. • Keep eye contact with your listeners during your presentation. • Use your board/poster as a prop and tool to help you present you work. • Present your work enthusiastically. Make certain you guide the listener or judge through your project. Have notebooks and reports in clear view and refer to them in your presentation so that the listener or judge will be cognizant of the amount of time, work, and effort you have invested in your project. • Learn the judge’s name (ask for it if he or she does not have a nametag), and address the judge using his or her name. Learn from judges by asking them questions, or asking if they have additional information or suggestions that you might consider. Be sure to record any suggestions that they give you. • Answer all questions that you can. If you are not certain of an answer, you might say, “I’m not certain, but I think it might be...” If you do not know the answer, you might give the person an idea of how you would find an answer to the question. It is also appropriate to say something like, “That was not part of my research or experimental plan.” You might ask the person if he or she knows and could help you. Use your judges as resources. Sometimes members of the public audience can give helpful suggestions. Note any helpful information in your logbook. MSSEF How to Do a Science Fair Project Guide 26
You can also read