Teachers Guide to accompany the presentation '"Teaching Astronomy Through Active Engagement" - 2015 Stanford University. Permission given to use ...
←
→
Page content transcription
If your browser does not render page correctly, please read the page content below
Slide 1

 Teachers Guide to accompany the
presentation ‘”Teaching Astronomy
   Through Active Engagement”

  © 2015 Stanford University. Permission given to use for educational purposes.

                                                                                  1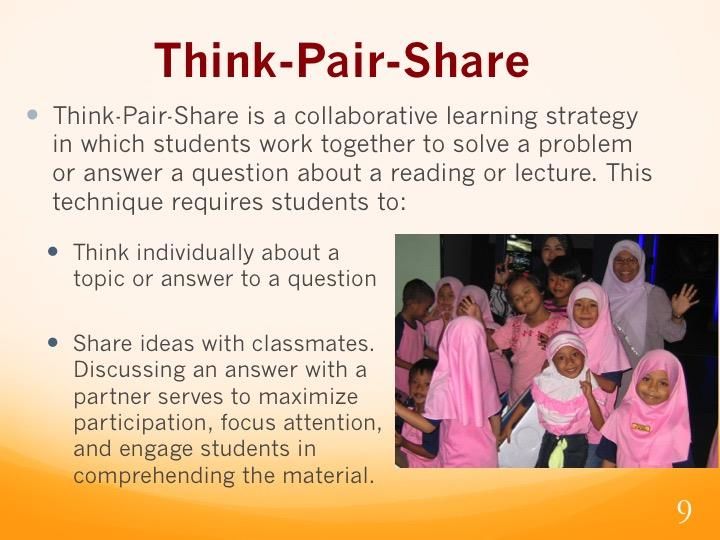
Table of Contents

Introduction .............................................................................................................................................. 3
How People Learn................................................................................................................................... 4
  How Effective is Lecturing? ............................................................................................................ 4
  What is Active Engagement?.......................................................................................................... 5
  How People Really Learn ................................................................................................................ 6
  How Can Teachers Help? ................................................................................................................. 7
  Examples of Active Engagement Techniques .......................................................................... 8
  Does Active Engagement Work? .................................................................................................. 9
  Let’s Experiment.............................................................................................................................. 10
  Think-Pair-Share ............................................................................................................................. 11
  Think-Pair-Share Procedure ....................................................................................................... 12
  Let’s try Think-Pair-Share ........................................................................................................... 13
  Signal Cards ....................................................................................................................................... 14
  Signal Cards Procedure ................................................................................................................. 15
  Let’s try Signal Cards ..................................................................................................................... 16
Teaching Moon Phases Through Hands-on Modeling ........................................................... 17
  Teaching Moon Phases .................................................................................................................. 17
  Modeling of Moon Phases Activity ........................................................................................... 18
  Modeling Eclipses Activity ........................................................................................................... 20
  Report Your Findings..................................................................................................................... 21
  Ordering Moon Phases Activity ................................................................................................. 22
  Report on Ordering Moon Phases Activity ............................................................................ 23
Wrapup & Final Discussion .............................................................................................................. 24
  Did active engagement help? ...................................................................................................... 24
  Final Discussion ............................................................................................................................... 25
Going Further ........................................................................................................................................ 26
  Challenge 1 ........................................................................................................................................ 26
  Challenge 2 ........................................................................................................................................ 27
  Challenge 3 ........................................................................................................................................ 28
  Challenge 4 ........................................................................................................................................ 29
  Challenge 5 ........................................................................................................................................ 30
  Challenge 6 ........................................................................................................................................ 31
Appendices ............................................................................................................................................. 32
  Appendix A – Teaching Moon Phases -- Presenter Guide ................................................ 32
  Appendix B - Signal Cards ............................................................................................................ 44
  Appendix C - Moon Phase Approximate Rise/Set Times .................................................. 45
  Appendix D – Resources ............................................................................................................... 46

                                                                                                                                                          2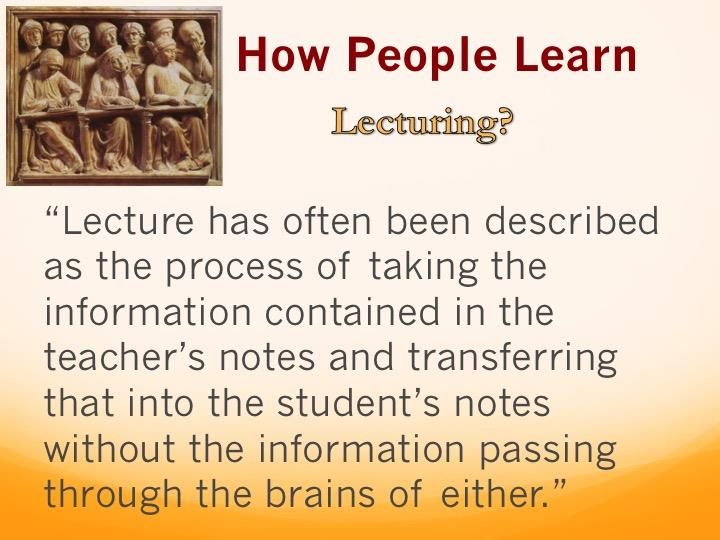
Introduction
This workshop is designed to introduce teachers to the concept of teaching through
Active Engagement. Teachers will learn new techniques to engage students as well as
how to apply them by participating in a hands-on, interactive model of understanding and
teaching the phases of the Moon and eclipses.

This workshop was developed as part of a program to bring modern science teaching
techniques and activities to high school educators in Developing Countries, though the
lessons are relevant to other locations and grade levels.

This workshop is also heavily inspired by the research of Dr. Edward E. Prather, of the
University of Arizona, particularly his presentation “How Research into Student Beliefs
and Reasoning Difficulties are Used to Create Effective Educational Environments”, a
presentation given at a NASA Forum Educational Workshop. See also Research on a
Lecture-Tutorial Approach to Teaching Introductory Astronomy for Non–Science
Majors, Prather, E. E.; Slater, T. F.; Adams, J. P.; Bailey, J. M.; Jones, L. V.; Dostal, J.
A., Astronomy Education Review, 3(2) 2005.

A good deal of the information in this presentation comes from “How People Learn –
Brain, Mind, Experience, and School” by the Committee on Developments in the Science
of Learning, John D. Bransford, Ann L. Brown, and Rodney R. Cocking, editors with
additional material from the Committee on Learning Research and Educational Practice,
M. Suzanne Donovan, John D. Bransford, and James W. Pellegrino, editors.
Commission on Behavioral and Society Sciences and Education, US National Research
Council, National Academy Press, Washington, D.C.
                http://www.nap.edu/openbook.php?isbn=0309070368

This is one of the best books on teaching and learning available. It is highly
recommended that participants obtain and read the book. It is downloadable for free.

                                                                                               3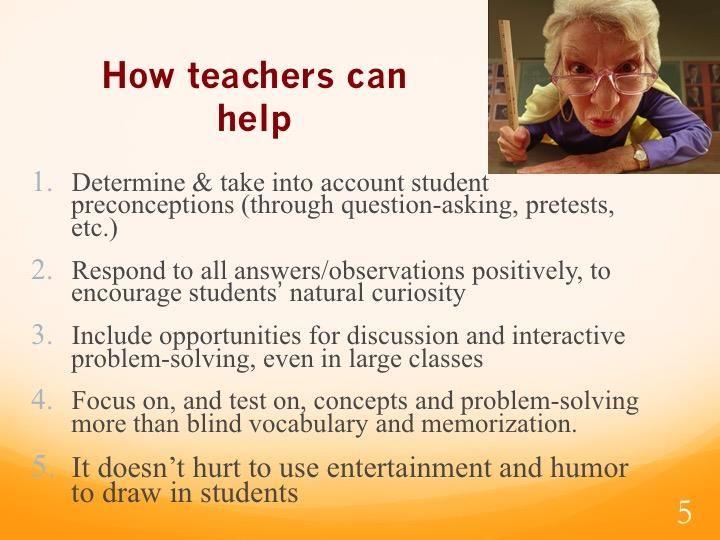
How People Learn

                                                  Slide 2

How Effective is Lecturing?
Ask the teachers how many learned in school primarily through the lecture technique.
Did they like it? Then ask them how many primarily rely on lecture technique to teach.

Lecturing is mainly a one-way method of communication that does not involve
significant audience participation. Therefore, lecturing is often contrasted to active
learning, which we will discuss later. The practice of lecturing evolved in the medieval
university, before the invention of the printing press, where the instructor read from an
original source to a class of students who took notes since they didn’t have books.

Studies have shown there is more new vocabulary in an introductory science class than in
a foreign language course. And teachers sometimes forget that the human brain can
effectively hold only ~7 items in short-term memory. So if students receive 7 new
vocabulary words at the beginning, there is little “space” left for other details and
concepts. Focusing on concepts and in-depth understanding, rather than on vocabulary
and unnecessary details, improves learning and retention in teaching astronomy.

According to research, the lecture method is a very difficult way to learn. Just by
listening, students pick up only about 10% of what is heard.

However, some lecture is almost always necessary. If it is kept to brief periods (7-10
minutes) at a time, and interspersed with Active Engagement, then retention and
understanding can be significantly improved.

Source of the quote is unknown. It was taken from Ed Prather’s presentation (see intro). The image is in
the public domain.

                                                                                                           4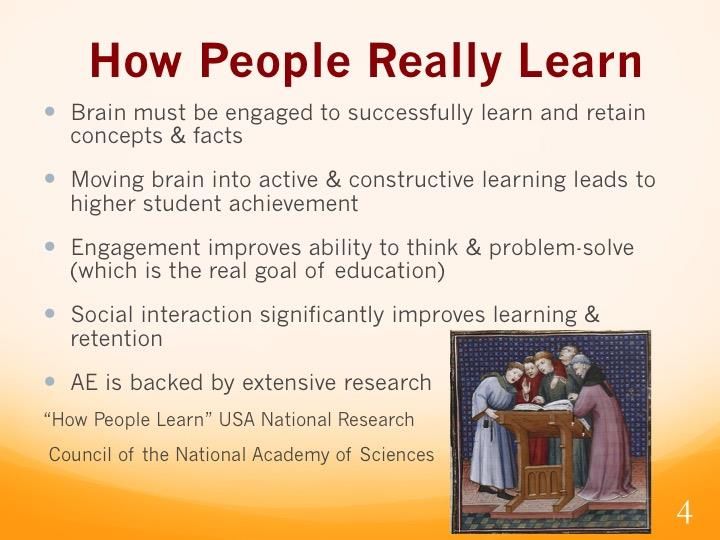
Slide 3

What is Active Engagement?
Active engagement, or active learning, is a model of instruction that places more of
the responsibility for learning on the learners.

According to Wikipedia: “It [AE] was popularized in the 1990s by its appearance on
the Association for the Study of Higher Education (ASHE) report (Bonwell & Eison
1991). In this report they discuss a variety of methodologies for promoting "active
learning". They cite literature which indicates that to learn, students must do more
than just listen: They must read, write, discuss, or be engaged in solving problems. It
relates to the three learning domains referred to as knowledge, skills and attitudes,
and that this taxonomy of learning behaviors can be thought of as "the goals of the
learning process". In particular, students must engage in such higher-order thinking
tasks as analysis, synthesis, and evaluation. Active learning engages students in two
aspects – doing things and thinking about the things they are doing.”

                                                                                       5
Slide 4

How People Really Learn
Numerous studies have shown that introducing active learning activities, especially done
before, rather than after, lectures or readings, results in deeper learning, understanding,
and transfer. In an active learning environment learners are immersed in experiences
within which they are engaged in meaningful inquiry, action, imagination, invention,
interaction, hypothesizing and/or personal reflection.

Image is in the public domain.

                                                                                          6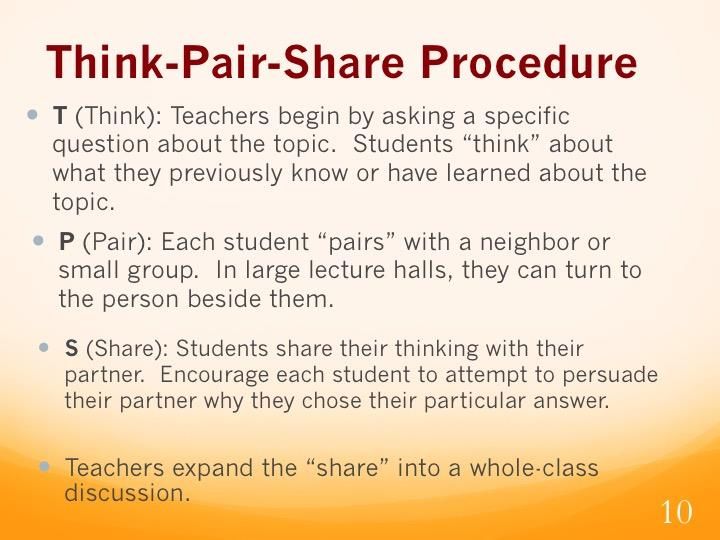
Slide 5

How Can Teachers Help?

Recent research shows that the human brain often discards information after about
30 days when that information hasn’t been accessed. This reaffirms research that
shows students after taking college courses based on memorization usually “forgot”
most of the material within 6 months.

Image from: http://laborunionreport.com/2015/01/29/nea-insurance-scheme-
exposed-a-teacher-explains-why-he-his-fellow-teachers-decertified-the-nea/

                                                                                 7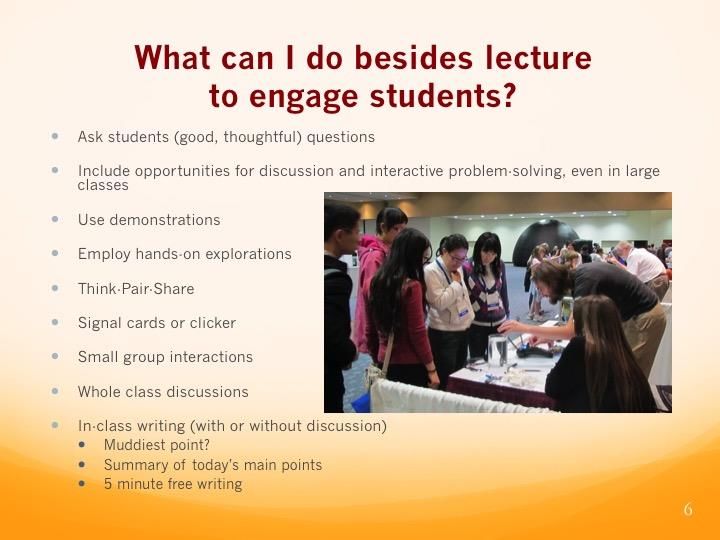
Slide 6

Examples of Active Engagement Techniques
We will spend the rest of the time experimenting with 3 of these techniques.

Image credit: Deborah Scherrer, engaging students at Exploration Station

                                                                               8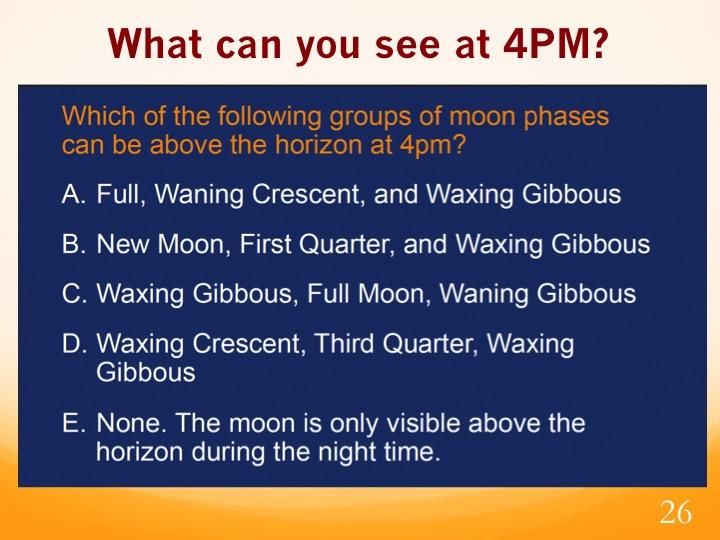
Slide 7

Does Active Engagement Work?

Again, some lecture is almost always necessary. If it is kept to brief periods (7-10
minutes) at a time, and interspersed with Active Engagement, then retention and
understanding can be significantly improved.

Research on a Lecture-Tutorial Approach to Teaching Introductory Astronomy for Non–
Science Majors, Prather, E. E.; Slater, T. F.; Adams, J. P.; Bailey, J. M.; Jones, L. V.; Dostal,
J. A., Astronomy Education Review, 3(2) 2005

Image is in the public domain.

                                                                                                    9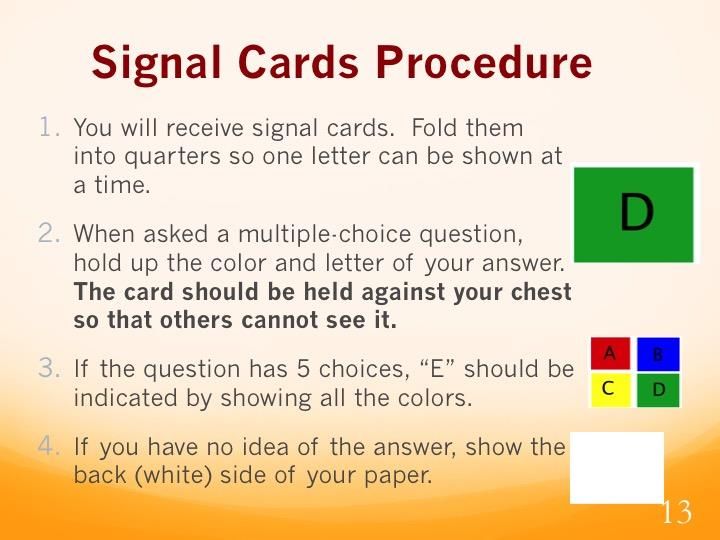
Slide 8

Let’s Experiment
In this workshop we will experiment with 3 of the suggested forms of Active
Engagement:
    1. Think-Pair-Share
    2. Signal Cards
    3. Hands-on activities

Each experiment will relate to the teaching of Moon phases and eclipses.
Image is in the public domain.

                                                                              10
Slide 9
Think-Pair-Share
Reading Rockets describes the Think-Pair-Share method like this:
“Think-pair-share is a collaborative learning strategy in which students work together to
solve a problem or answer a question about an assigned reading [or a lecture]. This
technique requires students to
Think individually about a topic or answer to a question
Share ideas with classmates. Discussing an answer with a partner serves to
maximize participation, focus attention and engage students in comprehending the
reading material.”
http://www.readingrockets.org/strategies/think-pair-share
Image credit: Deborah Scherrer, teacher and class in Malaysia
11Slide 10
Think-Pair-Share Procedure
1. Decide upon the text to be read, a brief lecture to be given, or a topic to discuss. Then
develop a set of questions or prompts that target key content concepts.
2. Describe the purpose of the strategy and provide guidelines for discussions.
3. Model the procedure to ensure that students understand how to use the strategy.
4. Monitor and support students as they work through the following:
T: (Think) Teachers begin by asking a specific question about the topic. Students
"think" about what they already know or have learned about the topic.
P: (Pair) Each student should be paired with another student or a small group. In large
lecture halls, they can turn to the person beside them.
S: (Share) Students share their thinking with their partner. Encourage each student to
attempt to persuade their partner why they chose their particular answer.
5. Teachers expand the "share" into a whole-class discussion.
The Think-Pair-Share method is suitable for students from grades 2 though college and is
commonly used in large lecture courses. For more information and examples, see
http://www.readingrockets.org/strategies/think-pair-share
12Slide 11
Let’s try Think-Pair-Share
Use the Think-Pair-Share technique to determine the answer, which is C-Gemini. Help
participants come to the conclusion that it is the Earth moving, not the Moon or
constellations.
Activity developed by Ed Prather and show-cased in his lecture (see introduction)
13Slide 12
Signal Cards
Signal Cards provide a classroom response system similar to clickers (though much
less expensive). They provide a good way to identify preconceptions and
misconceptions, assess student’s higher-order thinking skills, assure students have
picked up the main points, engage a class, recall facts, whatever.
Sample Signal Cards are available in Appendix B.
14Slide 13
Signal Cards Procedure
1. Pass out the signal cards. Have participants fold them in quarters, with the colors
showing.
2. Explain that, after you ask a multiple-choice question, and when an answer is
called for, they should hold up the color and letter of their answer. The card
should be held against their chest so that others do not see it. This both
minimizes embarrassment and gets you, the presenter, information you need to
proceed.
3. If a question has 5 possible answers, tell participants to hold up the opened sheet
to signify “e”.
4. If the participant doesn’t have a clue what the answer is, they should hold up the
blank side of the opened sheet.
5. Practice this once or twice by asking simple questions.
6. The next slide will pose a multiple-choice question to your participants. In your
classroom, you might pose your question via an overhead or computer projector.
7. Each participant submits an answer to the question using their signal card, again
held close to the chest so others cannot see their answer.
8. The presenter makes “on the fly” instructional choices in response to the cards;
for example, leading students in a discussion of the merits of each answer choice
or asking students to discuss the question in small groups.
Vanderbilt University Center for Teaching has an excellent website describing additional
details. Though based on clickers, the information is applicable to signal cards as well:
http://cft.vanderbilt.edu/guides-sub-pages/clickers/
15Slide 14
Let’s try Signal Cards
Pass out the signal cards. Have participants fold them in quarters, with the colors
showing. Explain that, after a question is asked, and when an answer is called for, they
should hold up the color and letter of their answer. To minimize embarrassment, the
card should be held against their chest so that others do not see it. In this case, pre-
conceptions and ideas about the causes of moon phases should help the Presenter address
these issues in the teaching exercise.
Ask participants to answer the question above with their signal cards. Do not tell them
the correct answer, no matter how much they beg. They will soon discover it for
themselves in the next activity.
Activity developed by Ed Prather, in his presentation to NASA Forum (see introduction)
16Teaching Moon Phases Through Hands-on Modeling
Slide 15
Teaching Moon Phases
Refer to the detailed procedures for doing the activity in Appendix A.
Start by having your participants stand around the light bulb in a circle, about 1-2 meters
from the bulb and an arm’s width apart. The bulb will model the Sun, participants’
heads the Earth, and eventually they will receive a ball to model the Moon. If you
choose to use the East/West cards, have participants tape or pin East onto their left
shoulder, and West onto their right shoulder. Tell them when they turn they should
turn towards the East/left.
This activity is inspired by one originally taught by Dennis Schatz to Project Astro participants. The full
activity is described in “Astro Adventures”, a publication of the Pacific Science Center. It is also available
through the Astronomical Society of the Pacific shop, as part of their Universe at Your Fingertips DVD. It
is highly recommended that teachers purchase one of these write-ups for doing a more extensive unit on
moon phases and eclipses:
http://www.astrosociety.org/education/the-universe-at-your-fingertips-2-0/
and
https://www.google.com/url?sa=t&rct=j&q=&esrc=s&source=web&cd=1&ved=0CB4QFjAAahUKEwiTr
Z3qlrvHAhVQKYgKHSDkBBM&url=https%3A%2F%2Fwww.pacificsciencecenter.org%2Fwp-
content%2Fuploads%2Fastro_adventures_order.pdf&ei=AqDXVZOkA9DSoASgyJOYAQ&usg=AFQjCN
Gqb_1F-qvHqt0jXCNdBpuR3uDoGA&sig2=EukJnLFQIgyZB-DRn27UYA
17Slide 16
Modeling of Moon Phases Activity
1. Darken the room after participants have gathered around the light bulb, but do
not pass out the Moon balls yet. Tell participants that:
The light bulb = Sun
Their head = Earth
Their nose = current location
Their left ear/shoulder = east
Their right ear/shoulder = west
The ball on a stick will eventually represent the Moon (but don’t pass
out the balls yet)
Ask participants to stand where it is “noon”, then midnight, sunrise,
sunset. Remember, they should turn towards their left shoulders. When
all participants get this right, have them
Turn around fully = 1 day
Walk around the Sun (counterclockwise) = 1 year
Repeat the daily cycle to make sure they “get it”
2. Pass out the ball Moons. Tell participants that the ball models represent the
Earth’s moon. Remind them that the Moon orbits the Earth (their head) in about
1 month (“moonth”).
183. Ask participants where the light on the Moon comes from [the Sun]
4. Have them stand facing the Sun/lamp at “noon” and hold up the Moon between
them/Earth and the Sun. What do they see? [New Moon or No Moon or a dark
moon]
5. Have them stand at midnight, with the Moon opposite the Sun. Make sure people
hold their Moon high enough for it to catch the light. What do they see? [Full
Moon]
6. Go back to noon (New/No Moon) and move their Moon a bit to the left. What do
they see? [small, waxing crescent ]
7. Continue moving the Moon leftward to 1st quarter, waxing gibbous, full, waning
gibbous, last quarter, and back to new. Give participants time to experiment
with their Moons.
Remind them that, all this time, their head/Earth is spinning through about ~29
day-night cycles during the time it takes for one month/moonth to go by.
8. Have participants figure out roughly what time of day the New Moon rises.
[sunrise]
9. What time of day does the Full Moon rise? [sunset]
10. What time of day do 1st quarter and last quarter rise? [1st quarter=noon, last
quarter=midnight)
11. What percentage of time is the Moon up during the day? [roughly half the time]
12. Ask them if all people on Earth see the same phase of the Moon on any given
day? [yes]
13. Do the people in the southern hemisphere see the Moon in the same way as the
northern hemisphere [yes, except that it is “upside down”]
Allow participants to experiment with all these concepts. Encourage questions and
discussions with neighbors.
19Slide 17
Modeling Eclipses Activity
Once participants are comfortable with moon phases, tell them they are now going to
model eclipses.
1. Have participants model a solar eclipse by placing the Moon, at noon, between the
Earth & Sun. In what phase is the Moon? [new]
2. Model a lunar eclipse by placing the Earth between the Moon and Sun at midnight.
In what phase is the Moon? [full]
3. How many people on Earth can see a total solar eclipse? Refer to the small shadow
that falls on peoples’ faces. [Only a few can see the total solar eclipse.]
4. How many people can see a total lunar eclipse? [everyone on the night side]
5. Why don’t we have solar eclipses and lunar eclipses every month? [the Moon’s orbit
is tilted so it rarely falls exactly in line with the Sun]
6. During a solar eclipse, what color is the corona? Refer to the image above. [white,
assuming your light bulb is white]. Hence what color is the Sun? [white – see
http://solar-center.stanford.edu/activities/SunColor/]
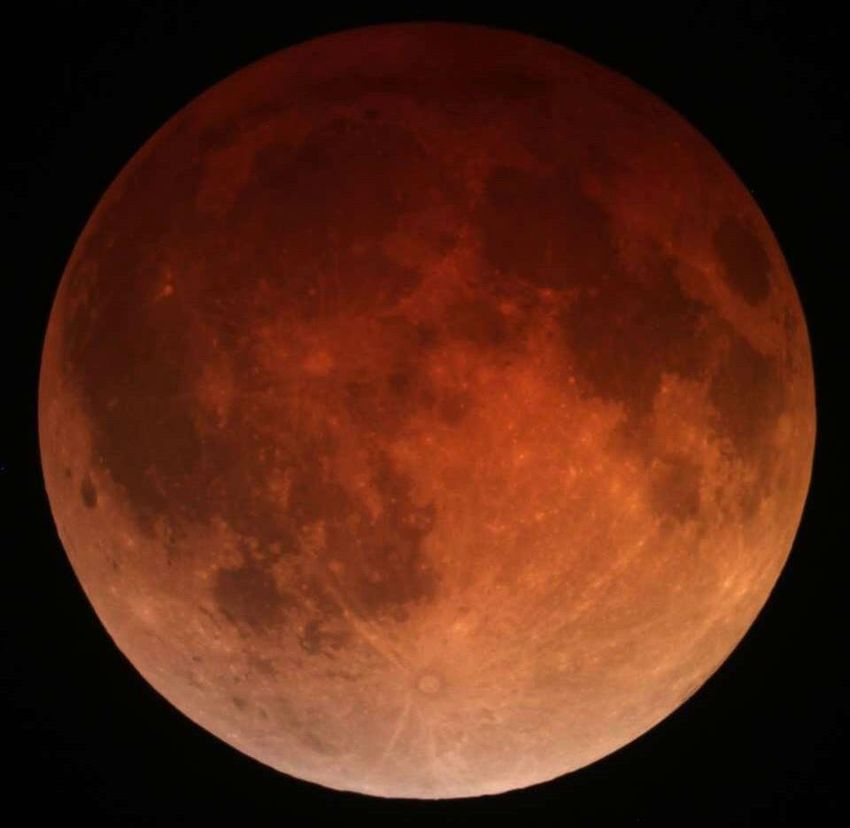
7. During a lunar eclipse, the Moon is often reddish. Again, refer to the picture above.
Do your participants know why? [light is scattered through the Earth’s atmosphere
and only the long red & orange waves get through to illuminate the Moon – see
http://solar-center.stanford.edu/activities/SunColor/What-Color-is-the-Sun.pdf]
Image credit: Solar Eclipse Seen in Baja California This photo mosaic shows a view of the sun from Baja
California during an eclipse on July 11, 1991, with the moon sliding in front of the Sun. Visit
http://laps.noaa.gov/albers/onepage.html for more information on this image. Steve Albers, Boulder, CO;
Dennis DiCicco, Sky and Telescope; Gary Emerson, E. E. Barnard Observatory Lunar eclipse:
HERIBERT PROEPPER / ASSOCIATED PRESS FILE
20Slide 18
Report Your Findings
After allowing time for participants to experiment with moon phases and eclipses,
encourage them to report findings and ask more questions.
Image credit: NASA
21Slide 19
Ordering Moon Phases Activity
More complete procedures are described in Appendix A.
1. Divide participants into pairs.
2. Copy a sheet of the Ordering Moon Phases imagery (Appendix A) for each pair.
Either cut out the images beforehand, or have participants cut them out. If you wish
to reuse the imagery, laminate the sheet before you cut it.
3. Ask participants to arrange the imagery in the order of the Moon phase cycle. They
may start with any phase they want. It might help if they arrange the imagery in a
circle.
4. Have participants discuss order with their pairs and come to a consensus.
5. Have pairs report to the group. Are there different interpretations? Encourage
discussion.
This activity was also inspired by one originally taught by Dennis Schatz to Project Astro participants. The
full activity is described in “Astro Adventures”, a publication of the Pacific Science Center. It is also
available through the Astronomical Society of the Pacific shop, as part of their Universe at Your Fingertips
DVD. It is highly recommended that teachers purchase these write-ups for doing the complete activities:
https://www.google.com/url?sa=t&rct=j&q=&esrc=s&source=web&cd=1&ved=0CB4QFjAAahUKEwiTr
Z3qlrvHAhVQKYgKHSDkBBM&url=https%3A%2F%2Fwww.pacificsciencecenter.org%2Fwp-
content%2Fuploads%2Fastro_adventures_order.pdf&ei=AqDXVZOkA9DSoASgyJOYAQ&usg=AFQjCN
Gqb_1F-qvHqt0jXCNdBpuR3uDoGA&sig2=EukJnLFQIgyZB-DRn27UYA
and
http://www.astrosociety.org/education/the-universe-at-your-fingertips-2-0/
Image credits: NASA
22Slide 20
Report on Ordering Moon Phases Activity
Participants should eventually discover that not only must they correctly identify the
Moon phase, but also use features on the Moon to determine which way is “up”. Rather
than indicating a right-or-wrong response, try to encourage participants to make
discoveries on how they should arrange the imagery.
Image on left: Students in India aligning their imagery. Submitted by a teacher who took the workshop.
23Wrapup & Final Discussion
Slide 21
Did active engagement help?
Discuss with your teachers the pros and cons of the Active Engagement approach. Was
anything confusing, difficult? What problems might they have taking the lessons into
their classrooms? How might the techniques be improved?
24Slide 22
Final Discussion
Wrap up.
The following slides give additional activities. They can be used in the workshop or
given to teachers to take back to their students.
25Going Further
Slide 23
Challenge 1
Use Think-Pair-Share or signal cards to answer the question.
The answer is D.
Activity developed by Ed Prather, in his presentation to NASA Forum (see introduction)
26Slide 24
Challenge 2
Moon phases timing is relative to latitude, longitude, and season. However, in a
generalized world (e.g. at the equator):
First quarter rises around noon & is highest at sunset.
Waxing gibbous rises around the middle of the afternoon & is highest ~9 PM.
Full moon rises around sunset & is highest at midnight.
Last quarter rises around midnight and is highest around sunrise.
(New moon rises at sunrise but is never visible.)
You can find a Moon Phase Rise/Set time chart in Appendix C.
1. The best time to observe the Moon, or any astronomical object, with a telescope is
when it is high in the sky.
2. The full Moon is difficult to observe in a telescope because it is too bright. Even with
a moon filter to cut down the light, there are no shadows so the craters and mountain
ranges are difficult to see and appear washed out.
3. Best time to observe the Moon is when it is only partially lit. When you focus a
telescope on the terminator (line between dark and light), you can see dramatic
shadows.
4. Since the last quarter requires students to arrive in the middle of the night, it is not a
particularly good choice for a star party.
So, around the first quarter or waxing gibbous phases are the best phases for
observing and for public events.
Activity developed by Deborah Scherrer, based on real-world experience.
27Slide 25
Challenge 3
Your principal wants to have a Star Party in 3 weeks. The best time for observing stars
is when there is little or no moonlight to interfere. You happen to look out the window at
10 AM and see the Moon on the western horizon. Will a Star Party in 3 weeks work?
Consult the moon phases timing chart in Appendix C.
If the Moon is on the western horizon ~10 AM, it is probably a waning gibbous, or
between a waning gibbous and last quarter.
3 weeks from then, the phases would be waning gibbous->waning crescent->new moon->
waxing crescent->first quarter->waxing gibbous->full
So, no, in 3 weeks would be a bad time to schedule a Star Party.
Activity developed by Deborah Scherrer, again based on real-world experience.
Image credit: “The waning gibbous moon stands out boldly between the evergreens this morning around 9
o’clock. Credit: Bob King” - See more at: http://astrobob.areavoices.com/2013/09/24/place-your-bets-on-
falls-high-rollin-moon/#sthash.WHx7ukyW.dpuf”
28Slide 26
Challenge 4
Consult the moon phases timing chart in Appendix C.
B – new moon, 1st quarter, & waxing gibbous
Activity developed by Ed Prather, in his presentation to NASA Forum (see introduction)
29Slide 27
Challenge 5
Consult the moon phase timing chart in Appendix C.
A is a waxing crescent
B is last quarter
C is first quarter
D is just past full
E is a waning crescent
Waxing gibbous -> past full -> last quarter -> waning crescent
Days: 0 4 11
So the answer is Only 1 (A); though depending upon the exact place in the waxing
gibbous phase, one might also argue for 2 (B)
Activity developed by Ed Prather, in his presentation to NASA Forum (see introduction)
30Slide 28
Challenge 6
Consult the moon phase timing chart in Appendix C.
Assuming we are near the equator:
A = last quarter high in sky ~sunrise
B = Full moon before sunrise ~4 AM
C = waxing gibbous ~6 PM
So the order would be A – C – B
(or C – B – A if you explicitly ask “after” sunrise)
Activity developed by Ed Prather, in his presentation to NASA Forum (see introduction)
31Appendices
Appendix A – Teaching Moon Phases --
Presenter Guide
Deborah Scherrer
Stanford University Solar Center
Activity originally developed by Dennis Schatz,
Pacific Science Center
Age Range:
Grades 4-14
Duration:
30-45 minutes
Overview:
This is an activity to teach and learn Moon phases and eclipses through hands-on
modeling. It has three sections:
1. Understanding what causes Moon phases activity
2. Understanding what causes eclipses activity
3. Assessment/Firm-up – ordering Moon phase imagery activity
This activity is inspired by one originally taught by Dennis Schatz to the Astronomical Society of the
Pacific’s Project Astro participants. The full activity is described in “Astro Adventures,” a publication of
the Pacific Science Center. It is also available through the Astronomical Society of the Pacific shop, as part
of their Universe at Your Fingertips DVD. It is highly recommended that users purchase one of these
write-ups for doing a more extensive unit on moon phases and eclipses:
http://www.astrosociety.org/education/the-universe-at-your-fingertips-2-0/
and
https://www.google.com/url?sa=t&rct=j&q=&esrc=s&source=web&cd=1&ved=0CB4QFjAAahUKEwiTr
Z3qlrvHAhVQKYgKHSDkBBM&url=https%3A%2F%2Fwww.pacificsciencecenter.org%2Fwp-
content%2Fuploads%2Fastro_adventures_order.pdf&ei=AqDXVZOkA9DSoASgyJOYAQ&usg=AFQjCN
Gqb_1F-qvHqt0jXCNdBpuR3uDoGA&sig2=EukJnLFQIgyZB-DRn27UYA
Activity Goals:
Participants will learn that:
The Moon is always half-lit by the Sun.
32 Moon phases are caused by observing the half-lit Moon at different times during
its orbit of the Earth.
All people on Earth see the same moon phase at the same time, though those in
the southern hemisphere see the moon upside down compared with the northern.
Solar eclipses are caused by the Moon coming exactly between the Earth and the
Sun, blocking all but a small shadow of the Sun’s light to the Earth. Only a small
number of people can observe a solar eclipse because of the small size of the
shadow.
Lunar eclipses are caused by the Earth coming directly between the Sun and the
Moon, casting a shadow on the Moon. Everyone on the night-side of the Earth
can observe a lunar eclipse.
Solar and lunar eclipses do not occur every month because the Moon’s orbit is
tilted to the Earth’s plane of orbit around the Sun. So the Moon, Earth, and Sun
rarely line up exactly.
Materials:
Light source: A tall floor lamp with the shade taken off. Or, a light bulb on a
stand or clip that can be placed about 1.5-2 meters high. Clear incandescent light
bulbs work best. Battery-powered lanterns sometimes work.
Small ball: A white (or light-colored) ~5cm (2”) ball for each
participant. These could be made of Smoothfoam™, Styrofoam™,
Model Magic™, clay, paper mache, or they could be golf balls, tennis
balls, wooden globes, round fruits, whatever. You may need to drill a
hole in each ball for the holder to be inserted.
Stick: 1 satay stick, pencil with a sharp point,
wooden stick, etc. to serve as a holder. You’ll need
1 for each ball. (Avoid very sharp sticks when
working with children.)
Signs (optional): A set of small West and East
paper signs for each participant; use tape or pins to
attach these to their shoulders (i.e. clothes over
shoulders). Stick-on name tags work well.
33 Dark place: A room that can be darkened, large enough for participants to form a
circle around the light bulb, about 1.5 meters (5 feet) away from it. You may
need to form 2 circles (and add another light bulb), depending upon the number of
participants you have. If you absolutely cannot find a dark room, you can still do
the activity by using small flashlights to light the model Moons. See Drive By
Science – Teaching Moon Phases:
http://solar-center.stanford.edu/activities/MoonPhases/Drive-By-Science-Moon-
Phases.pdf
Preparation:
Mention that the scale is way off in this activity. Give an example of the real Earth-to-
Moon scale, e.g. show a picture of the Earth and Moon to scale, or have a model of an
Earth and Moon to scale then mention how far away and how large the Sun would be on
that scale.
At this scale, the Sun would be ~4.5 meters in diameter and 1.4 km away.
Lesson Plan:
1. Get Oriented
a. Have participants pin or tape their East card on their left shoulder, and West card
on their right shoulder. When they turn, they should turn towards their left
shoulders.
b. Darken the room and gather participants around the light bulb, but do not pass out
the Moon balls yet. Tell participants that:
The light bulb = Sun
Their head = Earth
Their nose = current location
Their left ear/shoulder = east
Their right ear/shoulder = west
The ball on a stick will eventually represent the Moon (but don’t pass out the
balls yet)
c. Ask participants to stand where it is “noon”, then midnight, sunrise, sunset.
Remember, they should turn towards their left shoulders. When all participants
get this right, have them
Turn around fully = 1 day
Walk around the Sun (counterclockwise) = 1 year
Repeat the daily cycle to make sure they “get it”
34d. Pass out the ball Moons. Tell participants that the ball models represent the
Earth’s Moon. Ask them how long it takes for the Moon to orbit the Earth [about
1 month (“moonth”)].
2. Moon Phases Activity
a. Have participants hold up their Moons.
b. Ask participants where the light on the Moon comes from [the Sun]
c. Have them stand facing the Sun/lamp at “noon” with the
Moon between them/Earth and the Sun. What do they see?
[New Moon or No Moon or a dark moon] For now, ignore
the fact that they are also viewing a solar eclipse.
d. Have them stand at midnight, with the Moon opposite the
Sun. Make sure people hold their Moon high enough for it
to catch the light. What do they see? [Full Moon]
e. Go back to noon (New/No Moon) and move their Moon a
bit to the left. What do they see? [small, waxing crescent]
On what side of the Moon is the crescent? [right]
f. Have participants continue moving their Moon leftward to
first quarter, waxing gibbous, full, waning gibbous, last
quarter, and back to new.
g. Give participants time to experiment with their Moons.
35First Quarter Waxing Gibbous Full Moon
Waning Gibbous Last Quarter Waning Crescent
h. Remind them that, all this time, their head/Earth is spinning through about 29
day-night cycles during the time it takes for one month/moonth to go by.
i. Note that there are 2 points during the cycle when the Moon is in a crescent phase
(waxing and waning), a gibbous phase (waxing and waning), and a quarter phase
(first and last quarter). Ask participants to verbalize what differentiates these [the
sides of the Moon which are light or dark; the light part is always “pointing”
towards the Sun]
3. Timing
a. Explain to participants that, to determine rising and settings times, they will need
to use their periphery vision to determine when the light bub appears over their
left/east shoulder and when it “sets” beyond their right/west shoulder.
b. Have participants figure out roughly what time of day the New Moon rises.
[sunrise]
c. What time of day does the Full Moon rise? [sunset]
d. What time of day do first quarter and last quarter rise? [1st quarter=noon, last
quarter=midnight)
e. What percentage of time is the Moon up during the day? [roughly half the time]
36Moon Phases Timing
Day of Phase Rise (approximate) High in Sky Set (approx.)
cycle (approx.)
0 New Moon sunrise noon sunset
3.7 Waxing crescent ~ 9 AM ~3 PM ~9 PM
7.4 First Quarter noon sunset midnight
11 Waxing gibbous ~3 PM ~9 PM ~3 AM
14.7 Full Moon sunset midnight sunrise
18.4 Waning gibbous ~9 PM ~3 AM ~9 AM
22 Last Quarter midnight sunrise Noon
25.7 Waning crescent ~3 AM ~9 AM ~3 PM
29.5 New Moon sunrise noon sunset
4. General
a. Ask them if all people on Earth see the same phase of the Moon on any given
day? [yes]
b. Do the people in the southern hemisphere see the same phase of the Moon as in
the northern hemisphere [yes, except that it is upside down]
Image credit:
https://www.reddit.com/r/astrophotography/comments/19dx8z/last_nights_moon_from_the_southern_h
emisphere/
5. Eclipses
a. Have participants model a solar eclipse by placing the Moon, at noon, between
the Earth & Sun. In what phase is the Moon? [new] [this is also how they
observed the New Moon]
37b. Model a lunar eclipse by placing the Earth between the Moon and Sun at
midnight. This time, they should lower their Moon ball to fall into the Earth’s
shadow. In what phase is the Moon? [full]
c. How many people on Earth can see a total solar eclipse? Go back to the solar
eclipse arrangement and refer to the small shadow that falls on people’s faces
when they are modeling a solar eclipse. [Only a few people on Earth fall into that
shadow, so only a few can see the total solar eclipse.]
d. Go back to the total lunar eclipse. How many people can see a total lunar eclipse?
[everyone on the night side, because the shadow covers the entire Moon]
e. Why don’t we have solar eclipses and lunar eclipses every month? [the Moon’s
orbit is tilted so it rarely falls exactly in line with the Sun]
f. If you wish, show participants an image of a total
solar eclipse (one is attached). During a solar
eclipse, what color is the corona? [white]. Hence
what color is the Sun? [white – see
http://solar-center.stanford.edu/activities/SunColor/]
Credit: NASA/Cirtain
g. If you wish, show participants an image of a total
lunar eclipse (one is attached). During a lunar
eclipse, the Moon is often reddish. Ask your
participants if they know why. [light is scattered
through the Earth’s atmosphere and only the long
red & orange waves get through to illuminate the
Moon – see
http://solar-center.stanford.edu/activities/SunColor/What-
Color-is-the-Sun.pdf]
Credit: Heribert Propepper / Associated Press File
6. Firming up the Information (could also be used for assessment) by
Ordering Moon Phase Imagery
a. Divide participants into pairs.
b. Copy a sheet of the Ordering Moon Phases
imagery (attached) for each pair. Either cut
out the images beforehand, or have
participants cut them out. If you wish to
reuse the cards, you could laminate the
sheet before cutting.
38c. Ask participants to arrange the imagery in the order of the Moon phase cycle.
They may start with any phase they want. It might help if they arrange the
imagery in a circle.
d. Have participants discuss order with their pairs and come to a consensus.
e. Have pairs report to the group. Are there different interpretations?
Going Farther:
a. In what season does the Moon get highest in the sky (northern hemisphere)?
b. Where does the Moon rise at the equator? At the poles?
c. Does the Moon rise & set at the same places along the horizon each day? If so,
how long does it take for the Moon to go from its most northern rising point to its
most southern rising point?
Resources:
This activity is inspired by one that was taught to a collection of Project Astro
participants. It was developed by Dennis Schatz and originally described in “Astro
Adventures”, a publication of the Pacific Science Center. It is also available through the
Astronomical Society of the Pacific, as part of their Universe at Your Fingertips DVD.
It is highly recommended that teachers purchase one of these write-ups for doing the
complete activities:
http://www.astrosociety.org/education/the-universe-at-your-fingertips-2-0/
or
https://www.google.com/url?sa=t&rct=j&q=&esrc=s&source=web&cd=1&ved=0CB4QFjAAahUKEwiTr
Z3qlrvHAhVQKYgKHSDkBBM&url=https%3A%2F%2Fwww.pacificsciencecenter.org%2Fwp-
content%2Fuploads%2Fastro_adventures_order.pdf&ei=AqDXVZOkA9DSoASgyJOYAQ&usg=AFQjCN
Gqb_1F-qvHqt0jXCNdBpuR3uDoGA&sig2=EukJnLFQIgyZB-DRn27UYA
3940
41
Total Solar Eclipse

"NH53 - Outer corona (by)" by NH53 - Outer coronaUploaded by ComputerHotline. Licensed under CC
        BY 2.0 via Wikimedia Commons - https://commons.wikimedia.org/wiki/File:NH53_-
                _Outer_corona_(by).jpg#/media/File:NH53_-_Outer_corona_(by).jpg

                                                                                             42
Total Lunar Eclipse
Photo: Wiki commons
43Appendix B - Signal Cards
44Appendix C - Moon Phase Approximate Rise/Set Times
Day of Phase Rise High in Sky Set (approx.)
cycle (approximate) (approx.)
0
sunrise noon sunset
New Moon
3.7
~ 9 AM ~3 PM ~9 PM
Waxing crescent
7.3
noon sunset midnight
First Quarter
11
~3 PM ~9 PM ~3 AM
Waxing gibbous
14.75
sunset midnight sunrise
Full Moon
18.4
~9 PM ~3 AM ~9 AM
Waning gibbous
22.1
midnight sunrise noon
Last Quarter
25.8
~3 AM ~9 AM ~3 PM
Waning crescent
29.5 New Moon again sunrise noon sunset
45Appendix D – Resources
Universe at Your Fingertips DVD:
This activity is inspired by one that was taught to a collection of Project Astro
participants. It was developed by Dennis Schatz and originally described in “Astro
Adventures”, a publication of the Pacific Science Center. It is also available through
the Astronomical Society of the Pacific, as part of their Universe at Your Fingertips
DVD. It is highly recommended that teachers purchase one of these write-ups for
doing the complete activities:
http://www.astrosociety.org/education/the-universe-at-your-fingertips-2-0/
or
https://www.google.com/url?sa=t&rct=j&q=&esrc=s&source=web&cd=1&ved=0CB
4QFjAAahUKEwiTrZ3qlrvHAhVQKYgKHSDkBBM&url=https%3A%2F%2Fwww.paci
ficsciencecenter.org%2Fwp-
content%2Fuploads%2Fastro_adventures_order.pdf&ei=AqDXVZOkA9DSoASgyJOY
AQ&usg=AFQjCNGqb_1F-qvHqt0jXCNdBpuR3uDoGA&sig2=EukJnLFQIgyZB-
DRn27UYA
Activities and Information about the Moon:
http://nasawavelength.org/ - search on “moon”
http://moon.nasa.gov
http://www.nasa.gov/moon
http://www.nasa.gov/topics/moonmars
http://nssdc.gsfc.nasa.gov/planetary/planets/moonpage.html
NASA Lunar Missions:
http://nssdc.gsfc.nasa.gov/planetary/lunar/lunartimeline.html (All)
http://nssdc.gsfc.nasa.gov/nmc/spacecraftDisplay.do?id=2013-047A (LADEE)
http://nssdc.gsfc.nasa.gov/nmc/spacecraftDisplay.do?id=2011-046A (GRAIL)
http://nssdc.gsfc.nasa.gov/nmc/spacecraftDisplay.do?id=2007-004B (THEMIS-B /
ARTEMIS-P1)
http://nssdc.gsfc.nasa.gov/nmc/spacecraftDisplay.do?id=2009-031A (LRO)
http://nssdc.gsfc.nasa.gov/nmc/spacecraftDisplay.do?id=2009-031B (LCROSS)
46You can also read