Condor and Condor XL - Instruction Manual - Roofnest
←
→
Page content transcription
If your browser does not render page correctly, please read the page content below
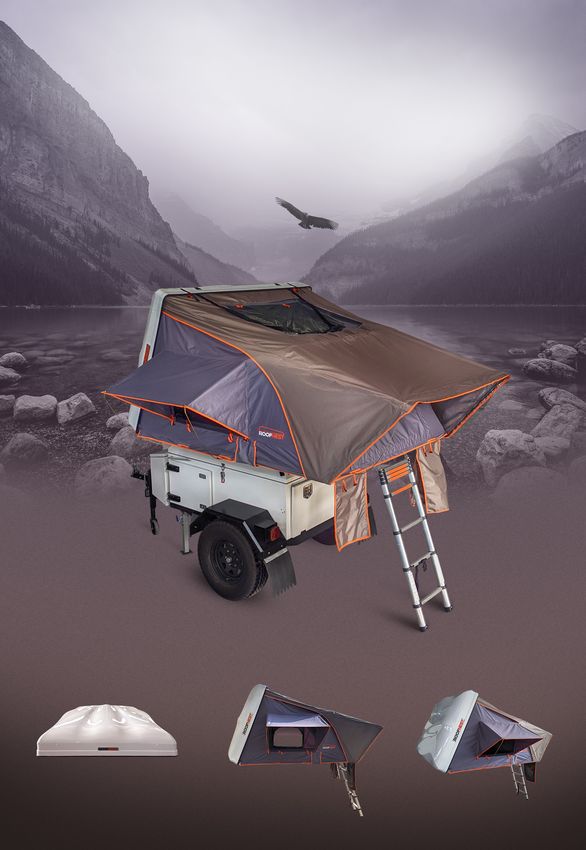
Condor and Condor XL

   Instruction Manual
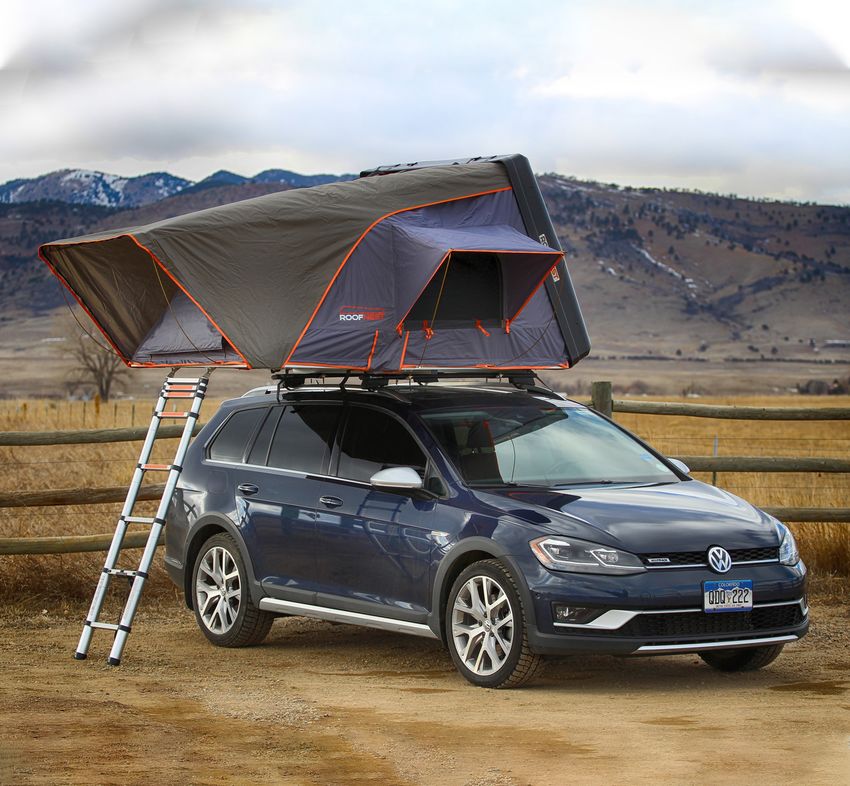
A Note About Roof Racks

• Roofnests are engineered to be mounted to two crossbars which
 are at least 30 inches apart. Many other mounting possibilities are
 available so contact support if you have questions.

• Your Roofnest Condor weighs 145 lbs (165 lbs for the Condor XL)
 and your crossbars should be rated to support at least 150 lbs.

 This is the Dynamic Load rating of your crossbars – your crossbars
 can support up to 5 times the Dynamic Load rating when your car
 is parked and the Roofnest is stable.
Parts List

Your Roofnest Condor is shipped with the following items.
Please inventory all parts and make sure you have all of the following:

    • One Mounting Kit with 4 U-shaped brackets, 8 square-head bolts, 8 self-
      locking nuts, one 17mm ratcheting wrench, and 4 rubber end-plugs (for
      the ends of the mounting rails on the bottom of the tent).

    • Two multi-functional pockets with waterproof covers

    • Six metal awning poles and storage bag

    • One battery connector with dimmable dial (for the lighting)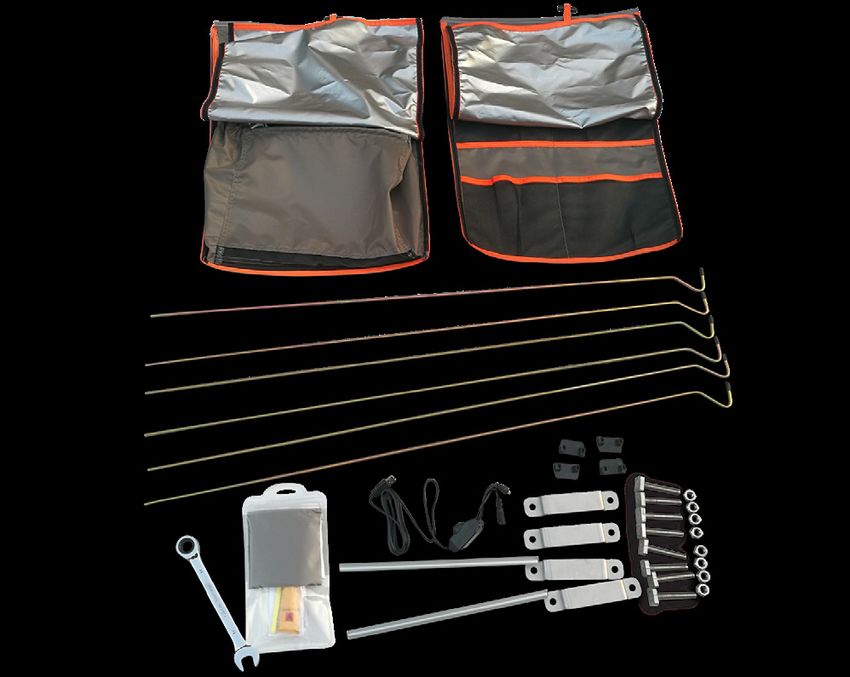
Installation
You can refer to our installation video under the support tab on our
website for a general overview of the installation process.
Please follow these steps for a successful install:
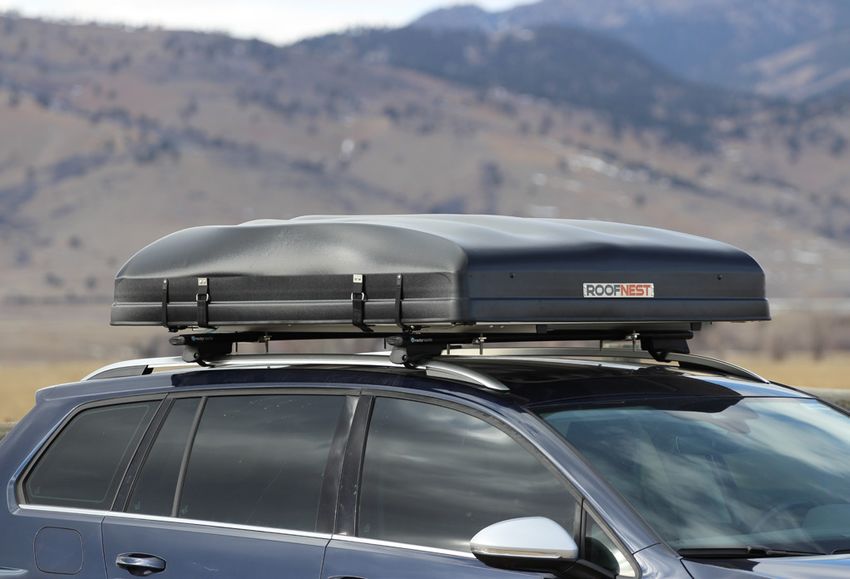
1 Lift the tent onto your crossbars (takes two people) with the large Roofnest badge
facing towards the rear (the tent shell is lower in the front than in the back).
2 Make sure the tent is positioned approximately where you want it.
3 Begin assembling the hardware by inserting a square-head bolt through one side
of a mounting bracket and finger tighten the nut as shown. Repeat this step for the
other three mounting brackets.
4 Slide each mounting set into the mounting rails and then slide one of the remaining
square-head bolts in after it. Do this at each corner of the tent.
5 Start at the front or back with a partner and lift the front or back up to slide the
mounting set to the inside of your crossbar as shown. Do this for each corner.
6 Insert the outside square-head bolt through the mounting bracket and finger
tighten a nut onto the bolt. Repeat for all four mounting sets.
7 Tighten the nuts evenly and snuggly making sure that before you do a final
tightening of the nuts that you have your Roofnest lined up on your vehicle’s roof
exactly where you want it.
IMPORTANT: Be sure to check the
hardware after 10-20 miles of driving
to ensure it is still snug and periodically
check the hardware.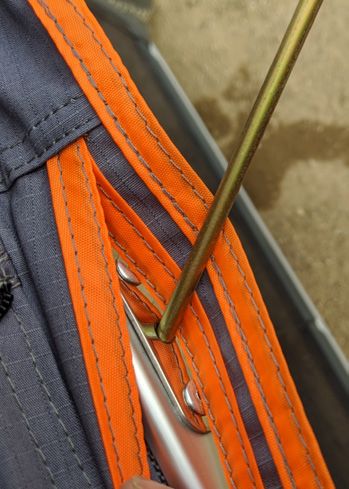
Setting up the Condor

 1   Undo all four closure
     straps and lift the edge
     of the shell until the gas
     struts take over.

 2   Grab the bottom of the ladder and pull
     it towards you until it is fully extended
     and locked.

 3   Use the ladder to open the floor by
     pulling down on the end of the ladder
     and pulling it towards you until the tent
     floor is unfolded and fully extended.

 4   Adjust the height of the ladder by collapsing ONLY the upper rungs so that the
     bottom of the ladder is touching the ground.

 5   The ladder should be at roughly a
     70-degree angle and support the floor
     of the tent so that both sections of the
     floor are level. If you need to adjust the
     height of the ladder, make sure that all
     lower rungs are fully extended and only
     the upper rungs are collapsed.

An Important Note on Operation of the Ladder:
• When you extend the ladder, make sure you extend all
  the rungs fully so they are locked. If you need to shorten
  the ladder, only collapse the very upper rungs – do not
  collapse the lower rungs to shorten the ladder. This will
  ensure that the ladder is safely locked so that climbing
  the ladder to get in the Condor is stable and safe.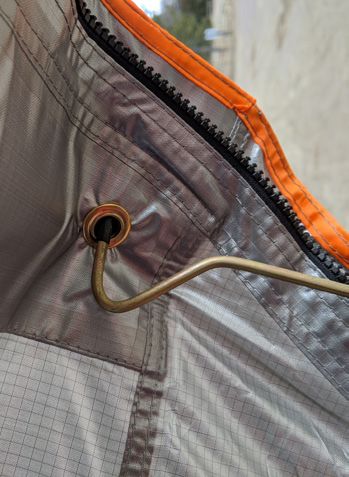
Setting up the Awning at Door and Windows
1 Your Condor is shipped with 6 awning rods, each time you set up your Condor
you’ll most likely want to add the rods to the front of the tent where the door is
but the window awning rods are optional.
2 Insert one rod into the hole at an 3 Gently bend the rod from
angle facing outwards until it is the hook and insert the hook
snuggly fit all the way into the hole. into the grommet in the top
corner of the door or window.
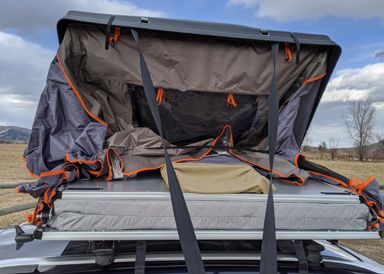
LED Lights and Strut Locks
Your Condor comes with 3 LED lighting strips – one inside the tent and two on the
fold-out floor outside the tent.
There is a black dimmer cable in the pocket inside the Condor which has two plugs
that can be attached to either or both the plugs at the rear floor hinge.
The USB plug on the dimmer cable must be plugged into a USB battery pack such as
you would use to charge your cell phone.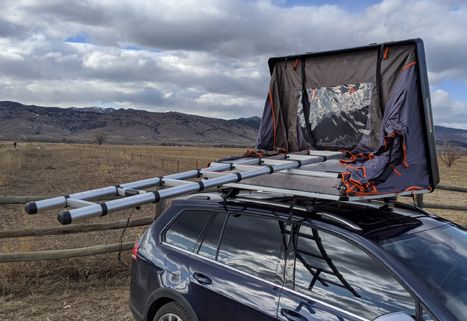
Closing the Condor

1   First take down any awning rods from the door and windows

2   Using the ladder, fold the extension floor back into the tent.

3   Collapse the ladder by pressing the black tabs on the rungs and
    compressing the rungs back to the top of the ladder.

4   (optional)
    Fasten the elastic cord that holds the tent material in to both sides of the tent.

5

                                         Pull the black webbing strap
                                         towards you to fold down the shell.

6

                                         When the shell is almost closed,
                                         stuff all the tent material back
                                         under the shell.

7   Close the shell fully and fasten all four straps (two Velcro, and two ratchets).

           Note: the recommended speed limit with the Condor on your
           vehicle is 75 MPH. Driving speed should always be adjusted
           according to the current driving condilions – please use caution on
           your first few drives with the Condor on top and always remember
           to check the mounting hardware.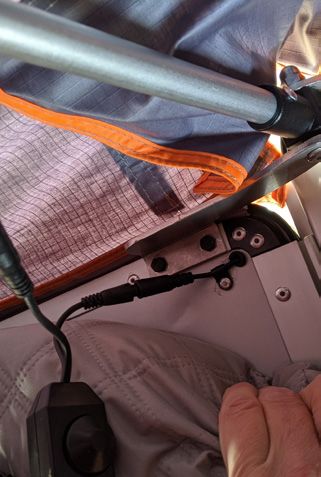
Thank you so much for being a Roofnest customer!

Please stay in touch and let us know where your travels take you – we love to
get photos! We also have a great community online where customers post
photos, share stories, tips, and good vibes – the Roofnest Flock – find it on
Facebook by searching for “Roofnest Flock”.

Now go camping and enjoy!
Share Your Adventures #Roofnest

www.roofnest.com

    @roofnest          /roofnest        info@roofnest.com          (855)-887-8897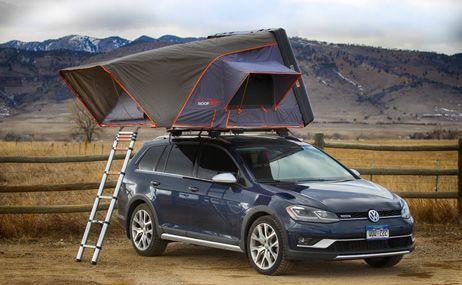
You can also read