Exam Information and Study Guide - COMPETENCY EVALUATION PROGRAM NURSE ASSISTANT TESTING CALIFORNIA - American Red Cross
←
→
Page content transcription
If your browser does not render page correctly, please read the page content below
Exam Information and Study Guide
                     COMPETENCY EVALUATION PROGRAM
                                       NURSE ASSISTANT TESTING
                                                    CALIFORNIA

redcross.org/take-a-class/cna-testing/california-nurse-competency-test

  WHAT TO EXPECT DURING YOUR SKILLS TEST
                                                                (Rev.04/2020)
1|Page

                  THE COMPETENCY EVALUATION PROGRAM – AN OVERVIEW

Since 1992, the Competency Evaluation Program (CEP) of the American Red Cross (ARC) in California has tested
over 375,000 candidates for skill competency. Candidates are qualified to become a Certified Nurse Assistant
(CNA), after receiving a criminal record clearance from the Department of Justice (DOJ), completing training
requirements approved by the California Department of Public Health (CDPH), and passing both parts
(Skills Test and Written Test) of the Competency Evaluation Examination.

During the Skills Test, candidates will demonstrate four (4) skills learned from their training program.
Candidates will be evaluated based on the demonstration of each skill performed, including how to follow
The Six Principles of Care. The Written Test (Nurse Assistant Written Knowledge Examination) consists of
sixty (60) multiple-choice questions with a two-hour time limit.

                                           TABLE OF CONTENTS
THE COMPETENCY EVALUATION PROGRAM (AN OVERVIEW) – TABLE OF CONTENTS                                  Page 1

ONLINE REGISTRATION / RESCHEDULING – TESTING FEES – CONFIRMATIONS – CANCELLATIONS                    Page 2

ITEMS TO BRING TO THE EXAM – WHAT NOT TO BRING TO THE EXAM                                           Page 3

ADDITIONAL EXAM DAY INFORMATION – PROFESSIONAL CONDUCT – GUESTS / VISITORS                           Page 4

PASSING BOTH PARTS OF THE EXAM – FAILING ONE OR BOTH PARTS OF THE EXAM                               Page 5

RECEIVING TEST RESULTS – HOW TO READ TEST RESULTS – VERIFY YOUR CNA CERTIFICATE ONLINE               Page 5

SKILLS TEST – WHAT TO EXPECT DURING YOUR SKILLS TEST                                                 Pages 6-7

SKILLS TEST – THE SIX PRINCIPLES OF CARE                                                             Page 8

SKILLS TEST – OPENING AND CLOSING PROCEDURES                                                         Page 9

SKILLS TEST – WHAT TO REMEMBER DURING THE SKILLS TEST                                                Page 9

SKILLS TEST – COMMUNICATION WITH THE RESIDENT                                                        Page 10

SKILLS TEST – MAKING CORRECTIONS DURING THE SKILLS TEST                                              Page 11

SKILLS TEST – HOW TO PERFORM THE TWENTY-FOUR (24) SKILLS – TESTING STATIONS A – B – C                Pages 12-27

HEALTH & SAFETY CONSIDERATIONS AT THE TEST SITE    –   HOW TO REQUEST ACCOMMODATIONS                 Page 28

WRITTEN TEST – SAMPLE TEST QUESTIONS                                                                 Page 29

WRITTEN TEST – VOCABULARY LIST                                                                       Page 30

THE GRIEVANCE PROCESS                                                                                Page 31
2| P a g e MAKE AN APPOINTMENT FOR CNA TESTING – debit and credit cards only (Rev 04/2018) ONLINE REGISTRATION Go to: www.redcross.org/take-a-class/cna-testing Available for all testing options – EXCEPT RESCHEDULING Skills and Oral Test $ 125 Skills and Written Test $ 110 Re-Test Skills $ 70 Re-Test Written $ 40 Re-Test Oral $ 55 RESCHEDULING – Call 800-RedCross (800) 733-7267 Hours of Operation: 4:30 am – 7:00 pm (Monday – Friday) Hours of Operation: 4:30 am – 5:00 pm (Saturday) Rescheduling Fee - not tested (paperwork / ID issues) $ 50 - changing appointment date *Fees not used within ninety (90) days from receipt of payment will result in forfeiture of entire Test Fee. CONFIRMATIONS SENT VIA EMAIL 1. Order Details Confirmation * Confirms PAYMENT only 2. Appointment Confirmation for CNA EXAM * Emailed by Testing Department – confirms your EXAM DATE * Make sure to read ATTACHMENT! Exam Information and Study Guide CANCELLATION (DROP) POLICY After payment has been received, the cancellation (drop) policy is: Late Charge For cancellations up to 10.0% From 8 to 14 days before event starts 25.0% From 3 to 7 days before event starts 50.0% From 1 to 2 day(s) before event starts 100.0% From 0 to 0 days before event starts 100.0% 1 day after event starts
3|Page

ITEMS TO BRING TO THE EXAM

First-Time Testers: Items 1, 2, and 3 Must Be Presented at the Exam.
Re-Testers: Items 2 and 3 Must Be Presented at the Exam.

Item No. 1—State Application (Form CDPH 283B)
This document must include correct information. The form must be signed and dated in ink (red, blue, or
green) by a Registered Nurse, who is authorized to verify that the student has completed an approved CNA
training program. The signature must include the title (, RN).
OR

Item No. 1—State Approval Letter (Form CDPH 932)
This document must include correct information, be signed and dated by an ATCS Representative, have the
CDPH 99 stamp, and be embossed with a State Seal.

All names that appear on Form CDPH 283B or Form CDPH 932, must be present on:
(Valid Picture ID) and (Social Security Card or Individual Taxpayer Identification Number Card / Letter)

Item No. 2—One (1) Valid Picture ID:
State Driver License Card
State Identification Card
U.S. Military ID Card
Passport or Passport Card
Permanent Resident Visa Card /Alien Registration Card
REAL ID (Driver License or ID Card)

Item No. 3 - Social Security Card or Individual Taxpayer Identification Number Card / Letter

IDs and documents presented at the test site must be legible, current (not expired), originals (no copies), and
unaltered. Receipts, printouts, and Interim / Temporary Driver Licenses are not accepted.

The only exception to originals (no copies) is:
A copied 283B form must be completely re-signed and re-dated in ink (red, blue, or green) by the student
(“applicant”) and the Registered Nurse who is authorized to verify that the student has completed an
approved CNA training program. The signature must include the title ( ,RN ).

WHAT NOT TO BRING TO THE EXAM

Candidates are not permitted to take personal belongings such as briefcases, large bags, study materials,
books, or papers into the examination room. American Red Cross is not responsible for lost/misplaced items.

 Study materials are not allowed at the exam site, including this document titled
“Exam Information and Study Guide”.
4|Page
ADDITIONAL EXAM DAY INFORMATION
Mandatory: Bring your mask and wear at all times at test site.
Recommended: Wear uniform/scrubs (any color) and non-skid, supportive shoes.
Bring a black or blue ink pen, non-perishable snacks, and water to last throughout the day.
Study materials are not allowed at the exam site.
Arrive 30 minutes prior to your appointment time. Set aside the entire day (8:00 am to 5:00 pm).
The length of the day will vary, depending on the number of students scheduled to test.
If you are late for your scheduled examination or do not bring all your required documents, you will not be
allowed to test and must reschedule.
The California Department of Public Health (CDPH) allows you three (3) testing opportunities.
If you leave without completing a test, you forfeit that testing opportunity.
American Red Cross is not responsible for lost/misplaced items.
ABOUT PROFESSIONAL CONDUCT
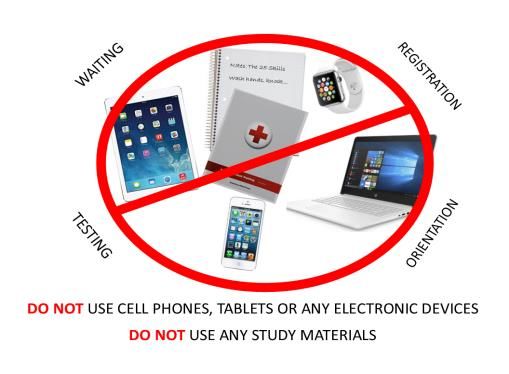
The following actions are grounds for dismissal during registration, testing or waiting periods.
The incident will be reported to the California Department of Public Health and your examination will be
•
scored as an automatic failure.
• Non-compliance with facility policy and posted signage
• Use of cell phones and electronic devices [Electronic word-to-word translators are not allowed]
• Use of study materials [A book that gives word-to-word translations (not definitions) is allowed: Written Test]
• Giving help to or receiving help from anyone
• Cheating, verbal hints, coaching, pointing, suggestive body or facial gestures
• Causing a disturbance or engaging in any kind of *misconduct
*Misconduct: Behaving in an improper or unprofessional manner
GUESTS / VISITORS
Guests, visitors, children, and pets are not permitted at the test site.5|Page
RECEIVING TEST RESULTS
The Competency Exam consists of a Skills Test and a Written Test.
Exam results will Not be given at the test site. When you have completed your last skill and/or the written test, the examiner
will instruct you to collect your belongings and exit the test site.
TEST RESULTS will be emailed within 24 hours (or next business day if testing falls on a Friday or weekend).
PASSING BOTH PARTS OF THE COMPETENCY EXAM
Successful completion of both parts of the exam and DOJ fingerprint clearance is required to become Certified. If you do not
receive your Nurse Assistant Certificate within 30 days after testing completion, contact the California Department of Public
Health (CDPH) at 916-327-2445.
HOW TO VERIFY YOUR CERTIFICATION ONLINE
Verify your CNA Certification online at cvl.cdph.ca.gov
FAILING BOTH PARTS OF THE COMPETENCY EXAM
• Skills Test & Written Test - you will need to register for a Skills & Written re-test.
FAILING ONE PART OF THE COMPETENCY EXAM
• Skills Test - you will need to register for a Skills re-test.
• Written Test -you will need to register for a Written re-test.
Online Registration for ALL re-tests - Go to: www.redcross.org/take-a-class/cna-testing
The State Application (Form CDPH 283B) is only valid for two (2) years after your training program completion date. You are
allowed three (3) attempts to PASS the exam, during the two (2) years that your CDPH 283B is valid.
The State Approval Letter (Form CDPH 932) has a “must successfully pass the evaluation by” date printed on it. You are
allowed three (3) attempts to PASS the exam on or before the "must successfully pass the evaluation by" date.
If you have not passed both parts of the exam on or before the expiration date of your form, or if your 3rd attempt is
unsuccessful, you must be re-trained.
HOW TO READ YOUR TEST RESULTS
SKILLS TEST RESULTS - The emailed report will show PASS or FAIL
PASS – “Congratulations, you passed the SKILLS TEST”
FAIL – “Unfortunately, you failed the SKILLS TEST”
• Find: Failed skill and failed step numbers in the Exam Information and Study Guide
• Review: Entire skill and failed step numbers to improve performance. See: How to Perform the Twenty-Four Skills
• Go to: redcross.org/take-a-class/cna-testing/california-nurse-competency-test
WRITTEN TEST RESULTS - The emailed report will show PASS or FAIL
PASS – “Congratulations, you passed the WRITTEN TEST”
FAIL – “Unfortunately, you failed the WRITTEN TEST”
• See: Your score, minimum score needed to pass (35), test opportunity number, and test booklet version
• Find: Helpful written test information in the Exam Information and Study Guide
• Go to: redcross.org/take-a-class/cna-testing/california-nurse-competency-test
• See: Sample Test Questions and Vocabulary List
• See: Unlimited Written Practice Tests: www.testrun.com/red-cross (30 or 60 day subscription available)6| P a g e
WHAT TO EXPECT DURING YOUR SKILLS TEST
1. Turn off (“power-down”) your cell phone now. 2. Read this information carefully. 3. If you have questions, please ask.
Welcome to your State Competency Exam! During the registration process, we need to maintain a quiet environment to
focus on completing paperwork correctly, so please keep your voices down. After registration, there will be a brief orientation,
to answer questions you may have. After orientation, two groups may be formed. One group will follow the Charge Nurse
to complete the skills test, while the other group remains with the Proctor to complete the written test. There may be a
waiting period between tests. The Charge Nurse will instruct each group to remain in a designated waiting area. Thank You
for your cooperation.
We understand that test-taking can be stressful for some. Feeling nervous is completely normal.
Please, take a deep breath and try your best to relax today.
Breaks / Lunch:
The schedule does not allow for a formal break time or lunch time, and leaving the building is not permitted.
Feel free to eat or snack during any waiting period (in the areas designated by the Charge Nurse or Proctor).
No eating or snacking in Written Test Room, while the test is in progress. No eating or snacking at any time in Skills Test
Room.
You can keep your water bottle at all times.
You will be evaluated on your demonstration of the following:
1. Handwashing – You will actually demonstrate at a real sink, using soap and water.
2. One (1) Station A Skill – Personal Care
3. One (1) Station B Skill – Vital Signs, Measurements, or Isolation
4. One (1) Station C Skill – Positioning, Transferring, Restorative Care, or Bed-making
5. Your overall demonstration of the Six Principles of Care at Stations A, B, and C
Infection Control – Privacy – Safety – Dignity – Independence – Communication
When you arrive at Station A, Station B, and Station C:
• You will see the supply area, the resident’s room and doorway, and the SIGNS posted on the wall:
NAME OF STATION (Station A, Station B, or Station C) – SINK – CURTAIN – THE SIX PRINCIPLES OF CARE – SUPPLY AREA
• The SINK sign is a reminder that a sink is present. You can verbalize handwashing, but you also need to
USE HAND SANITIZER.
• The CURTAIN sign is a reminder that a curtain is present. You can verbalize the closing and opening of the curtain.
• The SIX PRINCIPLES OF CARE sign is a reminder that all Six (6) Principles must be demonstrated at Stations A, B, and C.
• The SUPPLY AREA sign is a reminder that ALL supplies are located outside of the resident’s room.
• You will select one card from a group of cards that have been placed face-down.
• You will read the information printed on the card: the skill number, the skill name, and the skill scenario (story).
• The last words printed on the card are: “You may begin/start now” or “You may begin/your time starts now.”
At this point, you will start your skill demonstration.
• Your skill card will remain face-up and you may look at the card at any time during your skill demonstration.7| P a g e
• At each Station, you will have a maximum of 10 minutes to complete your skill. As you demonstrate your skill, the
RN/Skill Evaluator will observe, evaluate, and document on Skill Sheets, while keeping you aware of time remaining.
• All skills require an Opening and Closing Procedure.
• Your resident will be a manikin. You must demonstrate your skill and communicate, as if you are really at work, caring
for and speaking with a real “living” resident. The RN/Skill Evaluator is not in the resident’s room with you, so please
focus on your resident. Each resident will have an ID band with a printed name.
• You must really use the side rails, brakes, and bed controls as you would at work; do not pretend. However, if the side
rails, brakes, or bed controls happen to be broken, then you will need to verbalize or simulate how you would use them.
• You must actually collect and use real supplies, including real gloves. Do not pretend to wear gloves; really wear them.
Remove gloves, wash/sanitize hands and apply new gloves as needed. However, to avoid accidental spills and stains, do
not open any containers of liquids or creams. Really collect the item, but just pretend to remove the cap.
• The RN/Skill Evaluator may need to intervene during your skill demonstration if there are HEALTH / SAFETY CONCERNS.
Making Corrections During the Skills Test:
1. You can verbally correct any of the Six Principles of Care, however, some verbal corrections may also require a
re-demonstration. The RN/Skill Evaluator will tell you if a re-demonstration is necessary.
If a correction is made and time allows, the RN/Skill Evaluator will ask you to re-demonstrate by saying:
“Please show me how you would do that”. You will then receive credit for your corrected demonstration.
2. When you are done with your “Closing Procedure”, the RN/Skill Evaluator will say, “Looking at the Six Principles of
Care, which are posted on the wall, is there anything that you would like to add, change, or correct about your skill
demonstration?”
3. The RN/Skill Evaluator is not permitted to guide or correct you during your skill demonstration.
For example, if you were to ask for guidance during your demonstration, you may hear the following:
“Do what you think is best.” “I can’t advise you...do your best.” “Do what you were taught to do.”
“All supplies are available.” “Show me what you mean by that.” “I am not in the resident’s room with you.”
Your Conduct on Exam Day:
The following actions are grounds for dismissal during registration, testing or waiting periods.
The incident will be reported to the California Department of Public Health and your examination will be scored as an automatic
failure.
• Non-compliance with facility policy and posted signage
• Use of cell phones and electronic devices (except for approved word-to-word translators: Written Test)
• Use of study materials
• Giving help to or receiving help from anyone
• Cheating, verbal hints, coaching, pointing, suggestive body or facial gestures
• Causing a disturbance or engaging in any kind of *misconduct
*Misconduct: Behaving in an improper or unprofessional manner
Receiving Competency Exam Results:
Exam results will Not be given at the test site. When you have completed your last skill and/or the written test, the examiner
will instruct you to collect your belongings and exit the test site.
TEST RESULTS will be emailed to you within 24 hours (or next business day if testing falls on a Friday or weekend).
• For additional information, go to: redcross.org/take-a-class/cna-testing/california-nurse-competency-test8| P a g e
THE SIX PRINCIPLES OF CARE
Each skill demonstration MUST include ALL Six Principles of Care. Memorizing the first six (6) letters in the
word “Discipline” may be helpful to remember these principles.
1. D Dignity
2. I Infection Control
3. S Safety
4. C Communication
5. I Independence
6. P Privacy
Dignity
• Use respectful interaction with the resident at all times
• Maintain face-to-face contact whenever possible (speak directly to resident)
• Address the resident by his/her last name: (LEE, Mary H.) = “Mrs. Lee”
Infection Control
• Wash and/or sanitize hands before and after skill demonstration (repeat as needed)
• Wear gloves and PPE when necessary; use table barriers, trash & linen bags
• Carry linen/supplies away from uniform; keep linen off of floor
PPE - personal protective equipment
Safety
• Validate/check ID-band; greet resident using the actual name on the band
• Use correct body mechanics; lock brakes; use side-rails if necessary, ↑↓ Bed
• Place call-light; provide comfort (be gentle, check alignment at FOB, use pillows)
• Be observant regarding supplies -- use correctly
FOB - foot of bed
Communication
• Introduce yourself with your name and your correct title
• Use good interpersonal skills (conversation, interaction, give clear directions)
• Explain the procedure (using non-medical terms); report and record
Independence
• Ask permission to perform the skill (using non-medical terms)
• Encourage resident to make choices
• Encourage resident to manage as much of care as possible
Privacy
• Knock on door before entering
• Pull the curtain; shut the door
• Drape the resident when necessary; do not over/unnecessarily expose resident’s body9| P a g e
“OPENING PROCEDURE”
Beginning the skill demonstration:
1. Wash / Sanitize hands
2. Knock; pause for a response; enter the room
3. Greet the resident (example: “Good morning”)
4. Introduce yourself with name/title (example: “I’m Paul, your nurse assistant”)
5. Ask for permission to check the ID band (read name on band)
6. Respectfully greet the resident by name (example: “Nice to meet you, Mr. Lim”)
7. Explain procedure and ask permission to perform skill.
8. Gather supplies (you must really gather all supplies you will need)
9. Provide privacy
“CLOSING PROCEDURE”
Ending the skill demonstration:
1. Re-verify that your resident is positioned comfortably and is correctly aligned
2. Place resident’s bed in lowest position
3. Raise side rail or rails (if necessary)
4. Place and secure the call light within reach of the resident’s hands
5. Place over-bed table within reach (i.e. holds phone, tissues, water, if applicable)
6. Open privacy curtains
7. Wash / Sanitize hands
8. Say "goodbye" and Exit room
9. Report and record
REMEMBER TO DO “DURING the SKILLS TEST”
1. Maintain a confident and professional manner. Speak up. Be natural. Breathe.
2. DO NOT RECITE “skill steps” to the RN/Skill Evaluator.
3. DEMONSTRATE the skill as you would do it in the work situation.
4. You WILL DEMONSTRATE the skill in order for the RN to EVALUATE your performance.
5. Use good interpersonal skills (conversation, interaction, give clear directions and explanations).
6. Interact with the resident in a PROFESSIONAL manner.
7. When speaking to the resident, maintain face-to-face contact when possible.
8. Remember to USE good body mechanics while performing your skill.
9. Demonstrate safety (YOUR safety, RESIDENT’S safety, EQUIPMENT safety).
10. Be safe and gentle when moving the resident’s body (do not cause pain/injury).
11. Check alignment (stand at FOB to look at resident’s body from “head-to-toe”).
12. Check for comfort (adjust pillows; check head, shoulders, bony areas, joints).
13. Demonstrate good infection control measures (throughout skill performance).
14. You must include ALL Six Principles of Care during each skill demonstration.
FOB - foot of bed10| P a g e
COMMUNICATION WITH THE RESIDENT DURING OPENING PROCEDURE
Opening Procedure:
1. Wash your hands before entering room; Simulate a "Knock" on the Door—while saying “knock, knock”
2. Introduce yourself and identify resident by checking the ID band— “Good morning, my name is Sean
McKnight and I’ll be your Student Nurse Assistant today…may I check your ID band, please?
(Check the band; read/say resident’s name aloud). “Thank You… I see that your name is Mrs. Jane
Wilson… it’s very nice to meet you, Mrs. Wilson.”
3. Explain procedure/ask for permission to perform skill— “Mrs. Wilson, the Nurse has asked me to take
your blood pressure at this time. Is that alright with you?” ... (Resident's response is “Yes”) … “Thank
You, Mrs. Wilson.”
4. Gather supplies— “Mrs. Wilson, I’ll go wash my hands again and gather the supplies I’ll need…here’s
your call light (Place it within reach of resident’s hand) …I’ll be back in just a moment."
• Collect all supplies needed, carrying them away from your uniform.
• Place a barrier (example: a blue chux) on over-bed table and neatly arrange your supplies.
• Forgot some supplies? Ensure resident’s safety; wash hands; tell resident where you are going.
5. Provide privacy—Simulate closing the curtain and the door while saying “I’ll close the door and the
curtain for your privacy now.”
COMMUNICATION WITH THE RESIDENT DURING CLOSING PROCEDURE
Closing Procedure:
1. Position resident comfortably in correct body alignment — “Would you like to get back into bed?”
Stand at foot of bed and say — “I’m just checking to be sure you are comfortably aligned in bed.”
Or ask the resident—”Would you like to remain seated on your bed?”
2. Raise side rails — “I’ll raise your side rails now, for your safety” (Tell/warn resident ahead of time).
Or say to the resident — “If there is an order for side rails, I will raise/lower your rails…”
3. Return bed to lowest position — “I’ll be lowering your bed now, for your safety” (Tell/warn resident
ahead of time).
4. Place call light within reach — “Here’s your call-light Mrs. Wilson, I’m clipping it right here, next to your
hand. Can you test it now by pressing the red button? Great…that’s exactly how it works.”
5. Open privacy curtains — “I’m about to leave now, Mrs. Wilson…would you prefer your curtains open or
closed at this time?”
6. Say goodbye — “Let me double check to make sure your phone, water, TV control and tissues are within
easy reach. Did you need anything else before I go? OK, Goodbye Mrs. Wilson…if you need anything,
just press the call button.”
7. Wash your hands, after completing your procedure, just before you walk out of the door to leave
resident’s room; next, you will report and record — you can say to the resident — “I’ll report your blood
pressure to the Nurse and record it in your chart.”11 | P a g e
HOW TO MAKE CORRECTIONS DURING THE SKILL EXAM
Skill corrections that ARE allowed:
1. You can verbally correct any of the Six Principles of Care, however, some verbal corrections will also
require a re-demonstration. The RN/Skill Evaluator will tell you if a re-demonstration is necessary.
You have 10 minutes to complete each skill. If a correction is made and time allows, the
RN/Skill Evaluator will ask you to re-demonstrate by saying “Please show me how you would do that”.
You will then receive credit for your corrected demonstration.
2. When you are done with your “Closing Procedure”, the RN/Skill Evaluator will say, “Looking at the Six
Principles of Care, which are posted on the wall, is there anything that you would like to add, change, or
correct about your skill demonstration?”
3. This is the time that you will briefly pause to think about the skill that you just demonstrated.
Carefully look at each of the Six Principles of Care. Thoughtfully review each Principle to be sure that
you demonstrated all Six Principles of Care during your skill.
4. Review aloud what you did (or should have done) for each of the Six Principles of Care.
Speak up, to be sure you receive credit for all corrections made at each Skill Testing Station.
Tell the RN/Skill Evaluator if you have corrections while you are still being evaluated at that Station.
Examples of how to review each principle
• “for Dignity, I would have called her by her last name...”
• “for Infection Control, I should have washed my hands before and after the skill…”
• “for Safety, I didn't check the ID band …”
• “for Communication, I introduced myself, but I didn't explain what I was going to do…”
• “for Independence, I could have encouraged my resident to hold the mirror/ hold the basin…”
• “for Privacy, I should have knocked on the door and I should have closed the curtain
Skill corrections that are NOT allowed:
1. You may not simply “read” the principles aloud. You will not get credit for saying “I would do more
Dignity, I would do more Infection Control, Safety, Communication, Independence, and I forgot to do
Privacy too!” See examples (above) for what to say when corrections are made.
2. You may not correct your entire skill demonstration “verbally”.
3. You must re-demonstrate certain verbal corrections; You will not get credit for simply saying:
• “I should have put the gait belt on a little tighter. It was too loose…”
• “I would have raised the head of the bed a little higher…”
• “I really should have wiped from front to back. Not back to front…”12 | P a g e
HOW TO PERFORM THE TWENTY-FOUR (24) SKILLS
These guidelines are not intended to replace your teacher’s instructions, textbook, or your school’s curriculum.
You will demonstrate four (4) skills - Handwashing and one (1) skill at Testing Stations A, B, and C.
ENTIRE LIST OF TWENTY-FOUR (24) SKILLS
You will randomly choose one (1) Skill Card when arriving at each of the three (3) Testing Stations.
1: Handwashing (at a real sink, using soap and water)
2: Put on and Remove Gown and Gloves
3: Position the Resident in a Fowler’s Position
4: Position the Resident in a Side-Lying (Lateral) Position
5: Prepare to Stand the Resident Using a Gait Belt: see page 15
6: Make an Occupied Bed
7: Brush the Resident’s Dentures
8: Mouth Care for an Unconscious Resident
9: Give the Resident a Partial Bed Bath (Upper Body) - Face-Neck-Chest-Abdomen-Arms-Hands
10: Give the Resident a Partial Bed Bath (Lower Body) - Hips-Legs-Feet
11: Give the Resident a Back Rub/Massage
12: Give the Resident Perineal Care (Female Resident)
13: Shave the Resident
14: Clean and Trim the Resident’s Fingernails
15: Dress the Resident with a Paralyzed/Contracted Arm
16: Serve the Meal Tray and Feed the Paralyzed Resident
17: Read and Record the Height of a Resident Using an Upright Scale: see page 22
18: Read and Record the Weight of a Resident Using an Upright Scale: see page 23
19: Assist the Resident with the Bedpan
20: Count and Record the Resident’s Radial Pulse: suspended due to COVID-19
21: Count and Record the Resident’s Respirations: suspended due to COVID-19
22: Take and Record the Resident’s Blood Pressure: not tested
23: Perform Passive Range of Motion (Upper Body) - Shoulders-Elbows-Wrists-Fingers
24: Perform Passive Range of Motion (Lower Body) - Hips-Knees-Ankles-Toes
25: Assist the Resident in Walking Using a Gait Belt: suspended due to COVID-19 (see new Skill #5)
Skill Testing Station – “Handwashing”
(Skill #) 1 - Each student will demonstrate Handwashing (at a real sink, using soap and water).
Skill Testing Station A – “Personal Care”
(Skill #) 7, 8, 9, 10, 11, 12, 13, 14, 15, 16, and 19
Skill Testing Station B – “Vital Signs, Measurements, or Isolation”
(Skill #) 2, 17, 18, 20, 21, and 22
Skill Testing Station C – “Positioning, Transferring, Restorative Care, or Bedmaking”
(Skill #) 3, 4, 5, 6, 23, 24, and 2513 | P a g e
Skill #1: Handwashing (at a real sink, using soap and water)
1. Remove watch, or push it up on your forearm, roll up sleeves.
2. Turn on water; adjust temperature.
3. Wet hands and wrists. Apply soap.
4. Keep hands lower than elbows. Rub hands together to make a bubbly lather.
5. Wash hands, fingers, and wrists for about 15 seconds (not under water); do not touch sink.
6. Re-wet hands/wrists and re-apply soap as needed.
7. Rinse hands and wrists (avoid splashing); keep hands lower than elbows.
8. Let hands drip; reach for paper towels.
9. Dry hands and wrists thoroughly (from fingertips to wrist). Discard towels.
10.Use a new clean paper towel to turn off the faucet.
11.Discard paper towel.
Skill #2: Put on and Remove Gown and Gloves
1. Perform hand hygiene.
2. Choose appropriately sized gown and gloves.
3. Examine gown and gloves for any damage.
4. Put on the gown (with opening in the back).
5. Overlap gown to fully cover uniform in the back.
6. Tie gown (securely): at the neck first, then the waist (OK to secure waist at front, back, or side).
7. Put on gloves.
8. Pull gloves up (over) the gown cuff. (OK to make thumb-hole in gown cuff)
9. Knock, enter, and proceed with “opening procedure".
10. Perform some form of resident care.
11. Perform “closing procedure".
12. Remove PPE (before leaving room), without contaminating yourself.
13. Dispose of PPE (in the isolation hamper inside resident’s room), without contaminating yourself.
14. Perform hand hygiene; exit room. *do not touch resident or room contents after PPE removed.
15. Report and record.
PPE - personal protective equipment14 | P a g e
Skill #3: Position the Resident in a Fowler ’s Position
1. Perform “opening procedure". (includes hand hygiene).
2. Verbally acknowledge resident’s complaint of "having difficulty breathing".
3. Adjust HOB to appropriate level (between 30-90 degrees) as quickly as possible.
4. Re-check resident’s breathing.
5. Perform comfort measures (pillows, raising FOB to prevent sliding, etc).
6. Perform “closing procedure” (includes hand hygiene).
7. Report and record (resident’s complaint, what you did to help, and the results of your actions).
HOB - head of bed
FOB - foot of bed
Skill #4: Position the Resident in a Side-Lying (Lateral) Position
1. Perform “opening procedure” (includes hand hygiene).
2. Use good body mechanics: raise level of bed, bend knees, spread feet apart.
3. Safely move the supine resident to the side (edge) of bed in 3-segments.
4. Prepare arms/arm: Cross resident’s arms over chest or place correct arm in “stop-sign” position.
5. Cross ankles or bend the knee of the upper (top) leg.
6. Be sure side rail is up on the side resident is turned towards.
7. Place one hand on shoulder, the other on hip, and “log-roll” turn resident onto side; moved the
body safely, gently, naturally as a unit, avoiding force/pressure to spine, limbs and joints.
8. Support resident's back by tucking a pillow, folded lengthwise, behind back.
9. Support resident’s top arm with a pillow in front of chest; use hand roll if needed.
10. Place resident’s top leg slightly forward, with knee bent; support top leg with a pillow.
11. Be sure that the top leg/foot does not rest on (or rub) the lower leg/foot.
12. Stand at FOB to see if resident’s body is properly aligned.
13. Resident should not be lying on his/her arm or shoulder. (see line 4.)
14. Adjust pillow to cradle/support resident’s head/face comfortably.
15. Perform “closing procedure"(includes hand hygiene).
.
FOB - foot of bed15 | P a g e
Skill #5: Prepare to Stand the Resident Using a Gait (Safety) Belt *This is a new Skill that was
developed due to COVID-19.
Highlighted areas are required.
1. Perform “opening procedure” (includes hand hygiene).
2. Gather belt and place chair *close enough to side of bed before resident sits up/dangles.
3. Apply belt and make all belt adjustments while resident seated on bed or lying in bed.
4. Raise HOB fully to assist resident to a sitting position.
5. Lower side rail nearest to chair.
6. To Dangle: place one arm behind resident's back and the other arm under the thighs.
7. Encourage resident to assist in turning to a dangling position, verifying feet flat on the floor.
8. Assist resident with robe and non-skid shoes (never leave bedside while resident dangling).
9. Securely fasten belt snugly around resident's waist. Ask resident if dizzy prior to transfer.
10. Place your knee, (furthest from chair), between resident’s knees.
11. Maintain a secure, underhand (palms-up) grasp to hold belt, using 2 hands at all times.
12. May instruct resident to assist (to stand) by having resident press hands on mattress.
13. On the count of "three", assist resident to stand up, maintaining palms-up grasp on belt.
14. If belt loosens upon standing, assist resident to sit on the bed for all belt adjustments.
15. Assist resident to turn/pivot while moving feet along with resident, until right in front of chair.
16. Lower resident into chair, then release your 2-handed grasp. Leave gait belt on.
17. Provide a lap blanket.
18. Perform “closing procedure” (includes hand hygiene).
HOB - head of bed
*This Skill was developed, utilizing content from the following two suspended skills:
Skill #5 – Transfer the Resident from Bed to Chair Using a Gait (Safety) Belt
Skill #25 – Assist the Resident in Walking Using a Gait (Safety) Belt16 | P a g e
Skill #6: Make an Occupied Bed
1. Perform "opening procedure"(includes hand hygiene).
2. Remove and fold any reusable linen (blanket/spread) and place over a clean chair.
3. Ensure clean linen is on a barrier.
4. Ensure side rail is up (at all times) on side resident is rolled towards.
5. For resident’s comfort, leave pillow under head and top sheet in place.
6. Wear gloves while handling soiled linens.
7. With resident on side, loosen and roll dirty bottom sheet toward resident and tuck against back.
8. Secure ½ of clean (fitted) bottom sheet on the bare mattress.
9. Roll clean (fitted) bottom sheet towards resident; tuck and flatten it under old (fitted) bottom sheet.
10. Raise the side rail; go to the opposite side of bed; lower the side rail.
11. Gently and safely roll resident over the linen.
12. Remove dirty (fitted) bottom sheet; place in linen bag (on FOB or on chair with barrier).
13. Pull clean (fitted) bottom sheet towards you and secure onto mattress with minimal wrinkles.
14. Center resident on back and check for comfort; raise side rail; go to FOB and check alignment.
15. Cover resident with clean top sheet. Resident can hold it as you remove the old top sheet.
16. Miter corners of top sheet at FOB.
17. Make a toe pleat.
18. Wear gloves (as necessary) to dispose of linens. Remove gloves and wash hands.
19. Perform “closing procedure" (includes hand hygiene).
FOB - foot of bed17 | P a g e
Skill #7: Brush the Resident ’s Dentures
1. Perform “opening procedure” (includes hand hygiene).
2. Apply gloves. Remove gloves, sanitize hands, and re-glove as needed.
3. Take dirty dentures (already in denture cup) and supplies to sink area.
4. Line bottom of sink with a washcloth or small towel. Turn on cool water without splash.
5. Carefully handle and place dirty dentures in emesis basin. Clean denture cup and fill will cool water.
6. Apply toothpaste (or denture cleanser) to toothbrush (or denture brush).
7. Used denture-brush (or toothbrush) and water to clean all surfaces upper and lower plates over sink.
8. Handle dentures carefully by holding/brushing one plate at a time.
9. Rinse dentures under cool, running water.
10. Carefully place dentures back in denture cup (filled with clean, cool water).
11. Offer mouthwash solution, sponge-tipped swabs, and emesis basin for oral hygiene.
12. Clean and store equipment. Dispose of linens and trash appropriately.
13. Remove gloves and wash hands.
14. Perform “closing procedure” (includes hand hygiene).
Skill #8: Mouth Care for the Unconscious Resident
1. Perform “opening procedure” (includes hand hygiene).
2. Apply gloves. Remove gloves, sanitize hands, and re-glove as needed.
3. Gently position resident’s head towards you. Entire body may be turned to side.
4. Place a towel or waterproof barrier under head and over chest.
5. Place emesis basin under the chin, at side of resident’s face, if resident is fully on their side.
6. Open packages of sponge-tipped swabs and/or lemon glycerin swabs.
7. Prepare a small cup of water or mouthwash/water solution to dip sponge-tipped swabs.
8. Gently open mouth and separate teeth with a padded tongue blade.
9. Clean entire mouth (roof, tongue, cheeks, teeth, gums, lips) - use moistened sponge-
tipped swabs and/or glycerin swabs; do not use toothpaste at any time.
10. Do not pour liquids in resident’s mouth at any time.
11. Dry resident’s face. Remove basin, towels, and waterproof barriers.
12. Apply lip lubricant.
13. Clean and store equipment. Dispose of linens and trash appropriately.
14. Remove gloves and wash hands.
15. Perform “closing procedure” (includes hand hygiene).18 | P a g e
Skill #9: Give the Resident a Partial Bed-Bath (Upper Body): Face-Neck-Chest-Abdomen-Arms- Hands
1. Perform “opening procedure” (includes hand hygiene).
2. Apply gloves. Remove gloves, sanitize hands, and re-glove as needed.
3. Resident is already draped; leave bath blanket in place prior to starting bath.
4. Keep linens dry by placing a towel/waterproof barrier under limbs while washing.
5. Gently wash (with soap), rinse and pat-dry entire** upper body, starting with face*.
6. Only uncover one area at a time to ensure warmth, dignity, and privacy.
7. Leave resident draped and comfortable when bath is completed.
8. Clean and store equipment. Dispose of linens and trash appropriately.
9. Remove gloves and wash hands.
10. Perform “closing procedure” (includes hand hygiene).
* may omit soap for face (as desired by resident)
** including underneath neck and arms, as well as axillary areas
Skill #10: Give the Resident a Partial Bed-Bath (Lower Body): Hips-Legs-Feet
1. Perform “opening procedure” (includes hand hygiene).
2. Apply gloves. Remove gloves, sanitize hands, and re-glove as needed.
3. Resident is already draped; leave bath blanket in place prior to starting bath.
4. Keep linens dry by placing a towel/waterproof barrier under limbs while washing.
5. Gently wash (with soap), rinse and pat-dry entire* lower body, starting with hips.
6. Only uncover one area at a time to ensure warmth, dignity, and privacy.
7. Leave resident draped and comfortable when bath is completed.
8. Clean and store equipment. Dispose of linens and trash appropriately.
9. Remove gloves and wash hands.
10. Perform “closing procedure” (includes hand hygiene).
*Including underneath legs, heels and bottom of feet19 | P a g e
Skill #11: Give the Resident a Back Rub (Massage)
1. Perform “opening procedure” (includes hand hygiene).
2. Apply gloves (if necessary).
3. Maintain resident’s position (Resident is already in a comfortable side-lying position).
4. Keep resident draped for warmth and privacy with a bath blanket.
5. Place towel on bed (behind back) to protect linens.
6. Only uncover back/partial buttocks area to ensure warmth, dignity, and privacy.
7. Use lotion; apply to palms and rub hands together to “warm” lotion.
8. Rub/massage resident’s enire back (shoulders to coccyx), using circular and/or long strokes.
9. Start at the coccyx and work your way up to the shoulders (shoulders down to coccyx is also OK)
10. Continue gently massaging back for 3-5 minutes.
11. Assist resident into position of choice after the massage.
12. Cover resident with sheet (bed linens) and remove bath blanket.
13. Clean and store equipment. Dispose of linens and trash appropriately.
14. Remove gloves (if worn) and wash hands.
15. Perform “closing procedure” (includes hand hygiene).
Skill #12: Give the Resident Perineal Care (Female Resident)
1. Perform “opening procedure” (includes hand hygiene).
2. Apply gloves. (OK to remove gloves, sanitize hands, and re-glove as needed).
3. Assist resident to position legs (knees bent and legs apart). Resident will already be supine.
4. Place a linen protector under resident’s buttocks.
5. Keep resident warm and completely draped with a bath blanket.
6. Only uncover perineal area/buttocks area to ensure warmth, dignity, and privacy.
7. Wash (using soap/peri-wash), rinse, and pat dry genital area from front to back,
while resident is in supine position.
8. Wash (using soap/peri-wash), rinse, and pat dry rectal area from front to back
while resident is in side-lying position.
9. Use a different part of the washcloth/mitt for each wipe/stroke.
10. Remove gloves, wash, re-glove to assist resident into position of choice.
11. Cover resident with sheet (bed linens) and remove bath blanket.
12. Wear gloves to clean and store equipment. Dispose of linens and trash appropriately.
13. Remove gloves and wash hands.
14. Perform “closing procedure” (includes hand hygiene).20 | P a g e Skill #13: Shave the Resident 1. Perform “opening procedure” (includes hand hygiene). 2. Place barrier for supplies to maintain clean set-up. 3. Place clothing protector to resident’s chest area prior to shave. 4. Assess skin for abrasions, moles, and/or direction of hair growth. 5. Check razor for rust, chips, or breaks. 6. Soften beard with warm, moist cloth before applying shaving cream. 7. Apply shaving cream to resident’s face. 8. Apply gloves before shaving. (OK to remove gloves, sanitize hands, and re-glove as needed). 9. Hold skin taut to prevent nicks. 10. Shave face using downward strokes, in direction of hair growth. 11. Rinse razor often during procedure to remove hair/excess shaving cream. 12. Wipe/rinse resident’s face of remaining lather after the shave. 13. Dry resident’s face. 14. Offer resident a mirror. 15. Offer resident choice of aftershave or shaving lotion. 16. Remove towel from resident; clean equipment and return to proper area. 17. Dispose of razor in sharps container. 18. Dispose of linens and trash appropriately. 19. Remove gloves and wash hands. 20. Perform “closing procedure” (includes hand hygiene). Skill #14: Clean and Trim the Resident's Fingernails 1. Perform “opening procedure” (includes hand hygiene). 2. Apply gloves. (OK to remove gloves, sanitize hands, and re-glove as needed). 3. Place towel under resident’s hands for comfort and hygiene. 4. Soak resident’s fingernails in a basin of warm water prior to trimming. Use soap to clean them. 5. Push back cuticles gently with a washcloth and/or orange stick padded with cotton. 6. Use orange stick to clean under dirty fingernails. 7. Change water and rinse resident’s hands. 8. Dry resident’s hands thoroughly. 9. Use clippers to trim fingernails straight across. 10. Use nail file/emery board to smooth rough and sharp edges after trimming. 11. Offer lotion and gently massage resident’s hands. 12. Dispose of linens and trash appropriately. 13. Return clippers to facility designated dirty area (or to resident’s personal grooming kit). 14. Remove gloves and wash hands. 15. Perform “closing procedure” (includes hand hygiene).
21 | P a g e

Skill #15: Dress the Resident with a Paralyzed / Weak Arm

    1.   Perform “opening procedure” (includes hand hygiene).
    2.   Allow resident choice of clothing/gown.
    3.   Pull the curtain and/or shut the door to maintain resident’s privacy.
    4.   Keep resident covered (with very minimal exposure) with a bath blanket until fully dressed.
    5.   Dress the resident’s paralyzed/weak arm* first, with the entire arm completely through the
         sleeve before dressing the other arm.
    6.   Move resident’s arms gently and naturally without force.
    7.   Encourage resident to assist with non-paralyzed arm as able.
    8.   Dispose of linens and trash appropriately.
    9.   Perform “closing procedure” (includes hand hygiene).
         *RN will place hand-roll in hand of paralyzed arm.

Skill #16: Serve the Meal Tray and Feed the Paralyzed Resident

    1. Perform “opening procedure” (includes hand hygiene).
    2. Validate/check for the correct resident by reading name printed on ID band before selecting tray.
    3. Offer resident a washcloth for hands before meal.
    4. Clean overbed table before serving the meal.
    5. Select correct meal tray from meal cart by checking the diet card located on tray.
    6. Check dietary card and verbalize (say aloud) resident’s name, diet, and allergies.
    7. Verify that the food items on tray match diet (lift the plate cover “lid” to see the food).
    8. Drape resident with a towel/clothing protector prior to feeding.
    9. Open containers, cut meat, offer correct condiments, remove items NOT allowed, etc.
    10. Check temperature of hot liquids/food items.
    11. Allow the resident time to chew food; feed resident slowly, without rushing.
    12. Offer liquids between swallows.
    13. Offer the resident choices during meal; encourage use of unaffected hand.
    14. Offer the resident a washcloth for hands after meal.
    15. Clean overbed table after meal.
    16. Dispose of linens and trash appropriately.
    17. Remove tray and note % of meal eaten and cc’s or ml’s of fluids taken.
    18. Perform “closing procedure” (includes hand hygiene).
22 | P a g e
#17: Read and Record the Height of a Resident Using an Upright Scale
1. Perform “opening procedure” (includes hand hygiene).
2. Place chair at side of scale.
3. Gather paper towel (to place on scale platform). Measure and Record
was modified to
4. Assist resident to put on non-skid shoes.
Read and Record
5. Drape resident with a robe.
6. Keep one hand behind/near resident while walking to the scale. Steps 2 – 11 and 14 – 17 not
7. Place paper towel on scale platform. required due to COVID-19.
8. Assist the resident to sit on the chair to remove shoes.
9. Assist the resident to step on the scale from the side, facing away from scale.
10. Raise height bar safely.
11. Lower height bar until it touches top of resident’s head and is level with resident’s head.
12. Read resident’s height at correct location.
13. Record resident’s height, choosing words, abbreviations, or symbols (chose ONE on recording grid)*:
FEET ( feet, ft, or ‘ ) INCHES ( inches, in, or “ ) CENTIMETERS ( centimeters or cm )
14. Assist resident to step safely off of the scale.
15. Assist resident to sit on the chair and put non-skid shoes back on.
16. Remove paper towel from scale platform and discard; gloves may be worn.
17. Assist resident back to room, keeping one hand behind/near resident while walking.
18. Perform “closing procedure” (includes hand hygiene).
Note: Some testing sites have scales with multiple measurement functions.
Be familiar with multiple ways to record height:
feet/inches [ft/in] or inches [in] or centimeters [cm]
*Recording grid (documentation sheet) will be provided by RN.23 | P a g e
Skill #18: Read and Record the Weight of a Resident Using an Upright Scale
1. Perform “opening procedure” (includes hand hygiene).
2. Place chair at the side of the scale.
3. Gather paper towel (to place on scale platform). Measure and Record
4. Assist resident to put on non-skid shoes. was modified to
5. Drape resident with a robe. Read and Record:
6. Keep one hand behind/near resident while walking to the scale.
Steps 2 – 12 and 14 – 17 not
7. Place paper towel on scale platform.
required due to COVID-19.
8. Assist the resident to sit on the chair to remove shoes/robe.
9. “Zero” (balance) scale prior to the resident standing on scale platform.
10. Assist the resident to stand on scale platform.
11. Measure the resident’s weight correctly by sliding weights to appropriate areas until scale
indicator balances. Begin with "large weight" clicked in place, then adjust “smaller weight”.
12. Adjust both weights, as needed, until indicator balances.
13. Read resident’s weight correctly.
14. Record the resident’s weight using words or abbreviations (chose ONE on recording grid)*:
POUNDS ( lb ) KILOGRAMS ( kg )
14. Assist the resident to step safely off the scale.
15. Assist resident to sit on the chair and put non-skid shoes/robe back on.
16. Remove paper towel from scale platform and discard; gloves may be worn.
17. Assist resident back to room, keeping one hand behind/near resident while walking.
18. Perform “closing procedure” (includes hand hygiene).
Note: Some testing sites have scales with dual measurement functions.
Be familiar with both ways to record weight:
pounds [lb] or kilograms [kg]
*Recording grid (documentation sheet) will be provided by RN.24 | P a g e
Skill #19: Assist the Resident with a Bedpan (Standard or Fracture)
1. Perform “opening procedure” (includes hand hygiene).
2. Apply gloves. (OK to remove gloves, sanitize hands, and re-glove as needed).
3. Assist resident to lift hips, slide linen protector and bedpan under buttocks.
4. Place the resident on the bedpan correctly with resident’s buttocks well-centered over the
opening of the bedpan. (Note the direction of the bedpan)
5. Drape the resident with a bath blanket/sheet while on the bedpan.
6. Remove gloves and sanitize hands.
7. Raise HOB for resident’s comfort during bowel movement.
8. Leave call light within resident’s reach, before leaving room--to allow privacy.
9. Return to room when resident signals or after no more than 5 minutes.
10. Lower HOB for resident’s comfort during bedpan removal.
11. Wash hands and apply gloves.
12. Turn resident to the side and remove the bedpan. Cover it and properly place it out of the way
(on FOB or on chair with barrier).
13. While resident is on the side, wipe the resident from front to back.
14. Place soiled toilet paper into a prepared (cuffed) plastic trash bag.
15. Remove linen protector and discard in the trash bag.
16. Discard gloves and sanitize hands; raise side rail and lower entire bed.
17. Reapply gloves -- take bedpan to the bathroom.
18. Observe any abnormalities in bowel movement (for reporting and recording).
19. Empty bedpan into toilet while wearing gloves.
20. Clean and rinse bedpan, while wearing gloves, then store bedpan in proper area.
21. Dispose of linens and trash appropriately.
22. Remove gloves and wash hands.
23. Perform “closing procedure” (includes hand hygiene).
HOB - head of bed
FOB - foot of bed
Skill #20: Count and Record the Resident's Radial Pulse
1. Perform “opening procedure” (includes hand hygiene).
2. Place resident’s hand in a comfortable resting position prior to counting pulse.
3. Place your fingertips correctly on the radial artery (thumb side of wrist).
4. Count the resident’s radial pulse using a second-hand watch or clock for one (1) minute.
5. Record the resident’s radial pulse within (plus or minus) 5 beats of Evaluator’s recording.
6. Perform “closing procedure” (includes hand hygiene).25 | P a g e
Skill #21: Count and Record the Resident's Respirations
1. Perform “opening procedure” (includes hand hygiene).
2. Avoid telling resident that respirations are being counted; you can say “taking vital
signs” while pretending to take resident’s pulse.
3. Count resident’s respirations using a second-hand watch or clock for one (1) minute.
4. Record resident’s respirations within (plus or minus) 2 breaths of the Evaluator’s recording.
5. Perform “closing procedure” (includes hand hygiene).
Skill #22: Take and Record the Resident's Blood Pressure : not tested
1. Perform “opening procedure”.
2. Place resident’s arm, with the palm up, in a comfortable resting position.
3. Clean the stethoscope’s diaphragm/bell and earpieces with alcohol before use.
4. Feel for the resident’s brachial artery on the inner aspect of the resident’s arm.
5. Wrap the blood pressure cuff snugly around the resident’s arm, approximately 1-2 inches
above the antecubital area.
6. Correctly place the stethoscope earpieces in your ears.
7. Safely and correctly place the diaphragm of the stethoscope over the brachial artery.
8. Inflate the cuff.
9. Let the air out smoothly, at a safe rate (2-4 mm Hg per second), and listen for the first sound
(the systolic reading).
10. Continue steady deflation as you listen for the last sound-- becomes quiet/almost silent (the
diastolic reading).
11. Remember the readings to be able to record them.
12. Quickly let all air out of the cuff (completely deflate).
13. Record the blood pressure reading correctly within (plus or minus) 8 mmHg of the Evaluator’s
recording (systolic and/or diastolic).
14. Remove the blood pressure cuff from resident’s arm.
15. Perform “closing procedure”.26 | P a g e
Skill #23: Perform Passive Range of Motion (Upper Body): Shoulders-Elbows-Wrists-Fingers
1. Perform “opening procedure” (includes hand hygiene).
2. Adjust bed to a safe and comfortable working height.
3. Lower side rail on the side you will be working on.
4. Ask, at some point during procedure, if resident having any pain.
5. Safely and gently exercise the resident’s shoulder, elbow, wrist, and fingers, supporting and
moving each joint gently and naturally (without force to limbs or joints).
6. Exercise each joint in at least TWO patterns.
Examples of Patterns: Flexion, Extension, Abduction, Adduction, and Rotation
7. Each pattern must be demonstrated at least THREE times (for each joint).
8. Ask frequently during the exercises if the resident is having any pain.
9. Repeat exercises on the other arm.
10. Perform “closing procedure” (includes hand hygiene).
Skill #24: Perform Passive Range of Motion (Lower Body): Hips-Knees-Ankles-Toes
1. Perform “opening procedure” (includes hand hygiene).
2. Adjust bed to a safe and comfortable working height.
3. Lower side rail on the side you will be working on.
4. Ask, at some point during procedure, if resident havng any pain.
5. Safely and gently exercise the resident’s hip, knee, ankle, and toes, supporting and moving
each joint gently and naturally (without force to limbs or joints).
6. Exercise each joint in at least TWO patterns.
Examples of Patterns: Flexion, Extension, Abduction, Adduction, and Rotation
7. Each pattern must be demonstrated at least THREE times (for each joint).
8. Ask frequently during the exercises if the resident is having any pain.
9. Repeat exercises on the other leg.
10. Perform “closing procedure” (includes hand hygiene).You can also read