MEDIASITE Uploading Video - Mediasite Instructional Guide Series - TAMU
←
→
Page content transcription
If your browser does not render page correctly, please read the page content below

MEDIASITE
    Uploading Video

             V 10.31.17

Mediasite Instructional Guide Series
Getting Started
System Requirements
       Minimum system requirements must met. Your smartphone will likely be compliant, but a laptop should have
       Windows 7, 8, 8.1, or 10; 2.4 GHz Core 2 Duo CPU or equivalent 4 GB RAM, and at least 1 GB of free disk space, and
       a built-in or external camera and microphone.
       Although professional recording assistance is available, your smartphone, tablet, or computer possess the
       microphone, camera, and recording software to create a video component.

Microphones
       Microphone placement is critical to the quality of sound. Lapel mics must be placed away from moving articles of
       clothing such as jacket lapels or collars and jewelry such as large necklaces, bracelets, or multiple loop earrings.
       Headset mics can be used with the mic placed optimally just below the corner of the mouth. Holding the
       microphone out and away from your mouth can reduce the popping sounds when pronouncing words beginning
       with the letter “P”.
       External speakers must be turned down to avoid feedback noise.

Physical Environment
        External noises, such as ringing phones, squeaking doors/chairs, people walking in a hall, fans, lawnmowers,
        jewelry, or traffic; can create distractions.
        Poor lighting can reduce visibility. Open blinds, curtains, flickering fluorescents, and poorly placed desk lamps can
        reduce image clarity.
        Background images can create environments of reinforcement or distraction. Properly placed charts, maps, or
        diagrams can add to a concept. However, calendars, personal artwork, or charts from other courses can easily distract
        and prevent future repurposing.

Attire
         Certain clothing choices will be more visually appealing on video. Clothing with close, high-contrast pin stripes, like
         white shirts with closely placed black or navy stripes, herringbone or corduroy, or busy plaids can be visually
         distracting. White shirts are acceptable, but must be worn under a darker jacket. Anything orange or reddish-orange
         can become too luminous. Maroon, blues, greens, grays and earth tones all work great for video.

Structure
        Creating a bulleted list of key concepts is usually better than a written script. This allows you greater fluency and
        flexibility while presenting your concepts in a natural, conversational tone. This also assures that all topics are
        adequately addressed.
        Testing all of the hardware components and conducting a “dry run” of your lecture prior to the recording, especially
        a live presentation, will increase the probability of seamless success.
        Less is often more. Segmenting or “chunking” your topic into easily consumable three to seven minute segments
        can dramatically increase learner retention. Increase this with interactive polls or questions to drive even higher
        levels of retention and engagement.

Everything Else
        If you realize that something, whatever that may be, is missing or you would like to try something new, or
        something simply does not work; feel free to contact us at coe.mediasite-helpdesk@tamu.edu. We would be
        pleased to provide assistance!
Index
Just receive a video of new discoveries about your topic from an industry partner? Did you find a YouTube video that
summarizes key points? Or do you have pertinent procedures captured on your smartphone? Now, with Mediasite, you
can include them in your course. Over 100 different formats can easily be uploaded. Even better, all of your video files
can be searched, secured, and interactive! Share them with a research community, Blackboard courses, iTunesU, or
even a Youtube channel. The choice belongs to you!

       1. Getting Started
       2. Locate Course Semester Folder
       3. Create Presentation
       4. Record Desktop & Upload Media
       5. Uploading Existing Video
       6. Edit Video Settings
       7. Delivery Options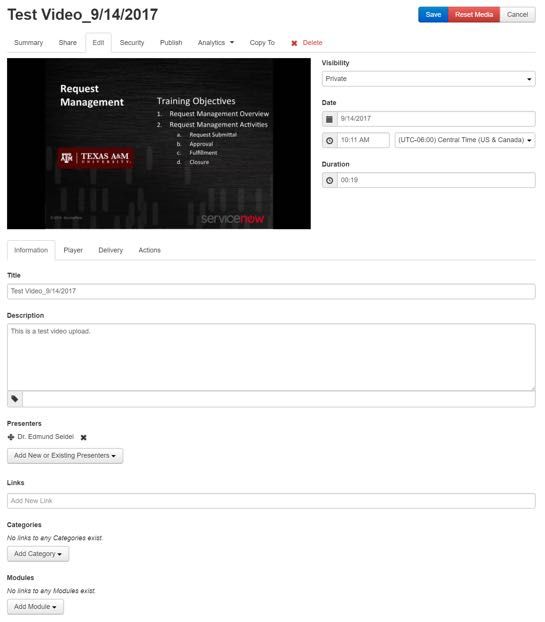
Logging into MyMediasite
Getting Started

  1    Go to: https://
       mediasite.engr.tamu.edu/
       Mediasite/MyMediasite
  2    Log in with your NetID:
       If it is your first time logging into       2
       the system you will be asked to fill
       out some information before you
       can proceed.

                                                              Uploading Video

Locate Course Semester Folder

   1   Find your course semester folder
       at the bottom left and select it.

                                               1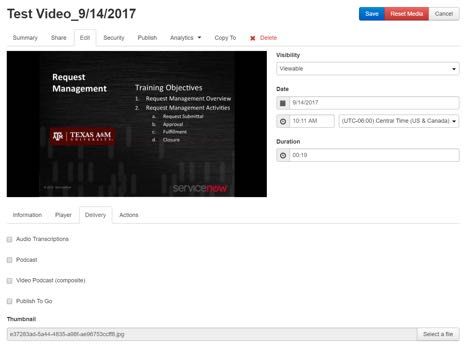
Uploading Video

Create Presentation

                                         1
  1   To upload or create a new video,
      click Create Presentation.

Record Desktop and Upload Media

  1   Record Desktop: used to make a
      new video only if you have the                      1
      Mediasite Desktop Recorder
      software installed.                                 2
  2   Upload Media: used when you
      have a video that you want to
      add to your course. Videos can
      be created using Camtasia, Real        Note: Camtasia by default records in its own proprietary
      Media, etc. or from sources like       format, either .camrec or .trec. These formats are not
                                             ingestible by the Mediasite system. They would either
      YouTube, Echo, etc.                    need to be processed into another format or the default
                                             recording format can be changed.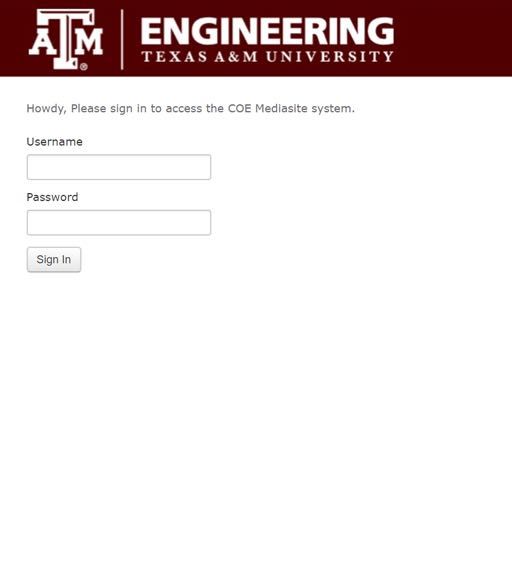
Uploading Video

Uploading Existing Video

   1   Please choose a name for the video

  2    You may choose to write a detailed
       description.                            1
  3    Please choose the semester folder
       for the related course. This will       2
       default to the course semester folder
       you chose earlier.
                                               3
  4    Click Select Video.
                                                   4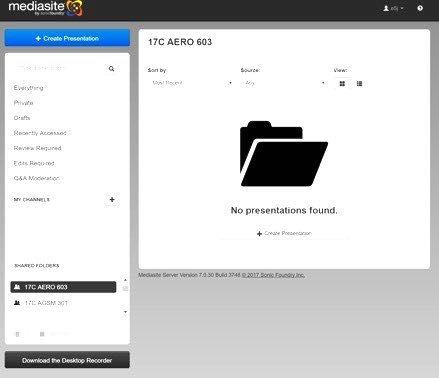
Uploading Video

Edit Video Settings

  1   Now click the “Edit” tab to change
      the title and set visibility of the video.
                                                   1
  2   By default the system marks all
      uploads as private so that you can
                                                       2
      choose when to make the video                    3
      available to the students.
      ‣ To make it visible choose
         Viewable from the dropdown
         menu at the right.

  3   You are also able to set a specific date
      and time for the video. This allows
      you to set the order in which they will
      show up in the catalog. (This is not a
      necessary step.)
       ‣ If you would like to create a
         Download please continue.
       ‣ If not, you can close this window
         but please keep the computer
         running for a bit to make sure the
         file successfully uploads.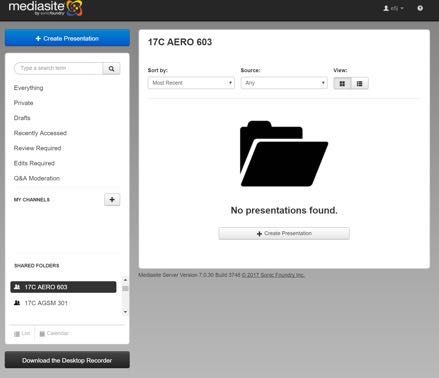
Setting up Downloads

Delivery Options

   1   Audio Transcripts: Used for closed                    5
       captioning. Please contact the remote
       learning team for information.

  2    Podcast: Used to provide only the
       audio to the student, no video.
       ‣ Please choose FM radio quality
         from the dropdown menu.

  3    Video Podcast (Composite):
       Provides both audio and video to the
       student.                                1
       ‣ Please choose the 1.5 Content         2
         Only for uploads from other
         sources (Camtasia, Real Producer,     3
         Windows media, etc.)
                                               4
  4    Publish To Go: Provides a streaming
       like experience with audio and video
       to the student. Please be aware that
       this is the largest download and may
       be difficult for some students to
       download.

  5    Once you are finished please click
       Save.
This concludes the tutorial on
           MyMediasite.

 Please contact us for assistance at:
coe-mediasite-helpdesk@tamu.edu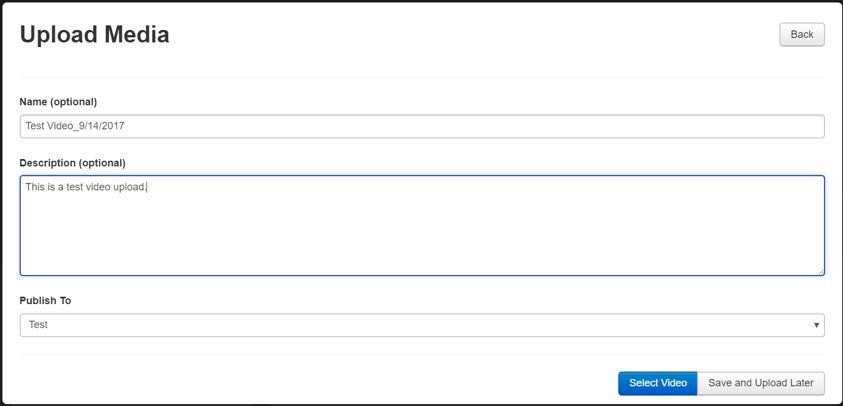
You can also read