Remote and Hybrid Learning
         Guide
←
→
Page content transcription
If your browser does not render page correctly, please read the page content below
Remote and Hybrid Learning
Guide
At Promethean, we support global education communities with the right tools to keep classrooms connected
and students engaged. We have combined the interactive tools of the ActivPanel with our award-winning
lesson delivery software to help you create digital resources, connect your classrooms and engage with your
students no matter where the physical classroom takes you.

           Record your lessons and share via                  Interact with your students via live
             Google Classroom, Microsoft                           online lessons and create
            Teams, Box or any cloud sharing                  assignments, playlists, quizzes and
            platforms. Have students install                      activities to keep students
                 the personal version of                     connected to their learning with any
            ActivInspire and share activities                                device.
                 for offline interactions.

          https://support.prometheanworld.c                          https://classflow.com
              om/activinspire-download
Preparing Students and Parents for Remote Learning
Message: Provide a clear, calm message of why you are providing remote learning, accessing materials,
expectations and how you will communicate and support both parents and students.

Remind: Parents and students should be reminded of the district’s acceptable use policy. Post a copy in your
remote learning platform.

Access: Provide or explain how students will access devices. (Either the district will provide, personal devices
or if public devices are accessible.)

Internet: Explain how students will connect to the internet on their device. Provide safety tips for students on
devices. Ex. Lessons will be 15 min. in length, internet safety and digital citizenship.

Applications: Provide access to applications students will need to view and interact with content.

Communication: Provide “How To” tips for signing in, accessing resources, connecting to the internet, content
releases, due dates, how to communicate with the teacher, locating quiz/test scores, support guides.

Demonstrate: Provide videos or live demonstration of how to navigate the mobile environment, how to access
content, create products, complete course work, quizzes and tests and how to submit items.

Schedule: Live lessons should be performed at the same time on the same set day. (Ex. The live math lesson
will be every Monday and Wednesday at 9:00 am.)

Teacher Tips for Creating New Resources

Microlearning: Create smaller learning units, short learning activities and keep resources organized in units.

Weeding: Remove unnecessary information.

Match Modalities: Showing on-screen animation with narration, audio with reading passages, photos to
support content or sound files for pronunciations helps to prevent cognitive overload and assists students
with processing.

Signaling: Highlight the information that needs to be processed and bold key words to direct the learner’s
attention.

Segmenting: Chunk your information to help students process information. Smaller videos (5 min. or less)
break points for information and call out information.

Design: Support for all screen sizes – Larger text, easy activities and easy navigation of resources. Games
should be single-screen challenges.

Assess: Quiz students often to provide them with feedback and test for documentation of student
understanding.

Communicate: Post directions and communicate often on your message board. Create office hours to provide
a time when students know you are available to communicate with them.

Award: Provide badges, call outs on the message board or emails to students and parents about whole class
or individual success.

Anywhere Content: Content should be created/placed in formats that are accessible on all mobile devices. Ex.
PDFs. Choose a platform that has players for your videos and easy upload of content.

Data Access: Access to student data to evaluate and document understanding.
Student Products: Provide resources and applications for students to create and submit.

Administrator Tips for Remote Learning
Device Agnostic: Browser access for access to learning content and live instructional sessions.

Equitable Platforms: All teachers and students have access and support the classroom workflow in a mobile
environment.

Data Security: Ensure that your mobile learning platform is iKeepSafe and compliant with the Family
Educational Rights and Privacy Act (FERPA), Student Online Personal Information Protection Act (SOPIPA),
and the Children’s Online Privacy Protection Act (COPPA). (ClassFlow has no subscription or hidden fees and
is FERPA, SOPIPA and COPPA compliant.)

Data Retrieval: Confirm that your mobile learning platform allows you to retrieve your instructional materials
and student data.

Professional Development: Learning needs to be online, self-paced and provide certificates and badges.
Training materials should be varied and include lesson samples, short “How To” videos, online courses for
certifications and orientations and getting started manuals.

Content Materials and Management: Teachers need the ability to access a lesson repository and manage the
instructional engagement of the content, assessments and the student workflow in a controlled environment.

Accountability: Assessments and student work samples demonstrate student learning and understandings.
Ensure your mobile learning platform has a variety of ways for teachers to assess and gather student work.

                Resources for Content and Professional Development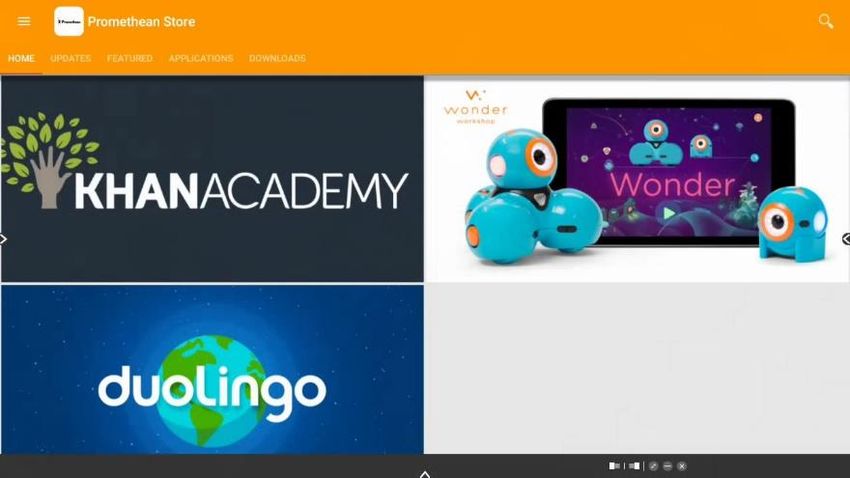
Learn Promethean
Free on-demand training and teaching resources at your fingertips to
help you easily get started creating interactive lessons.
learn.prometheanworld.com

Promethean Certified Teacher
Learn the foundational tools of the Promethean classroom and how to
integrate these tools into your daily instruction. Showcase your proficiency
by taking the exam and earning your Promethean Certified Teacher badge
and certificate.
learn.prometheanworld.com

myPromethean’s Resource Library
Easily preview, download, and open flipcharts in a few clicks.
mypromethean.com

ClassFlow’s Marketplace
Save time with ready-made activities. Choose from lessons,
ActivInspire Flipcharts, PPTs, 3D Objects and more.
classflow.com
Record and Share with ActivInspire
Record your ActivInspire flipcharts, desktop and computer
applications to create lesson materials to share with your
students.
Examples:
   • Modeling new skills                                             •   State the purpose
                                                                T
   • Digital storytelling                                            •   Get to the point
                                                                I
   • Presenting content                                         P    •   Keep recordings short
   • Instructions/directions for tasks                               •   Align recordings with
   • Science experiments                                                 activities
   • PE exercises
   • Navigating the mobile environment

                                                                    Share to Google Classroom
ActivInspire Screen Recorder                                        1. Save your recording to
                                                                       your Google Drive
Open ActivInspire – Tools>More Tools>Screen Recorder.
                                                                    2. Open Google Classroom
Choose between Full Screen Recorder or Area Screen
                                                                    3. Select Share with
Recorder.
If you choose Full Screen Recorder, the recorder will                  class>Add>Google Drive
automatically launch. With Area Screen Recorder,                                     >Choose
                                                                                      File>Add
drag to create the area you wish to record, then
                                                                    4. Assign to Classes
select Launch Recorder.

When you are ready to begin, select Record. The Save a
                                                                     Share to OneNote
Recorder File dialog box opens. Choose the location you wish
                                                                     1. Save your recording to
to save the file to, enter a name, and select Save.
                                                                        your computer
For Windows, recording is indicated by alternating blue and          2. Open OneNote
red flashing dots. For Mac, recording is indicated by a solid        3. Select Insert>File>Insert
blue dot and continues until Pause or Stop is pressed.                  Attachment>Choose File
                                                                     4. Locate your recording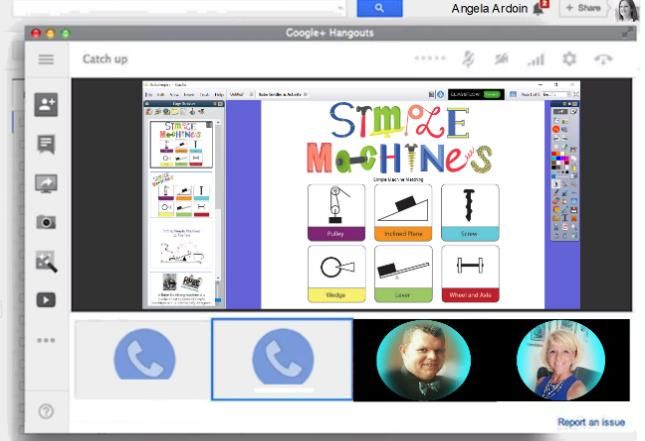
ActivInspire and Live Polling
Present your flipcharts through any
telecommunication learning platform such as Skype
or Google Hangouts and connect students to conduct
live polling sessions.

                Polling in ActivInspire
                   1. Open ActivInspire.
                   2. Select the Express Poll.
                   3. Select the Poll Option.

            •   Guided Reading
                Questions
        T   •   Check for
        I       Understanding
        P
            •   Building Concept Maps
            •   Fun Games
            •   Use Desktop Annotate
                during live lessons

            •
Create and Engage with ClassFlow
Create Assignments, connect students to lessons,
quiz and submit student products in an easy online
environment that provides                                    •     Organize lesson
fluid interactions and submissions.                                materials
Examples:                                                    •     Use rubrics to guide
                                                     T
•        Live Lessons                                I             students
•        Live Polling                                P       •     Reward students
                                                                   with badges
                                                             •     Include
•       Assessments                                                assessments
 •      Assignments
Create
 •        a Student
        Student  AccountsAssignment
 • intoAnnouncements
Log      your ClassFlow account.
Create a Class.
Upload your resources (Resources>New>File Upload).
Create an Assignment (Resources>New>
Assignment>Title>Save).
                                                                 Google Classroom
                                                                 1. Add ClassFlow app to
                                                                    G-Suite

                                                                 2. Lessons, Assessments
                                                                    and Activities stored in
                                                                    Google Drive

                                                                 3. Assign via Google
                                                                    Classroom

Organizing Resources (Add Resources>Select
Resource>Select).
Assign (Assign>Choose Class>Deliver).

                                                         Polling/Assessment
                                                             • Create assessment
                                                                 Resources>New>
                                                                 Assessment
                                                             • Add the assessment to
                                                                 your assignments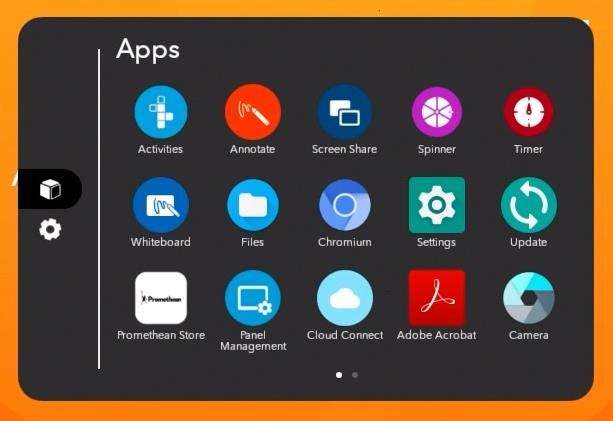
ClassFlow Classes

    Create a Class
    Log into ClassFlow.
    Classes>New>Add a Class.
    Name Your Class>Student Generated.

    Enrolling Students
    Log into ClassFlow.                             Polling
    Classes>Chose Your Class>Roster>Class       •   Deliver Lesson
    Code>Select Choose.                                 Resources>Choose
    Students create their account and use the           Lesson>Deliver
    class code to enroll.                       •   Connect Students
                                                        Classflow.com/student
                                                •   8 Types of Polling Options

]
Video Conferencing with Google Meet You will need to install the Google Meet video conferencing app in order to present your ActivPanel screen to student devices remotely. You can install Google Meet from the Google Play Store. Google Play Store is an option on the Promethean Elements Series ActivPanel. However, Promethean ActivPanels are not Google Play Protect certified devices. Therefore, the decision to enable GMS (Google Play) is 100% your district’s choice and should be made by an authorized and informed decision maker within your district. To install apps from the Google Play Store, select the Unified Menu, then tap Locker. From the Apps page within the Locker, select Play Store.
Once in the store, select Sign In. Enter your Google Account credentials, then tap Next. Enter your password,
then tap Next. You will be prompted to agree to the Google Play Terms of Service. To accept the Google
Services settings, select Accept. You may now search for hundreds of apps.

Once you have searched for Google Meet, simply tap Install to begin the installation process. You may be
prompted to confirm installation once more.

Tap Open to immediately open the newly installed app.
Sign in to your account. Once the app is open, select either New meeting or Meeting code.

Once you have joined the meeting, tap the menu in the top right corner of the screen.

Select Present screen from the menu.

Toggle the Allow display over other apps option on and tap Back. You will once have to toggle this setting on
once.

You are now presenting your ActivPanel screen to your students. Students will see every action completed on
your ActivPanel screen, unless you switch away from the Home source.

While you can share your screen directly to students, you may wish to share audio or show yourself physically
teaching. If you wish to share audio, you have the option of connecting a USB webcam or microphone to one
of the USB ports on your ActivPanel.

If you wish to show yourself teaching while sharing your screen, some of your readily available options may
include using the camera of a computer, tablet, or phone. Simply aim the camera at yourself and your
ActivPanel while you teach. This method would also allow you to see your students in grid view while you’re
teaching. Your computer, tablet, or phone can also function as the microphone in this instance.
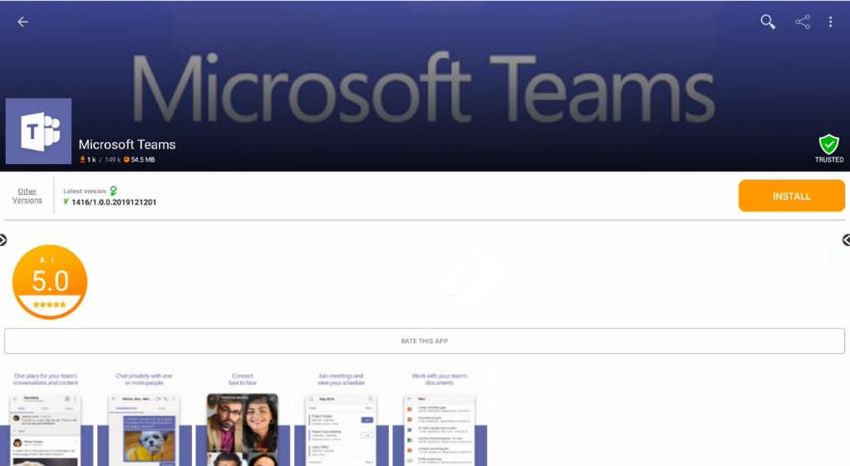
Video Conferencing with Microsoft Teams

You will need to install the Microsoft Teams video conferencing app in order to present your ActivPanel screen
to student devices remotely. You can install Microsoft Teams from the Promethean Store. To begin, select the
Unified Menu, then tap Locker.

Locate and select the Promethean Store. Note: You may need to swipe through your Locker’s pages to locate
the Promethean Store app.

Within the Promethean Store, use the search function in the top right corner to locate Microsoft Teams.
Once you have located the Microsoft Teams app, select Install. You may be prompted to confirm installation
once more.

Once an app has finished installing, you will receive a confirmation and two options: Done and Open. Tap
Open to immediately open the newly installed app. Sign in to your account in advance, so you will be ready to
easily connect to your session once you are teaching your students.

Once the app is open, select the Calendar icon located at the bottom of the screen. Select Join to join a
previously scheduled meeting, then tap Join now.
Once you have joined the meeting, tap on More Actions located on the menu bar at the bottom center of the
screen and tap on Share and Share Screen.

The first time you use the app, you will be prompted to “Allow display over other apps.” Toggle on and tap
Back.

Return to Share, then select Share Screen and Start Now. If you are prompted to allow Microsoft Teams to
record audio, tap Yes.

You are now presenting your ActivPanel screen to your students. Students will see every action completed on
your ActivPanel screen unless you switch away from the Home source.

While you can share your screen directly to students, you may wish to share audio or show yourself physically
teaching. If you wish to share audio, you have the option of connecting a USB webcam or microphone to one
of the USB ports on your ActivPanel.

If you wish to show yourself teaching while sharing your screen, some of your readily available options may
include using the camera of a computer, tablet, or phone. Simply aim the camera at yourself and your
ActivPanel while you teach. This method would also allow you to see your students in grid view while you’re
teaching. Your computer, tablet, or phone can also function as the microphone in this instance.
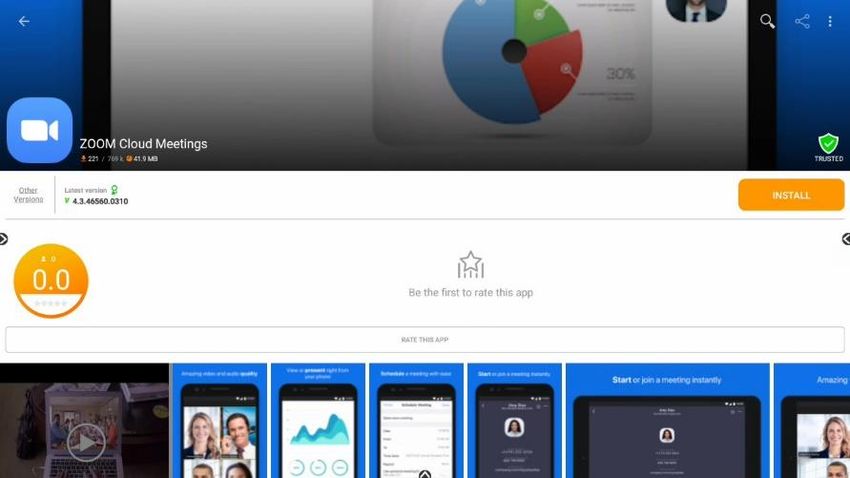
Video Conferencing with Zoom

You will need to install the Zoom video conferencing app in order to present your ActivPanel screen to student
devices remotely. You can install Zoom from the Promethean Store.

To install apps from the Promethean Store, select the Unified Menu, then tap Locker.

From the Apps page within the Locker, select Promethean Store.

Once in the store, you may use the tabs to help you locate apps or utilize the search option in the top right
corner.
Once you have searched for Zoom, simply tap Install to begin the installation process. You may be prompted
to confirm installation once more.

Once an app has finished installing, you will receive a confirmation and two options: Done and Open. Should
you tap Done, you will be returned to the app page, at which point you may open the app, or use the back
arrow in the top left corner to return to the Promethean Store and continue browsing apps. Tap Open to
immediately open the newly installed app.
Sign in to your Zoom account. Once the app is open, you may start a New Meeting, Join, or start a previously
scheduled meeting from the Meetings icon at the bottom of the screen.

Select Share and Screen from the menu located at the bottom of screen.

                                                  Share icon

Toggle the Allow display over other apps option on, and tap Back. You will only have to toggle this setting on
once.

You are now presenting your ActivPanel screen to your students. Students will see every action completed on
your ActivPanel screen unless you switch away from the Home source.

While you can share your screen directly to students, you may wish to share audio or show yourself physically
teaching. If you wish to share audio, you have the option of connecting a USB webcam or microphone to one
of the USB ports on your ActivPanel.

If you wish to show yourself teaching while sharing your screen, some of your readily available options may
include using the camera of a computer, tablet, or phone. Simply aim the camera at yourself and your
ActivPanel while you teach. This method would also allow you to see your students in grid view while you’re
teaching. Your computer, tablet, or phone can also function as the microphone in this instance.
You can also read