GCSE Food and Nutrition Food Preparation Skills - CCEA GCSE - For first teaching from September 2017
←
→
Page content transcription
If your browser does not render page correctly, please read the page content below

GCSE

CCEA GCSE
Food and Nutrition
Food Preparation
Skills

For first teaching from September 2017

Food Preparation Skills

                                 Skill 1: Weighing and measuring
The ability to weigh and measure accurately is vital when developing food preparation skills. It is the
starting point in any practical; therefore, developing this skill requires attention to detail and precision.

Weight and Volume
Measurements for solids are based on weight. Solids are also known as ‘dry ingredients’ and include
flour, rice and oats.
Measurements for liquids are based on volume. Liquids include water, fruit juice, milk and stock.

Metric and Imperial
Some recipes use metric whilst others use imperial. You should aim to work in metric rather than
imperial. This should be considered when researching recipes and whilst writing your plan for the
practical assessment in component 2.
                          Metric                           Imperial
                          Grams                            Ounces
                          Kilograms                        Pounds
                          Millilitres                      Fluid ounces
                          Litres                           Pints

When recipes use imperial, conversion tables can be used to convert to metric. It is vital that this is
done correctly; otherwise there will be significant errors which could potentially destroy your final
product. Conversion tables have been devised in weight (table 1.1) and volume (table 1.2) for your use
if required.

•   Converting a recipe from imperial to metric
Table 1.1 Conversion tables for weight (dry ingredients)

Ounces                Grams               Ounces                     Grams
1 oz.                 25g                 9 oz.                      255g
2 oz.                 55g                 10 oz.                     285g
3 oz.                 85g                 11 oz.                     310g
4 oz.                 115g                12 oz.                     340g
5 oz.                 140g                13 oz.                     370g
6 oz.                 170g                14 oz.                     395g
7 oz.                 200g                15 oz.                     425g
8 oz.                 225g                16 oz. (1 lb.)             450g

                                                       1
Table 1.2 Conversion tables for volume (liquids)

Fluid Ounces/         Millilitres/       Fluid Ounces/ Pints      Millilitres/ Litres
pints                 Litres
1 fl oz.              30ml               11 fl oz.                310ml
2 fl oz.              55ml               12 fl oz.                340 ml
3 fl oz.              85ml               13 fl oz.                370 ml
4 fl oz.              115ml              14 fl oz.                400 ml
5 fl oz./ ¼ pint      140ml              15 fl oz./ ¾ pint        425 ml
 6 fl oz.             170ml              16 fl oz.                455 ml
7 fl oz.              200 ml             17 fl oz.                485 ml
8 fl oz.              230ml              18 fl oz.                510 ml
9 fl oz.              255 ml             1 pint                   570 ml
10 fl oz./ ½ pint     285 ml             1 ¾ pint                 1 litre

Equipment
A range of equipment can be used when weighing and measuring:

Kitchen scales:
Traditional kitchen scales will feature a large clock with a dial. In order to be accurate when using this
type of scale, consider the following points:

•   Set to Zero: When the bowl has been placed on the top of the scale, the dial should be manually
    moved to zero.

•   Eye Level: When the ingredients are placed in the bowl, the dial will move and the weight is
    recorded by looking at eye-level.
Digital/ electronic scales are becoming ever more popular. There are many advantages to this type of
scale including a high degree of accuracy however, the following points should also be considered:

•   Set to Zero: The bowl being used to weigh the ingredients should be placed on the scale before it
    has been turned on and any ingredients added.

•   Batteries: Ensure the product is checked for power being using and replace batteries regularly

                                                     2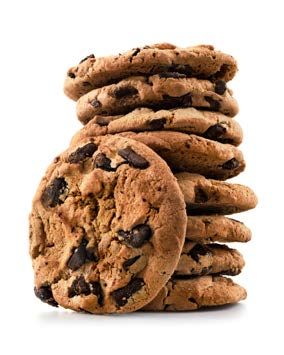
Measuring jug:
Used to measure liquids but some measuring jugs can also be used to measure dry quantities.
Points to consider:

•   CLEAN AND DRY: ensure jugs are washed thoroughly between uses and dried. Bacteria thrive in
    moist conditions.

•   OBSERVE: read and examine the marks on the jug. Be sure you have clearly found the mark you
    are aiming to reach before you begin.

•   FLAT SURFACE: avoid holding the jug when measuring as this will lead to inaccuracies. Place
    the jug on a flat surface and look at eye level when pouring the liquid.

Measuring Spoons
Recipes often include measurements in teaspoons (tsp.), dessertspoons (dsp.) and tablespoons (tbsp.)
Points to consider:

•   It can be difficult to get this accurate if you are unsure of heaped spoons and level spoons. A
    heaped spoon of sugar may cause little variation in the end result however a heaped spoon of
    baking soda may leave a soapy taste in the final product.

•   Use a levelled measuring spoon: If in doubt use a measuring spoon levelled at the top to ensure
    accuracy.

(www.foodpyramid.com date accessed 7.11.16)

                                                    3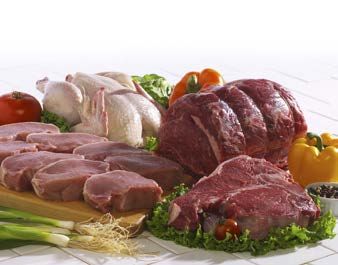
Common problems when weighing and measuring

Action                         Problem                         Fix
Measuring volume and           Inaccurate measurements         Use measuring jug for liquid
liquid in a measuring jug                                      and kitchen scales for solid
                                                               ingredients such as flour

Estimates of oil, salt and     Incorrect taste and             Ensure measuring spoons are
sugar                          consistency                     levelled
                               Higher calorie intake

Altering (doubling or          Incorrect taste and appearance Avoid halving a recipe when
halving) the recipe of baked   of final product               baking
goods
                               Cooking time is altered         Alternatively you can cook it
                                                               and when cooled, store in an
                                                               airtight container or freeze

                                                               If doubling a recipe, make one
                                                               batch at a time

Too much flour                 Incorrect texture               Lightly add a spoon at a time
                                                               into the measuring scale or
                               Depending on the product,       cup.
                               the end result can be thick,
                               dry, rubbery or tough           Always set the scales at zero
                                                               and look at eye level
Different sized portions       Uneven cooking time             Follow the recipe and ensure
                                                               you are not over generous or
                               Some of the larger portions     light handed
                               are undercooked while the
                               smaller will potentially burn

                                                   4
Skill 2: Knife skills for meat, fish and alternatives
Knives
A range of knives are needed in the kitchen for preparing different ingredients. The main knives used
when preparing meat, fish and alternatives are:
Filleting knife: used to fillet fish due to its narrow and flexible properties making it easy to remove the
skin.
Carving knife: has a thin, long blade used to carve cooked meat (hot or cold).
Cooks knife: is a large knife with a thick blade used for carrying out a range of cutting duties such as
chopping, dicing and slicing.

Health and Safety
When preparing ingredients, it is vital to remember the importance of health and safety.
Points to consider when handling any knife or sharp utensil in the kitchen:

•   SHARPEN: knives should be sharpened carefully by someone who has received training on such
    activity.

•   CLEAN: ensure all utensils have been washed in hot soapy water and have been dried after use. If
    in doubt about the cleanliness of a knife that has been used to prepare raw meat, clean and dry it
    again.

•   STORE CORRECTLY: often knives are stored in a wooden block. They can be stored in a
    drawer that has been clearly labelled to avoid accidents. Store knives in an organised manner.

•   CHOOSE CORRECTLY: always use the correct knife for the food you are preparing to avoid
    accidents

•   CARRY DOWNWARDS: carry your knife by the handle in a downwards position to avoid injury
    in the kitchen

•   WARN: communicate to others if a knife has been left in a place that could cause potential injury.

Cross-contamination
Is a term that describes the contamination of one food product by another. It can happen as a result of
unsafe food practices and food handling. The equipment being used in a kitchen can be one of the
main causes of cross contamination. Knives must be kept clean and dry. The correct colour of
chopping board must be used when preparing all food. When practicing this skill, use a red board to
prepare raw meat and chicken and a yellow board to prepare cooked meat.

                                                     5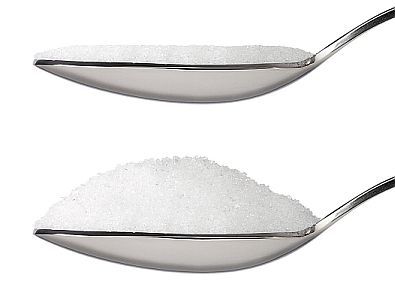
Demonstrating knife skills in the preparation of chicken
Chicken comes in a variety of forms including fillets, wings, drumsticks and thighs. All chickens begin
in whole form and can be cut into portions. Buying a chicken in whole form can be relatively less
expensive that buying specific portions.
Portioning a chicken:
There are many cooking resources that can be used to demonstrate this skill in class. You may want to
use this as a step-by-step tutorial during your cookery session.
Filleting a chicken:
Fillets of chicken are a popular choice amongst consumers. Chicken fillets are a very lean part of the
bird and can be quite expensive when bought this way. You will demonstrate this skill when portioning
a chicken.
Points to consider:
• COOKS KNIFE: Use a cooks knife that has been sharpened to prevent accidents
• REMOVE FAT: Remove all fat from the breast when preparing chicken fillet
General points to consider:
• RED BOARD: Cut on a red board as chicken is considered a ‘high risk food’
• HYGIENE: Wash hands and utensils well after handling raw chicken to avoid cross
contamination
• CHILL: Keep chicken chilled before preparation and when marinating
• COOKING: Cook thoroughly as instructed or until juices run clear
• STORAGE: Leftovers can be stored appropriately after cooking
• AVOID WASTE: the carcass can be used to make a stock for sauces and soups.
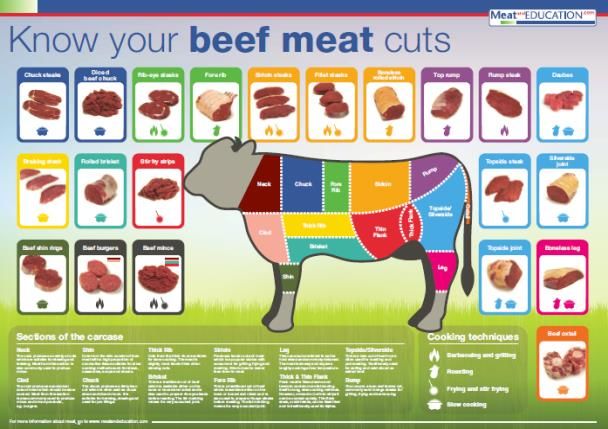
6Demonstrating knife skills in the preparation of meat
Meat requires some preparation before it can be cooked. The
animal, from which the meat is derived, will go through the
slaughter process before the carcass is ready for preparation. There
are a range of cuts of meat that are removed with care, precision
and excellent knife skills by a trained butcher.
Use the following link to download the poster ‘Know your beef
meat cuts’ and ‘Know your lamb cuts’
http://meatandeducation.redmeatinfo.com/sites/default/files/Know%20your%20beef%20meat%20c
uts%20poster.pdf
http://meatandeducation.redmeatinfo.com/sites/default/files/Know%20your%20lamb%20meat%20c
uts.pdf
7Demonstrating knife skills in the preparation of fish and alternatives
When developing this skill you will need to consider how to
prepare flat fish (e.g. plaice) and round fish (e.g. salmon).
General points to consider when demonstrating this skill:
• USE SCISSORS: to trim any fins on the head of the fish, either side and back
• FILLETING KNIFE: removing the head then fillets from the bone. A round fish will have two
fillets. A flat fish will have four fillets
• REMOVE SKIN: using the filleting knife and trim fillets.
• SMELL: always smell fish to test the freshness. There should be a fresh ‘sea’ smell not ‘fishy’ or
‘sour’
• SHINY: scales and flesh should be shiny, eyes should appear ‘bulging’ and clear and; gills should
be red and free from slime
• MOIST AND FIRM: the flesh of the fish should spring back after being touched
• AVOID CROSS CONTAMINATION: use a blue board and wash hands/ utensils in hot soapy
water after preparation. Store appropriately until cooking/ eating.
Alternatives
As an alternative for meat and fish, consumers may choose to cook with
high protein, non-meat alternatives such as Tofu. This is suitable for all
groups of people but may be preferred by vegetarians or those with strong
cultural beliefs.
Tradition and culture may also see a range of alternative dairy products such as Paneer (unsalted
cheese) and Halloumi (goat’s cheese).
8Skill 3: Techniques for preparing fruit and vegetables
Equipment used in preparation of fruits and vegetables
• VEGETABLE PEELER: to reduce waste when peeling potatoes or apples
• VEGETABLE KNIFE: or paring knife to cut, shred and slice
• SCOOP: for portion control (potatoes) or for presentation (melon)
• CRUSHER: for garlic when adding flavour
• GRATER: for the zest of fruit when adding flavour and retaining moisture
(lemon in Madeira cake). For presentation for a salad (cabbage and carrot in coleslaw)
• POTATO MASHER: for a smooth consistency (potatoes or carrot and parsnip)
• BLENDER: for a smooth consistency in a soup, sauce or smoothie free from lumps
• JUICER: to reduce waste and prevent pips when using the juice from citrus fruits (oranges and
lemons)
• PIPING BAG: for presentation purposes (duchess potatoes or to top a pie)
• CORER: used to remove the centre whilst reducing waste (apples and
pineapples.)
• SPIRALISER: a technique used to prepare vegetables in a creative and healthy
way. Vegetables are prepared to resemble noodles or spaghetti (courgette and
sweet potato)
Preparing fruit and vegetables
Points to consider:
• WASH: this is vital to remove soil or dirt. Bacteria from soil has been linked to E-Coli food
poisoning
• PEELING: removing the skin may not be essential. Keeping the skin on will reduce vitamin and
mineral loss. The skin can contribute to fibre intake which is useful for the digestive system
• DON’T SOAK: water soluble vitamins B and C are lost when vegetables are left to soak in water
• PREVENT OXIDATION: prepare fruits and vegetables just before eating. Oxidation will cause
vitamin and mineral loss
• AVOID ENZYMIC BROWNING: discolouration of fruits and vegetables happens when they
are prepared in advanced. Apples, bananas, potatoes and parsnips will turn brown when prepared in
advance; a process known as enzymic browning
• LEMON JUICE: if you must prepare in advance, lemon juice can be used to slow down enzymic
browning
9• BLANCHING: a technique used to prevent vitamin loss and discolouration. Fruits and vegetables
are put in boiling water briefly followed by submersion into iced water. This prevents enzymes
being activated.
Knife skills and techniques used when preparing fruit and vegetables
A range of knife skills and techniques are used to prepare fruit and vegetables. Skills in this area will
ensure safe handling, improve the presentation of fruits and vegetables; and ensure accurate cooking
time.
The following link can be used to demonstrate some of the skills below
http://www.foodafactoflife.org.uk/VideoActivity.aspx?contentId=73§ionId=62&siteId=14
Skill/ Technique Demonstration Description Food example
Bridge hold Place hand into bridge Cutting fruit and Onion
position vegetables into pieces
Apple
Cut between finger
and thumb safely
Claw Grip Place hand in claw Slicing fruit and Cabbage
position and slice vegetables into slices
or dices Lettuce
Fingers are placed
back from the knife
and used as a guide
Shredding Use the claw grip to Slicing into strips Peppers
create long thin strips
Cabbage
Julienne Remove root and tail Cutting vegetables Carrots
then peel. Cut into long thin strips
precisely into 2 cm that resemble Parsnips
lengths then into matchsticks
slices that are close to
identical in size
Brunoise From julienne, cut Cutting vegetables Carrots
horizontally into very small dice
Onions
Jardinière/ Batons Remove the root and Cutting vegetables Carrots
tail then peel. Cut into into precise slices that
lengths of 1.5cm then are thicker than Parsnips
slice into 3mm julienne
lengths (3mmx18mm)
Macedoine From batons, cut into Cutting vegetables Potatoes
even sized cubes into large dice/ cubes
Leeks
10Fan Make several slices A technique used in Strawberries
vertically just past the improving
top of the fruit or presentation. Slices
vegetable. Arrange in are made whilst
a fan shape keeping the fruit or
vegetable intact. Final
outcome is a ‘fan
effect’
Twist Slice the fruit or Oranges
vegetable then cut
past the middle Cucumber
Ribbon Peel long lengths of Thin peelings that are Carrots
fruit or vegetable arranged in creative
before arranging ways to improve Cucumber
presentation
Courgettes
Waterlily Cut vegetable in half An effect that is used Melon
then create ‘v’ shaped to create excellent
cuts from the edge to presentation. Tomatoes
the centre of the fruit
or vegetable
Segments Slice the top and A technique used to Apples
bottom from the fruit. create excellent
Cut into wedges. presentation whilst Tomatoes
improving sensory
With citrus fruits, cut appeal Oranges
the fruit away from its
Lemons
inner skin as close as
possible to prevent
waste
De-seed Cut the fruit or A technique used to Tomatoes
vegetable in half then improve the taste and
scrape unwanted texture or fruit and Peppers
seeds from the centre vegetables
11Skill 4: Soup and sauce making
Soup making
There are many types of soup:
1. Broths (Clear soup)
Broths are traditionally characterised as chunky soups made with meat and vegetables. A clear broth is
made using the stock from meat or meat joints. The remaining ingredients are simmered. Examples of
broths include; Minestrone and Vegetable broth.
2. Puree Soups
Puree soups are soups that are blended to a smooth texture. The ingredients are simmered until soft
and then a food processor or hand blender is used to puree and remove lumps.
Examples of pureed soups include; Carrot and coriander, Gazpacho and Curried Parsnip.
3. Chowder
Chowders are thick soups or stews which are usually based. They are known to contain potatoes, a
range of fish and some vegetables. Examples of chowder soups include; Corn Chowder, Spiced
Haddock Chowder.
Examples of chowders include: Parsnip and smoked cod and traditional seafood chowder.
Points to consider when making soup
1. DO NOT OVERCOOK THE INGREDIENTS: always sauté the vegetables to help enhance the
flavour. Add water when you feel the vegetables have softened nicely
2. PREPARE VEGETABLES CORRECTLY: dice vegetables to similar sizes to ensure less cooking
time. If vegetables are cut into varied sizes, the cooking time is altered
3. SIMMER NOT BOIL: Do not boil soup as water will evaporate and the consistency will be
incorrect
4. WATER OR STOCK: The correct amount of water is important for consistency. A thick soup is
not desirable. If you do not have stock made, stock cubes can be dissolved into water or your soup can
be seasoned with herbs or spices
5. GARNISH: Important for presentation and to add texture. Blended soups can be garnished with
cream for presentation or crotons to add a crunchy texture.
12Sauce making
Sauces are generally liquid based and a flavoursome addition to many dishes. They often form the basis
of many popular dishes such as Spaghetti Carbonara, Pasta Bolognese, Chicken Chasseur, Beef
stroganoff and Caesar Salad.
There are a wide variety of uses for sauces. A lot of sauces are made using the same technique. The end
product is determined by the ingredients used and their proportion.
Starch
based
Types
Emulsion of Reduction
sauces
Dressing
1. Starch based sauce
The addition of starchy ingredients will thicken liquids to make sauces. Liquid begins to merge with the
starch when heated to 60degrees Celsius. This causes them to swell up. Gelatinisation occurs when the
starch granules burst and form a gel. This causes the sauce to thicken. At 100 degrees Celsius the
process is complete. During the cooling stage, the sauce will thicken and its viscosity is known.
131.1 Flour
Flour contains starch and is used to create the following blended sauces:
1.1.1 Roux Sauce
This is a traditional method to make white sauce. Milk is commonly used as the liquid that is heated
with butter and flour to create the viscosity.
Points to consider:
• MELT BUTTER CAREFULLY: firstly melt the butter in low heat.
• REMOVE FROM HEAT: add the flour to the melted butter when the saucepan is off the heat.
This will ensure the flour can be well coated and will prevent it from burning
• STIR CONTINOUSLY: add the flour and fat to a low heat and stir for 2 minutes. This will cook
the flour out.
• ADD MILK: remove the saucepan again. There will be enough heat in the saucepan to add the
milk gradually. Beat the milk in to prevent a lumpy sauce.
• BRING TO THE BOIL: place the saucepan on the heat and allow it to boil (so gelatinisation
occurs and the starch thickens the sauce).
• AVOID STANDING: do not allow the sauce to ‘stand’ too long as it will cause a thick skin to
form on the surface.
1.1.2 All-in-one sauce:
This sauce is the same as a roux sauce. However it is a quicker method that requires limited skill in
sauce making.
Points to consider:
• ADD ALL INGREDIENTS: using this method, all the ingredients for the sauce is added to the
saucepan at once
• MEDIUM HEAT: place on medium heat to let the gelatinisation to occur
• STIR CONTINUOUSLY: carefully stir until the sauce begins to heat and thicken. This will
prevent lumps
• SIMMER: allow cooking for about 5 minutes so the flour is cooked.
141.1.3 Infused sauces:
Again, this sauce uses the same ingredients as a roux sauce. The technique differs to allow distinctive
flavours to dominate a dish.
1.2 Corn flour/ arrowroot
These types of starches are generally used to make blended sauces. Blended sauces require continuous
attention in the cooking process. They rely on some form of preparation before cooking; heat to
thicken them and attention-to-detail to ensure no lumps form.
Points to consider:
• PREPARE PASTE: mix the corn flour or arrowroot with a small amount of milk to form a paste
• BOIL LIQUID: bring the liquid to boiling point before pouring the paste
• GRADUAL: gradually add the paste to the boiled liquid
• STIR CONTINUOSLY: like with all starch based sauces, stir all the while to avoid lumps
forming.
Viscosity
This is used to describe the thickness of a starch based sauce. The thickness or viscosity, will determine
the outcome of a dish.
Points to consider:
1. POURING SAUCE: a pouring sauce is the thinnest starch based sauce. A small amount of flour is
used. The desired end result should be thin enough to pour easily and will coat the back of the spoon in
a thin layer e.g. Crème Anglaise
2. COATING SAUCE: this type of sauce is a little thicker than a pouring sauce. Slightly more flour is
used to create a more substantial viscosity. The sauce will coat the back of the spoon. Often other
ingredients are added to make pasta dishes or fillings for pies
3. BINDING SAUCE: this is the thickest of each of the starch based sauces. The sauce is thickened
with flour and extra ingredients added to create a dish such as fishcakes.
152. Reduction sauce
Making a reduction sauce can take up to an hour to make. However, this type of sauce is often full of
flavour and economical to make.
Points to consider:
• SIMMER: allow liquid to simmer slowly until a concentrated gravy is formed
• DEGLAZE: use the juices left behind after frying and add liquid in the form of cream, wine or
stock to form a reduction sauce when liquid has evaporated
• SPICE: spices can be added to liquids such as coconut milk and simmered to create Indian cuisine.
3. Emulsion sauce
This type of sauce is formed when liquid and oil or fat are mixed together with the addition of an
emulsifier. Without an emulsifying ingredient, the liquid and oil or fat would split.
Points to consider:
• EGG YOLK: used as an emulsifier when making hollandaise or mayonnaise. The egg yolk makes
the emulsion stable and the egg yolk acts as an emulsifying agent to prevent the sauce from
separating
• MUSTARD: can be used as an emulsifier when making dressings for salads. These types of sauces
must be shaken before use as the emulsion is unstable and some separating may occur after it has
been made.
4. Dressing
This is a sauce made simply with vinegar or oil. It is typically made to improve the flavour of salad.
Herbs and garlic can be used to help infuse flavours and improve the taste.
16Skill 5: Combining and shaping mixtures
Combining, mixing or binding
This skill is used when making most dishes. Some form of combining or mixing will be required in
most recipes.
Points to consider:
• MORE THAN ONE: mixing a range of ingredients to form one final product is essential when
making bread, baking cakes, making sauces and preparing burgers
• READ RECIPE: when combining ingredients, it is important to read the recipe and take note of
any instructions that will determine the outcome of the product. For example, adding the sugar to
the egg whites when making a meringue should be done gradually.
Shaping and coating
Shaping an end product will create visual appeal. The way in which this is done is important when
making fish cakes, burgers, sausage rolls and roulades.
Points to consider:
• COMBINING: before shaping, the mixture must be combined effectively. If the mixture is too
wet, the shape will be lost. If the mixture is too dry, it will crumble rather than form a desired shape
e.g. fishcakes require egg to help combine and are often coated with breadcrumbs
• DUST: when shaping, lightly dust the work surface with flour to avoid the mixture sticking.
• AVOID OVER HANDLING: too much handling will cause the mixture to become wet and
sticky. Handle as little as possible and aim to work fast
• DO NOT OVER GLAZE: when preparing pastry products such as scones or croissants, glaze is
very important. If there is no glaze, the product may burn and will not have a shiny appearance. If
over glazed, the product will become soggy and cooking time may be altered.
A technique used
-to improve the presentation of baked products, pies, meat and other products. It creates a
shiny coating
- in improving the texture of such products by adding a crispy coating.
Glazing can prevent the product from burning during the cooking process.
17Skill 6: Dough making and shaping
A dough is mixture of flour, liquid and fat in different quantities. Although this may not seem difficult,
making a dough for pastry, bread, bread products and pasta is quite complex and requires a high level
of skill.
6.1 Pastry making
The dough required for making pastry depends on the product being made. There are different types of
pastry suited to various dishes; shortcrust pastry, choux pastry and puff pastry.
Shortcrust pastry
This type of pastry is commonly used to make the base for quiche, the case for pie or sweet shortbread.
It is known as shortcrust due to the crumbly or ‘short’ texture it has when cooked.
Points to consider:
• ACCURATELY WEIGH: set the scale to zero and weigh accurately to prevent the dough from
being too wet or too dry
• PLAIN FLOUR: this type of flour is essential as it will not rise.
• RUBBING-IN METHOD: cut the butter into cubes before completing this. Ensure the fat coats
all of the flour as this prevents gluten from forming into strands that will make the pastry elastic
rather than crumbly.
• LIQUID: whether it is milk, water or egg (used to enrich) any liquid should be added one spoonful
at a time. Combine this well before forming a dough.
• COLD HANDS: wash hands under cold water and form a ball of dough whilst kneading lightly
• RELAX: allow the pastry to rest before rolling out. The reduces the risk of shrinkage when shaping
the pastry in a flan dish
• LIGHTLY FLOUR: only lightly flour the table to prevent sticking.
• ROLL LARGER: always roll the pastry larger than the dish you are going to shape.
• GREASE: grease the dish lightly to avoid sticking and press the pastry firmly into the dish before
pricking with a fork and cutting the edges
• EVEN ROLLING: roll evenly to ensure even cooking time
• BLIND BAKE: when making a pastry case that requires filling (pie), blind bake the pastry case to
prevent it from going soggy. You can do this by covering the pastry with greaseproof paper than
weights (dried peas are fine) to stop it from rising. Then bake for 15 minutes to create a crusty
texture.
• HOT OVEN: ensure the oven has been pre-heated so the pastry can cook well without becoming
greasy or soggy.
18Choux Pastry
This type of pastry is quite complex to make. This method is used to
make profiteroles and dumplings.
Points to consider:
• WATER: water is used in this process to make a batter. Butter and water should be boiled
• BATTER: when making the batter, remove from heat and add flour. This will prevent burning.
• BEAT: with a wooden spoon until flour cooks. Keep the temperature low
• COOL: before adding the eggs allow to cool. This will help stabilise the mixture and enable it to
form peaks
• PEAKS: add the egg gradually until peaks are visible. Beat the mixture well
• PIPE: this type of pastry will form good shape when piped.
• PIERCE: allow to cook for the desired time. In the final cooking stage (when the product is
golden and risen), pierce with a fork to allow the steam to escape from the product.
Puff pastry
Puff pastry uses equal amounts of fat and flour. It is a very complex process and requires very high
skill. A lot of cooks may choose to buy ready-made varieties due to cost, limited skill and convenience.
Although this is the lightest, it is the richest.
196.2 Bread making and shaping
Bread differs from pastry as it requires a high degree of kneading. Unlike pastry, the texture improves
with vigorous kneading. Raising agents are also used in this process.
Points to consider:
• Strong plain flour: is used due to the large presence of gluten content. This is important to help
make the dough elastic and to enable to dough to stretch
• RUBBING IN METHOD: to help incorporate air and activate the gluten
• GRADUALLY ADD WATER: so the dough becomes soft not sticky
• KNEAD: until the dough becomes elastic when stretched. This is when gluten is formed. This will
trap the air during the cooking process and allows the bread to harden
• PROVE: in a warm area to enable the gluten to form and to help the bread rise. Carbon dioxide is
formed when proving by the process of fermentation. The yeast grows when it feeds on the sugar.
Carbon dioxide is produced and air pockets may be visible after this stage is complete
• KNOCK BACK: knead the bread again to remove carbon dioxide or air pockets. This improves
the texture
• SHAPE: roll into desired shape to make bread rolls, pizza base, naan bread or fruit whirls.
• EVEN SIZE: ensure you have cut your bread dough into even sizes. This will keep cooking time
similar and prevent under/ over cooking parts of the dough.
20Skill 7: Using raising agents
A range of ingredients and methods are used to encourage a product to rise when cooked. Raising
agents contribute to the overall texture of a final product.
1. EGGS:
Whole egg
When whisking eggs, air is trapped to form a foam. It becomes more stable
when sugar is added.
Food examples include: Swiss roll, muffins and cookies
Points to consider:
• BEAT EGGS: beat eggs until they rise in volume
• ADD SUGAR: to stabilise the foam
• FOLD IN: fold in the plain flour gently to avoid air being lost.
Egg Whites
Egg whites are most effective at trapping air.
Food examples include: Making Meringues, folding into mousses an making
soufflés involves separating egg
Points to consider:
• CLEAN, DRY BOWL: water will prevent air being trapped and result in an eggy base
• SEPARATE: egg whites must be successfully separated from the yolk. The presence of a small
amount of yolk may be enough to destroy a meringue
• PEAKS: Whisk egg whites to form peaks and until they have increased in volume
• SUGAR: the general rule of 50g of sugar per egg white applies. Beat this gradually until the figure
of 8 can be easily seen on the top of the mixture. The egg whites should be glossy and thick.
2. SELF RAISING FLOUR
Raising agents will already have been added to this type of flour. This type
of flour is common when baking as it raises the mixture with minimal
effort and time. Carbon dioxide is trapped when the starch and the liquid
combines. This enables the product to rise easily.
Food examples include: scones, sponge cakes, fruit flan and pizza dough.
Scones
Points to consider:
21• RUB IN: rub the fat into the flour to help coat it and add air
• KNEAD LIGHTLY: to encourage gluten. Do not over handle as the dough will become sticky
and the end product heavy
• REST: allow to rest for a small time to allow the carbon dioxide to form and help the product rise
• SHAPE EVENLY: to ensure even cooking time.
3. BAKING POWDER
This is a chemical raising agent. It produces carbon dioxide when in contact with liquid. This causes the
product to rise.
Points to consider:
• WORK FAST: this chemical raising agent must be added quickly and placed into the oven for
cooking
• MIX EVENLY.
4. BICARBONATE OF SODA
Often, bicarbonate of soda and corn flour is used to make baking powder. This is a chemical raising
agent also. This white powder produces carbon dioxide to help a product rise. Yogurt or buttermilk is
often used in recipes with bicarbonate of soda to help the gluten stretch, rise and set.
Food examples include: Fruit soda bread and ginger bread.
Points to consider:
• ACIDIC: ensure this is combined with ingredients that are high in acid such as yogurt or
buttermilk. This helps it rise
• MEASURE CAREFULLY: too much of this product can leave a metallic taste and will form a
coating on the surface of the product
• PLAIN FLOUR: self-rising flour mixed with bicarbonate of soda would create the effect
mentioned above.
5. YEAST
During bread making, yeast is used to cause fermentation. The carbon dioxide created during this
process acts as a chemical raising agent.
6. STEAM
Some pastry products are made with water. When heated, water causes steam inside a product causing
it to rise. This will harden when cooled. This process occurs when making choux pastry for profiteroles
or choux buns.
22Skill 8: Setting a mixture
There are many ways to set a mixture; using heat and removing heat.
1. Using heat
Denaturation
When heat is added to a protein rich food, the protein changes the chemical structure.
Coagulation
When denaturation occurs, the protein thickens and sets into a solid product.
Food examples include choux pastry, quiche or pudding.
2. Removing heat
Gelation
This occurs when products set into a solid without heat. When making a starch based sauce,
gelatinisation occurs. This must be cooled before it hardens and solidifies. Chilling (custard trifle) or
freezing (ice cream) is an example of setting with the removal of heat.
3. Using gelatine
Sachets of gelatine can be purchased in order to help thicken popular chilled desserts. Heat is used in
the form of boiling water and when mixed into a recipe and left to chill, will set and create the desired
consistency for example cheesecake
4. Whisking cream
Whipping cream is a method used to help set mixtures such as cheesecake
when gelatine is not being used. It can ensure a light creamy texture whilst
stabilising the food to hold air and keep the structure in the dish.
Useful Resource: https://www.food4life.org.uk/learning-areas/key-stage-3/food-skills-and-
cooking/food-skills-and-cooking-techniques
23You can also read