USER MANUAL - Reel Lawn Mower - Swardman
←
→
Page content transcription
If your browser does not render page correctly, please read the page content below
USER MANUAL - Reel Lawn Mower
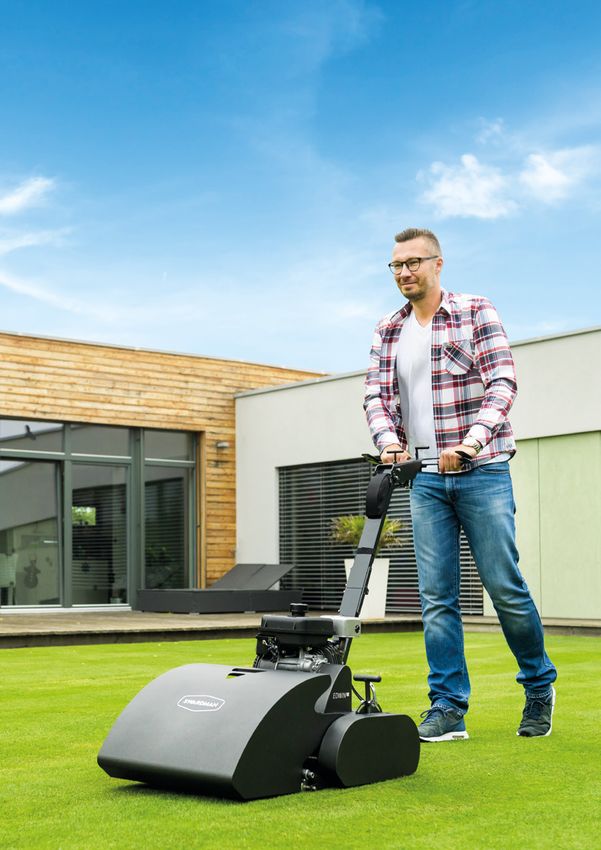

Table of Contents

Table of Contents                                              3

Safety Instructions                                            4

Basic Information                                              5

Contents of Package                                            6

General Safety Instructions for Walk-behind Reel Lawn Mower    7

Technical Data                                                 9

Product Description / Explanations                            10

Commissioning                                                 12

Maintenance                                                   14

Acknowledgements                                              15

Troubleshooting                                               16

Warranty Information                                          17

Accessories and Manufacturer Information                      18

Declaration of Conformity                                     19

Product description and use                                   22

Technical specifications                                      23

Explanations to Figures 1 and 2                               24

Installation of regenerative cartridges                       25

Maintenance                                                   26

Acknowledgements                                              26

Troubleshooting                                               26

          User Manual | Effective from January 1, 2020         3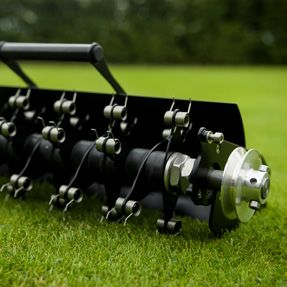
Safety Instructions

           Please read the User Manual from the first to the last
           page.

                    Warnings placed on the machine:

        WARNING!            READ THE USER           DANGER - FLYING          KEEP YOUR ARMS
                              MANUAL!                  OBJECTS!              AND FEET AWAY
                                                                            FROM THE BLADES

       DO NOT LIFT          LOCKING SCREW          KEEP BYSTANDERS              MAGNET
    THE MACHINE USING                             AT A SAFE DISTANCE!
       THE HANDLE

                                             93
                                          GUARANTEED
                                          NOISE LEVEL

           y Read the User Manual before you start using the machine.
           y Third parties must keep a sufficiently safe distance from the working area.
           y For safety reasons, children and adolescents under 16 years of age and persons
             who have not read and understood this User Manual sufficiently are not allowed to
             work with this machine. To ensure that they do not play with the product, persons
             with limited physical or mental abilities are only allowed to use this product under
             the direct supervision of a competent person.

4                                                                                       User Manual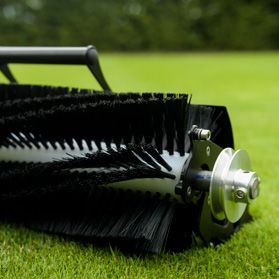
Basic Information

Read this User Manual carefully to understand thoroughly how to use and maintain your machine in a proper and safe
manner. If you fail to do so, this may lead to personal injury or damage to the machine.

Always keep this User Manual available as an integral part of the machine, even if you sell the machine.

The left and right sides as referred to in this User Manual are meant from the perspective of the operator standing
behind the machine in the direction of forward running.

Using the machine in any way contrary to this User Manual or failure to observe the operational and maintenance
instructions may void the warranty.

The Swardman E 45S and E 55S model reel lawn mowers are exclusively designed for mowing lawns in private gardens
and gardens around the house having the area less than 21 500 sqft (2000 m2) or for their being in operation for
100 running hours per year. The use for any other purpose is considered inconsistent with the intended purpose.
The manufacturer does not assume any liability for injury or damage to the machine thereof, and these risks are
unconditionally borne by the user. Strict observation of the conditions for operation, maintenance and repairs
specified by the manufacturer is essential for the intended use of the machine.

This reel lawn mower should only be used, maintained and repaired by persons who are thoroughly familiar with its
specific characteristics and all the relevant safety regulations.

                Safety information is marked with this symbol.
                In the interests of your safety, pay special attention to sections marked with
                this symbol!

             User Manual                                                                                         5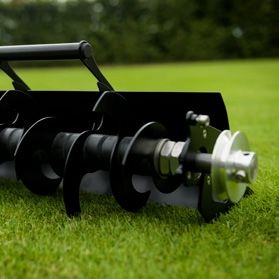
Contents of Package

         Contents of Package
         1. Lawn mower
         2. Grass box
         3. Tools
         4. Oil (1 liter)
         5. Oil aspirator
         6. User Manual
         7. Briggs&Stratton engine user manual
13       8. Quick Start Instructions
              12        11       10        9     8   7   6   5      4           3

     6                                                           User Manual   Designed by

                                                                               Swardman
                                                                                             Chec

13            12        11       10        9     8   7   6   5      4           3
General Safety Instructions for Walk-behind Reel Lawn Mower
General
• In the interests of your safety and the correct use of this machine, read this User Manual thoroughly and carefully.
• Please note that this machine user is responsible not only for ensuring other persons and their property are not in
danger, but also for preventing any and all accidents that might occur due to the use of the machine.
• This User Manual is an integral part of the machine and must be handed over to each user.
• For safety reasons, children and adolescents under 16 years of age and persons who have not read and understood
this User Manual sufficiently are not allowed to work with this machine. To ensure that they do not play with the
product, persons with limited physical or mental abilities are only allowed to use this product under the direct
supervision of a competent person.
• Please explain all the potential hazards and how to prevent them to anyone who is going to work with this machine.
• Please keep the machine in a secure place. Any machine that is not in use should be kept in a dry and locked place
not accessible to children.
• When using the machine, wear hearing protection.
• When using the machine, always wear protective gloves, in the interests of your safety.
• In case of continuous work with the machine longer than two hours, take a safety break.
• The lawn mower is designed for mowing lawns in private gardens and gardens around houses having the area less
than 21.528 ft (2000 m2) or for its being in operation for 100 running hours per year.
• The machine must not be equipped with any additional accessories not authorised by Swardman. Failure to observe
this instruction may void the warranty.
• This lawn mower must not be used for mowing areas that are not covered by grass or contain more than 20% plants
that are not grasses.
• Never mow if there are other persons nearby, especially children or animals.
• Before as well as during each mowing, make sure there are no foreign or undesirable objects on the lawn that may
cause damage to the machine or injury to the user. These above all include stones, sticks, tree bark, toys, wires,
cords, hoses, etc.
• When mowing, always wear safe footwear and long trousers. Do not wear open shoes nor sandals.
• Before using the machine, always check its proper technical condition. Pay particular attention to the reel, counter-
blades, screw connections, Bowden cables. If any parts are damaged or worn, have them repaired or replaced
immediately. When carrying out repairs and maintenance, use only the original parts or parts authorised by
Swardman.
• Petrol is extremely flammable!
• Store petrol only in containers designed and manufactured for this purpose.
• Refuel only outdoor and when the engine is cold. Smoking and being near open fires are prohibited during refuelling.
• Refuel only before you start the machine. Do not open the fuel tank when the engine is running or hot.
• If the tank overflows, do not start the engine. Immediately remove the mower from the area contaminated by
petrol. Dry any petrol spilled from the engine. Do not start the engine until you are sure the excess petrol has
evaporated from the fuel tank or the engine surface.
• Always carefully close the container and fuel tank.
• In case of any damage to the fuel tank, hoses of the fuel system, the exhaust or any other parts of the engine,
immediately replace the damaged part.
User Manual 7General Safety Instructions for Walk-behind Reel Lawn Mower Handling • Do not use the mower in areas where the dangerous carbon monoxide could accumulate and create a poisoning hazard. • The engine and the exhaust heat up very quickly. Never touch them just after the engine has been started or stopped. • Only use the fuel and oil recommended in the manual. • Only mow lawns by daylight or sufficient artificial light. • Only use your normal walking pace to drive the machine. • Primarily control the machine speed using a throttle lever , see Fig. 1. Higher throttle setting = higher number of engine revolutions = faster drive and higher number of reel revolutions. Lower throttle setting = lower number of engine revolutions = slower drive and lower number of reel revolutions. Number of cuts per meter and cut quality remain unchanged. Speed can additionally be controlled with a drive lever, e.g. upon a change of the drive direction. • When mowing on a slope, always pay attention to a safe posture. • Take special care when changing the direction or turning on a slope. • For safety reasons, do not mow a slope inclined more than 25°. • Take special care when turning or reversing the machine. • Always keep a natural posture when mowing and maintain a stable position all the time you are working. • When mowing, keep the minimum safe distance ensured by the handlebars from the lawn mower. • If you transport the machine to another location, load it into a vehicle or move it through places with no grass, always wait until the mowing blades stop. • Never carry nor lift the mower while the engine is running. • Never operate the mower when the grass box is not fitted correctly or other safety elements are missing or damaged. • Start the mower only in its operating position, never start it while it is lying on its side. • When starting the mower, always make sure your hands and feet are at a safe distance from the mowing blades. • Never touch the mowing blades while the engine is running. • Never adjust or clean the mowing blades while the engine is running. • Stop the engine and remove the spark-plug connector every time you: • check, clean or adjust any part of the machine, • remove any undesirable items from the mowing blades. • If the mower blades or drive gets blocked, immediately stop the mower, find the cause, remove it and before restarting, check the parts for any damage. If the machine shows increased vibrations after you restart it, stop it and contact the Swardman service department. • The handle of interchangeable cartridges does not serve for handling of the machine but exclusively for removal and insertion of cartridges. Handling of the machine using the cartridge handle could result in an irreversible damage to cut settings or other functions of the cartridges. Maintenance and Storage • Please make sure all the screws are properly tightened. • Before storing the machine, always make sure the motor has cooled down. • Before storing the machine and for fire prevention reasons, always make sure there are no pieces of grass around the engine that could ignite. • Before mowing, always check the mowing blades. • For safety reasons, replace damaged parts with new parts. • During maintenance or repair work on the machine, always wear protective gloves. • Always perform maintenance and repair work with the engine stopped and the spark plug disconnected. • Do not clean the mower with running water or a pressure washer. • In case you need to drain the fuel tank, always do it outdoor and use a suitable container. • For safety and reliability reasons, use only original Swardman parts. 8 User Manual
Technical Data

Reel lawn mower                                              Edwin 45                         Edwin 55

Model number                                                    E45S                            E55S

Engine displacement (cc)                                        127                             127

Fuel tank capacity                                         0.5 gal. (1.9 l)              0.5 gal. (1.9 l)
                                                             Unleaded petrol w. octane rating 100
Fuel
                                                                  without bio components
Oil tank capacity                                         18 fl oz (0.54 l)             18 fl oz (0.54 l)

Oil type                                                      SAE 30                           SAE 30

Gross Torque (lb-ft)                                            5.50                            5.50

Maximum operating speed                                 3.7 mph-1 (6 km/h)            3.7 mph-1 (6 km/h)

Maximum engine operating speed (rpm-1)                         2800                             2800

Spark plug                                                  B&S797235                        B&S797235

Cutting width                                               18“ (45 cm)                      22” (55 cm)

Mowing height                                          0.2 - 1.8“ (4 - 45 mm)        0.2 - 1.8“ (4 - 45 mm)

Number of cuts per meter (5-blade reel)                          60                              60

Grass box volume                                          10.6 gal. (40 l)              13.2 gal. (50 l)

Weight                                                    121 lbs (55 kg)               137 lbs (62 kg)

Total width                                                21.3“ (54 cm)                 25.2“ (64 cm)

Declared sound pressure level A
                                                               77 + 1                          79 + 2
on the operator‘s side1 LpAd (dB)

Guaranteed sound power level2 A LWA,G (dB)                       93                              93

Declared aggregate value of acceleration of
vibrations transferred to the operator‘s hand/               3.1 + 1.6                        2.9 + 1.5
arm3 ahvd (mps-2)

Serial number                                                 See specifications on the nameplate

1 measured in accordance with ČSN EN ISO 5395-1, Annex F and ČSN EN ISO 11201: April 2010
² measured in accordance with the Government Decree No. 9/2002 Coll., Directive 2000/14/ES
3 measured in accordance with ČSN EN ISO 5395-1, Annex G and ČSN EN ISO 20643

             User Manual                                                                                      9
Product Description
Figure 1 6
5 7
8
4
3
10
9
2
11
12
1
13
14
1 Grass box 6 Safety lock of reel 11 Handlebar angle
2 Engine 7 Handlebar body and height adjustment
3 Fuel tank cap (B) 8 Drive control lever 12 Height adjustment lever
4 Engine exhaust 9 Control lever for mowing blades 13 Quick-release bolt
5 Throttle control lever 10 Handlebar body position adjusting 14 Mowing height indicator
Figure 2
16 (A) 18 (B)
17 (B)
15 Rear roller with differential
15
16 Oil tank cap (A)
17 Spark plug
18 Oil tank cap (B)
10 User ManualProduct Description
Figure 3 21 (A) 22 23 (G) 24 (E)
19 Engine stop switch (H)
20 Fuel shutoff (E)
21 Choke control lever (A)
22 Air filter 20 (E)
23 Throttle control (G)
24 Starter cord handle (E)
25 Mowing height locking screw
19 (H) 25
Figure 4
26 27 28 29
30
31
33 32
26 Grass box support rings
27 Reel cable screw counternut
28 Reel cable screw
29 Drive cable screw counternut
30 Drive cable screw
31 Reel V-belt
32 Drive V-belt
33 Timing belt
User Manual 11Commissioning
Assembling the Lawn Mower
Take the mower out of the box. The best way is to carefully cut the box from its front face and push the mower out.
Do not ever use the handle on the mowing cartridge for lifting the mower or its transport.
1. Straighten the handlebars 2. Secure with screws 3. Adjust position and angle of
the handlebar body
Install the grass box as shown in Figure 3. The grass box is an integral part of the machine.
Checking the Reel Adjustment
Regularly check adjustment of the reel against the bed-knife. When adjusting, use the 8 mm wrench.
Mower with 45 cm (18in) cutting width has 2 adjusting screws on the reel and 55 cm (22in) cutting width has
3 adjusting screws.
34 35
1. If the reel does not provide 2. Close the petrol supply. 4. Insert a piece of double-
smooth cut mowing, tighten 3. Tilt the machine onto folded paper ahead of the
up the adjusting screws 34 the handlebars for only bed-knife 35 and carefully
clockwise on a corresponding necessary time period. High turn the reel with your other
reel side. Proceed carefully possibility of oil spillage! hand.
by tightening them by approx. 5. If the paper has been cut by all
10°. If required, repeat the the blades in whole width, the
procedure. cylinder is adjusted. A light
Note: There are 3 adjusting touch of reel blades with the
screws on the 22“ (55 cm) model. bedknife is normal.
Adjust only with An excessive pressure between the reel and the bed-knife
protective gloves on and will result in an excessive wear of blades as well as the
driving belt. When properly adjusted, the reel should turn
the machine stopped. smoothly.
12 User ManualCommissioning
Starting the Engine (For more detail information follow engine manual)
1. Before starting the engine for the very first time, pour 0.5 liters of oil, which is included in the package (oil SAE 30),
into the yellow plug hole (front and rear holes are identical) 16 + 18 (A or B). Pour the oil slowly into the engine oil
fill. Insert the dipstick but do not screw in. Oil level should be at the FULL mark on the dipstick.
2. Pour unleaded gasoline with octane rating 100 without bio components into the fuel tank through the filler 3 (B).
The fuel tank has a capacity of 0.5 gal (1.9 l).
3. Open the fuel supply to the engine. Turn the lever 20 (E) downwards to the position „on“.
4. Start – turn the button 19 (H) on the engine to the “I” position. Turn the choke lever 21 (A) to the forward position
(see Fig. 3).
5. Turn the throttle lever 5 to the “START” position (see Fig. 3) or in the fast position (highest RPM) for cold
start. Grasp the starter cord 24 (E) and yank it to start the engine.
6. If the engine fails to start after three attempts, check adjustments according to the above points.
7. If the engine starts, turn the choke lever 21 (A) to the intermediate position. After approx. 30 seconds, turn the
choke lever 21 (A) backwards to the run position .
8. Stopping the engine – set the button 19 (H) to the stop “0” position. The engine shall stop running.
The engine running-in process is completed after For the detailed engine maintenance description,
5 hours of work. It is necessary to change the see the Briggs&Stratton engine manual, which is
engine oil. Follow the instructions on page 15. part of the package.
Mowing Height Adjusting
Mowing height can be adjusted with the control lever on the left side of the machine. To change the height adjustment,
proceed as follows:
1. The mowing height is locked with the screw 24 in the right-hand side plate; the screw moves along a groove. Before
changing the mowing height, slightly loosen the locking screw.
2. Loosen the quick-release bolt 13 .
3. Adjust the mowing height by moving the lever 12 forwards to decrease and rearwards to increase the mowing
height.
4. After the required height has been achieved, retighten the quick-acting bolt as well as the locking screw. This shall
ensure the constant mowing height over the total machine width.
Next to the control lever for mowing height adjustment, there is an orientation scale with an indicator 14 . The scale
shows the mowing height in inches.
Drive - Mower is Controlled by Three Levers
• The throttle lever 5 controls the engine revolutions and primarily serves for speed control. Use it to control
the machine speed - both the drive speed and the mowing blades revolutions. Higher throttle setting = higher
number of engine revolutions = faster drive and higher number of reel revolutions. Lower throttle setting
= lower number of engine revolutions = slower drive and lower number of reel revolutions. Number of cuts
per meter and cut quality remain unchanged. However, it is not recommended to use the minimum engine
revolutions that could cause an excessive engine load, in particular during verticutating or scarifying.
• The left lever 8 controls the sensitive clutch of the machine drive and secondarily serves for speed control, e.g.
during a change in travel direction. Push it to speed up the machine and vice versa. Slowly and softly push the left
lever of drive to activate the clutch and put the machine in motion.
• The right lever controls the clutch of the mowing blades.
• The safety lock 6 of the reel prevents the mowing blades from being started unintentionally. When locked, the
right lever 9 cannot be operated.
Machine Work Termination
Use the throttle lever 5 to decrease the engine revolutions to minimum (START position) and turn the button 19 (H)
on the engine to the “0” position.
User Manual 13Maintenance
Emptying the Grass Box
Continuously visually check that the box is not full. Never fill the box to allow grass to fall from the box onto the
lawn. Never fill the box so as not to be able to pick it up and empty it by yourself. Because of curved reel knives, grass
clippings may accumulate more on the ride side of the grass box. To avoid this, cut the grass clippings smaller.
Cleaning
Clean the machine from dirt and cut grass after each operation. Thoroughly brush off the machine and wipe it with
a cloth. Never use pressure washers, their use can void the warranty.
Cut Quality Adjusting
A quality lawn depends on properly adjusted mowing blades. Adjust every time you notice the machine is not mowing
well. (For better illustration, see the video manual at www.swardman.com or www.reelrollers.com.)
Adjust as follows (shown in the paragraph - Checking the reel Adjustment (page 12)):
1. Stop the machine engine
2. Disconnect the spark plug
3. Let the engine cool down
4. Put on protective gloves
5. Take off the grass box
6. Close the fuel cock 20 (E)
7. Tilt the machine onto the handlebars
8. Take a strip of double-folded paper and the 8 mm wrench
9. Kneel down in front of the mower
10. Gripping the paper strip in one hand, simulate a blade of grass and bring it perpendicularly before the bed-knife
11. Turn the reel with your other hand so that the paper is cut - be very careful - the mowing blades can cause painful
injuries even at a low speed
12. The paper should be cut off smoothly - repeat on both ends and in the middle. If the cut has been smooth at each
point, the machine is adjusted correctly.
13. If the paper has not been cut or the cut has not been smooth, it is necessary to draw the bed-knife up towards
the reel.
14. To do so, use the wrench on the blade adjustment nut 34 and slightly turn the nut clockwise.
15. Repeat the check using another piece of paper. Repeat this process until the reel cuts perfectly over the total
width.
16. If the mowing system has been used for a prolonged period (depending on the mowing intensity and dimensions
of the mown area), the blades might become dull and making adjustments will be more difficult. If the adjustment
no longer helps to achieve a smooth cut, the mowing blades must be sharpened. How to have the mowing blades
sharpened, visit the Swardman e-shop in the Service Section.
17. You can lubricate the reel blade with organic oil after each mowing to protect the blade against corrosion and
reduce any noise and friction at the same time.
Filter Change
It is important to keep the air filter clean. The filter can become dirty quickly, especially during lawn verticutting,
scarifying, brushing, and mowing dry lawns. Clean the airfilter and pre-filter every 25 hours of use. More information
in the engine manual on page 27.
You can change the filter by unscrewing the air filter cover 22 , opening it and removing the filter and pre-filter.
You can order the original filter and pre-filter in the Swardman e-shop in the Service Section.
14 User ManualMaintenance
Oil Change
The engine oil needs to be changed after the first 5 hours of operation - after the running-in period.
Then, it is sufficient to change oil after 50 hours of operation or after 12 months.
It is recommended to use the oil change kit that is part of each machine package.
For subsequent changes, it is recommended to visit the Swardman service department, where an overall check of the
machine and adjustments necessary to ensure its faultless operation will take place.
For the detailed engine maintenance description, see the Briggs & Stratton engine manual,
which is part of the package.
Winter Storage / Storage longer than 30 days
The prescribed regular maintenance to be performed at the recommended service intervals, replacing worn or
damaged parts if needed and having repairs and maintenance of the machine performed at the Swardman service
department before winter storage will extend the mower lifetime and reliability.
Before storing the mower, observe the following:
1. Thoroughly clean the machine. Remove all stuck grass, especially from the area around the engine cooling fins
(also see the Engine Operation Manual).
2. Check the mechanical mowing parts (see “Counter-Blade Adjustment”) and slightly lubricate the blades with a
biological oil.
3. Make sure all the bolts and nuts are tightened.
4. Drain all the petrol out of the fuel tank (see the Engine Operation Manual).
5. Clean the fuel shut-off valve (see the Engine Operation Manual) and close it.
6. Drain all the petrol from the carburettor, start the engine and let it run until all the fuel is consumed.
Acknowledgements
Thank you for choosing the Swardman reel lawn mower. We believe that with proper care it will serve you for a long
time and your lawn will be your pride and joy.
Our team is always ready to advise you on how to correctly use this machine. If you have any questions, please do not
hesitate to contact us.
We will be happy if you share with us your experiences in using the Swardman reel lawn mower.
User Manual 15Troubleshooting
The following table shows possible symptoms of problems and how to fix them if your machine is not working
properly. If you cannot find or fix the problem while using this table, please contact your dealer.
Caution: Before checking for any defects, stop the machine and disconnect the spark-
plug connector. For support in the form of video instructions, visit
www.swardman.com and section „support“
Problem Possible cause Removal
The ground is untreated The bed-knife is not adjusted
Adjust the bed-knife.
after mowing correctly.
1. Engine flooded 1. Allow engine to rest for 10-15 minutes
Engine does not start 2. Spark-plug cable disconnected 2. Reconnect cable
3. Spark plug dirty 3. See Engine Operation Manual
1. Lack of petrol
1. Fill the fuel tank with petrol
2. Engine speed too low under given
Engine has stopped 2. Open the throttle
conditions
3. Stop engine and remove an obstacle
3. Reel blocked
Disconnect the cable connector from
Engine cannot be
Malfunction of the ignition switch the spark plug to stop the engine
stopped
Contact your Swardman dealer.
1. Loosen adjusting screws of the reel 34
and readjust the reel
1. Incorrect adjustment of the reel
2. Tighten the cable by loosening the
Reel does not rotate 2. The reel cable is too loosened
counternut 27 , screwing out the screw
3. Worn belt
28 and tightening the counternut 27 .
3. Replace the reel belt 31
Reel rotates even when Loosen the cable by loosening the
Incorrect adjustment of the reel
the reel control lever is counternut 27 , screwing in the screw 28
cable
not pushed and tightening the counternut 27 .
1. Tighten the drive clutch cable by
loosening the counternut 29 , screwing
1. Incorrect adjustment of the drive clutch
out the screw 30 and tightening the
Drive does not start 2. Damaged drawbar or cable guide
counternut 29 .
3. Worn belt
2. Replace the bowden and cable
3. Replace the drive belt 32
When the machine is In this case, try pulling the machine
pushed forward with the or when the machine is to be pushed
Uneven tension of the transmission belt
engine not running, the forward for longer distances, start the
rear roller jams engine.
If the above troubleshooting procedures fail to solve problems, contact Swardman
at www.swardman.com in „contact“ section.
16 User ManualWarranty Information
Swardman provides a warranty against manufacturing and material defects in the product. In case of a manufacturing
or a material defect during the warranty period, we undertake to repair (or replace) the product.
The engine, which is part of the mower, is covered by its manufacturer’s warranty conditions.
For this product intended for domestic use, the warranty period is 24 months from the date of purchase. In the event
of industrial or professional use of the machine or any use of a similar load, the warranty period shall be 6 months.
A warranty repair will be made, if:
• you take the machine to your Swardman gardening equipment dealer,
• you prove the product purchase and the purchase date, e.g. through the product invoice.
The warranty cannot be applied, if:
• you fail to prove the product purchase with the purchase date,
• the machine is not provided with the serial number plate,
• the product is modified resulting in a change in the manufacturer’s specifications or the use of non-original parts,
• any previous repair of the product is performed elsewhere than in the authorised Swardman service department,
• a defect is caused by an incorrect adjustment, misuse, improper use, professional use, negligence or by accidental
damage,
• a defect is caused by insufficient lubrication or maintenance,
• any part, especially the drive or mowing mechanism, is damaged by its impacting against a solid object,
• a defect is caused by the product‘s misuse,
• a defect is caused by the product‘s normal wear and tear.
The following parts are considered to be consumables. Their lifetime depends on regular servicing, and the warranty
does not normally apply to them: blades, driving belts, bearings, bovden cables.
The warranty does not cover the costs associated with routine maintenance of the product.
It is in your best interest to follow the User Manual of the lawn mower. Thorough care will ensure that the product
will serve you well for many years. To ensure proper functioning, it is recommended to have the reel sharpened at the
authorised Swardman service department at least once a year.
If necessary, always use the Swardman original spare parts. The warranty does not cover a damage resulting from
using spare parts not manufactured or approved by Swardman.
This warranty does not affect your statutory rights in connection with defective products.
When the time comes to dispose of the product, please consider the environment and recycle the product. (For
information on where to properly dispose of the product, please contact your local authorities).
User Manual 17Accessories and Manufacturer Information
Interchangeable Cartridges
Cylinder (5, 6, 10 blades) Verticutter cartridge Scarifier cartridge Astroturf cleaner Grooming lawn brush
cartridge cartridge
Handlebars Front roller Lights
Leather handlebars Beverage holder Front profi led roller Front and rear LED spotlights
roller wiper
Other accessories
Broom for dirt Transport wheels Wheels for taller grass
and dew removal
Colours and materials
ANTRACIT RAL 3011 RAL 2009 RAL 3020 RAL 5015 RAL 6018 Optiaonal
RAL
Manufacturer Information
Swardman, s.r.o.
Šardice 792
696 13 Šardice
Czech Republic
www.swardman.com
E: info@swardman.com
Service T: +420 774 365 599
18 Regenerative Cartridges - User manualDeclaration of Conformity
EC Declaration of Conformity, EU Declaration of Conformity
ES Prohlášení o Shodě, EU Prohlášení o Shodě
This declaration of conformity is issued under the sole responsibility of the manufacturer.
Toto prohlášení o shodě se vydává na výhradní odpovědnost výrobce.
Výrobce / Manufacturer: Swardman, s.r.o.
Adresa / Address: Šardice č.p. 792, 696 13 Šardice, Česká republika / Czech Republic
IČ / ID: 29 15 57 38
Jméno a adresa osoby pověřené sestavením technické
dokumentace (podle 2006/42/ES, NV č. 176/2008 Sb.)
a jméno a adresa osoby, která uchovává technickou
dokumentaci (podle 2000/14/ES, NV č. 9/2002 Sb.) / Swardman, s.r.o.
Name and address of the person authorised to compile Šardice č.p. 792, 696 13 Šardice, Česká republika / Czech Republic
the technical file (according to 2006/42/EC) and name
and address of the person, who keeps the technical
documentation (according to 2000/14/EC):
Výrobek (stroj) – typ / Vřetenová sekačka typ E55S, (E45S) /
Product (Machine) – Type: Cylinder lawnmower type E55S, (E45S)
Výrobní číslo / Serial number:
Popis / Description: Ručně vedený žací stroj se spalovacím motorem, s pojezdem. Pohon jednoválcovým, čtyřtaktním,
vzduchem chlazeným, zážehovým motorem Briggs & Stratton 550 Series o zdvihovém objemu
127 cm3, o výkonu 2,5 kW / 3 600 ot.min-1 (dle údajů výrobce motoru). Číslo schválení typu
motoru e9*2016/1628*2016/1628SYA2/P*1153*00.
Součástí motoru je vlevo uložený tlumič výfukového systému, výfuk vyústěn vodorovně doleva.
Oba stroje jsou identické konstrukce, liší se pouze šířkou záběru. Vřetenové žací ústrojí s pěti
břity je umístěno za válečkem určujícím výšku sečení. Za žacím ústrojím se nachází válec který
slouží k pojezdu stroje. V přední části vřetena je umístěn sběrací koš. Shora a z boků je žací
ústrojí zakryto kovovým krytem. Na levé straně pod krytem je pohon vřetene a pojezdu.
Pedestrian-controlled cylinder lawnmower with combustion, engine, self-propelled. Propelled by
single-cylinder, four-stroke, air-cooled, gasoline engine:
Briggs & Stratton 550 Series of 127 cm3 and power 2,5 kW at 3600 rpm (according to the
manufacturer's engine). Approval number of the engine
e9*2016/1628*2016/1628SYA2/P*1153*00 .
Part of the engine is mounted on the left muffler exhaust system, exhaust opens out horizontally
to the left. Both machines are identical in construction, differing only cutting width. Cylinder
lawnmower cutting cylinder with five blades is positioned behind the roller determining the
cutting height. Behind the cutting mechanism is a cylinder which drives the machine. In front of
the cutting cylinder is provided the collector. Top and the sides of the cutting mechanism is
covered by metal cover. On the left side under the cover is placed drive of cutting and moving
cylinders
Prohlašujeme, že strojní zařízení splňuje všechna Strojní zařízení – směrnice 2006/42/ES, NV č. 176/2008 Sb. /
příslušná ustanovení uvedených směrnic (NV) / the Machinery Directive 2006/42/EC,
We declare that the machinery fulfils all the relevant Elektromagnetická kompatibilita – směrnice 2014/30/ES, NV č. 117/2016Sb. /
provisions of the mentioned Directives (Government the Electromagnetic Compatibility (EMC) Directive 2014/30/EC,
Provisions): Emise hluku – směrnice 2000/14/ES; NV č. 9/2002 Sb. /
the Noise Emission Directive 2000/14/EC.
Harmonizované technické normy a technické normy
použité k posouzení shody / ČSN EN ISO 12100, ČSN EN ISO 5395-1,
The harmonized technical standards and the technical ČSN EN ISO 5395-2, ČSN EN ISO 14982:2009.
standards applied to the conformity assessment:
Osoby zúčastněné na posouzení shody / Notifikovaná osoba č. 1017 / Notified Body No. 1017.
Bodies engaged in the conformity assessment: TÜV SÜD Czech s.r.o.
Novodvorská 994, CZ–142 21 Praha 4, ČR /
Použitý postup posouzení shody / Na základě směrnice 2000/14/ES, příloha V; NV č. 9/2002 Sb., příloha č. 5 /
To the conformity assessment applied procedure: Pursuant to the Noise Emission Directive 2000/14/EC, Annex VI.
Regenerative Cartridges - User manual 19Declaration of Conformity
Naměřená hladina akustického výkonu /
Measured sound power level: LWA = 92,1 dB
Garantovaná hladina akustického výkonu /
Guaranteed sound power level: LWA = 93 dB
Poznámka: Veškeré předpisy byly použity ve znění jejich změn a doplňků platných v době vydání tohoto prohlášení bez jejich citování.
Note: All regulations were applied in wording of later amendments and modifications valid at the time of this declaration issue without any citation of them.
Místo a datum vydání / Šardice, 1.1.2021
Place and date of issue:
Osoba zmocněná k podpisu za výrobce /
Signed by the person entitled to deal in the name of producer:
Jméno / Ing. Pavel Holešínský Funkce / jednatel Podpis /
Name: Grade: Signature:
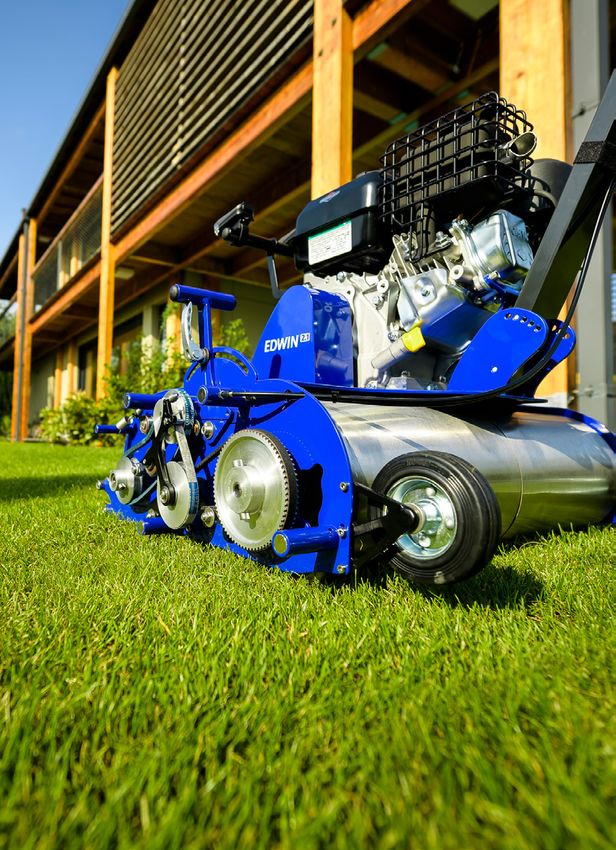
20 Regenerative Cartridges - User manualUSER MANUAL
regenerative cartridges
verticutter scarifier rotary
cartridge cartridge brushRegenerative cartridges - Product description and use Verticutter cartridge Verticutter cartridge is used to cut lawns vertically. The cartridge is fitted with steel rotating blades. The denser a lawn is, the more it needs verticutting. We recommend to verticut the lawn 3 - 5x per year during the grass season, always before each fertilization to a depth of 3 - 5 mm. Verticutting the lawn before fertilizing will remove the thatch and dead parts of the plants, prevent the fertilizer from being washed away by rain and ensure absorption into the soil and to the roots of the lawn. At the same time the grass sods are being broken, increased water absorption and supports the growth of grass sprouts and growth of the new plants. By breaking the surface of the soil, the circulation of the air in the soil will be restored. The surface will also have better access to sunlight. All of these positive procedures result in thicker and healthier lawn. Verticutting must be performed at high speed in order for the blades to cut correctly. When using Edwin, you can increase the power using the throttle lever on the handlebar. When using the Electra, use the regeneration mode. See the mower‘s user’s manual for more information. If the lawn is very thick and full of thatch, we recommend double verticutting in two direction crossways. Never carry out the verticutting if the lawn is soaked or too dry. The lawn does not need to be verticut all over its area. If there are thin areas, skip them. Never perform verticutting if the soil temperature is below 10 °C (50°F). The steel blades of the verticutter are subject to normal wear and can be replaced with new ones when worn and not functioning. Spare parts are available in the e-shop at www.swardman.com Scarifier cartridge / Astroturf cleaner cartridge The scarifier cartridge is used to remove broken thatch and dead stalks after verticutting. It can also be used on lawns where verticutting was not performed. Thanks to a large number of double springs and high revolutions (increase in high revs when using Edwin) or in regeneration mode (when using Electra), it is much more efficient and faster than manual raking. The scarifier can remove undesired dirt from the lawn, such as leaves, moss, twigs, small cones and bark residues which can prevent safe mowing. The scarifier combs the grass nicely and highlights the stripes on the lawn. The stainless steel springs of the scarifier are subject to normal wear and should be replaced with new ones when worn and not functioning. Spare parts are available in the e-shop at www.swardman.com. Astroturf cleaner will clean your artifical grass from leaves, needles, little rocks and other small objects. It is used the same way as scarifier cartridge. 22 Regenerative Cartridges - User manual
Technical Data

Rotary brush

The rotary brush is used for the application of sand and material, which usually
follows the aeration. The sand can also be incorporated into a lawn that has
not been aerated, although the resulting effect is poorer than on a previously
aerated lawn.

The sand application is sufficient when the grass stalks are visible and the
sand does not form accumulated hills. An uneven terrain can be levelled by
repeating the sand application.

For best results, we recommend using dry and loose sand. Wet sand is not
suitable for rotary brush application.

Technical Data

                                          Verticutter cartridge      Scarifier cartridge       Rotary brush
                                             45 cm        55 cm        45 cm       55 cm     45 cm        55 cm
Model
                                              18in         22in         18in        22in      18in         22in
                                            450 mm       550 mm       450 mm       550 mm   450 mm       550 mm
Range width
                                             18in         22in         18in         22in     18in         22in

Number of blades / springs                     10           12           36          44        -            -

                                            - 10 mm      - 10 mm       0 mm        0 mm      0 mm         0 mm
Maximum designed depth
                                              -0.4in       -0.4in       0in         0in       0in          0in
                                             - 5 mm       - 5 mm       0 mm        0 mm      0 mm         0 mm
Maximum permissible working depth
                                              -0.2in       -0.2in       0in         0in       0in          0in

Note: The working depth of the verticutting cartridge mentioned above is indicative. The actual working depth
decreases with increasing the soil hardness and in case of solid particles such as stones which can also damage the
verticutter blades.

Regenerative Cartridges - User manual                                                                             23
Explanations to Figures 1 and 2
Fig. No. 1 - Swardman Edwin
16 15 14 13 12 11 10 9 8 7 6 5 4 3 2 16 1 15 14 13 12 11 10 9 8 7 6 5 4 3 2 1
L L L L
K K K K
J J J J
I 1 2 I I 4 5 I
H H H H
G G G G
F F F F
6
E E E E
D D D D
C C C C
3 7
B B B B
Designed by Checked by Approved by Date Date Designed by Checked by Approved by Date Date
Swardman 15.11.2018 Swardman 15.11.2018
A A A A
Edition Sheet Edition Sheet
1/1 1/1
16 15 14 13 12 11 10 9 8 7 6 5 4 3 2 16 1 15 14 13 12 11 10 9 8 7 6 5 4 3 2 1
Fig. No. 2 - Swardman Electra
16 15 14 13 12 11 10 9 8 7 6 5 4 3 2 16 1 15 14 13 12 11 10 9 8 7 6 5 4 3 2 1
L L L L
K K K K
J J J J
I
1 2 I I
4 5 I
H H H H
G G G G
F F F F
E E E
6 E
D D D D
C C C C
3 7
B B B B
Designed by Checked by Approved by Date Date Designed by Checked by Approved by Date Date
Swardman 15.11.2018 Swardman 15.11.2018
A A A A
Edition Sheet Edition Sheet
1/1 1/1
16 15 14 13 12 11 10 9 8 7 6 5 4 3 2 16 1 15 14 13 12 11 10 9 8 7 6 5 4 3 2 1
1 Cartridge handle
2 Side cover
3 Cartridge left securing screw
4 Cartridge clutch
5 Cylinder/reel drive V-belt (Edwin) / Cylinder/reel drive cog belt (Electra)
6 Cartridge right securing screw
7 Cartridge pulley
24 Regenerative Cartridges - User manualInstallation of regenerative cartridges
1. Loosen the mowing height lock screw on the right side of the machine
2. Use the height setting lever to set the mowing height to maximum
3. Remove the side cover of the machine 2
4. Release manually the V-belt (Edwin) 5 or cog belt (Electra) 5 from the cartridge pulley 7 .
5. Using the Allen key, loosen and remove the left 3 and the right securing screw 6 of the cartridge (the key is
included)
6. Remove the cartridge from the machine using the cartridge handle 1
7. Using the handle 1 insert the desired verticutter / scarifier / rotary brush cartridge in the machine
8. Reinstall the securing screws - the left 3 as well as the right one 6 (make sure the screw can be screwed easily)
9. Install the V-belt (Edwin) 5 or the cog belt (Electra) 5 on the cartridge pulley 7
10. Guide the V-belt under the cartridge clutch 4 into its original position and at the Electra under the tensioner
11. Install the side cover 2
12. Set the correct working height of the machine.
a. for the verticutter set the height so that the front roller is maximum 5 mm (0.2in), preferably 3 mm (0.1in),
lifted in the air, and always so that it moves freely above a hard surface. This corresponds to a working depth
of -3 mm (-0.1in) and deeper.
b. for the scarifier set the height so that the springs slightly touch the hard surface or move over it. This
corresponds to a working depth of 0 mm/in and deeper.
c. for the rotary brush lower the working height of the machine so that the bristles are in moderate contact
with the surface / lawn. Replace the protective cover Fig. 3 and then cover the gap between the mower
chassis and the protective with the magnetic shield Fig. 4
Fig. 3 Fig. 4
13. After installation of the verticutter or scarifier cartridge, place the grass box (for the verticutting cartridge, the
collection into the box is less effective, but the bin serves as a protection against flying objects). After installing
the rotary brush, the grass bin is not installed.
14. The machine is then ready for work. In the case of the installation of the rotary brush according to Fig. 5
obr. č. 5
Regenerative Cartridges - User manual 25Maintenance
When working with the machine and also with the verticutter / scarifier cartridge, grass box
should always be installed as it also serves as a protective cover. When working with the rotary
brush cartridge always use the metal cover and a magnetic shield.
Cleaning
After each work, clean the machine from dirt and grass residues. Wipe the appliance using a brush and wipe with
a cloth, or use a leaf blower. Never use pressure washers, their use can void the warranty for the machine or the
accessories.
Winter Storage / Storage longer than 30 days
The prescribed regular maintenance to be performed at the recommended service intervals, replacing of the worn
or damaged parts if needed and having repairs and maintenance of the machine performed at the Swardman service
department or at the service partner before winter storage will extend the machine lifetime and reliability.
Before storing the machine, observe the following:
1. Thoroughly clean the machine. Remove all stuck grass residues
2. Check the mechanical parts
3. Make sure all the bolts and nuts are tightened
Acknowledgements
Thank you for purchasing a Swardman product. We believe that with proper care it will serve you for a long time and
your lawn will be your pride and joy. Our team is always ready to advise you on how to correctly use this machine. If
you have any questions, please do not hesitate to contact us. We will be happy if you share with us your experiences
in using the Swardman machine.
Troubleshooting
The following table shows possible symptoms of problems and how to fix them if your machine is not working properly.
If you cannot find or fix the problem using this table, please contact your dealer. Caution: Before troubleshooting,
turn the machine off and remove the end cap from the spark plug (Edwin) or pull the main switch to the off position
(Electra).
Problem Type Possible cause Remedy
1. The cartridge control cable is too loose
Edwin
2. Worn belt
The cartridge does
not rotate 1. Low capacity of the accumulator Follow the Edwin or Electra
Electra 2. Fallen or damaged belt main user’s guide in the
3. Electronics failure „Troubleshooting“ section.
The cartridge Removal of the fault is the same as
rotates even when Edwin Incorrect clutch adjustment, cartridge for the same symptoms of mower
the cylinder/reel control cable too tight cylinder/reel malfunction.
control lever is not
pushed Electra Electronics failure
The cartridge does Use the height adjustment on the
Edwin The working height is not adjusted
not engage in the machine to lower the working
Electra properly / or the blades are worn
lawn height. / replace the blades.
26 Regenerative Cartridges - User manualpassion for lawns
info@swardman.com Swardman, s.r.o.
Šardice 792
www.swardman.com 696 13 Šardice
www.reelrollers.com Czech RepublicYou can also read