How to print on canvas with HP Latex 700 and HP Latex 800 Printer Series
←
→
Page content transcription
If your browser does not render page correctly, please read the page content below

How to print on canvas
    with HP Latex 700 and HP
    Latex 800 Printer Series
    This document will explain how to print on different
    types of canvas, including post-print finishing.
    A deep dive training about HP Latex 700/800 Printer
    series - Canvas for home decoration is available in
    the Learn App from your PrintOS account. See more
    details in this article.

1                                                          © Copyright 2021 HP Development Company, L.P. The information contained herein is subject to change without notice.
How to print on canvas

What you will need

                                                Canvas                                                                                      Clean cloth
               What you will need                                     Cutting device

    Before     Preparing the substrate
    printing
                                                SW tools                  Printer                                                        Precision ruler
                                         (RIP, Adobe tools, etc.)

               Preparing the job

    Printing   The printing process         Canvas pliers           Wood stretcher bars                                           Heavy Duty Staple Gun
                                                                        (frames)

     After     Post-print finishing
    printing

                                            Table protection             Wedges                                                     Canvas backing tape

2                                                                             © Copyright 2021 HP Development Company, L.P. The information contained herein is subject to change without notice.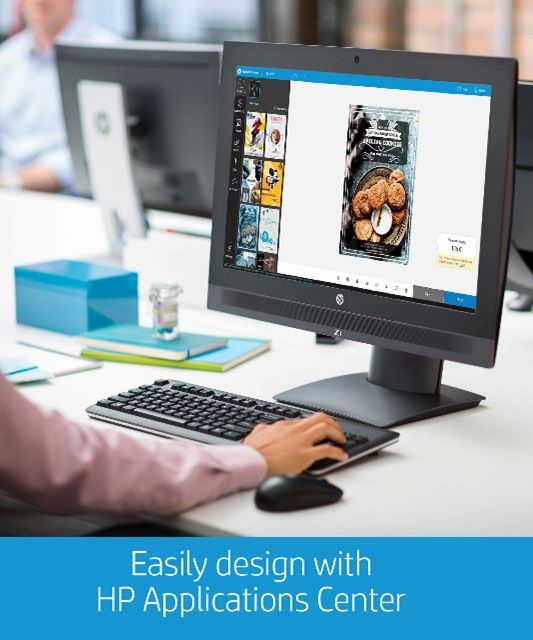
How to print on canvas                   1. Types of canvas
                                         By raw material                                                                                 front                                                    front

Preparing the substrate                       •   Polyester/cotton
                                              •   100% cotton
                                              •   100% polyester
               What you will need        By finishing
                                              •   Matte, semi-glossy, satin, natural,                     back                                                back
                                                  metallic, luster, matte
                                                                                                                      Poylester                                            Poly/cotton

    Before     Preparing the substrate      NOTE: If you use a canvas with colored finishing such as silver, gold or natural fibers you may need to add a white ink layer
    printing

                                         2. Substrate presets

               Preparing the job         • Check that the material you are going to use has its own substrate preset:
                                                   a)   On the web, in the HP PrintOS Media Locator: www.printos.com/ml/#/medialocator
                                                   b)   On the printer’s front panel online search (Substrate Library)
                                                   c)   On the web, from the substrate vendor’s or RIP vendor’s websites
    Printing   The printing process      • Download and install.

                                            NOTE: If you cannot find the substrate presets, you can always use the generic presets for canvas already installed in your printer. If
                                          you need to fine-tune some settings, clone the existing generic preset and modify it, or create a new one with the Add new substrate
                                          function on the front panel.
     After     Post-print finishing
    printing
                                            TIP: Learn how to customize your profile by enrolling on the available training HP Latex 700/800 Printer series – Advanced main
                                         tasks and maintenance routines on the Learn with HP website.

3                                                                                                                © Copyright 2021 HP Development Company, L.P. The information contained herein is subject to change without notice.
How to print on canvas                   1. Software for designing and editing
                                         Tools such as HP Application Center (HP WallArt), Adobe Illustrator, Photoshop, and
Preparing the job                        InDesign help you design and edit jobs and adapt them to your needs.                                                            Make your decision
                                                                                                                                                                           based on your
                                                                                                                                                                               needs

                                            A. HP WallArt
               What you will need                                                HP WallArt is part of HP Applications center, a complete package of
                                                                                 tools to boost your business.

    Before     Preparing the substrate
    printing                                                                        EXPAND YOUR KNOWLEDGE: For further detailed information regarding
                                                                                  the HP Applications center and how to log in for the first time, get the
                                                                                  available webinar in this link!!

               Preparing the job             How does it work?

                                                                 1                                      2                                                                   3

                                                          Join the platform                      Choose web app                                              Manage orders
    Printing   The printing process                      Simple, easy sign-in           Select the standalone decorative                                   Manage production
                                                         with your HP printer          web apps you want to produce and                                efficiently with automatic,
                                                            serial number              allow your customers to create and                               reliable, print-ready PDF
                                                                                            visualize the design with a                                  generation, as well as
                                                                                           simulation for each unique                                     customer, order, and
                                                                                                   environment.                                       content management tools.
     After     Post-print finishing
    printing

4                                                                                                       © Copyright 2021 HP Development Company, L.P. The information contained herein is subject to change without notice.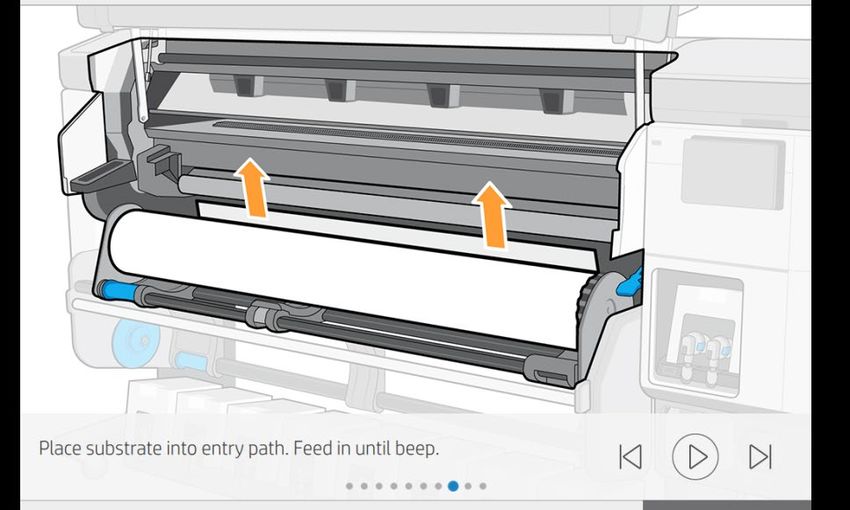
How to print on canvas                   2. Canvas size
                                         Choose the size of the frame you want to stretch the canvas on and adapt the image
Preparing the job                        size accordingly.                                                                                                                      Make your decision
                                                                                                                                                                                  based on your
                                                                                                                                                                                      needs
                                            TIP: Take into consideration the frame size to add to each side of the image: 1.5x the
                                         thickness of the frame bar.

               What you will need
                                         3. Canvas edges style
                                         Select the type of edge style you want for your canvas:
                                         • None - Image folded or stretched
                                         • Mirrored
    Before     Preparing the substrate   • Pixel stretch (with different effects: blur, gradients, distortion)
    printing                             • Solid color edge (black, white...)

               Preparing the job

    Printing   The printing process

                                            NOTE: Image modification (size, edge styles) can be set either in the editing software or in the RIP.
     After     Post-print finishing
    printing

5                                                                                                              © Copyright 2021 HP Development Company, L.P. The information contained herein is subject to change without notice.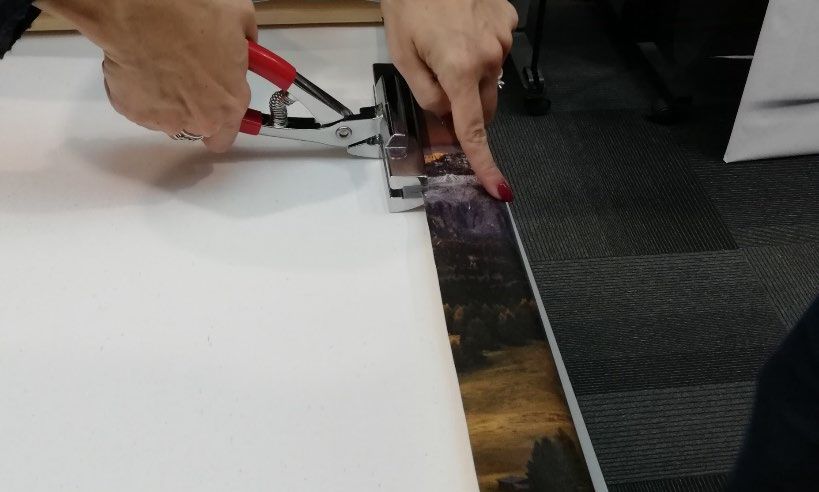
How to print on canvas                   4. RIP processes

Preparing the job
                                         ONYX, CALDERA, and SAi RIPs have been certified for HP Latex 700/800 Printers series.                                                  Make your decision
                                         All these rips have specific options for canvas job editing.                                                                             based on your
                                                                                                                                                                                      needs

                                                                                                                     NOTE: Please refer to the specific trainings on RIPs at
               What you will need                                                                                  the PrintOS Learn App.

    Before     Preparing the substrate
    printing
                                            A. Substrate & Printmode selection
                                            • Choose the substrate type, then select the specific media you have loaded on the printer.
                                            • Finally, choose the printmode: normally 6p mode gives good quality prints with canvas.

               Preparing the job            B. Image size & bleed
                                            • Modify the image size according to the frame size.
                                            • Add the amount of bleed required to stretch the canvas around the frame bars.
                                            • Choose the type of bleed you desire (mirror, solid color, pixels stretched).
    Printing   The printing process
                                            C. Finishing: cutting marks & others
                                            •   Select the automatic cutter you will use for cutting your jobs.                       NOTE: Each rip has different ways to set the
                                                                                                                                    cutting marks. Please refer to RIP manuals.
                                            •   Configure the cutting marks for that cutter: trim box, placement,
     After     Post-print finishing             and type of barcode.
    printing
                                           NOTE: To work with white ink layers, learn how to create it with Illustrator and Photoshop by enrolling on the available training HP
                                         Latex 700/800 Printer series - White ink on the Learn with HP website, or refer to the cookbook How to print on white.

                                                                                                               © Copyright 2021 HP Development Company, L.P. The information contained herein is subject to change without notice.
6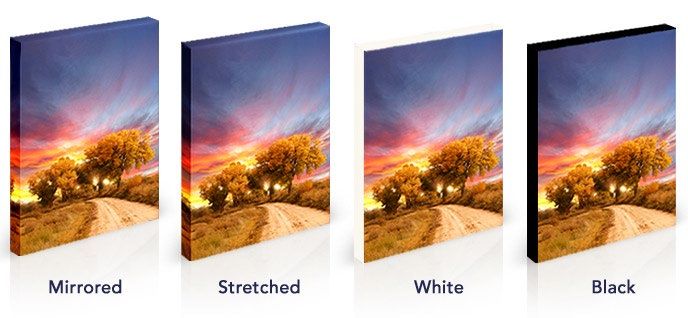
How to print on canvas

The printing process                     1.   Load the roll
                                              By default, this is in automatic mode.
                                                                                                                                                1                                                                     2

                                              Select the right media preset
                                         2.   If your media is new, select the generic
               What you will need             canvas.

                                              Check print IQ status
                                         3.   Perform the printhead nozzle check and                                                            3                                                                     4
                                              printhead alignment.
    Before     Preparing the substrate
    printing                                     TIP: Due to canvas rugosity, perform
                                              these diagnostics on a white self-adhesive
                                              vinyl before loading your canvas substrate.

                                              Start printing position
               Preparing the job         4.   Most canvases can be positioned on the
                                              printing platen.                                                                                  5                                                                     6

                                                TIP: For long jobs, connect the media to
                                              the take-up-reel (TUR).

    Printing   The printing process
                                         5. Send job to print from RIP
                                            Check the RIP has synchronized the loaded
                                              substrate with the printer.
                                              Select the correct printmode and set any
                                                                                                  TIP: Before cutting the printed job, advance the substrate so you protect
                                              other settings (copies, placements, etc.).        the printed roll when unloaded.
     After     Post-print finishing           Click Send to print.
    printing
                                              Cut & retrieve printed roll
                                         6.   This can be done in automatic mode or manually.

7                                                                                                        © Copyright 2021 HP Development Company, L.P. The information contained herein is subject to change without notice.
How to print on canvas

Once printed, what else?                 1. Cut
                                         When few copies are printed, the canvas can be cut manually.
                                         For long jobs, automatic cutters are recommended.

               What you will need

    Before                               2. Stretch on frame bars
               Preparing the substrate   • Automatically: Used in high production environments.
    printing
                                         • Manually: Use the canvas pliers, scissors, and stapler.

               Preparing the job            TIP: Protect the working surface with a felt or plush.

                                         3. Finish
               The printing process      Add the backing tape for clean finishing.
    Printing

     After     Post-print finishing
    printing

8                                                             © Copyright 2021 HP Development Company, L.P. The information contained herein is subject to change without notice.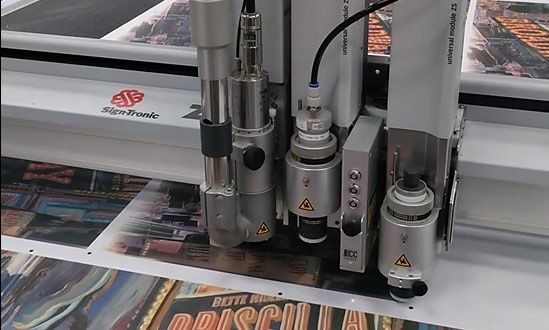
How to print on canvas

Remarks
       •   HP Latex Technology provides great versatility when printing on different types of canvas.
       •   Latex inks are very flexible and do not crack when folding the edges.
                                                                                                                                                                                                              Learn more at:
       •   Print saturated images on canvas at speeds up to 25 m²/h (269 ft²/h).                                                                                                                              • HP Latex Knowledge Center
       •   We recommend protecting the working surfaces to prevent damage to the printed image while stretching the canvas.
       •   The new HP Latex inks are ideal for safe indoor applications. The newest HP Latex Inks are UL ECOLOGO and UL GREENGUARD                                                                            • Learn with HP
           GOLD certified, and conform to the Zero Discharge of Hazard Chemicals (ZDHC) manufacturing restricted substances list v1.1.

                                                                                                                  1
                                                                                                                   Zero Discharge of Hazardous Chemicals. Applicable to HP Latex Inks. The ZDHC Roadmap to Zero Level 1 demonstrates that an ink conforms to or meets the standards of the ZDHC Manufacturing

Certifications:
                                                                                                                  Restricted Substances List (ZDHC MRSL) 1.1, a list of chemical substances banned from intentional use during production. ZDHC is an organization dedicated to eliminating hazardous chemicals and
                                                                                                                  implementing sustainable chemicals in the leather, textile, and synthetics sectors. The Roadmap to Zero Program is a multi-stakeholder organization which includes brands, value chain affiliates,
                                                                                                                  and associates, that work collaboratively to implement responsible chemical management practices. See roadmaptozero.com.
                                                                                                                  2
                                                                                                                   Applicable to R Series and 700/800 Printer series HP Latex Inks. UL ECOLOGO® Certification to UL 2801 demonstrates that an ink meets a range of multi-attribute, lifecycle-based stringent criteria
                                                                                                                  related to human health and environmental considerations (see ul.com/EL). HP is the only printing company with UL ECOLOGO® Certified inks in the “Printing Inks and Graphics Film” product
                              Level 1- Zero Discharge of                                                          category, see spot.ul.com/main-app/products/catalog/.
                                                         1
                             Hazardous Chemicals (ZDHC)
                                                              Inks meet stringent      Unrestricted, full room.   3
                                                                                                                   Applicable to HP Latex Inks. UL GREENGUARD Gold Certification to UL 2818 demonstrates that products are certified to UL’s GREENGUARD standards for low chemical emissions into indoor air
                                                                   health and          No-wait installation or    during product usage. Unrestricted room size—full decorated room, 33.4 m2 (360 ft2) in an office environment, 94.6 m2(1,018 ft2) in a classroom environment. For more information, visit ul.com/gg
                                                                                   2                     3
                                                             environmental criteria         lamination            or greenguard.org.

In partnership with:

9                                                                                                                                                                                          © Copyright 2021 HP Development Company, L.P. The information contained herein is subject to change without notice.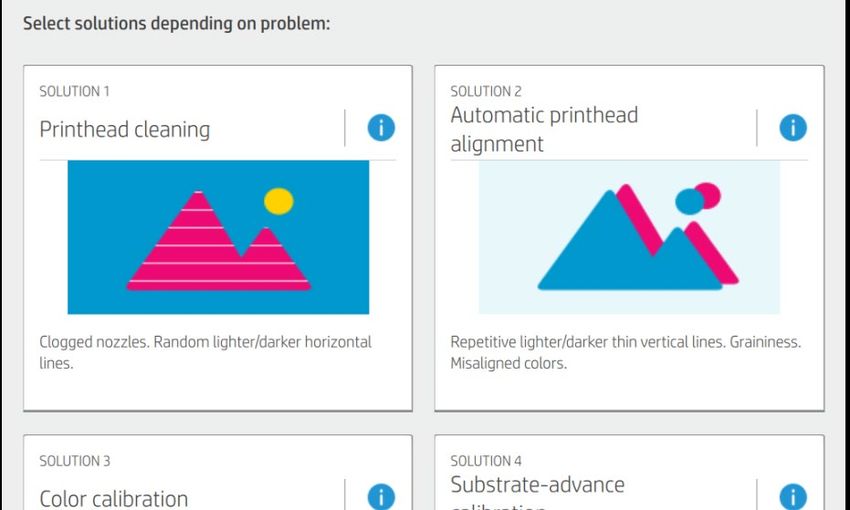
10 © Copyright 2021 HP Development Company, L.P. The information contained herein is subject to change without notice.
You can also read