Instruction manual Hot Pot - (shabu-shabu) - Aroma Housewares

Page created by Joe Williams
 
CONTINUE READING
Instruction manual Hot Pot - (shabu-shabu) - Aroma Housewares
instruction manual                        ASP-610

                                        Hot Pot
                                (shabu-shabu)

    Questions or concerns about your Aroma product?
                        www.AromaCo.com/Support
                                    1-800-276-6286
Instruction manual Hot Pot - (shabu-shabu) - Aroma Housewares
VER
     DISCO our
           f
     more o ts!
                                                                                                        IMPORTANT SAFEGUARDS
      prod c
          u
                                                                                          Basic safety precautions should always be followed when using electrical appliances,
                               To Enhance and Enrich Lives.
                                                                                          including the following:
                                                                                          1.		 Important: Read all instructions           9. Do not let the cord touch hot surfaces
                                                                                               carefully before first use.                      or hang over the edge of a counter or
                                                                                                                                                table.
                               Here at Aroma we strive to make a                          2.		 Do not touch hot metal surface. Use
                                                                                               handles or knobs.                          10. Do not place on or near a hot gas or
                               difference­—to design and distribute                       3.		 To protect against electrical shock,             electric burner or in a heated oven.
                               products that enhance and enrich                                do not immerse the appliance, cord         11.		 Extreme caution must be used
                                                                                               or plug in water or other liquid. See            when using or moving an appliance
      Multicookers/            people's lives.                                                 instructions for cleaning.                       containing hot liquids.
      Rice Cookers
                                                                                          4.		 Close supervision is necessary when        12. Do not use the appliance for anything
                                                                                               any appliance is used by or near                 other than its intended use.
                               Aroma offers an array of exceptional                            children. This appliance is not intended   13. Do not clean with metal scouring pads.
                               products to make cooking simple                                 to be used by children.                          Pieces may break off the pad and
                                                                                          5. Unplug from outlet when not in use                 touch electrical parts, creating a risk of
                               and satisfying. Discover other                                  and before cleaning. Allow to cool               electric shock.
                               countertop appliances and cookware                              before putting on or taking off parts,     14. Be sure to use on a dry, level and heat-
         Pot-style                                                                             and before cleaning the appliance.               resistant surface.
       Rice Cookers            from our current product lineup to                         6. Do not operate any appliance with            15. This appliance should be operated
                               complement your kitchen.                                        a damaged cord or plug or after                  on a separate electrical circuit from
                                                                                               the appliance malfunctions or has                other operating appliances. If the
                                                                                               been damaged in any manner.                      electrical circuit is overloaded with
                                                                                               Contact Aroma Customer Service for               other appliances, this appliance may
                                                                                               examination, repair or adjustment.               not operate properly.
                                                                                          7. The use of accessory attachments not         16. This appliance is not intended for deep
                               Stay connected for more recipe                                  recommended by Aroma Housewares,                 frying food.
                                                                                               may result in fire, electrical shock or
      Water Kettles            ideas and monthly giveaways!                                    injury.                                    17.		 To disconnect, turn any control to OFF,
                                                                                                                                                then remove the plug from the wall
                                                                                          8. Do not use outdoors.                               outlet. Always attach plug to appliance
                                                                                                                                                first, then plug into the wall outlet.
                                                               www.AromaTestKitchen.com

      Indoor Grills
                                                               /AromaHousewares

         Woks

                                                                                              SAVE THESE INSTRUCTIONS
                                     Published By:
          Aroma Housewares Co. | 6469 Flanders Drive, San Diego, CA 92121, U.S.A.
                          1-800-276-6286 | www.AromaCo.com
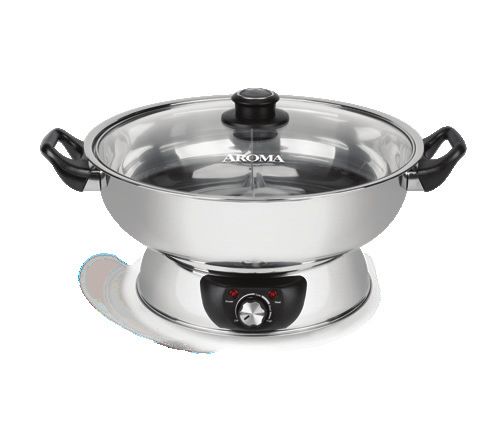
2.               ©2021 Aroma Housewares Company | All rights reserved.                                                                                                                 3.
IMPORTANT SAFEGUARDS                                               (CONT.)      Parts Identification
     Short Cord Instructions
     1.		 A short power-supply cord is provided to reduce the risks resulting from                                                 Cool-Touch
          becoming entangled in or tripping over a longer cord.                                                                    Lid Handle
     2.		 Longer extension cords are available and may be used if care is exercised in
          their use.                                                                                                               Steam Vent
     3.		 If a longer extension cord is used:
     		 a.) The marked electrical rating of the extension cord should be at least
                  as great as the electrical rating of the appliance.                                                              Tempered
     		 b.) The longer cord should be arranged so that it will not drape over the                                                  Glass Lid
                  countertop or tabletop where it can be pulled by children or tripped
                  over unintentionally.
     		 c.) If the appliance is of the grounded type, the extension cord should be a                                               Cool-Touch
                 grounding 3-wire cord.                                                                                            Handles

                                DO NOT DRAPE CORD!
                                                                                                                                   Stainless
                                        KEEP AWAY                                                                                  Steel Body
                                        FROM CHILDREN!
                                                                                                                                   Heating
                                                                                                                                   Plate

     Grounding Instructions                                                                                                        Stainless
     This appliance must be grounded while in use to                                                                               Steel Base
     protect the operator from electrical shock. The
     appliance is equipped with a 3-conductor cord and
     a 3-prong grounding-type plug to fit the proper                                                                               Control Panel
     grounding-type receptacle.

     The appliance has a plug that looks like Figure A.
     An adapter, Figure B, should be used for connecting
     Figure A plugs to two-prong receptacles. The
     grounding tab, which extends from the adapter,
     must be connected to a permanent ground such as
     a properly grounded outlet box as shown in Figure C
     using a metal screw.

                                                                                            Controls/Functions
           THIS APPLIANCE IS FOR
           HOUSEHOLD USE ONLY.
                                                                                            Temperature Dial
                                                                                            Manually set to desired temperature.
                                                                                            (150°F-450°F)

4.                                                                                                                                                 5.
Before First Use                                                                     To Cook
     1.		 Read all instructions and important safeguards.          Note:                    1.		 Before each use, check for debris on the surface
     2.		 Remove all packaging materials and check that           · Do not use abrasive          of the heating plate and remove if there is any
                                                                    cleaners or scouring         present.
          all items have been received in good condition.
     3.		 Tear up all plastic bags and dispose of them
                                                                    pads.
                                                                  · Do not immerse the
                                                                                            2.		 Pour desired broth into the body of the Hot Pot.        Caution:
          properly as they can pose a suffocation or                stainless steel base,   3.		 Place the body on the heating base and ensure           The Hot Pot's stainless
          choking risk to children.                                 cord or plug in water        it’s properly in place by turning until both surfaces   steel body will get
     4.		 Wash stainless steel body and glass lid in warm,          at any time.                 meet snugly.                                            hot; use caution when
          soapy water. Rinse and dry thoroughly. Wipe the         · Any other servicing                                                                  handling.
                                                                    should be performed     4.		 Plug the power cord into a 120V AC wall outlet.
          surface of the stainless steel base and heating                                        The POWER indicator light will illuminate.
          plate with a damp cloth. Do not immerse the base          by Aroma ®

          of the Hot Pot in water or other liquids.                 Housewares.             5.		 Adjust the temperature control dial to the desired
                                                                                                 temperature. The HEAT indicator light will
                                                                                                 illuminate, indicating that the cooking process has
                                                                                                                                                          Note:
                                                                                                                                                         · Temperature settings
                                                                                                 begun.
                                                                                                                                                           on the adjustable
                                                                                                                                                           dial range fom Low,

         To Assemble
                                                                                                                                                           Medium, to High Heat.
                                                                                                                                                         · The stainless steel
                                                                                                                                                           body and lid are

                                                                                              To Clean
                                                                                                                                                           dishwasher safe.
     1.		 Locate the lid handle. The screw needed to
          assemble the handle to the lid has been screwed
          into the lid handle.
     2.		 Using a Phillips screwdriver, unscrew the screw                                   1.		 Wash the stainless steel body and tempered
                                                                                                 glass lid in warm, soapy water. Rinse and dry
                                                                                                                                                         Helpful
          from the handle.
                                                                                                 thoroughly.
     3.		 Place the handle on top of the lid, so that it lines
          up with the hole in the lid correctly.                                            2.		 Do not immerse the base, cord or plug in water or
                                                                                                 any other liquid.                                       Hints:
     4.		 Place the screw beneath the lid so that it fits                                                                                                For a quick and simple
          correctly through the hole in the lid and into the                                3.		 Wipe the surface of the base with a damp cloth.
                                                                                                                                                         meal, simply pour your
          handle.                                                                           4.		 Dry all parts thoroughly. Reassemble for next use.      favorite packaged
     5.		 Using a Phillips screwdriver, tighten the screw until                                                                                          soup broth into your
          the handle is securely attached to the lid.                                                                                                    Hot Pot and bring to
                                                                                                                                                         a boil by turning the
                                                                                                                                                         dial to High. Serve with
                                                                                                                                                         your choice of hot pot
                                                                                                                                                         ingredients such as
     1                    2                      3                                                                                                       meat, vegetables, tofu
                                                                                                                                                         or seafood. To prepare
                                                                                                                                                         your own Hot Pot broth,
                                                                                                                                                         see "Recipes" on pages
                                                                                                                                                         8-9.

               4                     5

6.                                                                                                                                                                                 7.
Recipes                                                                           Recipes
     Chicken Tomato Soup Base                                                          Curry Soup Base
     2                onions, diced                                                    13 cups          vegetable stock
     2                celery stalks, minced                                            3 tbsp           sugar
     6                tomatoes, peeled and diced                                       3 tbsp           oil
     16 cups          chicken stock                                                    15               cloves garlic, minced
     6 tsp            olive oil                                                        1 inch           ginger, cut into thick slices
     2 tbsp           ketchup                                                          3 cup            coconut milk
     2 tsp            salt                                                             6 tbsp           Thai red curry paste, to taste
     4 tsp            sugar
     2 tbsp           cooking wine                                                     Add oil to a large frying pan, and apply medium heat. Once heated,
                                                                                       add in garlic and ginger and sauté until fragrant. Stir in the vegetable
     Add oil to a large saucepan and apply medium heat. Once heated, add in            stock and coconut milk and heat thoroughly. Whisk in the Thai red curry
     diced onions and sauté until soft and transparent. Mix in diced tomatoes,         paste until the paste is dissolved then cover and let simmer for 5 minutes.
     tomato juice and ketchup and simmer until the consistency of the base             Remove the large ginger slices from the broth. Transfer the prepared
     thickens. Once thickened, stir in minced celery, chicken stock, salt and sugar.   broth to your Hot Pot and bring to a boil by turning the dial to High heat.
     Transfer the prepared broth to your Hot Pot and bring to a boil by turning        Serve and enjoy with other hot pot ingredients such as meat, vegetables,
     the dial to High heat. Serve and enjoy with other hot pot ingredients such as     tofu or seafood.
     meat, vegetables, tofu or seafood.                                                SERVES 4-6.
     SERVES 4-6.

                                                                                       Sauerkraut Soup Base
                                                                                       6 cups           sauerkraut
     Milk Broth Base                                                                   2
                                                                                       9
                                                                                                        green onions, chopped
                                                                                                        cloves garlic, minced
     8 cups           milk                                                             1 inch           ginger root, sliced
     1                onion, diced                                                     400g             pork belly, thinly sliced
     7 cups           chicken stock                                                    12 cups          chicken broth
     3 tbsp           butter                                                           3 tbsp           oil
     2 tsp            salt                                                             2 tbsp           salt
     2 tsp            sugar                                                            2 tbsp           sugar
                                                                                       3 tbsp           cooking wine
     Add butter to a large saucepan and apply medium heat. Once the butter             3 tbsp           pepper powder
     is melted, add in diced onions and sauté until transparent and soft. Pour
     in chicken stock, milk, salt and sugar and heat thoroughly. Transfer the          Add oil to a large saucepan and apply medium heat. Once heated, add in
     prepared broth to your Hot Pot and bring to a boil by turning the dial to         garlic and ginger and sauté until fragrant. Add in the thinly sliced pork belly
     High heat. Serve and enjoy with other hot pot ingredients such as meat,           and stir-fry for 5 minutes or until the pork belly has browned. Once browned,
     vegetables, tofu or seafood.                                                      add in sauerkraut and sauté for another 6 minutes. Pour in chicken broth,
     SERVES 4-6.                                                                       salt, sugar and cooking wine and heat thoroughly. Transfer the prepared
                                                                                       broth to your Hot Pot and bring to a boil by turning the dial to High heat.
                                                                                       Serve and enjoy with other hot pot ingredients such as meat, vegetables, tofu
                                                                                       or seafood.
                                                                                       SERVES 4-6.

                      For additional recipes, visit us at                                                For additional recipes, visit us at
              www.AromaCo.com or at www.AromaTestKitchen.com                                     www.AromaCo.com or at www.AromaTestKitchen.com
8.                                                                                                                                                                       9.
Limited Warranty
      Aroma Housewares Company warrants this product
      against defects in material and workmanship for one year
      from provable date of purchase in the United States.
      Within this warranty period, Aroma Housewares Company
      will repair or replace, at its discretion, defective parts
      at no charge, provided the product is returned, freight
      prepaid with proof of purchase and U.S. $25.00 for
      shipping and handling charges payable to Aroma
      Housewares Company. Before returning an item, please
      call the toll free number below for a return authorization
      number. Allow 2-4 weeks for return shipping.
      This warranty does not apply if the warranty period
      expired; the product has been modified by any
      unauthorized service center or personnel; the defect
      was subject to abuse, improper use not conforming to
      product manual instructions, or environmental conditions
      more severe than those specified in the manual
      and specification, neglect of the owner or improper
      installation; the defect was subject to Force Majeure such
      as flood, lightning, earthquake, other natural calamities,
      war, vandalism, theft, brownouts or sags (damage due to
      low voltage disturbances).
      This warranty gives you specific legal rights, which may
      vary from state to state, and does not cover areas outside
      of the United States.

         Service & Support
      In the event of a warranty claim, or if service is required
      for this product, please contact Aroma® customer service
      toll-free at:
      1-800-276-6286
      M-F, 8:30am-4:30pm, Pacific Time
      Or we can be reached online at:
      CustomerService@AromaCo.com
      For your records, we recommend stapling your sales
                                                                    Note:
                                                                    · Proof of purchase is
      receipt to this page along with a written record of the         required for all warranty
      following:                                                      claims.
      · Date of Purchase:
      · Place of Purchase:

                   Aroma Housewares Company
           6469 Flanders Drive, San Diego, CA 92121, U.S.A.
               1-800-276-6286 | www.AromaCo.com
10.             M-F, 8:30am – 4:30pm, Pacific Time                                         11.
To Enhance and Enrich Lives.

w w w . A r o m a C o . c o m
You can also read