Let's Go... Support INTERNATIONAL CHALLENGE 2019 - Girlguiding North West England
←
→
Page content transcription
If your browser does not render page correctly, please read the page content below

Let’s Go...
      Support
INTERNATIONAL CHALLENGE 2019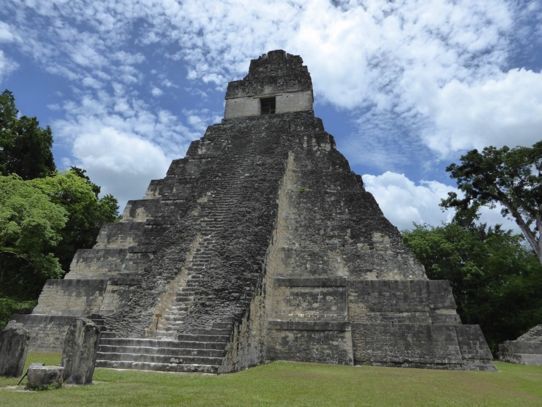
About ‘Let’s Go... Support’ ....................................................................................... 3
International Trips 2019 .............................................................................................. 4
Themes ................................................................................................................................... 5
Chocolate Temples ......................................................................................................... 6
Aztec Sundials .................................................................................................................. 7
Aztec Ball Game ............................................................................................................. 8
Hearty Gingerbread ..................................................................................................... 9
Traditional Dance of the Balkans ....................................................................... 10
Martenitsa ........................................................................................................................... 11
Aurora Borealis ......................................................................................................... 12-13
Finnish Furniture ....................................................................................................... 14-15
Create Yourself as Haltija ..................................................................................... 16
TENT-TASTIC .................................................................................................................... 17
International Friendship and Knots ................................................................. 18
ACT it out............................................................................................................................ 19

Appendix 1 .......................................................................................................................... 20
Appendix 2 ........................................................................................................................ 21
Appendix 3 ........................................................................................................................ 22
Appendix 4 ........................................................................................................................ 23
Appendix 5 ........................................................................................................................ 24
Appendix 6 ........................................................................................................................ 25
Appendix 7 ........................................................................................................................ 26
Appendix 8 ........................................................................................................................ 27
Appendix 9 ........................................................................................................................ 28

                                                               Page 2
About ‘Let’s Go... Support’
This challenge has been developed by the Region International team and 2019 trip
leaders and participants.

‘Let’s Go... Support’ will take you on an exciting journey around the world and
will bring the international experience to your unit. The challenges aim to give
you a flavour of what it is like to get involved in an international experience with
Girlguiding North West England and will help you to discover interesting facts about
the destinations the Region is visiting this year, as well as the European Jamboree -
an exciting international camp open to our members happening in Poland in 2020.

The ‘Let’s Go’ scheme began in 2017 with ‘Let’s Go... Explore’ and was followed by
the release of ‘Let’s Go…Educate’ in 2018. ‘Let’s Go…. Support’, 2019 represents
the final year of the scheme. The aim of the ‘Let’s Go…’ series was to ensure our
Girlguiding members could achieve all three badges over the three years, even as
they progressed through the sections.

All the badges can be sewn onto a camp blanket in a large triangle shape, as shown on
the diagram below. The upside-down triangle, which makes up the fourth badge, can
be gained by taking part in any international experience through Girlguiding.

                                                          Let’s Go...
                                                           Support

                                                Girlguiding North West England

                                       Page 3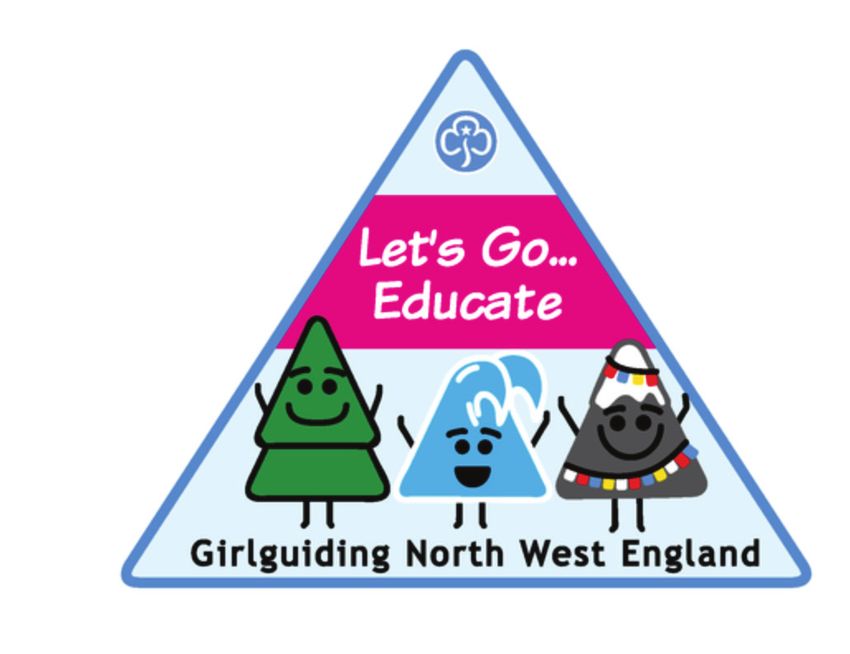
International Trips 2019
This year, Girlguiding North West England will support four groups of young women
on their international adventures. These teams will travel to Finland, Mexico, The
Balkans, and Poland to take part in activities, get involved with local communities
and to develop global guiding links. Our special ‘Let’s Go…Support’ badge features our
four mascots from this year’s challenge pack. They represent different novelties from
each country. You can find out more about them below.

How to complete the challenge
The ‘Let’s Go...Support’ challenge is suitable for all sections to take part in. You
can choose to complete activities as a Six, Patrol, unit… or another grouping of your
choice! We’ve provided some helpful hints and tips for each activity, and how to take
them further for older girls. Feel free to incorporate your own ideas and activities, if
they are relevant to the challenge. We recommend you spend a minimum of three-
unit meetings working on the challenge, and that you choose activities from a range
of different countries. Rainbows and Brownies should aim to complete 3 - 6 activities;
Guides and Rangers, 4 - 8. Don’t worry if you don’t have access to all the tools or
materials listed in an activity – this is a flexible challenge! All the activities range in
time and equipment needed, so you can adapt them to suit your needs. Remember
that this is a fun badge, not a qualification, so a flexible approach is required. As long
as you have taken a full and active part in the challenge, then you should receive
your badge.

Characters
                        Hello, I’m Cleo,                                Hi! My name
                         and I’m your                                  is Susi, which
                        Mexican Cactus                              is Finnish for wolf.
                            friend.

                                                                              Hello! My name is
                                                                               Piernik, and I’m
                    Hey there!                                                 a yummy polish
                 My name is Rila                                                Gingerbread!
             and I’m named after the
             highest mountain range
                  in the Balkans.

                                           Page 4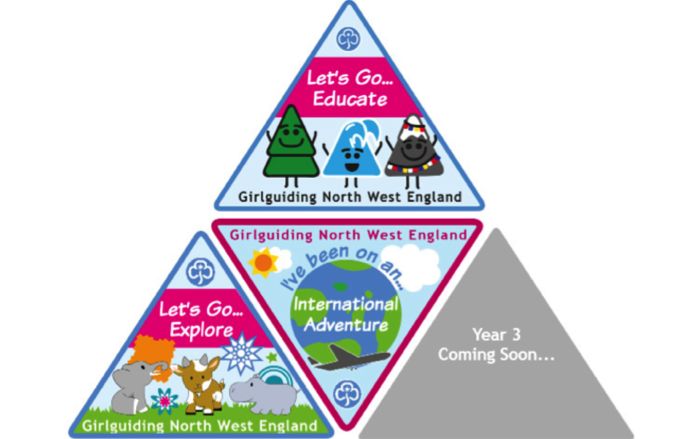
Remember
You should decide as a group which activities you would like to do. Why not get
together for a Rainbow Chat, Brownie Pow Wow, or Patrol Meeting ?
How to order your badges?
Badges are £1 each and are available at the Girlguiding North West England shop.
They can be purchased in store, or online here: http://shop.girlguidingnwe.org.uk

Why not try some of our top tips to make this challenge print-
friendly:
•   Print multiple pages to one sheet – make sure you can still read it though!
•   Set your printer to print double-sided and use paper more efficiently
•   Only print the pages and sections you need
•   Print the challenge in black and white to save on ink

                                        Page 5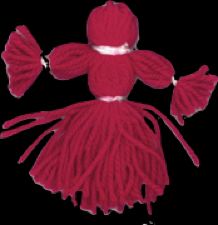
Mexico 2019

                      Chocolate Temples
 Background Information
 Our region team travelling to Mexico will be seeing the hints of Aztec culture
 everywhere- which remains since the Aztec empire. The country is a blend of Spanish
 and native cultures that can be seen in the architecture, food, art, and overall spirit.
 Did you know, an amazing Aztec find was only unearthed after an earthquake which
 struck Mexico in 2017? Here, a secret Aztec temple was discovered hidden inside an
 ancient Mexican pyramid. With this activity, you can learn about other cultures and
 make delicious Aztec treats by building your own temple out of chocolate, or any other
 materials you can get creative with.

 Time: 1 hour       Suitable for: All sections

 Equipment/Additional Materials:
 Pictures of Aztec temples (Appendix 1)
 Chocolate (if you are using it): Per six/patrol/group – 1 x200g bar of chocolate broken
 into squares
 1 dessert spoon of chocolate spread
 Plates/trays to use as a base
 Knives or spoons
 Alternative material: building bricks, stickle bricks, wooden blocks, cardboard

 Method
 1. Discuss in your groups or with your leader why temples are important. Why were
    they built? Who uses them? What do they do there? What are the different parts for?
    Perhaps you could look at pictures of Aztec temples on the internet and share them
    in your unit meetings.
 2. Form a team of 4-6 girls.
 3. Give out an even number of bricks per team.
 4. Take some time to discuss how to design and build the temple. Write out a plan on
    some paper, or just have a simple discussion.
 5. Work together with your team to create your temple using bricks and mortar.

 Hints and tips
 • Read the background information in appendix 1. It has lots of cool information about
   the Aztec religion to help you get started.
 • Mortar can be sticky tape, glue etc. Depending on your initial discussion and the age/
   ability of the girls you can give each team a picture of an Aztec temple to use as a
   guide when they are doing the building activity.
 • Try the Mexico quiz (appendix 2) and award a brick for teams that answer questions
   correctly. To make it more challenging, a bonus question could decide whether teams
   get mortar or not.
 Taking it Further
 • With your leader, explore Aztec belief systems (appendix 3) and discuss how they
   relate to your own belief systems.

                                          Page 6
Mexico 2019

                           Aztec Sundials
  Background Information
  Have you ever wondered how people told the time before clocks were invented? A
  sundial is a device that tells the time of the day using the position of the sun. It uses
  a flat plate (the dial) and a gnomon, which casts a shadow onto the dial; the markings
  indicate the time by the position of the shadow. Use your imagination and build a sundial
  using Aztec pictograms as inspiration.

  Time: 30 minutes       Suitable for: All sections

  Equipment/Additional Materials:
  Paper to plan your design (or use the template in appendix 5)
  Pencil
  Paper plate
  Colouring pens/pencils
  Large craft/lollipop stick
  Play dough/plasticine/blue tack

  Method
  1. Discuss how people could tell the time before there were clocks? How can the sun
     and shadows be used to tell the time?
  2. Use paper and a pencil to sketch out your design of a sundial. Include symbols,
     numerals, and animal imagery the Aztecs used.
  3. Sketch out the design on your paper plate and colour it. You can also add a design
     along the outer edge of the plate to make a frame.
  4. Using the playdough/plasticine/blue tack to attach the large craft stick to the middle
     of the plate.
  5. Take the plate outside and use it to tell the time. If your meeting place is too
     dark you can take it home and take pictures of it working in a sunny spot over the
     weekend.

  Hints and tips
  • Why not use the Aztec signs (appendix 4) representing different qualities, to express
    yourself in your own design? Would you use wind for strength, a house meaning love
    of home, or a lizard which means endurance? You can choose the most fitting ones
    from a full list in the appendix.
  Take it further
  • Use the Aztec day signs to create a picture of your Girlguiding friends. This can be
    done in pairs and you can share with each other how you described your friend in the
    Aztec key.

                                          Page 7
Mexico 2019

                         Aztec Ball Game
 Background information
 Ullamaliztli, the famous Aztec ball game, uses a court known as the tlachtli ball court,
 which is in the shape of an I. The ball court was one of the first things that was built
 when the Aztecs settled in the new area, which makes it one of the oldest and most
 important ancient game. A newer, more modern version of the game is still played in the
 indigenous population, to this day! In this activity, you will get active and work as a team
 to learn how to play the fun Aztec ball game.

 Time: 20 minutes      Suitable for: All sections

 Equipment/Additional information
 2 Hula hoops
 Masking tape
 Football

 Method
 1. Split yourselves into two teams.
 2. To start with, face each other on the court on either side of the line, but once the
    game starts you can go anywhere.
 3. You need to get the ball into the hoop on the other side of the court from where you
    started.
 4. You get 5 points for getting the ball in the hoop and 1 point every time the ball cross-
    es the line.
 5. BUT the ball cannot touch the floor, your hands or your feet. You have to keep the
    ball in the air and pass it between you using your elbows, knees, shoulders and head.
 6. If the ball touches the floor, it is given to the opposing team and play resumes.
 7. You decide how many points need to be scored for the game to end.

 Hints and Tips
 • Be careful of falling over and knocking yourself and other players as you attempt to
   get the ball during play.
 • The court is in the shape of an I with a centre line, (traditionally it was
   100-200-foot-long, but you can adapt it to smaller spaces that have enough room
   for girls to run about). There should be markers along the sides of the court and two
   rings (hula hoops) positioned at the middle of the two sides. You can use the masking
   tape to mark out the court and the line and markers etc.
 • You can make this harder or easier by changing the size of the balls and the hole in
   the hoop.
 Taking it Further
 • Why not adapt the game by making up extra rules or using the markers along the
   side of the court in your games?
 • Design a uniform for your team.
 • Come up with a pre-team ritual or dance for your team to do before each game.

                                           Page 8
Balkans 2019

                   Hearty Gingerbreads
 Background information
 Traditionally, each capital in the Balkans set up a Christmas Market early December
 selling homemade crafts, food, and other exciting things. ‘Buy Local’ is a trend
 specifically in Montenegro where initiatives call on Montenegrins to buy handmade
 instead of mass-produced gifts for Christmas, which is why these markets are such a hit!
 Many of these countries bake goodies to sell to those visiting, including baked goods,
 sweets, meats and cheeses. Many sweets and baked goods are often shaped in hearts
 to really spread the love. Using the recipe in the below activity, bake and decorate
 gingerbread love hearts to tie in with Serbia, Montenegro & Bulgaria’s love of baking.

 Time: 45 minutes     Suitable for: All sections

 Equipment/Additional Materials:
 350g plain flour
 100g butter
 5 1/2 teaspoons ground ginger
 1 1/2 teaspoons ground cinnamon
 1 teaspoon bicarbonate soda
 175g light brown soft sugar
 4 tablespoons golden syrup
 1 medium egg

 Method:
 1. Preheat the oven to 180ºC.
 2. Put the flour, butter, ginger, cinnamon and bicarbonate of soda in a mixing bowl. Mix
    it all together with fingertips until crumbly.
 3. Add the sugar, syrup and egg and mix until it forms a firm pastry mix.
 4. Using the rolling pin, roll out the pastry to about 5mm thick. Make sure the surface
    and the rolling pin are well dusted with flour. Use gingerbread men cutters to cut out
    shapes.
 5. Place the cut-out pastry on a greased or non-stick baking tray.
 6. Bake in the preheated oven until golden, about 15 minutes. Check after 10 minutes.
    Gingerbread may be ready after 12 minutes in a fan assisted oven.

 Hints and tips:
 • Stay safe, make sure you use oven gloves, and only operate an oven with a suitable
   adult.
 • If you don’t have baking ingredients, why not use play dough and decorate your
   hearty cookies with glitter, glue, and craft goodies.
 Take it further
 • Why not research other tasty treats that come from countries in the Balkans and have
   a go at making and sharing them with your unit.

                                         Page 9
Balkans 2019
Traditional Dance of the Balkans
Background information
The Kolo is a traditional dance that originated in Serbia but is danced throughout
Croatia, Bosnia, Herzegovina, and Slovenia. It is a group dance that is often performed
at celebrations to bring people together. Starting off in a circle, people hold each other’s
hands making a chain or a union, following the same rhythm.
There are many different variations of the Kolo – all of which reflect the community
spirit. Why not have your own Kolo dance to represent your guiding unit spirit!
Check out these videos to see how it’s done:
www.youtube.com/watch?v=bQl2pp4AfX4
www.youtube.com/watch?v=07qN7RzIw0M&t=45s
Time: 30 minutes Suitable for: All sections
Equipment/Additional Materials:
At least four group members
Kolo music: www.youtube.com/watch?v=tVevZnmpRkE
Method:
1. Stand in a line or circle. Hold hands no higher than waist height.
2. Moving to the right, take four side steps (right foot, left foot, right foot, left foot). On
your fourth step, keep your left foot hovering in the air ready for your next step.
3. Take two small steps to the left, keeping right foot in the air after the second step. Do
the same again whilst moving to the left.
4. Now, do the four side steps again but move to the left. After the four steps to the left,
take the two side steps in each direction (starting with the right.)
5. Repeat this process.
6. If you would like to add a twist to your dance, put your left foot in front of your right
when taking four side steps to the right. Do the same with your left foot when moving
to the left.
7. In Kolo, all of the movement should be in the lower legs. To make it more challenging,
you can hold hands.
Hints and tips:
• This can be made easier or simpler depending on the ability or age of your group.
Watching the videos first will help you get an idea of the dance and can give you ideas
about how to make the dance simpler/more challenging.
Take it further
• Make the dance more complex by adding in new steps, making the movement faster
or trying a different formation.
• Research other styles of dance that are common in the Balkans. Are there any
variations on the Kolo that you could try out? Or maybe even a completely different
style of dance.
Page 10Balkans 2019
Martenitsa
Background information
Bulgaria is one of the great countries that belongs to the Balkans. Bulgarians continues to
value many traditions and celebrations, many of which have been celebrated for years.
One of the highlights of their calendar is Baba Marta (Grandma March). Celebrated on 1st
of March, Baba Marta celebrates the start of spring. It is named after the mythical figure
who brings with her the end of the cold winter and the beginning of the spring. The
traditional day is celebrated by exchanging a Martenitsa which is often made of white and
red yarn and usually in the form of two dolls. The dolls represent a male and a female
called Pizho and Penda. It can also take the form of a red and white bracelet. Have a go
at making your very own Marternitsa.
Time: 30 minutes Suitable for: All sections
Equipment/Additional Materials:
Picture guide (appendix 6)
Red and White wool
A piece of cardboard (the height you want your doll)
Scissors
Method:
For Girl Doll Penda (use red wool for the main body)
1. Wrap the wool around the card at least 40 times.
2. Slide the wool off the book. Tie a separate piece of wool at the top end and cut the
wool at the bottom end. To make the head, tie a piece of wool (in different colour)
tightly around the wool to form a neck.
3. To make the arms, split the wool in two, and then split each half in two again. The
outside bunches on each side are the arms. Tie each arm at the wrist (with different
coloured wool) and trim the hands even.
4. Tie wool (different colour) at the dolls waist.
For Boy Doll Pizho (use white wool)
5. First, follow steps 1-4 as above.
6. Split the wool below the waist in half. Tie (in a different colour) each bunch at the
ankle. Trim the feet even.
7. Attach the head to safety pin.
Hints and tips:
• Be careful when using the scissors, as they can be sharp
Take it further
• Martenitsas can also be made as the form of bracelets. Twist red and white wool
together or knot as a friendship bracelet.
• Martenitsas are often given to friends and family as a symbol of good wishes. Give
yours to someone you care about.
• Baba Marta is also a folklore in in other Balkan countries, research how these stories
differ from country to country.
Page 11ICE- Finland 2019
Aurora Borealis
Background information
The Aurora, sometimes referred to as, northern lights is a natural light display in the
Earth’s sky, predominantly seen in the high-latitude regions such as Finland. The lights
are an incredible blend of green, purple, red or blue caused by electrons from solar
winds. The fascinating light show is caused by collisions between electrically charged
particles released from the sun that enter the earth’s atmosphere and collide with gases
such as oxygen and nitrogen. Create your own shining sky in a jar or paint the sky.
Time: 30 minutes each or whole meeting for both activities
Suitable for: All sections
Equipment/Additional Materials:
For Glitter jar:
One jar per girl
Glitter glue
Glitter
Warm water
Food colouring
For Paint the night sky:
Paper
Coloured Paint
Paint brushes
Glitter
Method:
For Glitter jar:
1. Choose a suitable jar.
2. Assemble glitter and food colouring.
3. Boil enough water to almost fill the jar. Pour the water into the jar once it has cooled
slightly.
4. Add a few drops of food coloring. Go slowly, adding only enough to reach the color
you desire.
5. Add the glitter. Tip in the glitter and the glitter glue. Stir to mix through.
6. Place lid on the jar securely.
7. Shake and use.
Page 12ICE- Finland 2019
Paint the Night Sky:
1. Start with a blank piece of paper.
2. Be creative and think about the colours you want in the night sky such as orange,
purple, blue, or just white and black.
3. Using your colour paints and brushes in water paint your version of the night sky.
This can be the one you just looked at or one from a memory.
4. Add glitter for extra sparkle.
5. You could do this by a technique called marbling:
• Use non-perfumed shaving foam.
• Mix colours you want in.
• Place paper on top to create desired effect
Hints and tips:
• When using paint and colouring, it is important to protect your work area and
clothes.
• Be sure to use a jam jar which is safe to use with boiling water.
• Make sure the lid is screwed tightly, to prevent leaks when being shaken.
Take it further
• Use the internet to research pictures and videos of the Northern lights. Plot on a
map where they are seen.
Page 13ICE- Finland 2019
Finnish Furniture
Background information
The Finnish Artek stool was made in 1932 making it 86 years old! Designed by Alvar
Aalto, the stool is one of the icons of Finnish furniture pieces. The design is often
repeated and because of its geometry, the stools are known for their space-saving, easy
to stack nature. To create this chair properly, takes 42 very important production steps.
In this activity, you’ll get to design your own furniture and create a model of your fab
design.
Time: 30 minutes each or whole meeting for both activities
Suitable for: All sections
Equipment/Additional Materials:
For furniture design:
Plain paper
Coloured pens/pencils
Optional: scraps of fabric
For 3D model:
Art Straws
Blue tack
Spaghetti
Pipe cleaners
Playdough (or any other malleable material)
Method:
Create a new furniture design:
1. Split into small groups and discuss what piece of furniture you want to design.
2. Top Tip: Think about the function of the material, what material would you use, the
style it will be in, who will use it? You could use magazines to get inspiration.
3. Using a pen/pencil and a plain piece of paper, draw out your design.
4. Be creative and add colour or patterns or fabric to bring the design to life.
5. Share your design with the other groups.
Page 14ICE- Finland 2019
Method:
Create a 3D model:
1. Using your previous design collect the materials that you will use to build your
piece of furniture.
2. Working on your own – try to create a small model of the design using playdough,
clay, straws, spaghetti or whatever materials you have.
3. Once you have finished; show the model off to other unit members and see how
they interpreted the design.
Take it further
• Take a unit visit to a furniture store to look at the furniture. Who is the furniture
designed for? How does it work? What is it made of? Is there a piece of furniture
that is similar to your design?
Page 15ICE- Finland 2019
Create Yourself as a Haltija
Background information
Haltija are a Finnish version of gnomes or fairies and are believed to live everywhere
you look and serve as protecting spirits for all things. There are Haltijas for nature,
graveyards, and even humans. Human homes and buildings can sometimes have a
protecting Haltija. Humans themselves may have a Haltija looking out for them, much
like the idea of a guardian angel. A special kind of Haltija is the Joulutonttu, seen only at
Christmas time; they are similar to Christmas elves, though without pointed ears.
Time: 30 minutes each or whole meeting for both activities
Suitable for: All sections
Equipment/Additional Materials:
Decorate a Haltija:
Haltija template (appendix 7)
Coloured pens/pencils
Optional: tissue paper, scraps of fabric
Haltija comic strip:
Plain paper or template (appendix 8)
Haltija character from first activity
Method:
Decorate a Haltija
1. Take a template picture.
2. Make clothes for your character.
3. Give them a facial expression.
Create a Haltija comic strip
4. Take a comic strip template.
5. Work in small groups to create a story for your character (Does your Haltija have a
problem that needs solving? Have a few alternate endings).
6. Write up your comic strip.
7. Add your character in.
8. Add colour to make your story come alive.
Hints and tips:
• When working with a group to make a story, it is important to listen to each other and
allow everyone a chance to input their ideas.
Take it further
• Make a video story for Guides and Ranger age by working in small groups to think up
a story. You can each be a Haltija character and film your epic play.
Page 16European Jamboree 2020
TENT-TASTIC
Background information
European Jamboree 2020 is an exciting Jamboree for thousands of Scouts and
Guides from all over Europe aged between 14 to 18, taking place in Gdańsk, Poland.
Participants will be camping on Sobieszewo Island in Gdansk, the City of Freedom, on
the coast of the Baltic Sea in Northern Poland, for just under 2 weeks. In this activity,
you can have a go at working in a team to pitch a tent.
Time: 60 minutes Suitable for: All sections
Equipment/Additional Materials:
Tent (s): you may want several so you can do this activity in small groups.
Space to pitch the tent (indoors or outdoors)
Method:
1. Pick a spot for your tent; find an area that is level as possible.
2. Unfold the tent and lay it out.
3. Insert the tent poles into the tent frame.
4. Thread them into the tent fabric, starting at one corner.
5. Time to raise the tent; pull the tent upright.
6. Tug poles as far apart as possible to make sure it is taut and roomy.
7. Peg out the tent.
8. Put up the inner tents.
9. Sit inside you tent and discuss what you think it would be like to camp for nearly 2
weeks. Brainstorm what your dream camp would like. What activities would you do?
What would the layout of the camp look like? What would you eat? Who else would
be there? Etc.
Hints and tips:
• You could build a tent out of blankets etc. if you do not have access to a tent.
• You could pitch your tent inside (without pegs) if you do not have the outside space
for this activity.
Take it further
• Perhaps you could race against other groups to see who can pitch the tent the fastest
and who works as the most effective team.
• Challenge older girls to work together to pitch a tent with a twist! Have some girls
who aren’t allowed to touch the tent to direct girls with blindfolds to assemble the
tent.
• Have a camping themed evening and make camp treats like dampers and smores.
Page 17European Jamboree 2020
International Friendship and Knots
Background information
Guides and Scouts around the world wear neckers (or scarves) as part of their uniform.
At large camps/jamborees, there is a tradition of participants swapping neckers in an act
of international friendship. Participants often also tie special friendship knots in neckers
to demonstrate this. In this activity, you can practice tying friendship knots in neckers.
Can you tie the knot on someone else’s necker as a sign of friendship?
Time: 30 minutes Suitable for: Guides and Rangers
Equipment/Additional Materials:
Neckers or triangles of fabric
Written instructions (appendix 9)
Video instructions for friendship knot tying: www.youtube.com/watch?v=Fc4E9C7mkMk
Paper
Pens
Method:
Use appendix as to see a picture guide on tying friendship knots.
1. Roll the long edge of your necker first to give neat ends to tie.
2. Cross one end over the other then fold it back upon itself.
3. Bring the second end over the folded (first) end and take it round behind.
4. Bring end 1 down over end 2, then take end 2 round and over end 1 and tuck it
through the loop formed by end 1.
5. Adjust the knot until the ends are even and the knot flat and square, tighten gently
until it is the size you want.
Hints and tips:
• If you don’t have any neckers you could try using triangular bandages instead.
• Remember to stay safe and not tie the knots too tight as this can be hazardous.
Take it further
• Why not make unit neckers? Find fabric you like and get sewing.
• Explore other useful knots for camping.
• Set yourself a knot challenge and see if you can tie the knots with your eyes closed.
Page 18European Jamboree 2020
ACT it out!
Background information
The educational motto for European Jamboree 2020 is ‘ACT’. This is about realising that
every Guide possesses the potential to become a driver of social change. Members of
Girlguiding are invited to go to European Jamboree and discover their power, find out
where their helping hands are needed, and inter-ACT with others of various cultures.
To ACT, is to make positive change and for this, your voice needs to be heard. This fun
activity will make you realise how difficult it is to make yourself understood and to
make change if your voice cannot be heard.
Time: 10 minutes Suitable for: All sections
Equipment/Additional Materials:
A group of at least 5 people
Bags of enthusiasm
Method:
1. Sit or stand in a line one behind the other (if there are more than 15 people in your
unit split into two smaller groups).
2. Give the girl at the back of the line an everyday action such as washing up or feeding
the cat.
3. This girl should mime this action to the girl in front of her, who then mimes it to the
girl in front of her. Repeat in silence until every girl in the line has had the action
mimed to her.
4. When the action has reached the front of the line the girl at the front should guess
what the original action was.
5. Discuss together…
a. Was the task easy or hard? Why? What would have made it easier?
b. Can you think of people in the world who do not have a voice? Why not? How
can we help them?
Hints and tips:
• You could write out the actions on slips of paper and pick them out of a bowl to
mime.
Take it further
• Make the activity harder and instead of miming everyday actions, mime causes or
campaigns that you are aware of.
• You could use your creative skills and the voice you have, to promote change i.e.
write letters to your MP about an issue you are passionate about, make posters or
design social media campaigns etc.
Page 19Appendix 1
Aztec Temples
Aztec temples were usually found at the top of pyramids and they are often called
temple pyramids. They were built using ancient Mesoamerican architectural traditions
that went back thousands of years. A temple-pyramid was always a tall structure
consisting of four main platforms. A grand stairway runs up one side.
The Aztecs believed their pyramids were the homes of their gods and places of worship.
Burial sites have been found inside the temple walls, and the pyramids were also used
to perform rituals of sacrifice. The pyramids had flat tops - and called ziggurats – and
were mostly located inside busy cities. They were centres of regular worship and
festivities and used as centres of astrology and astronomy.
The temples were used as centres of worship, religious schools, astronomical
observatories, sacrificial centres. They were also the focal point of regular religious
festivities involving the whole community. Archaeologists have found incredible
artefacts inside the different layers of Aztec temple-pyramids. These decorated pots or
carved stones were most likely offerings to the gods. Sacrifices were made to the gods
at the top of the temple. Sometimes the bodies of the people sacrificed were thrown
down the stairs after they were sacrificed.
Page 20Appendix 2
Mexico Quiz
You can use all these questions as part of a quiz or choose your favourites. We wanted
to give you as much choice as possible.
Which state in Mexico has the same name as a breed of dog?
Chihuahua
What bird is found on the Mexican flag?
Eagle
What is the capital city of Mexico?
Mexico City
What name is given to a thin Mexican bread?
Tortilla
What is the main vegetable used in guacamole?
Avocado
Which country is in between Mexico and Canada?
USA
What is Mexico’s most commonly used language?
Spanish
What festival occurs in Mexico on the 2nd of November?
Day of the dead
Which country did Mexico get its independence from?
Spain
When did Mexico gain its independence?
1821
What is the date of Mexican independence?
16 September
Which native peoples lived in Mexico for thousands of years and built great temples?
Aztec and Mayans
Frida Kahlo is a famous Mexican painter. What childhood disease resulted in her
disability?
Polio
Which of the WAGGS five world centres is in Mexico?
Nuestra Cabana
What is the national animal of Mexico?
Xoloitzcuintli (a hairless dog)
What is the national plant of Mexico?
Nopal or prickly pear, it is on the flag
The Axolotl is an iconic Mexican animal, but where does it live?
In rivers and lakes
The ocelot and jaguar live in Mexico’s rainforests, what kind of animals are they?
Cats
Page 21Appendix 3
Aztec Belief Systems
In Aztec religion, there were many Sun Gods. There were five main ages in Aztec
religion and therefore five suns – meaning that there were five main Sun God’s too.
These five ages represent different parts of Aztec history.
Tezcatlipoca (smoking mirror) was the first god to be a sun. He was the god of the night
and an enemy of Quetzalcoatl (who we’ll learn about later). Quetzalcoatl knocked
Tezcatlipoca from the sky, and in revenge Tezcatlipoca took the form of a jaguar and
destroyed the world.
Next, we have the defeater, Quetzalcoatl (feathered serpent). The great rivalry started
with Tezcatlipoca continued and the jaguar knocked him too from the sky. This brought
the end of the second Sun God and with it, brought a great wind and a huge wave of
destruction over the earth.
The third god chosen to become a Sun God was Tlaloc – who was a god of rain. Although
chosen by his fellow god’s to take on this role, one was not happy, and Quetzalcoatl
made fire rain down, once more devastating and destroying the earth, bringing with it
the end of Tlaloc’s age.
The fourth Sun God, was actually a Sun Goddess. Chalchiuhtlicue (lady of the jade
skirts) was actually Tlaloc’s sister and was specially chosen by Quetzalcoatl to rule the
skies. Chalchiuhtlicue was the goddess of the waters – but once again, the sparring
gods caused destruction of the world, which were destroyed by floods. This devastation
brought an end to Chalchiuhtlicue rule as Sun Goddess and an end to this age of the
world.
After the reigns of these four Sun God’s ended in such disaster, no other god wanted
the role of being the sun. A council was formed to decide who would take rule and it
was decided that the last Sun God would have to offer his life so that the people of
the world would survive. One humble god, Nanauatl and one wealthy god Tecciztecatl
were chosen. A fire was lit and the god who lept into the fire would become the Sun
God. Tecciztecatl was proud and wanted the immortality becoming the Sun God would
bring, but was not able to jump into the fire as the flames were too hot. Nanauatl, the
humble and wise god jumped in without a second thought. Not to be outdone by a rival,
Tecciztecatl jumped in right after him, meaning that the five age brought with it two
Sun God’s.
But of course it wasn’t this simple, the gods did not think two Sun God’s was right and
so they threw a rabbit into the fire, which dimmed Tecciztecatl’s brightness – and so
he instead became the moon, leaving Nanauatl to be the Aztec Sun God. He was then
given the name of Tonatuih – and it is his face that many believe adorns the Aztec sun
calendar stones.
Page 22Appendix 4
Day signs
Alligator Wind House Lizard
Quick response Strength Love of Home Endurance
Snake Death Deer Rabbit
Meditation Life Force, Vitality Alertness Speed
Water Dog Monkey Grass
Cleanliness Loyalty Agility Healing (herbs)
Reed Jaguar Eagle Vulture
Music Grace Great spirit Hope
Movement Flint Rain Flower
Sensitivity Renewal Fertility Contentment
Page 23Appendix 5
Aztec Sundials
Page 24Appendix 6
How to make a Martenista
1. 2.
3. 4.
Page 25Appendix 7
Haltija Template
Page 26Appendix 8
Comic Strip Template
Page 27Appendix 9
Friendship Knot
1. Put neckerchief
around neck. Fold
bottom of left-hand
side up. 2. Put right-hand
side over this and
fold underneath
3. Fold the loose 4. Use the loose end
end of the left-hand of the right-hand
side down as shown. side to complete the
knot.
Page 28You can also read