Managers ADP eTime Training Manual - August 2014 - Roger Williams ...
←
→
Page content transcription
If your browser does not render page correctly, please read the page content below
Managers ADP eTime
  Training Manual

    August 2014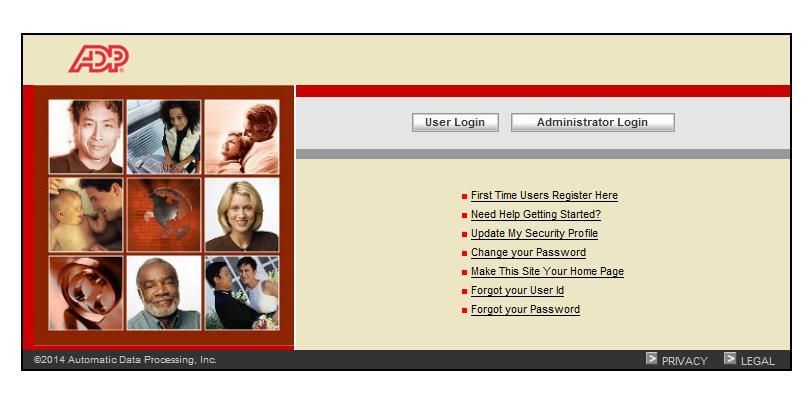
Table of Contents
Introduction                                 Page 3

How to Log Into eTime                        Page 4

Approving Exception Time Requests            Page 6

How to Review Timecards                      Page 7

How to Edit Timecard Exceptions              Page 11

How to Transfer Amongst Multiple Positions   Page 14

How to Approve Timecards                     Page 17

Viewing Timecards                            Page 20

Manager Proxy Delegation                     Page 21

Manager Schedule View and Edit               Page 27

How to Run Reports                           Page 30

How to Sign Out                              Page 31

                                  2
Introduction
ADP eTime is a “Time & Attendance” program that allows managers on the internet to:

   1.   Review, edit and authorize exception time requests (i.e. vacation, sick, etc.);
   2.   Review, edit and approve their employee’s time card;
   3.   Appoint manager proxy delegation;
   4.   Modify employee’s work schedules;
   5.   View reports.

Registering for eTime as a first time user

For more information about how to register as a first time user please see the Registration
Manual found at the Roger Williams University Payroll website.

                                                 3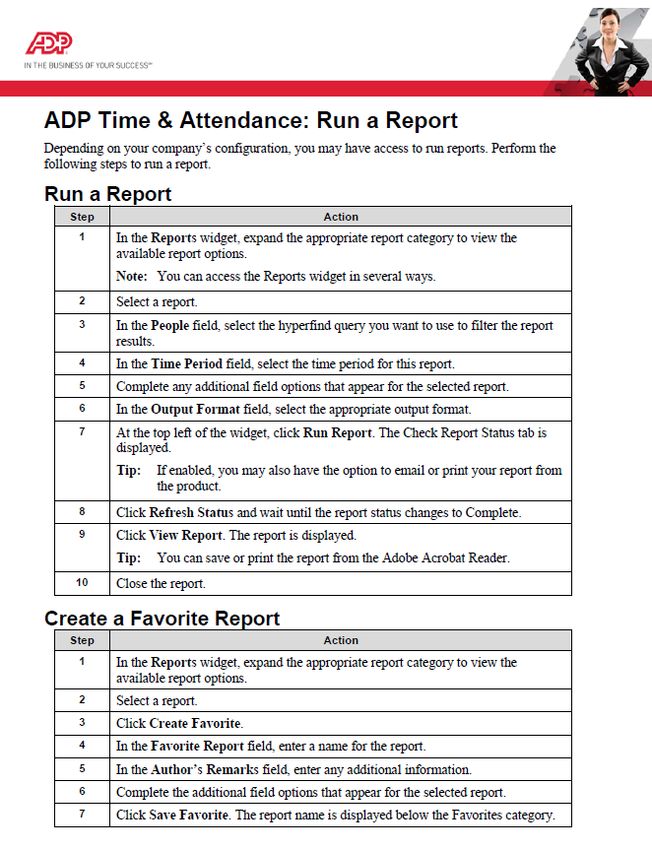
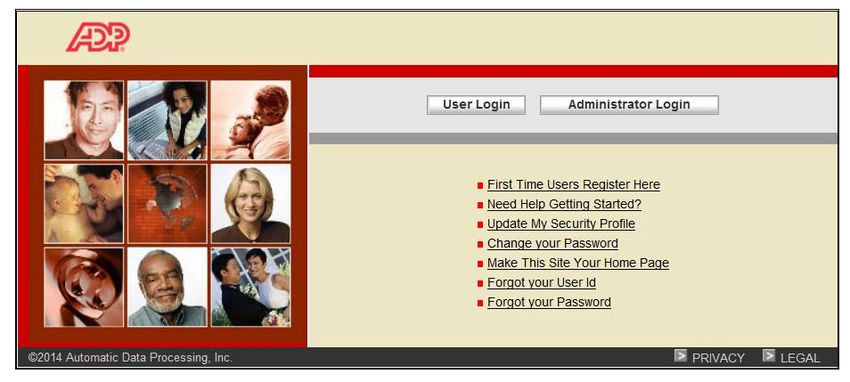
Logging Into eTime
1. Log into ADP eTime at https://portal.adp.com/public/index.htm
2. Please save this site as a “favorite” on your website.
3. Click the ‘User Login’ button and enter your User Name and Password created when
   registering.

                                            4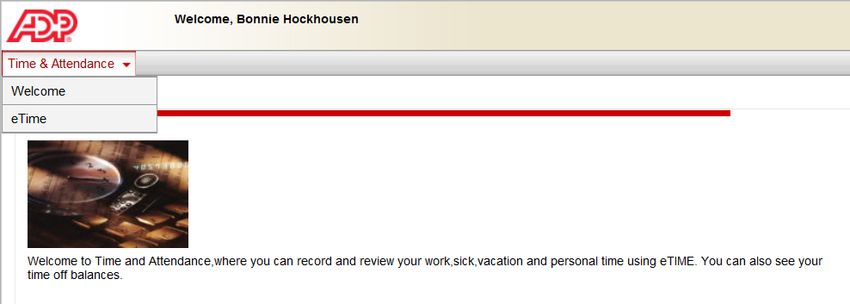
4. The ADP Time and Attendance home page will appear. Click the “Time and
   Attendance” drop box and select “eTime”.

5. Click on eTime

                                        5
How to Approve Exception Time Requests
Employees may request exception time (i.e. vacation, sick, etc.) through ADP eTime. The manager will
receive an e-mail alert when a request is submitted notifying them to review the pending Scheduled
Exception Time Request.

   1. After logging into eTime an “Alert” icon with a number will appear in the top center of the tool
      bar. Click on the Alert”.

   2. In this example a manager has a time-off request alert and a manager delegation request that
      have not been resolved.

   3. When the manager clicks on the Time-Off request, he/she will be brought to the request that
      will provide details as well the option to edit, approve, refuse, retract etc. Once the manager
      has completed the action an e-mail message will be sent to the employee notifying them, i.e.
      their vacation request has been approved. That specific manager alert will also go away once
      the manager has completed the action, saved and signed off of eTime.

                                                  6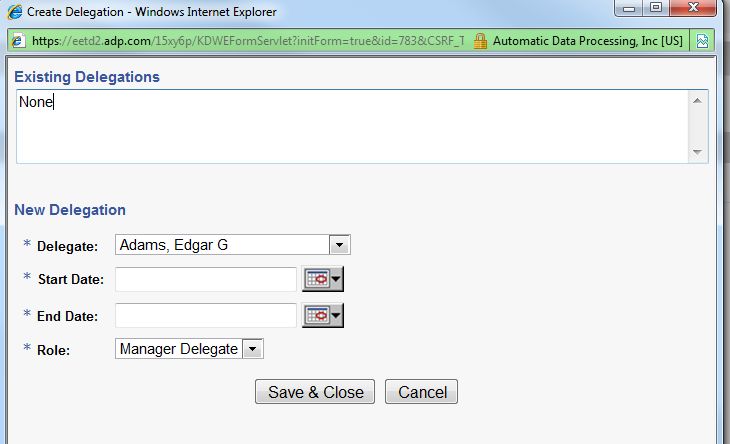
Reviewing Timecards

1. Click on ‘Workspaces” in the upper right hand corner of your screen.

2. Click on “Timekeeping”

3. Once you have clicked on “Timekeeping” it will bring you to the “Quick Links” screen.

                                           7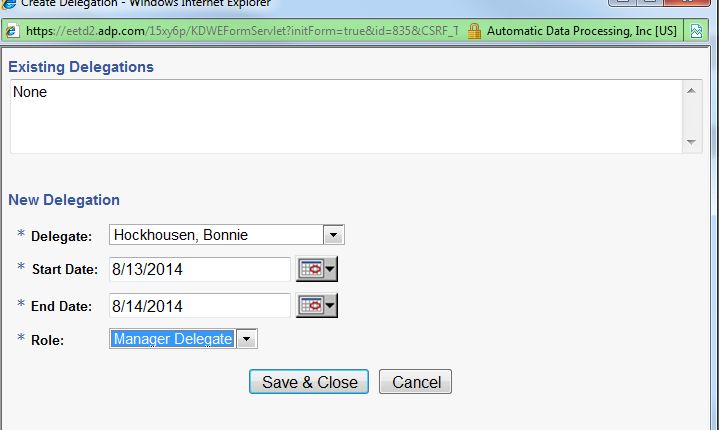
4. Click on “Reconcile Timecard” to review your employee timecards.

5. Click on “Show” and based on your security access to a Department you can select it from
   the drop down menu and select “Apply.”

                                          8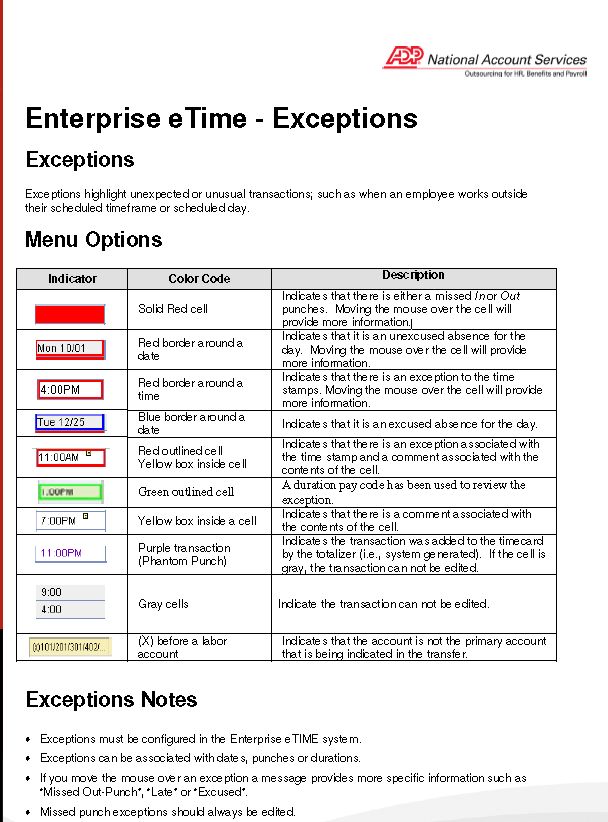
6. Select the “Time Period” you wish to review and select “Apply.” Choose “Previous Pay
   Period” for hourly employees and “Current Pay Period” for salary employees.

7. Click “Select an Action” from the drop down menu and “Select All” and then select “Apply.”

8. Click “Timecard” to review each employee’s activity and make any edits.

                                          9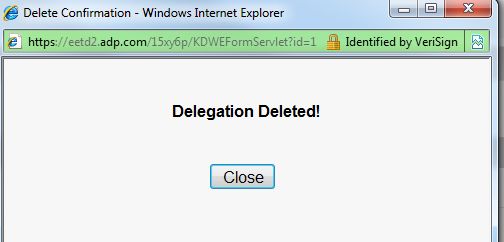
9. You may “Maximize” the screen. Select or move to each employee by using the “Person &
   ID” dropdown box or the “Arrow” buttons.

                                        10
Editing Timecard Exceptions
1. Review each employee’s time card for exceptions. Exceptions will be flagged by the system.
See the next page for an exception menu and description.
2. To fix a missed punch click inside the cell and enter the correct in or out punch time. For
example if it’s an in punch type 8a for 8 a.m. or if an out punch type 5p for 5 p.m. (If you don’t
put an “A” or a “P” after the time the system will automatically default to a.m.). Click on “Save”.
It is important to note that if an employee misses a punch that the system does not
know the amount of time worked and therefore will not pay the employee for the
entire pay period.
113. Time Card Exceptions Guide:
124. You may also review each employee’s time card for any pay code exceptions. By using the drop
down menu you may change a pay code, i.e. Vacation.
5. Enter the hours taken in the “Amount” column.
6. Then click “Save”.
13Transferring Multiple Positions
1. To perform a job transfer for an employee who has more than one position click on the
magnifying glass in the transfer column. The system will default to the employee’s primary
position.
2. The “Transfer Selection” box will open.
143. Click on the drop down arrow in the position ID field and choose the correct position. Click OK.
4. Select the correct Position. Click OK.
155. The timecard should now display the position selected.
6. By selecting the “Totals Summary” tab from above you can also view an employee’s total hours
worked by position.
You will see the total hours worked for each position on the totals summary screen.
16Approving Timecards
Important information on approving timecards:
Review and edit your employee’s time during the pay period rather than wait until the
end of the two-week time period.
All time must be approved by 10:00 a.m. on the last Monday of the pay period.
If there are missed punches in eTime, no payment will process for that hourly employee.
1. After reviewing an employee’s individual timecard. Click Approve.
2. An approval message will appear.
173. To approve all employees at once after you have reviewed their timecards click on “Pay Period
Close”.
4. Please note that the “Missed Punch” column will highlight which of your employees has missed
a punch and needs to be reconciled. If an employee has a missed punch, they will not be paid
for the entire pay period! If an employee has a missed punch, double click on their name. A
solid red box will appear on the employee’s time highlighting the missed punch. See “Editing
Timecard Exceptions” above.
185. To continue approving all employees at once after you have reviewed their timecards go to
“Select an Action” and “Select All” and then click “Apply”. Select “Time Period” and select from
the drop down menu the period you wish to approve. Then click on the actions drop down box
and select “Approve.” The approved manager’s name will appear in the “Approved Manager”
box.
19Viewing Timecards
To view Historical time exceptions for your employee such as missed punches or late in or early out
punches you may click on Count of Exceptions.
Also, the “Shift Start and “Shift Close” tabs allow you to identify which hourly employees have punched
in or out for the day and are currently working on the premises.
20Manager Proxy Delegation
Managers are required to review, edit and approve employee time cards for all employees that report to
them by the published due dates and times. Should a manager be out of the office without access to
eTime when time card approval is due, the manager must appoint proxy delegation to someone to
complete the approval role in their absence. eTime is designed to allow managers to delegate their
approval role to another manager in their department, college or division.
Please note that you should only choose an employee as a manger-delegate that is someone who has
appropriate supervisory authority and knowledge of your employees work schedules and is able to
verify that your staff has worked these hours. This means that they must have interaction with your
staff. Also the delegation of this function should not be used to supplant a manager’s overall
supervisory responsibilities.
How to Delegate to another manager:
1. Click on “Workspaces” in the upper right hand corner of your screen. Click on “Timekeeping”
2. Click on the expand button.
213. Select the “Actions Inbox”
4. Select “Actions”
5. Selct “RM_Mgr_Delegation”
226. The following screen will appear.
7. Using the drop down menu select the Delegate, Start Date & End Date. When selecting the
delegate the search name can be narrowed by typing the first letter of the last name of the
perosn being selected. The “Role” will always be Manager Delegate. Then click Save & Close.
23How to approve or accept a manager-delegate request:
1. When the manager that you have delegated to logs into ADP eTime they will see the
following alert in their Inbox. To take action, the manager-delegate will click on
RM_Mgr_Delegation
2. The manager-delegate must accept or decline the delegated request. They will click on
Accept or Decline and then click on Save & Close. After they accept or decline the
delegation, the task will be removed from their Inbox task list once they sign out of eTime.
24NOTE: If you are continuing to Step 3 immediately after completing Step 2, it will be necessary for you
to log out of eTime and log back in to view the “Switch Role” option. As a manager-delegate you do
not have access to the requesting manager’s personal “My Information” tab.
3. The manager delegate must now “sign off” of ADP eTime and then log back into eTime.
4. Select “Workspaces” and click on “Timekeeping”. Click on “Switch Role” (looks like a
“diamond” by your name). The “Switch Role” works after you have accepted the delegation
authority and on the day your delegate responsibilities begin. The Switch Role function
allows the delegate to move back and forth between their role of manager and manager-
delegate. I.e. “Switch Role: Myself” to approve their employee’s time cards and their
delegate role “Switch Role: John Doe”. The system will default to manager when logging in.
5. Then click on the manager’s name who delegated their employees to you.
6. The manager-delegate will now be able to view, edit and approve the other manager’s
employee’s timecards and approve time-off requests.
7. When the manager delegate has completed the other manager’s timecards they will need to
click on “Switch Role” again to go back to their own employee’s information by clicking on
“Myself”.
25How to remove a delegation sent to another manager:
The ADP eTime system will automatically terminate your delegated access rights to the other manager
after the end date specified in the request. However, you may need to manually cancel a delegation
early. For example, if you returned to work earlier than expected and no longer require the manager-
delegate assistance to perform your timekeeping tasks.
1. Click on “Workspaces” in the upper right hand corner of your screen. Click on
“Timekeeping.”
2. Select the “Actions Inbox”
3. Select “Actions”
4. After clicking on RM-Mgr-Delegation a pop-up box will appear. Select “Remove Existing
Delegation”
5. Click “Next”
6. The manager delegate’s name will appear, click on it, and select, “Delete”.
7. A delegation deleted message will appear.
26Manager Schedule View and Edit
Generally an employee’s permanent schedule will be approved by Human Resources and created by the
Payroll Office at the time of hire of the employee. Managers may view their employee schedules by
following the instructions below.
Also, for manager’s that need to modify schedules for short periods of time they may do so by following
the instructions below.
Note, any permanent changes to an employee’s schedule will need to be approved by Human Resources
and entered by the Payroll Office.
How to view schedules for your department:
1. Click on “Workspaces” in the upper right hand corner of your screen. Use the arrow button and
Click on “Schedule View”
272. Click on the drop down button to obtain the “Schedule date”. Then click on the drop down
button and “Select your department”.
3. To edit a schedule of an employee, select the employee’s name on the left. A pop up box will
appear. Make the edits and select add. The schedule will then appear.
284. To modify a current shift you can click on the schedule and a drop down menu will appear with
options to choose from.
29How to Run Reports
30Signing Out
1. When finished with eTime, please sign off the system by selecting “Sign Out”
on the top left. Please note that the system will automatically log off after a
period of inactivity (approximately 20 minutes).
31You can also read