METHOD STATEMENT - Etonsurfaces
←
→
Page content transcription
If your browser does not render page correctly, please read the page content below
METHOD STATEMENT

          Surface preparation
          Prepare the surface according to Surface preparation Guide.

          The surface must be

          - Clean, free of dust and debris and loose materials and free of oils,
            grease or other chemical impurities;
          - Dry (both on the surface and inside);
          - Leveled;
          - Cohesive;
          - Even;
          - Free of cracks (to be pre -treated);

          Recommended primers
            Our Pro Aquapox with Sand/quartz carpet (1-1.5 mm). Alternatively, you
          can your use your high quality primer.
           Combimix PP 600 with mortar – textured Surface

          Check Edge Isolation - prevent Seamless Terrazzo from going under the
          edge isolation so to avoid problems in the nal appearance of the oor.
          Check that you have no dead spots, spills or loose particles on the primed
           oor.
          Make sure that you have stable temperature on oor and in room. Preferred
          between 50º F to 77º F (10ºC to 25º C).
          Floor heating should be turned off.
          Heavy direct sunlight and heavy draft should be prevented.

          Finishing around edges, windows, doors and inserts

          Clear out client expectations with the possible options and take precautions
          before installing the oor. Will there be a skirting board? And if not – how is
          the oor nished next to the walls?

          Preparing the work area

          Prepare and organize the working area with a good and easy access to
          aggregates, cements and tools.
          Have access to the power supply you need for machines.
          Make sure that you cover all areas where you do not want to stain or have
          risk to splash on.

          • Horizontal big concrete mixers for Terrazzo and vertical for EcoFlow.
          • Screed bars to take level from the oor and screed material – Laser
            Screed
          • Hand Trowels - Spike Shoes - Metallic Spike roller with 10 mm ne spikes
          • Wheelbarrow or dumper to transport material.
          • Spray new tools with a hydro repellent for easier cleaning and better
            performance.
fl
     fl
               fi
                           fl
                                             fl
                                                  fi
                                                       fl
                                                                      fi
                                                                           fl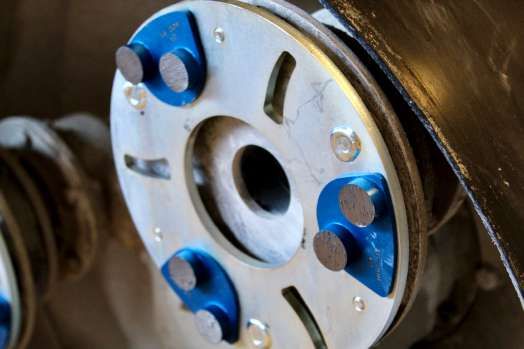
METHOD STATEMENT
Floor Screeding
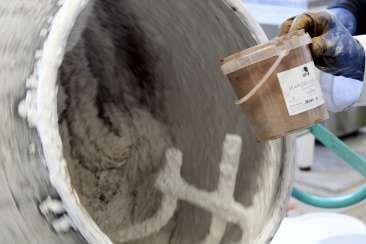
Mixing
Premix alone the Liquid B component. Once mixed, add the liquid to the mixer
and then the powder.
Make a test mix to adjust the mixing rate – mixing rate will normally be
between 20 -22% liquid B (in gal) to A powder component (44 lbs of powder
and aggregates with 0.92 gallons of liquid B), but workability should be
adjusted to temperature and work conditions. Once mixing rate is established
make sure it is always the same.
Manual mixing: mix for minimum 2-3 minutes and until it is homogeneous and
without lumps and all pigments are integrated.
When small mixers are used you can use two mixers to secure an even material
ow.
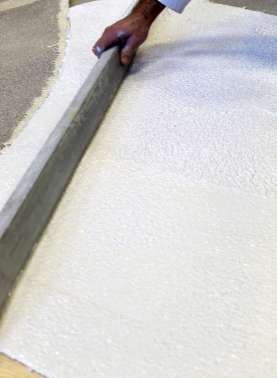
Thickness
We recommend to screed the oor in 1/2” thickness, so the nished oor is
minimum 0.4 inch after grinding and nishing work.
A good base is essential since the thickness of the screed is taken from the
oor base.
For smooth screeding the oor should be screeded 2 mm thicker than biggest
aggregate.
To achieve an even nish the oor should be screeded in even thickness.
Use laser screed for best result.
Pumping Style
Depending on the size and percentage of aggregates Seamless Terrazzo can
be pumped, but applicators should test that option before using this option.
Pouring the material evenly
The material is poured out on the oor and it is screeded out between bars by
hand or laser screeded. If the thickness is taken from bars on the oor the bars
should be 2 mm under the actual thickness you want on the oor. When the
bars are pulled out a hand trowel should be used to ll the gap. Another
person with spike shoes follow right after with a spike roller to even out marks
and smoothen the oor. This process takes air out of the oor leveling
compound and evens the oor. This should be done with 10 mm spike roller
and only super cially not to move the stones around. When aggregates are
small a gauge rake can be used.
Curing process
At 70º F the Seamless Terrazzo cures in 24 hours. If temperature is lower curing
will take longer.Seamless Terrazzo should be curing at stable temperatures.
Seamless Terrazzo cures without being covered and the material should not be
touched during the curing. Touching the material with a trowel after that it has
started to settle may cause separation and cracking in the material.
Precaution
It is ideal to nish the oor once you have started to work on it. Before the oor
has been fully nished it is sensitive to water and other liquids that can
penetrate and make marks in the oor. It needs to breathe also after the curing
process if nished, therefore it should only be covered with breathable
materials. If it is covered completely with non-breathable materials, marks
might occur also after curing.
fl
fl
fi
fi
fi
fi
fi
fl
fl
fl
fl
fl
fl
fl
fl
fi
fi
fi
fl
fl
fl
fl
fl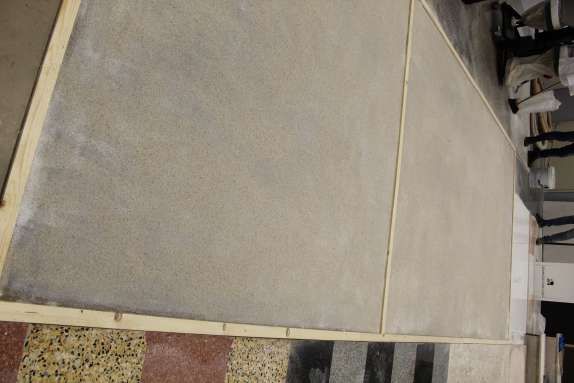
METHOD STATEMENT
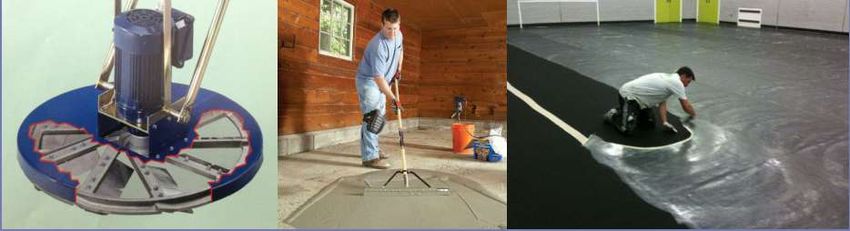
Floor Grinding
Metal diamonds
Do the grinding with a constant slow speed always overlapping 50% the
previous grinding line. Always check that parts of the machine or big particles
are not dragged around and cause scratching in the oors. Continue with
crossed grinding till the surface is even and all scratch marks form the
previous steps are gone. Crossed grinding is always the best – North – South,
East – West.
Repeat the grinding if needed – after the initial grinding the oor should be
uniform.
• 30 Grit Metal
We recommend to start rough/deep with a soft/medium metal alloy. Going
rough and deep on the rst grinding steps makes the oor even and more
uniform. Remember that the rst grinding step is the deepest and the one
that set the standard for the nished oor. All dead spots should be
evened out at this grinding stage.
• Clean between Grinding Steps – make sure you do not drag lose particles
around that scratch the oor.
• 70 grit metal – the speed on the grinder can be turned up a bit
• 120 grit metal - the speed on the grinder can be turned up a bit
Comments on Grinding
We recommend to go deep to get the best result. If you over grind steps due
to time issues or budget jump, be sure that you always have gone so deep in
the grinding that you have taken off the surface lm layer formed from the
curing of Seamless Terrazzo and Seamless EcoFlow. Bigger machines save
time and give a atter grinding with less effort.
Do not wait too long to start the grinding process. We recommend starting as
soon as the oor is completed cured: the longer you wait, the stronger and
the harder the ooring will get, the slower the grinding process will become.
fl
fl
fl
fl
fi
fi
fi
fl
fi
fl
fl
fl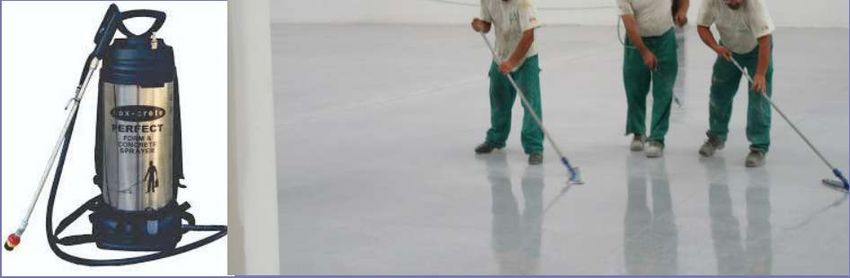
METHOD STATEMENT

          Pore Filling And Floor Finishing
          Pore Filling and resin diamonds

          Start the process with a 50 grit resin diamond. Then stop and
          proceed with the application of ProEco Fill. Make a sample of the
          pore ller the day before – make 3-4 small tests with different
          concentrations of pigment. Use the mix that gives the right color
          match when dry. Pore lling will give you a better nished and
          smooth oor that is easier to clean.
          Mix the powder component of ProEco Fill with approximately 30%
          water until you have a homogeneous paste with a good workability. If
          necessary, adjust with water and keep the same mixing rate in the
          application.
          Spread the slurry over the oor with a rubber rake. Spread it evenly
          over the oor in a thin layer and work it well into the pores manually
          or with a slow speed swing machine with exible blades. Go over the
          same place several times.
          ProEco Fill is a very strong binder. Make sure that you scrape off
          eventual excess of material, they can’t stay in the oor and take a lot
          of extra work to get off. Leave the pore ller to dry – minimum 4
          hours, but best till next day.

          Continue Grinding with 50 Grit resin
          Continue until the oor is cleaned and there is no more pore ller left
          on the surface. Repeat the pore- lling process if necessary.

                         Epoxy Trowel or Swing machine           Material spread with         Hand trowel application
                         With exible blades to push the          rubber rake                  Make sure you get over the same spot
                         material into the pores.                A rubber rake si used to     several times to get the material into the
                                                                 extend the material and to   pores.
                                                                 take off excess.

          Continue the grinding process with 100 Grit Resin Diamonds.
          A properly pore- lled Seamless Terrazzo and Seamless EcoFlow is a very strong and dense surface, that is why a
          good gloss level is achieved earlier using our product base than on traditional concrete.
          If a higher gloss or a tight surface is desired, continue with 200 Grit and 400 Grit, all the way to 800 grit.
          Seamless Terrazzo base can be polished further after 400 grit, but if you do polish further make sure that you use
          diamonds that do not cause burn marks on the surface. Consult with your machine supplier to get the best
          equipment for your work.
          if water stands too long, it can stain the oor before the oor is sealed. Especially on grey or darker colors wet
          grinding is risky and we recommend to take necessary precautions.
          Clean the oor well with diamond impregnated pads. If the oor has been left at 400 grit use 400 grit of ner.
fi
     fl
          fl
               fl
                    fl
                              fi
                                   fl
                                        fi
                                             fl
                                                  fi
                                                       fl
                                                       fl
                                                            fi
                                                                   fi
                                                                        fl
                                                                              fl
                                                                                   fl
                                                                                        fi
                                                                                                                           fi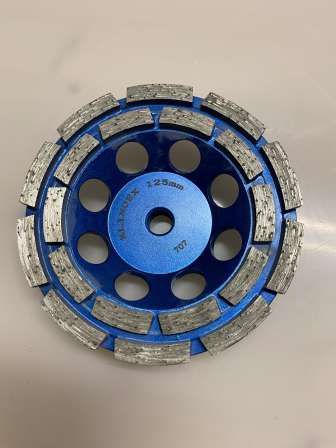
METHOD STATEMENT

Sealing the oor
ProSealer 330 – Water based solution

Clean the oor well with a scrubber dryer with a cleaning pad. Make sure that the scrubber dryer is in good
conditions – do not leave water sacking on the oor.
When the oor is fully dry it is ready to receive sealer.

Mix 20% of sealer with 80 % water for the rst layer
Use a low pressure sprayer to apply the sealer evenly. Pass over immediately with a 4 mm hair roller or micro ber
mop and a second dry roller/mop right after. Let dry for 4 hours approximately and impregnate a second time
with 100% pure sealer.

 Seamless Terrazzo wet look
ST wet look is an alcohol based sealer that enhances the color.
Apply ST Wet Look as ProSealer 330. Pass a cleaning pad over the oor to remove unevenness or excess. Apply ST
Finish Gloss or ST Finish Matt. On dense surfaces dilute with 5 -15 % water.
It can be buffed to a high gloss nish.

Low Pressure Sprayer                                   Sealer application
Ideal Sprayer for penetrating sealers                  Sealers applied with Low Pressure Sprayer and micro ber mop

Cleaning and maintenance

Clean the oor with STClean daily diluted 1:20. For best result use Scrubber Dryer and diamond impregnated
pads.

For deep cleaning and stain/spot cleaning

Dilute 1:3 - Wet the oor with the diluted cleaner - leave to react for 10 minutes and clean the oor with
scrubber dryer or a brush. For best result use Scrubber Dryer and diamond impregnated pads.

Heavy cleaning - ST Detergent

Dilute 1:5 Apply and work on the surface with sponge/brush or scrubber dryer. When ST detergent has been
used it can be necessary to reapply a ne layer of ST Finish Gloss/Satin/Matt.
   fl
   fl
        fl
                fl
                         fl
                              fi
                                   fi
                                        fi
                                             fl
                                                  fi
                                                                   fl
                                                                                                      fl
                                                                                                               fi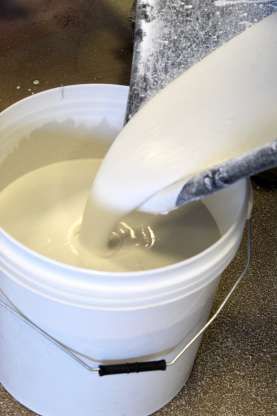
Only by

           Contacts:
  350, 5th Avenue, 41st Floor
    Empire State Building
  10118, New York (NY), USA
      info@etonsurfaces.com
      Tel. : + 1 917 566 1341

www.etonsurfaces.com
You can also read