Ontario College Online Application - Your future starts here . . .
←
→
Page content transcription
If your browser does not render page correctly, please read the page content below
Ontario College
Online Application

Your future starts here . . .

Step 1 – Research colleges and programs
FIND A COLLEGE – view the map
FIND A COLLEGE

                                    Visit ontariocolleges.ca
                                    and click on the Choose a
                                    College button.

     Links to college information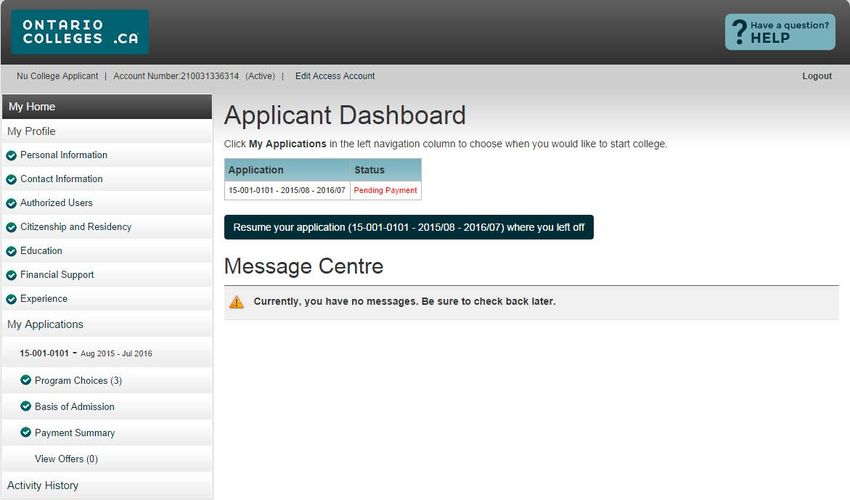
FIND A PROGRAM TOOL
ontariocolleges.ca/find
 Search by
 keyword

 Search by a
 college

    Links to college information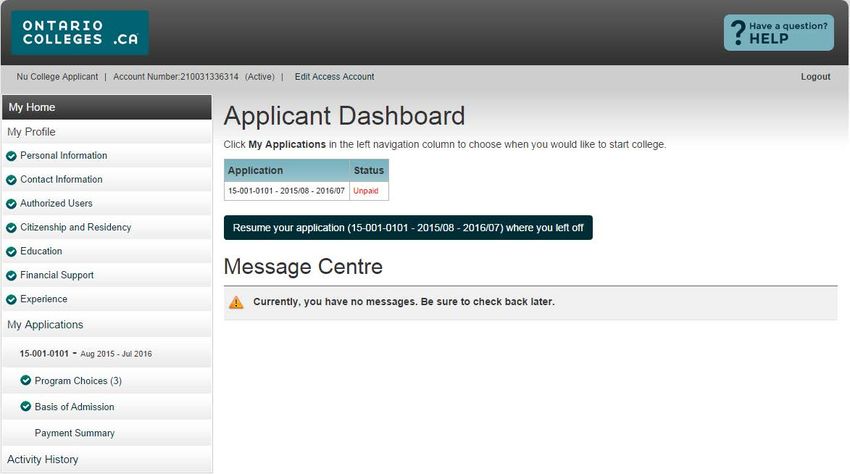
OTHER RESEARCH OPTIONS
College Information Program (CIP)
  • Meet with college representatives
  • Runs from mid-September to late October
  • Look for an event in your area
  • See the full schedule at ontariocolleges.ca/news/cip

College Open Houses
  • Held each fall and spring
  • See facebook.com/ontariocolleges.ca for upcoming events
Important Dates
Early October
 • Access the application at ontariocolleges.ca.
November 24, 2014
 • First date that 2015 / 16 application data is sent to colleges.
 • Earliest date that colleges may acknowledge applications.
February 1, 2015 – Equal Consideration Date
 • Applications received and paid for by this date are considered equally by
   the colleges.
 • This is not a deadline for submitting applications. It is, however, critical
   to apply to highly competitive programs by this date.
 • Applications are still processed after this date, but are considered on a
   first-come, first-served basis by the colleges.
Important Dates
February 1, 2015 – Offer Date
 • First day that colleges MAY release offers of admission.
 • Not all offers are posted on this day. The colleges continually post
   offers of admission until programs are filled.
February 1, 2015 – Accept Offer Date
 • Earliest date that applicants may confirm an offer of admission.
May 1, 2015 – Confirmation Deadline
 • Applicants must confirm their acceptance of an offer of admission by this
   date.
 • Each college will determine the due date to confirm offers made after
   May 1.
 • Check your offer letter AND the expiry date of your offer of admission.
June 15, 2015 – Tuition Fee Payment
 • Earliest date that colleges may require payment of tuition fees.
Important Info Before You Apply
 • The application processing fee is $95 (non-refundable).
 • Your application allows you up to 5 program choices, with no more than
   3 at any one college.
 • All program choices must start within the same academic year (August –
   July).
 • Your username is permanent.
 • Your password must be between 8 and 14 characters in length.
 • DO NOT create more than one account.
 • The application works best in the following browsers:
    Internet Explorer 9, 10, 11
    Firefox latest version
    Chrome latest version
    Safari 7+ & IOS 7+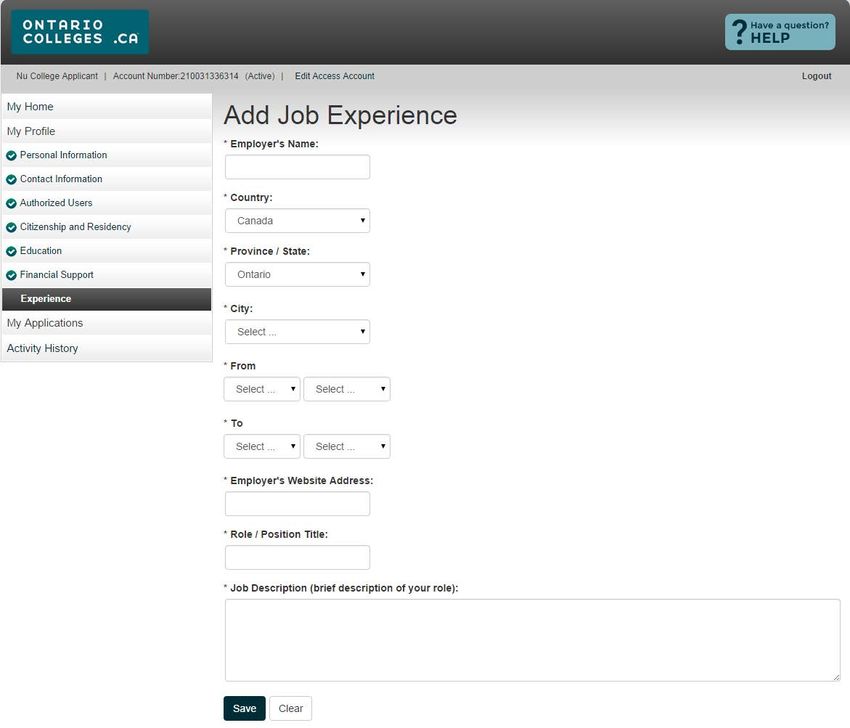
Important Info Before You Apply
EMAIL ADDRESS
Provide a valid email address.
 • This allows ontariocolleges.ca to communicate with you for important
   information about your application, account activation and username /
   password recovery.
 • The colleges you apply to use this email address to communicate with
   you about your application and offers of admission.
 • Update your email address if it changes.
Check your email regularly.
 • Check your junk / spam mailboxes
 • If you do not receive emails from myaccount@ontariocolleges.ca, add
   this email address to your safe senders list.
Important Info Before You Apply
PRIVACY STATEMENT
Review our complete Privacy Statement.
 • It explains how we use the information provided as part of your college
   application.
 • A link to the Privacy Statement is located in the footer of the
   ontariocolleges.ca website and within the college application.
ACCOUNT INFORMATION
Your name, date of birth and email address are automatically added to your
account based on the information provided during account creation.
INFORMATION YOU CANNOT CHANGE ON YOUR ACCOUNT
Name, date of birth, username, OEN & academic data*.
 • To make changes to this information, call the ontariocolleges.ca
   Customer Contact Centre at 1-888-892-2228 (toll-free in Canada).
                      * To make changes to academic data, see your guidance counsellor.
What You Need to Know Before You Apply Your Ontario Education Number (OEN) and Student Number. • Found on your report card or high school transcript. Your complete home mailing address. • Including your postal code. The city where your high school is located. • This is especially important for cities in the GTA. • Example: Is your high school in Toronto OR Etobicoke?
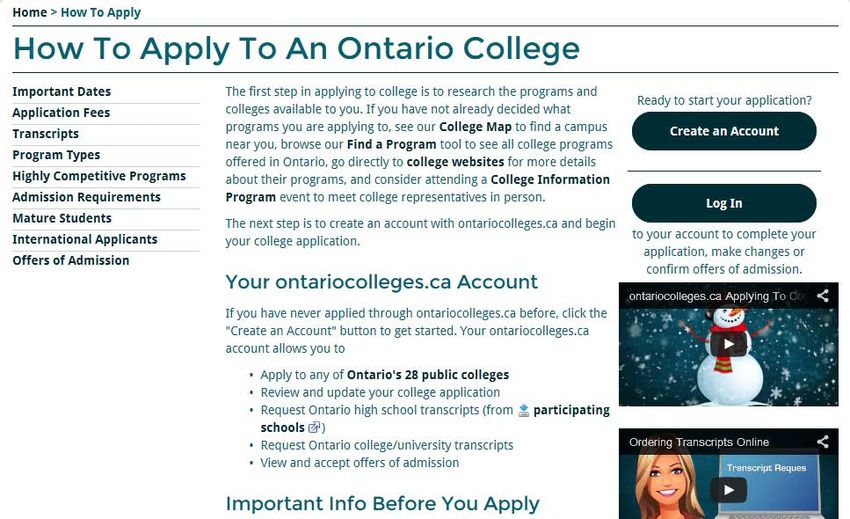
Your ontariocolleges.ca Account
Your ontariocolleges.ca account allows you to:
 • Apply to any of Ontario’s public colleges.
 • Review and update your college application.
 • Request Ontario high school transcripts (from participating schools).
   (Note: most current high school students have their grades sent
   automatically by their high schools.)
 • Request Ontario college / university transcripts.
 • View and accept offers of admission.
Step 2 – Create an Account
                                                                    New Users: If you have
Go to ontariocolleges.ca/apply                                      never applied through
                                                                    ontariocolleges.ca before,
                                                                    click the Create an Account
                                                                    button.

                                 Returning to your application:
                                 If you have an existing account,
                                 click Log In.
Create an Account
Complete required fields
Passwords that DO
NOT meet these
requirements will not
allow you to login.Select a question from
the pull-down list, or
create your own.
If you do not agree to the Terms
and Conditions you will be logged
out of the college application.Activate Your Account
! You cannot log in to your account without first activating it
An activation email is sent to the email on file.
You need to activate your account via email.Successful Account Activation
Log in using the username
and password created during
account sign up.
If you forget, click to
have your login info
sent to your email
address.Forgotten Username / Password
Usernames / passwords are recovered separately. The process is identical.
Enter the email address
provided during account sign
up and click Verify.
Answer the challenge questions and
click Recover.
Note that answers must match exactly
and are cAse SenSitive.
The requested information will be sent
to the email address on file.Privacy Statement
On first login only, you will be asked to review and accept our Privacy Statement.
If you do not accept the Privacy Statement you will
not be able to complete your application to college.Email Communications
On first login only, you will be asked to review and accept our Email Communications.
Check the boxes to receive
emails and click Submit.Step 3 – Applicant Home Screen / Dashboard
Start your college application from this screen
MESSAGE CENTRE:
Important information about
your application is found
here. Check regularly.MY PROFILE: • A checkmark ( ) will appear after each section is completed. • All sections (even if they do not apply to you) must be completed, in order, when you complete your account for the first time. • Click Save to continue to the next step.
MY PROFILE:
Personal Information – basic demographic info, including legal name,
date of birth, etc.

Contact Information – street address, email address, telephone
numbers

Authorized Users– authorization to allow another individual access to
your account / application (e.g. parent, guidance counsellor).
(Note: not shared with the colleges.)

Citizenship & Residency – Citizenship, residency status in Canada,
country of birth.

Education – schools attending / attended; marks will be posted to this
section.

Financial Support – agency sponsorship; this does not include OSAP.

Experience – add employment or volunteer experience that relates to
your area of study.
MY APPLICATIONS:
Program Choices – select or update your program choices in this
section.
Basis of Admission – identify if you are / will be a high school graduate
or enrolled in a high school course.
Payment Summary – listing of fees requiring payment.
ACTIVITY HISTORY:
Summary of application’s day-to-day activities.
Personal Information

                       Complete all required
                       fields. Click Save and
                       Continue to Next Step.
Contact Information
Click the Click to add your
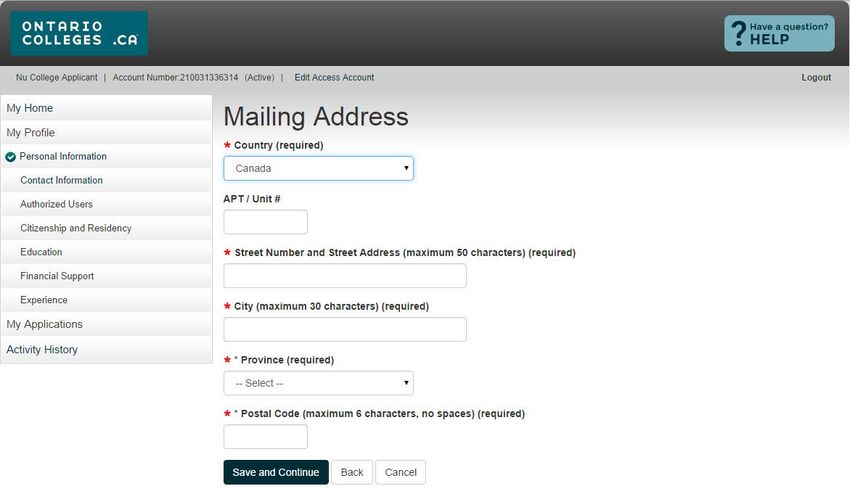
mailing address button.Mailing Address
Complete all fields.
Click Save and Continue.Contact Information
Click the Click to edit mailing
address button if your address is
incorrect or it changes.
Complete any remaining fields.
Click Save and Continue to
Next Step.Authorized Users
ADD AUTHORIZED USERS:
• Authorize another individual access to your account / application.
• Maximum of 3 individuals at one time.
• Authorization can be added, changed or revoked at any time.
• All actions made by authorized individuals appear in activity
history.Complete required fields. Click Save. Full Access – authorized individuals may make payments AND changes to your application information . Read Only / Pay – authorized individuals may make payments and ONLY VIEW your application information.
Authorized Users Summary

      • Authorized individuals, once added, receive account activation emails and are asked to
        create their own unique usernames and passwords to access your account.

      • Authorization can be added, changed or revoked at any time by using the Edit and
        Deactivate links.

      • Deactivated individuals receive email notification of the change.
Citizenship and Residency
Complete fields by selecting information
from the drop-down menu.
Canadian citizens – Select Aboriginal
Ancestry if applicable.
Click Save and Continue to Next Step.Education
Complete only the sections
that apply to your education
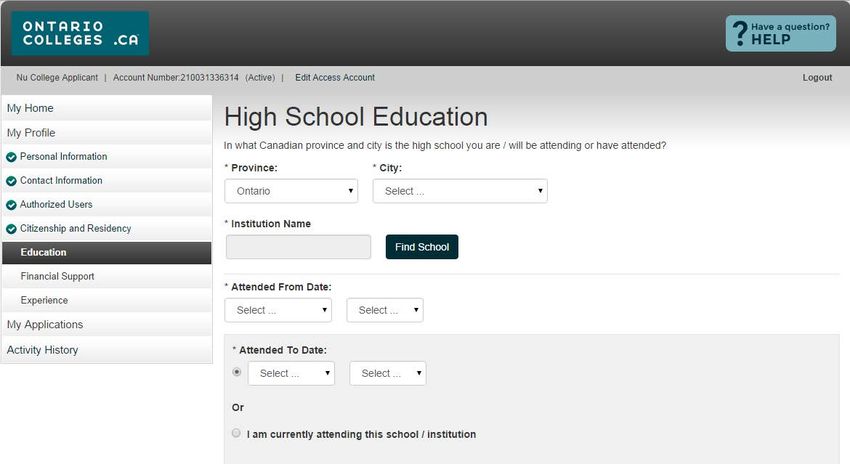
experience.High School Education
Use the drop-down
menus to complete
all fields.
Ontario high school
students: Use the Find
School button to add
your high school.All Applicants – Enter the
Important date you began high school.
for current
students. Graduates / Former Students – Enter the
date you completed / left high school.
! Current Students –
click the radio button.
To allow us to match your grades to your
application, your OEN, student number
and name (as it appears on your school
record) must be accurate.
Click Save when done.
CURRENT ONTARIO HIGH
SCHOOL STUDENTS ONLY:
Most high schools will
automatically forward your
grades to ontariocolleges.ca.Education Summary
A school record, once added, cannot be deleted.
Its contents (e.g. attended dates), however, can
be modified.
Click Save and Continue to Next Step when done.
ONTARIO HIGH SCHOOL GRADES
• Grades will be listed in the ‘Academic Data on
File’ section.
• It is recommended that current students check
their grades several times during the school year
(e.g. after mid-semester and final marks for
semester 1 and 2).
• Any errors should be reported to your guidance
counsellor.Financial Support
Sponsor Agency – Agency that will be paying
all or part of your educational or living
expenses while at college.
If you are applying for financial assistance
(e.g. OSAP, bursary, scholarship, etc.) you are
not considered ‘sponsored’ and should select
‘No Sponsorship’.
Use the drop-down menu to
select the agency. Click Save
and Continue to Next Step.Experience
Add information in these sections
ONLY if it relates to your area of
study.
Skip the sections that do not
apply to you.
Add Job Experience – Previous or
current paid employment.
Test Information – Standardized
test information that will be
submitted to support your
application (e.g. GED, TOEFL,
nursing, etc.).
Other Activities – Previous or
current volunteer experience,
association memberships, etc.Complete the required fields. Click Save when done.
Experience Summary

                     Add buttons – Use to add additional
                     information.

                     View Details – View existing information.

                     Edit Details – Use to update existing
                     information.

                     Delete – Use to remove existing
                     information.
Create an Application
Click the button with the start
date you wish to apply to.
Programs with
start dates in:
• September 2015
• January 2016
• May 2016
Selecting programs from BOTH
application cycles will result in two
applications and an additional
application processing fee.
! Fees paid on duplicate
applications are non-refundable.You may apply to a maximum of FIVE program choices
with no more than THREE at any one college.
List your programs in order of preference.
Received Date – The date Record your Account and
your application fee Application Numbers.
payment is received and
processed. You cannot create additional
accounts to apply to more
programs.Search for Programs
Enter the code or title of the program you wish to
search for. If you don’t know the exact program title,
enter a word that you believe is part of the title.
Click Search.Program Search Results
Click Add to add a Make sure you select the
program to your correct program start date
application. and campus.Previous Year Applied / Previous
Year Attended – If you have
previously applied to or attended
this college, enter the dates.
Otherwise, leave the default values.
Entry Level 1 – The first semester
of the first year of the program.
Note: programs with January
start dates are still Entry Level 1.
Review the information and complete any required fields.
Click Save to return to the program choice screen.Manage Program Choices
Click Add a Program to
add additional programs.
Click Edit to change
program information
OR Delete to remove
Use the Move Up and the program from
Move Down arrows to your application.
reorder your program
choices (if required).
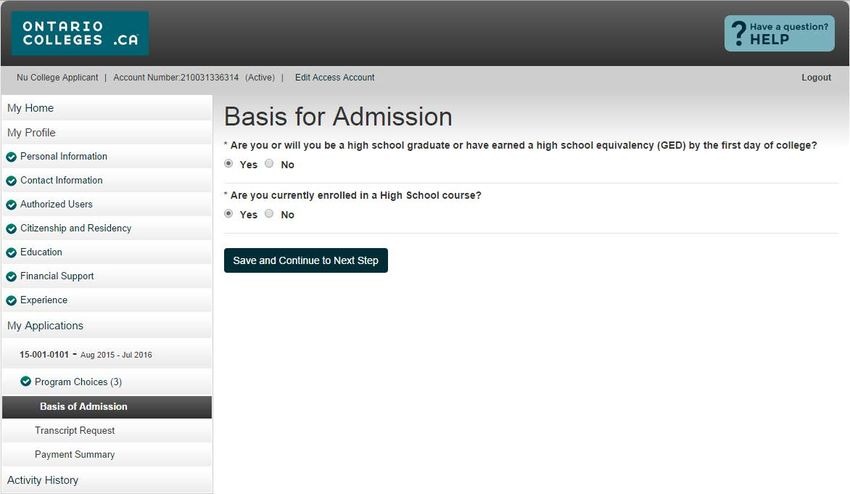
Click Save and Continue.Basis for Admission
Review and answer the questions.
Click Save and Continue to Next
Current high school Step when done.
students: Make sure Yes
is selected for question 2.Applicant Dashboard
Once programs choices are added, the application
status will be Unpaid.
After the application processing fee is received the
status is updated to Paid and the application
information is forwarded to your college choice(s).Payment Summary
Review your fees.
Click Process Payment to pay
your application processing fee.Secure Online Credit Card (including Visa Debit)
or Interac Online Payment
Select a payment method:
Credit card (including Visa Debit)
or Interac Online.
Enter your credit card details.
Cardholder Name – Must appear exactly
as on credit card.
Credit Card Number – Numbers only. No
spaces or hyphens.
Expiry Date – Select the dates using the
drop-down menu.
Click Process Transaction or
Proceed to Online Banking to
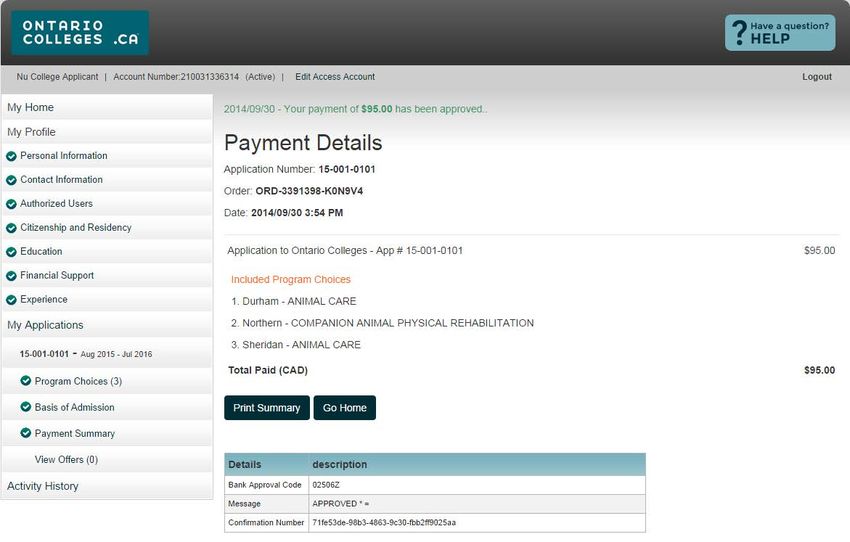
complete your payment.Successful Payment Verification
Payment is verified on
screen and confirmation is
also sent to your email.Declined Payment Notification
DECLINED PAYMENT
A payment can be declined for a number
of reasons:
• Incorrect credit card number and / or
expiry date. Confirm that the
information you entered is accurate.
• Insufficient credit limit.Offers of Admission
OFFERS OF ADMISSION
• Offers can only be viewed after they are
posted by the colleges.
• You may accept only ONE offer at a time.
• You may accept only ONE offer in one
24-hour period.
• A confirmation of your acceptance is sent
to your email.
CHANGING AN ACCEPTED OFFER
• If, after accepting an offer, you change your
mind or receive another that you prefer,
you may accept the new offer (before the
Click View Offers to expiry date). The new acceptance will
view your offers of cancel your previous one.
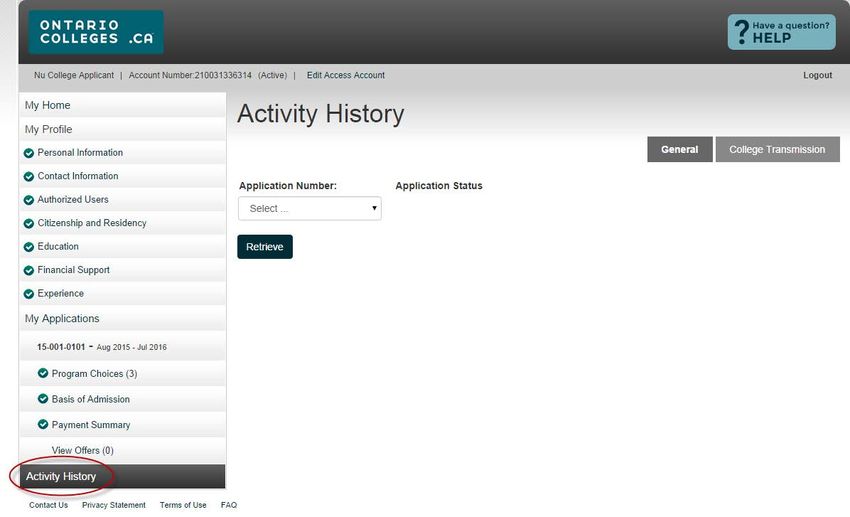
admission.Application Activity History
Select the application number you wish to review and
click ‘Retrieve’. Read only.
General – Day-to-day summary.
College Transmission – Summary of information that
has been sent to your college choice(s). Updated
nightly.Application Activity History – General Read only
Returning to / Making Changes to Application

                                                               Remember to log out when
                                                               you finish each session.

                                                               Clear your computer cache
                                                               after you log out.

             • At any time you may resume your application
               where you left off.

             • Once ALL sections are completed (as indicated
               by the green checkmarks), you may return to
               each section to view or make edits.
Need Help? FOR APPLICATION HELP: • Click FAQ to see answers to Frequently Asked Questions • Click Live Chat under Contact Us at ontariocolleges.ca to reach one of our Customer Contact Centre staff (real-time website feature). • Email our Customer Contact Centre at ask-us@ontariocolleges.ca. • Call our Customer Contact Centre at 1-888-892-2228. • Like us on Facebook: facebook.com/ontariocolleges.ca • Follow us on Twitter: @ontariocolleges TO CORRECT HIGH SCHOOL GRADES: • See your guidance counsellor. OFFER OF ACCEPTANCE INFORMATION: • Contact the college(s) you have applied to.
You can also read