School Garden Guide How to set up and use organic school gardens for Global Learning and beyond - EAThink
←
→
Page content transcription
If your browser does not render page correctly, please read the page content below
School Garden Guide
  How to set up and use organic school gardens
        for Global Learning and beyond
                 Anamarija Slabe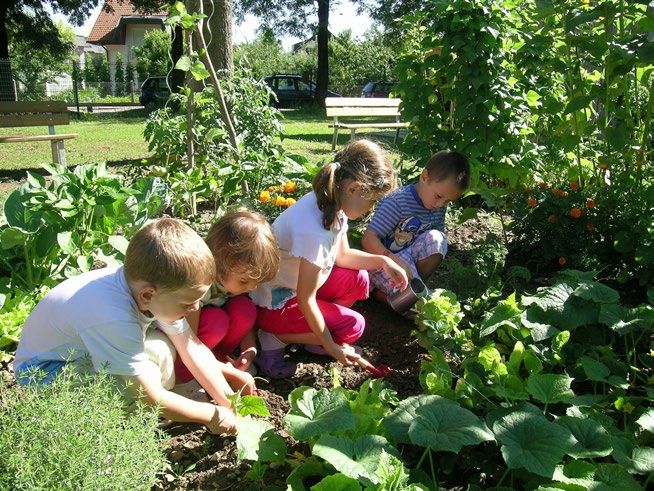
School Garden Guide
How to set up and use organic school gardens for Global Learning and beyond

                            Anamarija Slabe

              Institute for Sustainable Development, Slovenia

                              Ljubljana, 2017
School Garden Guide
How to set up and use organic school gardens for Global Learning and beyond

Publisher:                    Institute for Sustainable Development /Inštitut za trajnostni razvoj, Ljubljana, 2017

Author:                       Anamarija Slabe, PhD

Photos:                       Anamarija Slabe, Petra Perne, Archive ISD

English proof-read:           Peter S. Fendrick

Graphic design:               Medium d.o.o.

License: Attribution-NonCommercial 4.0 International (CC BY-NC 4.0)
Published within project EAThink2015, DCI-NSAED/2014/349-033, a project co-funded by the European Union.
The information and views set out in this publication are those of the author and do not necessarily reflect the official opinion of the
European Union.

The publication is part of the project “Global Learning for Change in EYD 2015 and Beyond: European Youth Engagement from School
Garden to Sustainable Food Systems” - EAThink2015, DCI-NSAED/2014/349-033.

The project is co-funded by the European Commission.
This publication and the project activities of the Institute for Sustainable Development are co-funded by the Ministry of Foreign Affairs
of the Republic of Slovenia.
The content is the sole responsibility of the Institute for Sustainable Development.
The content does not reflect the official position of the European Commission or the Government of the Republic of Slovenia.

Kataložni zapis o publikaciji (CIP) pripravili v Narodni in univerzitetni knjižnici v Ljubljani
COBISS.SI-ID=292878592
ISBN 978-961-94311-1-5 (pdf)
Acknowledgements
I would like to thank Jožica Fabjan, Certified Permaculture Teacher and the chief expert of Institute for
Sustainable Development’s Organic School Garden (OSG) Programme, for her extensive contribution
to the chapter on Permaculture Designing of the school garden/Zoning in permaculture. Jožica kindly
provided the materials and schemes which she developed within the OSG Programme, based on her
vast experience of permaculture and school gardening. I also thank her for providing her comments
on the Guide. However, my appreciation for her involvement goes way beyond her specific support
for this guide. She has been the soul of the OSG Programme since its beginning and she has gener-
ously shared her knowledge and wisdom on permaculture with her colleagues and school teachers
participating in the programme. Looking from this perspective, I can say that without her involvement
in the OSG Programme, I wouldn’t be able to prepare this booklet at all.

Further my thanks go to Alenka Henigman, expert of OSG Programme, for reading this Guide and
providing her comments and opinion.

All the co-authors of the Slovenian Global Learning Manual for Teachers should be credited for the
contents of the sub-chapter “Global Learning”.

I also want to thank several colleagues from EAThink2015 project who provided their comments and
suggestions.

Finally, my sincere thanks go to my friend Peter S. Fendrick, who proof-read the text, improved the
language and contributed suggestions on how to make it more clear.

Anamarija Slabe
Contents
1         Introduction ·  ·  ·  ·  ·  ·  ·  ·  ·  ·  ·  ·  ·  ·  ·  ·  ·  ·  ·  ·  ·  ·  ·  ·  ·  ·  ·  ·  ·  ·  ·  ·  ·  ·  ·  ·  ·  ·  ·  ·  ·  · 5

2         Reasons for establishing a school garden ·  ·  ·  ·  ·  ·  ·  ·  ·  ·  ·  ·  ·  ·  ·  ·  ·  ·  ·  ·  ·  ·  ·  ·  ·  ·  ·6

3         How to start your school garden ·  ·  ·  ·  ·  ·  ·  ·  ·  ·  ·  ·  ·  ·  ·  ·  ·  ·  ·  ·  ·  ·  ·  ·  ·  ·  ·  ·  ·  ·  · 8

    3.1   A school garden is a social project! ·  ·  ·  ·  ·  ·  ·  ·  ·  ·  ·  ·  ·  ·  ·  ·  ·  ·  ·  ·  ·  ·  ·  ·  ·  ·  ·  ·  ·  ·9

    3.2   How to ensure social sustainability of the school garden  ·  ·  ·  ·  ·  ·  ·  ·  ·  ·  ·  ·  ·  ·  ·  ·  ·  13

4         How to design a school garden ·  ·  ·  ·  ·  ·  ·  ·  ·  ·  ·  ·  ·  ·  ·  ·  ·  ·  ·  ·  ·  ·  ·  ·  ·  ·  ·  ·  ·  ·  ·  15

    4.1   Conditions to consider ·  ·  ·  ·  ·  ·  ·  ·  ·  ·  ·  ·  ·  ·  ·  ·  ·  ·  ·  ·  ·  ·  ·  ·  ·  ·  ·  ·  ·  ·  ·  ·  ·  ·  ·  ·  16

    4.2   Permaculture designing of the school garden  ·  ·  ·  ·  ·  ·  ·  ·  ·  ·  ·  ·  ·  ·  ·  ·  ·  ·  ·  ·  ·  ·  ·  · 17

5         Basic guidelines for school gardening ·  ·  ·  ·  ·  ·  ·  ·  ·  ·  ·  ·  ·  ·  ·  ·  ·  ·  ·  ·  ·  ·  ·  ·  ·  ·  ·  ·  39

    5.1   Suggested principles and methods of school gardening ·  ·  ·  ·  ·  ·  ·  ·  ·  ·  ·  ·  ·  ·  ·  ·  ·  ·  39

    5.2   Using local resources  ·  ·  ·  ·  ·  ·  ·  ·  ·  ·  ·  ·  ·  ·  ·  ·  ·  ·  ·  ·  ·  ·  ·  ·  ·  ·  ·  ·  ·  ·  ·  ·  ·  ·  ·  · 40

    5.3   Circular economy and the 3 R’s  ·  ·  ·  ·  ·  ·  ·  ·  ·  ·  ·  ·  ·  ·  ·  ·  ·  ·  ·  ·  ·  ·  ·  ·  ·  ·  ·  ·  ·  ·  ·  41

    5.4   Enhancing agro-biodiversity and biodiversity ·  ·  ·  ·  ·  ·  ·  ·  ·  ·  ·  ·  ·  ·  ·  ·  ·  ·  ·  ·  ·  ·  ·  · 43

    5.5   Start small and grow organically  ·  ·  ·  ·  ·  ·  ·  ·  ·  ·  ·  ·  ·  ·  ·  ·  ·  ·  ·  ·  ·  ·  ·  ·  ·  ·  ·  ·  ·  · 45

6         Maintenance ·  ·  ·  ·  ·  ·  ·  ·  ·  ·  ·  ·  ·  ·  ·  ·  ·  ·  ·  ·  ·  ·  ·  ·  ·  ·  ·  ·  ·  ·  ·  ·  ·  ·  ·  ·  ·  ·  ·  ·  · 46

    6.1   Maintenance during the school year  ·  ·  ·  ·  ·  ·  ·  ·  ·  ·  ·  ·  ·  ·  ·  ·  ·  ·  ·  ·  ·  ·  ·  ·  ·  ·  ·  · 46

    6.2   Summer maintenance ·  ·  ·  ·  ·  ·  ·  ·  ·  ·  ·  ·  ·  ·  ·  ·  ·  ·  ·  ·  ·  ·  ·  ·  ·  ·  ·  ·  ·  ·  ·  ·  ·  ·  ·  · 48

7         Educational and learning use ·  ·  ·  ·  ·  ·  ·  ·  ·  ·  ·  ·  ·  ·  ·  ·  ·  ·  ·  ·  ·  ·  ·  ·  ·  ·  ·  ·  ·  ·  ·  · 52

    7.1   The benefits of school gardening ·  ·  ·  ·  ·  ·  ·  ·  ·  ·  ·  ·  ·  ·  ·  ·  ·  ·  ·  ·  ·  ·  ·  ·  ·  ·  ·  ·  ·  · 52

    7.2   Farming, gardening and green jobs ·  ·  ·  ·  ·  ·  ·  ·  ·  ·  ·  ·  ·  ·  ·  ·  ·  ·  ·  ·  ·  ·  ·  ·  ·  ·  ·  ·  · 53

    7.3   Food and nutrition ·  ·  ·  ·  ·  ·  ·  ·  ·  ·  ·  ·  ·  ·  ·  ·  ·  ·  ·  ·  ·  ·  ·  ·  ·  ·  ·  ·  ·  ·  ·  ·  ·  ·  ·  ·  ·  · 53

    7.4   Global Learning  ·  ·  ·  ·  ·  ·  ·  ·  ·  ·  ·  ·  ·  ·  ·  ·  ·  ·  ·  ·  ·  ·  ·  ·  ·  ·  ·  ·  ·  ·  ·  ·  ·  ·  ·  ·  ·  ·  · 56

    7.5   Further opportunities for education and learning  ·  ·  ·  ·  ·  ·  ·  ·  ·  ·  ·  ·  ·  ·  ·  ·  ·  ·  ·  ·  · 59

8         Conclusion ·  ·  ·  ·  ·  ·  ·  ·  ·  ·  ·  ·  ·  ·  ·  ·  ·  ·  ·  ·  ·  ·  ·  ·  ·  ·  ·  ·  ·  ·  ·  ·  ·  ·  ·  ·  ·  ·  ·  ·  ·  ·  62

9         Literature ·  ·  ·  ·  ·  ·  ·  ·  ·  ·  ·  ·  ·  ·  ·  ·  ·  ·  ·  ·  ·  ·  ·  ·  ·  ·  ·  ·  ·  ·  ·  ·  ·  ·  ·  ·  ·  ·  ·  ·  ·  ·  ·  63
1 Introduction
At the Institute for Sustainable Development we have been able to establish a strong link between our
Organic School Gardens (OSG) Programme and Global Learning through the EAThink2015 project. In
the OSG programme we have been supporting teachers and kindergarten educators with the knowl-
edge to establish and run an organic school garden as well as to use it as a learning and educational
tool. The aim of Global Learning (or Global Education) is to empower learners of all ages to become
proactive contributors to a more just, peaceful, tolerant, inclusive and sustainable world. We believe
that Global Learning can be significantly strengthened by providing pupils with the opportunities to
engage in hands-on, sustainable practices of school gardening. The pupils can engage all their senses
and enlarge their awareness of the globally interlinked issues of food production and consumption.

We started the OSG Programme in 2011; since then we have provided expert support to more than
400 kindergartens and primary and secondary schools in Slovenia. Since 2015, we’ve been developing
tools and experiences on how to integrate OSG and Global Learning. Based on these experiences,
we have prepared this guide with the aim to provide support to schools and teachers who want to
develop school gardens and use their many benefits for the pupils in the regular school learning and
education process. We also want to provide further opportunities for Global Learning in the schools.

The guide is focused mainly on the topics which, according to our experiences, are essential for the
success of a “school garden project”, but haven’t yet been systematically covered. Of particular im-
portance is the process of planning the OSG project, which has to be implemented as a “mini-social
project” in order to succeed. In relation to the design of a school garden, we rely strongly on the
permaculture approach. The guide further describes the main elements of an OSG from the specific
school context. It looks into maintenance during the school holidays, as well as selected topics
of educational use. Here we focus on education about farming and gardening as well as food and
nutrition, and Global Learning.

We don’t elaborate on the details of organic gardening itself, because the information about this is
widely available. However, we provide some recommended links.

We hope this guide will be useful both for newcomers as well as for already experienced users of
school gardens, and most of all, we hope that it will support synergies between school gardening
and Global Learning.

Anamarija Slabe, PhD

                                                                                                  {5}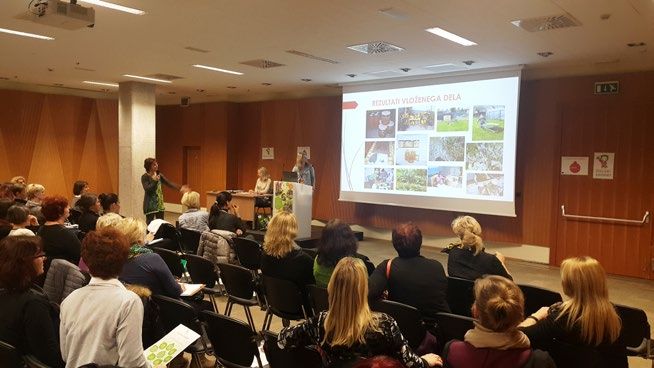
2 Reasons for establishing
                                                      a school garden
The missing link

For many adults and children, gardening can be the missing link between their daily life and nature
and – indeed – their daily food! In modern societies, the alienation from nature and food growing is a
serious issue. People fail to understand the depth of the problems we are facing worldwide, whether
it’s the destruction of the environment, or the deterioration of the quality of the food we eat, or the
very availability of food on the global level.

School gardening creates a special relationship with Global Learning possibilities. A school garden
(or kindergarten garden) can be an innovative education and learning tool that provides a holistic
experience for pupils. All the senses get involved and social interactions are stimulated and enhanced.
By setting up this interactive space, school gardening literally opens the possibilities for new edu-
cation methods and contents.

Why should school gardens be organic, permacultural, edible?

School gardening is a great tool to promote understanding and implementation of sustainable de-
velopment in general. More specifically, however, it focuses on sustainable agriculture and sustain-
able and healthy eating habits using the guiding principles of organic gardening, permaculture, and
growing one’s own food.

By implementing organic farming methods, we raise an awareness on the sustainable production of
food and demonstrate how it is done, while at the same time protecting pupils from harmful chemicals.

The concepts of permaculture – the development of agricultural ecosystems intended to be sustain-
able and self-sufficient – help us to design a smart school, needs-oriented garden within the given
conditions, to maximise knowledge input, and to minimise work and costs.

Growing edible plants in school gardens enables the development of a deeper understanding of
food production and the importance of sustainable management of agro-ecosystems. It further helps
children to develop their food-related senses, especially taste and smell, and the ability to recognise
the quality of the products they buy and eat. It teaches them about the diversity of vegetables,
fruits, herbs, and foods in general and the importance of obtaining nutrition from a wide variety of
foods, particularly plants, for their health, well-being, and enjoyment.

{6}                                                                                School Garden Guide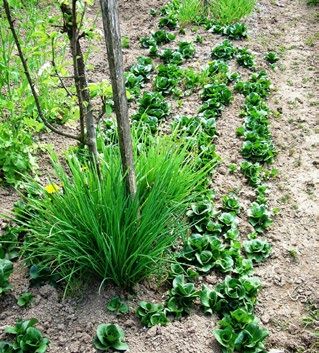
School garden – a tool for any class and beyond

Beyond these basic principles, school gardens can be used to support the learning process of almost
any desired school topic – from mathematics to languages, and not only “the usual suspects” such
as nature science or biology.

School gardens also provides possibilities for building up social competences of the pupils. It has
the potential to improve the relationships and daily communications among the pupils themselves
as well as with the teachers.

School gardens support better understanding of the importance of social fairness, both in relation
to the local and global food chains, including the issue of Fair Trade.

Last, but not least, school garden also provides many opportunities for developing links and cooper-
ation with the local community, through different school actions addressed to the public, on-going
cooperation with local partners, and the like.

                                                                                                {7}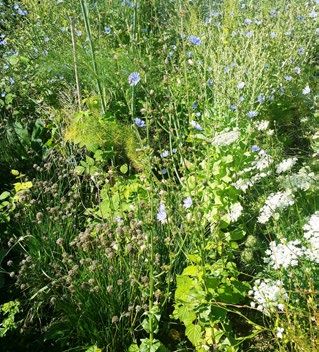
3 How to start your school garden
Starting a school garden depends on the situation at the specific school or kindergarten. Every sit-
uation is specific in many aspects – from the area available, to the characteristics of the site, to the
social situation. Nevertheless, through the experiences with our Organic School Garden Program (in
Slovenia) we have been able to identify some key issues which need to be considered when starting
a school garden project. These issues are:

 • Define your primary aims: what do you want to achieve with the school garden, what are your
   top priorities? Of course we are pleading for a largely “edible garden” where vegetables, fruits,
   herbs... are the core plants to grow, whenever possible!

 • Describe and assess your physical/spatial possibilities for setting up the garden (the type and
   the dimensions of the area/surface available; availability of direct sunlight, ...).

 • Assess your social situation: existing or expected support/opposition of the relevant parties –
   colleagues – teachers, management, other school staff... for the school garden project.

 • Keep in mind that it is better to start small and grow gradually, in line with the growing experi-
   ences and support.

 • Look for professional help and support, if available and/or necessary: is there an organization
   or program in your country or region that would support the development of school gardens or
   similar type of activity?

Prepare a game plan – define actions and stakeholders.

To address these issues, we recommend that you implement a “SWOT analysis“(see below) for your
school garden project.

{8}                                                                                 School Garden Guide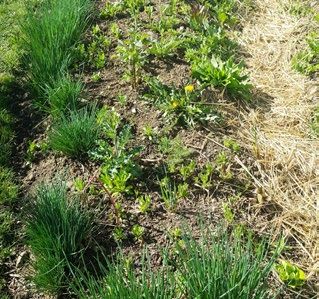
3.1 A school garden is a social project!

It is important to stress that setting up a school garden is not only a technical, but also a “social
project”.

One of the most common mistakes made in relation to a school garden is insufficient awareness
about the importance of the social support for such project. A school garden can become a long-term
success if it’s not carried by a single person or few individuals: we need the support of our colleagues
(teachers), non-teaching staff, and sometimes even the local community.

We may be able to organise the work in the garden during the weeks when children are in school,
but what about during the holidays? Who will water the plants, if there’s going to be a period of
drought and we haven’t (yet) found a solution for providing enough water for the plants? Will our
colleagues/teachers embrace the garden as an inspiration, or will they reject it fearing additional
work and “complications”? Will the cleaning staff complain every time when a bit of dirt will find its
way into school areas where this is not desired? Who will help us with the occasional more specific or
more demanding works? Will the kitchen staff support us in, for example, preparing herbal infusions
from school garden plants, or will they categorically refuse to get involved?

Every garden needs sufficient attention and appreciation. For a school garden, sufficient attention
can be guaranteed only if enough people share responsibilities. Therefore we need their support.

                                                        3.1.1 Who is important and why –
                                                  how can we ensure appropriate support?

The school management

It is clear that there’s no chance of developing a school garden if the person(s) responsible for the
management of the school are not supportive. On the other hand, the initiative for the school garden
may also come from the management itself.

If we have to warm up the management of the school for the project, it is important that we clearly

                                                                                                    {9}
describe both the benefits and the challenges and the ways the school could deal with them. We
need to be positive but realistic. A good way is to present some positive examples from other schools,
even from schools in other countries if there aren’t any good examples available in your country yet.
The idea of an innovative and forward-looking school which is doing something more than the usual
in the education may especially appeal to the management.
The teachers
Some teachers may immediately see the benefits of a school garden. They will have ideas about
how they could use it to diversify, improve or deepen their teaching. Others will perhaps see it as a
potential source for increased work. And many teachers may be rather neutral to the idea. We need
to show potential benefits of school garden as an innovative teaching and educational tool. More
about this is presented in the chapter Educational and Learning Use. It should be made clear from
the beginning that involvement in school garden and its use is optional, intended for those teachers
who would feel attracted to the idea. The level of involvement may of course gradually increase, as
the school develops more experiences with its use. The more positive experiences the teachers will
have, the more the others will be motivated to join.
Our experiences show that the teachers who initiate the school garden and oversee it are usually
natural sciences teachers, especially biology. However, among the initiators there may also be teach-
ers from several other areas of interest that may not seem, at first, particularly related to gardening.
But a teacher’s strong idea about the school garden is more important than his/her specific teaching
area. Even better is if the initiator is a group of teachers!
A good way to convince the teachers about the school garden is to present examples from other
schools. Here you can show how the garden is used in connection to the different curricula and learn-
ing goals; what are the benefits for the pupils and teachers; etc. It is also important to present the
challenges and possible solutions in concrete situations. Each school system or school has specific
ways to deal with such projects.
{ 10 } School Garden GuideIdeally you would organise a presentation about school gardens, followed by a discussion and brain-
storming session. This can also be one of the first stages in the preparation of the project and can
be connected with a proper SWOT analysis.
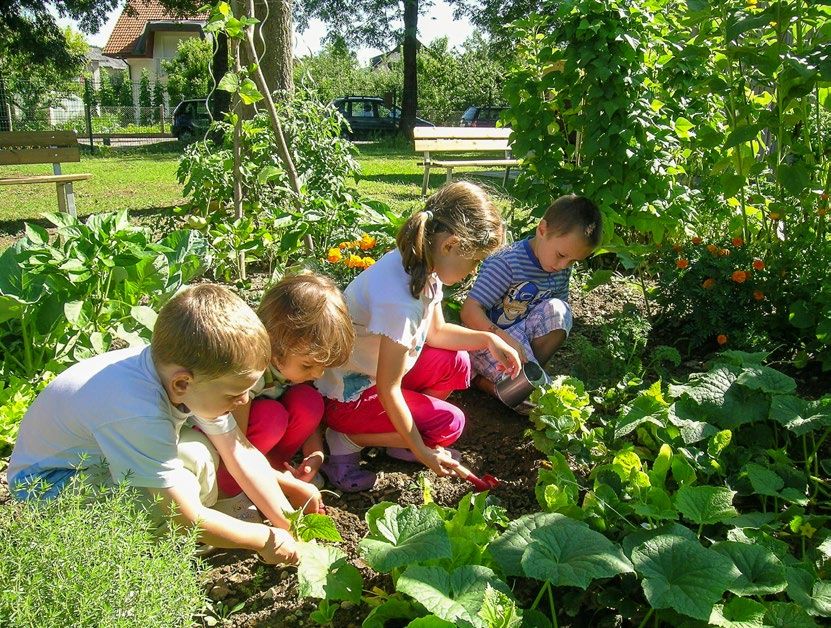
The pupils
In the first place, a school garden is intended to benefit the pupils. In general, pupils have a positive
attitude towards the school garden. The vast majority of them welcome the opportunity to leave the
four walls of the classroom and spend time outside, and to experience the world with all their senses.
The janitor
The moment that our school garden project starts moving from an idea and a plan into reality, it will
be important to meet with the school staff responsible for other jobs than teaching and education.
Again, some of them may fear that a school garden would put an additional burden on their shoul-
ders, while others will be supportive right from the start. We have to win their approval, or at least
to address their concerns. One important person is the school janitor, who can provide a great deal
of support, especially in the setting up phase, but also later in the maintenance and further devel-
opment of the garden.
We need to involve the janitor in the planning at the appropriate time to foresee how we will meet
eventual challenges such as consulting on concrete tasks, providing timely information, coordinating
activities, etc. The attitude of the janitor will be, in the majority of cases, much more positive if (s)
he feels a part of the project from the beginning.
The cleaning staff
The considerations in relation to the cleaning staff are similar to those with the janitor, although the
expected level of their involvement will usually be lower. Nevertheless we should consider how to
take into account any expected impacts and how to handle them best, depending on the concrete
situation.
The kitchen staff
Of course we want to eat what we grow in the school garden – the pupils learn through a complete
experience! Depending on what and how much produce we grow, at some point the school kitchen
(if the school has its own kitchen) may get involved. It is therefore important to get the kitchen staff
warmed up to support us when necessary, in whatever way needed.
An edible school garden often goes hand in hand with improving the school meals, so an appropri-
ate communication with the kitchen staff is vital. In addition, in some countries/schools, one of the
teachers may be responsible for drawing up the meal plan. In such cases, the cooperation with this
teacher is needed, as well.
The parents
In our experience, parents largely support the development of a school garden. They are sometimes
also the first to suggest that the school should set up a garden for their children. Occasionally it is
even possible to benefit from hands-on support from the parents. They may offer to provide voluntary
help or even contribute some materials.
{ 11 }Depending on the approach and needs, you may want to involve parents right from the start, or
provide an opportunity for this at a later point. The school can inform the parents about the project
at any time that seems appropriate, depending on the game plan.
The local community
A school garden project is a good way to better link the school with the local community – the town,
the municipality, etc. The school may organise an Open Day event related to the school garden for
the local community and invite representatives of the local administration and the general public. The
municipalities may sometimes have programs which allow them to provide financial support for starting
the project or upgrading it, if necessary. It is useful to check out the possibilities in this direction.
We can also look for support from the business world, such as companies based in our local commu-
nity. This should be done with a grain of salt: our school garden should be a promotion of sustain-
able growing (organic gardening and organic agriculture), sustainable consumption, and sustainable
management of natural resources. Not every company can be a meaningful supporter or partner of
such a project, but there are many who can.
Other stakeholders
In different countries there may be other stakeholders that are important. Think about them and
approach them in the appropriate way.
{ 12 } School Garden Guide3.2 How to ensure social
sustainability of the school garden
If we have done our “homework” of developing support for the school garden project well, we’ve
already ensured a substantial part of the social sustainability. However, a support (or at least lack of
opposition) on theoretical level will to a certain degree have to translate into more practical support.
3.2.1 Develop school garden project
in a participatory process
Once you’ve received enough support for considering the idea of a school garden, you may want to
plan it together with a larger group of people. Depending on the situation at hand, this may be either
a smaller group of teachers and other interested parties, or the whole school collective. A good way
to plan the project is to organise a SWOT analysis workshop – to identify Strengths, Weaknesses,
Opportunities and Threats for your school garden project. Through this process you will be able to
identify and think about many issues which you can then appropriately consider in the planning. If not
identified on time, some issues (threats) may cause disturbances at later stages of implementation,
while others (opportunities) will not be taken advantage of. With many other people participating
in the SWOT analysis process there is a higher chance that such issues will be identified.
This may sound a bit complicated, but it’s not, or it doesn’t have to be. If you haven’t done SWOT
analysis before, you can ask an NGO for help. There may be environmental, Global Learning, etc.,
NGOs in your country who usually have quite a bit of experience with SWOT and the facilitation of
SWOT procedures. They may be willing to support such project by facilitating a SWOT workshop,
for a small fee.
A SWOT is not a must, though; in smaller schools a good discussion may be sufficient. However, even
such a discussion can be formulated in the SWOT way.
3.2.2 Show the benefits,
improve the shortcomings
It is important to be able to recognise and show what kind of benefits the pupils obtain through
the school garden. There is a body of scientific and anecdotal references on this topic. But more
valuable than quoting these is to look for concrete impacts in the classroom, on the pupils, and also
on the teachers. A concrete personal experience shared with others is stronger and more valuable
than theory.
Teachers should be encouraged and enabled to note and share their experiences with the school
garden. There will be positive and sometimes less positive experiences; it is also advisable to look
into the latter and find out the reasons they occurred and figure out how to deal with them.
Some examples from the schools in Organic School Garden Programme in Slovenia:
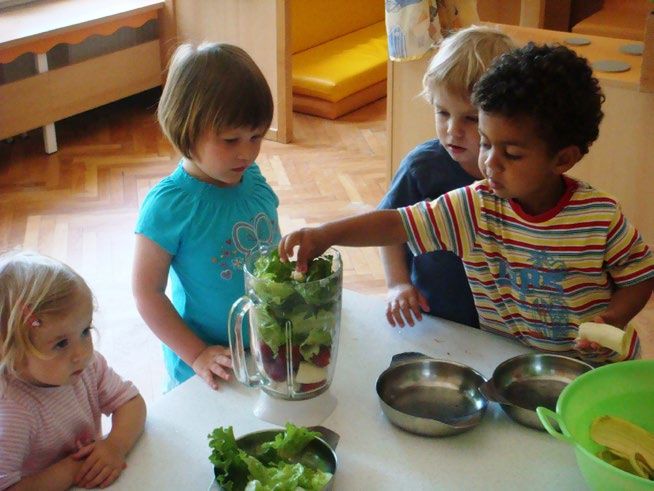
{ 13 }“Our school serves meals and many of our pupils reject vegetables, especially lettuce and other
“green things” so a lot of this food had been thrown away. Then we started to grow greens in our
new school garden. When the vegetables were ready we prepared a big salad together with the
class. Suddenly there was not a single kid who wouldn’t want to eat the salad and all the remarks
were: good, yummy, ... We had the same experience with freshly prepared green smoothies. So, when
the pupils participate in the process and tend the plants, harvest them, and use them to prepare a
meal..., the attitude towards the veggies becomes positive. Also their attitude to their regular school
or home meals changed, for many or most of them.”
“There was this kid who wasn’t good in anything in the school: not at math, not at languages, and
not at any other subject. He was also not good at gym. He was always outside of everything and it
showed that he felt that way too. But when we’d started a school garden this kid became the best.
He was highly interested, did all the tasks well, took his own initiative, and other pupils acknowledged
it. The school garden provided him an opportunity for a positive (school) experience and showed how
much more able he was than one would have thought.”
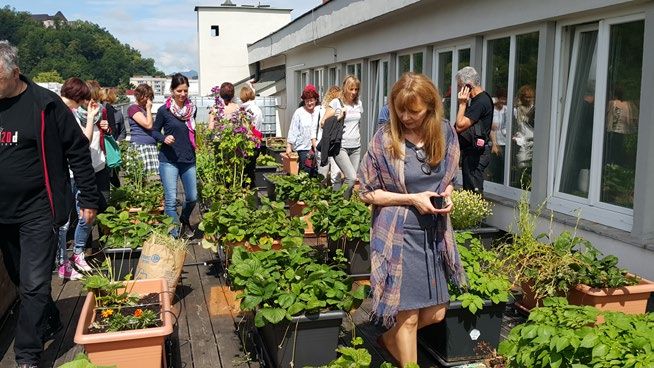
3.2.3 Actively involve partners
You should provide opportunities for all important groups to get actively involved in the school garden.
You can organise Open Day events in the garden for the parents and the local community. These can
be events where pupils present what they have done, achieved, and learned in the school garden.
Workshops can provide opportunities for parents and others to participate in upgrading the school
garden and similar projects. You can invite an organic gardening expert to speak or lead a workshop
on a specific topic and organise it as a open event, with a small fee to cover the costs. In this way,
everybody will benefit and outside participants will appreciate the school garden and the school’s
activity.
{ 14 } School Garden Guide4 How to design a school garden
The planning of the actual school garden should start from the location. An ideal location for a school
garden would have at least these features:
• best possible growing conditions for the plants,
• best possible accessibility of the garden for the pupils and the teachers – close to the school
building, and
• protection from traffic and other sources of air and noise pollution.
Of course it’s often not possible to have all of these at the same time. Nevertheless, we should know
what we are looking for and then try to choose the best compromise location.
{ 15 }4.1 Conditions to consider
Availability of sunlight
The availability of sunlight is the ultimate criterion for a garden. Sunlight is the source of energy for
the growth of the plants. Of course it depends on the geographic area, but generally in Europe we
will be looking for a location which is sunny throughout the day, with as little shade as possible.
Some plants may prefer some shade, but we can provide it by planting such plants in the shade of
taller plants or in a shady part of the garden.
Why we deem this the most important aspect? Because it’s hard to compensate for the lack of
sunlight, while it may be easier to improve some other less optimal conditions such as the quality
of the soil, etc.
The quality of the soil
The quality of the soil is very important for the plants. But we can improve the soils with proper
management – use of compost, raised beds, growing of the plants that improve the soil, etc. In most
cases, the school won’t have garden or field soil available to start seeding and planting immediately.
The area available will be perhaps a meadow with more or less shallow soil, or even a compacted
ground. In such cases, it is the best to start a raised bed which makes it possible to prepare fertile
soil from organic waste.
Availability of water
We need to consider the availability of water and the water situation in the soil and on the location.
It depends on the climate and on the characteristics of the ground. Some locations may be just fine,
while others may have an insufficient amount or too much water most of the time, or just occasionally.
We should observe our potential garden locations for signs of excess water – such as long periods of
standing water after the rain. We should avoid such locations which may indicate compacted ground.
But even here, if we have no other choice, we can to a certain extent mitigate the water situation
with draining the location. For this, however, we will need some professional help and the costs may
increase. Less severe water excess can again be mitigated by growing plants on raised beds.
In most of the cases, we will need to think about ensuring additional water during the growth season,
especially in the areas with frequent or regular drought periods. There are several options to do this;
we explain them in chapter Water sources.
Other factors
There may be some other factors to consider in the selection of the location, such as strong and/
or regular winds, potential pollution sources (industrial pollution, proximity to a conventional agri-
cultural field, polluted soils, etc.), and so on. In general, we should avoid such locations or examine
if we can do something to mitigate the problems.
{ 16 } School Garden Guide4.2 Permaculture designing
of the school garden
4.2.1 Basic considerations
The school garden should be used as an educational tool; therefore, we need to be able to integrate
it easily into the daily education and learning process. It shouldn’t be too far from the classrooms
so that it can be reached in a (very) short walking time.
Permaculture is adept at handling the aspects of the spatial organisation of garden and buildings (a
home, a farm, or any other type of buildings including a school building). This is the main reason that
in our Organic School Garden Programme in Slovenia we use the permaculture system and its meth-
odological approach when we plan and design a school garden. We also devote time to this topic in
our workshops for the teachers who act as organic school garden tutors. Of course, the permaculture
approach, together with organic gardening methods, are the core of our school gardening education
in general, but these methods are especially important during the initial designing process. At this
stage we carefully plan the placement of all the elements of the school garden we want to include.
A school garden consists of several elements. There are the actual beds for the plants, as well as
the areas for shrubs and trees if we have enough space. Another element that every (school) garden
needs is the place for composting. Further, we need a place to store the gardening tools. We may
also want to have a source of water for watering the plants – a water storage such as a container,
or something similar. We also need some running water where the pupils can wash their hands,
clean the tools, etc.; this can also be in the actual school building, if appropriate. If there’s enough
space, we should plan an outdoor classroom where the teacher(s) can sit together with the pupils.
Here there could be a class outdoors, in connection with the garden, or it could be a place where
everyone could take a break from the work and join in a discussion.
4.2.2 Zoning in permaculture design
Understanding the principles of zoning in permaculture design helps us to plan the garden and its
elements smartly, in a functional way and enables the use of natural ecosystems’ principles. In this
way, our school garden will be easier to use and with fewer of the problems that gardeners usually
face. The design will help to provide optimal conditions for the plants and to keep the life in the
garden in balance, thus discouraging pests and diseases. When our school garden has been designed
in such a way, we can make the pupils understand the principles of ecosystem-based agriculture:
how they work and what are their benefits. This is actually the most important reason to implement
the zoning in the best possible way.
The design principle of zones is related to efficient energy planning. We strive to place the garden
elements (plants such as herbs and vegetables, shrubs, trees, etc.; and structures and buildings such
as tool shed, watering well, sitting area, etc.) in such a way that we can achieve the most efficient
use of energy. Elements which we need to visit most frequently should be closer and those which we
visit less frequently can be further away. This is related both to the use of the elements as well as
{ 17 }to their maintenance. For example, herbs are used daily so they should be the closest to the school
while fruit shrubs and trees can grow further away.
If the permaculture approach initially seems too challenging, you should first try to use its logic in
garden planning, i.e. placing the beds and other elements so that the design will enable as easy,
hassle-free daily use of your school garden as only possible. Then you may gradually implement more
permaculture approaches in accordance with your increasing knowledge and experiences.
In the following three schemes we present the first three zones with the school building as the centre
of the activity to which the school garden should relate.
Zone 0
In the case of the school garden, Zone 0 is the school itself, with all its internal areas and parts of
the building. This include window sills where some stages of the gardening can already take place,
namely the raising of seedlings. In our scheme, we identify those elements of the school building
which are important in relation to the school garden, such as the kitchen, dining room, waste sepa-
ration and collection, etc.
Zone 1
Zone 1 is the immediate area around the school building. Apart from the driveways and paths, park-
ing lot, etc., this is the zone in which we should place the most frequently visited elements of our
school garden. These are herb and vegetable beds; a composter for the collection of organic waste;
flower beds, hotbeds, and greenhouse (if we will have one); some smaller fruit shrubs; the shed or
place for the garden tools; water sources (tap water as well as water collection tanks for rain water
and/or greywater); and an insect shelter. Here we also plan the outdoor classroom/sitting area, a
recreation and leisure area with playground and playground equipment. We can also add a solar
clock and different sculptures.
Zone 2
Zone 2 is the area just beyond Zone 1, in case the school has enough land. Here we will eventual-
ly have a larger vegetable and herb garden, larger fruit trees and shrubs, and perhaps even some
forest trees. This is also the area for the place for composting (which can happen in the compost
heaps or in different composters), eventual further water collection tanks, a fishpond, and so forth.
A welcome addition is a beehive. If we want to include some domestic animals, such as poultry and
small ruminants, this is the right zone. In this case we would also plan a shelter for the animals and
a fodder storage. Further leisure areas are possible.
With regard to the water, you can see that this element is represented both in Zone 1 and Zone 2,
which demonstrates the importance of water for the garden. More about this is covered in section
on Water sources.
For our needs we will not go beyond Zone 2, although in permaculture design, there can be (and
usually are) further zones. Of course these are suggestions based on the permaculture design prin-
ciples, but their implementation depends on the concrete situation in our school, especially on the
land available, its current use, and the possibilities of adapting the existing uses in order to accom-
modate the school garden with all its key elements.
{ 18 } School Garden GuideWe should also note that the zones are a tool that help us in planning. They don’t have fixed bound-
aries nor should we see them in rigid geometric shapes such as circles or squares; rather, we should
take into account the real situation in the area we are designing.
ZONE 0
SCHOOL (AREAS WITHIN THE SCHOOL)
CULTIVATION OF SEEDLINGS
WINDOW SILLS
CLASSES
LIBRARY KITCHEN FOOD STORAGE
OFFICES…
DINING ROOM
PLANNING, SEPARATE WASTE
LEARNING… COLLECTION
DINING HALL
ORGANIC WASTE
{ 19 }ZONE 1
VEGETABLE AND COMPOSTER
HERB BEDS (organic waste collection)
THE AREA AROUND
THE SCHOOL BUILDING
HOTBEDS
SPACE FOR TOOLS WATER
TAP WATER
AREA FOR RECREATION PARKING LOT
AND LEISURE
WATER BASIN INSECT SHELTER
PATHS
DRIVEWAYS
PLAYGROUND EQUIPMENT
VARIOUS SCULPTURES
{ 20 } School Garden GuideSMALLER TREES, SHRUBS
FLOWER BEDS
GREENHOUSE
OUTDOOR CLASSROOM
WATER COLLECTION TANKS
FOR RAINWATER FOR GREYWATER
PLAYGROUNDS
SOLAR CLOCK
{ 21 }ZONE 2
BIGGER VEGETABLE AND SHELTER FOR
HERB GARDEN DOMESTIC ANIMALS
COMPOSTERS
ANIMAL FOOD
STORAGE
FRUIT TREES FOREST TREES
EDIBLE SHRUBS
WATER TANKS
RAINWATER
POND
BEEHIVE
AREA FOR RECREATION
AND LEISURE
{ 22 } School Garden GuideWho should prepare the design and when to involve pupils
Designing of the school garden can be done by a group of dedicated teachers following the guidelines.
If the teachers involved haven’t done any garden/permaculture designing, you may want to check if
there is an organisation or expert who could provide support to this process. The need for external
help also depends on the size of the project; the larger it is the more experience is necessary.
The pupils can enter the project even when it’s in the designing stage, if we can introduce them to
the principles and lead them through the process. This depends, naturally, on the age of the pupils
and the time we can devote to this process. However, even the children in kindergarten can be invited
to “draw out” the shapes of the beds once we have designed the garden to the stage when we had
defined the actual location of the beds.
4.2.3 The elements of the garden
Composting
Composting – recycling of organic waste to produce high quality fertiliser for the school garden – is
the first and most important activity that should go hand in hand with setting up the garden. There’s a
bounty of information about composting, including the ratio between high-cellulose material (“brown
organic waste”) and fresh high-nitrogen material (“green organic waste”), what kind of waste is ap-
propriate to be composted in the garden and what not, and so on.
However, in the school this process should start in the school building itself, with the collection of
organic waste produced in the kitchen, as well as organic waste from pupils’ and staff’s lunches.
Therefore it’s necessary to point here out that almost all fresh produce leftovers (i.e. vegetable cut-
tings, fruit/apple cores...) can be used for garden composting, but not leftovers of cooked food or
prepared food (i.e. salad tossed with dressing) which should be put in the regular organic waste bins.
The school can opt for composting on simple compost heaps or in different composters. These can
be made by pupils themselves. Depending on the type of the composter, you may want set up 2 or
3 in order to have different ripeness grades of the material available.
{ 23 }TRADITIONAL COMPOST HEAP
1 Branches and twigs, loosely 2 A layer of soil 3 Plant materials – green and
spread dry garden plant residues, food
scraps, leaves, etc.
4 A layer of animal manure, if 5 More plant materials 6 Another layer of animal manure
available
7 Straw bales can be stored and 8 The heap is covered by straw 9 The compost heap is watered
the straw used when the compost or hay to protect it from the sun to stimulate the transformation
heap is assembled and rain process
{ 24 } School Garden GuideSMALL LUMBRI COMPOST CONTAINER
2 A small plastic container for 3 The perforated lower compart- 4 The initial culture of earthworms
earthworm composting in house- ment is covered by a piece of (embedded in soil/compost) is
hold or school, consisting of a garden fabric and a layer of dry added.
base (stand), two compartments garden residues.
for plant residues and a cover.
5 The worms are covered by a 6 Finer plant materials (moss, cut 7 It is also possible to add some
mixture of soil and residual plant grass etc.) are added and fluffed paper (white tissue, black and
materials from the garden or to obtain an airy layer. white printed newspaper, etc.; but
kitchen. not coloured materials), torn into
smaller pieces.
8 When the lower compartment 9 After 3 – 4 weeks, the earth- 10 In the upper compartment, fun-
is almost full, the upper compart- worms will have transformed or- gi mycelia can be observed on the
ment is filled with organic plant ganic plant residues in the lower surface, whereas the earthworms
residues in the same manner, but compartment and start to move will have started to work on the
no earthworms are added. Finally vertically into the upper compart- plant residues.
the cover is placed on top of it. ment.
The beds
Garden beds can be prepared in different ways and can take different forms and shapes. We can opt
for the more traditional beds both in form (more or less rectangular) as well as in the preparation
(using the existing garden soil on the spot), for raised beds or for the combination of both. However,
sometimes the only option for a school garden is in containers – in cases we don’t have any natural
ground available.
{ 25 }{ 26 } School Garden GuideWe already mentioned raised beds. A raised bed is a bed that is higher than the surrounding area
or surface. It has many benefits. Usually we build a raised bed by layering and heaping up different
organic materials, which will then disintegrate and turn into a rich soil, with the help of soil organisms.
We are actually using the principles of composting. We place thicker and more biodegradation-re-
sistant materials (such as the twigs and branches of smaller trees and bushes) on the bottom and
more biodegradable materials on top of them, finishing by a layer of soil. Depending on the type of
materials used, thickness of the layers and the climate, the materials will gradually turn into soil, in
2 – 3 years. Here are some suggestions for creating raised beds.
Sometimes a raised bed will be the only way or the best way to prepare the beds for our school
garden: for example, where we have a meadow with a shallow topsoil, or when we are in a hurry – if
we have only a couple of weeks before seeding and planting time, etc.
However, there is an important educational aspect of a raised bed that makes it especially desir-
able in every school garden. With a raised bed we can demonstrate to the pupils how a living soil
develops from organic “waste” materials, and how we can use this process in sustainable – organic
agriculture. They will learn that there is no need to purchase “garden soil” in bags because we can
use natural processes and recycle organic waste. The compost has a similar educational value, but
the creation of a raised bed is another method to use these processes in a very practice-oriented
way. It is therefore advisable that we have at least one or two raised beds in our school garden, one
{ 27 }which we will create together with pupils this year and one which was created a year or two ago,
so that the pupils can observe the processes on and in the raised beds.
Whatever type of beds or containers we choose, their dimensions should be adapted to the pupils’
age. The pupils should be able to reach with their hands to the middle of the bed without stepping
on the bed itself. This means a width from 0,9 to 1,4 m; the latter is the maximum for older pupils.
STANDARD RAISED BED
1 A 10 – 30 cm deep hole is dug
within the outline drawn on the
ground. The depth depends on
the soil profile and tools/tech-
niques available. The removed
material is collected in three sep-
arate heaps: first the grass turf is
carefully placed on the side with 2 The hole is filled with loosely
the root side up; the second heap spread branches and twigs – the
consists of well-structured, living thicker ones placed in the bottom. 3 Followed by a layer of grass turf
soil; and lastly the third heap con- with the soil/root side up; this
sists of usually more compacted will prevent the grass from taking
soil from the bottom of the hole. root.
Any slightly larger stones should
be removed.
5 Fresh and semi-decomposed
garden plant residues are added.
It may be covered with a dusting
of wood ashes, if available. Other
materials, such as powdered dry
clay, can also be used. In case of 6 While creating a compost bed,
any additional layers of garden care should be taken to shape it
4 Any suitable organic material residues, some soil should be properly during the entire process,
that is available can also be add- placed in between; the soil from so that the middle of the bed is
ed; here, for example, a layer of the bottom of the hole is used the highest part of it and its sides
spelt hulls has been spread over for this (any big stones should be gradually taper down in height
the turf. removed beforehand). toward the bottom.
{ 28 } School Garden Guide7 Garden residues are covered 8 Some fermented animal manure 9 The bed is then covered with
with the bottom soil. can be added, if available. Animal the fine well-balanced top soil.
manure stimulates the process of
good fermentation and provides
additional nutrients.
10 Finally the well-formed bed 11 ...then insert the seed (pump-
is covered with a thick layer of kin, zucchini, cucumber...), cover it
straw or rough hay (but without with soil, or plant a young plant.
grass seeds or other plant seeds). Finally, add some water again. For
The layer will protect the bed seeds, the straw can be left on
from the sun. Immediate planting the side, while it can be pushed
is now possible: push the straw back for the plantlets.
aside, dig a hole, and water it a
bit...
{ 29 }BUILDING A RAISED BED WITH CARDBOARD SHEETS
1 The hole was dug in the same 2 The school had a lot of fresh 3 Freshly cut twigs were covered
way as for the standard raised materials left over from trimming with sheets of cardboard which
bed. the bushes, which they used to was torn into smaller pieces.
make the first/bottom layer.
4 Cardboard was covered with a 5 Everything was covered with 6 Since there was only a small
layer of dry and semi-dry garden the dug-out soil. amount of material available, a
plant residues, as well as with slightly lower raised bed was
grass turf (root side up). made.
7 Since there was no straw or hay 8 The grass was pushed aside to 9 Finally, the bed was watered.
at their disposal, the soil was pro- make room for the shallow rows The rows were left open, because
tected with a top layer of freshly of seeds; after the sowing, the a cover would prevent the germi-
cut grass. soil was pushed back to cover the nating seeds from growing into
seeds. plantlets.
{ 30 } School Garden GuideHERB SPIRAL
This innovative bed was created at Srednja trgovska šola (High School for Commerce) in Ljubljana. It is a
variation on the standard herb spiral: it consists of two connected spirals.
1 Mark out the perimeter of an 2 Determine the number of its 3 Draw a chalk outline of the spi-
herb spiral(s) with some string inner rings – they should be wide ral(s) and the connecting bed on
and a stake. enough to accommodate the beds the ground.
and the rock edge. Cut off the
string and save it for later.
4 Use a shovel or a pick to turn 5 After laying a gravel base, drive 6 Before placing the rocks, mark
over the soil within the spiral. a long stake into the ground in the edge with sawdust.
the centre of the spiral. To deter-
mine the perimeter, stretch out
the string attached to the centre
stake to mark out your circle.
Draw a line in the soil with the
other stake tied on the end of it.
7 Using your edging material of 8 Use increasingly smaller rocks 9 Stack additional layers of rock,
choice, start laying your rocks on towards the centre of the spiral. starting with the innermost ring.
the outer edge. Work inwards to Make sure that the rings gradu-
create a spiral shape. ally taper down in height toward
the bottom. Fill the empty space
between the rows of rocks with
gravel.
{ 31 }10 Cover the gravel with a layer of 11 Here the two connected herb 12 Fill the vacant space between
compost. spirals can be seen. the spirals with decorative beds
lined with smaller rocks. Put grav-
el on the pathways.
13 To prevent weeds from grow- 14 Top the newspaper layer with 15 Top the gravel pathways with
ing, cover the ground surrounding gravel. If you want a water garden gavel-stone.
the spirals/connecting bed with at the base of the spiral, dig out a
newspaper sheets, taking care not hole for a container that will hold
to leave any surface unprotected. sufficient water and grow water
loving species.
16 Plant different herbs. 17 Taller plants should be planted 18 The double spiral in 6 months
in the centre of the spiral. after establishing.
{ 32 } School Garden GuideSMALL TERRACE GARDEN
1 Cover the bottom of containers 2 Place a layer of floating row 3 The saplings have been raised
with clay pebbles. This improves cover on top of the pebbles so from seeds etc. in repurposed
moisture retention, aeration to that the soil will not migrate to containers.
plants’ root systems, and drainage the bottom of the container. Fill
capabilities. the containers with potting soil.
4 Taller and shorter plants should 5 Tie horizontal strings to the bal- (6) Plants growing along the sup-
be planted separately – taller cony rails, as shown in the photo; port system.
plants need more space to grow it will provide gardening support
– thus the number of plants per for the climbing plants.
container should be smaller than
for shorter plants.
7 Use vertical strings to provide 8 For tall plants, you can use (9) Plants climbing along the
the climbing plants with addition- stakes as a gardening support. string support.
al support.
{ 33 }10 When a plant is heavily load- 11 Horizontal strings support the 12 Vertical strings provide perfect
ed down with growing fruit, use cucumbers. support for climbing beans.
some garden string to tie the
main stem to the vertical support
to prevent it from breaking.
PLANTING UNDER A YOUNG TREE
This innovative bed was created at Srednja trgovska šola (High School for Commerce) in Ljubljana. It is a
variation on the standard herb spiral: it consists of two connected spirals.
1 You will need a garden fork to 2 Plan the border of the bed. 3 Make an outline of the border
mark the circle and loosen the soil with clumps of soil.
first.
4 Turn over the soil at the border. 5 This is how the border should 6 Place some dug-out soil in the
look like once finished. circle.
{ 34 } School Garden Guide7 A protective layer of newspaper 8 The borders are secured with 9 The bed is watered.
sheets is added. pieces of cardboard.
10 Finally, if there is no garden 11 The soil should be spread even- 12 Add some plants and protect
soil available, potting soil is add- ly over the bed. the soil with bark mulch.
ed.
13 Finally, add a top layer of green
garden materials.
Water sources
The main aim is to retain as much water as possible in the area (in our case the school area), to use
it in our system, and afterwards to return it to the environment as clean as possible.
We can start with the basics and try to develop water management further with time, according to
our possibilities.
The most simple system consists of catching the rainwater from the roof into a closed container or
perhaps a well. It is also possible to catch rainwater in the open containers – smaller or larger wa-
terholes, ponds or small lakes. This can be done both in Zone 1 and 2; we should not limit it to only
one zone but strive to use all opportunities for catching the water wherever it appears.
We will use this water for watering or irrigating the plants, providing drinking for the animals, cleaning
{ 35 }You can also read