The Lorax spoke for the Truffula trees. What animal or plant would you speak for?
←
→
Page content transcription
If your browser does not render page correctly, please read the page content below
The Lorax spoke for the
 Truffula trees. What
 animal or plant would
    you speak for?                   Insert Picture Here

 WHAT WILL I NEED?

                               WHERE SHOULD I GO?
   •   Poster Board
   •   Markers

                               Find a table or other craft
                                         space.

    PARENTS CORNER

Campers may want to research
  an animal or plant online.

                                                       There’s More!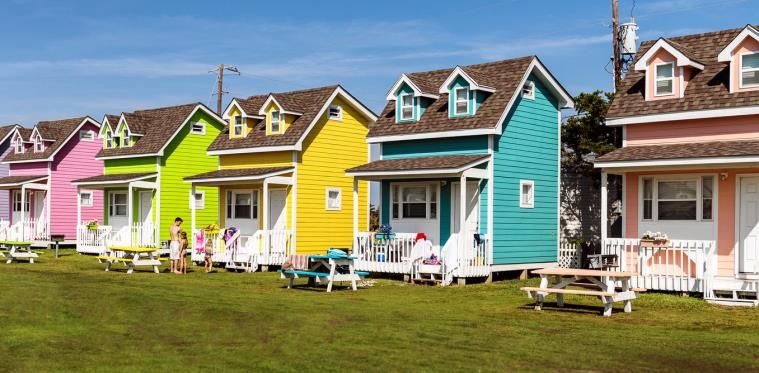
WHAT DO I ALREADY KNOW?

1) What does it mean when an animal or plant is on
   the Endangered List?

2) What causes animals to be listed as
   “endangered”?

3) How can we help reduce habitat loss?

4) What are the basic needs of living things?
INSTRUCTIONS

“I speak for the trees,” said the Lorax “for the
trees have no tongues.”

The plants and animals around us can not tell us
how they feel or what they need. So, it is our
responsibility to consider their needs and stand
up when things are wrong or hurtful.

Brainstorm a few different wild plants or animals.
Then, create a poster to show others how your
chosen plant or animal feels. Describe what they
need or enjoy.

You can be the voice for those that are quiet.

Feel free to draw or print a picture of what you
chose. Share your projects with us at GSMIDTN.
INSTRUCTIONS (continued)

You can use this page as space to brainstorm.
Consider the following;

*Where does you animal or plant live?
*What does your animal or plant need?
*What are some problems that your chosen
animal or plant face?
*What can we do to help solve the problem?
WHAT DID I LEARN?

1) What can you do to help animals and plants on
the endangered list?

2) What did you learn about the plant or animal
that you chose?
Micro homes and green
 homes are becoming
more popular. Can you
     design one?

 WHAT WILL I NEED?

                                WHERE SHOULD I GO?
   Recycled Materials

                                This is an activity that will
                                  most likely take place
                                          indoors.

   PARENTS CORNER

  There are references and
topics that girls may want to
  further research from this
           project.
                                                      There’s More!
WHAT DO I ALREADY KNOW? 1) What is a carbon footprint? 2) What is a micro-home? Why do some people want a micro home? 3) How many things in your home use energy?
INSTRUCTIONS

Many people are becoming more creative in ways
to live in a more ecologically friendly way.

In Texas, a resident constructed his home out of
mostly recycled materials. His house is known as
the “aluminum can home” because much of the
structure is built using cans. Another person used
glass bottles in a similar manner.

In recent years, many people have either
refurbished things such as old school buses into
homes. Many have also created “micro homes”
that have very small square footage and thus
consume very little energy. Many micro homes
also run on alternative energy sources.

Ask a parent’s permission to research some of
these topics if this information is new to you.
INSTRUCTIONS (continued)

Your challenge is this:
Design a “green” home using recycled materials.
If the home uses clean, alternative energy, kudos
to you! That is awesome.

Your project can be on a poster or you can create
a model. However, try to use only items that you
already have at home if you choose to buils a
model.

Show off your house design with a brief
explanation in a clip and tag us at GSMIDTN.

Bonus Challenge:
Compare the energy use of your model home
with the most recent energy report from your
current home (with parental permission).
Did you know that
 Earth Day was created
  to bring awareness
    after an oil spill?                    Insert Picture Here

  WHAT WILL I NEED?

    •    Cotton Balls
    •    Vegetable Oil
    •    Water                       WHERE SHOULD I GO?
    •    Cocoa Powder
    •    Dawn Dish Soap              This activity can be messy
    •    Spoons & Cups                so let’s head outside for
    •    Faux Feathers                         this one.
    •    Container                       Make sure to wear
                                     clothes that can get dirty.
     PARENTS CORNER

   The oil in this activity can
   potentially stain clothing.
 There are hyperlinks included
to educate girls about oil spills.
                                                             There’s More!
INSTRUCTIONS Earth Day was established the year following an oil spill in 1969 in California. Let’s start this week’s virtual camp with learning about a pivotal point in environmental history. Oil Spills in the oceans can be very difficult to stop and clean up after. These accidents are detrimental to nearby plant and animal life. It takes years and lots of hard work to clean up after any type of oil spill. Get a parent’s permission to check out the following link or to conduct your own research. https://kids.niehs.nih.gov/topics/environment- health/gulf-oil-spill/index.htm https://www.nwf.org/~/media/PDFs/Kids/oilspil l_mini-page.ashx You can do this activity by yourself or with your family to learn about cleaning up oil spills.
INSTRUCTIONS (continued)
Make sure to wear clothes that can get messy and
to do this activity in an outside space that can be
easily cleaned up afterwards.

Set up:
Pour water into a container and add fake feathers
to the container. In a separate bowl, pour in
vegetable oil (¼ of the amount of water used in
the container). Slowly add some cocoa powder to
the bowl of oil until the mixture looks like dark oil.
Use a plastic cup to have an amount of soap only
for the experiment. Do not use the entire bottle.

Materials to clean the oil spill: cotton balls,
sponge, a cup with Dawn dish soap, plastic
spoons, additional cups, and a trash bag.

Challenge: Add the oil mixture to the container.
How much oil can you remove from the water
and the feathers using only the resources listed?
WHAT DID I LEARN?

1) How much oil were you able to remove from
the water? Was this more or less than what you
expected?

2) Were you able to completely clean the
feathers? What made it difficult? What worked
well?

3)What is your takeaway?
Let’s make a tasty
snack for our feathered
        friends!
                                   Insert Picture Here

 WHAT WILL I NEED?

   •   2.5 cups Birdseed
   •   2 tbsp unflavored
       gelatin                WHERE SHOULD I GO?
   •   2 tbsp corn syrup
   •   ½ Cup cold water
   •   ½ C Boiling water      You can make this in the
   •   Cookie cutters         kitchen but it will end up
   •   Twine & Straws                 outside.

   PARENTS CORNER

 Campers should be able to
 complete this with minimal
           help.

                                                     There’s More!
WHAT DO I ALREADY KNOW? 1) What types of birds live near you? (If you don’t know, try birdwatching this week.)
INSTRUCTIONS
1) Pour ½ cup of cold water into a large bowl.
2) Add 2 tbsp unflavored gelatin (often found in
   packets)
3) Add ½ cup of boiling water on top of the mixture
   and stir until the gelatin has dissolved.
4) Stir in the corn syrup until combined.
5) Add in the birdseed until all is mixed well.
6) Chill the mixture in the refrigerator for at least 10
   minutes (no loose liquid; kinda thick)
7) Line a baking sheet with parchment paper and
   place cookie cutters on top.
8) Fill each cookie cutter with the seed mixture and
   press firmly to make sure it holds together.
9) Push pieces of straws into each piece (½ away
   from the edge). Leave straw pieces in.
10)Chill the mixture overnight in the refrigerator.
11)Gently push the shapes out of the cookie cutters
   and remove straws.
12)Use twine to tie your treats near branches for
   birds to rest on while snacking.
Let’s enjoy an outside
 kaper that helps the
environment near us.
                                   Insert Picture Here

WHAT WILL I NEED?

  •    An adult                WHERE SHOULD I GO?

  •    A trash bag
  •    Gloves
  •    Germ-x
                               Grab your adult, a trash
                               bag, and head outside!

   PARENTS CORNER

This can be a good reason to
       get some sun!

                                                     There’s More!
INSTRUCTIONS Social distancing can keep us inside sometimes, but this is good to get us outside (but still at a safe distance from others). Let’s grab gloves and a trash bag so we can help the environment in our own local community. Head out with an adult to hike around the block. As you hike around your community, look around to see if there is any trash that you can pick up. Remember that Girl Scouts leave the world a better place!
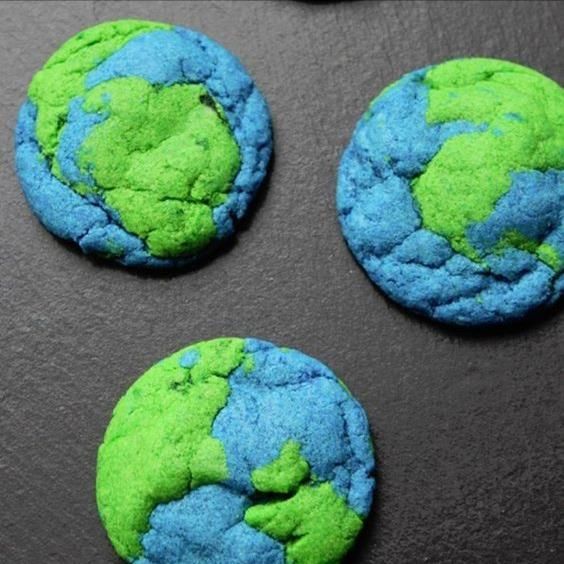
Make these marbled
blue and green cookies
                                       Insert Picture Here

 WHAT WILL I NEED?

   •    Boxed Sugar
        cookie mix or              WHERE SHOULD I GO?
        sugar cookie
        recipe.
   •    Blue and Green
        food coloring               Head to the kitchen.

    PARENTS CORNER

  This is a baking activity that
 uses food dye. Food dye can
stain their hands and clothing.

                                                         There’s More!
INSTRUCTIONS 1) Prepare sugar cookie dough according to recipe card or box. Divide dough into two bowls. 2) Slowly add a couple drops of blue into one bowl and a couple drops of green food dye in the other bowl. Mix and add dye until you get the colors you want. Dye can stain your hands and clothing. 3) Line a baking sheet with parchment paper and preheat the oven according to package directions. 4) Grab a little bit of green dough and blue dough. Roll them together into a ball and place on the baking sheet. 5) Continue rolling cookie balls together and space them apart on the baking tray. 6) Bake according to package directions.
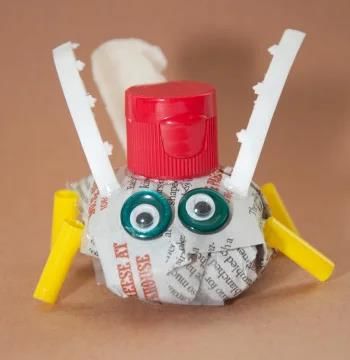
What does your litter
   bug look like?
                                      Insert Picture Here

 WHAT WILL I NEED?

   •   Bulleted                 WHERE SHOULD I GO?
   •   List of
   •   Materials
   •   And Tools                Brief description of where
                                    they should do the
                                activity (outside, table or
                                  desk, quiet place, etc.)

    PARENTS CORNER

 Any information the parent
may need (safety precautions,
    internet access, etc.)

                                                        There’s More!
INSTRUCTIONS Here is your challenge: Using at least 3 different non-perishable materials that normally would be thrown away, create a “litterbug”. Only use materials that would not spoil and that you already have at home. Will your litterbug resemble an actual insect? Or do you have your own creative concept? Share your litterbug creation with us.
You can also read