Trout in the Classroom - Activity Guide and Reference for Teachers New Jersey Department of Environmental Protection
←
→
Page content transcription
If your browser does not render page correctly, please read the page content below
Trout in the Classroom

   Activity Guide and Reference for
               Teachers

New Jersey Department of Environmental Protection,
            Division of Fish & Wildlife
                         And
          NJ Chapters of Trout Unlimited

                    Updated March 2012
Trout in the Classroom
A Cooperative Program Sponsored by
New Jersey Department of Environmental Protection
Division of Fish & Wildlife
And
New Jersey Chapters of Trout Unlimited

Activity guide modified from New York State Trout in the Classroom, 2005

                                                                           2
Contents
PART ONE: GETTING STARTED
Introduction                                                        4
Acknowledgements                                                    5
Eggs to Fry: Overview of Trout Development                          6
Creating a Fish Habitat in Your Classroom                           10
Setting Up the Aquarium                                             11
Critical Water Quality Elements                                     13
Monitoring and Record Keeping                                       14
Frequently Asked Questions                                          16
Trout Journals                                                      17
Introducing Students to the Aquarium                                18

PART TWO: TROUT ACTIVITIES IN THE CLASSROOM
1.  The Trout Body                                                  19
2.  Trout Dissection                                                22
3.  Trout Life Cycle                                                27
4.  What Trout Need                                                 29
5.  Trout in the Ecosystem                                          31
6.  Threats to Trout Habitat/Threats to Trout Survival              32
7.  Where Does Our Water Come From?                                 36
8.  Determining the Health of a Stream                              37
9.  Macroinvertebrate Survey                                        40
    Part 1: Identification of Macroinvertebrates
    Part 2: Field Trip
    Part 3: Assessing Data and Drawing Conclusions
    Alternative study ideas: Leaf Pack Study
10. Managing Trout by the Numbers                                   47
11. How much water do we use?                                       51

PART THREE: APPENDIX
       Glossary                                                     54
       Online Resources                                             56
       Trout Unlimited Today/Background on Trout in the Classroom   59
       Contact List                                                 61

                                                                         3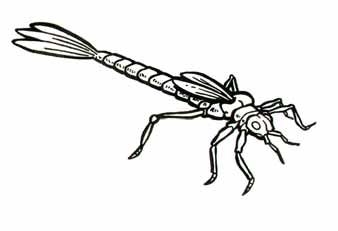
Trout in the Classroom
Introduction
Raising trout in your classroom is a hands-on activity that engages students and helps to
connect them to real-life water quality, fish and wildlife issues and problems, and inspires
them to seek solutions. Hatching eggs in the classroom and watching fish develop from eggs
to fry generates enthusiasm among students and helps them develop caring attitudes about
fish species and their habitats. This is the first step in fostering in students a sense of
stewardship for the planet.

The program encompasses not only science, but many other curriculum areas including
language arts, mathematics, social studies, ecology, and art. The program is easily adapted
to the needs and abilities of students, whether they are 2nd graders or high school students.
One feature of the program is that it is hands-on and flexible. Teachers can implement it as a
complete yearlong unit of study or it can be an extension of the regular science curriculum.
The TIC curriculum is correlated to the New Jersey Science Standards. The activities in this
guide are written for the middle school level and correlated to the standards for 8th grade, but
teachers are encouraged to modify the activities to fit the grade level of their students.

Brook trout eggs are supplied by the Division of Fish and Wildlife at no charge to teachers
who want to raise trout in their classrooms. Brook trout are used rather than rainbow or brown
trout because they are a native fish to New Jersey. Members of the conservation group Trout
Unlimited (TU) in New Jersey have pledged to support this program through their chapters.
This program is a partnership between TU, teachers, and the NJ Division of Fish & Wildlife.

This Resource
This resource will guide you in setting up and maintaining a TIC program in your classroom. It
will also provide stand-alone lesson plans and activities that you can use to enhance your
program. The contents include:

−   Background and General Information
−   Care and Maintenance of the Classroom Aquarium
−   Trout Activity Guide
−   Glossary
−   Contact Information

                                                                                               4
Acknowledgements (NY TIC)
                             Thanks to Joan and Arthur Stoliar
                       Whose tireless efforts and devotion have made TIC
                          the wonderful, inspiring program it is today.

 Individuals who work to improve and                   Organizations that have continued to
 expand the program:                                   fund and support NY TIC:
 Kim Estes-Fradis, NYC DEP                             New York City Department of Environmental
 John Fisher, Take-A-Kid Fishing                       Protection
 Chris Von Strasser, Take-A-Kid Fishing                New York State Department of Environmental
 Rob Roberts, Trout Unlimited                          Conservation
 Matt Rota, Trout Unlimited                            Catskill Watershed Corporation
 Evan Stoliar                                          Theodore Gordon Flyfishers
                                                       Take-a-Kid Fishing
                                                       Trout Unlimited

 These educational materials are made possible by generous grants from Susan and
 Peter J. Solomon, the Peter J. Solomon Family Foundation, and the Peter J. Sharp Foundation.

 Editor and Writer:                          Phil Dickler, John Bowne High School
 Christine Economos                          Matt Rota, Trout Unlimited
 Art: Eric Hamilton                          Rob Roberts, Trout Unlimited
 Design: Armistead Booker                    Arthur Stoliar, Theodore Gordon Flyfishers
 Cover Art: Duane Raver,                     Barbara Taragan, NYC Department of Education
 U.S. Fish & Wildlife Service                Kim Estes-Fradis, NYC DEP

 Reviewers:
 The following resources were consulted in preparation of this guide:
 River Watch Network: River Monitoring Study Design Workbook
 California’s Salmon and Steelhead: Our Valuable Natural Heritage
 (Published by Trout Unlimited, California Council)
 Trout Unlimited Coldwater Conservation Guide
 Fish Eggs to Fry: Hatching Salmon and Trout in the Classroom
 (Oregon Department of Fish and Wildlife)
 An Educator’s Resource Guide for Hatching Salmon and Trout in the Classroom
 (Oregon Department of Fish and Wildlife)
 Macroinvertebrate Identification Sheet (U of Wisconsin Environmental Resources)

 New Jersey version of Trout in the Classroom Activity Guide edited by Jessica Griglak, NJ Department of
 Environmental Protection, Division of Fish & Wildlife. June 2009
 Reviewers: Marilyn Steneken, Sparta Middle School

                                                                                                           5
From Eggs to Fry:
An Overview of Trout Development in the Classroom
Egg Development
In the hatchery, eggs are taken from the female fish and fertilized with milt (sperm) from the male. The sticky
eggs are soaked in water during which time they become firm. These are called green eggs. They are very
delicate and any roughness can kill them at this stage.
As the eggs develop, an eye can be seen forming in the embryo. These eyed eggs are still fragile, but
stronger than green eggs. At the eyed stage, eggs are ready for your classroom aquarium. You will receive
eyed brook trout eggs in mid-October from the NJ Division of Fish and Wildlife’s Pequest Trout Hatchery.
Eggs will be delivered by Trout Unlimited members to your school. The eggs will be kept moist and cool
during the transport to your classroom. An insulated cooler will keep the eggs cool during the trip to the
school.
Back in the classroom, gently open the plastic bag that contains your eggs and divide them into petri dishes
filled with water. Have your students pick out the dead, non-viable eggs with the tweezers or eye dropper.
These eggs will appear white or opaque in color. Students will need to work quickly at this stage, but it gives
them an immediate hands-on experience with the program. After the eggs have been picked through, they
will need to go into your Vibert box or hatching basket. The eggs need to be in one single layer. Do not
expose the eggs to sunlight or fluorescent light. Even fifteen minutes of light can kill both eggs and fry. It is
suggested to enclose three sides of the tank with foam. Leave the front side open so students can see what
is happening in their tank.
Check the aquarium each day for dead eggs or eggs with fungus—they will appear white. Some eggs will
die, even though all your systems are working properly. Remove dead eggs to prevent the spread of fungus
that will form on them. Use an eye dropper or turkey baster to remove the eggs. Record the number of dead
eggs you take out of the tank on your daily record sheet.
Alevins
When the eggs hatch the alevins (pronounced Al-a-vin) will swim out of the Vibert box to the spaces in the
bottom of the tank. They will remain there until they consume their yolk sacs. They are still fragile at this
stage, so avoid any handling of them. Any egg cases with fungus and any dead alevins should be removed
and their numbers recorded on your daily record sheet. If you are using a hatching basket, leave your alevins
in the hatching basket until they are free swimming.
During development, alevins use the food in their yolk sacs. The size of the sac will gradually become
smaller. After a week or so the sac will be used up. The alevins will begin to swim about looking for food. At
this stage you will begin feeding the fry.
6Guidelines for Feeding the Fry
courtesy of Scott Covert, Debruce Hatchery
The food comes in three different sizes...smallest to largest, 0 to 2. Start feeding with the bag marked 0, then
1, then 2. You will receive the food in the Trout Care Box that will be delivered to you along with your eggs in
mid-October. You will receive enough food to last the entire school year. If you run out, chances are high that
you are overfeeding your fish. More fish food can be obtained from your local pet store.
Size 0...First Feeding
Timing: Your hatchlings do not require feeding for 7 to 14 days after hatching. They will feed from their yolk
sack as they stay low, at the bottom of the hatching basket. When you see the first hatchling begin to rise off
the bottom of basket, you can start providing food. Much of this first food will go uneaten, but by providing it
to the developing fish, it will be there when they're ready to eat.
NOTE
There WILL be some mortality as the fish start to feed...some hatchlings just never start eating, and die.
− When your fish reach about 1" in length, it is time to switch to Size 1.
− When your fish reach about 1 1/2" in length, it is time to switch to Size 2.
Quantity
When born, your hatchlings are very small...Assuming 200 trout, feed them approximately the following
amount of food each day...interpolate as needed:
− First feedings fish still in hatch box: feed very little food
− Fish just out of hatch box: 0.34 grams (0.01 oz) of food
− Fish = approx. 1": 1.36 grams (0.05 oz) of food (Switch to size 1 now)
− Fish = approx. 1 1/2": 3.4 grams (0.12 oz) of food (Switch to size 2 now)
− Fish = approx. 2 1/4": 10.9 grams (0.38 oz) of food (This is about the size where you will release)
NOTE
You can calculate feeding amounts quite precisely, but this is totally unnecessary. We have provided the
formula at the end of this page for those of you into the math.
The 0 and 1 sized feed needs to be sunk down to the fish, because the oil added to the food will cause it to
float. A small plastic paddle will work fine. When the food is introduced to the water directly above the fish, a
slight back and forth motion should get the food down to the fish.
It is important NOT to overfeed your fish. Wasted food will degrade water quality. If you start to see clumps of
dull yellow forming on the bottom or sides of your tank, gently remove it with your net. You can also use a
small siphon, but use care not to suck up your fish.
When the fish get larger and you switch over to the 2s, you will be able to see them actively feeding more
than you will with the 0s and 1s. Be sure to take out dead fish...the reasons are obvious.
Keep your food in a dark place out of direct sunlight. When you are about to run out of one size of food, mix
a little of what's left into the next size larger before switching. It is better to feed less food, more often, than a
lot of food all at once.
A Note About Enthusiastic Help
Every year, many schools enlist the assistance of security and maintenance staff members to feed the fish
on the weekends and holidays. These well-meaning folks often become great fans of the fish, and are soon
spending their breaks watching...and yes...feeding the fish. People with different schedules feed the fish
unaware that others are doing the same. You might want to warn these fans about over-feeding by having a
sheet of paper near the tank so they can track how often the fish have been fed. You can also leave out the
correct amount of food, pre divided and marked in daily increments.
7Calculating Food Quantity
The formula is simple.
1
-------- x 0.03 = weight of food needed to feed fish in POUNDS
(P/N)
Where
P = Number of fish per pound
N = Number of fish in tank
EXAMPLE
If you started with 200 eggs, they will require only 0.012 ounces or 0.34 grams per day. They will reach about
1" before you need to move up to size 1, by then they will weigh about 2000 to the pound (bigger fish, less
per pound), and will require about 0.048 ounces or 1.36 grams of food.
Approximate number of fish per pound...based on average length:
At Birth: 8000
At 1": 2000
At 1 1/2": 800
At 2 1/4": 250
If you have any questions, you can call Scott Covert at the Debruce Hatchery
(845-439-4328), or Jeff Matthews at Pequest Trout Hatchery in Oxford, NJ (908-637-4173).
Over the next six months you and your students will watch the fry develop and grow. During this stage it is
important to keep a check on water temperature (twice a day). You will also be testing pH, dissolved oxygen
and ammonia. As the fry grow, ammonia levels in the aquarium will rise. Be prepared to change the water. A
1/2 to 2/3 water change will improve water quality. Always keep buckets of dechlorinated water available for
changes.
8Releasing Trout
Trout must be released at a site approved by the proper authorities.
You cannot put trout into every ecosystem. Why? Releasing trout in unauthorized areas can taint native and
wild fisheries with hatchery fish. They are also better suited to some streams and not others. When you
undertake a TIC project in New Jersey, you should look at the list of approved TIC trout stocking streams for
New Jersey. The TIC Coordinator will provide you with the list of streams that are approved for TIC trout and
the permit application that you will need to fill out before releasing the fish.
Releasing the trout can be a bittersweet experience for your students. They will be sad to see the trout go,
but happy to put the trout into their proper habitat. Transporting the trout can be tricky especially if you are
traveling a long distance to the release site. Place the young trout in a cooler or large bucket. You will need
to obtain a small aerator to keep the oxygen flowing for the fish. The temperature of the water in traveling
containers must be the same temperature as that in the aquarium. That temperature must be maintained
throughout the trip. It is a good idea to use ice or ice packs in the cooler with your fish, just make sure that
they are inside a closed ziplock bag.
When you reach the release site you will want to adjust the water temperature in the bucket so that it is equal
to the stream water. To do this, have students slowly add stream water to the containers. Use a thermometer
to avoid large fluctuations (greater than 5 degrees F.) in water temperature.
When the water temperature is more or less equal, have students fill small plastic bags or cups with water.
Place a trout in each bag or cup and allow students to release them.
Some do’s and don’t’s when releasing trout:
− Don’t release trout in deep pools where large fish may be present.
− Don’t release trout in streams with a fast moving current.
− Do release trout in shallow pools.
− Do release them in an area with shade or plant cover.
− Do try to release the trout at different spots along the stream.
To release trout:
− Place trout from the tank into a cooler or large bucket so that the water stays cool.
− Add ice or ice packs into the water. Make sure they are in a ziplock bag.
− Make sure you have a small aerator in your cooler or bucket to keep the fish alive.
− Hold the plastic bag or cup in the water.
− Allow some stream water to enter the container.
− The trout should swim out at this point.
Ideas for trout releases:
− Measure the temperature at the release site and compare to your tank.
− Have the students assess why that was a chosen release point (food, cover, shelter, etc)
− Ask someone to help you look at the insects in the river and classify the stream based on the
insects that you find.
− Teach the kids to fish.
− Take a hike and look at the riparian areas.
− Do a stream clean-up at your release site.
− Talk about a trout’s web of life or food chain and look for those things that you can find in
either one.
− Release the fish on the way to a facility, such as the Pequest Trout Hatchery, where your
students can learn about trout, aquatic wildlife, upland wildlife and so much more.
− Reach out to other groups and organizations with an interest in water and conservation and
ask them to join you for an education session on their organization and what they are doing
to help conserve and protect the waters of New Jersey.
9Creating a Fish Habitat in Your Classroom
In nature, healthy streams provide the physical and chemical conditions fish eggs need to develop and
survive. Your classroom set-up will simulate natural conditions. This chart shows optimum conditions for trout
development in nature and how a classroom aquarium can model those conditions.
Optimum conditions In Nature In the Classroom
Limited light The eggs are buried under Aquarium is positioned away
(as eggs and alevin) the gravel in a redd. from direct sunlight and/or
enclosed in Styrofoam.
Cold water (42° F. -55°F.) Shade trees, snowmelt and A chiller maintains optimum
underground water sources water temperature.
keep stream water cool.
Oxygen Aquatic plants produce Aeration unit adds and
oxygen. Streams gather circulates oxygen in the
oxygen as they flow over water.
rocks.
Clean water Clean water is stored and Dechlorinated water is used.
gradually released by a Filters remove wastes and
healthy watershed system. encourage microorganisms
Bacteria break down which turn harmful ammonia
decaying matter in streams. into harmless nitrates.
Plants absorb nitrates.
pH (6.5-7.5) Runoff from highways, Proper balance between
lawns, farms, and decaying acidity and alkalinity
organic matter all affect pH. (optimum is 7.0) is
maintained in the aquarium.
Food Fry feed on insects and on Fry are fed until release
zooplankton. date.
Predators Eggs in gravel are safe from No predators in classroom
predators. Protective aquarium.
coloration of fry helps to
protect them.
10Setting up the Aquarium
Time Line
− First week of September:
School receives funds with which teachers can purchase required
equipment (contact TIC Coordinator for latest list))
Teachers buy parts and assemble setup (see equipment list and diagram)
− Last week of September (two - three weeks before eggs arrive):
Set up the bio-system in the tank:
• Temperature, 65 degrees Fahrenheit
• Biozyme or StressZyme
− 12 hours before eggs arrive:
Set temperature to 50-55 degrees Fahrenheit
What’s Next?
The eggs you receive will be "eyed” – ready to hatch in about two weeks. Keep the tank shaded with the
styrofoam cover. You can remove it for viewing...or cut a viewing window in it. The cover will also help
keep the temperature down.
Check your eggs twice a day. Dead eggs MUST be removed each day. Dead eggs appear opaque or
white white. Use an eye dropper or tweezers to remove them.
When they hatch, the trout (called alevins at this stage) will lie on their sides. A yolk sac will still be
attached. The yolk sac will be their source of nourishment until it is absorbed. These fish can not swim
and will remain in the gravel at the bottom of the tank or on the bottom of their hatching basket.
Soon the alevins will "right" themselves, but remain low in basket. As the yolk sac is consumed, they
begin to rise.
You will receive food from the hatchery on the day your eggs are delivered. This food should last a full
year. If you run out of food, you can purchase it from your local pet store. Do not feed the trout until the
entire yolk sac is absorbed. The hatchery will provide 3 sizes of food, and instructions on when to begin,
quantity and frequency of feeding.
Eventually the trout (called fry at this stage) will swim up over the basket edge into the larger area of the
tank. You may want to put a bit of screen or stocking net over open tubes to keep tiny fish from getting
sucked up into the system. Screens are included in your Trout Care Box.
At this point you can expect some losses. There may be non-eating pinheads, deformities, two-headed
trout, etc. Continue with the feeding and monitoring of the tank.
In about six months the fry will be ready to release. You will need to get a permit for the release from the
NJ Division of Fish and Wildlife. Applications for release permits are due at the end of December.
We encourage communication between classes, particularly within similar age groups.
11Equipment List
From your local pet store…
• 55 gallon standard glass aquarium with stand (available at any pet shop).
• 55 gallon glass hood with fluorescent lights built in (available at any pet shop)
From your local pet store or order as a TIC Kit #1 from That Fish Place…
• Aqua Euro USA 1/4hp Chiller
• Fluval 405 Canister Filter
• Whisper 60 Air Pump (Tetra)
• Sandstone (Blue) 12” Airstone – 206 (Blue Ribbon)
• 8’ Flexible Airline Tubing ST-8 (Penn Plax)
• Check Valve – 1 pk (Lee’s)
• Net Breeder (Lee’s)
• Battery Operated Digital Thermometer (ESU)
• Floating Thermometer – Economy (Penn Plax)
• 4” Net (Penn Plax)
• Stress Zyme 16 oz. (Aquarium Pharmacy)
• Tap Water Conditioner 16 oz. (Aquarium Pharmacy)
• Mag Drive Water Pump 700 GPH (Supreme)
• 15’ Clear Flexible Tubing
• ½” x ½” Female Adapter FPT x INS (IPS)
• 5 – Stainless Steel Hose Clamps 7/16” x 25/32”
• Freshwater Master Test Kit (Aquarium Pharmacy)
• Siphon Kleen X-Large (Marineland)
• Swift Creek Gravel – 10 lbs. (Estes)
• Outlet Tube and Diffuser for Magnum 220
• Teflon Tape
• Chemi-Pure, 5 oz (2)
Optional Equipment…
• Eye Dropper or Turkey Baster (or more for multiple students) for daily removal of eggs
• Sheets of Styrofoam to cover tank on all sides, except the front of the tank
• Two five gallon plastic buckets (not metal) to age water before putting it in the tank.
• Battery-operated aerator, to give trout oxygen during transport (available at sporting good stores)
• Long-handled scrub brush to loosen grime and growth in the tank
• Clean ice packs, for use in transportation and/or chiller emergencies
Equipment Replaced Yearly…
• Filter Pads and Charcoal
• Biozyme
• Airstone – these can degrade or build up with waste.
• Water Quality Test Kit
To call and place an order, please contact Stephanie Welsh from That Fish Place at 717-299-5691 x 1288
and tell her you’d like to place an order for Trout in the Classroom Kit #1 for New Jersey.
12Critical Water Quality Elements
Temperature
Use a standard aquarium thermometer to monitor the water temperature. The ideal temperature range for
raising trout is between 48° F. and 52° F. Temperature affects ammonia and oxygen concentration and fish
metabolism. A sudden increase or decrease of 3 to 5 degrees within a 15-minute period (even within the
acceptable temperature range) can create major problems for eggs and alevins. When doing a water
change, make sure the new water is within 1 to 2 degrees Fahrenheit of that in the aquarium.
Dissolved Oxygen
Dissolved oxygen is defined as the amount of oxygen, measured in parts per million (ppm), that will dissolve
in water at a given temperature. Trout are active and consume a lot of oxygen from the water. Dissolved
oxygen levels of 10-12 ppm is most desirable. 8 ppm for developing eggs and alevins is the absolute
minimum. 5 ppm is the absolute minimum for fry. At the 5- 8 ppm you can expect some problems for eggs
and fry. Use a dissolved oxygen test kit (available from aquarium supply stores) to check for dissolved
oxygen.
pH
pH (the power of Hydrogen) is an indicator of water acidity or alkalinity. The pH values range from 1 to 14.
Pure, pH-balanced water has a value of 7. Any number less than 7 is acidic. Any number more than 7 is
basic or alkaline. A pH below 6.0 or above 8.0 in your aquarium water is reason for concern. Make a partial
water change or use a buffering agent, such as baking soda, to correct the situation. Use a pH test kit
(available from aquarium supply stores) to test pH.
Ammonia
As the eggs, alevins and fry develop both ammonium ions (NH4) and ammonia (NH3) are produced through
excretion. Ammonia is highly toxic to fish. High levels can cause gill damage, anemia, and even death for
eggs and fry. At pH levels above 7 the ammonia increases its concentration. Total ammonia levels (the sum
of both forms) should be less than 5 mg per liter. Monitor ammonia levels with a test kit available from an
aquarium supply store. If the ammonia level is high you will need to do a partial water change.
Pollutants and Chlorine
Pollutants are not a problem if you are using tap or well water in your aquarium. Chlorine in drinking water is
toxic to fish and to the bacteria making up the aquarium’s biofilter. Because chlorine is an active element it
can be quickly and easily removed from tap water. Dechlorinate a bucket of tap water by leaving it exposed
to the air for 24 hours. Tap Water Conditioner also rids your water of chlorine.
13Monitoring and Record Keeping
Before the eggs arrive, instruct students on how to conduct a daily inspection of the aquarium. Show them
how to check that the equipment is working properly and how to read and record the temperature. Explain
that when the eggs arrive, they will also be checking for egg mortality.
Assign three students to conduct the inspection twice daily for a week. At the end of the week rotate out one
student and put a new student in. That way, after the first week, you will always have two students with
experience in conducting the inspection. Have students inspect the aquarium early in the morning and at the
end of the day and record their findings both on the daily inspection record and on the progress chart.
Record keeping is an essential part of the program. Records can identify potential problems and can be used
to reference experiences from past years. Students should record everything that is done or observed. For
example:
− Dates
− Temperatures
− Egg/alevin/fry numbers
− Problems and solutions
− Water quality testing results
− Mortality
− Observations: hatching, predation, etc.
At the end of each week, student inspectors should report to the class on the data they collected for the
week.
Use the daily inspection record and progress report that follows or have students create recording sheets of
their own.
14Trout Inspection Record
Week of:
Inspectors:
Date Temp pH Water: clear? Powerhead Number of Mortality Initials of
Correct or air pump live trout (dead picked inspectors
level? plugged in? and recorded)
MON
TUE
WED
THU
FRI
Average Temperature:
Mortality (total number for week):
Average pH:
Water change: [ ] 1/4 tank [ ] 1/3 tank [ ] 1/2 tank
Weekly Water Testing
pH: Dissolved Oxygen:
Observations:
15Frequently Asked Questions
How large must the aquarium be?
A 55-gallon aquarium will easily accommodate 300 eggs. This is the standard size for New Jersey.
Where do the eggs go?
The eggs should be placed in a Vibert box or hatching basket in a single layer. This will make it easier to
remove dead eggs. The tray must float deep enough in the tank to provide adequate oxygenation and water
circulation for the eggs.
How much water circulation is needed?
A powerhead or riser tube attached to an air pump creates sufficient circulation in a 55- gallon tank. Water
circulation moves waste products (ammonia) away from the eggs and provides the eggs with oxygenated
water.
Should the water be filtered?
Filters can reduce the need for frequent water changes. Charcoal filters remove some of the waste products
and impurities from the aquarium. An undergravel filter traps particles as the water is drawn down through
the gravel. The microbes that develop in gravel function as a biofilter. They consume ammonia that fish
excrete and convert it to nitrogen. Food particles may be trapped underneath of this, and it should be
cleaned occasionally.
How often do I need to test the water?
Water should be tested at least once weekly. Inexpensive water testing kits are available from pet shops.
You should test for dissolved oxygen, pH, and ammonia. If there is ammonia build-up you can change 1/2 to
2/3 the water in the tank.
Can I use tap water in the aquarium?
The answer is yes and no. You cannot put water directly from the tap into the aquarium. The water needs to
sit for a day or so to lose the chlorine content. Fill a 5-gallon bucket and keep it handy for emergency water
changes. The water must be the same temperature as water in the tank.
Can We Release the Trout in Any Stream or Brook?
No! Trout raised in the classroom must be released at approved sites ONLY! To do otherwise would interfere
with native trout. You will need to get authorization from the NJ Division of Fish & Wildlife. (See Contact
Information for more on where and how to release trout.)
16Trout Journals
Raising trout in your classroom will provide many opportunities for students to use their observation skills. It
will also generate opportunities for recording, measuring, formulating and answering questions, writing,
illustrating, hypothesizing, and drawing conclusions. Journaling is a natural way for students to record their
findings about trout. Suggest students purchase a loose-leaf notebook to use as their trout journals.
Encourage them to write in the journals daily, focusing on notable events—from setting up the aquarium to
the release day. Descriptions of changes as the trout grow, drawings of them at various stages, observations
about trout behavior, and completed hand-outs should be included in journals. Below are some questions
you might pose to students as they observe the trout during different stages of development.
Alevin
Describe the alevin.
− What color are they?
− Do they have fins?
− What is most interesting about them? NOTES ON KEEPING A TROUT
− How well do alevin swim? JOURNAL
− What do alevin do when light shines on them?
− How might this reaction help them to survive To the student:
in the wild?
Fry
Observe how the fry move.
− How many fins are there? Draw the fish. Draw
and label the fins. A field journal is essential to a scientist's fieldwork.
As you observe the trout you will make sketches
− Describe the motion of each fish. What is the
and record all your observations, thoughts and
direction and range of movement?
questions in your field journal. Your field journal
− Do paired fins move together in the same
will be unique to you, reflecting your personal
way? Are some fins used more than others?
style. There is no “right” way to keep a field
− What happens to the fish’s fins when it is still? journal. Some scientists will sketch simple pencil
drawings, and others will paint colorful, detailed
Color images. You can use whatever tools work best for
− What colors can you identify on the fish? you. Try working with pens, pencils or watercolors
− Are the back and stomach the same color? to capture an image. Some people record their
Why do you think the fish are colored this observations in charts, list and labels, while others
way? will write long, detailed descriptions. Here are
− Which is easier to see, a fish swimming near some questions that may help you get started:
the top of the tank or near the gravel?
− What do I see?
Senses − What is the condition of the water in the tank?
− Do you think fish have good eyesight? Why? Temperature?
− Can fish hear? How do you know? − Do I see anything that surprises me?
− Can you see the lateral line? What purpose − How have the trout changed since the last
does it serve? time I observed them?
Behavior The answers to these questions, along with all
− What do fish do when they are startled? Why? your observations, interpretations, and data will be
− Do the fish move as a group? What is this a valuable source of information as you complete
called? your trout study. Did you know that scientists
− Are all the fish the same size? share their field journals? Their journals are a
− How do the fish interact with each other? permanent record of their work and are kept in
− Do individual fish have established areas of libraries for scientists to study in the future.
the aquarium that they stay in?
− What do fish do at feeding time? Do they all
get the same amount of food?
17Introducing Students to the Aquarium
Preparation:
The aquarium should be set up and running for a month before doing this activity.
Materials:
− Inspection chart (one per student)
− Water testing kit
Procedure:
1 Tell students that, during the next 6-8 months, they will participate in raising trout in the classroom. At
the end of that time they will go to a stream to release the trout into their natural habitat. Point out that
the purpose of the program is not to stock a stream, but to learn about fish development, water quality
and the problems wildlife, like trout, face in the wild. Emphasize that this program is not about raising
trout, but it is a lesson on coldwater conservation. Not all of your fish will survive. You may have none
survive.
2 Display the aquarium set up to students. Have them gather around as you describe the equipment and
the purpose of each item. Tell students that one important aspect of raising trout will be monitoring the
trout, the water, and the equipment. Display and distribute the daily inspection charts to students. Tell
students the charts will provide the class with valuable data that can be used to evaluate the project
and improve it.
3 Discuss with students what their roles will be during the project. Explain that every student will keep a
journal in which they will record their observations of the trout both in words and in drawings. In
addition, they will each be responsible for monitoring the aquarium. Each week three students will do
daily monitoring of the aquarium. At the end of the week, one student will leave the team and a new
student will join the team. Using this rotating basis there will always be experienced students
monitoring the aquarium. At the end of the program they will all participate in the release.
4 Do a “run-through” of how students will monitor the aquarium. Ask students to fill out the daily
inspection chart as they complete the inspection with you. Conduct the water quality testing using the
instruction in your test kit. Point out that the water quality will change when eggs are introduced to the
tank and that it is critical to trout survival to maintain a healthy water quality.
5 Provide time for students to draw and label a diagram of the aquarium and equipment in their journals.
18Lesson 1: The Trout Body
Preparation:
Duplicate Trout Body handout and Trout Body crossword.
Materials:
– Trout Body handout (one per student)
– Trout Body Crossword (one per student)
– Index cards (one per student)
Standard Correlations:
NJ CCCS Science 5.5 Grade 8 A.2, B.1
Procedure:
1 Briefly discuss with students how our senses and our physical features allow us to function in our
environment. Point out that humans move through air; trout through water. Ask students to think about
how things might look, taste, smell, sound, and feel in a water environment. If necessary, use these
questions to stimulate discussion.
– What physical features would an animal, like a trout, need to function in a water environment?
– What sort of body shape would a trout need to move quickly through the water?
– What helps propel a trout through the water?
– What sense organs help a trout find food?
2 Have students work in small groups. Explain that they are going to examine the features of a trout and
how those features help the trout function in its environment. Distribute the Trout Body hand-out to
students. Instruct them to read the information on the hand-out and to identify each body part and how
it helps the trout to function. (Allow 15 minutes)
3 Distribute one index card to each student. Have students write a question about a trout feature on the
front of the card and the answer on the back. For example, “What is the biggest fin?” (answer: caudal
fin). Collect the cards and use them to play a quick question-answer game.
4 Have students draw and label a diagram of a trout in their journals.
5 Distribute Trout Body crossword to students to complete during their free time.
19Trout Body
Mouth: Trout do
not gulp their food,
they suck it up
using their mouths.
Mouths are also
used to feel things.
Kype: The kype is
the hooked part of
the lower jaw.
Males use the
kype to fight over
mates during
spawning time.
Nare: The nare is a closed sac and functions as a nostril, helping the trout to detect odors.
Gills: Gills work much the same way our lungs do. Trout draw water in through their mouths. The water
passes through the gills where oxygen is exchanged for carbon dioxide.
Operculum: The delicate gills are covered by a hard plate called the operculum.
Eyes: The eyes provide sight. The pupil has a slight triangle shape which gives the trout a larger field of
vision.
Lateral line: This sense organ runs from the operculum to the tail. This sensor detects pressure waves or
vibrations. It helps the trout maintain position without bumping into other fish or objects in the water.
Vent: The vent is an opening through which extra water is excreted. The vent is the opening through which
eggs or sperm (milt) pass during spawning.
Caudal fin: The caudal fin or tail fin is the biggest fin. It provides the “push” for the trout to start moving and
also acts as a rudder for steering through the water.
Dorsal fin: The dorsal fin is used for swimming and stabilization.
Anal fin: The anal fin is used for swimming and stabilization.
Adipose fin: The adipose fin is used for swimming and stabilization. (Adipose means that it is a “fatty” fin
without rays.)
Pectoral fins: The pectoral fins are paired fins which act as brakes and help with side to side movement.
They are below the gills.
Pelvic fins: The pelvic or ventral fins are paired fins which are set back from the pectoral fins. They help with
up and down movement.
20Trout Body Crossword
Across Down
2 the fin that gives the trout a ‘push’ and acts as a 1 the hooked part of the lower jaw
rudder 3 this “fatty” fin does not have rays
4 a hard plate covering the gills 5 fins below the gills
7 this fin is used as a brake and helps with up and 6 the trout use this body part to suck up
down movement food
10 the opening through which eggs or sperm (milt) 8 this line is a sense organ running from
pass during spawning the operculum to the tail
12 these organs have triangle-shaped pupils 9 one of the fins used for swimming and
13 one of the fins used for swimming and stabilization
stabilization 11 this organ helps the trout detect odors
14 this organ works the same way our lungs do
1
2 3
4 5 6
7 8 9
10 11
12
13
14
21Lesson 2: Trout Dissection
Preparation:
Read the background information on trout anatomy and functions. Duplicate Fish Anatomy diagram (one for
each student).
Materials:
– A fresh, whole trout
– Dissecting scissors
– Tweezers or forceps
– Newspapers
– Probe
– Paper towels
– Magnifying glass
– Fish Anatomy diagram
Standard Correlations:
NJ CCCS Science 5.5 Grade 8 A.2, B.1
Procedure:
1 Choose a location where all students can view the dissection clearly. Cover the surface with
newspaper. Refer to the reference sheet (if needed) to help explain the function of each organ or
characteristic.
2 Have students feel the fish’s skin and discuss what purpose the slime serves. (It protects against
growth of fungus and it allows the fish to glide more easily through the water.) Have students use the
magnifying glass to carefully examine the scales and note how they are arranged.
3 Have students describe the color pattern of the fish and talk about the function of coloration (protection,
camouflage).
4 Observe the lateral line. Discuss what it is used for and the way it works.
5 Have students describe the fish’s overall shape and how this adaptation is beneficial to the fish. Look at
the placement of the fins and ask students to imagine the fish swimming in the water. How does it
move? How are the fins used? Note the range of movement of each fin.
6 Allow students to feel the bony rays that support the fins. Have a volunteer count the number of rays on
the anal fin. Point out that this is one of the most distinguishing characteristics of salmonids.
7 Note the size of the eye. Its relatively large size, and the large pupil tells us how important vision is for
this animal. Have students note that there is no eyelid. Have them observe the tough, clear membrane
that covers the eye. Rotate the eye in the socket.
8 Locate the nostrils. Describe the large olfactory lobes that are located in the brain. Ask students to
speculate why a salmonid’s smell receptors are so highly developed.
9 Open the mouth and have students note the color of the gums. Have volunteers feel the teeth along the
gum margins and on the roof of the mouth. Ask students what function these teeth perform. Are they
used for chewing? (The teeth are used for grasping and holding onto prey.) Make note how wide the
mouth can open and have them comment on why this is so. Point out that the mouth is also used for
22breathing. In low oxygen conditions, fish can actively pump water over gills by opening and closing the
mouth. Demonstrate this action with the fish’s mouth.
10 Point out the gills arches by having students look down the fish’s mouth. Use a probe to separate the
arches and explore how they are arranged.
11 Place the fish on its side and look at the operculum—the bony plates which protect the gills. Lift the
operculum and look at the gills. Cut the operculum away from its base, exposing the gills.
12 Remove the gills by cutting the upper and lower attachments of the arch. Look at the gill rakers, the
bony projections along the inside curve of the arches. Observe the large surface area provided by the
gill filaments, and the thin tissue which allows blood vessels to come into contact with the oxygen in the
water. Compare and contrast gills and lungs.
13 Carefully cut the fish open using the scissors or scalpel. Before moving any organs, let students
observe how all the internal organs fit together. Look for the thin transparent membrane that encloses
the organs. Cut away the flap of skin and look for fat deposits, which are found around the stomach.
14 Look for the swim bladder. It is made of very thin tissue and is located in the upper body cavity, below
the kidneys. It will be less developed in small fish and since it will not be inflated, it may be hard to find.
If you can’t find it, point to its location and discuss its function.
15 The male reproductive organs will be a flaccid white or orange tissue near the intestines. Eggs may or
may not be noticeable in females. They will vary in size depending on the maturity of the fish.
16 Put the fish on its back and find the kidneys, located just under the backbone. They are thin, dark in
color and run the whole length of the body cavity. Call on a volunteer to discuss the function of the
kidneys.
17 Investigate the digestive track by starting in the mouth and following the route that food would take. Put
the probe through the mouth and into the esophagus to show the beginning of the route. Then follow
the course of the stomach using your finger or the probe. The first area of the stomach is called the
cardiac stomach; this is where digestion begins. Have students notice the different kinds of tissue that
make up the stomach.
18 The pyloric stomach is that portion from which the pyloric ceca project. It begins at the bend below the
cardiac stomach, and is made of different tissue. Discuss how the stomach area is increased by the
pyloric ceca and how this improves the function of the stomach.
19 The intestines extract nutrients from food. Notice the network of blood vessels which are used for
nutrient exchange. Follow the intestines to the anal opening, where waste products are eliminated.
20 Lift the stomach to show the spleen. It is a reddish organ found at the end of the cardiac stomach. Ask
a volunteer to discuss the spleen’s function.
21 The liver is in front of the stomach. Discuss the liver’s role in the digestion of fats. Point out the gall
bladder, a mass of darker tissue on the liver.
2322 Move the liver to locate the heart—which can be found near the fish’s mouth. You should be able to
make out the different chambers. Point out that the fact that the gills, heart, and liver are so close
together is no accident. Blood pressure is best near the heart (pump). Blood is filtered by the liver, and
absorbs oxygen from the gills; both are vital functions.
23 Cut through the fish to expose the backbone and muscles and have students note the arrangement of
muscle mass. Point out that this is the part of the fish that we eat.
24 Carefully cut away the skin by lifting it while running the scalpel along the skin-muscle interface. If you
have a small fish, the skin may be thin enough to place under a microscope. If so, observe the pattern
of the scales, the growth rings on the scales. If the skin is too thick, use a magnifying glass. Try to
remove some of the scales so that you can look at the rings.
25 Discuss with students how the trout’s body parts and functions compare to a mammal’s.
26 Distribute the Fish Anatomy diagram to students. Have them label the organs and include the diagram
in their Trout Journals.
24Trout Anatomy
All animals are adapted to their environments.
The streamlined shape of trout allows them to Ears: Trout hear well, although there are no
swim through the water with the minimum of external openings to the inner ear mechanism.
resistance. They can maintain their position in a The inner ear is composed of chambers that
stream with little effort. contain pieces of bone, called otoliths. As the trout
moves through the water, the bones move and hit
EXTERNAL FEATURES against nerve endings, sending messages to the
brain.
Skin: The outer layer of skin, the epidermis,
contains pigment cells and mucous glands. The Lateral Line: This mucous-filled canal runs the
dermis is the layer of skin that lies under the length of the trout and is located in the skin. The
epidermis. It contains nerves, blood vessels, and lateral line acts as a sonar device, picking up
connective tissue. The trout’s scales grow from vibrations by movement in the water or on nearby
and are imbedded in the dermis. land.
Scales: imbedded in the dermis, only a small INTERNAL SYSTEMS
portion of each scale is visible. The scales overlap
with their margins pointing toward the tail. This Nervous System: As in most vertebrates, the
helps to reduce friction in the water. Scales grow nervous system is made up of the brain, spinal
with the fish. The age of a trout can be determined column, and nerves. The trout’s brain is encased
by counting the concentric rings on a scale. in a bony skull.
Teeth: Teeth can be found along the margins of Olfactory and optic lobes: process information
the upper and lower jaws. from the nostrils and eyes.
Semi-circular canals: help maintain balance
Fins: The fins (except for the adipose fin) are Cerebellum: controls muscle movement
composed of a tough membrane that is supported Medula: controls vital processes, such as
by bony fin rays. heart rate and respiration
The caudal fin, or tail fin, propels the trout Nerves: send impulses to the brain, which
through the water and helps it to stay upright. reacts to the stimuli.
Females use the caudal fin as a fan when
making a redd. Respiratory System: The gills take in oxygen and
The anal fin helps the trout propel forward, eliminate gaseous waste. Water is taken in
balance and steer. through the mouth and passes through gill
The dorsal fin helps the trout to stay upright openings. The gill arches have filaments along
and on course. their back edges. Blood flows through the very
The pelvic and pectoral fins, the paired fins, thin filament, which allows for waste to be
help the trout maneuver, turn, brake, and exchanged for oxygen. Gill rakers on the edges of
balance. the arches strain particles out of the water to
The adipose fin is a fatty fin. It is used for prevent injury or clogging to the gills.
swimming and stabilization.
Skeletal and Muscular Systems: The trout’s
SENSORY ORGANS skeleton is comprised of bone and cartilage. Its
muscles are laid down in segments and have thin
Eyes: Trout can see things both near and far sheets of connective tissue between each
away. The eyes have large pupils which allow segment. Muscles are connected to the tissue.
available light to be admitted. This is probably why Dark muscle tissue has better blood circulation
trout tend to stay away from sunny areas. and is used for prolonged activity, such as
swimming. Light muscle tissue has less of an
Nostrils: Trout have a well-developed sense of oxygen supply and is used for short bursts of
smell. The nostrils are covered with flaps that activity.
guide incoming water into the olfactory sac, which
contains the smell receptors. Water passes Circulatory System: The heart and blood vessels
through the sac and exits through another carry oxygen from the gills to the tissues and carry
opening in the nostril. waste back to the gills and kidneys.
25Kidneys: The kidneys filter
Digestive System: waste from the blood stream
When a trout eats and also manufacture blood.
both food and water Two canals, ureters, carry
enter its mouth. waste from the kidneys to
Water is directed to the bladder. From the
the gills and food to bladder, the waste passes to
the esophagus which the outside.
leads to the stomach.
In the stomach food is Swim Bladder: The swim
mixed with bladder allows the trout to
hydrochloric acid and remain suspended in the
mucous and then water at any depth. Air
passes to the enters the swim bladder
intestines. Food is through a duct when the fish
broken down in the gulps air.
intestines by
enzymes. Nutrients Reproductive System: The
are absorbed. Waste gonads produce the sex
is eliminated through cells. The females ovaries
the anus. are generally an orange hue
and appear granular. The
Liver: The liver granules are developing
produces bile which is eggs. The male testes are
stored in the gall limp white organs which
bladder. The bile produce sperm. Sperm and
breaks down fat. eggs pass through
passageways from the
Spleen: The spleen gonads to the urogenital
manufactures and opening.
stores blood.
Trout Anatomy
26Lesson 3: Trout Life Cycle
Preparation:
Duplicate the Trout Life Cycle handout.
Materials:
– Trout Life Cycle handout
Standard Correlations:
NJ CCCS Science 5.5 Grade 4 A.1, C.1, Grade 6 C.1, Science 5.10 Grade 6 A.1
Procedure:
1 Call on students to describe what a life cycle is. Tell students they are going to work in groups to learn
about the life cycle of the trout. Then each group will use their creative talents to present the life cycle
of the trout to the rest of the class. Distribute Trout Life Cycle hand-out to students.
2 Brainstorm with students to discover some creative ways of presenting the trout life cycle. Encourage
ideas such as: presenting the life cycle in a play, a short story, or poetry; present the life cycle in a
series of artistic drawings or a poster; make up a song with lyrics that describe the life cycle and
present it to the class. After brainstorming, have students work in small groups.
3 The groups should decide how they will present their life cycle. Each member should be responsible for
some aspect of the presentation.
4 Groups can work on their presentations during class time or as a homework activity. When groups are
ready, set aside time for groups to make their presentations to the rest of the class. Afterwards, discuss
which presentations were the most informative and the most engaging.
27Trout life cycle
28
The eggs
develop and
hatch into
alevins.
When the sacs are
Trout spawn in
consumed, the tiny fish, As they grow, they
gravel stream
called fry, swim out of the move to the main
bottoms. The
gravel to find food. They current of the
female digs a redd Alevins remain in the gravel.
stay near the stream bank stream. They feed
with her body and They obtain nourishment
where the water is calmer on insects and small
deposits eggs. from their yolk sacs.
until they grow bigger. animals that live in
The male deposits
sperm (milt) over or fall into the
the eggs. The stream.
eggs are covered
with gravel.
Some trout may live in
lakes, but often return to
streams to spawn.
Trout mature at age three and
rarely live past the age of five.Lesson 4: What Trout Need
Preparation:
Review Creating a Fish Habitat in Your Classroom. Duplicate the brook trout information sheet for students.
Materials:
– Brook Trout information sheet
Standard Correlations:
NJ CCCS Science 5.5 Grade 8 A.2, Grade 12 A.4, Science 5.10 Grade 6 A.1
Procedure:
1 Discuss with students how the aquarium will simulate a trout’s environment in nature. Review the
conditions for trout development. Copy this chart on the board:
Conditions for Trout Development
In Nature In the Aquarium
Limited light
Cold water (42° F. to 55° F.)
Oxygen
Clean water
pH (6.5 to 7.5)
Predators
Food
2 Have students work in small groups. Distribute the Trout Information Sheet to each student. Give
groups 20 minutes to read the sheets and to discuss how a trout’s natural habitat meets the conditions
listed.
3 Allow time for groups to share their findings. Record responses on the board. For each item, call on
students to say how the aquarium will meet those same conditions.
4 After the discussion, have students copy the chart in their journals.
29Brook Trout Salvelinus fontinalis
Brook trout are native to the northeastern United States and Canada. Brook trout require
clean, clear, cold streams with temperatures ranging from 53° F. to 60° F. They generally
live in spring-fed streams with many pools and riffles. There they hide in undercut banks,
under large rocks, in deep pools and near banks with overhanging trees and plants. Brook
trout are mostly carnivorous. They feed on many water and land insects such as mayflies,
caddis flies, midges and beetles. As they increase in size they will go after larger prey,
such as leeches, small fish, mollusks, frogs, and salamanders.
Brook trout spawn in late fall in shallow, gravelly areas of streams with clean bottoms and
good water flows. Spring-fed headwaters are ideal, but they will also spawn in the gravel-
bottomed areas of lakes where spring waters occur. The female uses her body to made a
redd in the gravel. The redd is about 4 to 6 inches deep. The female lays eggs and the
male deposits sperm. After spawning, the female covers the eggs with gravel. Over the
winter the eggs slowly develop. Clean, oxygenated water flowing through the redd keeps
the eggs clean and helps them to develop successfully.
When alevins hatch in late spring they have a yolk sac attached. They remain in the gravel
and grow using nourishment from the yolk sac. When the yolk sacs are absorbed the fry
emerge from the gravel and begin to search for food. They feed on aquatic insects. They
reach a size of 2 to 4 inches in a year. They are preyed upon by larger fish, birds, and
small mammals, such as otters and minks.
Brook trout are the only trout that are native to New Jersey – they were here before
European settlers colonized our state. For more than 100 years, people have introduced
many other kinds of fish into New Jersey, including rainbow trout (from the western U.S.)
and brown trout (from Europe). The brook trout has been designated as the “state fish”.
30Lesson 5: Trout in the Ecosystem
Preparation:
Duplicate Trout in the Ecosystem handout (one for each student).
Materials:
– Trout in the Ecosystem handout
– Scissors
– Glue or tape
– Additional sheets of paper
Standard Correlations:
NJ CCCS Science 5.5 Grade 8 A.2, Grade 12 A.4, Science 5.10 Grade 6 A.1, B.1, Grade 12 B.1
Procedure:
1 Call on students to define ecosystem. (Answers should include all the living and nonliving things in an
area. There is an interaction among living and nonliving things in an ecosystem.) Ask students to
consider the ecosystem that trout inhabit and to name some of the living and nonliving things in that
ecosystem. Write their responses on the board. (Answers can include: sun [energy], algae, water
plants, insect larvae, insects, small fish, frogs, turtles, snakes, trout.)
2 Ask students to define food chain. (Answers should include that a food chain moves the sun’s energy
through a community from producers to consumers.) Point out that in a food chain there are producers
and consumers. Have students identify which of their responses are producers and which are
consumers (Algae and water plants are producers; insect larvae, fish, frogs, turtles, and trout are
consumers.)
3 Write minnow, dragonfly, algae, caddisfly larva, trout, and sun on the board. Call on a volunteer to use
these examples to draw a diagram showing how the energy moves through this food chain. Ask for
volunteers to help explain the flow of energy. (Answer: the sun provides energy for the algae to grow;
algae is consumed by caddisfly larva; larva consumed by dragonfly; dragonfly consumed by minnow;
minnow consumed by trout.)
4 Point out to students that there are other ways of showing energy flow through an ecosystem. In an
Energy Pyramid the producers are at the base and the top consumer at the tip of the pyramid. As you
move from the base to the tip there is less and less food and energy available. Ask students to define a
food web and discuss how it is different from food chains and energy pyramids. (Answers should
include that a food web shows the relationship between all of the species in an environment. It shows
the competition for food and is basically a map of overlapping food chains.) Point out that every food
chain and food web ends with decomposers-- worms, insects, bacteria, and fungi--organisms that
break down dead organisms and waste into matter that can be absorbed by the decomposers or
returned to the environment to be used by producers.
5 Have students work with a partner. Distribute Trout in the Ecosystem handout to each student. Explain
that partners will use one two-page handout to create an energy pyramid. The other two-page handout
will be used to create a food web. Instruct students to cut out the pictures and to arrange them on a
separate piece of paper into an energy pyramid. With the other pictures they are to construct a food
web, drawing arrows to show the relationship among the members of that community.
6 When students have finished have them share and compare their energy pyramids and food webs.
Discuss with them what would happen if some of the members of community died. How would it effect
the trout?
31You can also read