Welcome guide - Alta Window Fashions
←
→
Page content transcription
If your browser does not render page correctly, please read the page content below
Ask us about our many products that are certified Best for Kids.
  They are best suited for use in homes with young children.

                                                                                 welcome guide
                                                                   #ALTWELCOME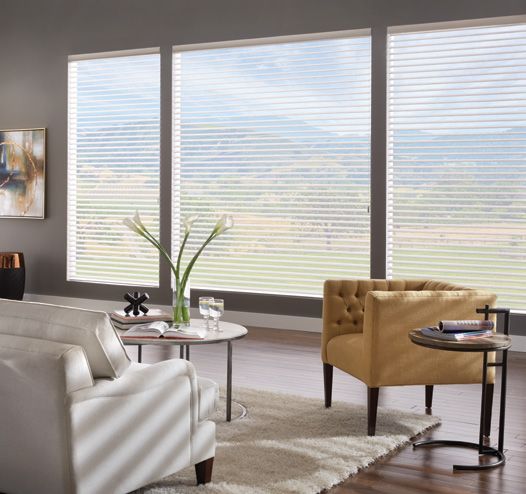
Congratulations,
you’ve made a
great choice!
And thank you for making that choice Alta.

We take our customer’s experience very
personally. After all, we are part of your most
personal space. Your home. For over four
decades, we have delivered on our promise
of enduring style and quality. Our pledge is
to deliver that same experience for your next
project. And the project after that.

Because with Alta, you have a partner for life.

Take a look:
l   Instructions for easy care and maintenance
l   Directions for safely and correctly
    operating your new window coverings
l   Limited Lifetime Warranty

With our appreciation,

the Alta team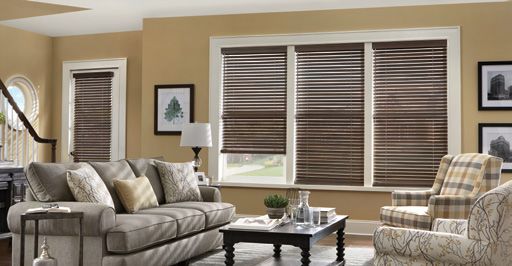
// Honeycomb and Cellular Shades                                                                                         // Wood & Faux Wood Blinds

Care & Cleaning Guidelines                                    Operating Instructions                                      Care & Cleaning Guidelines                                  Operating Instructions
Alta Honeycomb Shades are 100% polyester and are              Cordless Lift Shades                                        Dusting Dust your blinds regularly using an ordinary        Aligning Your Blind: After the blind is installed, tilt it
treated to help resist dust, dirt, and stains.                Firmly grasp the handle or center of the bottomrail,        soft, clean cloth, chemically-treated dust cloth or mitt,   open, then raise and lower it several times. This will
Dusting Dust your shades regularly using an ordinary          then lift or lower the shade to the desired position.       feather-like duster, or cylindrical dust brush specially    allow the cords and slats to align themselves.
soft, clean cloth, dust cloth or mitt, feather-like duster,                                                               designed for blinds.                                        Cordless Lift Blinds
                                                              Cordless Lift & Lock™ Shades
or cylindrical dust brush specially designed for shades.      Push and hold the button on the bottomrail handle.          Vacuuming For deeper cleaning, vacuum gently with a         Firmly grasp the center of the bottomrail, then lift
Vacuuming For deeper cleaning, vacuum gently with a           Lift or lower the shade to the desired position, then       brush attachment.                                           or lower the blind to the desired position.
brush attachment.                                             release the button to lock the shade into place.            Compressed Air/Hair Dryer                                   Cordless Lift & Lock™ Blinds
Compressed Air/Hair Dryer Use a can of compressed             Motorization                                                Use a can of compressed air or a hand-held hair dryer       Push and hold the button on the bottomrail to lift or
air or a hand-held hair dryer on the COOL setting to          Push the up or down botton on the remote or                 on the COOL setting to blow off dust and debris.            lower the blind. Release the button to lock the blind
blow off dust and debris.                                     PowerWand™ to raise or lower shades.                        Spot Cleaning Faux Wood Blinds only.                        into place.
Spot Cleaning Use a soft cloth or sponge moistened            Standard Rectangular and                                    Use a soft cloth or sponge moistened with lukewarm          Motorization
with lukewarm water and mild detergent. Blot gently to        Top-Down/Bottom-Up Shades                                   water and mild detergent if needed. DO NOT USE to           Press button on remote to tilt slats open and closed.
avoid creasing or damaging the fabric.                        Raising Your Shade: Pull the cord toward the center of      clean Wood Blinds.                                          Standard Blinds
Bathtub Cleaning/Water Immersion                              the shade (approximately 30° from vertical) until the       Bathtub Cleaning/Water Immersion                            Tilting The Slats: Pull down on either one of the tilt
This method can be used for most, but not all,                lock is released. Continue pulling the cord at this angle   Faux Wood Blinds without cloth tapes only.                  cords or twist the tilt wand until slats reach the desired
honeycomb fabrics. DO NOT USE with any SoftStyle              until the shade reaches the desired position. To lock,      DO NOT USE to clean Wood Blinds.                            position.
fabrics or Blackout fabrics. DO NOT immerse headrails         move the cord back toward the edge of the shade and         Immerse entire blind in lukewarm water with a mild          Raising Your Blind: Ensure slats are in the open position,
on any operating system other than standard cordlock.         release.                                                    detergent and gently move the water around with             then pull the lift cord downward until the blind reaches
Immerse entire shade in lukewarm water with a mild            Lowering Your Shade: Pull the cord toward the center of     your fingers. Rinse with clear water. Close blind before    the desired height. Release the cord and the blind will
detergent and gently move the water around with your          the shade (approximately 30° from vertical) until the       removing, and hold vertically allowing the excess water     automatically lock into place.
fingers. Rinse with clear water. Close shade before           lock is released. Let the cord slip slowly through your     to drain off. Re-install the damp blind into the window.
                                                                                                                                                                                      Lowering Your Blind: Gently pull the cord toward the
removing, and hold vertically allowing the excess water       fingers until the shade reaches the desired position. To    Lower the blind all the way down and allow to dry
                                                                                                                                                                                      center of the blind until the lock releases. Let the cord
to drain off. Re-install the damp shade into the window.      lock, move the cord back to the edge of the shade.          completely.
                                                                                                                                                                                      slip slowly through your fingers until the blind reaches
Lower the shade all the way down and allow to dry             Continuous Cord Loop Shades                                                                                             the desired height. Move the cord toward the outside
completely.                                                   Pull gently on the front or back of the cord loop                                                                       of the blind and release. The blind will automatically
Ultrasonic Cleaning Professional ultrasonic cleaning          to lift or lower the shade.                                                                                             lock into place.
is recommended for most, but not all, Honeycomb               NOTE: If the cord tensioner moves up the cord while
fabrics. DO NOT USE with any Blackout fabrics.                operating, you have not secured it to the wall or window
Injection/Extraction Cleaning This type of cleaning           frame. You must do so for the shade to operate properly.
injects a cleaning solution into the fabric and
                                                              Vertical Application
immediately extracts the dirty solution. The service is
                                                              Grasp the handle on the side rail and pull the shade
typically performed in the home.
                                                              back and forth across the window.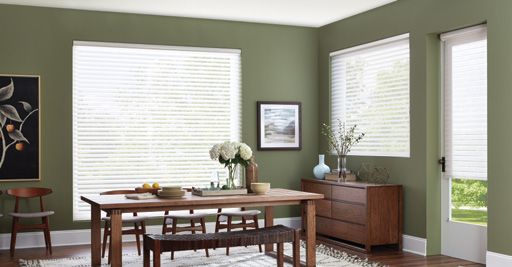
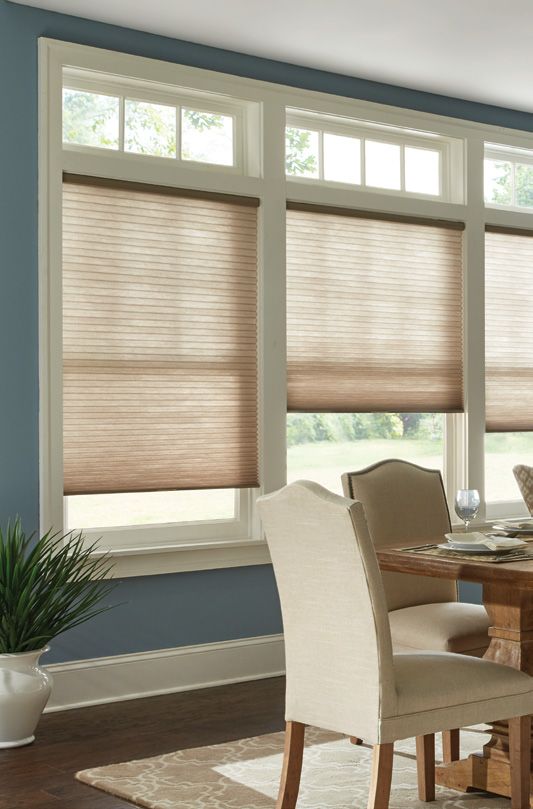
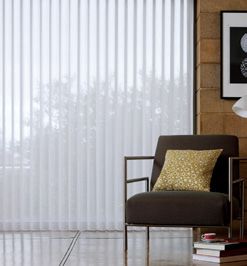
// Window Shadings // Vertical Shadings // Dual Shades
Care & Cleaning Guidelines weight needs to be adjusted. To do so, release the Care & Cleaning Guidelines Care & Cleaning Guidelines
weight clips on the bottomrail by inserting a flat blade
Alta Window Shadings are 100% polyester and are Alta Vertical Shadings are 100% polyester and are Alta Dual Shades are 100% polyester and are treated to
screwdriver into the weight clip and turning clockwise.
treated to help resist dust, dirt, and stains. treated to help resist dust, dirt, and stains. help resist dust, dirt, and stains.
Move the weight in 1" increments toward the side
Dusting Dust your shadings regularly using an ordinary where the fabric is gathering. Secure the weight clips Dusting Dust your shadings regularly using an ordinary Dusting Dust your shades regularly using a feather-like
soft, clean cloth, dust cloth or mitt, feather-like duster, back into position by counterclockwise after making soft, clean cloth, dust cloth or mitt, duster, or cylindrical dust brush specially designed for
or cylindrical dust brush specially designed for shades. the adjustment. Test and adjust again as necessary. feather-like duster, or cylindrical dust brush designed shades.
DO NOT USE magnetic cleaners such as a dusting mitt for shades.
on light-dimming fabrics. This will damage the light- Motorization Compressed Air/Hair Dryer Use a can of compressed
Separate instructions available. DO NOT USE magnetic cleaners such as a dusting air or a hand-held hair dryer on the COOL setting to
dimming backing. mitt on light-dimming fabrics, for it will damage the
Continuous Loop Control blow off dust and debris.
Vacuuming For deeper cleaning, vacuum gently with a backing.
brush attachment. Lower Shading/Open Vanes: Pull the rear cord of the Ultrasonic Cleaning Professional ultrasonic cleaning
cord loop down to lower the shading. With the shading Compressed Air/Hair Dryer Use a can of compressed
Compressed Air/Hair Dryer Use a can of compressed air or a hand-held hair dryer on the COOL setting to is recommended for Dual Shades.
fully lowered, continue to pull the rear cord to tilt the
air or a hand-held hair dryer on the COOL setting to bottom rail and open the vanes. blow off dust and debris. Injection/Extraction Cleaning This type of cleaning
blow off dust and debris. Ultrasonic Cleaning Professional ultrasonic cleaning is injects a cleaning solution into the fabric and
Close Vanes/Raise Shading: Pull the front cord of the
Ultrasonic Cleaning Professional ultrasonic cleaning recommended for Vertical Shadings. immediately extracts the dirty solution. The service is
cord loop down to close the vanes and raise the
is recommended for Window Shadings. shading. typically performed in the home.
Injection/Extraction Cleaning This type of cleaning
Injection/Extraction Cleaning This type of cleaning NOTE: If the cord tensioner moves up the cord injects a cleaning solution into the fabric and NOTE: Dual Shades should not be vacuumed or spot-
injects a cleaning solution into the fabric and while operating, you have not secured it to the wall immediately extracts the dirty solution. The service is cleaned.
immediately extracts the dirty solution. The service or window frame. You must do so for the shading to typically performed in the home.
is typically performed in the home. operate properly.
Operating Instructions Operating Instructions
Retractable Cord Control
Operating Instructions Lower Shading/Open Vanes: Pull cord down toward Wand/Cord Combination Control
Motorization
Cordless the center of the shading with long strokes. Allow Rotating the Vanes: With the shading fully traversed Press button on remote or PowerWand to raise and
Lower Shading/Open Vanes: Gently pull down on handle. cord to retract completely into the headrail after each across the window, grasp the wand tether in one hand lower shades, as well as adjust band position.
(Handle will retract when released.) When shading is downward stroke. Continue untilshading is fully and the bottom handle in the other. Twist the bottom Continuous Loop Control
fully lowered, continue pulling down on the handle lowered and vanes are open. While lowering, stop handle left or right to open or close vanes. Lowering the Shade: Hold the back of the cord loop and
until the vanes open to desired position. shading at any point by moving the cord back toward Traversing The Vanes: Rotate the vanes to the fully open pull down until shade reaches desired position.
the vertical position. position. Then pull down on either side of the cord to
lose Vanes/Raise Shading: Slightly pull down on handle
C Raising the Shade: Hold the front of the cord loop and
(about 1") and release. Thevanes will close first, then Note: The shading must be in the fully lowered draw the shading across the window. pull down until the shade reaches desired position.
shading will retract into headrail. position before the vanes can be opened.
Safety Wand Operation NOTE: If the cord tensioner moves up the cord while
Tilt Vanes/Raise Shading: Pull cord straight down,or
NOTE: To reposition the shading, it must be raised Rotating the Vanes: With the shading fully traversed operating, you have not secured it to the wall or window
down and slightly out,with long strokes. With each
several inches first to reset the mechanism and then across the window, twist the wand to the left or right frame. You must do so for the shade to operate properly.
stroke the shading partially raises. Allow cord to retract
pulled down to the new position. to open or close vanes to the desired position.
completely into headrail after each downward stroke.
IMPORTANT: If the shading raises or lowers unevenly, Use multiple strokes until shading reaches desired Traversing The Vanes: Rotate the vanes to the fully
the fabric rubs against one end of the headrail, or the position. The shading can be stopped at any point open position. Then push or pull the wand to draw the
bottomrail is uneven when fully raised, the bottomrail while raising. shading across the window.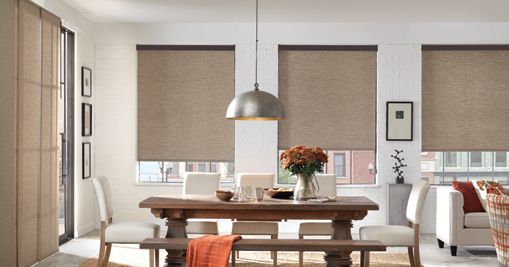
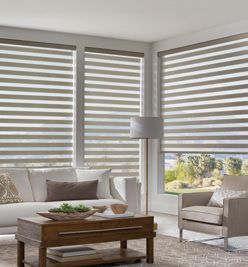
// Shades: Roller // Panel Track // Natural Wovens // Aluminum Blinds
Care & Cleaning Guidelines Care & Cleaning Guidelines
Dusting Dust your shades regularly using an ordinary Alta Aluminum Blinds are treated with an anti-static
soft, clean cloth, dust cloth or mitt, feather-like duster, paint additive that helps inhibit dust build-up.
or cylindrical dust brush specially designed for shades. Dusting Dust your blinds regularly using an ordinary
Vacuuming For deeper cleaning, vacuum gently with a soft, clean cloth, chemically-treated dust cloth or mitt,
brush attachment. feather-like duster, or cylindrical dust brush specially
Care & Cleaning Guidelines Operating Instructions designed for blinds.
Compressed Air/Hair Dryer Use a can of compressed
Dusting Dust your shades regularly using an ordinary ROLLER SHADES
air or a hand-held hair dryer on the COOL setting to Vacuuming For deeper cleaning, vacuum gently with a
soft, clean cloth, dust cloth or mitt, feather-like duster, TouchLift Cordless Control
blow off dust and debris. brush attachment.
or cylindrical dust brush specially designed for shades. Lowering Your Shade: Grasp the handle or center of
the bottomrail and gently pull the shade down to the Compressed Air/Hair Dryer Use a can of compressed
Vacuuming For deeper cleaning, vacuum gently with a
brush attachment. desired position. Release the shade and it will lock Operating Instructions air or a hand-held hair dryer on the COOL setting to
into position. blow off dust and debris.
Cordless Breeze Shades
Compressed Air/Hair Dryer Use a can of compressed Spot Cleaning Use a soft cloth or sponge moistened
Raising Your Shade: Gently pull the handle or center Grasp the bottomrail with two hands, then lift or
air or a hand-held hair dryer on the COOL setting to with lukewarm water and mild detergent.
of the bottomrail down slightly to release the locking lower the shade to the desired position.
blow off dust and debris.
mechanism, then guide the shade to the desired Motorization Bathtub Cleaning/Water Immersion
Spot Cleaning (Screen shades and vinyls only) position. Then gently pull down slightly to engage Press button on remote to raise and lower shades. This method can be used for all Aluminum Blinds
Use a soft cloth or sponge moistened with lukewarm the lock.
Standard Rectangular And except 2" Blinds with cloth tapes.
water and mild detergent. Blot gently to avoid creasing
or damaging the fabric. DO NOT USE this method on Motorization Top-Down/Bottom-Up Shades Immerse entire blind in lukewarm water with a mild
delicate woven fabrics. Press button on remote or PowerWand to raise and Lifting Your Shade: Pull the lift cord down and toward detergent and gently move the water around with your
lower shades. the left of the shade to unlock the cordlock, then fingers. Rinse with clear water. Lift the blind from the
Beaded Chain Control continue pulling on the cord until the shade reaches water and hold vertically allowing the excess water to
Raising and Lowering Your Shade: Pull gently on the the desired height. To lock the shade into position, pull drain off. Lightly pat dry with a soft towel. Re-install
front or back of the tensioner-secured beaded chain the cord sharply to the right of the shade and release. the blind into the window. Lower the blind all the way
to lift or lower the shade. Lowering Your Shade: Pull the cord down and toward the down and allow to dry completely.
NOTE: If the tensioner moves up the chain while left of the shade to unlock the cordlock, then let the
operating, you have not secured it to the wall or window cord slip slowly through your fingers until the shade Operating Instructions
frame. You must do so for the shade to operate properly. reaches the desired position. To lock the shade into Aligning Your Blind: Tilt slats open, then raise and lower
position, pull the cord sharply to the right of the shade blind several times to allow the cords and slats to align
PANEL TRACK and release. themselves.
Safety Wand Operation
NOTE: Do not try to raise the shade any higher than it Cordless Lift & Lock: Push and hold the button on the
Traversing the Panels: Push or pull the wand to draw
was intended to go. If the shade binds, check the cord bottomrail to lift or lower the blind. Release the button
the panels across the window.
alignment to ensure that the cords are not jamming. to lock the blind into place.
Cord Draw Operation Continuous Loop Control Shades Tilting Slats Open and Closed: Twist the tilt wand until
Pull down on the tensioner-secured cord to draw the Pull gently on the front or back of the cord loop to the slats reach the desired position.
panels across the window. lift or lower the shade to the desired position. Do not Raising Your Cordlock Blind: Open slats, then pull the
try to raise the shade any higher than it was intended lift cord downward until the blind reaches the desired
to go. If the shade becomes uneven, lower the shade height. Release the cord to lock into place.
completely to realign the shade lift cords.
Lowering Your Cordlock Blind: Gently pull the cord
NOTE: If the tensioner moves up the cord while toward the center of the blind until the lock releases.
operating, you have not secured it to the wall or window Let the cord slip slowly through your fingers until the
frame. You must do so for the shade to operate properly. blind reaches desired height. Move the cord toward the
outside of the blind and release to lock blind into place.
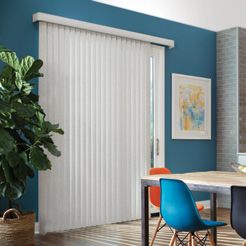
// Vertical Blinds                                                                                     ®

                                                                                                                          limited lifetime warranty
                                                                                                                          Covering Our Custom Made Window Coverings
                                                                                                                          Because we take pride in our workmanship and                This warranty does not apply to
                                                                                                                          quality that goes into every one of our products,           conditions caused by normal wear and
                                                                                                                          we back our products with this warranty.                    tear upon this product.
                                                                                                                          We extend this limited lifetime warranty to the             This Warranty Is Exclusive And In Lieu Of All
                                                                                                                          original purchaser. This warranty applies only to           Other Obligations, Liabilities Or Warranties. In
                                                                                                                          manually operated Custom Products properly                  no event shall Alta be liable for INCIDENTAL
                                                                                                                          installed in the window, door or interior area for          or CONSEQUENTIAL DAMAGES or any other
                                                                                                                          which they were intended.                                   direct or indirect damage, loss, cost, expense or
                                                                                                                          Installation of the product must be in accordance           fee. Some states do not allow the exclusion or
Care & Cleaning Guidelines                                    Care & Cleaning Guidelines                                  with the accompanying instructions. The                     limitation of incidental or consequential damages,
Dusting Dust your blinds regularly using an ordinary          Eclipse Shutters, comprised of Polyresin 3 compound,        product cannot be modified. It is the purchaser’s           so this exclusion or limitation may
soft, clean cloth, dust cloth or mitt, feather-like duster,   feature a permanent finish that is waterproof and           responsibility to maintain and clean the product            not apply to you.
or cylindrical dust brush specially designed for blinds.      resists dents and scratches.                                in compliance with the instructions provided.
                                                                                                                                                                                      In the event of a defect under this warranty, Alta
Vacuuming For deeper cleaning, vacuum gently                  For regular cleaning, simply take a damp cloth and          The product must be used only in the window for
                                                                                                                                                                                      will repair or replace the product, at our option,
with a brush attachment.                                      gently wipe the shutters with it. You can use mild soap     which it was purchased.
                                                                                                                                                                                      provided it is returned to an authorized dealer.
Compressed Air/Hair Dryer Use a can of compressed             if you wish, but if you do, run a clean cloth afterwards
                                                                                                                          This warranty covers our products for defects in
                                                              to make sure no soap residue is left behind. If you have                                                                Our warranty excludes shipping charges and labor
air or a hand-held hair dryer on the COOL setting to                                                                      materials, mechanisms, workmanship, or failure to
blow off dust and debris.                                     hard water in your area, make sure you dry the shutters                                                                 costs for removal, measuring and installation.
                                                                                                                          operate properly. Operational cords are warranted
                                                              with a clean cloth to avoid nasty water spots caused by                                                                 Repairs will be made with like or similar parts.
Spot Cleaning Vinyl Blinds only. Use a soft cloth or          residual minerals in your water. If it's been some time     for 5 years from the date of purchase.
sponge moistened with lukewarm water and mild                 since you last cleaned your plantation shutters, you                                                                    This warranty gives you specific legal rights, and
detergent. DO NOT USE this method on Fabric Blinds.                                                                       Any conditions caused by damage to the product
                                                              may want to vacuum them first before wiping them                                                                        you may also have other rights, which may vary
                                                                                                                          resulting from misuse, abuse, direct exposure to
Ultrasonic Cleaning Professional ultrasonic cleaning          down. The brush attachment of your vacuum will pick                                                                     from state to state.
                                                                                                                          salty air or discoloration due to sunlight or the
is recommended for Fabric Blinds only.                        up most of the dirt and dust that has built up over time
                                                                                                                          passage of time are not covered by this warranty.
Injection/Extraction Cleaning This type of cleaning           and prevent streaks across the panels when you wipe
injects a cleaning solution into the fabric and               them with the wet cloth.
immediately extracts the dirty solution. The service                                                                      Notes:
is typically performed in the home.                           Operating Instructions                                      l   Specialty Shades are warranted for one year from the date of purchase.
                                                              Tilting Louvers Open and Closed: Grasp one of the
Operating Instructions                                        center louvers from the panel and move it up or down
                                                                                                                          l   Motorization Systems are warranted for five years from the date of purchase.
                                                              to the desired position. If the panel features rear tilt,   l   Eclispe Shutters feature a 25-Year Warranty.
Safety Wand Operation
Rotating the Vanes: With the blind fully traversed            grasp one louver and move it to the desired position.       l   This warranty does not apply to commercial orders.
across the window, twist the wand to the left or right        All other louvers in that panel will move as well.
to open or close vanes to the desired position.               Opening Panels: Tilt the louvers to the open position,
Traversing the Vanes: First, rotate the vanes to the fully    grasp the inside edge of the panel and gently pull open.
open position. Then push or pull the wand to draw the
vanes across the window.
Standard Cord and Chain Operation
Rotating The Vanes: Pull gently on either of the beaded
chains to tilt vanes open and closed.
Traversing the Vanes: Ensure vanes are in the open
position, then pull gently on the front or back of the
cord loop to traverse the vanes across the window.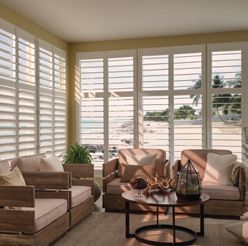
You can also read