2 IN 1 CORDLESS STICK VACUUM CLEANER - VCH 9130 - DE EN IT
←
→
Page content transcription
If your browser does not render page correctly, please read the page content below
2 IN 1 CORDLESS STICK
VACUUM CLEANER
VCH 9130

DE   EN   IT   NO PT   TR   EL
____________________________________________

   A

   B

                        C

                        D
   E
                        F

   G

   H

   I
                        J
   K
                        L   M

                                          3
SAFETY________________________________________
Please read this instruction manual thoroughly 77 Avoid using extension cables or multipoint
prior to using this appliance! Follow all safety connectors. Plug the appliance directly in a
instructions in order to avoid damages due to wall socket if possible.
improper use!
77 For additional protection, this appliance
Keep the instruction manual for future reference.
Should this appliance be given to a third party, should be connected to a household residual
then this instruction manual must also be handed current device with a maximum rating of 30
over. mA. Consult your electrician for advice.
77 Always keep hair, clothing and any other uten- 77 Do not disconnect the plug by pulling on the
sils away from the appliance during operation cable.
in order to prevent injury and damages. 77 Never use the appliance if it or the power
77 The appliance is designed for domestic use cord is visibly damaged. This also applies if
only. Warranty will be voided if the appliance is the appliance has accidentally become wet.
used for industrial or commercial purposes. Please contact a service centre in this case.
77 Observe these instructions in order to prevent 77 Our GRUNDIG Household Appliances meet
damage to the appliance or danger arising all applicable safety standards; thus if the ap-
from improper use. pliance or the power cord is damaged, it must
77 Do not use on wet surfaces and do not attempt be replaced by the dealer, a service centre
to use on wet objects. or a similarly qualified and authorised service
person to avoid any danger arising. Faulty or
77 Do not use the appliance in wet surroundings. unqualified repair work may cause danger
77 Do not use the appliance with wet hands. and risk to the user.
77 This appliance is designed for vacuuming dirt 77 Keep the appliance away from children.
and dust particles. Do not attempt to use it on 77 The appliance should not be used by the fol-
large objects which could block and damage lowing persons, including children: those with
the appliance. limited physical, sensory or mental capabilities
77 Do not use to clean cigarette stubs, ash from a or those with a lack of experience and knowl-
fireplace or matches. This could cause a fire. edge. This does not apply to the latter if they
were instructed in the use of the appliance or
77 This appliance is not designed for cleaning peo- if they use it under the supervision of a person
ple or animals. responsible for their safety. Children should
77 Do not insert any foreign objects into the suction always be supervised to ensure that they do
intake. Always keep the suction intake free of all not play with the appliance.
objects. 77 Do not dismantle the appliance under any cir-
77 Never operate the appliance without the filter. cumstances. No warranty claims are accepted
for damage resulting from improper handling.
77 Clean the filter when necessary.
77 Do not use the appliance if the air duct and
77 Only use original GRUNDIG accessories when
the ventilation slot are blocked. Always keep
replacing parts.
the air duct and ventilation slot free of dirt,
77 Check if the mains voltage on the rating label hair and any other elements which could ob-
corresponds to your local mains supply. struct or block the air flow.
77 Always pull out the power cord after the charg- 77 Only use the LKC-173030-G power supply
ing process, before cleaning or carrying out any unit provided.
maintenance on the appliance or the charging
unit.
18 ENGLISHOVERVIEW_____________________________________
Dear customer, Special features
Congratulations on the purchase of your new 77 Versatile usage: as a cordless handheld
GRUNDIG 2 in 1 Cordless Stick Vacuum vacuum cleaner to clean working tops or furni-
Cleaner VCH 9130. ture or as a beautifully designed cordless stick
Please read the following user notes carefully to vacuum cleaner with electric brush
ensure you can enjoy your quality product from 77 Powerful 14.4 V NiMH batteries for a long
Grundig for many years to come. and efficient service life
77 High-performance electric brush for removing
A responsible approach! stubborn dirt and pet hair on any surface
GRUNDIG focuses on contractu- 77 Efficient filter system with cyclone technology
ally agreed social working condi-
tions with fair wages for both
77 Up to 15 minutes cordless operation
internal employees and suppliers, 77 8 hours charging time
as well as on the efficient use of
raw materials with continual 77 Holds up to 500 ml dry dirt
waste reduction of several tonnes of plastic each 77 Space-saving storage thanks to fold-down
year – and availability of at least 5 years for all handle and attachment storage at charging
accessories. station
For a future worth living.
For a good reason. Grundig.
77 Simple and hygienic emptying of the con-
tainer
HEPA filter
HEPA stands for Highly Efficient Particulate Air. Additional accessories:
HEPA filters are highly efficient particulate air 77 Washable HEPA-filter
filters which trap over 99.9% of all airborne dust
particles larger than 0.1 to 0.3 micrometres. 77 Crevice tool for cleaning crevices and corners
Viruses, respirable dust, dust mite larvae and difficult to reach
deposits, pollen, smoke particles, asbestos, bac- 77 Upholstery nozzle with brush attachment for
teria various toxic dust and aerosols are trapped fabrics, furniture, skirting boards or picture
in the filter.
frames
77 Charging station with attachment storage
77 Power adaptor
ENGLISH 19OVERVIEW_____________________________________
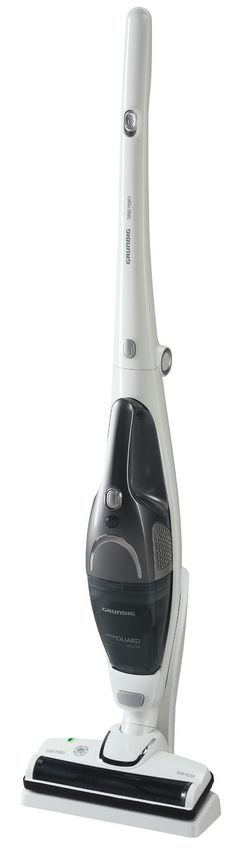
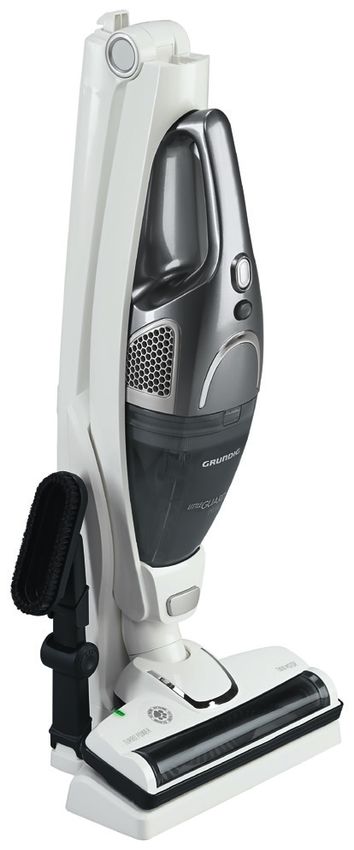
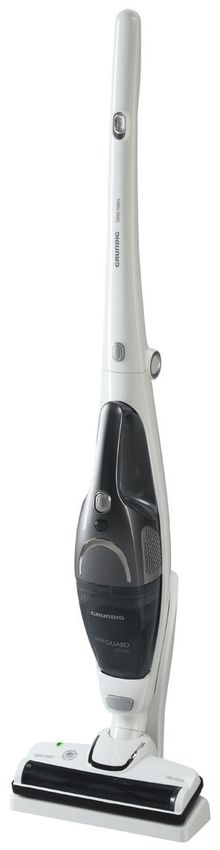
Controls and individual
parts
See the illustration on page 3.
A On/Off button for the cordless stick vacuum
cleaner
B Button for folding down the handle
C Button for removing the handheld vacuum
cleaner
D Body
E On/Off button for the handheld vacuum
cleaner
F Button for opening the dust container /
power indicator
G Handheld vacuum cleaner
H Dust container
I Button for removal of high-performance
electric brush
J Charging unit
K Power indicator
L High-performance electric brush
M 3 in 1 nozzle and brush attachment
Power adaptor
20 ENGLISHINDIVIDUAL PARTS_________________________
3 in 1 nozzle and brush The Upholstery nozzle or the crevice tool can be
attached to the handheld vacuum cleaner G .
attachment The tip of the crevice tool can be set in 3 differ-
The accessories include a 3 in 1 nozzle and ent positions: top, middle and bottom.
brush attachment.
The brush attachment can be attached onto the
upholstery nozzle to clean textile surfaces, furni-
ture, baseboards and picture frames.
Crevice tool
Upholstery nozzle with brush attachment
You can use the crevice tool to clean crevices
and corners difficult to reach or attach the up-
holstery nozzle onto the crevice tool to extend it. Upholstery nozzle with
brush attachment
Crevice tool
Placing the 3 in 1 nozzle and brush attachment
M on the holder will prevent it from getting lost.
3 in 1 nozzle and
brush attachment
Holder for 3 in 1
nozzle and brush
attachment on the
charging unit.
ENGLISH 21PREPARATION_________________________________
Check if the mains voltage on the type plate When removing the handheld vacuum cleaner
(on the power adaptor, the handheld vacuum G , push the button for removal of the hand-
cleaner or the stick vacuum cleaner) corre- held vacuum cleaner C and pull the handheld
sponds to your local mains supply. vacuum cleaner G out of the body D .
Assembly of the handheld
vacuum cleaner onto the
body
The handheld vacuum cleaner can be installed
onto the body D and be removed again if nec-
essary.
When installing the handheld vacuum cleaner
G onto the body D plug it into the slot and Button for removal
push lightly towards the body D . of the handheld
vacuum cleaner
Body
Handheld
vacuum
cleaner
Slot
22 ENGLISHPREPARATION_________________________________
Assembling the charging 2 Connecting the power adaptor with the charg-
ing unit.
unit
1 Connecting the vacuum cleaner and the charg-
ing unit.
Connector
Power adaptor
socket
3 Connect the connector of the power adaptor
with the socket under the charging unit J .
– When connecting the power adaptor with
the wall socket, the power indicator K
lights up red and indicates that the vacuum
cleaner is being charged.
– If the power indicator K turns green, the
vacuum cleaner has been fully charged.
Note
77 The charging process will take about 6-8
hours.
Charging
Unit
ENGLISH 23OPERATION____________________________________
Switching on and off the 4 Insert the vacuum cleaner into the charging unit
J.
cordless stick vacuum
Note
cleaner 77 If the vacuum cleaner is inserted into the
1 Pull out the vacuum cleaner from the charging charging unit J while it is “on”, it turns off
unit J . automatically.
2 Press the On/Off button A to switch on the
appliance.
3 After use, switch off the appliance with the
On/Off button A .
On/Off button
for the cordless
stick vacuum
cleaner
Blue Indicator Switching on and off the
LED
handheld vacuum cleaner
1 Pull out the handheld vacuum cleaner G from
the body D .
2 Press the On/Off button for the handheld vac-
uum cleaner E to switch on the appliance.
3 After use, switch off the appliance with the On/
Off button E .
On/Off but-
ton for the
handheld
vacuum
cleaner
Blue Indicator
LED
24 ENGLISHCLEANING AND CARE________________________
Cleaning the dust container 5 Clean the cyclone cone, its cover, the HEPA
filter and the dust container H under running
Notes water.
77 It is recommended that you clean the dust
container after each use.
77 When removing the filter in the dust container
H , be careful not to shed the dust.
1 Push the button F for opening the dust con-
tainer and remove the dust container H .
Button for opening the dust container
6 Clean the body of the handheld vacuum
1
cleaner G with a soft and damp cloth.
7 After all parts are dry, close the cyclone cover,
Dust container place the HEPA filter on the cyclone cone, re-
insert them into the dust container H and at-
tach the dust container H on the body of the
2 Remove the filter from the dust container H.
handheld vacuum cleaner again.
Dust container
Filter
3 Remove the HEPA filter.
4 Open the cyclone cover.
3 HEPA filter
4
Cyclone cone
Cyclone cover
ENGLISH 25CLEANING AND CARE________________________
Cleaning the high- Storage
performance electric-brush You can store the appliance standing upright or
folded down from the handle.
1 Use a screwdriver to open the lock by turning
it from to . 1 To store the vacuum cleaner folded down, push
the button for folding down the handle B and
Lock fold the handle down.
Button for folding
down the handle
2 Remove the cover, pull out the brush and clean
it.
Cover
Brush roll
3 After the brush roll is cleaned and dry, re-insert
it and close the cover by locking it again with
a screwdriver.
26 ENGLISHINFORMATION________________________________
Troubleshooting
Problem Possible cause/reason Solution
Doesn’t work. Battery is low or flat. Charge the battery.
The handheld vacuum cleaner G Be sure to insert the handheld
might not be inserted into the body vacuum cleaner G into the body D
D properly. properly.
Suction power is Dust container H is full. Empty the dust container H.
decreasing.
The HEPA filter could be blocked. Clean or change the HEPA filter.
The air inlet or high-performance Clean the high-performance electric
electric brush L might be blocked. brush L .
The vacuum cleaner The power adaptor O might not be Plug the power adaptor O into the
cannot be charged. plugged into the wall socket. wall socket.
The connector of the power adaptor Plug the power adaptor O into the
O might not be plugged into the socket under the charging unit J .
socket under the charging unit J .
The vacuum cleaner might not be Insert the vacuum cleaner into the
inserted properly into the charging charging unit J properly.
unit J .
The vacuum cleaner The vacuum cleaner hasn’t been Charge the vacuum cleaner properly
can only be used charged enough. (about 6-8 hours).
for a very short time
after charging. The battery life has decreased. Consult your GRUNDIG service
partner.
ENGLISH 27INFORMATION______________________________
Environmental note Technical data
This product has been manufactured with high- This product conforms to the European
quality parts and materials which can be re- directives 2004/108/EC, 2006/95/EC
used and are suitable for recycling. and 2009/125/EC.
Therefore, do not dispose of the Power supply
product with normal domestic waste Power adaptor: LKC-173030-G
at the end of its service life. Take it to
a collection point for the recycling of Input: 100 – 240 V~, 50/60 Hz
electrical and electronic equipment, Output: 17.3 VDC, 300 mA
where the battery is taken out of the
device and disposed separately. This is indi- Batteries: NiMH
cated by this symbol on the product, in the oper-
ating manual and on the packaging.
Please consult your local authorities to find out
where the nearest collection point is.
Help protect the environment by recycling used
products.
Power
Nominal power vacuum cleaner 80 W
Nominal power handheld vacuum cleaner 6 W
Protection class
II
Technical and design modifications reserved!
28 ENGLISHAUS GUTEM GRUND www.grundig.com 72011 908 1900 12/02
You can also read