Deathmatch Creator - Rockstar Games
←
→
Page content transcription
If your browser does not render page correctly, please read the page content below
Deathmatch Creator
     GUIDE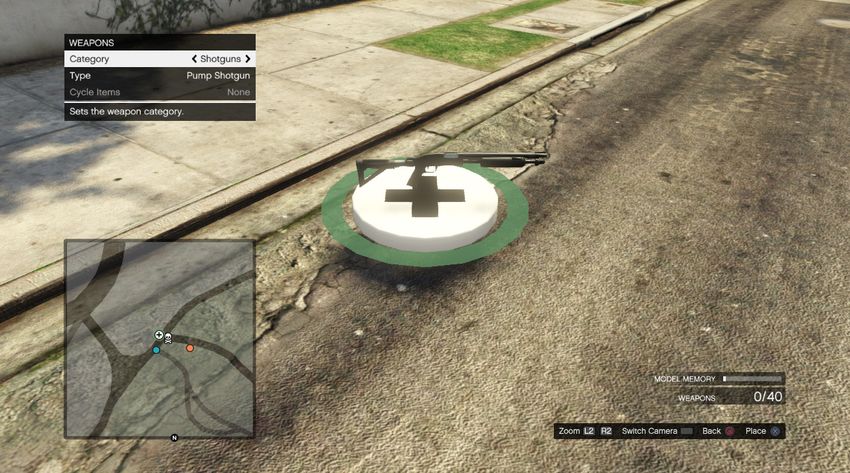
GTA Online         Deathmatch Creator                                                  1

       INTRODUCTION
       To design a custom Deathmatch, open the Online Creator menu and select
       “Create a Deathmatch” (01). From there, you will be shown the map and you can
       pick where to locate your Deathmatch.

                                        01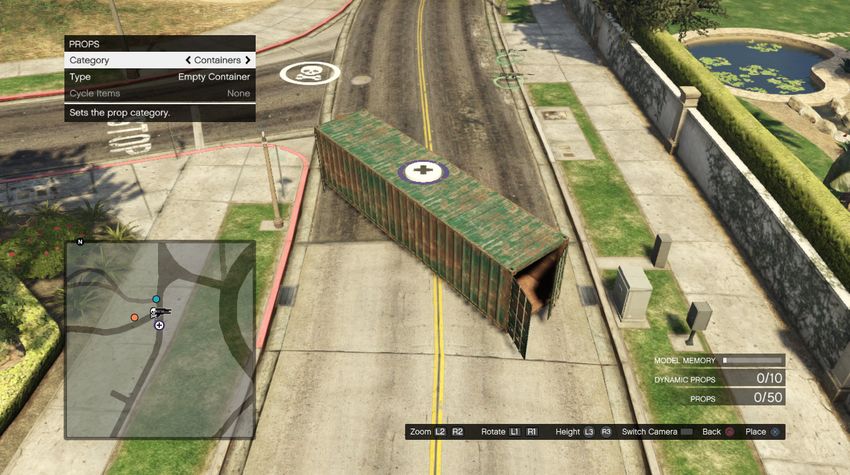
GTA Online           Deathmatch Creator                                                       2

       The first time you try the Deathmatch Creator tools, we recommend following the
       in-game tutorial to get a basic overview of the process. Then, when you return to
       the Start menu, select “Deathmatch” to bring up the Deathmatch Creator main
       menu. Finally, select “Deathmatch Details.”

       QUICK MAP JUMPING
       If you change your mind about the location you selected for your Deathmatch, use the
       Pause menu map to warp quickly to any new spot.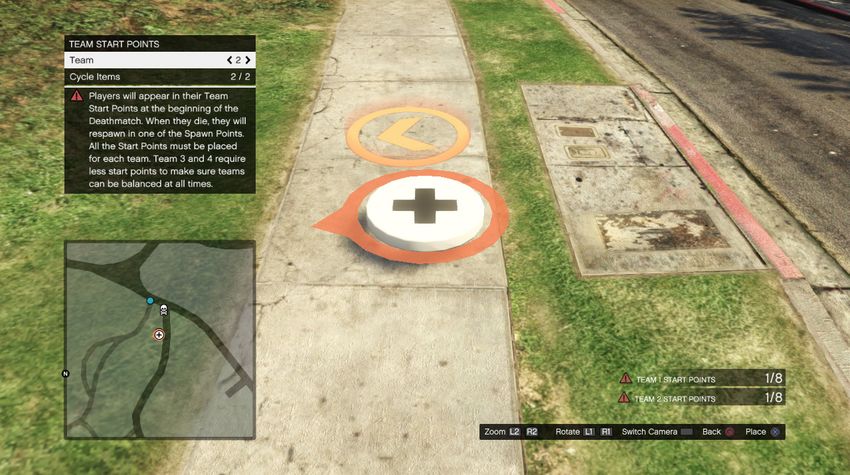
GTA Online          Deathmatch Creator                                                        3

       DEATHMATCH DETAILS
       The first step in creating a Deathmatch is to give it a name and description, then
       set the basic parameters for the game (02).

       TITLE/DESCRIPTION
       First, give your Deathmatch a slick title (03). Be as creative as you want here; the
       more intriguing it sounds, the more folks will check it out. Then write a succinct
       description of the scenario so that players know what to expect. Maybe your
       Deathmatch design focuses on short-range combat in the tight cluttered spaces
       of the Del Perro Pier. Or maybe you placed it in open stretches of the Grand
       Senora Desert with little cover, putting a premium on long-range marksmanship.
       Be sure to divulge this sort of basic information in the Description line.

                                                                 02

                                                                 03
GTA Online         Deathmatch Creator                                                     4

       The title and description appear when players launch or accept an invitation to
       your Deathmatch. Both also appear on the Rockstar Games Social Club.

       PHOTO
       Here you frame and snap the photo that accompanies the title and description
       whenever your Deathmatch is launched. Make the shot a good one: this Photo
       also appears on the Rockstar Games Social Club if you publish your creation. Use
       the controls indicated onscreen to raise or lower the camera and move or swivel
       the view, then press the “Capture” button shown to snap the photo (04).

                                                               04

       An overhead shot can give players a nice preview of the landscape you’ve
       chosen. But you can also move in tight on a key topographical or architectural
       feature that may give a better flavor for the challenge you’ve created.
GTA Online          Deathmatch Creator                                                        5

       SEARCH TAGS
       Next, add some accurate Search Tags to make it easier for prospective players
       to find your creation. Search Tags are single words categorized in the search
       engine on the Rockstar Games Social Club. You get a maximum of 62 characters
       (including spaces), and you must separate each word with a comma.

       Choose words that best describe the key features of your Deathmatch. For
       example, what’s the general setting; urban, desert, mountain, beachfront? What’s
       the specific location; downtown, docks, pier, golf course, penitentiary? What
       weapons are spawned? Did you place any special vehicles, or specify a particular
       time of day? A sample list of Search Tags: “deathmatch, pier, beachfront, night,
       shotguns.”

       DEATHMATCH TYPE
       Select the default type for this Deathmatch: Normal or Team. A Normal
       Deathmatch pits all players against each other, with just one individual winner. A
       Team Deathmatch involves two or more teams of players facing off against one
       another. Note that this is just an initial default setting; every Deathmatch created
       will be playable as either a Team Deathmatch or a Normal Deathmatch.

       NUMBER OF TEAMS
       Set the maximum number of teams that can participate in a Team Deathmatch.
       You can choose between 2, 3, or 4 teams.

       MAXIMUM PLAYERS
       This option lets you choose a maximum number of players that can participate
       in your Deathmatch, from as few as two players up to a total of 16 (30 players
       on PS4, Xbox One, and PC). In general, the more the merrier, but sometimes a
       Deathmatch layout may work better with fewer players. A few test matches can
       help you adjust this number to get the intensity of play that you desire.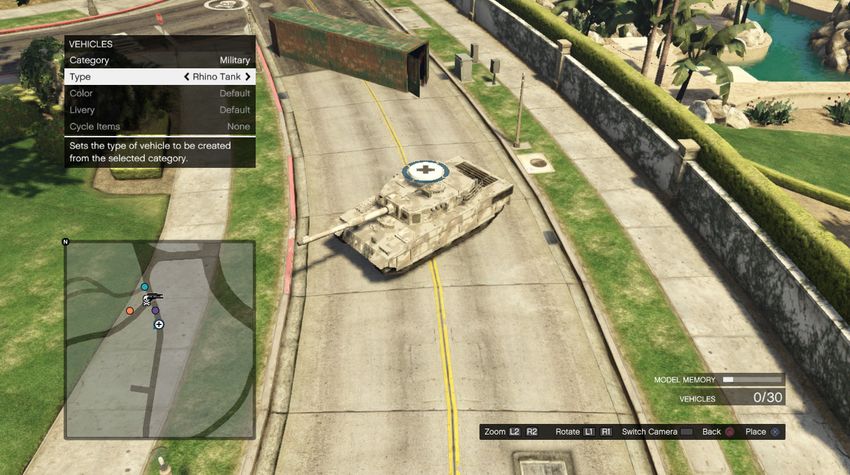
GTA Online          Deathmatch Creator                                                        6

       MINIMUM PLAYERS
       Set a minimum number of players that can participate in the Deathmatch. You can
       pick any number from 2 to 16 (30 players on PS4, Xbox One, and PC). Unless you
       have a big crew of ready players on hand, who you know will jump in, stick to a
       lower Minimum Players setting. This makes it easier to gather enough players via
       invitation to launch the match.

       TARGET SCORE
       The Deathmatch ends once a player/team reaches the number of kills you set with
       this option. You can toggle the Target Score from 10 to 40 in increments of 5 (10
       to 50 in increments of 5 and from 50 to 150 in increments of 10 on Xbox One, PS4
       and PC). You can also toggle this feature to “Off” and use your Time Limit to set
       the endgame points.

       TIME LIMIT
       This option lets you set a maximum playtime for the Deathmatch so that the game
       can end at a reasonable time if players don’t hit the Target Score or if you set no
       Target Score. Choose from among the following time lengths in minutes: 5, 10, 15,
       20, 30, 45, or 60.

       LOCK WEAPONS
       This option lets you choose the weapons available in your Deathmatch. The
       “Owned + Pickups” setting lets players bring their own GTA Online weapons into
       the match. If you scroll the selection to “Forced + Pickups,” then all players start
       the match with the Forced Weapon you select (see next category), but can switch
       out to other weapons that you place as pickups. If you scroll to “Forced Only,”
       the starting weapon for all players is the Forced Weapon, and so are all weapon
       pickups in the game. In other words, you can restrict all players in your match to a
       single weapon if you want; knives or crowbars or RPGs only, for example.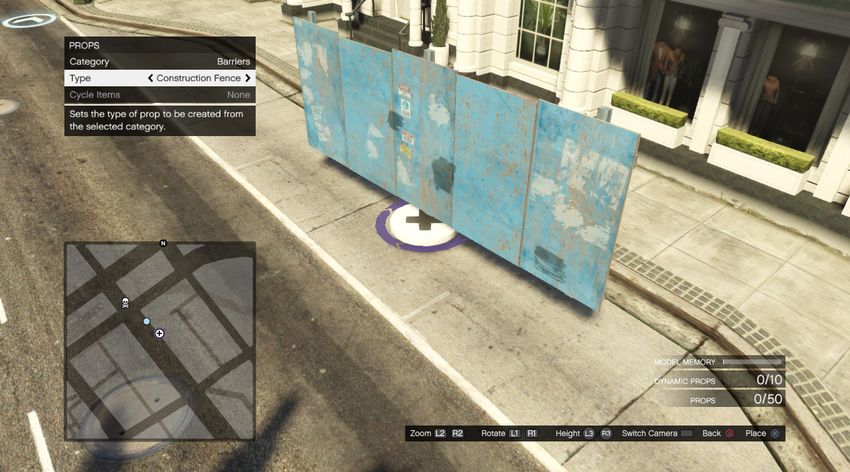
GTA Online          Deathmatch Creator                                                      7

       FORCED WEAPON
       Set a default weapon for all players at the start of the game, and also for all
       pickups if you select “Forced Only” in the Lock Weapons option (05). This
       selection can really set the tone for the opening moments of the match,
       depending on where you’ve placed the player Start Points. (See Page 14.)

                                                                  05

       TIME OF DAY/WEATHER
       The weather and time of day when your Deathmatch takes place can have both
       aesthetic and strategic effects on the gameplay (06). A clear nighttime match on
       the Del Perro Pier creates a dazzling backdrop for the Deathmatch action. But a
       rainy nighttime match on Mount Chiliad creates visual challenges that will affect
       how you deploy and fight. You can also set the time to Current, which will set the
       time of day to whatever time it is for the player hosting the Job.

                                                                  06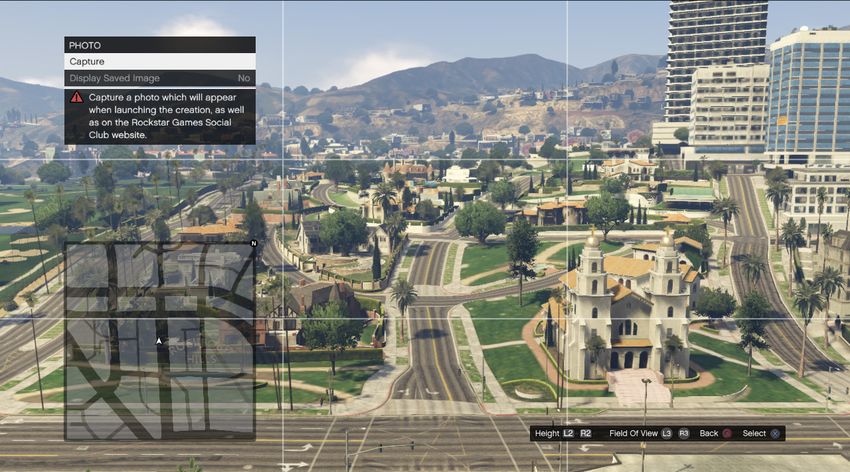
GTA Online          Deathmatch Creator                                                         8

       TRAFFIC
       This option lets you toggle the world traffic on or off during the Deathmatch. It
       won’t affect your match much if you’re fighting in Bolingbroke Penitentiary or the
       Ron Alternates Wind Farm. But if you design a noon match triggered on the fast
       lane of the La Puerta Freeway, active traffic can add a whole new level of difficulty
       to the proceedings.

       LOBBY RADIO
       Use this option to toggle on/off and select the radio station that plays in the
       background when players enter the Lobby. This gives you another creative way to
       set a specific tone for your match.

       FORCE CAMERA VIEW (PS4, XBOX ONE AND PC ONLY)
       With this option, you can choose to lock all players in the job into First or Third
       Person perspective for the duration of the job. Remember, the host can override
       the Force Camera option before the Capture begins.
GTA Online         Deathmatch Creator                                                     9

       PLACEMENT
       The Placement menu is where you get your creative juices really flowing. Here
       you drop and move markers that dictate where players start or respawn; place
       weapons, armor, and health pickups; and manipulate a stunning array of vehicles
       and “Props” (barriers, ramps, wreckage, exploding barrels) that add ambience
       and tactical challenge to your Deathmatch

       TRIGGER
       The next step of Deathmatch creation is to place a Trigger, the glowing halo
       where players gather to play. When you select “Trigger” from the menu, a Trigger
       placement icon appears on the ground in the center of your camera view.
       Moving the camera also moves this icon, centered in the viewer. Use the controls
       indicated onscreen to reposition the camera and zoom in or out.
GTA Online Deathmatch Creator 10
07
The Trigger must be placed in a flat, empty area. It turns white whenever it hovers
over an acceptable spot (07); it turns red if the spot isn’t suitable for placement.
We recommend an easily accessible location, preferably just off a roadway,
although some Online players may be intrigued by harder-to-reach Triggers; say,
atop Mount Josiah or on a high platform in the Palmer-Taylor Power Station.
LOBBY CAMERA
This function creates a “lobby” for your Deathmatch by placing a live camera
overlooking the Trigger location. The Lobby is where players wait for others to join
before the Deathmatch begins; it’s also where the host makes pre-match option
adjustments. As with the Photo function, use the controls indicated onscreen to
move and select the camera’s location. Note that the Lobby Camera must be
positioned near the Deathmatch Trigger.GTA Online Deathmatch Creator 11
08
SPAWN POINTS
This feature sets where players start your Deathmatch or respawn after getting
killed. Drop Spawn Points onto the world the same way you placed your Trigger;
just use the camera controls to move each placement marker to a suitable spot
(where the marker is white, not red). Rotate the marker to set which way the
player’s character will face when spawning in; an arrow shows the facing direction
(08). Then press the Place button. You can undo a Spawn Point you’ve already
placed by moving the placement marker over it and pressing the Edit button.
PLACING ITEMS AND SPAWN POINTS ON FOOT
Many valid placement locations can’t be seen in the Creator Camera’s overhead view.
To place Spawn Points or pickup items in underground or interior locations where the
overhead camera cannot go, switch the camera view to navigate the world on foot.
When placed, Spawn Points appear as white blips on your Radar display. Your
Deathmatch must have at least two Spawn Points per player, so the number you
place must be at least twice the number of Maximum Players you designated
earlier. For example, if you set the Maximum Players at 12, you’d have to place a
minimum of 24 Spawn Points (12 times 2) on your map. A Deathmatch creation
isn’t complete until you place the minimum required Spawn Points.GTA Online Deathmatch Creator 12
PLACING SPAWN POINTS
When a player is killed in a Normal (Free For All) or Team Deathmatch, he/she
respawns randomly in any one of the Spawn Points you’ve placed. If you want to
penalize players for getting killed, place the Spawn Points far out on the perimeter
of the area or inside enclosures so that respawned characters must work to return
to the action.
However, if you’re more interested in a furious, nonstop central kill-zone, then
cluster Spawn Points near the heart of your area. It’s a good idea to drop them
in somewhat protected spots, however, so respawns don’t end in instant death
if other players simply camp and target known Spawn Points. If respawning gets
too congested and chaotic, the match becomes less fun.
TEAM START POINTS
This feature designates starting positions for all teams if your design is played
as a Team Deathmatch. After selecting “Team Start Points” from the Placement
menu, make sure “Team” is highlighted, then scroll to select the team you want
to place. The Team Start Point icons you place on the world are color-coded for
each team: Team 1 is blue, Team 2 is red, and so on (09).
09GTA Online Deathmatch Creator 13
Drop the markers onto the world the same way you placed your Trigger and
Spawn Points; use the camera controls to move the placement marker to a
suitable spot, and then rotate the marker’s arrow to designate the direction the
player’s character faces when spawning in. Then press the Place button. You can
also undo a Start Point you’ve placed by moving the placement marker over it
and pressing the Edit button.
The number of Team Start Points you place for each team must equal the number
of Maximum Players divided by the maximum Number of Teams. For example,
if you restrict your Team Deathmatch to just two teams and set the Maximum
Players at 16, you’d have to place 8 Start Points apiece (16 divided by 2) for
Teams 1 and 2. If you set the maximum Number of Teams to 4 instead, you’d
place 4 Start Points for each team (16 divided by 4). A Deathmatch creation isn’t
complete until you place all required Team Start Points.
RADAR CHECK
When placed, Team Start Points appear as color-coded blips on your Radar in the
lower-left corner.
PLACING TEAM START POINTS
A common Team Deathmatch design is to distribute each team’s Start Points on
opposite sides of the designated match area. Since the Deathmatch objective
is to score kills, this distribution draws both teams toward the center of the map
where you can place other draws like Weapon, Armor, and Health pickups.
But don’t be afraid to experiment. You can group your Start Points in clusters that
include one from each team at various spots around the map to incite immediate,
game-opening duels. Or group one team on high ground (say, on a rooftop) and
scatter the other team(s) in a circle around that location.GTA Online Deathmatch Creator 14
WEAPONS (INCLUDES HEALTH/ARMOR)
This is where you place weapon pickups in your Deathmatch (10). Also, this is
where you place armor (11) and health pickups, too; look for them in the “Special”
category under Weapons. You can place up to 40 of these various pickups on the
map. Under “Category” scroll through the selections to the one you want: Pistols,
Shotguns, Special, etc. Then select “Type” and scroll to the specific item you
want to place. A template of the item appears above a placement marker on the
world.
10
11GTA Online Deathmatch Creator 15
PLACING WEAPONS & SPECIAL ITEMS
Place each weapon, health, or armor pickup the same way you placed your
Trigger and Spawn Points; use the camera controls to move the placement
marker, then press the Place button to drop the item onto the world. Weapons
you’ve placed appear on your radar as specific weapon-type icons; health items
appear as white crosses, and armor appears as white vest icons. You can undo
any placement by moving the marker over the item you’ve placed and pressing
the Edit button.
WALKING CREATOR
Remember that you can use the Switch Camera button to place pickups on foot. This lets
you walk into areas inaccessible to the overhead camera.
Balanced pickup placement is an important element in designing a Deathmatch
that people want to play again. Place more powerful weapons in harder-to-reach
spots.
Note that the Special category in your Weapons library includes armor and health
items. Placing these pickups can add significant tactical considerations to any
Deathmatch. Armor and especially health typically draw a lot of attention during a
match.
You can hide them in secluded or protected spots to reward players for diligent
exploration. Or you can drop Special pickups in the middle of wide-open locations
and dare players to make a rush for them across what is likely a dangerous killing
ground. Consider altering weapon options for each side (Sniper Rifles/SMGs) to
give teams unique tactical experiences.GTA Online Deathmatch Creator 16
VEHICLES
You can position up to 30 working vehicles (32 on Xbox One, PS4 and PC) in your
Deathmatch, including aircraft and boats. Select “Category” and scroll to the
preferred vehicle type, then highlight “Type” and find the specific vehicle you want
to place. A template of the vehicle appears above a placement icon on the world
(12).
12
BALANCE AND COUNTERBALANCE
The best Deathmatches feature well-designed checks and balances. Think about ways to
add advantage to one side, and then add something else to cancel it out. For example,
an interesting design could be dropping a pair of Rhino tanks that teams race to control,
countered by having Forced Weapons set to RPG-Only.
Balance should always be your ultimate goal; the feeling that every player or team has an
equal opportunity to win and that no particular Spawn Point offers an unfair advantage or
disadvantage.
Place each vehicle the same way you placed your Spawn Points or Weapons; use
the camera controls to move the placement marker, then press the designated
Place button to drop the vehicle onto the world. Vehicles you’ve placed appear on
your Radar as dark blue blips. You can undo a Vehicle placement by moving the
placement marker over the vehicle you’ve placed and pressing the Edit button.GTA Online Deathmatch Creator 17
PROPS
You can position up to 50 Props in your Deathmatch (100 Props on PS4, Xbox
One, and PC), objects that include ramps, barriers, cones, wreckage, machinery,
and trailers (13). You can also place up to 10 “Dynamic” Props (20 Dynamic Props
on PS4, Xbox One, and PC); such as barrels or fuel tanks that can tumble or
explode when struck. Select the Category you want, then highlight “Type” and
scroll to the specific object you want to place.
13
DYNAMIC RISK FACTORS
Dynamic Props can really add a jolt to your Deathmatch. Use explosive barrels to make
pickup locations risky to visit.
A template of the currently selected Prop appears above the placement icon.
Place each Prop the same way you placed Weapons or Vehicles; use the camera
controls to move the placement marker and rotate the object, then press the
Place button to lock the object onto the world. Each Prop appears on your radar
as a purple blip. To undo a Prop, move the placement marker over the object and
press the Edit button.GTA Online Deathmatch Creator 18
PLACING PROPS
Use Props to funnel movement and manipulate sight lines, as well as to provide
cover (14). You can create a natural flow with chokepoints that encourage fierce
fighting and thoughtful tactical deployment. But don’t overdo it! In general,
it’s better to keep things simple. While it may be tempting to fill the area with
exotic Props, weapons, and vehicles, this can result in a bloated, unbalanced
experience.
14
You can rotate Props on each axis (Pitch, Roll, Yaw) or relative to the world (World
Heading) before placing them. You can also reset a Prop’s rotation to its default
position and adjust the height of Props with the Prop movement controls. The
“Allow Prop Stacking” checkbox lets you place Props so that they intersect one
another or the existing world terrain.
Stunt Props from Cunning Stunts can be added including tracks and raised
tracks, tubes, building blocks, ramps, stunt signs and stunt set pieces.
PROP TEMPLATES
You can save and place templates constructed from multiple Props. Select
“Create New Template” to begin. You can then hover over placed Props and use
the “Select Prop” option to add them to the template. Selected Props will have a
purple circle over them. When you have selected all the Props for your template,
select “Save Template”. Now when you scroll through the Prop category options,
you will find a new option called “Templates”. From here you can select the
template(s) you previously saved and place them just like any other Prop. Once
placed, the individual Props can them be modified or deleted.GTA Online Deathmatch Creator 19
RANDOMIZE
If you want to play a new Deathmatch in a specific area but don’t want to create
it yourself, use the Creator’s automated Randomizer to generate a quick map.
First, specify a radius size from 25m to 100m for the Deathmatch area (17). Next,
specify a Low, Medium, or High number of both Spawn Points and Weapons.
Then press the Select button to generate the new map.
TOGGLE RADAR
Use this option in the Placement menu to switch the zoom style of your radar
display in the lower-left corner. You can toggle between two different zoom
distances.
DELETE OPTIONS
Select this function if you want to reset the whole map or delete all placements of
a specific type.
RADIO
This menu option lets you listen to the station of your choice while creating your
Deathmatch. You can toggle the radio on or off. If you want it on, scroll through all
of the highly entertaining GTA V radio stations availablGTA Online Deathmatch Creator 20
PUBLISHING AND PLAYING
TEST
You must complete a valid test of your Deathmatch, achieved by getting 10 kills or
reaching the time limit/5-minute rule, before saving or publishing it (15).
15GTA Online Deathmatch Creator 21
This test pits you against a squad of computer-controlled characters to see how
your Deathmatch plays. The Test menu lets you toggle Invincibility on or off.
Testing is the key to good game design. The initial pre-save test is important, but every
Deathmatch design has flaws that come to light only in the brutal glare of live player
testing. Your creation may seem brilliant in theory, but a handful of good players can find
the fissures that break its balance.
So play your match with Crew and Friends, solicit their feedback, publish it on the Rockstar
Social Club, and seek comments from the wider community. Then, armed with input, head
back to the Creator’s drawing board. Every great mission is saved in the editing.
SAVE
Save the unpublished Deathmatch. When you’re in GTA Online, you can invite
others to play an unpublished Deathmatch, but it won’t be available on the
Rockstar Games Social Club until you publish it.
PUBLISH/UPDATE VERSION
Publish your finished Deathmatch onto the Rockstar Games Social Club or
update a previously published Deathmatch with an edited version. Other Social
Club users can download and rate it. The best creations may even be promoted
as “Rockstar Verified.”You can also read