Dehydration Guide Guia de deshidratación Guide déshydrations - www.drying123.com
←
→
Page content transcription
If your browser does not render page correctly, please read the page content below
Dehydration Guide
         Guia de deshidratación
          Guide déshydrations

             www.drying123.com
                                                    MADE IN THE USA

                                         Household Use Only
                                     Solo para uso doméstico
101415                           Usage domestique seulement
CONTENTS
Introduction		                                      2
Safeguards & Operating Instructions                 3
  Temperature Guide                                 4
  Timing			                                         4
  Cleaning		                                        4
Preparation		                                       5
  Pretreatment		                                    5
  Dipping		                                         5
  Blanching		                                       6
Storage & Reconstitution                            7
  Food Drying Guide – Fruits                      8-9
  Food Drying Guide – Vegetables                10-12
  Leathers and Fruit Rolls                         13
  Fruit			                                         13
  Yogurt			                                        13
  Vegetables		                                     13
Jerky				                                          14
  The Process		                                    14
  Dehydrating		                                    14
  Storage		                                        14
Beef, Game, Poultry, Fish Jerky                    15
Raw & Living Foods                                 16
  What Are Living Foods                            16
  Food Temperature vs. Air Temperature             17
  Enzymes and Temperature                          17
  How to use your dehydrator for Living Foods      17
Other Dehydrator Uses                              18
  Herbs and Spices                                 18
  Nuts			                                          18
  Raising Bread                                    18
  Pasta			                                         18
  “Stale” Foods		                                  18
  Yogurt			                                        18
  Cheese		                                         19
  Drying Photographs                               19
  Whole Meal Preparation                           19
Year-round Dehydration Tips                        20
Recipes			                                      21-22
Questions and Answers                              23
Trouble Shooting Guide                          24-25
Warranty Info		                                    26
Helpful Hints & Tips                               27
French			                                          28
Spanish			                                         50
INTRODUCTION
Working on a simple premise, the Excalibur® Dehydrator removes water from food by
a continuous circulation of thermostatically-controlled warm air. A variety of foods, from
bright golden kernels of farm-fresh corn to rings of island-sweetened pineapple can be
dehydrated. Produce, however, is not the only food commonly preserved in a food dryer!
Slices of beef, chicken, fish or even venison can be marinated in a combination of sauces
and spices and easily transformed into homemade jerky. A carton of yogurt spread over a
sheet of Paraflexx™ or plastic wrap, dries, and becomes a vividly colored, taffy-like snack
or fruit roll.
Operating cost for your Excalibur® Dehydrator is approximately 3 - 6 cents per hour. Using
your dehydrator compared to traditional canning or freezing methods will prove to be well
worth your initial low-cost investment.

SAFEGUARDS & OPERATING INSTRUCTIONS

IMPORTANT SAFEGUARDS
When using electrical appliances, these basic safety precautions should always be followed.

1.   Read all instructions.
2.   Do not touch hot surfaces.
3.   To protect against electrical hazards do not immerse any part of the dehydrator, cord,
     or plug in water or other liquid.
4.   Close supervision is necessary when any appliance is used near children.
5.   Unplug from outlet when not in use and before cleaning. Allow to cool before putting
     on or taking off parts.
6.   Do not operate any appliance with a damaged cord or plug or after the appliance
     malfunctions, or has been damaged in any manner. Return appliance to the nearest
     authorized service facility for examination, repair, or adjustment.
7.   The use of accessory attachments not recommended by the appliance manufacturer
     may cause hazards.
8.   Sharp utensils should not be used inside the dehydrator.

9.         CAUTION HOT SURFACE: THE DEHYDRATOR DOES GET HOT TO THE TOUCH.

2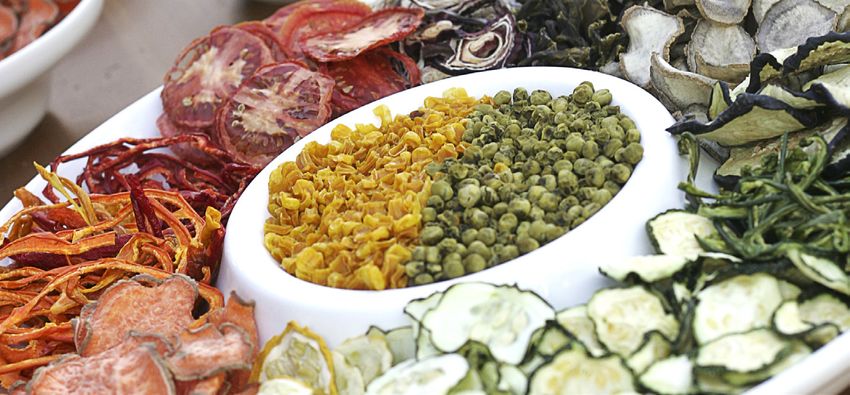
10.   Do not let cord hang over the edge of the table or counter, or touch hot surfaces.
11.   Do not use outdoors.
12.   Do not place on or near a hot gas or electric burner, or in a heated oven.
13.   Always plug cord into the wall outlet before turning machine on. To disconnect, turn
      switch to “off” before removing plug from wall outlet.
14.   Do not use appliance for other than intended use.
15.   Do not remove the ground pin on your power cord.
16.   Avoid contacting moving parts.
17.   Clean only sides and bottom, don’t wipe any electrical components.
18.   This appliance should not be used by children or persons with reduced physical,
      sensory or mental capabilities or lack of experience and knowledge of using the
      appliance. Only persons who properly understand the safe use of the appliance the
      hazards involved shall use this appliance. Children should only operate the
      appliance under close supervision and in no case should they play with the
      appliance. Cleaning and user maintenance shall not be made by children without
      supervision.
19.   This appliances is not intended to be operated with an external timer or separate
      remote control system.
20.   The symbol on the product or its packaging indicates that this product must not be
      disposed of with your other household waste. Instead, it is your responsibility to
      dispose of your waste equipment by handing it over to a designated collection point
      for recycling of waste, electrical and electronic equipment. The separate collection
      and recycling of your waste equipment at the time of disposal will help conserve
      natural resources and ensure that it is recycled in a manner that protects human
      health and the environment. For more information about where you can drop off your
      waste for recycling, please contact your local authority, or where you purchased your product.
21.   This appliance is not intended for use by persons (including children) with reduced
      physical, sensory or mental capabilities, or lack of experience and knowledge, unless
      they have been given supervision or instruction concerning use of the appliance by a
      person responsible for their safety. Children should be supervised to ensure that they
      do not play with the appliance.

        SAVE THESE INSTRUCTIONS.
OPERATING INSTRUCTIONS
Operating your dehydrator is extremely simple! Begin by plugging in your unit. Then using both
hands (to prevent tipping) carefully slide trays loaded with food into position. Once the trays are
in place, replace door* and set the thermostat to the correct temperature.
1.    Place the dehydrator on a smooth, dry surface.
2.    Load the trays with food. Place the door on machine.*
3.    Plug the power cord into standard 120 volt outlet or 220/240 volt outlet depending
      upon your voltage.
4.    Set the thermostat to desired temperature.**
5.    When the food has dehydrated, and is dry, allow it to cool. See pages 8 – 12 for
      proper dryness test and approximate drying time. Then package in airtight food
      storage containers.

  *For door assembly, page 25.
  **TROUBLESHOOTING GUIDE, page 24.

                                                                                                  3
TEMPERATURE GUIDE
For your convenience, a colorful temperature guide has been affixed to your Excalibur®
unit. Following this guide will ensure the use of proper temperatures when drying foods. If
the heat is too high, the food may “case harden” which means it will feel dry on the outside;
yet inside, it is still moist. If the heat is set too low, drying time and use of electricity is
increased.

              Timing
The individual foods listed on pages 8 - 12 is the approximate amount of time needed
to dehydrate each food. Drying times, however, are enormously dependent upon multiple
factors. These factors include the amount of humidity in the air, the moisture content of the
food being dried and the method of preparation.
       Humidity: Air must be kept in motion. Stagnant air will soon take on as much moisture as it
       can hold, and then drying will no longer take place. Drying must be a continuous process
       so the growth of micro-organisms is prevented. Check with your local weather service to
       determine the day’s humidity level. The closer the humidity is to 100%, the longer it will
       take for your food to dry.
       Moisture Content: The actual amount of water in the food you are drying is also a major
       consideration. Remember, water content of a fruit or vegetable can vary due to growing
       season, rainfall and environmental factors, as well as the ripeness of the food.
       Slicing: Uniform slicing is the last factor contributing to the length of the drying cycle.
       Successful drying is only possible if the food you are drying is properly sliced, (not more
       than 1/4" thick) and spread evenly in a single layer on the drying trays, successful drying
       should be yours!

          TEMPERATURE
                                                                      Temperature
    165                        105
                                         The thermostat range is 105° to 165° F.
 155                               115   The 5 & 9 tray units without a timer have the on-off switch in the thermostat.
                                         Turn counter-clockwise for off.
    145                        125
                                         Turn thermostat clockwise to desired temperature setting.
               135

               OFF
                          2
                               4
                                                                           Timer
 24                                6
                                         On units with a 26 hour timer, the Timer is on the on-off switch.
 22                                8
                                         In order to select timed operation, turn knob to desired time setting. While timing, the knob
    20                         10
                                         will indicate remaining time.
         18               12
              16     14                  Consult the drying times pages 8-12 for timing information.
              TIMER

              Cleaning
Your machine is easy to clean, both inside and out. The interior food contact areas and
exterior of your Excalibur Food Dehydrator should only be cleaned by wiping with a soft
cloth or sponge dampened with warm water and a mild detergent. The dehydrator can then
be rinsed using a soft cloth or sponge dampened with clear water. The trays can be cleaned
by hand or simply by placing them in the top rack of the dishwasher. The tray’s removable
Poly screens can be cleaned by soaking them in warm soapy water and then wiping them
down with a damp sponge. These inserts allow air to fully circulate around the food and the
construction of the trays also prevents moisture from being trapped on the underside of the
pieces. Therefore, the most even drying possible is attained. Re-usable non-stick sheets

4
should only wiped clean and NOT placed in the dishwasher. DO NOT USE harsh chemicals
or abrasive materials for cleaning. DO NOT immerse any portion of this appliance in water
except the trays and poly screens.
Your dehydrator has been equipped with a removable door. This solid door prevents light
from fading the colors or withdrawing nutrients from the food as it dries. Treat your door
carefully to prevent it from getting scratched. To clean, use a damp sponge or soft cloth only.

PREPARATION
There is really no right or wrong way to prepare your food for drying. By following these few
guidelines, success will be yours.

       Pre-treatment
Pretreating food is not an essential procedure when using your Excalibur® Food Dehydrator.
There are basically two types of pre-treatment, dipping and blanching. The fast drying times
and controlled conditions under which your unit operates dries food before it has a chance
to spoil. However, pretreating will help maintain:
•   Color: reduces oxidation of foods such as apples and potatoes keeping them from
    turning a rust-like color.
•   Nutrients: helps retain the minimal loss which tends to occur during the drying process.

•   Texture: the chance for fiber deterioration in the produce is lessened.
There are basically two types of pre-treatment: dipping and blanching.

       Dipping
Dipping is a treatment used primarily to prevent fruits or vegetables from oxidizing.
The following are various pre-treatment dips with which you may want to experiment.
•   Sodium Bisulfite: When mixed with water, sodium bisulfite is a liquid form of sulfur. It is
    the most effective and least expensive anti-oxidant. Use only a food-safe grade of sodium
    bisulfite that is made especially for dehydration. Sodium Bisulfite is available
    directly through Excalibur®.
    If subject to sulfur allergic reactions, check with your physician before using Sodium Bisulfite
    as a dip.
•   Fruits: Mix 1 1/2 tablespoons of Sodium Bisulfite in one gallon of water. Soak
    fruit slices for five minutes and halved fruit for fifteen minutes. Rinse.
•   Vegetables: Recommended for steam blanching only. Add 1 teaspoon Sodium
    Bisulfite to each cup of steaming water and blanch as you would normally. This is particularly
    recommended for vegetables to be stored in excess of three months.

                                                                                                  5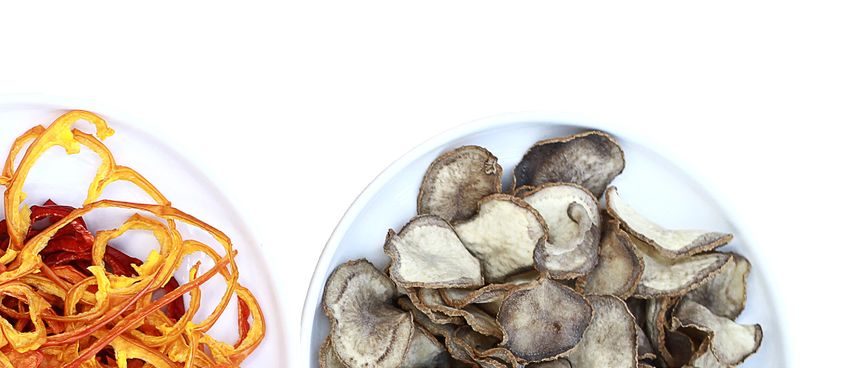
•   Ascorbic Acid-Citric Acid Dip: is simply a form of vitamin C. Citric acid is found in all
    citrus fruits. These citrus type dips are available through Excalibur, in drug or health food stores
    in crystal, powder or tablet form. Soak the prepared produce in a solution of 2 tablespoons of
    powder to 1 quart of water for 2 minutes.
•   Fruit Juice Dip: Citrus juices, such as pineapple, lemon or lime, may be used as a natural
    anti-oxidant. Stir 1 cup of juice into 1 quart of lukewarm water and soak for 10 minutes. Note:
    fruit juice is only 1/6 as effective as pure ascorbic acid and may add taste to your food.
•   Honey Dip: Honey dips are used quite frequently on fruits to be dried. Many dried
    fruits sold in the grocery store or in health food stores have been treated this way. The
    honey will make fruit considerably sweeter and will add calories as well. Dissolve
    1 cup of sugar in 3 cups of hot water. Allow mixture to cool until lukewarm, and add
    1 cup honey. Dip fruits in small batches, remove with a slotted spoon and drain thoroughly
    before dehydrating.
When using a dip, follow the specific directions listed above. Then, drain the treated food
and rinse it thoroughly. Blotting off any excess moisture with paper towels before placing
the food in the dehydrator is the final important step. Excess moisture of foods will prolong
the drying cycle.

       Blanching
Blanching, as a means of pre-treatment, can be done either in boiling water or by steaming
the foods. This pre-treatment is sometimes referred to as “checking” or “crazing.” You can
use this method most effectively on tough-skinned fruits (sometimes having natural protective
wax coating) such as grapes, plums, cranberries, etc. By boiling fruits in water for 1 to 2
minutes, the skin “cracks” and allows the moisture to more readily escape, thus the drying
time is faster.
•   Water Blanch: Fill a large pan over half-full with water. Bring the water to a boil and
    stir the food directly into the boiling water. Cover and blanch for approximately
    3 minutes. Remove food from the boiling water and place it into ice water to cool. Blot with
    a towel to remove excess water before drying.
•   Steam Blanching: Using an old fashioned, pan-type steamer, fill the lower portion with
    2 inches of water. The perforated upper section is then filled with food. Let the water
    rapidly boil approximately four minutes. Remove food from the boiling water and place
    it into ice water to cool. Blot with a towel to remove excess water before drying.
•   Electric Steamers: Electric steamers are perhaps the best means for blanching. The
    electric steamer will aid in the retention of nutrients, bring out the food’s most vivid
    color and heighten the natural flavor of the produce. Follow the set guidelines provided
    in your electric steamer’s operating manual for blanching individual fruits and vegetables.

6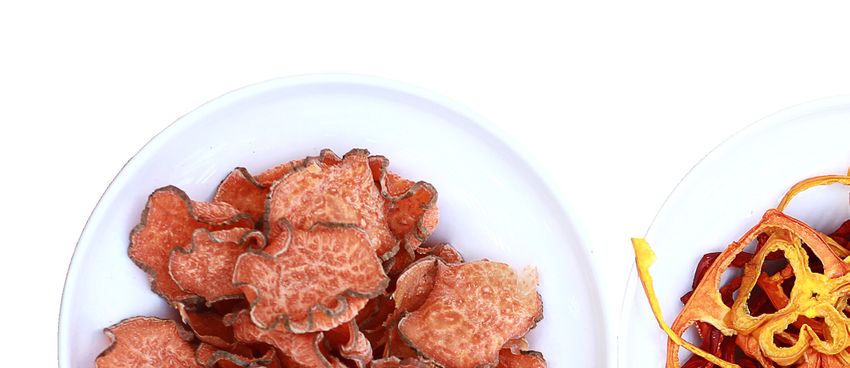
STORAGE & RECONSTITUTION
Containers for dried foods should be safe from moisture and insects. Glass jars with tightly
fitted lids, plastic zip-lock and vacuum/heat-sealable bags are recommended storage
containers. Food-safe metal cans, such as coffee cans or cookie tins, may be used to store
individual bags for extra protection.
Your dried foods should be stored in a cool, dark and dry area. The ideal temperature for food
storage is 50º - 60ºF/10º - 16ºC. Storing foods in this manner further protects the flavors and
colors of your dried products from fading.

       Reconstitution
Dehydrated foods can easily be incorporated into your diet. Snacking on banana chips, dried
seasoned meats and pieces of dried vegetables is a typical habit formed by many owners of
Excalibur® Food Dehydrators. Reconstituting dried foods adds yet another dimension to the
versatility of daily food preparation.
Properly dried foods rehydrate well. They return practically to their original size, form and
appearance. If carefully handled, they will retain much of the aroma and flavor as well as their
minerals and an appreciable amount of the vitamins. There are several methods of reconstituting
dehydrated food, including soaking foods in water or juice, placing food in boiling water,
cooking, or using an electric steamer. It is important to remember not to add salt, sugar or
spices during the initial five minutes of reconstitution as these additives hinder the absorption
process.
•   An Electric Steamer: is one of the most efficient and successful means of rehydrating
    foods. The food is placed into the rice bowl, and covered with a liquid. The circulation of the
    steam will aid in permeating the food and plumping it back to its original, fresh state. For best
    rehydration results, follow the guidelines given in your electric steamer’s operating manual.
•   Soaking: place the pieces in a shallow pan, cover with the liquid, and allow 1 to 2 hours
    for the rehydration process to occur. If rehydrating overnight, place the pan in the refrigerator.
•   Boiling Water: To reconstitute vegetables, place 1 cup of dried vegetables into 1 cup
    boiling water. Soak for 5 to 20 minutes. Prepare according to your recipe. To reconstitute
    fruits, place 1 cup of water and 1 cup dried fruit into a pan and simmer until tender.
•   Cooking: For vegetable side dishes, fruit toppings or compotes, use 1 part liquid to 1 part
    dried food. For foods used in soufflés, pies and quick breads, add 2 parts of liquid to 3
    parts dried food. When cooking fruits, place them into a saucepan with boiling water, turn
    heat to low and simmer 1 to 15 minutes or until tender.
The following charts are guidelines for the preparation, timing and testing of various fruits
and vegetables. If the humidity level is low on the days you are drying, your drying times will
be closer to the first amount of hours listed. If the humidity is high, it will be closer to the
second amount of hours listed.

                                                                                                   7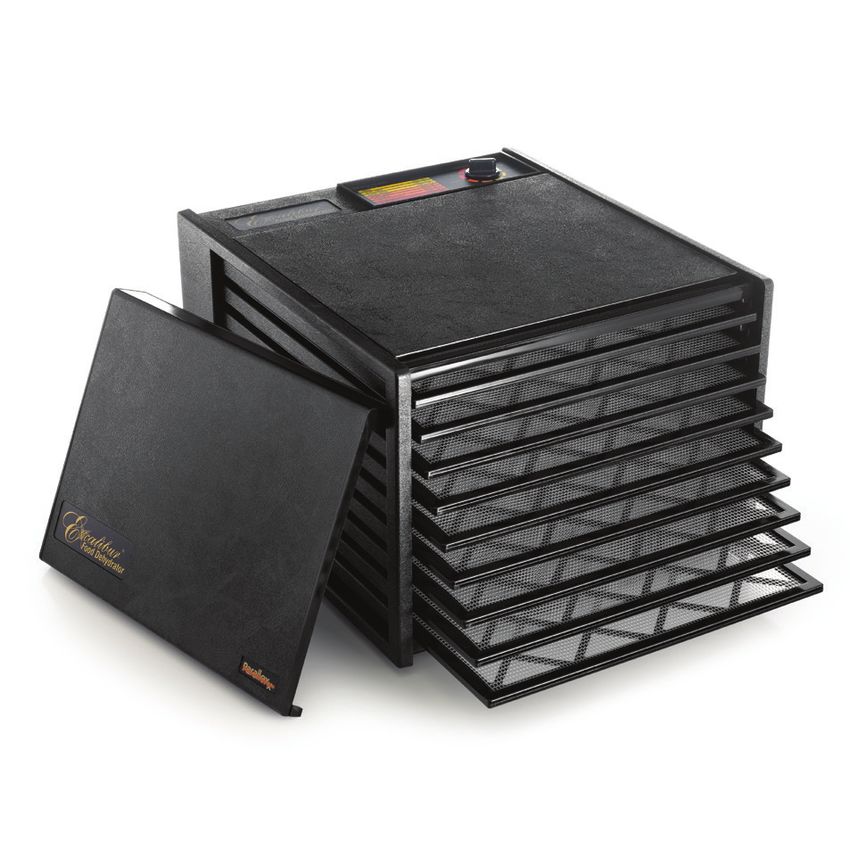
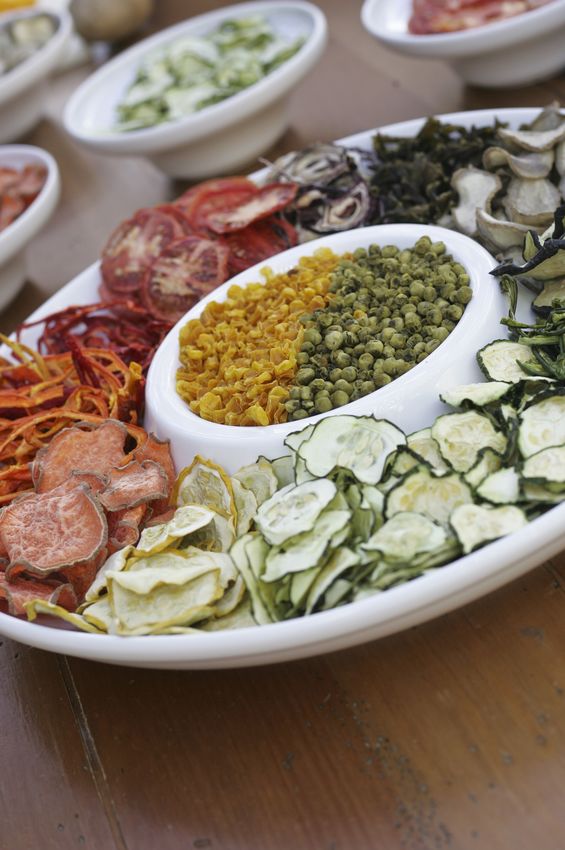
FOOD DRYING GUIDE FRUITS
Dry best at 135ºF/57ºC

      Food                    Preparation                     Test                  Time
                         Pare, core & cut into ¼”
                         slices or rings. May be
      Apples                                                 Pliable          7-15 hours
                         sprinkled with cinnamon if
                         desired.

                         Wash, cut in half, slice and
     Apricots            remove pit. Push in backs           Pliable          20-28 hours
                         dry skin side down.

                                                           Leathery or
     Bananas             Peel & cut into 1/8” slices.                         6-10 hours
                                                             Crisp

                         Leave whole. For wax skin
      Berries                                               Leathery          10-15 hours
                         berries pretreat by crazing.

                         Remove stems & pits. Cut
                         in half & place skin side
                                                           Leathery &
     Cherries            down & sticky on tray. Will                          13-21 hours
                                                             Sticky
                         be like raisins, watch to
                         prevent over drying.

    Cranberries          Same process as berries.            Pliable          10-12 hours

                         Wash, cut out blemishes,
       Figs              quarter & spread one layer          Pliable          22-30 hours
                         deep, skin side down.

                         Wash, remove stems & cut
                         in half or leave whole, skin
      Grapes                                                 Pliable          22-30 hours
                         side down. Blanching will
                         reduce drying time by 50%.

                  *for raw & living foods - use 105ºF/the drying time is extended

8
FOOD DRYING GUIDE FRUITS
Dry best at 135ºF/57ºC
Food Preparation Test Time
Wash, pit and peel. Cut into
Nectarines 3/8” slices, dry skin side Pliable 8-16 hours
down.
Wash, pit and peel-if
Peaches Pliable 8-16 hours
desired 1/4” slices.
Wash, remove core, peel
Pears Pliable 8-16 hours
1/4” slices, or 1/4 the pear.
Wash, remove cap & peel
Persimmons Leathery 11-19 hours
1/4” slices.
Peel, remove fibrous eyes
Pineapple and core. Cut into 1/4” Pliable 10-18 hours
slices or wedges.
Wash, cut in half, remove
pit and pop the back to
Prune Plums Leathery 8-16 hours
expose more surface to
the air.
Rhubarb Wash, cut into 1” lengths. Leathery 6-10 hours
Wash, cut off caps, slice Leathery &
Strawberries 7-15 hours
1/4” thick. Sticky
Cut off rind, cut into wedges Pliable &
Watermelon 8-10 hours
and remove seeds. Sticky
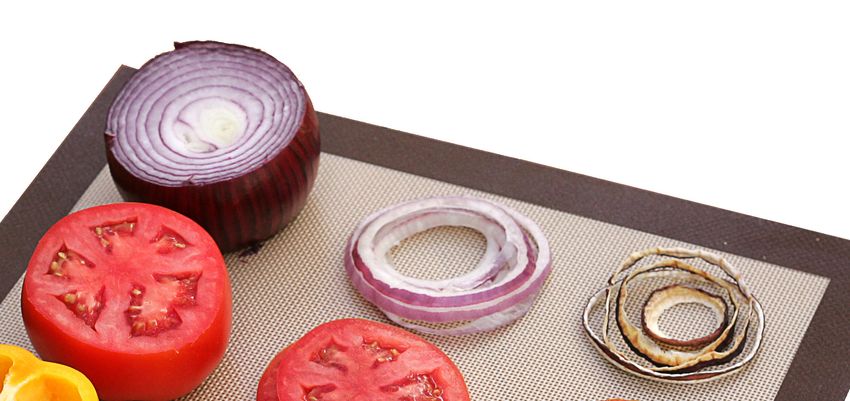
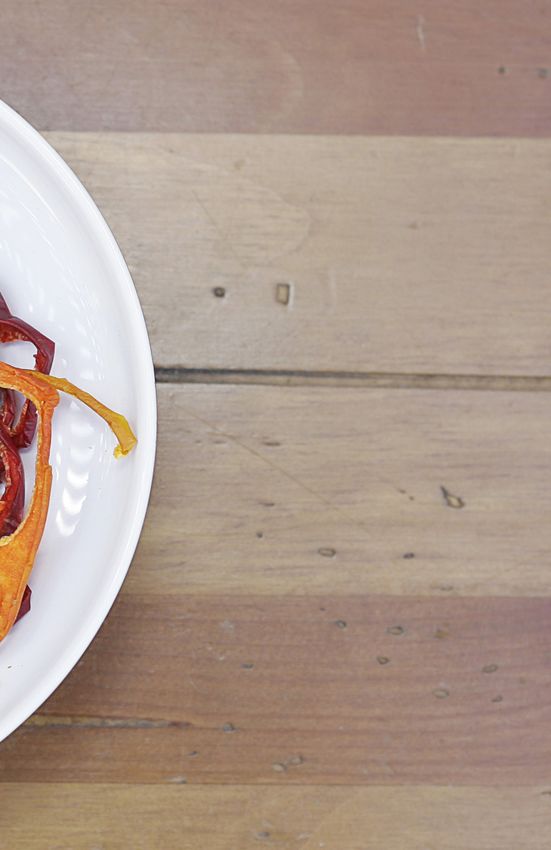
9FOOD DRYING GUIDE VEGETABLES
Dry Best At 125ºF/52ºC
Food Preparation Test Time
Asparagus Wash & cut into 1” pieces. Brittle 5-6 hours
Beans,
Wash, remove ends, cut 1”
Greens or Brittle 8-12 hours
pieces or French style.
Wax
Remove all but 1/2” of the
top scrub thoroughly, steam
Beets Leathery 8-12 hours
until tender. Cool, peel &
cut 1/4” slice or 1/8” cubes.
Wash & trim, cut stems
Broccoli into 1/4” pieces. Dry florets Brittle 10 -14 hours
whole.
Wash, trim & cut into 1/8”
Cabbage Brittle 7-11 hours
strips.
Wash, trim tops, peel if
Carrots desired. Cut into 1/8” cubes Leathery 6-10 hours
or circles.
Wash thoroughly, separate
Celery Leathery 3-10 hours
stalks, cut into 1/4” strips.
Shuck corn, trim silk &
steam until milk is set. Cut
Corn off from cob & spread on Brittle 6-10 hours
tray, stirring several times
while drying.
Cucumber Wash, slice 1/8” thick. Leathery 4-8 hours
Eggplant Wash, peel, slice 1/4” thick. Leathery 4-8 hours
*for raw & living foods - use 105ºF/the drying time is extended
10FOOD DRYING GUIDE VEGETABLES
Dry Best At 125ºF/52ºC
Food Preparation Test Time
Wash thoroughly, trim,
remove tough stems, spread
over trays so leaves aren’t
Greens Brittle 3-7 hours
matted together. For more
even drying, stir several
times.
Brush off dirt or wipe with
damp cloth, slice 3/8” slice
Mushrooms Leathery 3-7 hours
from cap through stem ends.
Spread in single layer on tray.
Okra Wash, trim, slice 1/4” circles. Leathery 4-8 hours
Remove root, top and skin,
Onions 1/4” slices, 1/8” rings or chop. Leathery 4-8 hours
Dry at 145ºF/63ºC.
Scrub, trim and peel if desired Tough/
Parsnips 7-11 hours
Cut into 3/8” slices. Brittle
Shell peas, wash and steam
only until they indent, rinse
Peas Brittle 4-8 hours
with cold water, blot dry with
paper towel.
Remove stem, seeds and white
Peppers section. Wash and pat dry, Leathery 4-8 hours
chop or cut 1/4” strips or rings.
Leave kernels on cob until
Popcorn well dried, then remove from Shriveled 4-8 hours
cob and dry until shriveled.
Use new potatoes, wash and
steam for 4-6 minutes. Cut
Brittle or
Potatoes French style, in 1/4” slices, 6-14 hours
Leathery
1/8” circles or grate.
11FOOD DRYING GUIDE VEGETABLES
Dry Best At 125ºF/52ºC
Food Preparation Test Time
Cut into pieces, remove all
seeds. Bake or steam until
tender, scrape pulp from skin
and puree in a blender. Pour
Pumpkin Leathery 7-11 hours
onto Paraflexx™ sheets or
kitchen parchment paper.
When dry cover with plastic
wrap & roll.
Summer Wash, peel if desired, cut
Leathery 10-14 hours
Squash into1/4” slices.
Wash & remove stems, slice
1/4:, Circles & for cherry/ Leathery or
Tomatoes 5-9 hours
grape tomatoes, slice in half, Brittle
dry skin side down.
Turnips Peel & cut into 3/8” slices. Brittle 8-12 hours
Wash & cut into pieces, bake
Winter or steam until tender, puree
Brittle 7-11 hours
Squash pulp in blender, pour onto
Paraflexx™ drying sheets.
Wash, steam until just
Yams tender, peel and cut into 1/4” Brittle 7-11 hours
slices.
Wash & cut into 1/4” slices or
Zucchini Brittle 7-11 hours
into 1/8” slices for chips.
12LEATHERS & FRUIT ROLLS
Leathers are an easy answer to the often heard request of “What is there to eat?” Yogurt,
leftover fruits or vegetables can be pureed, sweetened and spiced and made into a
nutritious, high-energy snack food. Spread the pureed, produce thinly on Paraflexx™ sheets
or plastic wrap and dehydrate, transforming the liquid into a chewy, quick-energy snack!
Leathers are so simple to make!
Select ripe or slightly overripe (but not spoiling) produce that blends and tastes well
together. Strawberries and rhubarb, or bananas and pineapple make great combinations.
Wash, remove any blemishes, stems or pits and peel produce if desired. Keep in mind
produce skins are highly nutritious. Puree the produce in a blender until it is smooth.
Pour 1 1/2 to 2 cups of puree onto the Paraflexx™ or plastic wrap covered trays. Since the
edges tend to dry more rapidly, the poured puree should be 1/8" thick at the center and 1/4"
thick at the edges. Place the prepared puree in the dehydrator with the temperature set at
135º/57ºC. Average drying time for leathers is 4-6 hours. When the leather has dried, it will
be a bit shiny and non-sticky to the touch. Allow the leather to cool and peel it from the tray.
Roll it into a tight cylindrical shape. A piece of plastic wrap, measured to fit the length and
width, is then tightly wrapped around the leather.
Fruit
Tart fruits such as rhubarb and cranberries require sweetening before drying. To the
fruit puree, add from 1/4 to 1/2 cup of honey or sugar. The amount of sweetener added
is dependent on your personal preference. Apple leather can be flavored with ground
cinnamon or nutmeg. Peanut butter and banana leathers can be made with 4 ripe bananas
and 1 cup old-fashioned peanut butter. Try adding coconut or chopped nuts to the leather for
an even more interesting taste and texture! Be sure to refrigerate leathers containing nuts
as the oil in them may shorten the leathers shelf life. Dry at 135º/57ºC.
Yogurt
Yogurt when spread onto Paraflexx™ sheets or plastic wrap and dried becomes a vividly
colored taffy-like snack. Make yogurt, add flavoring such as pureed strawberries or
peppermint extract. For best results with commercially made yogurt, use pre-stirred yogurt.
Cut the rolled yogurt leathers into 1/2" pieces and re-dry the individual “bites” for 1 hour.
Re-drying the yogurt after it has been cut will help seal the edges and prevent the pieces
from sticking in the storage container.
Vegetables
Vegetables can be steamed until tender, pureed and mixed with herbs and spices. Tomato
puree mixed with Italian herbs can be dried and later rehydrated for use as tomato paste or
sauce. Gazpacho leathers made from tomato, cucumber, onion, green pepper and herbs
is a delicious, low calorie treat! Carrot leathers can be the base for a cream soup. Using
your imagination, experiment a bit to find out what you will like the most! Dry at 125ºF/52ºC.
13JERKY
Many recipes are available, but it’s fun to make up your own concoction. You can use virtually
any combination of the following ingredients: soy, Worcestershire, tomato or barbecue sauce;
garlic, onion or curry powder, seasoned salt or pepper.
Pick a lean cut of raw meat as free from fat as possible; the higher the fat content, the shorter
the storage life of the jerky. The best way to get uniform pieces is with a meat slicer, but a
sharp knife will do. When using a knife, partially freezing raw meat will make slicing easier.
Slice the meat either with or across the grain. Jerky cut with the grain will be chewy; cut across
the grain will be very tender but more brittle. Cut into strips 1" wide, 3/18" thick and as long
as you want. Once sliced, cut off all visible fat.
To better preserve your jerky, apply either dry or brine cure prior to dehydrating. Dry cures are salt
and seasoning mixtures rubbed into the meat surfaces. Brine cures or marinades combine water
with the salt and seasoning. Meat is soaked in the brine until the salt is absorbed.
The Process
To dry cure, spread the meat strips in a single layer on a cutting board or some other flat
surface. Sprinkle the curing mixture on both sides of the strips. Coat the strips evenly. Layer
the strips one on top of another in a glass, plastic, or stoneware container that is sealed tightly.
Meat for brine curing should be layered with the cure poured over it to cover the top layers.
Place the container in the refrigerator and marinate for 6-12 hours (or preferably overnight.)
Turn the strips over several times to ensure thorough coating.
Dehydrating
Shake off any excess cure and spread the meat strips in a single layer on the dehydrator
trays. Dry at 165ºF/74ºC for approximately 4-6 hours, occasionally blotting off any fat droplets
that appear on the surface. While drying, the temperature will go up and down around the
set point - this is important to dry correctly. Your meat will hit 160º if you use the 165º - set
point on the dial.
Always test jerky using a cooled piece. Properly dried jerky, when bent, should crack but
not break.
Storage
Package cooled jerky in air-tight containers such as zip-top or vacuum sealed bags. For best
flavor retention, package the jerky into individual serving sizes and store in a cool, dark, dry
place. If beads of moisture form on the inside of the storage container, the jerky is not dry
enough and could mold - dry longer.
14Beef Jerky
Flank, round and sirloin tip cuts are the best to use when making beef jerky. Rich in protein,
beef is also high in phosphorus, iron, and riboflavin. See page 19, whole meal prep.
Game Jerky
Deer, bear and elk meat can all be made into jerky. Venison makes excellent jerky because
it has no marbled fat. Flank or round cuts are best for this purpose. Before drying, game
meat should be frozen for 60 days at 0ºF/-18ºC. This should kill any disease causing
bacteria that may be present. To prepare, follow instructions for beef jerky.
Poultry Jerky
For something uniquely different, try cooked chicken or turkey jerky. For this kind of jerky,
you can use the same cures as you would for meat. Since poultry is very fibrous, expect
your jerky to be somewhat more brittle than its beef counterpart. Dry at 165ºF/74ºC until
dehydrated throughout (about 4 hours.)
Fish Jerky
Dehydrating fish is not a process to treat lightly. Fish for jerky must be extremely fresh to
prevent spoilage before it can be dried. Be on the lookout for the oil content of the fish. Fatty
or oily fish, like tuna, spoil rapidly and, unlike meat, there is no way to simply cut off the fat.
Dehydrating these types of fish is inadvisable (see chart below.)
• Curing: Make up a cold brine consisting of 3/4 cup salt to 1 1/2 quarts water and place
the fish in it to marinate for about 1/2 hour. Rinse the fish thoroughly to remove traces
of salt; then arrange the pieces on a cutting board. Coat the fish with a dry cure which
may be made up of any combination of salt and seasonings. Layer the coated fish in an
airtight glass or plastic container. Refrigerate for 6-10 hours.
Remove the fish from the refrigerator and shake off any excess cure. Lay the strips on the
dehydrator trays so none are touching, and dry for approximately 12-14 hours at 165ºF/74ºC.
• Testing: When you squeeze the fleshy part of a cooled piece of fish between your thumb
and forefinger, it should never be crumbly or crunchy. Finish by smelling and tasting the fish.
The jerky should have a mildly fishy flavor and aroma. Fish jerky should contain 15% to 20%
water and there should be no visible surface moisture.
• Storage: Store according to beef jerky storing instructions.
Fish/Shellfish % Fat Fish/Shellfish % Fat
Catfish 5.2 Rockfish 0.2
Cod 0.5 Salmon 9.3
Croaker 2.5 Sea Bass 1.6
Flounder 1.4 Sea Herring 2.8
Greenland Turbot 3.5 Sea Trout 3.8
Grouper 1.0 Shark 5.2
Haddock 0.5 Shrimp 1.6
Halibut 4.3 Smelt 2.0
Lake Trout 11.1 Snapper 1.1
Mackeral 9.9 Sole 1.4
Monkfish 1.5 Tuna 5.1
Mullet 6.0 Whitefish 7.2
Ocean Perch 1.4 Whiting 1.3
Pollock 1.3 Yellow Perch 1.1
Rainbow Trout 6.8
15RAW & LIVING FOODS In 1963 Dr. Ann Wigmore and Victoras Kulvinskas founded the Hippocrates Health Institute in Boston, MA where they taught their patients about the benefits of a completely raw, organic diet. Today this raw food lifestyle has evolved into a worldwide movement, with Ann and Victoras being recognized as the movement’s mother and father. What are Living Foods? Ann Wigmore Foundation: “Living foods or raw foods are uncooked, free from animal products, organic, easy to digest, rich in enzymes, and highly nutritious. They include home grown sprouted grains and beans, vegetables, fruits, nuts, fermented preparations, dehydrated snacks and delicious deserts such as fruit and nut pies and fruit ice cream.” As you bite into a raw fruit or vegetable, you are experiencing the full potential of vitamins, minerals, and enzymes in one compact package. There is no nutritional loss caused by the heat of cooking, nor loss of water-soluble vitamins and minerals. If your produce was organically grown, it is free of chemicals, color dyes or preservatives. One of the most important characteristics of raw foods, is they are easier for your body to digest than cooked food. The enzymes are what make raw foods easier to digest than cooked foods. When food is cooked the enzymes become deactivated by heat. During the digestive process, the natural food enzymes assist your body’s digestive enzymes in breaking down food into digestive proteins. By eating more raw foods, your body does not have to work as hard to digest the foods, which gives your body more vibrant energy in other areas, making you feel stronger, healthier and happier. Dehydration is the best way to preserve the essence of raw fruits and vegetables. Dehydrating does not subject foods to the high temperatures associated with cooking, or traditional canning methods. When raw food is heated to an internal food temperature of 118ºF/48ºC or higher, for an extended period of time, its nutritional values begin to deteriorate, especially enzymes. Canning also leaches out water-soluble vitamins and minerals, which also depletes the healthy qualities of the raw-living foods. Why Excalibur® is Superior for Living Foods There are two important elements when dehydrating living foods to preserve the enzymes. The first element is the proper control of temperature, and the second, is the time it takes the food to dehydrate. If the temperature is too high the enzymes can be destroyed, but if the temperature is too low, the food takes longer to dry, causing it to spoil or grow bacteria. With the Parallexx™ Horizontal-Airflow Drying System and an adjustable thermostat, Excalibur® Dehydrators are uniquely suited for dehydrating raw foods while retaining the highest food qualities. The adjustable thermostat allows you to control the air temperature, and the rear- mounted fan that creates the Parallexx™ Horizontal-Airflow Drying System provides fast and even drying. With these two features, Excalibur® Dehydrators are able to keep the food temperature low enough to preserve the enzymes while raising the air temperature high enough to dry the food quickly, preventing mold and bacteria from growing. Most stackable dehydrators are poorly designed with no temperature control, or fan to properly circulate the air, and they dry from the bottom up requiring frequent rotating of the trays. 16
Excalibur® adjustable thermostat has been specifically designed to create a proper fluctuation
in the air temperature. As the air temperature fluctuates up, it quickly evaporates moisture
from the surface of the food. Then as air temperature fluctuates down, moisture from the
center of the food moves to the dryer outer surface. This proper fluctuation in temperature
also helps to keep the food temperature very constant throughout the entire dehydrating
cycle.

Food Temperature vs. Air Temperature
During the dehydration process the food temperature is generally 20 to 30 degrees F cooler
than the air temperature, due to the effects of evaporation. As the warm air blows across the
food, moisture is evaporated from the foods surface, creating a cooling effect that keeps the
food temperature cooler than the air temperature. Keep in mind that the dial settings represent
air temperature, so the air temperature may be as much as 25 degrees higher.

Enzymes and Temperature
There are many varying opinions among raw foodists concerning the temperature at which
enzymes become deactivated. The most frequently quoted temperature is 118ºF/47ºC / (food
temperature) based upon the studies of Dr. Edward Howell. However, he also states that the
optimal temperatures for enzymes are between 45º/7ºC and 140ºF/60ºC, and temperatures
above 140ºF/60ºC will destroy all enzymes. We have discovered through research and testing,
that the second of these two statements is more accurate when dehydrating, and that enzymes
can actually withstand food temperatures into the 140ºF/60ºC. According to Dr. John Whitaker,
a world recognized enzymologist, and emeritus professor and Dean of the Food Science and
Nutrition department at UC Davis in California; most enzymes do not become deactivated
until they reach between 140ºF/60 ºC and 158ºF/70ºC. This supports Howell’s statement of
140ºF/60ºC, as well as our tests and scientific experiments. We have tested food samples
for enzymatic activity that were dried at temperatures up to 145ºF/63ºC and found it to be the
same as in the foods dried at lower temperatures.
Enzymes are also most susceptible to damage by high heat while the food is wet. Once a
high percentage of the foods moisture has been removed, the enzymes become more stable
or dormant, and can withstand food temperatures higher than 155ºF/68ºC, according to
Viktoras Kulvinskas. When the food is rehydrated with water or in the digestive track the
enzymes become active again and assist your body’s enzymes in the digestive process.

How to use your Dehydrator for Living Foods
According to Ann Wigmore and Viktoras Kulvinskas, the best way to preserve the living
enzymes, and overcome the potential of spoilage or bacteria growth, is to set the dehydrator
on the highest temperature setting for the first two or three hours, then turn it down to less
than 120ºF/49ºC for the remaining time. During the initial hours the food temperature will not
exceed 118ºF/47ºC because of the high moisture content in the food. Neither will the air
temperature immediately rise to 145ºF/63 ºC. It may take several hours to get up that high.
Following this procedure will cut the lengthy (30+ hours) drying time in half. If you cannot be
there to turn the dehydrator down you may set at a lower temperature between 105ºF/41ºC
and 120ºF/49ºC, but keep in mind that the lower the setting, the longer it will take to dehydrate.

                                                                                              17
OTHER DEHYDRATOR USES Herbs and Spices Herbs and spices are sometimes a neglected part of our cookery. Use your Excalibur® dehydrator to dry your own freshly grown herbs! Buy bulk quantities of fresh herbs and spices, dry them and create special teas and seasonings. Left-over parsley will no longer be wasted…as drying herbs and spices require rather simple preparation: 1. Trim off any dead or discolored plant parts. Wash the leaves and stems in cool water. Blot with towel to remove as much water as possible. 2. Preheat dehydrator with the thermostat on 95ºF/35ºC - 115ºF/46ºC. Note: If herbs take longer than 4 hours, turn the temperature to a higher setting. Higher humidity areas may require temperature as high as 125ºF/52ºC to dry herbs and spices properly. 3. Spread the plants in a single layer on trays. 4. Dry 2 to 4 hours. This time can vary greatly. 5. Store in airtight containers free from moisture. Also, keep dried herbs and spices from sunlight. Sunlight fades the color and weakens flavoring oils. Nuts Nuts provide a concentrated source of protein, and many are rich in necessary dietary fats as well. Nuts can be dried at home in their natural state or spiced and seasoned. 1. Whole, unshelled nuts or just the kernels or nutmeats can be dried. 2. Spread nuts in a single layer on the drying trays. 3. Dry at 115ºF/46ºC - 125ºF/52ºC. Whole nuts should dry in 10 to 14 hours, and nut meats should be dry in 8 to 12 hours. 4. Store in airtight containers in the refrigerator. Note: Due to high oil content, nut meats may turn rancid if not refrigerated. Raising Bread The perfect environment for raising bread exists right inside your dehydrator. Remove the trays from the dehydrator, set the thermostat at 115ºF/46ºC and allow the unit to preheat. Place a shallow pan of water on the bottom of the dehydrator. Insert a tray directly above the water and place the bowl of dough on the tray. Cover the dough with a cloth to keep it from drying out. Allow the dough 1/2 to one hour of time to rise. When it has risen, continue with preparation according to your recipe. Pasta No need for separate pasta racks! Place strips of freshly made pasta in single layers onto your drying trays. Dry for 2 to 4 hours at 135ºF/57ºC. Store in airtight packages. Recrisping There is no need to throw away crackers, chips, cookies or cereals that have become stale. Recrisp these items by placing them in a single layer on the drying trays and drying them for 1 hour at 145º/63ºC. Yogurt Homemade yogurt is economical and easy when made in your dehydrator. Add 1 cup powdered milk to 1/2 gallon low-fat milk. Scald for 2 seconds. Remove from heat and cool to 115ºF/46ºC. Add 2 tablespoons of non-pasteurized plain yogurt to the cooled milk. Pour into 18
containers and cover. Incubate in the dehydrator at 115ºF/46ºC for 5 hours. (Note: Use a
candy thermometer for best results.) Do not disturb, bump, open door or move while yogurt
is incubating. When finished, refrigerate. Before serving, add flavors or fresh fruit, if desired.
Cheese
Cottage cheese got its name from the fact it is so easily made in the home…or in the
cottage. Unripened cheese, such as cottage cheese, can be made in your Excalibur®
dehydrator. To make this cheese, you’ll need a gallon of pasteurized milk and either 4
tablespoons of unflavored yogurt, 1/2 cup fresh buttermilk, or 1/4 tablet of rennet dissolved
in 1/2 cup warm water.
Pour the milk into a crock and warm it to room temperature, about 72ºF/22ºC. Mix in the
yogurt, buttermilk, or rennet and cover the crock with cheesecloth. Place the crock in the
dehydrator and hold the temperature inside at 85ºF/29ºC and 12 to 18 hours until clabbered.
Clabbering means that the milk has separated to form thick, solid “curd” and the watery,
liquid “whey.” When the milk has thickened into curds and little whey lays on the surface,
the cheese is clabbered.
Next, cut the curd as follows. Use a long bladed knife and make all cuts approximately
1/2” apart.
   1. Holding the knife vertically, make straight up and down cuts across the curd.
   2. Now slant the knife and make diagonal slices down through the cheese following the
    cuts of step 1, make the first cut at a 45º angle but gradually straighten the blade so
    that the last cut is nearly vertical.
   3. Repeat the process in step 2, only slant the knife in the opposite direction.
   4. Turn the crock 180º and make a final set of vertical cuts to form a crosshatch
    pattern on the surface. This process helps the sour whey drain out.
Place several inches of water in a large pan, set the crock in it and heat to 115ºF/46ºC. Hold the
cottage cheese at this temperature for 1/2 hour, stirring occasionally. Once the time is up, line a
colander with cheesecloth and pour in the curds and whey. Allow the whey to drain off; otherwise,
it will give the cottage cheese a bitter taste. To get rid of even more of the sour taste, dip the
colander in cold water and gently stir the curds to wash away the last traces of the whey. Let
the curds drain thoroughly. If desired, add 1 teaspoon salt per pound of cottage cheese and 4-6
tablespoons of cream. After refrigeration, your cottage cheese will be ready to eat as is or
in fruit salads, dips, cheesecake and casseroles.
In addition to using your dehydrator to make soft cheeses, semi-soft and hard cheeses also
can be made. There are between 700 and 2000 kinds of cheese and instructions for making
them would become a book in itself! Preserve it, Naturally! has “how-to’s” for making semi-
soft and hard cheeses in your Excalibur® dehydrator.
Drying Photographs
To dry photographs, treat and wash as usual. Shake or squeegee off the excess liquid and
place on the drying trays. Dry until no wet spots remain. Note: Dry only photographs that
have been printed on resin-water stock. Other types will wrinkle unless pressed flat.
Whole Meal Preparation
Outdoor enthusiasts will want to use the dehydrator to prepare whole meals that need only
to be rehydrated. Dried meats combined with powdered tomato and dried vegetable bits
can be mixed with dried pasta and cooked in a kettle over the campfire for a “gourmet”
after-hiking dinner! A bit of creativity and knowledge of required rehydration time is all that
is needed to devise recipes for lightweight and nutritious take-along meals.

                                                                                               19
YEAR-ROUND DEHYDRATION TIPS January Good Buys: Avocados, Bananas, Cabbage, Cauliflower, Mushrooms, Pears, Potatoes, Turnips and Winter Squash. February Good Buys: Avocados, Bananas, Broccoli, Cabbage, Cauliflower, Kumquats, Mangos, Mushrooms, Pears, Tangerines, Winter Squash. March Good Buys: Artichokes, Asparagus, Avocados, Bananas, Broccoli, Grapefruit, Kumquats, Lettuce, Mushrooms, Radishes, Spinach. April Good Buys: Asparagus, Bananas, Cabbage, Chicory, Escarole, Onions, Pineapple, Radishes, Rhubarb, Spinach, Strawberries. May Good Buys: Asparagus, Bananas, Celery, Papaya, Peas, Pineapple, Potatoes, Strawberries, Tomatoes, Watercress. June Good Buys: Avocados, Apricots, Bananas, Cantaloupe, Cherries, Corn, Cucumber, Figs, Green Beans, Limes, Mangos, Nectarines, Onions, Peaches, Peas, Peppers, Pineapple, Plums, Summer Squash. July Good Buys: Apricots, Bananas, Blueberries, Cabbage, Cantaloupe, Cherries, Corn, Cucumbers, Dill, Eggplant, Figs, Gravenstein, Apples, Green Beans, Nectarines, Okra, Peaches, Peppers, Prunes, Watermelon. August Good Buys: Apples, Bananas, Beets, Berries, Cabbage, Carrots, Corn, Cucumbers, Dill, Eggplant, Figs, Melons, Nectarines, Peaches, Pears, Peppers, Plums, Potatoes, Summer Squash, Tomatoes. September Good Buys: Apples, Bananas, Broccoli, Carrots, Cauliflower, Corn, Cucumbers, Dill, Figs, Grapes, Greens, Melons, Okra, Onions, Pears, Peppers, Potatoes, Summer Squash, Tomatoes, Yams. October Good Buys: Apples, Bananas, Broccoli, Grapes, Peppers, Persimmons, Pumpkin, Yams. November Good Buys: Apples, Bananas, Broccoli, Cabbage, Cauliflower, Cranberries, Dates, Eggplant, Mushrooms, Pumpkin, Sweet Potatoes. December Good Buys: Apples, Avocados, Bananas, Grapefruit, Lemon, Limes, Mushrooms, Oranges, Pears, Pineapple, Tangerines. 20
RECIPES
Banana Blush Leather
    1 cup strawberries
    1 banana
Puree fruit in blender. Pour onto Paraflexx™ sheets or plastic wrap and dehydrate at
135ºF/57ºC until leathery.

Peachy Pear Leather
    1 cup peaches, peeled
    1/2 cup pears, peeled
Blend together and sweeten if desire. Pour onto Paraflexx™ sheets or plastic wrap and
dehydrate at 135ºF/57ºC until leathery.

Persimmon-pineapple Leather
    1 cup persimmon pulp
    1/2 cup crushed pineapple
Puree in blender. Spread onto Paraflexx™ sheets or plastic wrap and dehydrate at
135ºF/57ºC until leathery.

Spaghetti Sauce Mix
    1 tbsp dried onions                               1 tbsp dried parsley
    3 tsp cornstarch                                  1 tbsp dried green peppers
    1 1/2 tsp dried garlic powder                     1 tsp sugar
    1/2 tsp dried oregano                             1/2 tsp dried basil
    1 cup tomato powder                               1/4 cup dried, sliced mushrooms
Mix all ingredients and store in a tightly sealed glass container. To prepare sauce, add 3
cups of water to mix and simmer until thick. Serves 4.

Beef Jerky Ole’
    1 jar of mild salsa                               1 package chili seasoning mix
    1 tsp oregano powder                              crushed red pepper
    5 lbs lean beef, sliced 1/4" thick
Remove all visible fat from beef. Combine all ingredients except crushed red pepper
in a large bowl. Place meat into a zip-top plastic bag and add marinade. Place in
refrigerator overnight, turning occasionally.
Place piece of meat in a single layer on the drying trays. For extra zest sprinkle
crushed red pepper sparingly over the meat.
Dehydrate meat for 6-10 hours at 155ºF/68ºC. Test for dryness; when meat is bent, it
should crack, but not break. Store in air-tight container or vacuum sealed bags.

  Visit www.drying123.com for more recipes and to submit your own.

                                                                                        21
Creamy Mushroom Soup
1 1/2 cups dried mushrooms 1/2 cup dried onions
2 cups hot beef bouillon 1/4 cup margarine
4 cups milk 1 tsp salt
6 tbsp flour parsley or garnish
Saute mushrooms and onions in margarine in a heavy saucepan for 5 minutes, stirring
occasionally. Combine bouillon, milk, salt & flour. Blend until smooth. Add to sautéed
mushrooms and onions. Cook over low heat until the mixture comes to a boil, stirring
constantly. Garnish with parsley. Makes about 8 servings.
Sweetheart Yogurt Leather
Strawberry, cherry or raspberry pre-stirred yogurt
Heart shaped cookie cutter Paraflexx™ sheets
Cover each drying tray to be used with a Paraflexx™ sheet or plastic wrap. Use 1 carton of
yogurt per tray. With yogurt at room temperature, empty cartons onto sheets. With a spatula,
smooth the yogurt into and 8-10" circle. Dry at 135ºF/57ºC for 4-5 hours. When dried, yogurt
will be shiny and non-sticky when lightly touched. With a heart shaped cookie cutter, cut 4-5
hearts out of the cooled piece of yogurt. Cover each with plastic wrap and store.
Potatoes O’Brien
2 cups dried, chopped potatoes 1/4 cup dried onion
Fresh ground black pepper to taste 1/2 cup crumbled bacon (optional)
1/4 cup chopped dried green onion 1/4 cup dried red peppers
4 tbsp oil salt to taste
Rehydrate potatoes, onion & pepper, letting stand about 20 minutes, drain. In a skillet,
over medium heat add oil. Cook potatoes, onion & pepper until crisp & golden brown.
Add crumbled bacon, salt, & pepper. Serves 6 – 1/2 cup serving each.
Summer Salad Topping
3/4 cup dried onion flakes 1/2 cup dried crumbled carrots
1/4 cup dried red peppers 1/4 cup dried green peppers
1/4 cup dried parsley 1/4 cup sunflower seeds
1/2 cup dried tomato flakes 1/2 cup grated parmesan cheese
Coarsely chop all ingredients in a blender. Be sure that all ingredients are thoroughly mixed.
Refrigerate mixture in glass jar with tight lid. To serve, sprinkle mixture over salads.
Aztec Corn
3/4 cup dried onion 1 1/2 cup dried corn, rehydrated
1 cup sour cream 1/4 cup mild red salsa
1/4 teaspoon pepper 3 tablespoons butter
1/4 cup water 1 cup shredded Monterey Jack cheese
3/4 teaspoon salt 1 can chopped black olives
Saute onion in butter until soft. Add corn & water. Cover tightly & cook over medium heat
for 5 minutes. Remove cover and over high heat, boil away most of the liquid. Stir in sour
cream, cheese, salsa, olives, salt & pepper. Heat thoroughly, but do not boil. Serves 6
22QUESTIONS & ANSWERS
One side of my drying trays seems to be dried before the other.
What should I do?
Because your dehydrator may dry one side faster than the other, halfway through the drying
cycle you may want to turn the trays 180º. This will speed up the dehydration process and
will reduce energy consumption.
My apples and pears have darkened to a rusty-brown color while drying.
Are they safe to eat?
Yes. Fruits that have turned brownish color are safe to eat. Many fruits will oxidize during the
drying process. Oxidation happens when the flesh of the fruit is exposed to air. By pretreating
fruits oxidation is reduced.
Why should the edges of my fruit leather be thicker than the center?
With fruit leathers, the edges of the mixture tend to dry first. If the edges are the same
thickness as the center, they will dry too quickly and become brittle.
My fruit leathers are very thin and brittle. I’d like to make them like the ones sold
commercially. How can I do that?
Juicy fresh fruits, such as strawberries, can be too runny to create a thick, chewy leather like
the commercial types. By simply adding a banana when pureeing, the mixture will become
thick and the fruit leather will as well. Be sure to pour 3/4 to 1 cup of puree on each tray
and allow it to spread out. Remember, the poured puree should be 1/4" thick at the edges.
If I powdered my dried vegetables, what could I use them for?
Powdered onion and garlic, of course, are favorite seasonings for meats and sauces. Powdered
tomatoes can be reconstituted into tomato sauce, paste, catsup, juice or soup. Powders are
easy to make. A blender or food processor will give you the finest texture. Simply place pieces
of dried vegetables into a blender and process. Store in air-tight bottles or jars.
As items dry, should they be removed to allow better circulation for still moist foods
and avoid over drying?
Yes. As foods dry, remove them from the trays and package. The other still moist pieces
should remain in the dehydrator until they are completely dry. However, if you have sliced
your food into uniform pieces and have turned your trays 180º halfway through the cycle,
your load should be finished at the same time.
Do you have more detailed information in your book Preserve It, Naturally! Does it
include guidelines or is it just recipes?
Preserve It, Naturally! over 250 page book. It contains hundreds of color pictures and
diagrams! The book completely details every aspect of drying from mint leaves to pistachio
nuts. It has detailed directions for craft ideas, instructions for yogurt and cheese making,
dehydrating grains and even making baby food! There are 275 recipes using home dried
fruits, vegetables, meats and grains for you to try, experiment with or use as a guideline
while concocting your own!
23TROUBLE SHOOTING GUIDE
All Excalibur® Dehydrators are checked three times for any electrical or mechanical problems.
They are shipped in perfect working order. If you see any damage to the machine due to
rough shipping you must report it to the shipper or dealer you purchased from. Excalibur®
will not be responsible for damage due to shipping. Technical support may be contacted
at (800) 875-4254 or (916)381-4254 from 8am-5pm Mon-Fri Pacific Standard Time.
Problem Answer
Test the outlet with another appliance that works. Test the
Nothing turns ON dehydrator on another outlet that you know has power.
Due to rough shipping the trays may have been forced into the fan’s
protective screen. Take out the trays, and blow on the fan blade to
Fan makes a locate where it is rubbing against the screen. You may need to turn the
rubbing noise fan on and press gently against the screen and listen where the noise
increases. With a pair of needle nose pliers pull the screen away from
the fan blade at point of contact.
Remove trays and check for any loose wires. There may be a piece
of dust or shipping debris blocking the tiny electrical points in the
thermostat, or it may simply be stuck due to rough shipping. With the
fan running, turn the knob back and forth between the highest and
lowest settings pausing for a moment on each setting. Repeat for 40
knob rotations. Then with the fan turning, stop the rotation of the fan
No heat, but fan
by pressing against the metal mesh screen towards the fan blade until
works it stops. This will make a loud noise - this is OK. Use your flattened
hand - never place any object through the square holes in the screen.
With the fan blade stopped look for glowing, if you see glowing,
immediately let go of the screen, you have cleared the points and your
unit is fixed. If there is no glowing you must replace the fuse. Fuses
are available on-line.
The polyscreens are all placed on the bottom or top tray. Take out all
Polyscreens missing the trays and look inside the dehydrator with sufficient light so you can
see them. They are there.
Kitchen accessories are shipped in the dehydrator box with exception
of larger items like the apple peeler, v-slicer, jerky gun or cannon.
Accessories are
They are placed on the side of the dehydrator and may have slid
missing underneath. Double check by removing all packaging. Paraflexx™
sheets are the same color as the corrugated box, so look closely.
Most high-quality plastic parts are injection molded. A mold is put
into a plastic injection-molding machine, where the plastic is melted
Door seems to be and injected under extremely high pressure into the mold. Where the
plastic enters the mold is called the gate. All plastic parts must have
broken or scratched a gate. Most gates are in an area that is not seen. The best place for
at bottom the gate on the door was the center on the bottom. We break the gate
off and if necessary file off any sharp edges. Due to design constraints
this is the best we can do.
www.drying123.com
24EXCALIBUR’S® CONVENIENT LIFT-OFF DOOR
Medium 5 Tray and Large 9 Tray Models
To install the door hold it at a slight angle, (see Fig. 1). Place the hooks on the inside top of
the door on the ledge at top of dehydrator, (see View A). Be sure there is an even space
between the door and the side of dehydrator, (see Fig. 2), and that the bottom of the door
does not hit the sides, (see front and side View B). This allows moist air to exit.
Fig. 2
View A Front
View B
Side
Fig. 1
25DOMESTIC 5 YEAR LIMITED WARRANTY
HOME UNITS
Excalibur Dehydrators are built to a such a high standard they come with a 5 year limited
warranty. Since we manufacture the EXCALIBUR® here in the U.S.A., we have replacement
parts on hand, if a component of your dehydrator is accidentally damaged or needs warranty
repair. Our 5 year limited warranty covers all plastic and electrical components for one year
free of charge. For the balance of five years new or rebuilt replacements for factory defective
electrical parts will be supplied at no charge. Shipping of the electrical parts are the
responsibility of the customer.
We recommend that you properly register your purchase by completing the warranty
registration online.
FACTORY-DIRECT EXCLUSIVE
Domestic 10 Year Extended Warranty - Home Units
This warranty is available on Food Dehydrators purchased directly from EXCALIBUR®. We
warranty your EXCALIBUR® Food Dehydrator to be free of defects in workmanship or materials
for ten years. This warranty covers all plastic and electrical components for one year free of
charge. For the balance of 10 years new or rebuilt replacements for factory defective electrical
parts will be supplied at no charge, all you have to do is pay the shipping to get the parts to
you. You can have peace of mind knowing your investment will be taken care of if the need arises.
International
1 Year Warranty- Parts Only
If you have warranty questions, please contact Excalibur® Customer Service at
(800) 875-4254 or (916) 381-4254 from 8am-5pm Mon-Fri Pacific Standard Time.
26You can also read