Egg Drop Demonstration - Target Audience: Children, Grades K-3
←
→
Page content transcription
If your browser does not render page correctly, please read the page content below
Egg Drop Demonstration
Target Audience: Children, Grades K–3
Demonstrating Bicycle Helmet Effectiveness: A How-to Guide
Egg Drop Demonstration
Target Audience: Children, Grades K–3
Description:
In this demonstration, the egg represents the head/brain. The demonstration shows what can hap-
pen when bicyclists fall and their heads are not protected by bicycle helmets.
The Egg Drop demonstration consists of two drops. In the first drop, the egg is dropped into a
protective material simulating a protective bicycle helmet. Because the egg is protected, it should
not break. In the second drop, the egg has no protective material and breaks.
Objectives:
By the end of this session, students will be able to:
Discuss the importance of wearing a bicycle helmet;
Explain what the experiment taught them; and
Explain why they should wear properly fitted bicycle helmets each time they ride a bike.
Room Set-Up:
Gather students in a semicircle or to the side of the demonstration area. Allow an open space of at
least 8’ x 8’ for the demonstration.
Materials Needed:
3 raw eggs
2 sealable plastic sandwich bags
brick or comparable size rock
Paper towels
Five-gallon bucket or medium sized cardboard box approximately 12” x 12” x 6”
Soft protective material (sand, bubble wrap, tissue paper, Styrofoam pieces or other soft
material) to layer the bucket or box.
Ladder, chair, or stool
Marker
Bicycle helmet
Handouts:
Easy Steps to Properly Fit a Bicycle Helmet:
English: www.nhtsa.dot.gov/people/injury/pedbimot/bike/EasyStepsWeb/index.htm
Spanish: www.nhtsa.dot.gov/people/injury/pedbimot/bike/EasyStepsSpan/index.htm
The Bicycle Helmet Pledge (click here)
Egg Drop Demonstration
Demonstration Steps:
Step 1: Introduction
A. Engage the students by asking:
Who rides a bike?
Who wears a helmet? Always? Sometimes?
Who has fallen off a bike or knows someone who has fallen off a bike?
Who knows someone who has hit his or her head hard and possibly had a concussion?
B. Discuss falling off a bicycle:
Many bicycle injuries are due to falls. Children young and old, adults, and even expe-
rienced riders can fall off their bicycles. You never know when a crash will happen and
that’s why it is important to always wear a helmet when riding.
Reasons why those who ride bicycles might fall/crash:
Learning to ride a bicycle for the first time, or getting used to a bicycle;
Riding over road hazards (debris, gravel, wet leaves, or sand), or damaged sidewalks
or roads (cracks, pot holes, uneven surfaces);
Bicycle failure (flat tire, bad brakes, etc);
Bicycle rider’s inexperience riding;
Motorists’ unsafe driving behavior; or
Bicyclists’ unsafe riding behavior.
Motorists’ unsafe driving behavior: Motorists’ driving behaviors causes some crashes
with bicyclists. Some examples include a motorist:
Driving too closely to a bicyclist;
Distracted/not paying attention (cell phone, etc);
Turning directly in front of a bicyclist;
Opening a car door in the path of a bicyclist; or
Failing to see or yield for a bicyclist.
Bicyclists’ unsafe riding behavior: Bicyclists’ riding behavior causes some crashes be-
tween bicyclists and motor vehicles. Some examples include a bicyclist:
Riding on the wrong side of the road;
Not paying attention;
Failing to look left, right, left before entering a roadway (driveway or street); or
Failing to ride in a predictable way, i.e., straight versus weaving between traffic.
C. Discuss the purpose of the demonstration:
Illustrate why wearing a helmet is important, and
Demonstrate how a helmet protects a rider’s head and brain.
Importance of wearing a bicycle helmet:
Wearing a properly fitted bicycle helmet can protect your brain from injury and can
possibly save your life.
Research shows that bicycle helmets are 85- to 88-percent effective in reducing head
and brain injury.
Demonstrating Bicycle Helmet Effectiveness: A How-to Guide
1 Wearing a bicycle helmet is the single most effective way to reduce head injuries and
fatalities resulting from bicycle crashes.
A properly worn bicycle helmet cushions the head when it hits a hard surface such
as a road or sidewalk; even from hard impacts on grass and dirt. The inner portion
of a helmet is a crushable liner that absorbs and reduces the force of impact to the
head.
Always wear the proper helmet for bicycling; there are varying types of helmets
for different sports. Each helmet is designed based on the particular sport. There
are some helmets that are designed for multi-sport use; make sure the helmet label
reads the helmet is suitable for bicycling.
A proper bicycle helmet should include a manufacturer’s label on the inside of the
2 helmet stating the helmet meets the CPSC safety standards. (Image 1)
The demonstration will show:
What can happen to a head and brain when a crash occurs.
The egg represents the human head—the shell is fragile like a skull; the sub-
stance inside the egg represents the brain.
If a head hits a hard surface it can crack and the brain can be injured.
How a bicycle helmet helps protect the head and brain from severe injury.
The helmet is represented by the soft material.
3 The soft material pads the egg when it is dropped.
Step 2: Preparing the Egg
A. Have the class name the egg. (Optional)
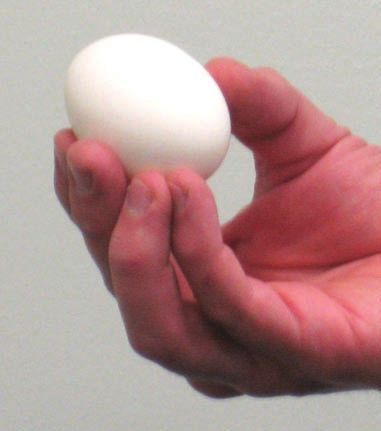
B. Hold up the egg and explain that the egg is delicate like our own heads and brains.
(Image )
C. Draw face and hair on the egg with a marker. (Image )
4 D. Place the egg in a sealable plastic sandwich bag. (Image )
Step 3: Involve the Students (Optional)
A. Ask for a volunteer to help with the demonstration.
B. Choose a student who can stand on a chair, stool, or ladder safely.
Step 4: First Drop
A. Place a minimum of six inches of soft material inside a bucket or box to serve as
your “helmet.”
Egg Drop Demonstration
B. Place the “helmet” (soft material) in the middle of the demonstration area. 5
(Image )
C. Have the volunteer stand on the chair, ladder, or stool.
D. Assist the student into the position and support the student during the
demonstration.
E. Give the student the egg in a plastic bag and instruct the student to drop the egg
in to the bucket or box from a height of at least four feet. (Image )
Step 5: Discuss Outcome
6
A. The egg most likely did not break.
B. Explain that the soft material represents the kind of protection a bicycle helmet
gives in the event of a crash.
C. What should you do if the egg does crack? Use this as a teaching opportunity.
Maybe the helmet doesn’t meet the CPSC standards. All helmets sold today are required
to have a CPSC sticker. There may still be a few helmets, however, that are sold at yard
sales and thrift shops that were used prior to required certification and may not meet
the safety standards. (See additional discussion under Demonstration Step 10.)
7
Maybe the helmet is damaged (i.e., has foam already crushed or cracked from a previous
fall)? If you are in a crash and hit your head, you should replace the helmet, even if you
can’t see a crack.
Maybe the helmet isn’t fitted properly. How a helmet is worn reflects how well it can do
its job. Helmets must always sit properly on the head, and adequately cover the fore-
head. Further, helmets must be buckled and fit securely under the chin. (See associated
handout).
Step 6: Second Drop
A. Set up a brick, rock, or other hard surface in the middle of the demonstration area.
8
(Image )
B. Lead the volunteer over to the area and hand the volunteer the sealable plastic bag
containing the egg used in the first drop (or a new egg/bag if needed).
C. Ask the class to guess at what height the egg will break.
D. Instruct student to drop the egg onto the hard surface from a distance of six inches
to one foot.
Note: You might correlate to real life. Consider a scenario: Imagine that you are riding your
bike very fast and hit some gravel and fall. How would you fall and hit your head? What would
happen?
Step 7: Discuss Outcome
A. The egg will most likely break inside the bag when dropped from a distance of six
inches and crack when dropped at a distance of two to three inches. (Image 8)
Demonstrating Bicycle Helmet Effectiveness: A How-to Guide
9 B. Use this demonstration to emphasize the delicacy of our own skulls and
brains. Explain that if a bicyclist falls and hits his or her head, wearing a helmet
significantly decreases the chances of serious brain or head injury or death from
a head injury.
Note: Anytime a young person hits his or her head hard an adult should be told, and a doctor
should check the person out to see if there is swelling to the brain and a possible concussion.
The doctor can instruct the parent or adult about signs to look for at home for 24 hours after
the impact that could indicate swelling and need for additional medical attention.
Step 8: Summary Discussion
10
A. Every person (young and old) riding a bicycle should wear a helmet every ride.
B. A helmet should be worn and secured properly. Discuss the basics of properly
fitting a bicycle helmet:
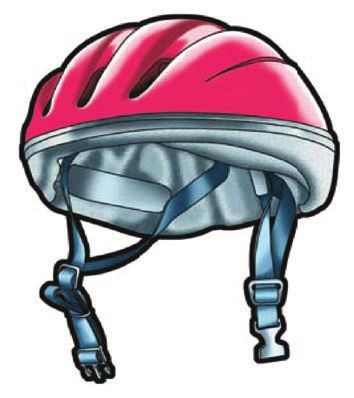
Helmet should fit level on the head (one to two fingerbreadths above eyebrow).
(Image 9)
Helmet straps should form a “V” under the ears. (Image 10)
Helmet straps must be buckled and tight enough so no more than two fingers can fit
between the chin and the strap. (Image 11)
When adjusted, the helmet should not move more than about an inch in any direction.
11 (Image 12)
C. Since the naked eye cannot always see crushed foam or a crack in a helmet, a hel-
met that has been involved in a crash where the head struck a hard surface should
be replaced. For the most recent recommendations on helmet replacement go to:
www.helmets.org/replace.htm.
Optional: Pass your helmet around to the class, pointing out the outside and inside of the hel-
met that protects the head. Both the inner and outer shell of the helmet needs to be inspected
after a crash. If your helmet has been in a crash, the helmet needs to be replaced because partly
crushed foam or small cracks in the lining reduce the protection for your head and brain. You
12 should never use a cracked or otherwise damaged helmet because once damaged it isn’t able
to do its job to protect you.
D. Certified and Proper Helmets:
The CPSC sticker tells the consumer that the manufacturer of the helmet certifies the
helmet meets the safety standards established by the CPSC.
There are different helmets for different sports.
Make sure the helmet you buy is for bicycling; there are varying types of helmets
now for different sports. Each helmet is designed based on the particular sport.
Some helmets are designed for multi-sport use; read the label inside the helmet to
make sure you are buying one suitable for bicycling.
8Egg Drop Demonstration
Step 9: Provide Handouts
A. Easy Steps to Properly Fit a Bicycle Helmet: Include this handout in each child’s
take-home material and encourage the child to share this with family and friends.
This handout provides children and their parents/caregivers with step-by-step in-
structions on how to fit a bicycle helmet.
English: www.nhtsa.dot.gov/people/injury/pedbimot/bike/EasyStepsWeb/index.htm
Spanish: www.nhtsa.dot.gov/people/injury/pedbimot/bike/EasyStepsSpan/index.htm
B. Bicycle Helmet Pledge: The helmet pledge serves as a commitment that each
student promises to wear a bicycle helmet every time they ride. Everyone should
encourage their family members and friends to be safe as well.
Encourage them to make the commitment and to sign it before the end of the session.
Include a blank copy of this handout in each student’s take-home material (click here).
Step 10: Discussion of Properly Fitted Bicycle Helmets
A. Using “Easy Steps to Properly Fit a Bicycle Helmet,” demonstrate how to properly
fit a bicycle helmet.
B. Emphasize that many who wear bicycle helmets wear them incorrectly. The most
common mistakes are:
Wearing the helmet too high or too low on the forehead. Helmets should be no more
than one to two fingerbreadths above the eyebrows (demonstrate based on picture in
handout).
Not buckling the helmet.
Not tightening the chin strap so it holds the helmet securely on the head. The strap
should be tight enough so not more than one to two fingers fit under the strap when it is
buckled.
Other Helpful Resources:
How to Fit a Bicycle Helmet Streaming Video. This video shows how to select and correctly
wear a bicycle helmet. Available on the NHTSA Web site at: www.nhtsa.dot.gov, under traf-
fic safety, bicycles. Available in English and Spanish.
Ride Smart. It’s Time to Start. This 9-minute video is part one of a two-part series. It dis-
cusses the importance of wearing a bicycle helmet and is presented by middle-school-age
youth. The video may be viewed on NHTSA’s Web site or ordered through e-mail: www.
intraweb@nhtsa.gov.
Bike Safe. Bike Smart Video. This 10-minute video is part two of a two-part series. It re-
views the importance of wearing a bicycle helmet and then discusses the rules of the road.
It is presented by the same middle-school-age youth as the first video. The video may be
viewed on NHTSA’s Web site or ordered through e-mail: www.intraweb@nhtsa.gov.
Helmet Replacement:
For the most recent recommendation on helmet replacement go to:
www.helmets.org/replace.htm.
Bicycle Helmet Site:
For the most up-to-date information on bicycle helmets go to the Bicycle Helmet Safety Institute
Web site: www.helmets.org.
Take the Pledge:

                                 Smart Riders Wear
                                 Bicycle Helmets

Student Pledge:
I promise to always wear a helmet every time I ride a bicycle. I know that wearing a properly
fitted bicycle helmet will greatly reduce the chances of my getting seriously hurt and that it
encourages others to make the same smart choice to wear one.

Student Signature                                           Date

Parent Pledge:
I promise to always wear a helmet every time I ride and to make sure that my children do the
same. I know that wearing a properly fitted bicycle helmet is the single most effective way to
prevent head injuries resulting from a bicycle crash and that wearing a helmet each ride en-
courages the same smart behavior in others.

Parent Signature                                            Date

For more information on bicycle safety, visit the
National Highway Traffic Safety Administration
Web site at www.nhtsa.gov.
You can also read