INSTALL GUIDE - COLOUR PANELTM - Boundaryline
←
→
Page content transcription
If your browser does not render page correctly, please read the page content below
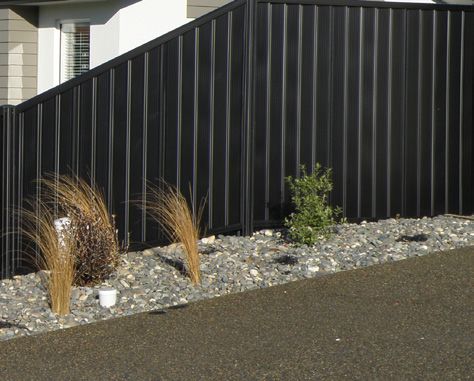
COLOURPANEL                         TM
                                         SLAT-TOP
                                                    STEP-BY-STEP GUIDE

A STEP-BY-STEP GUIDE TO INSTALLING YOUR FENCE

                    INSTALL
                      GUIDE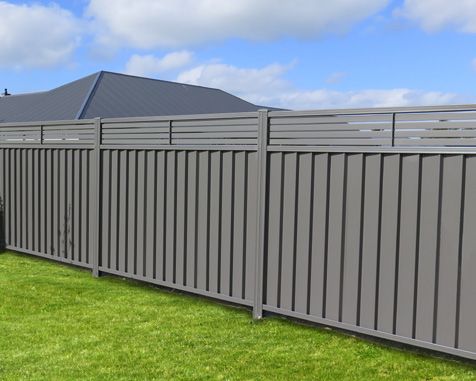
STEP-BY-STEP GUIDE

INTRODUCTION
Thank you for choosing                    The recommendations detailed              If you have any questions,
Boundaryline ColourPanelTM                in this guide are formulated              please contact our Technical
Fencing. This product will                along the lines of good                   Team on 0800 003 006. We
provide you with many years               building practice. They are not           are always happy to help in
of trouble free protection if             intended to be an exhaustive              any way we can.
installed in accordance with              statement of all the relevant
the directions outlined in this           data.
document.

BEFORE YOU START, READ THIS
- This guide does not apply               the table in Step 1. This will            - Check your local council
to any fences over 1.8m in                determine the concrete and                regulations on boundary
height. If your fence is greater          footing details required.                 fencing.
than 1.8m, please seek further
advice from Boundaryline.                 - Make sure you are aware of              - Check the delivered material
                                          underground services before               for the correct number of
- Describe your site details              you start digging! These could            components and general
when ordering materials.                  be gas, electricity, or water             condition before beginning
                                          mains. Call your local council            your installation.
- Identify your soil type/                for more information.
ground conditions. Refer to

TOOLS LIST
                                          TOOLS                                           SAFETY GEAR

                                            Tape Measure             String Line            Safety Boots
                                            Square                   Drill/Driver           Gloves
- Make sure you choose                      Shovel                   Angle Grinder          Helmet
                                            Circular Saw             Post Hole Digger       Eye Protection
the right tools before start
                                            Hex Drive Bit            Spirit Level           Hearing Protection
installing your fence.                      Line Marking Paint                              Sun Protection

  !
            It is recommended that the reader pays particular attention to those items identified as IMPORTANT in this
            manual to ensure satisfactory long-term performance.

IMPORTANT
                                                                                          0800 003 006 / boundaryline.co.nz   2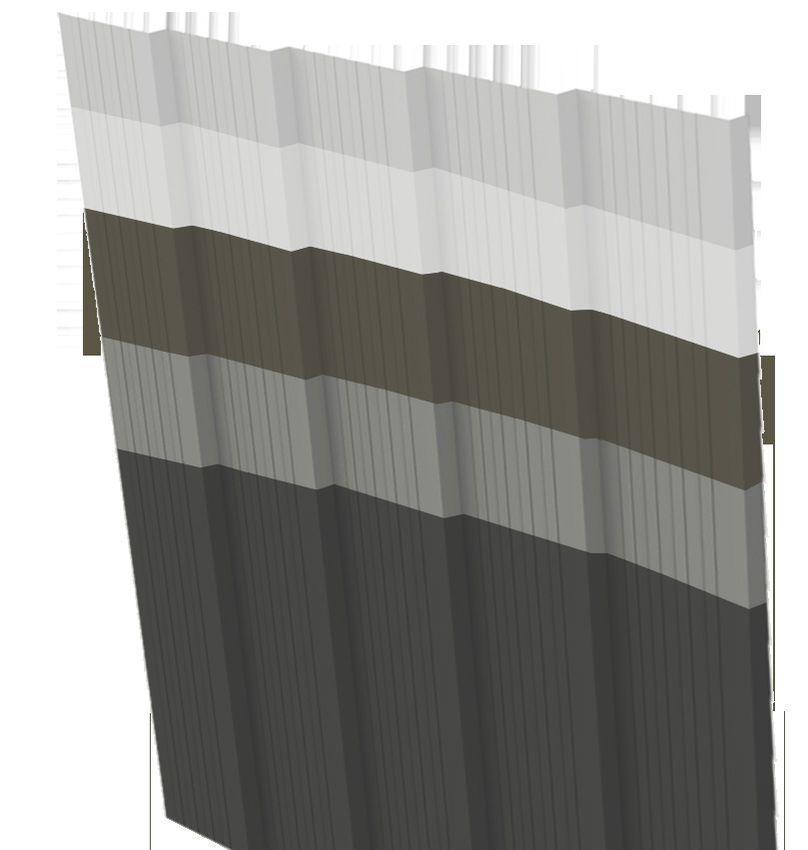
A STEP-BY-STEP GUIDE TO INSTALLATION
STEP 1 – MARKING OUT YOUR POST HOLES
                                                                                                                        All holes should be
                                                                                                                        straight (i.e. Sides
                                                                                                                        parallel or wider at
Start post may                                                                                                          the bottom than the
be existing                                                                                                             top
or temporary                                        Marker pegs
peg                                                                                                                     Diameter of all holes
                                                                                                                        is 200mm minimum.

                                                                                      =
                                                                                 res
                                                                         t  c ent 10mm
                                                                     pos        h+      y be                  Dig holes
                                                            r k  out l lengt ns ma
                                                         Ma m ra      i          io       )                   according to
                                                               t o        i m ens 65mm                        depth chart
                                                          bo t          d           3
                                                                   ical        to 2
                                                             (typ 2350                                        below

                 Post lengths required will increase accordingly to cater for these ground conditions.
   !             Soil Type                            Minimum Hole Depth                       Approximate Concrete Required
IMPORTANT                                                                                      1 bag per hole (20Kg bag)
                 Rock                                        300mm
                 Clay/Firm Earth                             600mm                             2 bag per hole (20Kg bags)
                 Sand/Loose Fill                             900mm                             3 bag per hole (20Kg bags)

SLOPING OR UNEVEN SITES                                                       a. Marking out sloping sites
                                                                                                                          Section 3
Uneven sites                                                                                             line 2
                                                                                                     Top tion
Vertical slitting of sheets may be required if slope is greater                                      Sec
than 1 in 8. This may reduce the three sheet coverage                                Section 1
to a point where one of the sheets may require vertical                                                                           Set up top and
slitting. On ColourPanelTM steel this can be achieved using                                                                       bottom string
a straight edge and scoring with a tungsten tipped hand                                                                           lines establishing
cutter available at most hardware stores, then bending and                             Establish post positions using             common sloping
                                                                                       bottom rail as a measuring aid.            sections.
snapping the sheet.

The top rail angles can be adjusted to create a smoother                      b. Cutting of sheets for a raked fence
angle if desired. Note that the post height required will
increase, so allow for this when fixing the posts in the                                                                              h/3       h
                                                                              Post
ground.

            2360        236                                                                                                        Post
                           0
                               23
                                 60
                                      2360   236
                                                0

We have longer rails available, so when you have a slope                                         The preferred method of cutting sheets is to
in your fence line, you can keep your post centres at the                                        use a nibbler or tin snips.
standard intervals.

                                                                                                                  0800 003 006 / boundaryline.co.nz    3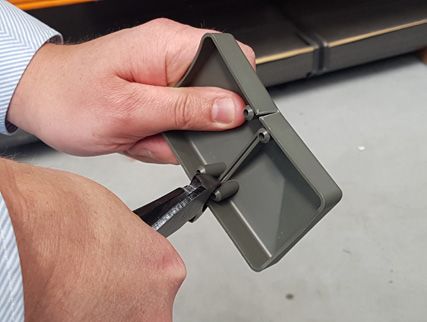
STEP-BY-STEP GUIDE

STEP 2 – SECURING POSTS

a. Fastening posts together                                         b. Fixing post in ground
                                     2 Fasteners approx.                                                         Align vertically with
   Approx.                           100mm max from top                                                          spirit level in both
   40mm                              of post (below depth                                                        directions
                                     or rail)
                                                                         Sheet length
                                                                           + 10mm
                                                                         (max. height
                                                                                                              Do not allow soil, garden
                                                                          1800mm)
                               Maximum screw spacing                                                          fill and/or dirt to come
                                                                                                              in contact with posts as
                               300mm centres                                                                  this may cause the post
                                                                                                              to corrode
                                                                 Bottom
                                                                 rail height
                                                                 approx.
                                                                 50mm
                                     10 - 16 x 16mm self-
                                     drilling screw placings.                                                               Slop top of
                                                                Add water                                                   concrete away
                                     Screws to conform to       and mix                                                     from post (to drain
                                     AS3566 Class 3.            well prior                                                  away water)
                                                                to pouring

             If it isn’t possible to fix posts as                   - Place first post in hole
   !         proposed here, please contact
             us for further information.
                                                                    - Adjust to correct height
                                                                    - Support post with temporary brace
IMPORTANT
                                                                    - Fill hole with fully mixed, wet concrete
                                                                    - Vibrate and compact the concrete to remove voids.

TYPICAL INSTALLATION OPTIONS FOR END                                TAPERING THE FRONT OF YOUR FENCE
POSTS, CORNER POSTS AND JUNCTIONS
                                                                    It is highly recommended that you taper the last two
       - 65mm SHS Section               - Fence Post                panels of your fence at an unsupported end, particularly
                                                                    where your fence extends beyond the front of your house.

                                                                    Cut sheets as per the instructions in the ‘sloping or uneven
                                                                    sites’ section.

                                                                    The minimal extra effort in tapering the unsupported end
                                                                    will provide a better looking fence than a stepped fence
                                                                    and is much stronger than leaving it at full height.

                                                                               Remember that the leading post at
                                                                               the free end should include a square
                                                                               hollow section
                                                                               (i.e. SHS)                                              Normal
                                                                                                                                       height of
                                                                     1/ h                                                               fence
                                                                       2                                                                   h
                                                                                 Note: a longer top rail well be required
                                                                                 for the two tapered panels

                                                                    Example for 2365mm post centres
             Dwelling 1                Dwelling 2
                                                                     Fence Height             Tapered End         Top rail length if
                                                                                                Height            tapered per two panels
                                                                     1500mm                     750mm             2385mm
                                                                     1800mm                     900mm             2400mm

                                                                                                     0800 003 006 / boundaryline.co.nz            4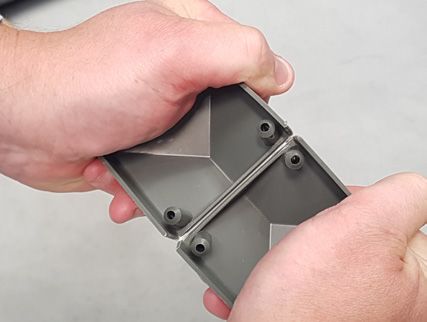
STEP-BY-STEP GUIDE

STEP 3 – INSTALLING INFILL SHEETS

- Insert bottom rail between posts to determine exact location
of next post.

- Adjust bottom rail to correct height - it is important to
maintain a minimum gap of 50mm between bottom of rail and
                                                                      Bottom rail
ground.
                                                                      between
                                                                      posts
- Screw fix the rails at this stage.

- Place top rail into post and fix with self drilling screws on
both sides of posts. Ensure that the self-drilling screws are not
fully tightened, as they need to be removed when inserting
sheets. Ensure the position of the top rail is protruding 2mm
above the top of the posts to reduce the risk of injury.

- Continue this procedure until fence length is achieved.

- Allow the concrete to cure overnight. Note: Longer curing
period may be required in very cold and/or wet weather.                                        3 infill
                                                                                               sheets
- Unscrew top rail and remove.

- Fit infill sheets into bottom rail ensuring correct lap as per
diagrams (right).

- Place top rail on infill sheets working from one end to the
other, locating the profile in the rail. A gentle tap with a rubber
mallet may help.

- Secure the top rail with self-drilling screws on both sides.

- Hose down with good water pressure when finished to
remove any swarf such as drill filings or remnants from the
nibbling process.
                                                                                    Correct lap detail for various
- Check installation.                                                               infill sheet profiles.

                                                                                    0800 003 006 / boundaryline.co.nz   5
STEP-BY-STEP GUIDE

INSTALLING SLAT TOPS
                                                                          5
                                                                                                   6

 ITEM       PART NUMBER         DESCRIPTION
 1          SPI-xx              Slotted Post Insert

 2          UNI3                Grommet
 3          NMS-xx              Notched ColourSlat
 4          Post-xx             Standard C Post
 5          Rail-xx             Universal Rail
 6          Cap-xx              Post Cap

                                                                                                                            4
                                                                                                         2      1
                                                                                            3

STEP 1 – SLOTTED POST INSERTS

- Ensure locking plugs and grommets are fully seated         - Remove top rail and insert Slotted Post Inserts with
into the Slotted Post Inserts. CNF-UH4 locking plugs go      locking mechanism of the plug at the base or bottom of
into one post insert and CNF-UP3 grommets go in the          each hole. If you are facing the fence, the locking plug
other post insert. Make sure the locking plugs are all       with the fully enclosed backing will be in the left-hand
the same with the lock point at the bottom of the slot.      post. You are now ready to insert the slats.

STEP 2 – INSERTING THE SLATS

- Pull back the core strip (plastic covering) from each      - Continue installing the slats until all slots are filled.
end of the slat approximately 100mm. Each slat will
have a small notch near the bottom of the left end.          - Peel all plastic core strip from the installed slats and
                                                             discard.
- The slat’s roll-formed seam should be at the top rear of
the slat when it is inserted.                                - Mark the centre of the top and bottom slats with a
                                                             non-carbon pencil.
- Insert the slat into the top hole of the Slotted Post
Insert by pushing it fully into the UP3 Grommet until        - Peel the corestrip (plastic covering) from the Centre
it contacts the rear of the ColourSlatTM post. The other     Vertical slat just before use. The pre-drilled Centre
end of the slat will now be able to be pushed into the       Vertical Slat (CVS) is now placed in position by standing
UP4 Locking Plug where it is pushed into the final           it in the centre of the bottom rail and moving it into
locking position. You may need to move the slat up or        position with the slats. The CVS is then riveted into
down to get it past the edge of the ColourSlatTM post.       position using the pre-drilled holes.

                                                             - Replace the top rail on the fence panel and secure
                                                             with pre-painted self-drilling hex. head screws #10-16.
                                                             One screw each side of each corner ie 8 per panel.
             Always start at the top as you may injure
     !       your fingers starting from the base if a slat
             slips and falls next to an inserted slat.
                                                             - Secure the CVS to the top and bottom rails using a
                                                             10G 40mm wafer head screw.
IMPORTANT

                                                                                        0800 003 006 / boundaryline.co.nz   6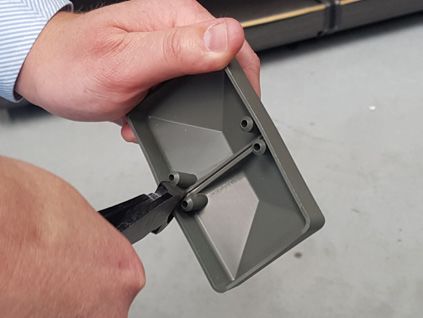
STEP-BY-STEP GUIDE

INSTALLING POST CAPS

All ColourPanelTM caps are supplied as a ‘double’ cap, which are designed to be snapped in half to create two
single caps where required.

1                                                                                                   Cut each side of the cap in line with the
                                                                                                centre ridge. Use end-nippers – do not use
                                                                                                 a knife as this is dangerous and difficult to
                                                                                                                       achieve a straight cut.
                                                                                                     Ensure the ‘nose’ of the end nippers is
                                                                                                      pushed all the way in before cutting.

2                                                                                              Bend the cap along the centre ridge to snap
                                                                                                it, and pull apart to create two single caps.

NOTES
If the cap is not a tight fit, place a small amount of silicone up inside the cap to secure it. Make sure the silicone is a small bead on the
inside corner of the sides only.

Make sure you keep the correct distance from the top of the post to the top of the rail (see page 5).

            10

                      MAINTENANCE AND WARRANTY OF YOUR FENCE
1. To keep your fence looking its best, simply wash down                 4. DO NOT SPRAY touch up paint directly onto fence as it weather
periodically with water when cleaning the car or watering the            differently to the ColourPanelTM steel. Recommended practice is to
garden. A soft broom should be sufficient to remove any cobwebs.         spray paint into the inside of the can lid and then touch up any small
Pay particular attention to the area under the top rail, which is        scratches with a small brush limiting the paint that’s applied to the
sheltered from natural washing by rain.                                  sheet to the scratched area only.

2. DO NOT build up soil, garden fill and/or dirt against the bottom      5. Fencing is backed by a 10-year warranty* under the following
rails and posts of your fence as this will retain water and lead to      conditions:
corrosion.                                                                        - Installation > 1km from Marine or Industrial environment
   DO NOT use your fence as a retaining wall, as it is not designed
                                                                                  - Fence is installed to manufactures guidelines
for this purpose.
                                                                                  - Fence is maintained regularly in accordance with
3. Avoid spraying the fence with garden sprays or fertilisers as these              suggestions made by Boundaryline.
can damage the surface. If this occurs wash the fence down with
water.

Adequate drainage is needed to ensure that water does not pond
in the bottom rail and to assist in the removal of debris. This is
achieved by ensuring there is a clearance between ends of the
bottom rail and the inside of the posts.

                                                                                                         0800 003 006 / boundaryline.co.nz        7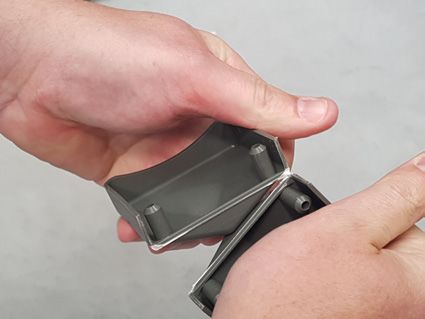
WHY IS COLOURPANELTM SO TOUGH?
ColourPanelTM materials are made from genuine ColourBond Steel. They are manufactured in Australia,
using an advanced 5 step coating process as outlined below;

Step 1. A base of Zincalume steel ensures
outstanding anti-corrosion performance.

  Step 2. A conversion layer is chemically applied
  to enhance coating adhesion.

    Step 3. A pre-treatment layer is applied to enhance
    the adhesion of further coatings.

      Step 4. A polyester primer is baked onto the surface.

         Step 5. A topcoat of specially developed exterior
         grade lead-free paint is baked on for maximum
         resistance to chipping, peeling and cracking. The
         Super Polyester technology ensures the painted
         finish retains its “as new” look for longer.

CONTACT BOUNDARYLINE FENCING
ColourPanelTM Fencing is designed to withstand most wind conditions. The wind on the fence at your site will depend
on a number of factors, including the number of surrounding properties and how exposed the location is.

If your property is exposed to higher wind speeds, please contact us for further advice/recommendations.

Also, if in proximity to severe marine conditions or bounding swimming pools, please seek specific advice from
Boundaryline.

BOUNDARYLINE’S TECHNICAL SUPPORT: 0800 003 006

To learn more about COLOURPANELTM visit: www.boundaryline.co.nz/our-brands/colourpanel/

                                                                                         0800 003 006 / boundaryline.co.nz   8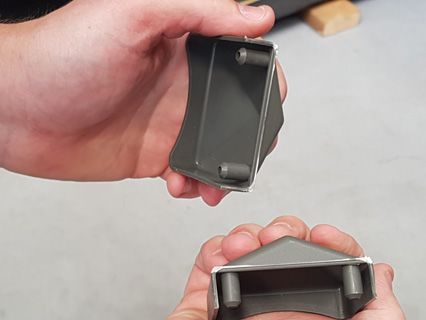
0800 003 006 / boundaryline.co.nz
You can also read