OptomCAS APPLICATION WALKTHROUGH 2020-2021 - UGA Pre ...
←
→
Page content transcription
If your browser does not render page correctly, please read the page content below
OptomCAS
APPLICATION WALKTHROUGH
               2020-2021
                       .
ASCO’s Optometry Virtual Fair
June 2, 2020
Click here for more
information.
Click here for participating
institutions and chat
schedule.
Click here to register!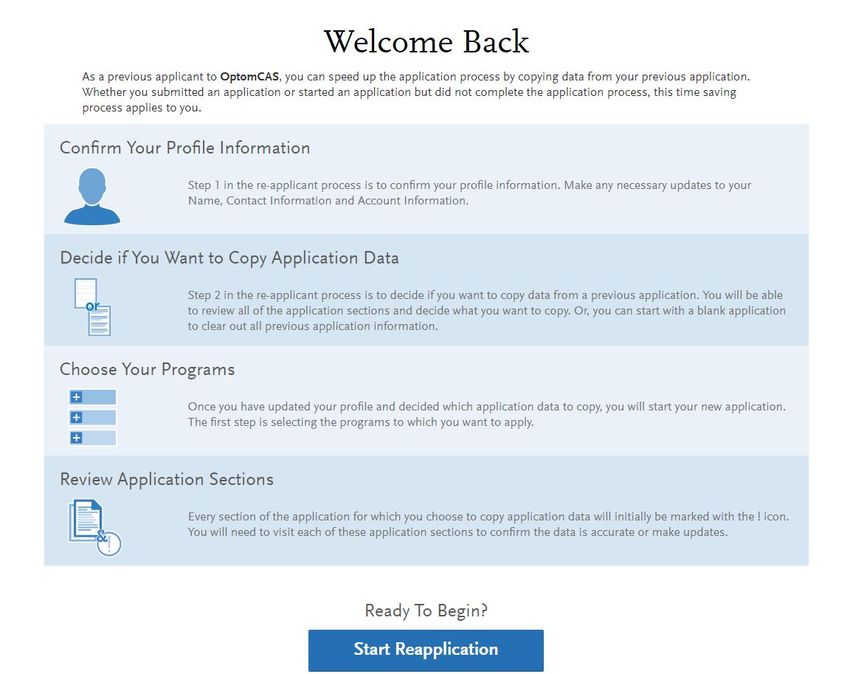
The 2020-2021 OptomCAS application cycle will
           open on June 30, 2020.
Resources and Information on COVID-19
•   The Association of Schools and Colleges (ASCO) is continuing to monitor the
    public health threat from the Coronavirus (COVID-19).
•   The 23 schools and colleges of optometry across the country and Puerto Rico
    are doing the same. Each institution is following their state’s
    recommendations and individual protocols regarding this threat. To ask
    questions specific to an institution, please reach out to them directly.
•   A statement from The Accreditation Counsel of Optometric Education, the
    accrediting body for optometry schools, can be read here.
•   COVID-19 Statement for Current and Prospective Applicants. Updated
    5/5/2020
•   Update from Federal Student Aid: Guidance for interruptions of study related
    to Coronavirus (COVID-19)
•   The National Association of Student Financial Aid Administrators’ Coronavirus
    (COVID-19) web center
•   For more COVID-19 information click here.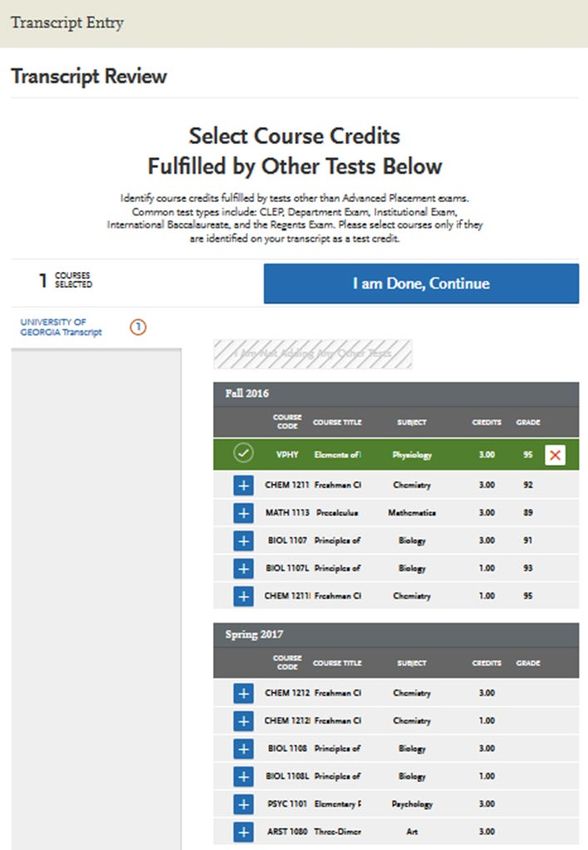
Do Your Own Research
This presentation is meant to serve as a resource during this application cycle.
Please note: If you are viewing this application walkthrough before the June 30, 2020 application launch, there may be
some changes in the application not covered in this PPT as the OptomCAS Applicant Help Center does not update until
the application opens.
• This presentation does NOT cover all aspects of the application, so you must do your own research!
• The OptomCAS Applicant Help Center offers and online chat session to answer your questions immediately as you
are working on your application. I recommend you try there first before you contact them via phone.
Please use the following information to contact OptomCAS Customer Support:
• Hours of Operation: Monday through Friday (9 am to 5 pm Eastern Time)
• Phone Number: 617–612–2888
• Email: optomcasinfo@optomcas.org. When contacting via email, please include your full name, OptomCAS ID
number and detailed question.
OptomCAS verification process may take up to six weeks after your application, transcripts, and payment are received.
• Frequently Asked Questions
• Directory of Schools and Colleges of Optometry
• Deadlines and Requirements
• ASCO’s YouTube Channel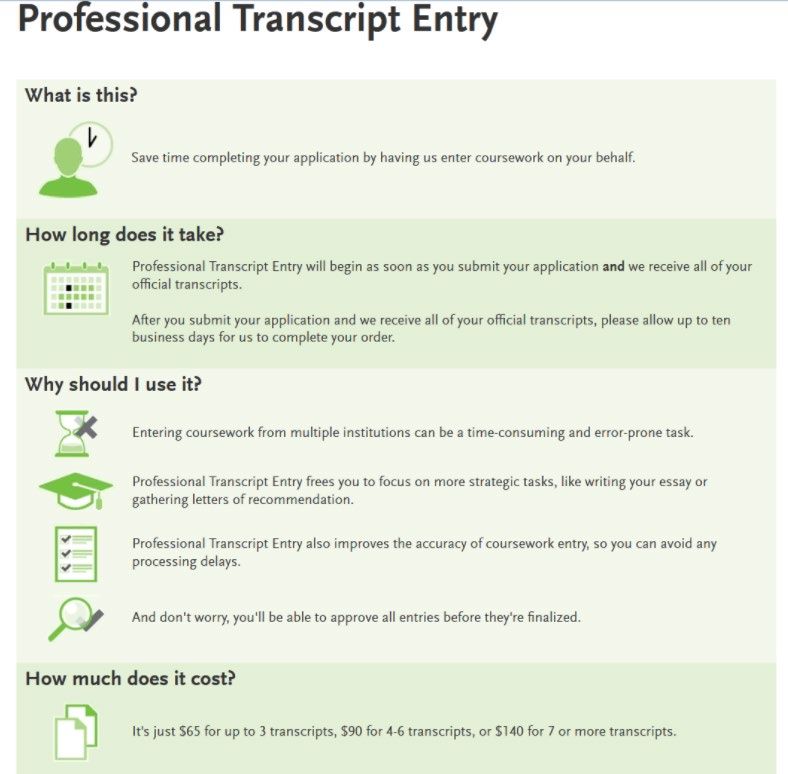
When To Apply/Checklist
The 2020-2021 OptomCAS application cycle will open on June 30, 2020.
Before this date, you should have:
Completed all pre-OAT prerequisite courses listed on the Pre-Optometry Quick Facts Sheet and
have a plan to complete the rest of the required prerequisite courses for all optometry schools that
you wish to apply. View the ASCO General and School-Specific Prerequisites.
Generated an OATPIN
Taken or scheduled the OAT
Asked your (4) evaluators to write letters of recommendation (typically, one optometrist, two hard
science professors and one professional letter). Review the Letters of Evaluation Requirements for
each school or college of optometry to which you are interested in applying.
Completed your personal statement (4500 characters max)
Compiled your resume
Documented your shadowing hours with an optometrist
Printed out an unofficial transcript to help you list your courses within the application
OptomCAS recommends you use the most up-to-date versions of Firefox or Google Chrome
Read the Applicant Responsibilities checklist for OptomCAS
Review ASCO Functional Standards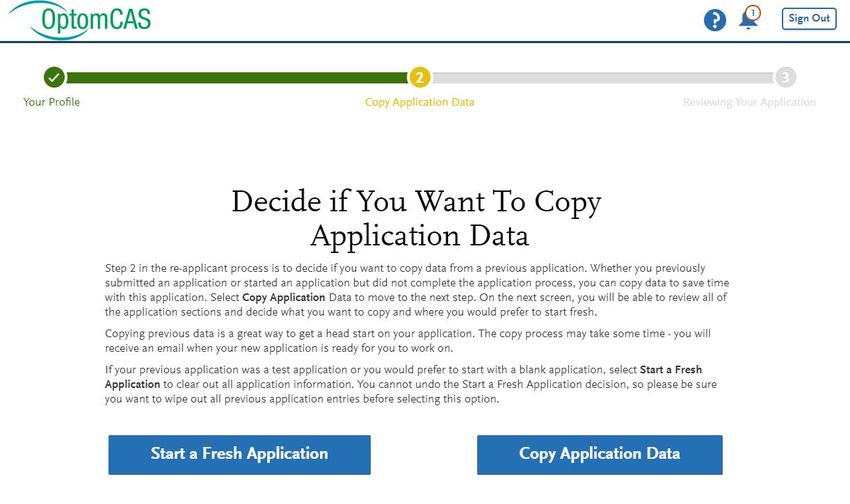
When You Should Contact a Program Directly

• OptomCAS can assist with application-related questions. For all other
  inquiries, including the following, please contact your program directly:
   •   Admission requirements and policies
   •   Deadline requirements
   •   Prerequisites
   •   Supplemental materials
   •   Requirements regarding the identity of recommenders
   •   Status of your application after it has been verified
   •   Admission decisions and interview questions
   •   Content and duration of a particular school's program
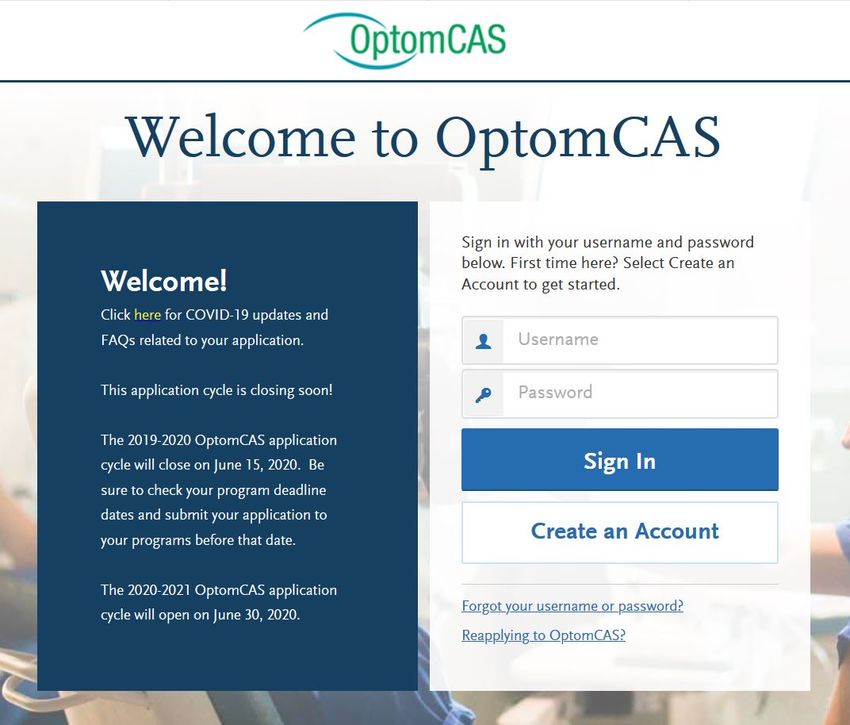
Creating An Account Click here to create an OptomCAS account.
Creating An Account
Account Basics
• When creating an account, consider the following:
• Create only one account to avoid processing delays and difficulties. Duplicate accounts and any documents associated with those accounts are
deleted.
• For your own security, do not share your password or account information with anyone.
• Usernames and passwords are case-sensitive.
• Use an email address that you check frequently to avoid missing important updates.
New Account Instructions
To create your account, you must select at least one program to which to apply. Once your account is established you may add or
remove programs as needed before you submit your application. To create an account:
From the application home page, click Create an Account.
Complete the required fields, agree to the terms and conditions, then click Create my account.*
A message appears that your account was successfully created. Click Continue.
Use the arrows to review helpful information. When you're ready, click Start Your Application!
Use the filters to find and select the programs to which you want to apply. Note that you can go back and change these selections at any point
before you submit your application.
When you are finished selecting your programs, click I am Done, Review My Selections.
Review your selections, then click Continue To My Application to view your dashboard.
*You must enter your first and last name. If you only have one name, enter it in the applicable name field (i.e., first name or last name), then:
• Enter FNU if your first name is unknown.
• Enter LNU if your last name is unknown.
Once your account is created, you receive a CAS ID number. This appears in the top right corner of your application. If you need to
contact customer service, provide this number to them so they can quickly find your application.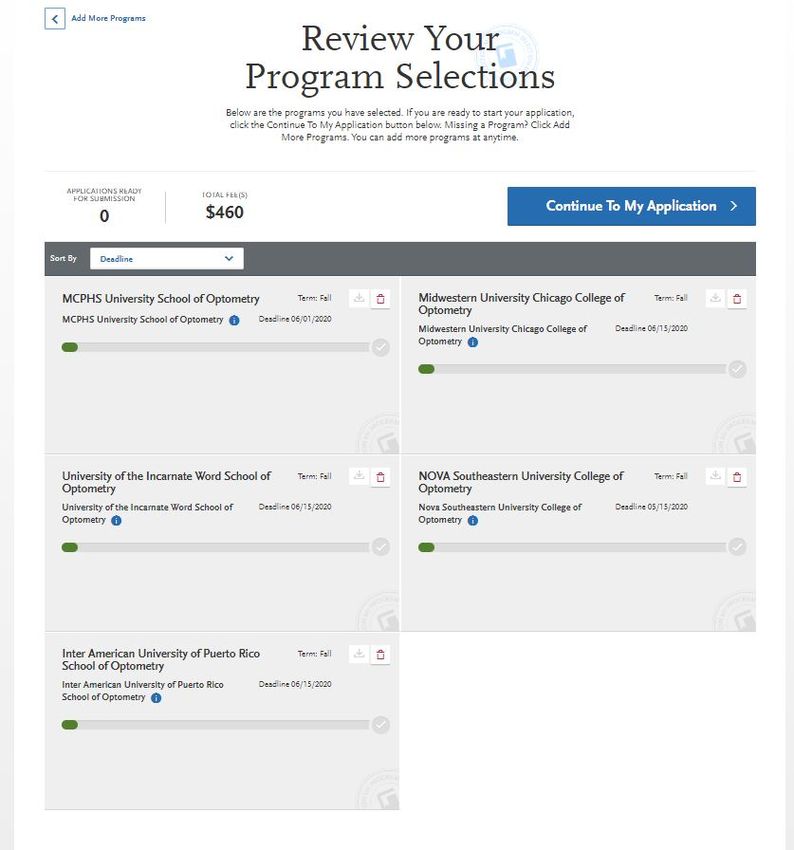
Starting Your OptomCAS Application

       ***Click here to watch this introductory video.
Reapplying To OptomCAS
Overview
• You can use an existing account from a previous cycle to re-apply in the current cycle. You also keep the same CAS ID
number from the previous cycle. To avoid processing delays and difficulties, do not create a new account. Duplicate
accounts and any documents associated with those accounts are deleted.
• Log in to the application. A welcome screen appears; confirm you want to begin the re-application process by
clicking Start Reapplication.
• Ensure your profile information, including your contact information, is correct.
• Decide if you want to copy application data. Your selection cannot be changed.Reapplying To OptomCAS
If You Choose to Copy Application Data
Information such as coursework, official test
scores, attached transcripts, etc. can be copied into the
new application. Letters of recommendation, essays,
payments, and program-specific information cannot be
copied into the new application.
1. Select the information you want to carry over. Unselected
items will not carry over and cannot be recovered, so
ensure your selections are complete before clicking Save
and Continue.
2. A notification alerts you that every section of the
application for which you choose to copy application data
will require your review. You will need to review each
application section to confirm the data is accurate.
Click Continue.
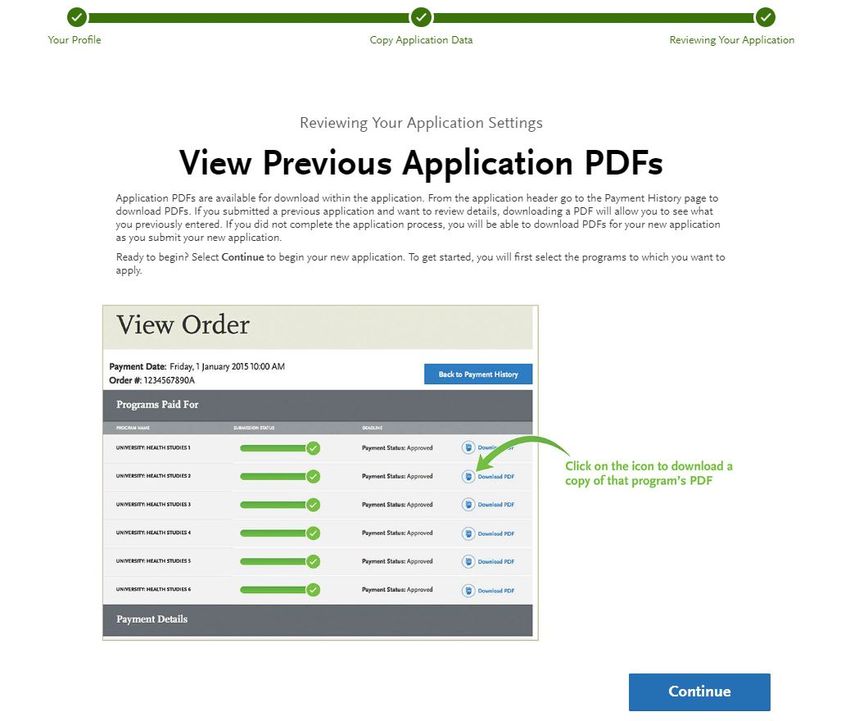
3. A second notification provides instructions for accessing a
PDF copy of your previous application. This PDF is only
available if you submitted an application last cycle.
Download the PDF before clicking Continue.
4. Your selected data will begin copying to your new
application. This can take up to 24 hours to complete and
you will receive an email once the application is ready.
• To successfully copy official test scores, the name and
date of birth on your new application must match the
name and date of birth on your original application. Note
that it can take several days for the matching process to
complete.
• If you have a difference in name and date of birth,
contact customer service to have your scores manually
copied into your application.Reapplying To OptomCAS
Downloading Last Cycle's Application
A PDF of last cycle's application is only available if
you submitted that application to at least one program.
• Click on your name in the upper right corner of the
application, then select View Payment History.
• Click View Order Details next to the payment.
• Click Download PDF.
Updating Coursework
If you completed additional coursework since the last cycle:
1. Update the Colleges Attended section to include changes
to dates, degree statuses, and schools.
2. Update your coursework. Coursework that was verified in the
previous cycle will be locked in the current cycle; however, you
can add, edit, and deleted unverified courses, including those
listed as planned/in-progress.
3. Request updated transcripts for new coursework or new
awarded degrees (this include degrees that were listed as
"expected" last cycle and have now been updated to
"awarded"). These transcripts are required and should be
requested after you finish updating your coursework.Before Selecting a Program
• Check the program's deadline requirements. Ensure you have enough time to apply. Determine if
OptomCAS or your program requires letters of recommendations, transcripts, or other supplementary
materials – if so, these must be received prior to the deadline for your application to be considered
complete. Once your application is complete, it takes on average two weeks to be verified.
• Confirm your eligibility. Research the program and determine if you are eligible to apply. Contact the
program directly if you have any questions regarding your eligibility. We do not verify prerequisites and
requirements so it is your responsibility to ensure you are eligible.
• Confirm that the program still has seats available. Some programs fill their classes prior to their posted
deadline, even if they do not specifically state they offer rolling admissions. We strongly encourage you to
contact your programs and ensure seats are still available before submitting your application. We cannot
offer refunds if a school you selected has already filled its class, nor can we transfer the payment to
another program.Selecting a Program
• Click Add Program at the top of the application home page.
• Use the filters to locate the programs you are interested in applying to.
• Click the plus sign next to a program to add it to your program list. You must select at least one program to continue
completing the application. If you want to remove a program and only have one selected, you need to add the second
program before you can remove the first one.
• Continue adding programs as desired.
• Begin filling out the application. Before submitting, be sure to review your program list to make sure you are applying to
all your intended programs.
• Note that by submitting your application, you are committing to applying to your selected programs. You cannot
substitute or remove submitted programs after submissions. Additionally, we do not offer refunds for selections made in
error and we do not transfer payments to another program.Deleting OptomCAS Programs
You can remove a program(s) at any time prior to submitting the application; however, any
information entered in the Program Materials section will be lost and cannot be retrieved or
transferred. Information in the Personal Information, Academic History, and Supporting
Information sections will be retained for any programs to which you choose to submit.
Once you submit your applications, you cannot remove any programs. To withdraw yourself
from consideration for admission to a program, contact the program directly. Note, however,
that OptomCAS does not offer applicant refunds for any reason.
Note that your application must always have at least one program selected. If you want to
change or remove a program prior to submission, be sure to select a new program first.
From the Add Program Page
• Click Add Program at the top of the page.
• Click the Undo button to the right of the program name.
• Click Yes, Delete this Program to confirm.
• From the Submit Application Page
• Click Submit Application at the top of the page.
• Click the trash can icon next to the program you want to remove.
• Click Yes, Delete this Program.Program Selection
OptomCAS Application Fees
• 1 school: $$180
• Each additional school: $70
• Average applicant applies to 7-10 schools
• 10 schools: $810 (Under the Submit Application
tab you can see the total cost before you confirm
your application)
APPLY EARLY!
• Since optometry school acceptance is done on a
ROLLING BASIS, applicants who submit early
are more successful in being invited to interviews
and considered for scholarships first. Please note
that there are exceptions. For example, UC
Berkeley is NOT based on rolling admissions.
They expect all applications to be submitted by a
certain date.
• Once your application becomes complete
(application submitted and all official transcripts
received) it can take 4 – 6 business weeks for
your application to be verified.Personal Information Section
This section is used to gather your
biographic and contact information,
as well as citizenship, race/ethnicity,
and other information.
• OptomCAS Release Statement
• Biographic Information
• Contact Information
• Citizenship Information
• Race & Ethnicity
• Other InformationOptomCAS Release Statement
Overview
• In this section, you must review and respond to the following release statements in order to submit your application. Once you
submit your application, your responses cannot be edited. Please review these instructions and the content of the statements
carefully. It is your responsibility to read and understand these statements before responding to them. If you have any questions
regarding these statements, contact customer service at 617-612-2888 for clarification before making your selections.
Continuing Disclosure
• Disclosure is a continuing duty. Select the checkbox to indicate you understand and agree to the statement.
ASCO Standards
• Select Yes to indicate you reviewed and understand the ASCO Functional Standards for Didactic and Clinical Optometric Training.
OptomCAS Applicant Responsibilities
• Select the checkbox to indicate you agree to follow the Applicant Responsibilities.
OptomCAS Code of Conduct
• This release certifies that you have read and agree to abide by the Applicant Code of Conduct. OptomCAS applicants are expected
and required to abide by the Applicant Code of Conduct in order to be considered for entry into the optometry profession.
Advisor Release
• Selecting Yes for this release allows OptomCAS to release certain information to pre-health advisors at schools you previously
attended. This information includes some application information, including your GPA, the names of the optometry programs to
which you applied, and which program, if any, you matriculate into. They will not see documentation such as transcripts or letters of
recommendation.
• If you select No, OptomCAS will not release your information to advisors. We encourage you to authorize this release, as it is
useful to advisors assisting you and other future applicants; however, it will not affect the consideration given to your applicationBiographic Information
Your Name: This section pulls in information you entered when you created
your account. Confirm that what appears here is correct; click the My Profile link
to make changes.
Alternate Name: If you are sending any documentation or test scores in which
your name is listed differently than it appears on your application, select Yes in
this section and enter the alternate information. This ensures that your
documents and test scores are matched to your application. Contact customer
service so they can manually match these items to your application; failure to do
so could cause significant delays.
◦ Examples of alternate names include:
◦ Birth names (if different from current legal name)
◦ Maiden names
◦ Nicknames (e.g., "Bob" for Robert, "Beth" for Elizabeth, etc.)
◦ "Westernized" names
◦ Alternate punctuation (e.g., your name appears with/without a hyphen or apostrophe)
◦ Alternate spacing (e.g., your name appears with or without specific spaces)
◦ Known misspellings (if a document contains a misspelling)
Sex: Select the appropriate option.
Gender Identity: Use the drop-down to select your gender identity.
Birth Information
◦ Enter your date of birth in MM/DD/YYYY format. For example, January 7, 1989, would
be listed as 01/07/1989. Make sure you enter your date of birth correctly; failure to do
so could cause significant delays with matching documentation and test scores.
◦ Then, enter your country, city, state/territory/province, and county of birth.
◦ Note: to ensure applicants are entering consistent data for some questions, this
application uses pre-populated answer options that are maintained by
the International Organization for Standardization (ISO). For example, country answer
options are derived from ISO 3166, which is the international standard for country
codes and codes for their subdivisions.Contact Information
Current Address
• Enter the address where you want to receive mail correspondence. Be sure to
keep this section up-to-date as you complete and submit your application. If you
anticipate a change of address, enter the date through which your
current address is valid.
• Note: to ensure applicants are entering consistent data for some questions, this
application uses pre-populated answer options that are maintained by
the International Organization for Standardization (ISO). For example, country
answer options are derived from ISO 3166, which is the international standard for
country codes and codes for their subdivisions.
Permanent Address
• If your current address is different from your permanent address,
select No under Is this your permanent address? Then, enter the address that
you consider to be your permanent and/or legal residence.
• Note: to ensure applicants are entering consistent data for some questions, this
application uses pre-populated answer options that are maintained by
the International Organization for Standardization (ISO). For example, country
answer options are derived from ISO 3166, which is the international standard for
country codes and codes for their subdivisions.
Phone Number
• Your phone number pulls in from the information entered when you created your
account. Verify that the listed phone number and type are correct; click
the Profile Section link to make changes.
Email
• Your email address pulls in from the information entered when you created your
account. Verify that what appears here is correct; click the Profile Section link to
make changes.Citizenship Information
United States Citizenship Details
• Select your US citizenship status and country of citizenship, if
applicable. If you have dual citizenship, indicate your second country of
citizenship.
• When selecting your status, consider the following definitions which
are adapted from the US State Department:
US Citizen: an individual who was born in the US or attained citizenship
through naturalization.
Permanent US Resident: an individual who holds a Green Card and is
permitted to permanently live and work in the US.
Temporary US Resident: an individual who is an alien – a nonimmigrant
foreign national – who is approved to temporarily live in the US for a specific
purpose (e.g., as a student), has a permanent residence abroad, and
does not hold a Green Card.
Non-resident: an individual who is a nonimmigrant foreign national and who
is permitted to travel in the US for tourism or business for stays of 90 days or
less.
None: an individual who has no US citizenship or visa (immigrant or
nonimmigrant) status.
Note: to ensure applicants are entering consistent data for some questions,
this application uses pre-populated answer options that are maintained by
the International Organization for Standardization (ISO). For example,
country answer options are derived from ISO 3166, which is the international
standard for country codes and codes for their subdivisions.
Residency Information
• Provide your residency information, including your legal state of
residence.Citizenship Information
Visa Information
• If you currently have a US Visa, select Yes and enter all visa
information. Please note that we cannot advise you on your visa status or
any related details.
• When selecting your visa type, consider the following definitions which are
adapted from the US State Department. Note that this list is not all-
inclusive. Refer to the US State Department for more information.
B-1 Visitor: an individual who wants to enter the US temporarily for business.
F-1 Student: an individual who wants to study at a US academic institution. This
is the most common student visa type.
H1-B Employee: an individual who wants to work in the US in a specialty
occupation.
J-1 Student: an individual who wants to study at a US academic institution. This
is generally used for students in educational exchange programs (e.g., Fulbright
Program).
J-1 Teacher, Researcher, or Trainee: an individual who wants to teach at a US
primary or secondary school, research at a US institution, or train in an
occupational field at a US business.
Refugee: an individual who is located outside of the US, is of special
humanitarian concern to the US, demonstrates that they were persecuted or fear
persecution due to race, religion, nationality, political opinion, or membership in a
particular social group, is not firmly resettled in another country, and is admissible
to the US.
Visa Waiver WB: an individual from a Visa Waiver Program (VWP) participating
country that allows travel to the US for business stays of 90 days or less without
obtaining a visa.
Visa Waiver WT: an individual from a Visa Waiver Program (VWP) participating
country that allows travel to the US for tourism stays of 90 days or less without
obtaining a visa.
Other: an individual who has received a visa type not listed. Note that this list is
not all-inclusive and more visa types may be available in the application.Race & Ethnicity
Programs fully recognize the importance of diversity
in their student body and in the workforce.
Accordingly, programs strongly encourage
applications from persons from all socioeconomic,
racial, ethnic, religious, and educational
backgrounds and persons from groups
underrepresented in the profession. Please select
any and all of the options in this section which you
feel best apply to you. Please note that this section is
used for statistical purposes only and in no way
affects your application or financial aid eligibility.
Ethnicity
• Indicate whether you consider yourself to be of
Hispanic or Latino origin. This question is optional.
Race
• Select one or more of the groups of which you
consider yourself to be a member. This question is
optional.Other Information
Military Status
If you have US military experience, select your anticipated status at the time of
enrollment from the drop-down. Select Not a member of the military if this
does not apply.
Felony and Misdemeanor Convictions
Indicate whether you've ever been convicted of a misdemeanor or felony. Note
that most programs require satisfactory background check results as a
condition of acceptance. Failure to disclose and provide accurate information
about prior convictions may have serious consequences, such as annulment of
acceptance offers, program dismissal, or other sanctions.
Background checks reflect all prior convictions, guilty pleas, city ordinance
citations (such as public intoxication), illegal possession(s) including
possession of alcohol under the legal age, payments of fines (including traffic
violations), and, in some cases, prior records thought to have been expunged.
Note that in some states, common traffic violations may be considered
misdemeanors.
Candidates with criminal records due to felony offenses are encouraged to be
aware of the potential impact for program acceptance and future licensure.
Contact the programs you wish to apply to and state licensing agencies where
you hope to practice for advice if you have a felony conviction or a criminal
record. If you are uncertain of the status of a charge versus a conviction on
your record, or if you are uncertain as to whether your offense was an
infraction, misdemeanor, or a felony, contact the city, county, or state
jurisdiction where the incident occurred.
If you are convicted of a misdemeanor or felony prior to admission and/or
matriculation, it is your responsibility to immediately inform your program(s).Other Information
Academic Infraction
• Indicate whether you have ever been disciplined or placed on
academic probation while attending an academic institution. If
yes, enter an explanation in the spaces provided.
License Infraction
• Indicate whether you have ever had any certification,
registration, license, or clinical privileges revoked, suspended,
or in any way restricted by an institution, state, or locality. If
yes, enter an explanation in the spaces provided.
Previous Attendance at a Medical School or Health Profession
Program
• Indicate whether you previously attended a medical school or
health profession program anywhere in the world, regardless of
completion. If you select Yes, enter details about the program.
Period of Non-Enrollment and Unemployment
• Indicate if you have been out of school and unemployed for a
period of time greater than six months. If you select Yes,
enter the dates and an explanation as to what caused this
period of non-enrollment and unemployment.
Additional Questions
• Select your answers to any additional questions. Answering
these questions helps programs gather information to develop
future recruitment strategies.OptomCAS Academic History
This section is where you input the colleges you attended. Additionally, you can provide
information about tests you have taken or plan to take, such as the OAT.
OptomCAS will NOT process any document that is
received prior to June 30, 2020.
Documentation received earlier than this date
will be discarded.Colleges Attended
Requirements Adding a College or University
• Report all institutions attended regardless of their • Click Add a College or University.
relevance to the programs you are applying to or if you
already attended another optometry school. Failure to
• Type and select your college or university. It may take several
tries to find your school, especially if it shares its name with
report an institution may cause your application to others or could be spelled differently. For example, if you
be undelivered. This can significantly delay the processing attended "Saint John's University," you may need to try
of your application. Report all institutions attended, "Saint John," "St. John," or "St John" (no period) to bring the
including but not limited to: school up on the list. If you exhausted all options and it does
not appear, select Can't find your school?
• courses taken in high school for college or university
credit • Select if you obtained (or plan to obtain) a degree from the
selected institution.
• summer courses
• If you earned or plan to earn a degree, provide details about the
• community college courses earned or expected degree.
• US military academies (note that this does not include • Click Add another Degree to add additional degrees for this
courses on SMART or JST transcripts) same college or university.
• post-baccalaureate, graduate, and doctoral work • Select your college's or university's term system. You can
usually find this on the back of your official transcripts, or you
• study abroad, Canadian, and foreign work, etc. can contact your college's registrar.
• List all institutions on your application even if the • Term system refers to the type of hours your credits are worth,
not the length of the term or how many terms a year your
coursework completed there was transferred to another college or university offered.
institution.
• If your transcript lists some courses as quarter and others as
• Report each institution only once, regardless of the semester, enter the term type that is most common (i.e., if you
number of degrees earned or gaps in the dates of have six quarter terms and two semester terms, enter quarter).
attendance. • Enter dates of the first and last terms you attended. Be sure
• Send official transcripts for each institution. to only enter each college or university you attended
once, regardless of gaps in your attendance there.
• Click Save This College or University to complete the entry.Sending Transcripts
• For each college or university entered, click the Download Transcript Request Form button to download and print a
transcript matching form. Provide this form to the college's or university's Registrar's Office so that they can send an
official transcript to OptomCAS. See Sending Official Transcripts to OptomCAS for more information (and for information
on sending electronic transcripts).
• Note that if you attended a foreign college or university – and depending on your program's requirements – you may be
required to send a foreign evaluation. See Sending Official Transcripts to OptomCAS for more information.
Requirements
• Transcripts must be sent to OptomCAS from all US and English-speaking Canadian institutions you listed in the Colleges
Attended section of your application, even if the courses later transferred to another institution. We cannot process your application
without receiving all of your transcripts.
• Do not send foreign transcripts (non-US/non-English-Canadian). This includes transcripts from Caribbean and French-
Canadian schools. We cannot accept these documents and they will be destroyed. See the Foreign and French-Canadian
Transcripts section for more details.
• Transcripts must be original. Transcripts that are photocopied, faxed, on file at a career center or Interfolio, etc. are not accepted.
• Transcripts must be addressed to OptomCAS. Transcripts addressed to you, a program, school, or any address other than
OptomCAS are not accepted.
• Transcripts must be mailed by your registrar. For security purposes, we cannot accept transcripts mailed by you or anyone other than
the registrar. If anything on your transcript indicates that it was issued to the student, picked up by you, or mailed to any address other
than OptomCAS, your transcript will be rejected and you will need to send a new one.
• In rare occurrences where a school's computer system can only include the applicant's name in the transcript's Issue to field, instruct
the registrar to mail the transcript to OptomCAS and include a letter stating the registrar's policy for addressing transcripts.
Transcripts will not be accepted without this letter. Additionally, the transcript cannot have an "Issued to Student" or "Student Copy"
stamp and cannot be picked up by the applicant.Sending Transcripts
How to Send US or English-Canadian Transcripts
• Enter your colleges or universities in the Colleges Attended section before requesting any transcripts.
• Click the Download Transcript Request Form under each school you listed and print each form.
• Contact the registrar at each institution you attended and request one transcript be sent to OptomCAS. You only need to
submit one transcript from each school regardless of the number of programs you're applying to.
• Provide the registrar with the following items:
• OptomCAS Transcript Request Form. Ask the registrar to attach it to your official transcripts. This form is not required, but
strongly recommended as it helps ensure your official transcripts are properly matched to your application. If you cannot use
this form, make sure the registrar prints "OptomCAS" and your full OptomCAS ID number on the transcript before mailing it.
• Any school-specific forms required by the registrar.
• Any transcript fees required by the registrar.
• All information needed by the registrar to properly identify you in the school's database.
• Any name changes.
• Your OptomCAS ID number.
• Follow up with your school(s) to ensure that your transcripts were mailed, and obtain the date they sent
them. Be aware that processing times vary by school and may take longer towards the end of a semester.
Some schools may not send your transcript until the semester is over.
• Monitor the Check Status page to ensure your transcript is received. On average, it takes up to seven
business days for your transcript to post to your application from the date we receive it. If your transcript is
not posted after this timeframe, contact customer service.Sending Transcripts
Sending Transcripts by Mail *** I recommend you send transcripts electronically.
• Your registrar should mail your paper transcripts to the following address:
• OptomCAS Transcript Processing Center
PO Box 9119
Watertown, MA 02471
• OptomCAS is not responsible for any materials lost in the mail or delays caused by the Registrar's Office. Express or certified mail does
not guarantee faster processing or receipt.
Sending Transcripts Electronically
• Please note that electronic transcripts are not the same as emailed transcripts. We cannot accept transcripts sent via email.
• OptomCAS only accepts electronic transcripts from Credentials Solutions, Parchment, and National Student Clearinghouse. If your
school does not offer any of these services, your transcript must be sent by mail.
• If your school requires that you use a service other than Credentials Solutions, Parchment, or National Student Clearinghouse, you
should ask that service to mail the transcripts instead of sending them electronically. Since you cannot include the Transcript Request
Form, you should include your full OptomCAS ID number when entering the OptomCAS mailing address.
• When using any of these services, select OptomCAS as the recipient. If you can't select OptomCAS and instead are asked for an email
address, your transcript must be sent by mail. Do not send your transcript to the OptomCAS customer service email.
• UGA uses Parchment:
• Parchment
• Click here to see if your school offers the Parchment service. If your school is not listed, your transcript must be sent by mail.
Otherwise, follow the instructions to proceed. Once your transcript is requested, it takes up to seven business days for it to post to
your application. If your transcript is not posted after this timeframe, contact Parchment directly to confirm the order was
completed, then contact customer service.Transcript Process Click DOWNLOAD TRANSCRIPT REQUEST FORM: Generate a request form for each institution and provide it to the university Registrar’s Office to submit with the official transcript.
Transcript Process

In Athena choose the Student tab and
click on Student Records, then choose
Request Official Transcripts. It will
redirect you to the My UGA Portal where
you will need to log in with your student   Once you click on the Parchment icon it will direct you
ID and password. Once you have done so,     to another page. Type in OptomCAS under institution
choose the Parchment Icon.                  and follow the instructions. Remember DO NOT send
                                            your transcripts before the application opens.
Transcript Process
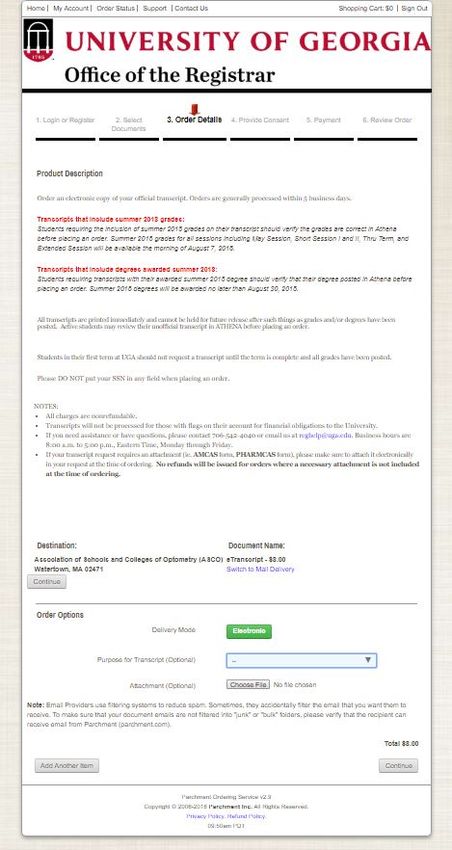
• Read the directions carefully and double check that
the destination is correct.
• Under Order Options you will choose
“Graduate/Professional,” under Purpose of Transcript.
• Under the Attachment section, you will upload your
transcript matching form before processing your
order. If you are requesting a transcript from another
institution you will need to ask them how they would
like to receive your transcript matching form.
• Please Note: If you are not able to attach your
Transcript Matching Form you will not be able to
continue and you will be asked to enter the barcode
manually. Once you enter the barcode you can then
proceed to check out in order to complete your order.
You must enter the barcode in the exact format it is
listed on the Transcript Matching Form.
• Example: 9335870187-1599229-XTranscript Process
Three things to ensure you successfully match your transcript to your application:
1. List the institution in the Colleges Attended section.
2. Make sure you download the Transcript Request form for each institution.
3. Request ALL transcripts the moment the application opens.
NOTE: Please list any alternate names used such as nickname, maiden name, or name variance in
the Alternate Name field under the Biographic section of the application.
It is your responsibility to monitor you application for transcript receipt.
• OptomCAS will NOT notify applicants concerning missing transcripts.
• If it has been longer than 10 business days since the transcript was mailed and it has not been
posted—resubmit. The status of all transcripts can be viewed in the CHECK STATUS tab.Transcript Faq
Can I print one transcript request form and send it to all the colleges I attended?
• No. Each institution attended has a unique transcript matching form created specifically for that
institution.
If I have attended multiple institutions, do I need to send a transcript from each
school?
• Yes. All applicants are required to send ONE transcript from each institution attended regardless
of the number of courses taken.
I have transfer credits that appear on my primary transcript. Do I still have to send a
transcript from the transferring institution?
• Yes. OptomCAS requires an official transcript from every institution attended.
What should I do if my transcript(s) are not received by OptomCAS?
• If it has been longer than 10 business days since the transcript was mailed and it has not been
posted—resubmit. The status of all transcripts can be viewed in the CHECK STATUS tab.Transcript Entry ***Click here to view video
Professional Transcript Entry This is an optional service and costs $69 for up to 3 transcripts, $95 for 4-6 transcripts and $145 for 7 or more transcripts. Please note that these fees are for coursework entry only and are in addition to OptomCAS regular application fees. For further details about this service click here. There will be a link to the professional service within the application. I recommend that you double check that everything was entered correctly. Click here to learn more.
Coursework Entry
Enter a Term
   ◦ Click Start to begin entering courses for a college or university.
   ◦ Add a semester, quarter, or trimester depending on the term system you selected in
     the Colleges Attended section.
   ◦ Select a term.
   ◦ Select a year. Options are based on the time spans you selected in the Colleges
     Attended section.
   ◦ Select an academic status. Academic status refers to your status during the term you are
     inputting, not your current status. Refer to the list of Academic Status definitions below for
     more information. If you're entering courses for a term that is currently in progress or planned,
     select In Progress/Planned.
   ◦ Click Save.
   ◦ Continue adding terms, as needed.
Coursework Entry
Academic Status Definitions
• Freshman-Senior: Applies to all college- or university-level courses taken prior to your first bachelor's degree. In general,
four-year students should list one year per designation and five-year students should list their last two years as senior. Non-
traditional students should label their terms as evenly as possible in chronological order.
• Dual enrollment courses (college courses taken during high school) are considered Freshman and should be listed
under the college where you took them. Do not report these courses again as transfer credits at your undergraduate
institution.
• Post-Baccalaureate: Applies to undergraduate level courses taken after your first bachelor's degree is earned. If you earned
a second bachelor's degree, that is considered post-baccalaureate.
• Graduate: Applies to master's degree- and doctorate degree-level work only, regardless of whether the degree was earned.
Work such as that taken in pursuit of a Ph.D, MD, PharmD, JD, JurisD, LL.D, DC., etc. are considered doctorate degree-level.Coursework Entry
Enter a Course
Enter Courses for a Completed Term
Click Add A Course under the appropriate term.
Enter the course code. Department prefixes and course numbers must exactly match what appears on your official transcript.
Enter the course title. You can abbreviate it if it does not fit in the text box.
Select the course subject. If you're unsure, make your best guess; our team will help you if it doesn't match.
Enter the course credits exactly as they appear on your transcript. See the Course Credits section below for more details.
Enter the grade exactly as it appears on your transcript, including any pluses or minuses.
• If your grades are listed as "BA," "CB," or "DC," you must list them as "AB," "BC," and "CD" in order for the system to recognize them.
• If your grades are listed as numbers (e.g., 93), enter them exactly as they appear on your transcript. They will automatically convert to the equivalent CAS letter
grade.
The CAS Grade populates automatically. This allows us to standardize your coursework for all programs and cannot be edited.
Click Save.
Continue adding courses, as needed.
Enter Courses for an In-Progress or Planned Term
You should enter any courses that you are currently taking or plan to take in the near future. This is not required, but is strongly recommended, as some programs require it. Note,
however, that any term containing In Progress/Planned courses cannot be marked as complete; the entire term must be marked as In Progress/Planned. Contact your programs to
determine if they require planned or in-progress coursework to be listed. Once you complete in-progress courses, you can update them in the application.
• Make sure that you selected In Progress/Planned for the term you're listing the course under. This alerts the system that you aren't required to enter a grade for this
course.
• Enter the course code.
• Enter the course title. You can abbreviate it if it does not fit in the text box.
• Select the course subject. If you're unsure, make your best guess.
• Enter the expected course credits. Depending on the format of your credits, you may need to convert them. See the Course Credits section below for more details.
• Click Save.
• Continue adding courses, as needed.Coursework Entry
Enter Narrative Transcripts
If your institution uses a narrative transcript, enter your coursework as described above. If the transcript lists "suggested"
credits and/or grades, be sure to enter those as well; otherwise, list the course credits as "0.0" and the grades as "Pass."
Your programs will see the list of classes you took, along with a copy of the official narrative transcript that you submit.
Course Credits
Semester, Trimester, and Quarter Credits
• If your course credits are mostly in "3.0," "4.0," or "5.0" format, then your transcript is listing normal semester, trimester, or quarter credits and
no conversion is necessary. Enter the credits exactly as they appear on your transcript.
Unit Credits
• If all of your course credits are listed in "1.0" or "0.50" format, then your transcript is listing credit units and you need to perform a conversion. Check
the back of your transcript for a conversion ratio, which will say something like "1 unit is equivalent to 4 semester hours."
• If there is no conversion on the back of your transcript, contact your registrar's office to determine the conversion ratio. Then, convert the credits by
multiplying the number of units listed on your transcript by the conversion factor. For example, if your conversion is 1 unit = 4 hours and your transcript
lists 1 unit for a course, you would enter 4.00 credits on your application. If 0.50 is listed, you would enter 2.00.
Lab Credits
• If your transcript lists labs separately, you must list them as separate courses on your application as well. Record the labs exactly as they appear on
your transcript. If your transcript combines lab and lecture courses into one course, list it as one course on your application.
Test Credits
• You can only list test credits if they were awarded by one of the schools you attended and they appear on your transcript. Test credit types include
Advanced Placement (AP), International Baccalaureate (IB), CLEP, DANTE, Regents, and courses you "tested out of" at college or university. List these
credits under your first term at the school that awarded you the credit and enter "CR" as the grade. If no course prefix or number appears on the
transcript, enter "N/A" for Not Applicable.
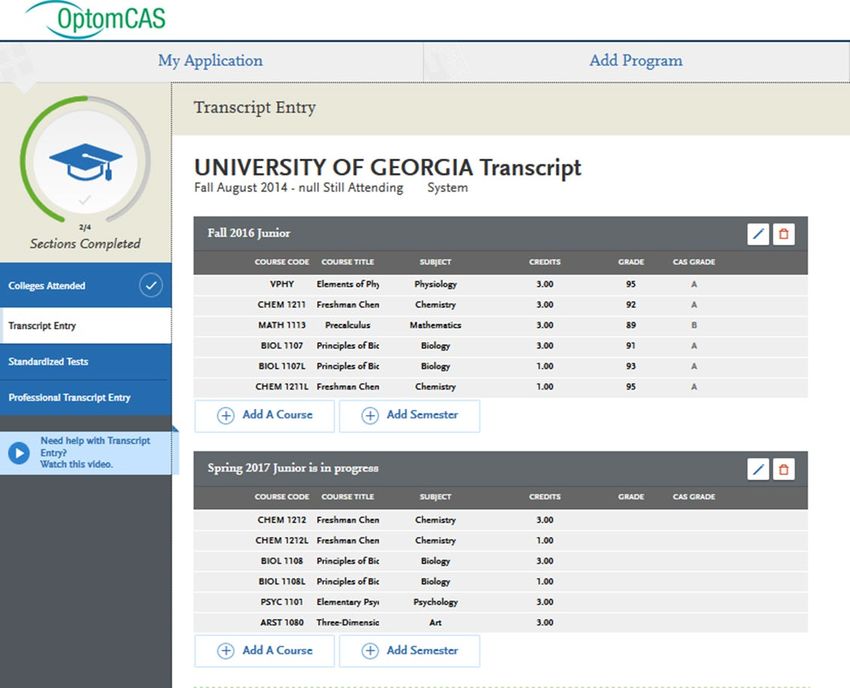
• Be sure to designate these test credits appropriately in the Transcript Review section (below).Example Of Coursework
ADVISOR TIP:
1. For your FYOS class you will want to
enter “special topics” for the subject drop
down menu.
2. When entering your AP credit you want to
list it exactly as it appears on your transcript
in the semester and year it appears. Instead
of listing the letter “K” for the grade, you
will want to list “CR” which means Credits
Received.
You will enter all of your
courses each semester as it is
designated on your transcript.
DO NOT rush through this
section as you will need to
select the courses you have
entered for later sections.Coursework Entry Step-by-step
Once all courses have been entered, you will
click Review and Finalize My Transcripts.
In Transcript Review, you will be asked to
identify additional attributes about your
coursework including Primary College and
courses that are Repeated, Advanced
Placement, Other Tests, Honors, and Study
Abroad.Transcript Review:
Repeated Courses
Repeated Classes
• Indicate if you repeated any of your courses.
Courses should only be marked as repeated if
you repeated them at the same institution
(i.e., you retook the course for a higher
grade). Withdrawn courses, courses taken at
different schools, and courses taken multiple
times for new credit (i.e., school band,
physical education, etc.) are not considered
repeated.
• Courses marked as repeated are not included
in your GPA calculation. Enter all initial
attempts for repeated courses with "0.00"
credits and record the grade received. For
the final attempt of the repeated course,
enter the full credit value and grade.
• If you repeated courses, select Yes and
click Continue. Then, click the plus sign next
to the repeated courses for each college or
university you attended.Transcript Review:
AP Courses
Advanced Placement Credit
• Indicate if you received Advanced
Placement (AP) credit on the College
Board Advanced Placement Exams
for any of your courses.
• If you received AP credit,
select Yes and click Continue. Then,
click the plus sign next to the
advanced placement courses. Be
sure to only select courses that are
clearly marked as AP on your
transcript.Transcript Review:
Additional Tests
Other Test Credit
• Indicate if you received credit for tests
other than the AP exam, including
International Baccalaureate (IB), CLEP,
DANTE, Regents, or
Institutional/Departmental exams (i.e.,
courses you "tested out of" at college or
university).
• If you received test credits, select Yes and
click Continue. Then, click the plus sign
next to the courses. Be sure to only select
courses that are clearly identified as test
credits on your transcript.Transcript Review:
Honors Courses
Honors Courses
• Indicate if you took any honors courses,
which are generally college or university
courses taken at an honors level. These are
usually designated with an "H" in the
course number on your transcript. Note
that earning Latin honors upon graduation
does not mean your courses are
retroactively considered "Honors."
• If you took honors courses, select Yes and
click Continue. Then, click the plus sign
next to the courses. Be sure to only select
courses that are clearly identified as
honors on your transcript.Transcript Review:
Study Abroad
Study Abroad Courses
• If you studied abroad, indicate the
courses you took as part of your
institution's study abroad
program. Refer to the Sending
Transcripts section for more
information.
• If you studied abroad,
select Yes and click Continue.
Then, click the plus sign next to
the courses.Self-Reported Test Scores
• You can self-report your Standardized Test scores or report tests you plan to take in the Standardized
Standardized Tests •
Tests section. Some of the programs you apply to may require you to report certain test scores; be sure
to check with your programs to ensure you are completing all requirements.
Note that self-reporting your scores is not the same as providing official scores to your programs. If your
programs require official test scores, see Sending Official Test Scores for more information.
• Click here for information on reporting your OAT scores.
Add a Test Score
• Navigate to the Standardized Tests section.
• Find the test you took in the list and click Add Test Score. In some cases, you may only be able to enter
scores for certain tests.
• Select Yes under Have you taken the test.
• Enter the date you took the test.
• Enter all applicable scores.
• Click Save This Test.
• After submitting your application, you can continue to add new test entries to this section, but you
cannot update or delete previous entries.
Add a Planned Test
• Navigate to the Standardized Tests section.
• Find the test you took in the list and click Add Test Score. In some cases, you may only be able to enter
scores for certain tests.
• Select No under Have you taken the test.
• Enter the date you plan to take the test.
• Click Save This Test.
• Add a Test Not Listed
• Click Add a Standardized Test at the bottom of the page.
• Select the test from the drop-down.
• Select whether you took the test or not.
• If you select No, enter the date on which you plan to take the test. If you select Yes, enter the test date,
indicate if the test was internet-based (IBT) or paper-based, and enter the Test Registration ID.
• Click Save this Test.Official OAT Scores
• The Optometry Admission Test (OAT) is a standardized examination designed to measure general academic
ability and comprehension of scientific information. OptomCAS programs may require applicants to take
the OAT or some may accept another official standardized test, such as the GRE. OptomCAS recommends
that you contact your programs directly to determine their requirements.
• If OAT scores are required, you must request that ADA send your official OAT scores electronically to
OptomCAS. Paper copies are not accepted.
• After you request your scores, make sure that you also self-report your OAT score in the Standardized Tests
section of the application. It takes approximately 10-12 business days from the date you make the request to
post to your application. Make sure that the name and date of birth on your application match that on your
OAT exam; otherwise, your scores will not automatically post to your account. If you believe there may be a
discrepancy, wait until ADA processes your scores, then contact customer service so they can manually
connect the scores to your application.
• Note that when you select at least one US optometry school to receive your official OAT scores, you grant
the Department of Testing Services permission to release your scores to all optometry programs to which
you have applied through OptomCAS, even if you did not originally select those schools to view your scores.
If your OAT application has no optometry schools selected, then you have not granted permission to the
Department of Testing Services to release your official scores and your official scores will not be forwarded
to OptomCAS. Only the schools you apply to through OptomCAS will receive your OAT scores once your
OptomCAS application is complete.
• Once your OAT scores are attached to your application, they cannot be removed should you decide you no
longer want your programs to view them. Your OAT scores will also remain attached to your application if
you re-apply. We recommend researching your programs to determine whether you want your OAT scores
to be part of your application before you request them.Letters Of Evaluation
Before You Begin
Letters of recommendation (sometimes called Letters of Evaluation or Letters of Reference) are submitted by the
recommenders themselves; they cannot be completed or submitted by the applicant or another party on behalf of
the recommender. We are not responsible for verifying recommenders' identities. If a discrepancy is found, we reserve the
right to contact the appropriate individuals to investigate and to share the discrepancy with all programs.
Before getting started, consider the following:
• All letters of recommendation must be submitted electronically by recommenders using Letters by Liaison, our
Recommender Portal.
• Research each program's requirements.You should determine whether your programs have specific requirements
regarding recommender roles or relationships before listing recommenders on your application. Many programs
have strict guidelines and completed letters of recommendation cannot be removed or replaced.
• Prepare your recommenders. Once you choose your recommenders, be sure to inform them about the process
and that they will be completing the letters of recommendation electronically. We recommend getting their
preferred email address and asking that they monitor that inbox for your request (which will come
from optomcasinfo@optomcas.org), including any junk or spam folders.
Requirements
• You are required to request at least 1 and may request a maximum of 4 letters of recommendation. If you want to
submit more, send those additional letters of recommendation directly to your programs.Letters Of Evaluation
Submit a Request
• In the Letters of Recommendation section, click Create
Letters of Recommendation Request.
• Enter the recommender's full name and email address.
• Select the date by which you would like this letters of
recommendation completed.
• Enter a brief message or note for the recommender.
• Select whether you want to waive your right of access to the
letters of recommendation. See Waiver below.
• Click the checkboxes to indicate your permission for us (and
programs) to contact your recommenders.
• Click Save This Letters of Recommendation Request to
submit it. Once you do so, an email is immediately sent to the
recommender.
• Confirm with your recommenders that they received the
email notification.
• Use the Check Status tab to monitor the status of your
letters of recommendation. Completed letters of
recommendation are marked as "Complete" and have a
Complete Date listed. Follow up with your recommenders if
their letters of recommendation are still marked as
"Requested" or "Accepted." It is your responsibility to ensure
that letters of recommendation requests are received and
completed on time. We will not notify applicants about
missing letters of recommendation.Letters Of Evaluation
Resend the Letters of Recommendation Request
• If you need to resend a request:
• In the Letters of Recommendation section, locate the request you wish to resend.
• Click the pencil icon to edit the request.
• Scroll to the bottom of the page and click Resend this Letters of Recommendation Request.
Change the Recommender's Email Address
• If you entered an incorrect email address for any recommender (or if any recommender asks that you send the request to a different email address), you must
delete these requests and then re-add them with the correct email.
Waiver
• The Family Education Rights and Privacy Act of 1974 (FERPA) gives you the right to access letters of recommendation unless you choose to waive your right of
inspection and review. Prior to requesting any letters of recommendation, you are required to indicate whether you wish to waive your rights. OptomCAS will
release your decision to waive or not waive access to your recommenders and designated programs. Your waiver decision serves the same purpose as a legal
signature and is binding.
• Selecting Yes indicates to programs that your recommender completed their letter of recommendation with the understanding that you would not be able to
view it. This means you will not be able to see the content of the letter of recommendation. Programs may view this type of letter of recommendation as a
more accurate representation of an applicant's qualifications.
• Selecting No indicates to programs that your recommender completed their letter of recommendation with the understanding that you may choose to view it
in the future. Selecting this option does not allow you to view your letters of recommendation via the application. If you do not waive your right to view the
letters of recommendation, you may ask your recommender for a copy of the letter. Programs may view this type of letter of recommendation as a less
accurate representation of an applicant's qualifications.
• Once you make a selection, you can't change it, so consider the choices carefully.You can also read


