Target X Department Training Manual
←
→
Page content transcription
If your browser does not render page correctly, please read the page content below
1

  Target X Department
    Training Manual

Last Updated December 2019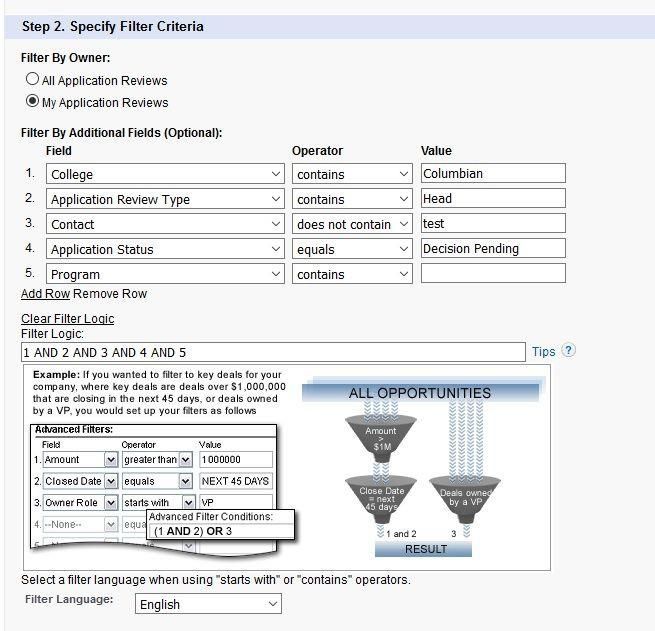
2

                                                              Table of Contents

Table of Contents
 Table of Contents .........................................................................................................................................2
Logging into TargetX .....................................................................................................................................3
Toggling Between Lightning View and Classic View .....................................................................................4
Viewing Your Applications .............................................................................................................................4
Entering Admission Decisions .......................................................................................................................7
Creating and Customizing A View in ‘Application Reviews’ .........................................................................10
Applicant Information and Enrollment Reports ............................................................................................12
Glossary.......................................................................................................................................................18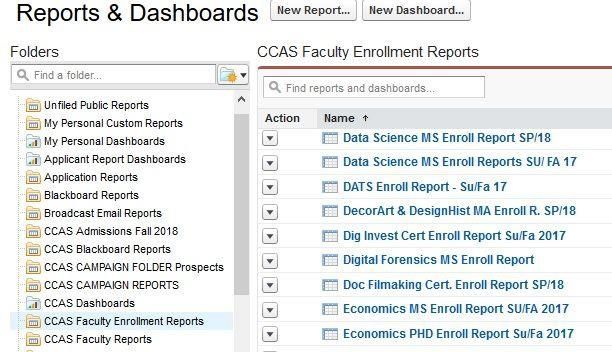
3

Logging into TargetX

All faculty and staff on admission committees will need access to Salesforce, the platform on which
TargetX is located. If you have not done so already, please email the Graduate Admissions office at
askccas@gwu.edu, with the names and emails of individuals needing access. You will receive the
below email once your account has been created. Please ensure that you verify your account.

2.     Once you have verified your account, you can visit http://gw.my.salesforce.com to login to
TargetX. Your username and password will be your general GW netID and password.
4

Toggling Between Lightning View and Classic View

The University is in the process of transitioning from the current version of TargetX called Classic, to a
new version called Lightning Experience. To this end, starting on January 7, 2020, each time you log
in, TargetX will open in the Lightning Experience version.

For now, CCAS Graduate Studies is still using TargetX Classic for application processing. To switch
from Lightning Experience back to the Classic version, click on the user profile icon on the top right
corner of the screen, and then click on Switch to Salesforce Classic.

In the reverse, if you are in Classic View, you can click the Switch to Lightening Experience link:

To learn more about the Lightning Experience, see the Lightning Experience for Salesforce Classic
Users training module.

Viewing Your Applications

Your Program Coordinator will alert you once a group of applications have been posted in TargetX for
review. Generally speaking, decisions are due within four weeks. You will receive auto-generated
emails alerting you when Decisions are “Due Next Week”, and again when any Decisions become
“Past Due.”

1.     Once in TargetX, open the Application Review tab.

If this tab does not appear at the top of your TargetX screen, click on the ‘+’ sign. You will then be
presented with an All Tabs screen. Select Application Reviews here.
5

2.     Select My Application Reviews (CCAS) from the drop down menu, and click Go to refresh
the screen.

A list of all of your pending applications will appear. You can sort your applications by any column on
the screen.

3.     Click on the application Review number. This will open a new screen.
6

4.      Click on Read Application to view the application.

5.     The application and bookmark menu will appear on the next screen. The application will have
approx 2-4 cover pages (Application Profile CCAS) with the applicants demographics as well as
educational history and test score information. Your can either scroll down the application to view the
information and attachments or use the navigation bar on the left to jump to different sections.

6.    The file can be downloaded as a PDF in two sections. For section one, click Application Profile
CCAS, then click on the download icon on the far right side of the screen.

7.     Open/print/save the pdf as needed.

8.     Next, for section two, click Transcripts, then click on the download icon on the far right side of
the screen (employment history, essay, resume, and recommendations will be included in this second
section).

9.     Open/print/save the pdf as needed.

NOTES

7

     ●   Your Program Coordinator will enter Decision Notes in the Review History section of the
         Application Profile if they feel there is pertinent information regarding the applicant that needs
         to be flagged for you.

     ●   The Official GPA in the Education section of the Application Profile was calculated by CCAS to
         include grades for all courses taken, in all schools attended, while in undergraduate status.
         The Self-Reported GPA is the GPA the student entered on their application.

     ●   If your department requires a portfolio, it will usually be the last item attached at the very
         bottom of the application as you scroll down.

Entering Admission Decisions

1.    Once you have reviewed the application and are ready to make a decision, click on the
Scorecard button on the left side menu.

2.       Click on Decision

3.     This where you will select Admit or Deny (some departments also can select Waitlist). The
options on your program’s Decision Scorecard are unique to your program, and may vary from the
image below (for instance, certain departments can enter notes, conditions or deficiencies).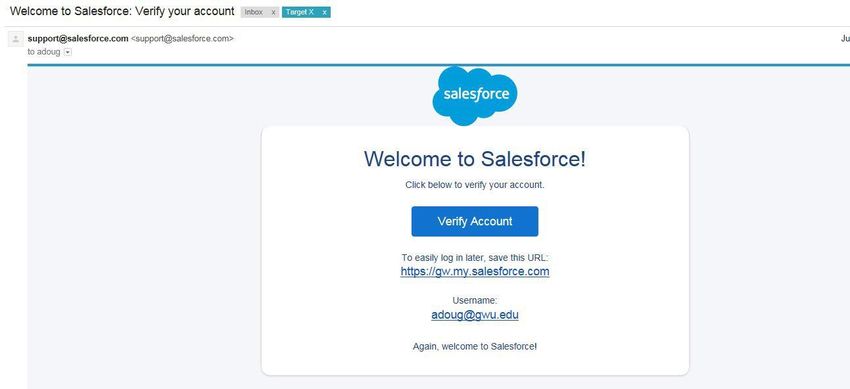
8

Decisions to admit can only be entered through the Scorecard. Do not click back into TargetX
and enter the decision on the application record.

4.     Click on Funding

5.     This is where you will select whether an applicant will receive funding from your department,
and/or be recommended for CCAS funding, and if so, the type of award. The options that appear on
your program’s Funding Scorecard are unique to your program, and may vary from the image below.

The answer you give to the Will you Offer Funding question will result in specific text being inserted
into the Admission letter as follows:

--If you select Yes, the admission letter text will read:

9

You have been selected to receive an award of merit-based financial assistance. Details will be sent
shortly by email to the address you provided on your application.

--If you select No, the admission letter text will read:

The applications for University Fellowships and Graduate Assistantships have been reviewed and I
regret to inform you that we are not able to offer you an award.

--If your department has the option of selecting Alternate, the admission letter text will read:

You have been named as an alternate for a University Fellowship and/or Graduate Assistantship. We
have only a limited number of these awards available, not nearly enough for all deserving applicants.
Although we cannot offer you an award at this time, we may be able to in the near future.

--All language about funding will be omitted from admission letters for Certificate students, as funding
is not normally given to Certificate students.

6.       After selecting your Decision, Funding and Campus Reimbursement decisions, click Submit.

NOTES

     ●   The Funding section of the scorecard does not replace Banner Workflow. After funding offers
         are approved by CCAS, the department must initiate the award in Banner Workflow.

     ●   When you Submit a Deny decision, it will automatically generate a Deny letter, and the
         applicant will be able to view the decision in his/her online application portal at 11:00pm that
         evening. If you accidentally enter a decision of Deny you must contact your Program
         Coordinator straight away so they can alter the student record and ensure that they do not
         receive the Deny decision. Changing your decision in TargetX does not reverse the decision.

     ●   When you Submit an Admit Decision, it does not automatically generate an Admission letter –
         instead, your Program Coordinator completes some processing and issues the admit letter.
         Coordinators attempt to process Admit letters on a daily basis as you Submit your decisions.
         However, during high volume periods, this may actually take a day or more to accomplish.

     ●   Any member of the admission committee can submit a decision, but only the decision of the
         Head Reviewer will be acted upon by the Program Coordinator.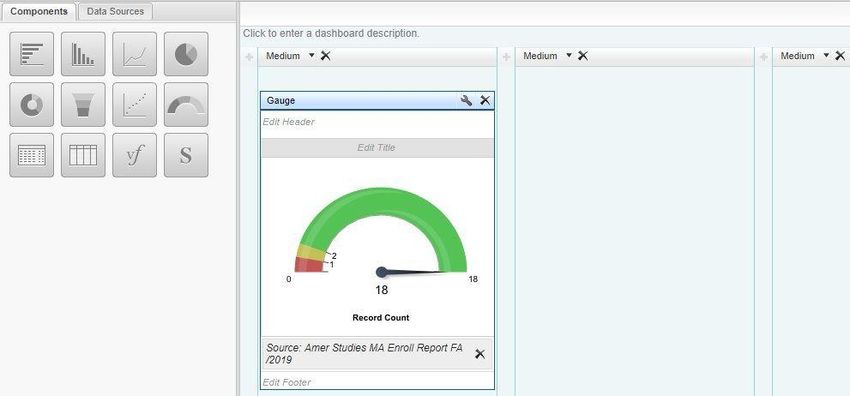
10
Creating and Customizing A View in ‘Application Reviews’

1.     Once in TargetX, open the Application Review tab
       .

If this tab does not appear at the top of your TargetX screen, click on the ‘+’ sign. You will then be
presented with an All Tabs screen. Select Application Reviews here.

2.     Select CCAS - Faculty Customizable Template from the drop down menu,

then select Edit.
11
3. Change the View Name in Step 1, using this naming convention:
CCAS - Program Name Your Name
So for instance, CCAS - Museum Studies Bob Smith
4. In Step 2, keep the Filter by Owner set at “My Application Reviews,” and leave rows Rows 1
through 4 as is. Specify other filter criteria by Adding new Rows.
5. Select the Fields you want to Display in Step 3.12 6. Restrict Visibility in Step 4 by changing Visible to all users, to Visible only to me. Then click on SAVE. Applicant Information and Enrollment Reports To assist you in your review process, your CCAS Coordinator can create Applicant Information Reports that list things like demographic data, official GPA, and undergraduate institution for all of your applicants. Please consult with your CCAS Coordinator to request these reports – in some cases these reports have already been created for your program, and can be easily updated and customized. Enrollment Reports have been created for all CCAS programs. These reports list all applicants for whom a decision has been made, and whether they have accepted or declined their offer of admission. They are updated in real time. You can view these reports any time as described below. You will also periodically receive auto-generated Enrollment Report emails, with the most recent report attached as an excel spreadsheet.
13

1.     Once in TargetX, open the Reports tab.

If this tab does not appear at the top of your TargetX taskbar, click on the ‘+’ sign.

You will then be presented with an All Tabs screen. Select Application Reviews here.

2.       On the left side, under Folders, click on CCAS Faculty Enrollment Reports. A list will appear
with all CCAS graduate program enrollment reports for the current term. Click on your program to view
your enrollment report (enrollment reports from previous terms are located in the CCAS Faculty Reports
ARCHIVE folder).
.
14

3. The blue headers in the report indicate the status of the application, as listed below.

01 - Offer Admission means the applicant has not yet accepted or declined the offer.

08 - Offer Admission Pending Final Cert only applies to international applicants, and means that the
department recommended admission, but the applicant has not yet submitted the financial support
documents required for visa processing.

30 - Applicant Waitlisted

50 - Denied Admission

52 - TOEFL Deny means the applicant’s English Language test score was below the minimum
required for admission consideration.

70 - Applicant Accepts Admission.
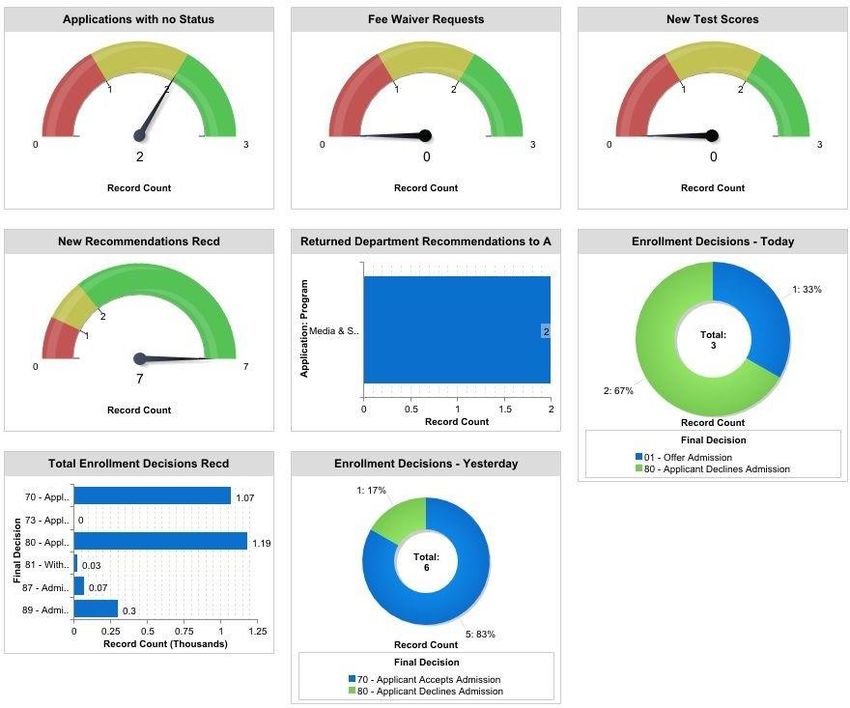
15

80 - Applicant Declined Admission

81 - Withdrawal After Commit means the applicant committed to coming, but changed their mind and
will not attend.

83 - Applicant W/draws Application - applicants can withdraw either before or after an admission
decision has been made.

82 - Institution Withdraws Application - this code is usually applied to Incomplete applications, after
the department has stopped reviewing for the coming term.

85 - Entry Term Changed and 87 - Admission Deferral Approved - these codes are used for applicants
who have requested to defer their applications to a future term. Only the application form (with a
waiver of the application fee) can be deferred, not offers of admission, nor of funding. Deferred
applications are re-reviewed within the application pool of the new term, with no guarantee that they
will be readmitted or receive the same funding offer.

88 - Commit, Not Enrolled means the applicant accepted the admission offer but never registered for
courses and CCAS has not heard from them.

89 - Admitted, No Response means the student was offered admission but never accepted or
declined.

Setting up a Dashboard

Through Dashboards you can view report data in graphic format. You can create several report
graphs within a single Dashboard.
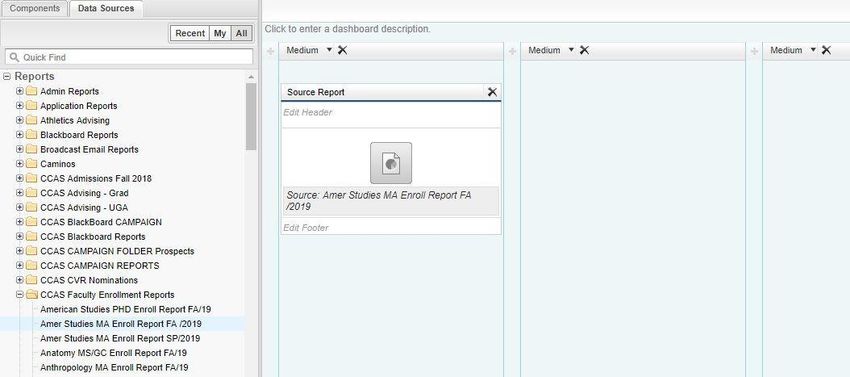
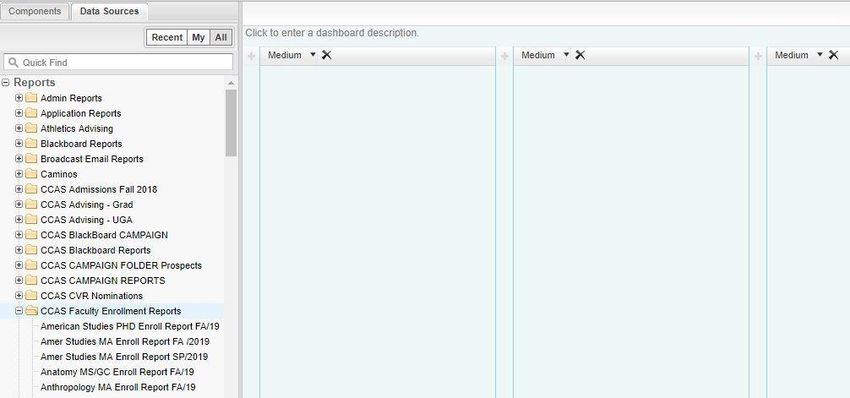
16

1.     Click on the Reports tab and then click on New Dashboard.

2.     Click on the Data Sources tab to select the report you wish to view in graphic format. We will
use your Enrollment Report in this example. Select Reports, then double click on the CCAS Faculty
Enrollment Reports folder, and find your department report.

Click and drag your report to drop it into one of the three columns displayed on the page.
17

3.     Click on the Components tab to select the graph type in which you wish your data to be
displayed.

Click, drag and drop the graph type inside the Source Report box.

You may change the settings (data labels, legend position etc) of your graph by clicking on the
Wrench icon on the top right. Click OK to save your settings.

4.     Click on Edit Title to create a title for your graph. Once you have finished click Save.
18

5.    After clicking Save, you will be prompted to create a title for your Dashboard. Save your
Dashboard in your My Personal Dashboards folder. Click Save and Run Dashboard.

6.      All data in Target X is updated in real-time. To check for data updates throughout the day,
click Refresh.

7.     To view the data behind the dashboard in report format, double click on the graphic image.

Glossary

TargetX- Admissions platform that applicants use to apply to GWU

Salesforce- C(ustomer) R(elationship) M(anagement) tool that houses TargetX

Head Reviewer- Person in the department who will make the final decision in TargetX.

Committee Reviewer- Person who has access to Target X to review and make comments and
recommendations, but cannot submit the final decision to CCAS.
You can also read