TELUS - PS Suite Tip Sheet
←
→
Page content transcription
If your browser does not render page correctly, please read the page content below
TELUS – PS Suite Tip Sheet
March 2014
The Alberta Screening and Prevention initiative is focused on supporting primary care
providers and team members to offer a screening and prevention bundle to all their
patients through enhanced opportunistic and planned outreach methods, targeting patients
who do not present for screening care.
Foundation for success: commitment to standardization in the EMR
It is strongly recommended to maximize use of standardized data fields and templates to record
patient information in the EMR. It is helpful before process redesign to determine how to record your
patient information in a standardized way to obtain the desired reports or queries and gain whole
team commitment to meet the new expectations. For example, if a clinic has a standard problem
list, it is easy to search for patients with single or multiple problems.
It is highly recommended for users to visit the PS Suite Community Portal to access the Knowledge,
Q & A and Ideas areas. All PS Suite users may obtain access to the PS Suite Community Portal.
Information is available on the Community Portal for weekly Q & A sessions with a trainer about
v5.2.500.
Useful videos include:
Patient Searches
Encounter Assistants
PS Suite 5.2.5xx Webinar
PS Suite Upgrade Training Overview Video 1 (Patient demographics)
Table of Contents
Part I: Panel                                                                     3
Part II: Panel Report using Advanced Search                                       4
  Advanced Search for Chart Review                                                7
Chart Review                                                                      7
Part III: Screening Process: Recording of Screening Offers                        8
  Recommendations for recording patient information in PS Suite                   8
  Adding a Risk                                                                   8
  Adding Influenza Vaccination                                                   10
  Entering Height, Weight and BP in Progress Notes                               10
  CV Risk Calculation                                                            11
  Recording Offers of Investigations                                             13
Part IV: Use of Reminders for Opportunistic Screening and Monitoring Screening   13
  Setting Global Reminders for ASaP                                              14
  Other examples of Screening Reminders for ASaP.                                16
  Option – Attaching a Stamp to a Reminder.                                      18
  Responding to Reminders                                                        19
  Important information about clearing reminders                                 19
  Reminder Reports:                                                              21
Part V: Searches and Reports                                                     21
  Steps to Performing a Search using the Pre-defined Searches                    21
  Defining New Searches and Editing Searches (Creating a Custom Search)          24
Part IV: Other Recommended Processes for ASaP                                    25
  Flowsheets                                                                     25
  Viewing Flowsheets                                                             26
  Steps                                                                          26
  2. Encounter Assistants                                                        28
Assistance                                                                       28

                                                                                  2
Part I: Panel
Opportunistic and outreach screening processes should be applied to the active, paneled patients for
each provider. Each provider should know which patients he/she is responsible for. This process is
managed by front staff. Patient demographics and physician attachment should be verified at each
patient encounter or on a regular basis. As well as being the leading practice for managing panel this
ensures that when a clinic receives a critical result, the patient may be contacted without delay and
the clinic team knows which physician is the primary provider for that patient.
The following fields in PS Suite EMR need maintenance and updating:
Primary Provider
o Assign each active patient to a primary care physician using the Patient’s MD in the
Patient’s file
Patient Status
o Active patients need to be distinguished from inactive patients which includes those
who have left practice, are transient/temporary or are deceased
Demographic data
o Manage demographic/registration information for each patient and validate it
regularly.
o Clinics may choose to use the Patients Status Date to monitor the last date the
patient status and demographic information was updated. Patient Status Date
is one method that clinics may choose to monitor when the patient status and
demographic information was previously updated.
Save Changes when complete
When the patient status has changed, the date is stamped on the chart in the Patient Status Date
field.
3
Tip: To view all changes to a patient’s change history go to: View > Patient Change
History. Each change is recorded by date of change, user and field. See PS Suite
Upgrade Training Overview Video 1 (Patient demographics) in the Community Portal.
Part II: Panel Report using Advanced Search
Before you begin:
Recommendation:
Are you new to Searches?
PS Suite has some excellent videos available to describe basic and advanced searches.
In the PS Suite Community Portal, which all PS Suite users have access to, type “Create
a Search” into the search field in the Knowledge area to be linked to the Patient Search
videos. Useful videos include:
What is a search?
Creating basic searches
Testing a search
Deleting a search
Creating a customized search report
Creating letters for all patients on a search report
4
Use of the Search in the EMR enables the clinic team to produce a list of active, paneled patients by
provider. For example to find the active patients who have seen a provider in the last three years:

Steps:

PS Suite EMR has predefined searches or you can create and save a new search made to meet the
needs of your clinic. To define your own custom search:

    1. In the Records window, choose Settings > Edit Searches. The search editor will open.

    2. Select an existing search to edit from the list on the left, or click Add Search to create a new
       one.

    3. Begin by defining the name of the search in the Search Name area at the top of the window.

                                                                          The search criteria will be
                                                                          defined in this window.

                                                                                                        5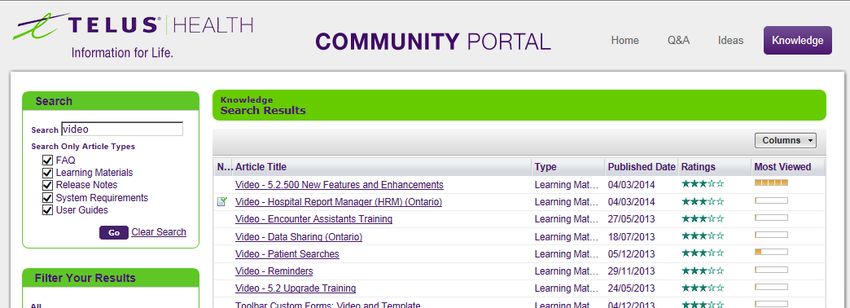
4. Click Add Line to add a search criterion
5. Click Demographics in the left column to begin selecting the criterion. When you select an
item in the second column, additional columns provide the operators to be applied to that
criterion.
6. Select Patient’s MD = [Name of physician]
7. Click OK to add the selected criterion
8. Select Last Seen Date < = 3 years
9. Click OK
10. Select Patient Status = Active
11. Click OK
As you add multiple criteria, the word “and” is automatically inserted between the
lines.
12. When you are finished, click Done
6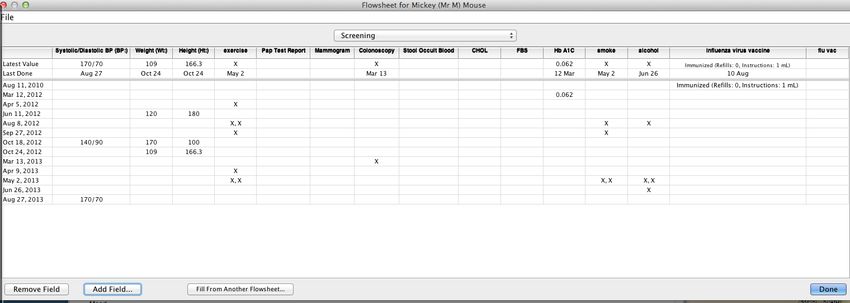
Note: The clinic needs to define how far back in time you are searching for active patients. Clinics will
usually choose between 3 and 5 years.

Advanced Search for Chart Review

For the chart review, a list of active patients by provider between the ages of 18 and 79 years will
need to be produced. Conduct the search as above but adding a line
         Age >= 18
         and
         Age  Show Last Renewal and Update
                Dates. The dates are shown with a yellow background at the right of
                the section or treatment. You can choose View > Hide Last Renewal
                and Update Dates to hide them again, or switch patients. The dates
                are automatically hidden when you switch patients.
                                                                                                       7
                During the chart review, the reviewer will need to choose View >
                Show Last Renewal and Update Dates for each patient reviewed.
Part IV: Screening Process: Recording of Screening Offers

Consistent charting of the 12 screening maneuvers in standardized fields, where possible, will allow
monitoring over time. It is encouraged to use a visit template to record screening offers and refusals.
A flowsheet, created from a template can display observations over time.

For advanced clinics, it is strongly recommended to create an Encounter Assistant to record patient
information and perform actions in the EMR associated with screening offers. See the section on
Encounter Assistants.

Recommendations for recording patient information in PS Suite

Using the Patient Profile

        Adding Lifestyle/Personal Information
        Tobacco use, alcohol and exercise assessment can be added into the PERS (Personal
        Information) field by typing directly, or double-click the PERS heading to use a form. Tobacco
        use, alcohol and exercise could also be recorded as Risk in the RISK section of the patient
        profile to add a summary of the patient’s risk factors. Is the clinic currently documenting in
        PERS or RISK? Continue the pattern that will be the least change for the clinic.

        Tip: Noting where the clinic chooses to document will be important if creating a Global
        Reminder later.

Adding a Risk
        Steps:
        1. Choose Data > New Risk Factor, or click the RISK heading in the patient profile.

                                                                                                      8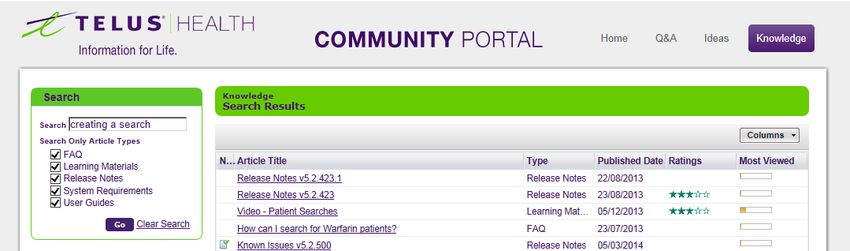
2. Click the appropriate tab and then click its Add button (such as Add Tobacco Risk).

3. Enter the appropriate information.
4. When you have finished, click Save All Changes.

Tip: To delete a risk, double-click the item in the profile and click the Delete button
identifying the risk (for example, Delete Tobacco Risk).

                                                                                          9
Adding Influenza Vaccination

        When you add a treatment and you select a vaccine or immunization, the system
        automatically recognizes it as such and you can enter details, such as the dose, lot, and
        expiry date.

        If the patient must pick up the vaccine at a pharmacy and bring it back to your office for
        administration, enter it first as a prescription. The system recognizes that the medication is
        a vaccine, and identifies it as such in the progress note.

        Because a prescription of this type should not be considered part of the patient’s ongoing
        treatments, it does not appear in the Rx field of the profile.

        When the patient returns with the vaccine, double-click the prescription in the progress note
        and choose Perform Immunization. Change the instructions, comments, and date, as
        necessary, and click Perform.

        If an immunization (such as the flu shot) is given in 2005 and 2006, then refused in 2007, a
        “refused” line appears below all flu shots, and as the only line if collapsed. If a flu shot is
        later given, the IMMU field will show all of the flu shots when expanded and the latest when
        collapsed.

        Treatments are shown in blue in the progress note, and any treatments defined as
        immunizations by the system are prefaced with Immunized.

        Immunizations are added to the IMMU field.

Entering Height, Weight and BP in Progress Notes

        When entering standard numerical data in a note, such as height, weight and blood
        pressure, you should use consistent categories to enable the system to recall that numerical
        data with advanced graphing and searching functions. Importantly, all of these categories
        can be searched, graphed, and used for reminders (under the vitals heading).

        Weight (for a patient who weighs 75 kg) is entered as “Wt: 75”
        Height (for a patient whose height is 170 cm) is entered as “Ht: 170”
        Blood pressure is entered as “BP: 130/70”

                                                                                                     10
Tip: To see imperial/metric conversion of any standard vitals, right-click {Control-click}
anywhere in a note that contains one of these vitals. Conversions are shown at the bottom of
the pop-up message for all standard vitals (Ht:, Wt:, HC:, T:) in that note.
CV Risk Calculation
The Cardiovascular Disease Risk stamp calculates the cardiovascular disease risk for the
patient over the next 10 years. It uses the patient's age (applicable for patients between the
ages of 20 and 79), sex, diabetic status, existing CVD status, latest total cholesterol, latest
HDL cholesterol, latest systolic blood pressure, and smoking status to calculate the risk
according to the tables based on the Canadian Journal of Cardiology (anything over 30% is
considered a high risk).
You must define some initial values, but the system will determine certain factors
automatically. If it finds the term “smoke” in the Personal History or Risk Factors profile
fields, the Smoker checkbox is selected in the Select Initial Values window (if it is not
specified in the patient chart, you are asked if the patient is a smoker). Also, if the largest
HbA1C > 7%, or if the largest FBS > 10, “Diabetic” is selected by default in the Select Initial
Values window.
If you identify the patient as already having cardiovascular disease, a message tells you that
the cardiovascular disease risk calculations do not apply. Because there are so many ways
to describe clinical CVD, the system is unable to determine this automatically.
11After you select the initial values and click OK, the values and risks are presented in a table.
Important: Click Stamp to record the values in the progress note.
For patient education, you can adjust the various sliders to change the factors and thereby
predict what effect lifestyle modifications may have on the overall risk. Return to the actual
values by clicking Restore This Patient's Numbers. Note that the Stamp button always
records the actual values, and not the modified values.
12Recording Offers of Investigations
Pap tests, mammograms, plasma lipid profile, Hgb A1c, fasting glucose and colorectal
cancer screens can be recorded through the investigation requisitions stored in the patients
charts. Refusals and deferrals can be managed through Global Reminders. See Global
Reminders.
Part V: Use of Reminders for Opportunistic Screening and Monitoring Screening
Background:
PS Suite EMR has Reminders, which are not only useful to determine which patients are due for a
screening maneuver but can also be used to document refusals and deferrals.
Reminders are very similar to searches. A search gives you a list of patients who satisfy certain
criteria, whereas a reminder automatically places a one-line note, called an intervention (e.g., “Order
Mammogram”), or a custom form or stamp into the REM field of the patient profile for each patient
who meets the criteria.
The following indicators provide additional information:
Red text indicates medium priority interventions
Blue text indicates low-priority interventions
Black text indicates interventions that may become applicable within the next two weeks,
along with the due date.
In the following example, various reminders appear in the REM field in the patient profile. This
patient is due for Hb A1C, flu shot and pap smear.
13Note: If a patient’s chart, medications or notes in that chart, were marked as private, they are not
included when you use reminders.
You can set Global Reminders for all patients or reminders that are unique to individual patients.
Tip:
New to Reminders?
It is highly recommended to watch the informative video on Reminders
accessible through the PS Suite EMR Community Portal.
Setting Global Reminders for ASaP
Considerations before you get started with Reminders:
1. Define your own global reminders to add intervention notes for all patients that match your
search criteria. Use the below examples as a guide but all reminder criteria should be
discussed with the clinicians in the organization.
Consider where the users are documenting information: Is Tobacco use, exercise and
alcohol documented in PERS or RISK or both depending on the user? When setting
a New Reminder, take this into account.
2. Start small! Begin with one global reminder if the clinic has never used reminders before
and grow incrementally.
Reminder criteria are defined the same way as search criteria, except that a reminder can be given a
medium or low priority (“High (scan daily)” is disabled for future use).
You can choose to add either an intervention note into the REM field for patients who meet the
reminder criteria. A low-priority reminder inserts the intervention in the REM field in blue letters,
while a medium-priority reminder inserts the intervention in red letters. Only medium-priority
reminders appear on the reminder report (see Reminder Reports).
14Steps:
1. From the Records window, choose Settings > Edit Reminders.
2. Click New Reminder.
3. Define the reminder name and criteria.
4. Choose whether to show an intervention or a custom form stamp:
To show an intervention in the REM profile field of those patients who meet the criteria, the
Show Intervention as Reminder field, type the text to be inserted.
If a custom form or stamp is available that is appropriate for this reminder, select the Show
Custom Form or Stamp option and, from the list, select the form or stamp.
5. Select the priority.
6. Click Done.
The example above will insert the Intervention “Order Mammogram” into the REM field of the patient
profiles of all women who have not had a mammogram in the past 24 months, and who are under
75 but either older than 50 or older than 40, with a family history of breast cancer.
15Other examples of Screening Reminders for ASaP.
Example 1: Blood Pressure
The example above will insert the Intervention “check BP” into the REM field of the patient profiles of
all patients 18 and 99 who have not had a blood pressure taken in the last 12 months.
16Example 2: Pap test
The example above will insert the Intervention “pap smear needed” into the REM field of patient
profiles of all women between age 21 and 69 who have not had a pap test in the past 36 months,
have not had a hystorectomy and are documented as not sexually active.
Example 3: Colon Cancer Screening Text (FIT test needed)
Age >= 50
and
Age = 24 Check the lab text for your
or incoming fecal
Lab Text Containing… “FIT” months since latest >=24
or immunochemical test (FIT)
HPS/Past Hx/History of Past Health does not contain osotomy results to set reminder.
or
Colonoscopy months since latest >= 120
or
Sigmoidoscopy months since latest >= 60
The example above will insert the Intervention “FIT test needed” into the REM field of the patient
profiles of all patients age 50 to 74 who have not had an FOBT in the last 24 months, a colonoscopy
in the last 10 years or a sigmoidoscopy in the last 5 years.
17Example 4: Diabetic screening
Age < 80
and
Age >= 40
and
Hemoglobin A1C [Hb A1C] months since latest > 36
or
Lab Text Containing…”Glucose Fasting” months since latest > 36
The example above will insert the Intervention “Diabetic Screening” into the REM field of the patient
profiles of all patients age 40 – 79 who have not had a Hgb A1C or a fasting glucose (FBS) in the last
36 months.
Tobacco Reminder:
Because documentation of tobacco use may vary, the reminder needs to reflect
that documentation. Discuss clinic documentation before creating a reminder.
Example 5: Tobacco Screening
RISK/Risk Factors/Risk Factors does not contain smok
and
Age >= 18
and
Age 18
And
PERS/PERSONAL/Personal History contains smok
And
PERS/PERSONAL/Personal History does not contain non
Or
PROB/PROB/Problem List contains smok
Or
RISK/RISK/Risk Factors contains current smoker
In the above example, where there is documentation of “smok” in PERS, PROB or RISK, “Tobacco
Assessment needed” will be inserted in the REM field of the patient profile of all patients over 18
years of age.
Option – Attaching a Stamp to a Reminder.
Attaching a stamp to a reminder in PS Suite EMR allows for information to be displayed in the
Cumulative Patient Profile (CPP) when a specific reminder appears in the patient’s record. This is
useful for many different reminders, including cholesterol tracking, INR tracking and preventive care
tracking. For example, when the reminder comes up for a patient to have a mammogram, the stamp
will display the date of the patient’s last mammogram in the CPP. Another example is when a
reminder appears for the patient to have cholesterol checked—the stamp will display the patient’s
last cholesterol result in the CPP.
You can also attach a stamp to a reminder that does not necessarily trigger an action, such as a
placeholder reminder for preventive care dates.
18Steps:
1. From the Records window, choose Settings > Edit Reminders.
2. Create your reminder as usual (or choose an existing reminder).
3. Under the Intervention Needed field, find the field titled Associated custom form or
stamp.
4. Choose a stamp that exists in your system from the drop-down menu, and then click
Done
Responding to Reminders
When one or more reminders are defined, the REM profile field for some of your patients will contain
one-line notes, called interventions. If an intervention is present, then that patient's data meets one
of the pre-defined requirements. Interventions in red letters are medium-priority, while those in blue
letters are low-priority. Interventions that may become applicable within the next two weeks are
shown in black, with the due date.
Notes in the REM field appear and disappear, depending on whether or not reminder criteria are
satisfied. If a patient's chart displays an intervention that does not apply, then the only method to
make the note go away is to change the reminder criteria or to correct the patient's data.
Important information about clearing reminders
Responding to reminders does not constitute an action—they are merely alerts to remind you to
perform a treatment, or to talk to the patient about an issue. Think of it like an electronic calendar or
task list—you can mark a task or meeting as done, but that doesn’t mean you actually completed it.
Reminders that display in the REM field are still classified as ACTIVE reminders, and as such, still
appear on the Reminder Report, even if you have marked them as done and they appear with a
strike through them. The only method to fully clear a reminder from the
19REM field and associated reports is to enter the appropriate information that will render this patient
as no longer meeting the reminder criteria.
If a reminder involves a treatment action, such as a flu shot, the reminder will remain in the patient’s
REM field until you perform that treatment. When the IMMU information is entered, the patient no
longer meets the reminder definition, so the reminder will no longer appear for that patient.
Steps:
1. To respond to the reminder, in the REM field, double-click the intervention.
The response form displays the intervention and the name of the reminder, and contains
several response options.
2. To leave the reminder for now, choose continue reminder.
3. To take some action now, choose one of the other options and enter any details and the
date, if required.
4. Click OK.
The intervention in the REM field reflects any response, and a reminder response is also logged in
the progress notes.
20You can edit this type of note at any time, like a regular progress note. This is useful for documenting
the fact that repeated reminders have taken place, such as counseling a smoker to quit smoking.
The first time that you tell the patient, choose the option “done on:” in the Reminder Response form.
The second time that you remind the smoker, double-click the reminder. The original reminder date
appears. Click Today and then click OK. This updates the reminder and posts a new reminder
response under today's date.
Reminder Reports:
Reminder reports will display all active reminders for patients and to view the latest reminder
response. The report includes global reminders and reminders that are unique to individual patients.
It is recommended to watch the Reminder video accessible through the PS Suite Community Portal
to learn how to create and run Reminder Reports.
Part VI: Searches and Reports
Note: It is recommended to run Searches and Reminder Reports after
regular clinic hours to avoid any possible slow-down of the system.
Depending on the search definitions and the size of the clinic database, it
may take a couple of seconds to minutes to run a report.
These reports can be scheduled to run on a regular basis after clinic
hours when the system is quiet. Instructions are found in the PS Suite
User Guide. See “Scheduling Reports”.
New to Searches? Before you begin, watch the videos on Searches
available in the PS Suite Community Portal video library.
Use of the search functionality to identify lists of patients that are overdue for screening maneuvers.
Through outreach screening processes, these patients may be contacted and notified that they are
due for screening. Reports generated by in the EMR can be used to measure progress throughout the
improvement period and rates of screening offers by providers and the care team.
In PS Suite you can choose between running Reminder Reports, if using Reminders, or using
Searches to identify patients that are overdue for screening.
Note: If you do not have permission to view a patient’s chart, the patient will not be included in the
search results. However, if all or part of a patient’s chart is marked private and you have permission
to view it, it will be included in the search results and will be identified in a Privacy column. This
allows you to remove those results before providing them to other users.
Steps to Performing a Search using the Pre-defined Searches
1. From the Records window, choose Patient > Search.
212. Choose one of the searches from the list on the left. The search parameters display on the
right.
Note: To make changes to the search criteria, click Edit Searches.
3. Click a doctor's name to exclude or include that doctor's patients from the search. The
patients of doctors with a bullet (•) next to their names are included in the search.
4. Select the Include Matched Data with Results checkbox to show the information from the
patient chart that contains the data searched for. This can be helpful when setting up your
searches to ensure that it is finding the right information.
5. For ASaP you do NOT want to Include Deleted Records in Evaluation.
6. Under Report Format, change the title of the report.
7. If required, change the format of the report. The default columns included are Patient #;
First Name; Surname; Age; Home, Business, and Mobile phone numbers; and Privacy.
Sample patient data is shown in the table for illustration purposes.
To remove a column, click in the column and click Remove Column
To add a column, click Add Column. In the tree, navigate to and double-click the
desired keyword data that you want to populate the column. For example, under the
Current Doctor folder, click Surname, and then click Add. You are prompted to
provide a name for the new column. When you run the search you will be asked if
you want to save the changes to the report template. Click Yes if you want this
search to always show this column. When this report is generated, the
corresponding data will appear instead of the doctor’s last name.
8. Click Search. The search process may take quite a while depending on the size and
complexity of the search. The following windows show the search results without including
matched data, and with matched data.
229. If applicable, remove results that are identified as private by clicking on the result and
pressing Delete.
10. If you want to view a patient’s chart, double click the patient name.
23If the search report is no longer visible, press Alt+Tab {command+~} to return to it.
11. From the Report menu, you can:
Print the list.
Export the found patients’ charts to XML format (anonymized or non-anonymized), PDF
files, or in a tab-delimited format, using a global flowsheet.
Find a particular patient. If you have a long list of search results, you can enter a string
of text to search within the results. Alternatively, you can sort the list by clicking on
any of the column headings.
Send a form letter to one or all found patients. For more information consult your PS
Suite User Guide, page 476.
Send a message about one or all found patients.
Defining New Searches and Editing Searches (Creating a Custom Search)
New to Defining New Searches?
See the PS Suite User Guide for Alberta, Defining New Searches or refer to your Help Menu in
the EMR. In the Community Portal, highly recommended videos include: Searching for Patients
Based on the “Primary Provider” and “Other Provider” fields that provides useful tips. It is also
recommended to view the Patient Searches Training Videos available in the Community Portal.
Experienced users may define new searches by:
1. In the Records window, choose Settings > Edit Searches.
2. Select an existing search to edit from the list on the left, or click Add Search to create a new
one.
3. Type or change the search name. Make this name meaningful as you will go back
4. Click Add Line to add a search criterion.
5. Select the search criterion.
6. Repeat steps 4 and 5 to add more search criteria.
If you have multiple criteria, the word “and” is automatically inserted between the lines.
This indicates that both lines must be satisfied by data in a patient’s chart before that
patient is included in the search report. To change this to an “or”, double-click the work
“and”.
To group lines together and to change the order of operations, use the Indent Line or
Outdent Line buttons.
Use the arrow buttons to change the order of the search criteria.
If you want to restrict a search to events that happened within a range of dates, as the
first line of the search, choose Restrictions > Start Date for subsequent lines, and then
enter the beginning of the range. For the second line, choose Restrictions > End Date for
subsequent lines, and then enter the end of the date range.
Because these criteria must both be “true”, they should always be separated by an
“and”; you get an error message if you try to change this to an “or”.
7. To test your search, click Test Search.
Tip:
A good method to make sure that your search definition is working as intended is to
check that the patients that you expect to see on the list are actually there. If patients
are included in the search, and you think that they shouldn’t be, then add a search
criterion that will exclude those patients. If others are left off the list, and you want
them included, then add a search criterion that will include them in the definition, or
alter the parameters of an existing criterion.
24Part VII: Other Recommended Processes for ASaP
Flowsheets
Flowsheets are custom reports that can include any information from a patient’s chart, such as lab
values, patient vitals, medication histories, test reports, immunizations, and just about anything else
that is searchable. Flowsheets help you to see at a glance the key elements that are part of chronic
disease management or preventive care.
You can customize a flowsheet for an individual patient, or create a global flowsheet that is
accessible for all patients. It is highly recommended to use flowsheets for ASaP monitoring.
The example flowsheet below shows offers of screening maneuvers over time. Flowsheets can be for
a patient or may be Global.
Steps:
1. From the patient record, choose View > Show Flowsheet, or press F1.
2. From the Flowsheet window, choose File > Add Flowsheet for this Patient, or Add Global
Flowsheet, as applicable.
3. Type a name for the flowsheet and click OK.
Tip: If you want to base your new flowsheet on an existing one (either a global one or one
specific to this patient), click Fill From Another Flowsheet. Select the flowsheet and click OK.
You can then add or remove fields as required.
4. Click Add Field.
255. Select the category and specific item to include in the flowsheet, and click OK.
6. Repeat until you have added all of the fields that you want to include.
7. To remove a field, click in a field below the column and click Remove Field.
8. To change the order of the fields, select a field and choose File > Move Up Selected Field (or
Move Down Selected Field).
Viewing Flowsheets
After a flowsheet is created for an individual patient, or a global flowsheet is created for all patients,
you can view it at any time to view and interpret the patient’s data.
Steps
1. From the patient record, choose View > Show Flowsheet, or press F1.
2. If more than one flowsheet exists for the patient, choose one from the drop-down list. The
list contains any flowsheets previously defined for this patient, followed by any global
flowsheets (which may have been defined in this or any other patient).
26The flowsheet displays all values that match the field, sorted by date. The latest value and date
for each field are shown at the top of the table. Any abnormal values are shown in red text.
3. To view the fields down the side and the dates along the top, choose File > Change
Flowsheet Orientation. This toggles the orientation. To change back, choose the menu option
again.
4. To show a subset of the results, choose File > Restrict Results to Date Range or Restrict
Number of Dates to Show. When you restrict the number of dates, the most recent dates are
shown. The filter applied is shown below the results table. To clear the filter, choose the
menu option again and clear the entries. These settings are not saved, so the next time that
you view this flowsheet, any filters will be removed.
5. To go to the related progress note, click on any date.
Note: This does not work if you chose to show only a subset of the progress notes that does
not include lab results.
6. To view a graph of a particular field, double-click any value in that column.
From the File menu, you can choose to print the flowsheet, export it to share it with other doctors, or
rename or delete the flowsheet.
272. Encounter Assistants
For clinics that are more advanced, it is recommended to build an Encounter Assistant. Encounter
Assistants are interactive forms that enable physicians and nurses to collect information during a
patient encounter, generate formatted progress notes and letters, and trigger such actions as
prescriptions, referrals, and bills.
Encounter Assistant instructions are in the User Guide. A comprehensive video tutorial on Encounter
Assistants and a “Handout – Encounter Assistants Getting Started Guide” is available in the PS Suite
Community Portal. In the Knowledge area of the Community Portal, enter “Encounter Assistant” into
the search criteria to bring up the resources. TOP has created an ASaP Encounter Assistant Plan
which can be downloaded from the TOP web site.
Assistance
In addition to the vendor help desk, help files in the EMR and video help files which are more
detailed. Clinic training can also be arranged. The PS Suite Community Portal is also recommended.
Questions can be posed in the portal for the vendor. TELUS Health Solutions will announce user
meetings and on-line webinars in the Community Portal.
User Guide: The PS Suite User Guide for Alberta is recommended as a comprehensive guide for using
PS Suite for screening and prevention.
The Alberta Medical Association will have EMR Advisory Services available April 1, 2014. Call 780-
733-3637 or 1-855-454-8400 for more information.
28You can also read