Tips for Recording Videos on Phones - Shoot Horizontally
←
→
Page content transcription
If your browser does not render page correctly, please read the page content below
Tips for Recording Videos on Phones

Shoot Horizontally
Generally, videos for courses are presented horizontally on a computer screen, with the width
longer than the height, so they should be shot horizontally.

Get Close to Subject

Fill the Frame
Get the phone as close to the subject as possible. Ask yourself, what is important in this video?
If it is just a body part, fill the frame with that body part. If it is an entire person or two, fill the
frame with that. Take care to not waste frame space on empty ceilings or floors. Zooming can
accomplish this as well, but it also amplifies any movement of the phone and can reduce quality
if overdone.

Scan the Background
Consciously examine the background for anything distracting or weird that you wouldn't want to
show up, especially if you are recording at home. It's hard to notice things on your phone, but
people will be watching it at a larger size.

Also, Because: Microphone
Phone microphones are generally not very good, so getting the phone as close as you can to
the subject will help a lot. Go somewhere quiet and keep the subject within a couple feet of the
phone if possible. Avoid recording outside because even a light wind will make speech hard to
decipher.

Stay steady
Prop the phone up on something level with the subject. If you have an actual tripod - perfect. If
not, you can try one of these DIY tripods https://www.youtube.com/watch?v=TTtJovKtujo (I've
even used two big hair clips.) Then put the whole set-up on a stack of boxes or books. Do not
then put the whole thing on something that moves, like the couch you are sitting on. Put it on a
table, desk, counter.
Light Sources

Underexposure
Any light source, (a light or a window), inside the video frame, will throw off the exposure
measurement and make the subject of the video too dark. You can lighten afterwards, but only
a bit before the quality is reduced. See if you can change your or your subject’s position or the
angle of the phone so the light is not in the video.

Even lighting
To get more flattering light, try to get even lighting with no harsh shadows on the subject's face.
Ideal lighting would be the subject facing a big window that has no direct sunlight coming in. If
you don’t have a window with indirect sunlight coming in, you can turn on lights inside a room
with light colored walls.

High Quality Settings
Generally, the default setting for videos on phones is the most efficient, not the highest quality.
Getting a higher quality video not only looks better but allows for more correction during editing,
like exposure correction and cropping.

iPhone
On an iPhone, navigate to: Settings/Camera/Formats/Record Video.
Pick the highest dimension setting you can, depending on your phone’s capabilities and how
much space you have.

                                                                                    Created April 2020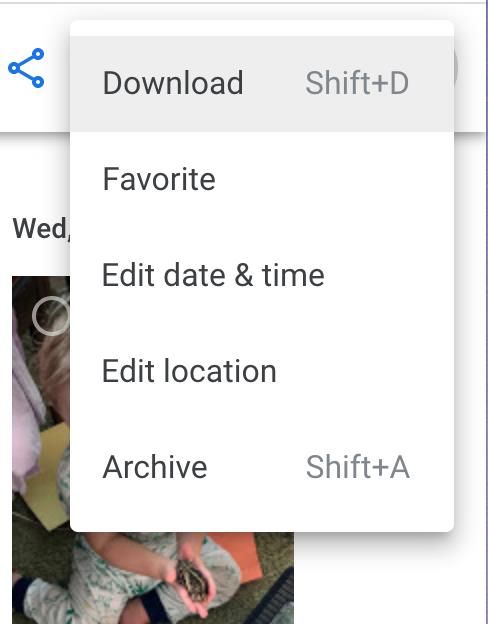
Also change the camera’s recording format by navigating to:
Settings/Camera/Formats/Most Compatible

Android
   1.   Open your Google Camera app
   2.   Tap More and then Settings
   3.   Under "Photo" or "Video," pick which camera you want to adjust
   4.   Tap the resolution you want

Transfer to Computer

iCloud
For an iPhone backed up to iCloud, sign in to icloud.com with your Apple ID and password.
Navigate to Photos. Hover over the download icon and a tiny arrow appears. Click on it and the
dialogue box below appears. Choose “most compatible” in order to download mp4 (not HEIF)
files. Again, the default is for lower quality, smaller files.

                                                                               Created April 2020
AirDrop - Transfer Wirelessly
If your Mac and iPhone are set up to connect via AirDrop you can send the video wirelessly.
Both devices must be on the same wifi network.
Google Photos
For an Android phone backed up using the Google Photos app, go to photos.google.com and
sign in with your Google account. Search through your files to find the video you want to
download. Hover over it and select it. At the top right there are three dots, click and select
Download.
Email
You could send the video to yourself from Photos on your phone.
iPhone
Navigate to the video, tap the up arrow icon and choose mail. If the video is large, you will be
prompted to use MailDrop (which uses iCloud).
Android
Connect Physically
You can connect your phone to your computer with a USB cable and import.
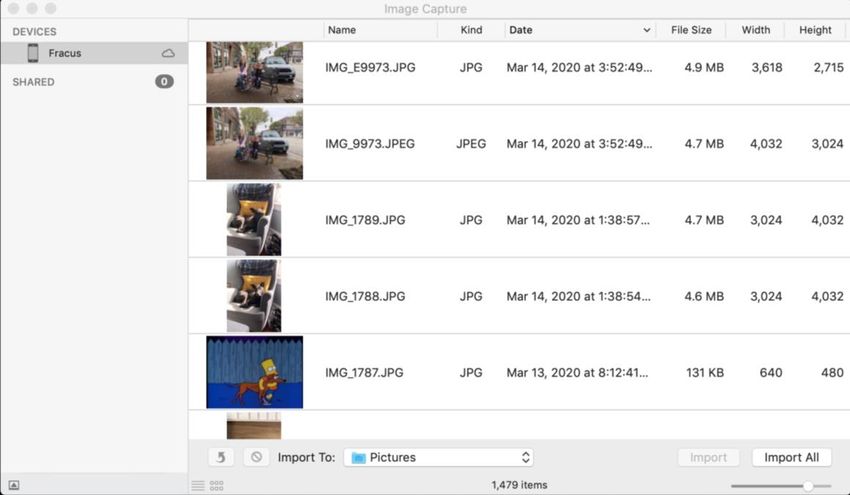
Created April 2020Apple Image Capture App (Mac)
On Macs you can use a built-in app called Image Capture to transfer your video to your
computer’s hard drive.
1. Connect your device to your computer, then turn the device on.
a. You may be asked to unlock your device with a passcode or to trust the device.
2. Open Image Capture on your Mac.
3. In the Image Capture app, select the device in the Devices or Shared list.
4. Use the buttons at the bottom of the Image Capture window to view the thumbnails as a
list or to see larger thumbnails, or to rotate images.
a. Drag the slider in the lower-right corner of the window to change the thumbnail
size.
5. Click the Import To pop-up menu, then choose where to save the images or which app
to use to open the image.
6. To import only some of the images, select them, then click Import. To import all the
images, click Import All.
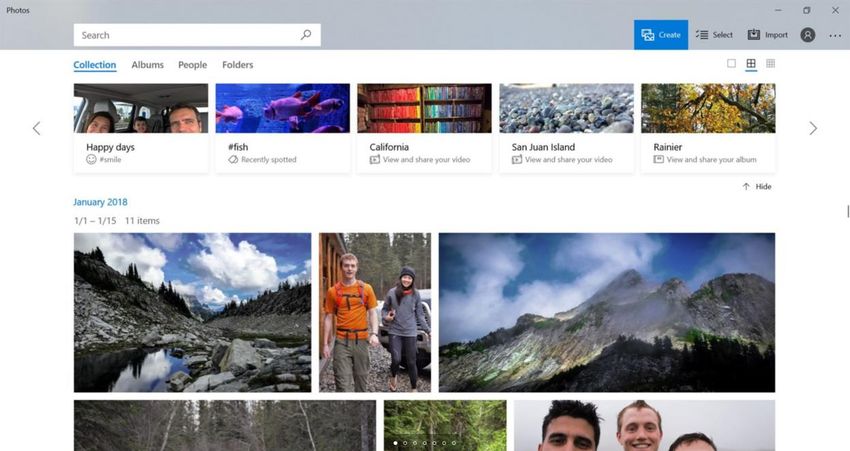
Windows 10 Photos App (PC)
1. Connect your phone to a PC with a USB cable that can transfer files.
2. Turn your phone on and unlock it. Your PC can’t find the device if the device is locked.
3. On your PC, select the Start button and then select Photos to open the Photos app.
4. Select Import > From a USB device, then follow the instructions. You can pick the items
you want to import and select where to save them. Allow a few moments for detection
and transfer.
Created April 2020Need Additional Assistance?
Karen Foote, Instructional Multimedia Specialist, foote@gwu.edu
Linda Cotton, Senior Multimedia Technologist, cottonl@gwu.edu
Created April 2020You can also read