MOBILE DEVICE User Manual
←
→
Page content transcription
If your browser does not render page correctly, please read the page content below
M O B I L E           D E V I C E
              User Manual
Please read this manual before operating your
   device and keep it for future reference.
Intellectual Property
All Intellectual Property, as defined below, owned by or which is otherwise the property of Samsung or its respective suppliers
relating to the SAMSUNG Phone, including but not limited to, accessories, parts, or software relating there to (the “Phone
System”), is proprietary to Samsung and protected under federal laws, state laws, and international treaty provisions. Intellectual
Property includes, but is not limited to, inventions (patentable or unpatentable), patents, trade secrets, copyrights, software,
computer programs, and related documentation and other works of authorship. You may not infringe or otherwise violate the
rights secured by the Intellectual Property. Moreover, you agree that you will not (and will not attempt to) modify, prepare
derivative works of, reverse engineer, decompile, disassemble, or otherwise attempt to create source code from the software. No
title to or ownership in the Intellectual Property is transferred to you. All applicable rights of the Intellectual Property shall remain
with SAMSUNG and its suppliers.
Open Source Software
Some software components of this product incorporate source code covered under GNU General Public License (GPL), GNU Lesser
General Public License (LGPL), OpenSSL License, BSD License and other open source licenses. To obtain the source code covered
under the open source licenses, please visit:
http://opensource.samsung.com.
Disclaimer of Warranties; Exclusion of Liability
EXCEPT AS SET FORTH IN THE EXPRESS WARRANTY CONTAINED ON THE WARRANTY PAGE ENCLOSED WITH THE PRODUCT, THE
PURCHASER TAKES THE PRODUCT "AS IS", AND SAMSUNG MAKES NO EXPRESS OR IMPLIED WARRANTY OF ANY KIND
WHATSOEVER WITH RESPECT TO THE PRODUCT, INCLUDING BUT NOT LIMITED TO THE MERCHANTABILITY OF THE PRODUCT OR
ITS FITNESS FOR ANY PARTICULAR PURPOSE OR USE; THE DESIGN, CONDITION OR QUALITY OF THE PRODUCT; THE
PERFORMANCE OF THE PRODUCT; THE WORKMANSHIP OF THE PRODUCT OR THE COMPONENTS CONTAINED THEREIN; OR
COMPLIANCE OF THE PRODUCT WITH THE REQUIREMENTS OF ANY LAW, RULE, SPECIFICATION OR CONTRACT PERTAINING
  SM-V700_UM_English_MII_PS_102513_F7
THERETO. NOTHING CONTAINED IN THE INSTRUCTION MANUAL SHALL BE CONSTRUED TO CREATE AN EXPRESS OR IMPLIED
WARRANTY OF ANY KIND WHATSOEVER WITH RESPECT TO THE PRODUCT. IN ADDITION, SAMSUNG SHALL NOT BE LIABLE FOR
ANY DAMAGES OF ANY KIND RESULTING FROM THE PURCHASE OR USE OF THE PRODUCT OR ARISING FROM THE BREACH OF
THE EXPRESS WARRANTY, INCLUDING INCIDENTAL, SPECIAL OR CONSEQUENTIAL DAMAGES, OR LOSS OF ANTICIPATED PROFITS
OR BENEFITS.
Modification of Software
SAMSUNG IS NOT LIABLE FOR PERFORMANCE ISSUES OR INCOMPATIBILITIES CAUSED BY YOUR EDITING OF REGISTRY SETTINGS,
OR YOUR MODIFICATION OF OPERATING SYSTEM SOFTWARE.
USING CUSTOM OPERATING SYSTEM SOFTWARE MAY CAUSE YOUR DEVICE AND APPLICATIONS TO WORK IMPROPERLY. YOUR
CARRIER MAY NOT PERMIT USERS TO DOWNLOAD CERTAIN SOFTWARE, SUCH AS CUSTOM OS.
Samsung Telecommunications America (STA), LLC

Headquarters:
1301 E. Lookout Drive
Richardson, TX 75082

Customer Care Center:
1000 Klein Rd.
Plano, TX 75074
Toll Free Tel: 1.888.987.HELP (4357)
Internet Address:
http://www.samsung.com

©
    2013 Samsung Telecommunications America, LLC. Samsung is a registered trademark of Samsung Electronics Co., Ltd.
Do you have questions about your Samsung Mobile Device?
For 24 hour information and assistance, we offer a new FAQ/ARS System (Automated Response System) at:
www.samsung.com/us/support
The actual available capacity of the internal memory is less than the specified capacity because the operating system and default
applications occupy part of the memory. The available capacity may change when you upgrade the device.
The Bluetooth® word mark, figure mark (stylized “B Design”), and combination mark (Bluetooth word mark and “B Design”) are
registered trademarks and are wholly owned by the Bluetooth SIG.
Table of Contents
Section 1: Getting Started .......................... 4 Configuring your Device . . . . . . . . . . . . . . . . . 21
Understanding this User Manual . . . . . . . . . . . . 4 Section 3: Understanding the
Setting Up Your Device . . . . . . . . . . . . . . . . . . . 6 Gear Manager .............................................23
Turning Your Device On and Off . . . . . . . . . . . . 8 Overview . . . . . . . . . . . . . . . . . . . . . . . . . . . . 23
Checking the battery charge status . . . . . . . . . 9 Launching Gear Manager . . . . . . . . . . . . . . . . 24
Installing Gear Manager . . . . . . . . . . . . . . . . . 10 Working with a Paired Gear . . . . . . . . . . . . . . 24
Launching Gear Manager . . . . . . . . . . . . . . . . 10 Clocks . . . . . . . . . . . . . . . . . . . . . . . . . . . . . . 26
Pairing the Devices Automatically . . . . . . . . . 10 My Apps . . . . . . . . . . . . . . . . . . . . . . . . . . . . . 27
Pairing the Devices Manually . . . . . . . . . . . . . 11 Using the Favorites Tab . . . . . . . . . . . . . . . . . 27
Disconnecting the Devices . . . . . . . . . . . . . . . 12 Adjusting the Settings of Installed Apps . . . . . 28
Wearing the Device . . . . . . . . . . . . . . . . . . . . 13 Installing Featured Applications . . . . . . . . . . . 29
Removing the Device . . . . . . . . . . . . . . . . . . . 14 Samsung Apps . . . . . . . . . . . . . . . . . . . . . . . . 29
Section 2: Understanding Your Device .... 15 Finding Your Galaxy Gear . . . . . . . . . . . . . . . . 30
Features of Your Device . . . . . . . . . . . . . . . . . 15 Gear Manager Settings . . . . . . . . . . . . . . . . . . 30
Front and Back Views . . . . . . . . . . . . . . . . . . 15 Help . . . . . . . . . . . . . . . . . . . . . . . . . . . . . . . . 31
Side View . . . . . . . . . . . . . . . . . . . . . . . . . . . . 17 Section 4: Calling Features .......................32
Charging Cradle Views . . . . . . . . . . . . . . . . . . 18 Making a Call . . . . . . . . . . . . . . . . . . . . . . . . . 32
On-Screen Indicators . . . . . . . . . . . . . . . . . . . 19 Ending a Call . . . . . . . . . . . . . . . . . . . . . . . . . 32
Navigation and Gestures . . . . . . . . . . . . . . . . 20 Answering a Call . . . . . . . . . . . . . . . . . . . . . . 32
1Making a Call Using Logs . . . . . . . . . . . . . . . . 33 Voice Memo . . . . . . . . . . . . . . . . . . . . . . . . . .44 Sending a Call to the Device . . . . . . . . . . . . . . 33 Weather . . . . . . . . . . . . . . . . . . . . . . . . . . . . . .44 Sending a Call to the Galaxy Gear . . . . . . . . . . 33 Section 6: Settings .................................... 45 In Call Options . . . . . . . . . . . . . . . . . . . . . . . . . 33 Turning on Outdoor Mode . . . . . . . . . . . . . . . .45 Active Call Menu Options . . . . . . . . . . . . . . . . . 34 Accessing the Settings Menu . . . . . . . . . . . . . .45 Logs Tab . . . . . . . . . . . . . . . . . . . . . . . . . . . . . 35 Clock . . . . . . . . . . . . . . . . . . . . . . . . . . . . . . . .45 Section 5: Applications .............................36 Sound Settings . . . . . . . . . . . . . . . . . . . . . . . .46 Accessing Applications . . . . . . . . . . . . . . . . . . 36 Volume . . . . . . . . . . . . . . . . . . . . . . . . . . . . . .46 Archive . . . . . . . . . . . . . . . . . . . . . . . . . . . . . . 36 Display . . . . . . . . . . . . . . . . . . . . . . . . . . . . . .47 Camera . . . . . . . . . . . . . . . . . . . . . . . . . . . . . . 36 Battery . . . . . . . . . . . . . . . . . . . . . . . . . . . . . .47 Contacts . . . . . . . . . . . . . . . . . . . . . . . . . . . . . 38 Bluetooth . . . . . . . . . . . . . . . . . . . . . . . . . . . . .48 Dialer . . . . . . . . . . . . . . . . . . . . . . . . . . . . . . . 39 Privacy Lock . . . . . . . . . . . . . . . . . . . . . . . . . .49 Find my device . . . . . . . . . . . . . . . . . . . . . . . . 39 Language . . . . . . . . . . . . . . . . . . . . . . . . . . . .49 Gallery . . . . . . . . . . . . . . . . . . . . . . . . . . . . . . . 39 Reset Gear . . . . . . . . . . . . . . . . . . . . . . . . . . . .49 Logs . . . . . . . . . . . . . . . . . . . . . . . . . . . . . . . . 39 Gear Info . . . . . . . . . . . . . . . . . . . . . . . . . . . . .50 Media Controller . . . . . . . . . . . . . . . . . . . . . . . 40 Section 7: Health and Safety Pedometer . . . . . . . . . . . . . . . . . . . . . . . . . . . 40 Information ................................................ 51 S Voice . . . . . . . . . . . . . . . . . . . . . . . . . . . . . . 43 FCC Part 15 Information to User . . . . . . . . . . . .51 Settings . . . . . . . . . . . . . . . . . . . . . . . . . . . . . . 43 Smart Practices While Driving . . . . . . . . . . . . .51 Stopwatch . . . . . . . . . . . . . . . . . . . . . . . . . . . . 43 Battery Use and Safety . . . . . . . . . . . . . . . . . .52 Timer . . . . . . . . . . . . . . . . . . . . . . . . . . . . . . . 44 Samsung Mobile Products and Recycling . . . . .54 Today’s Schedule . . . . . . . . . . . . . . . . . . . . . . 44 UL Certified Travel Charger . . . . . . . . . . . . . . .54 2
Display / Touch-Screen . . . . . . . . . . . . . . . . .              55
   GPS . . . . . . . . . . . . . . . . . . . . . . . . . . . . . . . .   55
   Care and Maintenance . . . . . . . . . . . . . . . . . .              56
   Responsible Listening . . . . . . . . . . . . . . . . . .             57
   Operating Environment . . . . . . . . . . . . . . . . .               59
   Restricting Children's Access to Your
     Mobile Device . . . . . . . . . . . . . . . . . . . . . . .         61
   FCC Notice and Cautions . . . . . . . . . . . . . . . .               61
   Other Important Safety Information . . . . . . . .                    62
Section 8: Warranty Information .............. 64
   Standard Limited Warranty . . . . . . . . . . . . . . . 64
   End User License Agreement for Software . . . 69
Index .......................................................... 76

                                                                              3
Section 1: Getting Started
Understanding this User Manual Note: Instructions in this manual are based on default settings,
The sections of this manual are laid out to assist you with and may vary from your device, depending on the
your setup and follow the UI features of your Galaxy Gear™. software version on your device, and any changes to the
A robust index for features begins on page 76. device’s Settings.
Also included is important safety information, beginning on
page 51, that you should know before using your device. Unless stated otherwise, instructions in this User Manual
This manual gives navigation instructions according to the start with the device at the Home screen.
default display settings.
All screen images in this manual are simulated. Actual
Unless otherwise specified, all instructions in this manual
displays may vary, depending on the software version of
assume you are starting from the Home (Clock) screen.
your device and any changes to the device’s firmware.
For a list of compatible smartphones, please visit:
www.samsung.com/us/galaxygearsupport.
4Special Text Text Conventions
Throughout this manual, you’ll find text that is set apart from This manual provides condensed information about how to
the rest. These are intended to point out important use your phone. To make this possible, the following text
information, share quick methods for activating features, to conventions are used to represent often-used steps:
define terms, and more. The definitions for these methods
are as follows: ➔ Arrows are used to represent the sequence of
• Caution: Provides information for the user to take care and avoid selecting successive options in longer, or
danger or risk. repetitive, procedures.
• Important: Points out important information about the current
feature that could affect performance. Note: From the Home (Clock) screen, slide left or right to
• Notes: Presents alternative options for the current feature, menu, select (Apps) ➔ Dialer.
or sub-menu.
• Tips: Provides quick or innovative methods, or useful shortcuts.
• Warning: Brings to your attention important information to
prevent loss of data or functionality, or even prevent damage to
your device.
Getting Started 5Setting Up Your Device 1. Before turning on your Galaxy Gear for the first time,
These steps take you through an out-of-the-box setup charge it fully.
process. These procedures are intended to help you get your 2. In a single motion, slide and hold the switch (1) to open
device setup, activated, and assist you with your initial the Charging cradle’s protective cover. (2)
connection.
Charging the Battery Charging Pins
Your device is powered by an internal rechargeable Li-ion
battery. Use only approved chargers with this device. Ask
your local Samsung dealer for further details.
Important! It is recommended you fully charge the battery
before using your device for the first time.
Note: If the battery is completely discharged, the device
cannot be turned on. Allow a depleted battery to charge
for a few minutes before turning on the device.
63. Carefully place the device onto the cradle (3), making
sure to align the connector plates to the charging pins.
4. Firmly close the cover (4). Power Plug
USB Connector
6. Insert the USB connector into the Charging cradle’s
charger jack.
Release Switch
5. Insert the power plug into a compatible electrical
outlet.
Charger Jack
Getting Started 7Caution! Connecting the charger improperly may cause
Turning Your Device On and Off
serious damage to the device. Any damage caused Turning Your Device On
by misuse is not covered by the warranty. Press and hold (Power/Home) to turn the
device on.
7. Plug the charging head into a standard AC power
outlet. The device turns on and indicates its charge
state.
Note: While charging, you cannot use calling features, voice
recorder, and camera.
8. When charging is finished, first unplug the charger’s
power plug from the AC wall outlet, then disconnect
the charger’s connector from the device.
8Turning Your Device Off Checking the battery charge status
1. With the device on, press and hold With the device turned off, the current charge state is
(Power/Home) until the Device options screen appears. displayed on-screen. The following icons will show the
2. Tap Power off ( ) ➔ OK. current battery charge status when the Galaxy Gear is off:
Restarting Your Device
1. With the device on, press and hold Displays your current battery charge level.
Icon shown is fully charged.
(Power/Home) until the Device options screen appears.
2. Tap Restart ( ) ➔ OK.
Shows your current battery level and percentage.
Icon shows the device only has a few
minutes of power remaining and will soon
shutdown.
The Galaxy Gear communicates to a compatible smartphone
via an active Bluetooth connection.
Important! Before the pairing process can be initiated, the
smartphone should have a current version of the
Gear Manager application loaded.
Getting Started 9Once paired, its the Gear Manager application that provides a Pairing the Devices Automatically
direct connection and access to setup/configuration menus
The Galaxy Gear and smartphone are paired using
for the Galaxy Gear. Bluetooth® technology.
Installing Gear Manager
1. Remove the Charging cradle from the packaging. Important! The Galaxy Gear must be paired from within the
2. Turn on your smartphone and enable NFC Gear Manger application. If it is paired manually
from within the Bluetooth menu, the device will not
communication.
correctly appear the application listing.
3. Turn your Charging cradle around and tap it to the back
of the smartphone. 1. Press and hold (Power/Home) to turn the
4. Read the on-screen Installation information, then tap device on. The following should occur once your device
OK ➔ Install. turns on.
5. If prompted, Accept Google’s app verification. 2. Turn on your smartphone and enable NFC
6. Confirm the Gear Manager application is now open. communication. If not already active, you may be
Launching Gear Manager prompted to activate Bluetooth.
The appearance of on-screen items within Galaxy Gear are 3. Turn your Charging cradle around and tap it to the back
controlled via the Gear Manager application. of the smartphone.
From within your smartphone’s Applications page, tap
Note: The Charging cradle contains the Bluetooth connection
(Gear Manager). information for the Galaxy Gear embedded within its
NFC tag.
104. Tap (Accept) on the Galaxy Gear screen, confirm Pairing the Devices Manually
the PIN codes match, and tap OK on your smartphone If there is an issue when trying to pair the devices
to confirm the pairing request. automatically via the use of the NFC tapping (between the
5. Read the on-screen legal and disclaimer information smartphone and the Charging cradle), then manual pairing
and accept the terms and conditions to complete the must be done.
process. To pair the devices manually:
6. Verify the Samsung Galaxy Gear entry now shows 1. Activate Bluetooth on the smartphone.
“Connected” within the Gear Manager application and
the icon appears at the top of your smartphone’s Note: Verify Bluetooth visibility is active.
screen.
1. From within your smartphone’s Applications page, tap
Note: If the connection process fails, restart both devices and (Gear Manager).
repeat the steps above. 2. If the Gear Manager has not yet been used to pair a
Gear, tap Connect manually.
– or –
Important! If re-pairing a previously connected device, select
Restore to update all settings and parameters from Tap the paired device from within the Paired Gear area
your smartphone. of the screen and select Connect new Gear ➔ OK ➔
DO NOT interrupt the restore process. Connect manually.
3. Tap the GALAXY Gear device from within the available
on-screen list.
Getting Started 116. Verify the Samsung Galaxy Gear entry now shows
“Connected” within the Gear Manager application and
the icon appears at the top of your smartphone’s
screen.
Note: If the connection process fails, restart both devices and
repeat the steps above.
Disconnecting the Devices
1. From within your smartphone’s Applications page, tap
(Gear Manager).
4. Tap (Accept) on the Galaxy Gear screen, confirm
2. Tap the paired device from within the Paired Gear area
the PIN codes match, and tap OK on your smartphone
of the screen and select Disconnect ➔ OK.
to confirm the pairing request.
Note: The icon disappears from the top of your target
Important! If prompted to restore a connection, select Restore device’s screen.
to update all settings and parameters from your
smartphone.
DO NOT interrupt the restore process.
5. Read the on-screen legal and disclaimer information
and accept the terms and conditions to complete the
process.
12Wearing the Device 4. In a single motion, push the metal joint downwards
1. Thread the wristband through the Frame (1). (towards the back of the Galaxy Gear), and then push
2. Slide your hand through the strap opening. the buckle down towards until you hear a click.
Frame Buckle
Metal Pin
Metal Joint
Caution! Humidity and liquids may damage your device.
Keep your device dry.
3. Place the Metal Pin into the desired hole on the
wristband (2).
Caution! Do not bend the strap excessively. Doing so may
Note: Use care when opening and closing the clasp. damage the device.
Getting Started 13Removing the Device
1. Firmly grasp both sides of the buckle.
2. Carefully pull the Buckle upwards and away from the
wristband. This causes the metal joint to move
upwards (away from the back of the Galaxy Gear).
Buckle
Speaker
3. Slide the wristband out from the Frame.
14Section 2: Understanding Your Device
This section outlines key features of your device. It also Front and Back Views
describes the device’s keys, screen and the icons that
The following illustrations show the main elements of your
display when the device is in use.
device. The following list correlates to the illustrations.
Features of Your Device For more information, refer to “Navigation and Gestures” on
Your device is lightweight, easy-to-use and offers many page 20.
significant features. The following list outlines a few of the 1. Control panel shows information about the connection
features included in your device. status, battery level, Volume and Brightness levels.
• Touch screen with virtual (on-screen) keypad
• Brilliant 1.63-inch sAMOLED (320x320)
• 800MHz Processor
• Android 4.2.2, Jelly Bean Platform
• Bluetooth® 4.0 enabled 1
• Capable of loading compatible third-party applications
• Display and reply to incoming calls and messages. 2
• 1.9 Megapixel Camera and Camcorder with autofocus
• Video recording: HD(720p) Recording
• Music Player control of target device
3
Understanding Your Device 152. Display shows all the information needed to operate 4. Buckle secures the wristband.
your device, such as the number of wirelessly 5. Cradle Connector Plates (back of device) when
connected devices, number of received messages connected to the connector pins on the cradle,
(along with date, time and phone number), and data provides charging to the device.
usage. 6. Speaker allows you to hear callers during a live call and
3. Wristband threads through the frame to secure the hear media that is being playback or through the
device to your wrist. device.
3
4
6
5
16Side View 2. Microphones (along sides) are used during phone calls
The following illustration shows the side elements: and allow other callers to hear you clearly when you
are speaking to them. There are two microphones on
1
the device:
6
• Bottom microphone: used during handset mode.
2
• Top microphone: used while an active call is in the
5
speakerphone mode and assists in noise cancellation
(2 microphone solution).
3 3. Power/Home key ends switches the device
off and on.
• Press and hold to turn the device on or off.
4 • Press and hold for more than 7 seconds to reset the device if it
develops any fatal errors, hang-ups, or freezes.
• Press once to return to the Home (Clock) screen.
• Press to unlock the device. The device goes into lock mode
2 when the touch screen turns off.
4. Frame is used to thread the wristband through for
Note: Do not use a screen protector. This causes sensor securing the Galaxy Gear.
malfunctions.
5. Metal Pin is placed on the wristband
1. Camera lens is used to take photos and shoot videos. 6. Joint is folded together to either secure the buckle to
strap or aid in the removal of the Galaxy Gear.
Understanding Your Device 17Charging Cradle Views 1. Charging Port (back of unit) allows you to connect a
The Charging cradle provides both power and connectivity compatible power cable.
for a connected and mounted Galaxy Gear.
Caution! Please use only an approved charging accessory to
Note: The Charging Cradle contains an embedded TecTile that charge your device. Improper handling of the
is used in conjunction with your smartphone’s NFC charging port, as well as the use of an incompatible
technology to both acquire the Gear Manager charger, may cause damage to your device and void
application and aid in automatically pairing the two the warranty.
devices.
2. Security Latch used to release the security cover.
3. Charging Pins provide power to the device once
secured onto the cradle.
4. Cover used to hold the Galaxy Gear securely within the
Charging cradle.
4
1
3
2
18On-Screen Indicators Displays your battery is currently charging.
Reveal the Control Panel (Bluetooth connection status,
Battery level, Volume and Brightness levels) by quickly Displays when Bluetooth technology is active
tapping simultaneously twice on the screen using two and enabled but the Galaxy Gear is not
fingers. communicating with the paired smartphone.
Displays when the Bluetooth technology is active,
paired, and communicating with an external
Control Panel
device.
Once the device is connected, confirm the corresponding
icon appears on the smartphone’s display.
Displays when the Galaxy Gear connection is
active and communicating with your
The following icons will show within the Notifications Bar smartphone. Both devices are successfully
when the Galaxy Gear is turned on: communicating via the Gear Manager.
Displays your current battery charge level.
Icon shown is fully charged.
Understanding Your Device 19Navigation and Gestures • Swipe or slide: Quickly drag your finger left or right across the
Using the touch screen display you can navigate the features screen to view your favorite applications. Scroll up or down to
of your device, select menu items, and enter characters. navigate within an available on-screen list.
The following conventions are used in this manual to For example: slide your finger left or right on the Home (Clock)
describe the navigation action in the procedures. screen to scroll among the currently loaded favorite applications
Waking the Device or slide through an available on-screen list.
Shake the Galaxy Gear on your wrist or press Note: From an open application screen, swipe down to exit the
(Power/Home). current application and return to the Home screen.
Navigating Through the Screens
• Tap: use a brief touch to select items on the display or to enter
The following terms describe the most common hardware
and on-screen actions. text on the virtual keypad. For example: tap an Application icon to
open the application.
Swipe/Slide Tap Double-tap • Double-Tap: in a single motion, tap the screen simultaneously
with two fingers to:
• Access the Brightness and Volume controls.
• View Battery and Bluetooth connection status.
20• Pinch: “Pinch” the screen using your thumb and forefinger to Configuring your Device
zoom out when viewing a picture. (Move fingers inward to zoom For more information, refer to “Settings” on page 45.
out.)
Adjusting the Brightness
• Spread: “Spread” the screen using your thumb and forefinger to
Double-tap the screen simultaneously once with two
zoom in when viewing a picture. (Move fingers outward to zoom
fingers, and then tap or under Brightness.
in.)
– or –
Pinch/Zoom Out Spread/Zoom In From the Home (Clock) screen, scroll to and then tap
(Apps) Settings ➔ Display ➔ Brightness, adjust
the brightness, then tap OK.
Adjusting the Volume
Double-tap the screen simultaneously once with two
fingers, and then tap or under Volume.
– or –
From the Home (Clock) screen, scroll to and then tap
(Apps) Settings ➔ Volume ➔ System, adjust the
volume, then tap OK.
Understanding Your Device 21Switching to silent mode
1. With the device on, press and hold
(Power/Home) until the Device options screen appears.
2. Select either (Mute) or (Vibrate).
– or –
From the Home (Clock) screen, scroll to and then tap
(Apps) Settings ➔ Sound ➔ Sound mode ➔
Sound, Vibrate or Mute.
Caution! Do not hold the device's speaker close to your ear.
Excessive exposure to loud sounds can cause
hearing damage.
22Section 3: Understanding the Gear Manager
The Gear Manager application manages the connection
between your Galaxy Gear and a connected smartphone. Important! If you connect to a different Galaxy Gear, your
smartphone’s Gear Manager will have to
In works to synchronize and manage the favorite applications
resynchronize your settings and applications with
located on the Galaxy Gear, adjust settings, configure
the newly paired device.
connections.
The appearance of on-screen items within Galaxy Gear are .
controlled via the Gear Manager application.
From within your smartphone’s Applications page, tap
(Gear Manager).
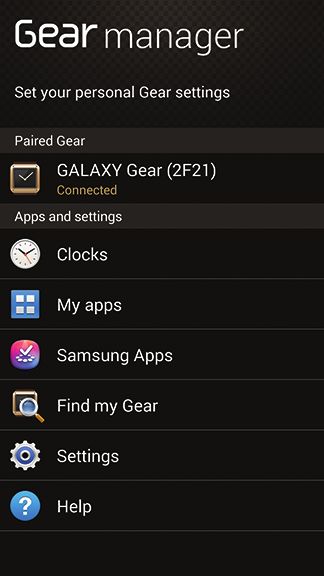
Connected
Important! Before using your Galaxy Gear, it must first be Devices
paired with your target smartphone via the Gear
manager application (page 10).
Applications and
Overview Settings
The main application is broken out into two sections:
• Paired Gear: displays the currently paired Galaxy Gear devices on
the smartphone. This menu allows you to rename and disconnect
a current device, and connect to a new Galaxy Gear.
Understanding the Gear Manager 23Caution! If you try to reconnect a previously paired Galaxy
Working with a Paired Gear
Gear to your smartphone, you may be prompted to 1. From within your smartphone’s Applications page,
Restore your connection - DO NOT interrupt this tap (Gear Manager) ➔ Paired Gear field.
process. 2. Select an available on-screen menu option:
• Rename: allows you to change the reference name used by
• Apps and settings: provides access to on-screen configuration the Gear Manager application for the selected Galaxy Gear.
of your clock, allows you to modify your current favorite apps, • Disconnect/Connect: allows you to disconnect or later
adjust your settings, and also access other features/functions. reconnect a currently paired Galaxy Gear device.
Launching Gear Manager • Connect New Gear: allows you to pair a new Galaxy Gear
This application allows you to connect to a smartphone, device.
customize your Galaxy Gear settings and applications. • Software update: allows you to use your current smartphone
From within your smartphone’s Applications page, tap connection to update the Gear manager software.
(Gear Manager). • Model number: displays the current Galaxy Gear model
number.
• Software version: displays the current Galaxy Gear software/
firmware version.
24Renaming the Connected Device Disconnecting a Currently Connected Device
It is important to rename a currently connected Galaxy Gear 1. From within your smartphone’s Applications page,
so that the identity of the device can not be determined and tap (Gear Manager) ➔ Paired Gear field.
its not left with its default name. 2. Select Disconnect ➔ OK. The Galaxy Gear screen will
It is also useful to identify individual Galaxy Gear devices if temporarily indicate “Bluetooth disconnected”.
you have multiple units connected/paired to the same
Reconnecting a Previously Connected Device
smartphone.
If your currently used Galaxy Gear ever becomes temporarily
1. From within your smartphone’s Applications page,
disconnected, it can be reconnected (re-paired) to its current
tap (Gear Manager) ➔ Paired Gear field.
smartphones very easily.
2. Select Rename, tap the current Device name entry field
to select the current name. Important! A Galaxy Gear can be temporarily disconnected if:
3. Delete the current entry, use the on-screen keyboard to the poser is completely depleted or if it is taken out
enter a new unique name, and tap OK. of Bluetooth range.
4. Confirm the new name has been properly applied.
1. From within your smartphone’s Applications page,
tap (Gear Manager) ➔ Paired Gear field.
2. Select Connect. The Galaxy Gear screen will
temporarily indicate “Bluetooth connected”.
Understanding the Gear Manager 25Connecting to a Different Galaxy Gear
Note: If the new Galaxy Gear is recognized as a previously
Although a single smartphone can be paired to multiple paired device, the Gear Manager software will attempt
Galaxy Gear devices, only one device can be controlled via to restore its settings to match.
the application on the smartphone at any single time.
If you go from using one Galaxy Gear then begin the paring Clocks
process with a secondary unit, the Gear Manager application
This menu provides the ability to customize the Clock screen
will have to “sync up” the configuration and settings
displayed as the Galaxy Gear’s Home screen.
between the smartphone and the newly pairing Galaxy Gear.
This synchronization process requires that the new Galaxy From within your smartphone’s Applications page,
Gear “Restore” its parameters and settings with your Gear tap (Gear Manager) ➔ (Clocks).
Manager. Changing Your Clock Screen
Caution! If the Gear Manager recognizes a previously paired From within the Clocks page, tap an available clock
Galaxy Gear, it will attempt to synchronize the two from the available list.
devices. DO NOT interrupt this restoration process. Customizing Your Current Clock
1. From within the Clocks page, tap (Settings) next
1. From within your smartphone’s Applications page, to the currently selected view within the Idle area of the
tap (Gear Manager) ➔ Paired Gear field. page.
2. Select Connect new Gear. 2. Configure the available parameters, what you want to
3. Follow the manual pairing process described on show, and available color usage.
page 11.
26My Apps Using the Favorites Tab
This menu allows you manage the applications being Adding Your Favorite Applications
synchronized between your smartphone and the paired Galaxy Gear comes with a set of default favorite applications
Galaxy Gear. that appear as you scroll across the screen. This list of
Tab Overview displayed applications can be customized via the Gear
There are currently three tabs located within the My Apps Manager application on the smartphone.
screen: 1. From within your smartphone’s Applications page,
• Favorites: displays both your currently assigned favorite apps tap (Gear Manager) ➔ (My apps).
(those that appear on the Galaxy Gear as you swipe across the 2. Tap the Favorites tab ➔ (Add).
main screens) and provides you the ability to Add, Rearrange, or 3. Scroll through the on-screen list and place a check
delete any application from this category. mark alongside those desired applications.
• Installed apps: only displays a list of those currently loaded 4. Tap Done. The My apps screen then displays the
applications that appear on the Galaxy Gear. When available, currently displayed favorite applications that will now
some apps listed provide access to settings for configuration. appear on Galaxy Gear as you swipe across the screen.
• Featured: provides an updated listing of new and feature
Reorder Applications
applications that can be installed onto the Galaxy Gear directly
1. From within your smartphone’s Applications page,
from the Samsung Apps function on your smartphone.
tap (Gear Manager) ➔ (My apps).
2. Tap the Favorites tab ➔ (Reorder).
3. In a single motion, touch and drag an available
on-screen application and place it into a new “slot”
within the list.
Understanding the Gear Manager 274. Once you have assigned the desired order, tap Done. Adjusting the Settings of Installed
The My apps screen now displays an updated list of Apps
available applications in their new order. Confirm the 1. From within your smartphone’s Applications page,
order on your Galaxy Gear by swiping across the tap (Gear Manager) ➔ (My apps).
screen.
2. Tap the Installed apps tab.
Removing Favorite Applications 3. Locate an application that has its settings icon
1. From within your smartphone’s Applications page,
displayed.
tap (Gear Manager) ➔ (My apps).
4. Tap (Settings) and adjust the available
2. Tap the Favorites tab ➔ (Removing). parameter.
3. Place a check mark alongside those applications you
wish to remove. Important! If you wish your images and videos to be
4. Tap Done. The My apps screen then displays an automatically updated to your connected
smartphone, alter the Camera settings ➔ Data
updated list of available applications.
Transfer setting to Automatic.
28Installing Featured Applications Samsung Apps
1. From within your smartphone’s Applications page, Allows you to easily download an abundance of applications
tap (Gear Manager) ➔ (My apps). that are directly compatible with your device. This includes
games, news, reference, social networking, navigation, and
2. Tap the Featured tab.
more. Samsung Apps makes your smartphone smarter.
3. Tap Install and follow the on-screen instructions to
complete the installation of the selected application Note: Access to this feature requires that you already be
from within the Samsung Apps feature on the paired logged in to your Samsung account application on the
smartphone. paired smartphone.
1. From within your smartphone’s Applications page,
tap (Gear Manager) ➔ (Samsung Apps).
2. Tap an available category listing such as:
Health/Fitness, Lifestyle, clock, etc..
3. Select an available application and follow the
on-screen installation instructions.
Understanding the Gear Manager 29Finding Your Galaxy Gear – Tap the Notifications field and then place a check mark
If you should ever misplace your Galaxy Gear, use the Find alongside those notification events you would like to be
my Gear function to locate the device. displayed on the smartphone.
1. From within your smartphone’s Applications page,
Note: Enable more options if you wish to see additional types
tap (Gear Manager) ➔ (Find my Gear).
of on-screen notifications such as: Emails, Messages,
2. Tap Start and begin to listen for the alarm tone Gmail, Hangouts, etc..
sounding on your Galaxy Gear.
3. Once you have found your Galaxy Gear, swipe in any • Double pressing power key: allows you to select the
direction atop to end the process. application that will launch when you double-press the Power
Gear Manager Settings key.
• Smart relay: when activated, allows you to go from seeing
The setting parameters listed on this menu page are not the
content on your Galaxy Gear to then viewing it on your paired
complete set available for configuration from within the
Galaxy Gear. These settings focus on how the Galaxy Gear smartphone once you pick it up.
interacts with your target smartphone. • Wake-up gesture: when activated, this feature allows you to
1. From within your smartphone’s Applications page, wake up the Galaxy Gear by simply raising the arm your Gear is
tap (Gear Manager) ➔ (Settings). on.
• Open source licence: displays the current licensing
2. Configure an available on-screen setting.
information.
• Auto lock: when activated, allow you it use your Galaxy Gear
to unlock your paired smartphone.
• Notification: when activated, allows you to select which
Notification events are displayed on the Galaxy Gear.
30To activate the notification features: To activate the Smart Relay features:
Stay up-to-date with a variety of events, such as missed Use this feature to view new messages, events, and other
calls or new chats, from the connected smartphone. information when you receive notifications. When you receive
1. From within your smartphone’s Applications page, a notification, pick up the connected mobile device with the
tap (Gear Manager) ➔ (Settings). hand wearing the Galaxy Gear. Then, unlock the mobile
device to view the details.
2. In a single motion touch and slide the Notification slider
to the right to turn it on ON . Note: Before using this feature, make sure the motion feature
3. To change the notification settings, place a check mark of the mobile device is activated.
alongside those notification events you would like to be
displayed on the smartphone. 1. From within your smartphone’s Applications page,
tap (Gear Manager) ➔ (Settings).
Note: Enable more options if you wish to see additional types 2. In a single motion touch and slide the Smart relay slider
of on-screen notifications such as: Emails, Messages,
to the right to turn it on ON .
Gmail, Hangouts, etc..
This is helpful if you wish to see your incoming email Help
notifications and new text messages. Displays on-screen help topics related to the Galaxy Gear.
Understanding the Gear Manager 31Section 4: Calling Features
This section describes features and functionality associated Answering a Call
with making or answering calls, and the Contacts list, which
When somebody calls you, the phone rings and displays the
is used to store contact information.
incoming call image. The caller's phone number, picture, or
Making a Call name if stored in Contacts List, displays.
1. From the Home (Clock) screen on your Galaxy Gear,
scroll to and then tap (Apps) ➔ Dialer.
2. Enter the phone number and then tap . Touch and
slide to the
If you make a mistake while dialing, tap to clear right to
the last digit. Touch and hold to clear the entire answer the
call
sequence.
Ending a Call
From within an active call, briefly tap (End call)
to end the call.
Touch and slide
to the left to
Note: To redial a recent number, return to the Home (Clock) reject the call
screen and then select Logs, tap the entry and tap
(Call).
32Making a Call Using Logs In Call Options
1. From the Home (Clock) screen, scroll to and then tap Your device provides a number of features that are available
(Apps) ➔ Logs. for use during an active call.
2. Tap an entry and select (Call). Speaker
– or – volume
Swipe a call log entry to the right to call. Menu
Call
Note: Swiping a call log entry to the left initiates a new Duration
outgoing message. Number
/Caller ID
Sending a Call to the Device
From within an active call, tap (Menu) ➔
(Send to Phone).
Sending a Call to the Galaxy Gear
Ends a Call
From within an active call screen on the smartphone,
tap (Bluetooth Headset Off) to turn the connection
Headset
Caution! Do not hold the device's speaker close to your ear.
back on and send the call to the Galaxy Gear. Excessive exposure to loud sounds can cause
hearing damage.
Calling Features 33Active Call Menu Options More In-call Options
the In Call menu provides several available options: During a call you can save the current caller’s information to
the Contacts list, or create a Memo.
Mutes or Unmutes
the call From within an active call, tap (Menu) and then
select an available in-call option:
• Mutes: during a call you can mute/unmute the current call.
Call duration • Send Call: used to send the current call back to the paired
smartphone.
Activates or Send call to • Dialer: launches the on-screen phone Dialer.
Deactivates smartphone
Bluetooth • Bluetooth: activates/deactivates the Bluetooth connection.
Connection
Dialer
34Logs Tab Each entry contains the phone number (if it is available) and
Contacts entry name (if the number is in your Contacts).
The Logs tab is a list of the phone numbers (or Contacts
entries) for calls you placed, accepted, or missed. The Logs
Indicates all outgoing calls made from your device.
tab makes redialing a number fast and easy. It is continually
updated as your device automatically adds new numbers to
the beginning of the list and removes the oldest entries from Indicates any received calls that were answered.
the bottom of the list.
The Notification area of the Home screen (upper left) displays Indicates a missed call.
phone notifications, status, or alerts such as:
Indicates any received calls that were rejected.
Displays when a call was missed.
Accessing the Logs Tab Note: You can also view missed calls from within the
1. From the Home (Clock) screen, scroll to and then tap Notifications area. Select and tap the Missed call
(Apps) ➔ (Logs). entry to open the Logs screen.
2. Tap an entry to view available options.
Note: The Logs tab only records calls that occur while the
phone is turned on. If a call is received while it is turned
off, it will not be included in your calling history.
Calling Features 35Section 5: Applications
This section contains a description of each application that is Camera
available on the Galaxy Gear, its function, and how to
Use this application to take photos or videos.
navigate through that particular application. If the application
Use Image viewer to view photos and videos taken with the
is already described in another section of this user manual,
then a cross reference to that particular section is provided. device’s camera.
Note: The camera automatically shuts off when unused. Make
Note: Favorite applications found on the Galaxy Gear are
managed by the Gear manager application. For more sure that the lens is clean. Otherwise, the device may
not work properly in some modes that require high
information, refer to “My Apps” on page 27.
resolutions.
Accessing Applications
1. Turn on Galaxy Gear and swipe across the screen to Important! If you wish your images and videos to be
view the currently loaded feature applications. automatically updated to your connected
2. Swipe across the screens and tap (Apps). smartphone, alter the Camera settings ➔ Data
Transfer setting to Automatic.
Archive
Access notifications from messaging sources such as 1. From the Home (Clock) screen, scroll to and then tap
Messages, Facebook, etc.. (Apps) ➔ Camera.
– or –
From the Home (Clock) screen, slide the screen down
to reveal the camera application screen.
362. Select an on-screen function: Zooming
• (Camera) indicates the camera mode is active. • Pinch: “Pinch” the screen using your thumb and forefinger to
• (Camcorder) indicates the camcorder mode is active. zoom out when viewing a picture. (Move fingers inward to zoom
out.)
• (Menu) provides access to the Camera settings menu.
• Spread: “Spread” the screen using your thumb and forefinger to
• Swipe left to access the Image viewer where you can view
zoom in when viewing a picture. (Move fingers outward to zoom
any new photos and videos taken with the device’s camera.
in.)
Taking Photos
1. Verify the camera mode is active (indicated by ). Note: Double tap on an image, from within the Image viewer,
2. Tap the screen to take a photo. The images are also to zoom in or out.
saved in the connected mobile device.
3. Swipe left to open the Image viewer and review your Pinch/Zoom Out Spread/Zoom In
images.
Shooting Videos
1. Tap to change the mode. Verify the camcorder
mode is active (indicated by ).
2. Tap the screen to begin shooting your video. The
videos are also saved in the connected mobile device.
3. Swipe left to open the Image viewer and review your
images.
Applications 37Camera/Camcorder Settings Contacts
To configure settings for Camera: This menu displays the list of currently available Contacts
1. Verify the camera mode is active (indicated by ). entries on your paired smartphone.
2. Tap (Menu) to configure settings for the Camera. 1. From the Home (Clock) screen, scroll to and then tap
• Focus mode: Select a focus mode. Auto focus is camera- (Apps) ➔ Contacts.
controlled. Macro is for very close objects. 2. Tap an available entry to view its details.
• Photo size: Select an available resolution. Using a higher – or –
resolution will generate a higher quality image, but will take up Swipe to access a quick function:
more memory. • Swipe to the right to make a call using the default number.
• Sound & shot: enables 9 seconds of background audio to be • Swipe to the left to use S Voice to begin a new text message.
recorded along with your image.
• Signature: adds signature logo to your image. Important! Before creating your first outbound message using
To configure settings for Camcorder: the Galaxy Gear, you must first accept the terms of
1. Verify the camera mode is active (indicated by ). use for the S Voice application on your target
smartphone.
2. Tap (Menu) to configure settings for the
Camcorder. For detailed instructions on related calling features and
• Video size: Select an available resolution. Using a higher functions, see “Calling Features” on page 32.
resolution will generate a higher quality video, but will take up
more memory.
38Dialer Gallery
This application allows you to make new outgoing calls Use this application to view images and videos.
1. From the Home (Clock) screen, scroll to and then tap 1. From the Home (Clock) screen, scroll to and then tap
(Apps) ➔ Dialer. (Apps) ➔ Gallery.
2. Enter the phone number and then tap . 2. Scroll across the screen to view thumbnail versions of
For more information, refer to “Calling Features” on page currently stored pictures and videos.
32. 3. Tap an on-screen entry to view a larger version of the
Find my device current file or begin playback.
Use this application to find your currently paired smartphone. Logs
If you should ever misplace your smartphone, use the Find The Logs tab is a list of the phone numbers (or Contacts
my device function to locate the device. entries) for calls you placed, accepted, or missed.
1. From the Home (Clock) screen, scroll to and then tap Accessing the Logs Tab
(Apps) ➔ Find my device. 1. From the Home (Clock) screen, scroll to and then tap
(Apps) ➔ Logs.
2. Tap Start and begin to listen for the alarm tone
sounding on your smartphone. 2. Tap an entry to view the details and select (Call).
3. Once you have found your smartphone, swipe in any For more information, refer to “Logs Tab” on page 35.
direction atop to end the process.
Applications 39Media Controller Increase volume
This application leverages the media playback capabilities of on smartphone
your smartphones Music player application. The Galaxy Gear
can only be used to control the playback of the smartphone’s
application.
Note: Some file formats are not supported depending on the Previous
Next
device’s software version. song
song
Some files may not play properly depending on the
encoding method used.
Play
1. Before beginning to use this application, populate the or Pause
paired smartphone’s Music folder with compatible playback Decrease Volume
Pedometer
audio files (ex: MP3).
2. From the Home (Clock) screen, scroll to and then tap Use this as a wellness application that allows you to better
(Apps) ➔ Media controller. manage your health by managing your step counts.
3. Make an on-screen selection. The file is then played 1. From the Home (Clock) screen, scroll to and then tap
back on your paired smartphone. (Apps) ➔ Pedometer.
2. Tap Start.
40To create a User Profile: To configure the Pedometer application:
1. From the main Pedometer app screen, tap 1. From the main Pedometer app screen, tap
(Menu) to configure the application. (Menu) to configure the application.
2. Select User profile and begin to update the values as 2. Tap the Goal field to assign a step count, tap or
needed. to adjust the value. Tap OK to save the new
• Gender: choose from either Male or Female. setting.
• Height: make adjustments using the on-screen dial. Tap ft,in 3. Tap Reset steps to reset your current step count.
to then change the measurement units to either cm or ft,in. 4. Tap Send to S Health to send your current Pedometer
Tap OK to save the new setting. information to the S Health application on your paired
• Weight: make adjustments using the on-screen dial. Tap lb to smartphone.
then change the measurement units to either kg or lb. 5. Tap User profile to configure the application with your
Tap OK to save the new setting. personalized information.
• Units (dist.): choose from either km or Miles. 6. Tap Feedback to allow form end-user feedback of the
application.
7. Tap Reset to reset not only the pedometer count but
also the main application.
8. Tap Help to view on-screen help information.
Applications 41Before You Start Exercising Finally, the American College of Sports Medicine
This app can be used to monitor your exercise. While recommends that you see your doctor before engaging in
moderate physical activity, such as brisk walking, is safe for vigorous exercise if two or more of the following apply:
most people, health experts suggest that you talk with your • You are a man older than age 45 or a woman older than age 55;
doctor before you start an exercise program, particularly if • You have a family history of heart disease before age 55;
you have any of the following conditions: • You smoke or quit smoking in the past six months;
• Heart disease; • You have not exercised for three months or more;
• Asthma or lung disease; • You are overweight or obese;
• Diabetes, or liver or kidney disease; • You have high blood pressure or high cholesterol.
• Arthritis. • You have impaired glucose tolerance, also called pre-diabetes.
You should also check with your doctor if you have symptoms When in Doubt - Check it Out
suggestive of heart, lung, or other serious disease, such as:
If you are unsure of your health status, have several health
• Pain or discomfort in your chest, neck, jaw, or arms during
problems, or are pregnant, you should speak with your
physical activity;
doctor before starting a new exercise program. Working with
• Dizziness or loss of consciousness; your doctor ahead of time is a good way to plan an exercise
• Shortness of breath with mild exertion or at rest, or when lying program that is right and safe for you. Consider it the first
down or going to bed; step on your path to physical fitness.
• Ankle swelling, especially at night;
• A heart murmur or a rapid or pronounced heartbeat;
• Muscle pain when walking upstairs or up a hill that goes away
when you rest.
42S Voice Tips for better voice recognition:
Use this application to command the connected smartphone • Speak clearly.
remotely by voice to do such actions as: dial a number, send • Speak in quiet places.
a message, write a memo, and more. • Do not use offensive or slang words.
Using S Voice on the Galaxy Gear leverages the functionality • Avoid speaking in dialectal accents.
of the same application on the paired smartphone to do the
Settings
work for you. When you say a command to the microphone
on this device, S Voice on the connected smartphone Use this application to configure the Galaxy Gear and set
launches. application options.
From the Home (Clock) screen, scroll to and then tap
Important! Before launching S Voice for the first time, you will (Apps) ➔ Settings.
need to launch S Voice on the paired smartphone
For more information, refer to “Settings” on page 45.
and agree its terms of use.
Stopwatch
To launch S Voice: This feature allows you to capture elapsed time while letting
With the device on, press (Power/Home) the stopwatch keep running.
twice to launch the default S Voice application. 1. From the Home (Clock) screen, scroll to and then tap
– or – (Apps) ➔ Stopwatch.
From the Home (Clock) screen, scroll to and then tap 2. Tap Start to start the stopwatch counter.
(Apps) ➔ S Voice. 3. Tap Lap to begin the lap time counter.
4. Tap Stop to stop the counter.
Applications 435. Tap Restart to restart the lap counter. You can have Voice Memo
multiple lap times. Use this application allows you to record an audio file of up to
6. Tap Reset to reset the counter. 5 minutes.
Timer 1. From the Home (Clock) screen, scroll to and then tap
Use this application to use the device as a countdown timer. (Apps) ➔ Voice Memo.
1. From the Home (Clock) screen, scroll to and then tap 2. Tap (Record) to begin recording your memo.
(Apps) ➔ Timer. 3. Tap (Stop) to stop recording. The file
2. Move the on-screen dial left or right to adjust the value. automatically saves to the Voice list.
3. Tap Start to start the timer. 4. Tap (Pause) to pause the recording of an audio
4. Tap Stop to stop the timer or Reset to reset the timer file.
and start over. 5. Tap (Cancel) to cancel the recording of an audio
5. Tap Restart to resume the timer counter. file.
Today’s Schedule 6. Tap (Menu) to display a list of current recordings.
7. Tap an entry from the list to begin playback.
This application is tied into the Calendar feature on your
paired smartphone. It will display today’s current Calendar Weather
events. Use this application to view weather information for the
From the Home (Clock) screen, scroll to and then tap region that is set by the paired smartphone.
(Apps) ➔ Today’s Schedule. From the Home (Clock) screen, scroll to and then tap
(Apps) ➔ Weather.
44Section 6: Settings
This section explains the settings for your device. It includes Accessing the Settings Menu
such settings as: clock, sound, volume, display, and any
From the Home (Clock) screen, scroll to and then tap
extra settings associated with your device.
(Apps) ➔ Settings.
Turning on Outdoor Mode
Clock
This mode brightens the content on the display screen for
better viewing in outdoor conditions. This menu allows you to change the current time and date
displayed.
To turn on Outdoor mode:
1. From the Home (Clock) screen, scroll to and then tap
1. With the device on, press and hold
(Apps) ➔ Settings ➔ Clock.
(Power/Home) until the Device options screen appears.
2. Tap an available on-screen option:
2. Tap Outdoor mode.
• Clock Type: scroll across the available clock types and make a
To turn off Outdoor mode: selection by tapping an on-screen entry.
1. With the device on, press and hold
• Date and time: allows you to adjust the date and time.
(Power/Home) until the Device options screen appears.
– Auto sync: obtains the date and time information from the
2. Tap Outdoor mode.
paired smartphone. This feature must be disabled if you wish to
manually set the date and time.
– Set date: allows you to adjust the date values as needed. Use
the on-screen dial to adjust each value. Tap Set to assign the
value.
Settings 45– Set time: allows you to adjust the time values as needed. Use • Vibration: tap an on-screen entry to assign a new vibration
the on-screen dial to adjust each value. Tap Set to assign the type. Select a vibration type (Strong, Medium, or Weak) and
value. then tap OK.
• Hourly alert: either activates/deactivates the hourly alert • Preferred arm: tap an on-screen entry to assign a preferred
function. display profile. Choose from: Left arm or Right arm.
Sound Settings Volume
From this menu you can control the sounds on the device as The Volume menu now provides access to various volume
well as configure the settings. settings within one menu.
1. From the Home (Clock) screen, scroll to and then tap 1. From the Home (Clock) screen, scroll to and then tap
(Apps) ➔ Settings ➔ Sound. (Apps) ➔ Settings ➔ Volume.
2. Tap an available on-screen option:
• Sound mode: tap an on-screen entry to assign the sound Note: Some of these volume levels will be greyed out if the
device is set to Silent mode. For more information, refer
mode. Choose from: Sound, Vibrate, and Mute.
to “Switching to silent mode” on page 22.
• Touch sounds: enables or disables sounds that play when the
device screen is tapped. 2. Select an available menu option to assign the volume
• Ringtones: tap an on-screen entry to assign a new ringtone settings for any of the following volume levels:
sound. Select a ringtone (Ringtone 1-3) and then tap OK. • Multimedia: adjusts the volume levels for the device’s
• Notifications: tap an on-screen entry to assign a new multimedia functions, such as Media Controller.
notification sound. Select a notification sound (Notification1-3) – Tap or to adjust the level and tap OK.
and then tap OK.
46You can also read