Heredis Help
    Heredis for Mac
         Blue Suite
←
→
Page content transcription
If your browser does not render page correctly, please read the page content below

Heredis Help
Heredis for Mac
Blue Suite
DISCOVER HEREDIS

         .

Heredis for Mac                      2
1         What can Heredis do?                                                    1.3 Exchange
                                                                                       Genealogy is an act of sharing. Heredis gives you all the tools which
                                                                                       you need to communicate with other genealogists, give and receive
     1.1   Data entry                                                                  information and have your work available everywhere, on all your
                                                                                       devices (desktop or laptop computer, Windows or Mac, iPhone,
                                                                                       iPad).
           Data
           Who were your ancestors? Heredis will help you find them. Through
           guided and intuitive progression, you enter all the information which
           you have gathered on your family. You will note some odd facts:
           your grandfathers were cousins, a certain great-uncle was a witness
           to all the marriages in the family, your great grandmother was very
           young when she lost her parents, one couple had more than 50
           years’ age difference...

           Illustrations
           You have found some photos or copies of acts? Every item of data
           will be shown directly in your genealogy.

           Unfamiliar with the area of origin of this family branch? Geolocation
           will show you that they all lived in neighboring towns.

     1.2 Family tree charts and other documents
           Your work is taking shape, you cannot wait to print the results of
           your research.

           Printing trees
           Heredis Family trees trace ancestors or descendants in a variety of
           different forms and adapt to all formats.

           Printing reports, sheets, or fully illustrated books
           All documents which the genealogist needs are available: working
           papers for refining your research, person or family sheets for your
           filing system and even illustrated books for preparing a family mono-
           graph which will bring you pride and happiness to your family.

Heredis for Mac                                                                                                                                                3
2       Keep your software up-to-date

     2.1 Be kept informed of all updates
         Heredis updates are automatic. You do not need to bother with this.
         To be kept informed, simply be connected.

         If you acquired the Heredis software via the Mac App Store, you will
         be notified of updates.

         Check the App Store icon in the dock. It shows the
         number of application updates available. Click to
         access the App Store then follow the instructions to
         update.

     2.2 Re-installing Heredis
         If you acquired the software through the Heredis store or that of one
         of its resellers, you may re-install the application after downloading
         the demo version via the www.heredis.com site. You just have to
         enter your license number in order to continue your work.

Heredis for Mac                                                                   4
3       How to start                                                                 GEDCOM file and modify if necessary the import options then click
                                                                                      Start Import.

                                                                                      You can now work on your genealogy, add to it, edit anything in it.
     3.1 Launching Heredis                                                            Heredis records all inputs every time you use the Save button or
                                                                                      press Command (⌘)-S, so you can revert to previous versions of
         Double-click the Heredis icon to launch the application.                     your genealogy.

         For a quick access to Heredis,                                               You can exit Heredis at any time. When you re-open the file, it will
         select the icon in the Applications                                          open your genealogy as it was at when last saved
         folder, drag it to your dock,
         wherever it is convenient, or drag it
                                                                                      Re-opening your genealogy
         to the Launchpad icon.
                                                                                      Select your genealogy from the Open Recent submenu or double-
                                                                                      click the file in the Finder.
     3.2 Creating a genealogy file
                                                                                  3.3 Overall view
         New genealogy file
         Click New Family File.
                                                                                      The main Heredis screen
         Save your new genealogy: give it a                                           At the top, menus and buttons provide access to all functions of the
         name and specify the desired loca-                                           software.
         tion for the file.

         Click in the center of the square to create the first person.

         The proposed data entry screen is ready and easy to fill in. Enter all
         known information and thus you have created the individual who is
         at the base of your genealogy: the root person.

         Importing a genealogy file
         You have already created a genealogy file or you have been given
         one created on another applica-
         tion? Importing a GEDCOM file, the
         recognized standard in the world of
         genealogy, is very simple.

         Choose File > Import > GEDCOM
         file. Read the data identified in this

Heredis for Mac                                                                                                                                              5
Some buttons allow access to more detailed choices: Add (>                                      The Family Group Data tab offers a quick data entry screen for the
          Unrelated Person), Find (> Search Number), Indexes (> Given                                     immediate family. This convenient method of entering related data
          Names). The toolbar may be modified at any time to meet your work                               can save up to 50% of the time you may take to enter your data.
          needs: click Customize Toolbar to add, remove or rearrange but-
          tons on this bar.                                                                               The Ancestors tab displays the family layout over 4, 5 or 6 genera-
                                                                                                          tions and can allows you to navigate rapidly over previous genera-
          The central part of the screen displays four tabs.                                              tions.

          The Immediate Family tab shows the immediate family members.                                    On both sides of the main screen, there are removable panels which
          It grows as and when you enter new data, each person taking his                                 provide access to data lists or tools. Their presentation is custo-
          place in the family organization.                                                               mizable. Open and scroll the panels, move them to improve your
                                                                                                          personal organization, add columns to the panels, choose how they
          The Personal Data tab allows you to add any new information                                     appear (one at a time or all visible at once) or hide them.
          about the primary person at any time.
                                                                                                          At the bottom of the Heredis screen, you find the management but-
                                                                                                          ton for the panels and all the key information concerning the genea-
                                                                                                          logy which is open.

                                                                                                      3.4 Navigating
                                                                                                          Explore all the family branches and display the people you want to
      1 column on left side                   1 column on right side                     No columns       view, edit or print documents concerning to them.

                                                                                                          Drag any person displayed on the screen to change their position:
                                                                                                          select a child and drag to the grandfather box. If this person is
                                                                                                          indeed a grandfather, a new Immediate family appears.

                                                                                                          Drag any person shown in the removable panels or on any data
                                                                                                          entry tab input or from one panel to another: a bookmarked indivi-
                                                                                                          dual as the primary person, an uncle to the bookmarks, a person
                          2 colums on one side                 2 columns on each side
                                                                                                          from any of the Indexes to the bookmarks, or as primary person
                                                                                                          etc…

                                                                                                          Display the Navigation panel and use it as a compass. A simple
                                                                                                          click will navigate to the parent, the partner, a child or sibling. For a
                                                                                                          list of partners, children or siblings, right-click their location on the
                                                                                                          panel.

                                                                                                          Navigate according to Ahnentafel numbering with
                                                           Panels unfolded: one at a time/
                                                                                                          the Next Ancestor - Previous Ancestor arrows.
                              Panels folded
                                                               several simultaneously
                                                                                                          Click Root Person on the toolbar to return to the
                                                                                                          person at the base of your genealogy.

Heredis for Mac                                                                                                                                                                       6
To view any person according to his number, choose Find > Search         3.6 Illustrating your genealogy
         Number..) and navigate directly to the person.
                                                                                      Whenever you see this display area you may add
         Use the Back and Forward arrows to redisplay those already
                                                                                      an illustration: the photo of your great-grand-
         consulted. For a history of your browsing, position the mouse on the
                                                                                      father, the photo of your baptism, the scanned
         relevant arrow and a list is displayed.
                                                                                      image of a death certificate from 1715... These
                                                                                      are not only images that you can attach to your
                                                                                      data files but also sounds, videos, PDF docu-
   3.5 Adding and linking persons                                                     ments, files created with your word processor.
         A simple click on any empty box on the Immediate Family screen               Nothing is easier than to associate media: select it from your hard
         will suffice for creating the parents, partners, children and even           drive or in iPhoto and drag to the display area.
         grandparents of the primary person. The family simply grows.

         The data entry screen for a new person displays the most normal-
         ly required information. Start by entering the full name and given       3.7 Deleting
         names. They take shape automatically.
                                                                                      Sometimes it takes a good deal of trial and error to get things right
         As you enter the data, you will see a list of all individuals with the       and you can always recover your mistakes. The toolbar has a Delete
         same name and given names appear on the right side of the screen.            button. This feature allows you to detach a person from the family
         Heredis does all it can for you to avoid duplicates. If you think you        without destroying the data. Permanent removal applies only to the
         have identified the person you want to add, do not continue typing,          primary person.
         but select the person from the list and click Choose.
                                                                                      If the child is not the right one, cut him out by choosing Unlink
         If there is no existing person displayed in the list of individuals,         Child. He can then be linked to other parents.
         continue filling out the data.

         The dates are displayed in full regardless of the input format.

         Most places in Western Europe and North America are made avai-
         lable as you type. Select the place with the Enter key or create a
         new place.

         When the input screen is complete, click Add.

         If you add a partner, make the most of the opportunity to submit all
         the information concerning the marriage: what type of marriage, date
         and location and status of this union. Then click OK.

         You can also work with other tabs, as and how it suits you. Add the
         parents on the Immediate Family screen, or other family members
         in the Family Group Data tab. Complete or modify known informa-
         tion in the Personal Data tab.

Heredis for Mac                                                                                                                                               7
3.8 Creating a tree chart                                                         In large trees, you may look for someone by using the Persons
                                                                                     panel and click the person’s name for display in the center of the
         You have collected plenty of data and you want to see an illustration       screen.
         of your work in a family tree chart. Heredis proposes a wide variety
         of charts, each of which can be broken down into different graphical
         themes.

         Click Charts and choose a chart in the viewer screen.

         Select a type of chart: ancestors, descendants or hourglass.
         Ancestor charts are displayed in a fixed format (from A4 to A0 or           With the Print Setup panel, you can with simplicity manage the size
         Letter to Quad Demy) and the trees are unlimited in size. Of course,        of your printer paper and resize the final size of the tree.
         they are printable on A4 (Letter) pages.
                                                                                     Save the chart if you want to keep it.
         When you select a type of chart, scroll through the themes with the
         arrow keys or mouse.                                                        To print the tree, click the Print button. You may then assemble the
                                                                                     pages as they emerge from your printer.
         Indicate the number of generations to be taken into account and
         click OK.                                                                   You want your large tree to be printed by a professional? From the
                                                                                     print window, you can also save to PDF for easy transfer.
         The chart appears on the screen. Use the buttons and the zoom sli-
         der at the bottom of the screen to see the entire tree or a detail.
                                                                                 3.9 Printing documents
         Select one or more boxes to change them if necessary. Wrap them
         by dragging the mouse or use the right mouse button to select a             Heredis will create all the documents which the genealogist may
         branch or a whole generation.                                               require. From the Documents menu, you may print reports, sheets,
         You may then change the color, change the content, rotate the               biographies to enhance the scope of your genealogy, or to create
         boxes. All these tools are available in the chart panels.                   working papers.

Heredis for Mac                                                                                                                                             8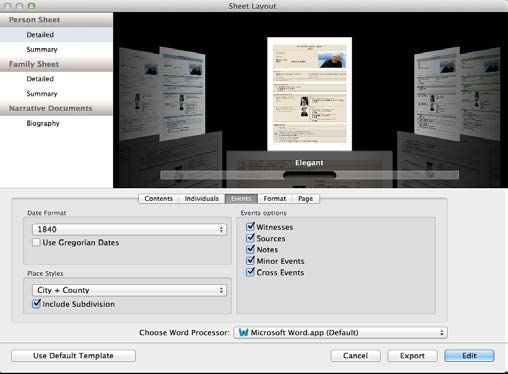
Reports                                                                    You work with sheets? Heredis offers a variety of formats which are
         For example, choose Documents > Person Reports > By Name                   easy to customize.
         (Alphabetical report). Click Edit and select the word processor on
         your Mac to which you wish to send it. Changes to the presentation         Sheets
         may be made in the word processor that you are familiar with and
                                                                                    Choose Documents > Sheets or click the Sheets button and make
         then you may start printing.
                                                                                    your choice from the options in the Template Chooser window.
         You can modify the list displayed by Heredis before printing.              Define the information you want in the sheet (I do not use the notes)
                                                                                    and the format of the data (I want to show the full names of the per-
         Click Options to improve the presentation of the list, by choosing         sons mentioned in the sheet). Then select the word processor on
         Classify by Surnames, or change the contents by selecting Men              your Mac to which you wish to send it. Click Edit.
         Only.
                                                                                    You will then be able to make any other required changes to the
         Add or remove a column by clicking Template. Select Age at                 presentation or print it immediately.
         death. The column order can be changed by simply dragging with
         the mouse: place the new column next to Death Place.

         If the presentation is how you want it and you want to keep it?
         Choose Create New Template from the pop-up menu and give it a
         name: «My list alphabetically.» It will then be available in the list of
         reports.

Heredis for Mac                                                                                                                                             9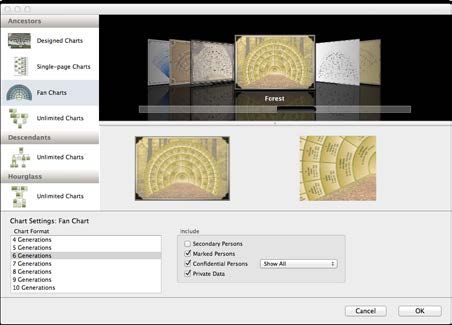
Books
         Your family tree has grown and you wish to share your findings with
         your family. The Ancestors or Descendants books are perfect for
         getting the interest of cousins or other relatives, even if they know
         nothing about genealogy. They are prepared in the same way as the
         sheets. Choose Documents > Books or click the Books button and
         select the options which suit you.

                                                                                      Searching by number (Ahnentafel or personal number if you have
                                                                                      entered them) is also available by clicking the Find menu.

                                                                                 3.11 Importing/exporting data
                                                                                      Heredis is able to communicate with other genealogy applications
                                                                                      by using GEDCOM files. Open a GEDCOM file in Heredis and trans-
   3.10 Researching your genealogy                                                    form it into a new Heredis file on the home page.

         You may easily find any information you need in your genealogy by            Heredis allows you to add to your genealogy all the data contained
         using the different panels on the main screen. In the Persons panel,         in another file. Import a GEDCOM file or another Heredis file directly
         a simple search by Name – Given Name will bring immediate results.           to your genealogy from the File > Import menu.
         For a more specific result, Heredis proposes different research
                                                                                      If you wish to submit your genealogy to a correspondent who does
         methods, with options according to identity, relationships, events...
                                                                                      not have Heredis, choose File > Export > GEDCOM and send the
         By selecting the different criteria to be considered, you can easily         resulting file.
         find the «Edward Brown» who was born in «Hull» in «1872», a
                                                                                      In either GEDCOM or Heredis export, you can select the data to be
         «Church Minister» whose graduation note contains “He was at
                                                                                      exported: exclude confidential persons, restrict to one branch or
         Mansfield College”, the «Paul Thomas» who had a sister called
                                                                                      exclude living persons.
         «Margaret», all your end-bits of ancestor branches, or every hus-
         band whose age gap over his wife is more than 30 years.

Heredis for Mac                                                                                                                                                10
3.12 Synchronizing You are going to your country home? Synchronize your genealogy
on a USB flash drive and then connect it to your home computer in
Heredis is open to other platforms and can exchange data with any the countryside. You can update your file instantly. Before leaving,
device which has an up-to-date version of Heredis: another Mac, synchronize your computer again with the USB flash drive and
PC, iPhone, iPad or iPod touch. update your files with all your weekend work as soon as you return
home.
Heredis will recognize all the different devices which are connected
to the network, as well as the removable storage devices you have
plugged in to your Mac (USB flash drive, external hard drive).
Start the update of data on your Mac with the Sync button. Heredis
will identify what data has been changed.
You have altered a date and added two photos from your iPhone
and these changes will be updated on your Mac.
Your cousin is visiting you with his PC? Connect it to the network
and send him your genealogy.
You are going to the Public Archives with your iPad? Synchronize
your file first to have to hand all the information fully updated. Then
if you add any new data, you will recover them on your return by tur-
ning on both devices.
Heredis for Mac 114 Going further
4.1 Arranging your work environment
You may adapt Heredis to your personal work methods.
Manage the panels
Certain panels are of no use to you? Click the closure button and
they will disappear from the column.
Use the buttons at the bottom of the screen to change the display
of panels. The arrow button to the right or left will show or hide the
column or columns of panels. The indented wheel button at bottom
right will give you access to any panels which have been removed. A
simple click will display the panel again.
The procedure for opening the panels may be different for each
column. Select Open one panel at a time and the panel which is
open will automatically close when another panel is opened in the
same column. Otherwise the panels will remain open as long as you Drag the icons and place them in the order you want. You can also
have not clicked the disclosure triangle. add extra spaces between the buttons.
Add a column of panels if you want to have more information simul- To display the buttons as they were when Heredis was first
taneously displayed. launched, drag the default set to the toolbar.
You may reposition a panel in the column or to another column You need more space; then change the display format of the icons.
using the mouse. Its new position is indicated by a blue line and Select Icon only from the Show pop-up menu and click Use small
then release the mouse to place it there. size.
You may alter column width and height of panels if necessary. The
cursor will change when placed at the limit of the bar and you may Select data entry method
then drag to resize the panel or column. Depending on whether or not you have a complete deed or just a
mention on a website, you will not need the same input fields. This
is why the Heredis data entry fields are modular. Choose between
Select your toolbar Basic, Comprehensive or Customized formats by clicking on the
Click Customize to select the tools you need. Choose an icon and setting button in all screens dedicated to data entry.
drag it to your toolbar at the desired location.
Prepare the data entry screen to your liking by using the Customize
To remove an icon, drag it out of the toolbar. view. Each data entry screen will then display the selected items.
Heredis for Mac 12Define your preferences Preferences
In the Heredis Preferences menu, you may define the formats of all What ever way you may have typed data, in uppercase or lowercase,
the various input fields. Choose how to display the names, places, Heredis will automatically format the entry according to your pre-de-
numbers. Change the font size in the Immediate Family screen fined Preferences.
and panels. Choose the default options for creating events and set
inconsistency alerts.
Automatisms
The Gender field is filled in automatically based on the given name
4.2 Getting assistance during data entry entered, but it may be changed. Multiple given names will be auto-
matically entered according to your initial entry, but may be subse-
Heredis does everything to help you enter data as quickly and safely quently altered.
as possible.
Heredis calculates for you the date of birth of people based on their
age at any particular event. It gives them an approximate date which
Enter data quickly you may confirm later, when you know it.
Data memorized
Drag and drop
Heredis memorizes all your previous data entries, item by item, and
To speed up your data entries, complete your data by using drag
will suggest the appropriate data as you type. To validate a pro-
and drop.
posed entry, press Enter or Return keys. To choose among several
propositions, use the arrow keys and then press Enter or Return Add links to other people by selecting them in the various panels
keys. and deposit them in the data field if it is empty. Select a man in the
Persons panel and drop it as the grandfather in the Immediate
Pre-recorded data Family tab. Select a woman from the Relations panel and drop in
Personal Data > Event > Christening to make this person the god-
The Application is supplied with databases of places, given names mother.
and occupations.
In the same way, you may add information to the Events field. Select
Choose from the propositions as they appear. If no proposition a source from the Sources panel and drop it on the event you will
appears or if it is not appropriate, select New Place. have selected to associate it with this event. You may do the same
Each new given name entered is automatically added to the Given for a place selected from the Places panel.
Names Index. Add media already used for other data by choosing from the Media
Each new Occupation panel and drop them into the appropriate entry fields. A group photo
will be added to the can illustrate both a family and a marriage event.
Occupations Index by
clicking the + button in this
section after selecting a
word or a phrase. The new
elements will be proposed
in subsequent data inputs.
Heredis for Mac 13Correcting spelling Major events have their buttons for direct entry. For any other event
to be created, click Add a person event to select it from the list of
Anything you type in the Notes data entry field will be subject to
events.
a spelling alert. Typing errors are underlined in red. Right-click the
underlined word so that Mac OS may propose the correct spelling. To facilitate your entry, Heredis will first display all the events already
in use in your genealogy.
Error-free data entry When an event is added, you may rename it by double-clicking
on its name. Transform a Diploma event by entering Master’s.
Consistency control The event will be available later as Master’s in a submenu of the
Heredis will check the validity and consistency of any data entry. Diploma event.
You will be notified if any date or time appears incons-
istent. 4.4 Entering a family group
Any input which appears inconsistent will be highlighted by
The Family Group Data tab is designed to add easily to expanded
a red cross in the Consistency button on the toolbar. Click the but-
family groups and is particularly suited for the entry of descendants.
ton to be notified of the apparent inconsistency (due to a mistake of
date, or the attribution of a link which is not valid). You may search Each generation has an adapted data entry field: parents, partners
for any inconsistency throughout the whole genealogy file by choo- and children and their partners may be entered one after another.
sing from the pop-up list in Genealogical Criteria of the Persons
panel Enter the name and given name. Then type the date and place of
the required events (Birth, Death or Marriage). To avoid duplicates,
Heredis will indicate with a red arrow, any existing person who may
Permanent control for duplicates
match the person you are entering. Click the red arrow to see the
To avoid the double entry of a person in your family tree, Heredis list of potential duplicates. If you think you have identified the person
will display a list of existing name matches similar to your entry for you wish to add, stop typing and select the person from the list and
any new persons you may enter in the Add menu screens. Simply then click Choose. If no person displayed in the list corresponds to
select from the list and click Choose to choose that person instead your individual, continue filling out the data fields.
of creating a new individual.
Each data input is validated as soon as you click outside the line.
Thus without displaying any other screen, individuals are simply
4.3 Entering a type of event added generation after generation.
Each field of the Family Group Data tab is equipped with the same
In the Personal Data tab, Heredis proposes a full list of events tools as the other input screens (modular input modes, drag and
commonly encountered in genealogy: individual events and shared drop input, automatic formatting, real-time duplicate control).
events which may apply to the couple formed by the primary person
and the selected partner.
Add events with the buttons at the bot-
tom of the screen
.
Heredis for Mac 144.5 Exploring the Indexes
You may use the Indexes for finding any data, modify or complete
them, and simply navigate throughout your genealogy. Each Index
gives you an overview of your data, indicates where they are used
and permits you to edit them throughout your genealogy file.
As you enter all data, Heredis will record the details to the right
place in the appropriate Indexes: names, occupations, places,
sources, media.
You may consult the list of assignments for every item of data and
the relevant statistics by period.
Edit, comment, illustrate your data in the Index for transmitting
throughout your genealogy. Change the spelling of «SHELITO» to
«SHILLITO» so that it applies to all holders of this surname. Change
the default gender assigned to all new «Lindsey» given names which
you may enter. Consult the list of all the «Master builders» and navi-
gate throughout their families. Show photos of the places where Search all descendants of the primary person born in Yorkshire after
your ancestors lived and refine their geolocation. Enter a transcript 1800. The resulting list can be used for navigating around these
of an old deed, which you may then consult in each event where the people but also for applying a specific treatment to them: marking
source is assigned. Import folders of photos to the Media Index so them, making them into secondary or confidential persons.
that you have them to hand for associating by a simple drag and
drop.
Indexes allow you to apply overall treatment for any data of the
same type: spelling, specific formatting, associating of variants,
notes, illustrations, replacement by another given item of data.
4.6 Managing the results of any search
The permanently available panels of data allow you to research
Persons, Places, Sources and Media without leaving the main
screen of the software. You may use all four indexes of data for
adding more detail or for completing an entry by drag and drop.
The Persons panel provides an advanced research tool for selecting
a category of persons which fit a specific set of criteria.
Click the indented wheel button for defining the appropriate treat-
ment or to print the list of results
Heredis for Mac 154.7 Searching for duplicates
Heredis will control for duplicates at all times during the entry
of data; but the importing of data from other genealogists, or a
moment of inattention may create duplicates.
This powerful tool is essential for maintaining an impeccable genea-
logy file. Research and verification is carried out in one click. The
results are clearly displayed and indicate the probability of duplica-
tion.
Heredis detects a potential duplicate? You may check it out in the
summary of the information about the persons concerned or return
easily to your genealogy to check the information. If there is indeed
a duplicate, merge the two individuals by selecting the most appro-
priate information on the Find duplicates screen. If the two indivi-
duals are distinct, Heredis allows you to tick the Not a duplicate
checkbox so they no longer may appear as potential duplicates at a
later moment.
Heredis for Mac 16MANAGING HEREDIS Heredis for Mac 17
5       Heredis architecture                                                      Discover Heredis
                                                                                   The left side of the Home page is dedicated to the discovery of the
                                                                                   software.
     5.1 Heredis files                                                             Click the image in the Discover field to access the on-line tutorial
                                                                                   pages of the www.heredis.com site.
         Heredis creates data files (genealogies), files of tree charts and
         transmits data to third-party software for printing (documents).          Click Download Sample Family File to connect to the site www.
                                                                                   heredis.com. The sample files provide an overview of the different
                                                                                   functions of the software and illustrate the main subjects encounte-
         Manage files on the Home page                                             red in genealogical research.
         The Heredis Home page allows access to all types of file that
         Heredis can handle.
                                                                                   Display of genealogies
         To find this screen during a work session, click the Home button in
         the toolbar or choose File > Home Page.                                   Display a genealogy
                                                                                   The genealogy file will open in a screen. This screen can occupy
         Create a new genealogy                                                    all available space on the screen, occupy only a part, or may be
                                                                                   reduced as an icon.
         Click New Family File. Enter a name for the new genealogy file and
         specify the desired location on your computer.                            Several views of the same genealogical file may be opened simul-
                                                                                   taneously: the main navigation screen, tool screens (Indexes,
         An empty Immediate Family screen appears, and you may now
                                                                                   Search for duplicates), tree chart screens, document screens, the
         start entering your data by clicking on the Create the First Person
                                                                                   Preferences screen...
         link at the center of the screen.

                                                                                   Display several genealogies simultaneously
         Open a recently used file
                                                                                   There are several different ways to open a Heredis genealogy file.
         Select the file from the Open Recent menu and then click OK.

         Info • To delete the list of recently used files, choose File > Open      Open a genealogy file
         Recent > Clear Menu.                                                      There are several different ways to open a Heredis genealogy file.

                                                                                   Open a data file
         Open an existing file
                                                                                 • To open a file when Heredis is already running, choose File > Open.
         Choose the type of file to open from the Open menu and then click
                                                                                   Choose the genealogy file in your file directory, and then click Open.
         OK. You can open Heredis files, including files from the earlier ver-
         sions X.2, GEDCOM files (Genealogical exchange files) or tree charts    • To open a file from the Home page, click the Home button, then
         created and saved with Heredis.                                           select Heredis File in the Open menu. Click OK and then select the
                                                                                   file.
         Select the file and click Open. Only files which match the selected
         file type are accessible.

Heredis for Mac                                                                                                                                             18
Info • Your Mac by default will open the last folder in which you Info • If you have made changes since you last saved the file,
saved a file. To select another location, select it in your file directory. Heredis will invite you to save it.
• To open a file you worked on recently, display the Home page and
select it in the Open Recent menu. You can also choose File > Save a file
Open Recent, and then the genealogy file in the submenu. Remember to save your file regularly during your genealogy work
session. When the file has been modified, a black dot appears in the
• To open a Heredis file from the Finder, double-click the file icon or
close icon of the file screen ; it needs to be saved.
drag it to the Heredis application icon.
You may open a Heredis file created with an older version of the Save a genealogy file
software (Heredis Mac X.2).
Manually
Open a tree chart file Click the Save button, choose File > Save or press the
Command (⌘)-S.
You have edited and saved a tree chart created with Heredis? You
can re-open it to further edit it or print it.
Automatically
• To open a tree chart saved when Heredis is already running, choose For security you can schedule automatic saving of your data.
File > Open. Select the tree chart file your file directory and click
Open. 1. Choose Preferences from the Heredis menu or press
Command (⌘)-Comma (,) keys.
• To open a tree chart from the Home page, click the Home button
and choose Chart File from the Open menu. Click OK and then 2. Click the General button and tick the Activate box in the
select it. Automatic Save field. Indicate at what frequency you want the data
saving to be performed.
• To open a tree chart file when another tree is already open, click
the Open button in the tree chart toolbar. Select the file in your tree 3. Tick the Confirm Saves box for Heredis to warn you before each
chart directory of files and click Open automatic saving.
Close a genealogy file Save a file under another name
When you have finished working with a genealogy file, you can close If, for example, you want to make a copy of your genealogy, or
it without leaving Heredis. create a back-up copy or make several versions, you can save the
file under a different name or in another location.
• To close the active document, choose File > Close or press the
Command (⌘)-W keys. You can also click the Close button in the Choose File > Save as and specify a name and location.
upper left corner of the file.
The file with the new name is now open on the screen. To work on
• To close all open Heredis documents, press the Option (⌥) key, then the previous version, choose File > Open Recent and select the
click the Close button of the active document. previous version in the submenu
.
Heredis for Mac 19Return to the saved version • Media (photos, videos or other documents) to illustrate the person,
unions or events.
Heredis allows you to re-open your genealogy as it was the last time
it was saved. This is very useful, for example, when one has made a • Personal ties. Apart from family ties, Heredis allows noting that
mistake during an import. people had a special bond. Include friends, tutors, mentors. Create
«witness» links for those present at or quoted at an event.
Choose File > Revert to Saved.
Surnames, occupations and locations entered may also be dis-
Heredis closes the active file without saving and then re-opens it as
cussed and illustrated.
it was before the latest changes.
Info • Any changes made after the last saving will be lost. Relationships
As you build your family genealogy, you create new persons with
their appropriate relationship. Any relationship can be established
retrospectively.
5.2 Heredis data structure
Relationships are of two types: the parent-child and partner rela-
Heredis manages all types of data related to genealogical research tionships.
and organizes them logically, in order to deepen your understanding
of your ancestors. Other family ties and the position of any person in the genealogy are
determined automatically from these basic links. To create brothers
and sisters, you have only to create new children for parents.
Persons
Every individual mentioned in the genealogy file: ancestor, contem- • Create direct family links: father, mother or child.
porary, witness, is known as a Person.
• Create a partner link (whether the union is official or not). Specify
For each person included in the genealogy file, specify: the status of the family: the partners are married, separated,
divorced...? When a person has been married several times, Heredis
• Identity (surname, give names, nickname, occupation, etc.). If you will number them for easy access, as well as to the children who
wish to enter information that is not proposed by Heredis, create resulted from them.
your own user field.
• Assign a note, pictures and events to each family created in your
• Characteristics known as flags: childless, no partner, confidential, genealogy.
etc.
• A free Note. Events
To record important events in the lives of your ancestors, you may
• Each person is numbered automatically according to his or her posi-
note person events (christening, military service, will...), or events
tion in the genealogy but you may assign a personal number based
shared with a partner, called family events (engagement, residence,
on other criteria.
etc. .). If you cannot find events that are appropriate, create your
• Various events in the person’s life, expanding his or her personal own definition of events.
story, and citing sources of information.
• For each event, enter all known details (date, time, place, age stated
on the record...) and add a note relating to the event.
Heredis for Mac 20• Specify the status of the source of information (untraceable, found, • Creating a witness assigns an individual to an event concerning ano-
to be researched), allowing you to edit a report of all sources to be ther person. A witness may be assigned to one or more events, and
researched. each event can have one or more witnesses.
• Declare an event as private, not to be exported or published. • Anyone entered in your genealogy plays a role, regardless of its
importance and the degree of kinship. When you assign a person to
• Illustrate the event with various media (photos, documents). an event, specify the type of link (witness, godfather, declarant...),
the age of the linked person at the time of the event, and enter if
• Assign a source to the event, to record the origin of your informa-
necessary a suitable comment on the link.
tion.
• The information entered for the witness is the same as for any other
• Assign witnesses to the event (witnesses, registrars, godparents,
individual: identity, flags, notes, media...
etc.).
Sources Linked Persons
Sometimes we know of a relationship which existed between two
The information gathered about your ancestors will be more or less
people, without being able to assign it to any event. You know that
reliable depending on their origin. Assign one or more sources to
Paul is the uncle of John, but you do not know if he is the brother of
each event in order to justify the information recorded.
the father or mother of John, or the husband of an aunt. You cannot
Each source (an act, a website, a historical work...) may be detailed create this link as a kinship. Create a personal link (Sundry Links)
and illustrated at the time of its creation or later. between Paul and John until you find the information you need to
create the kinship.
• For each source, specify in the proposed boxes, the title, reference,
author, quality of data.... A free text box allows you to enter a note • Create linked persons to declare a relationship between one indivi-
or record the transcript of an act. dual and another person. Every individual may be linked to several
other persons.
• You can mark a source as private in order not to export it when
exchanging files, nor to publish it. • The name of the link is determined by choosing the type of rela-
tionship and meaning of the link. You can also add a comment to
• Each source may be illustrated with media. the link.
Once a source has been created, you may assign it to one or more
events. Each event can have one or more related sources. When Media
you assign a source to an event, add a comment indicating the link You have photos or documents; use them to complement and illus-
between the event and the source. trate your family tree.
All sources entered are managed by the Sources Index. You can assign a digital image (photograph, signature, seal, etc..)
sound recordings (interviews, speeches), videos or any other type of
Witnesses file (document prepared with a word processor or spreadsheet, PDF,
HTML, etc..) to any data in your file.
Each person involved in the lives of your ancestors can be entered,
be they part of the family or not. Heredis will assign persons to • Each item of media is identified by its name, to which you can add a
events (the witnesses of a marriage, the registrar for a birth, a rela- date and a note.
tive present at the ceremony for a decoration etc.).
Heredis for Mac 21• You can make any media private if you do not want it to be broad-
cast.
• Media may be assigned to all types of data: person, family, event,
source, name, occupation, place.
• The number of media assigned to any data is without limit and every
item of media may be linked to several different data.
All media are listed and may be managed in the Media Index.
Surnames – Given Names – Occupations – Places
In your genealogy, you will have names, occupations and places that
sharpen your interest. When you know more about them (photo of a
place, story of a given name etc..), Heredis allows you to keep this
information by completing each item.
The surnames, given names, occupations and places that you use in
your genealogical file are automatically stored in the Indexes.
Indexes are powerful tools that play several roles: retrieve data by
how they are used, link different data by themselves, illustrate your
genealogy by management of your documents. Thus you enrich your
genealogy and understand all the better the lives of your ancestors.
• In each Index, the surnames and given names, occupations and
places may be illustrated by a note or by media.
• The Indexes can merge similar data. They allow you to declare
variants within the same category of data: such spelling of a name
is a variant of another name in the file, such given name is a local
variant of another given name, such a name is a variant of another
occupation saved in the file.
Heredis for Mac 226 Work environment 6.2 Display Tabs
Immediate Family tab
6.1 Menus and toolbar The Immediate Family tab displays the immediate family of a pri-
mary person (parents, grandparents, partners, children). It is used
for navigating between the different family members and to create
The Heredis Menus
them if necessary. The Immediate Family tab is displayed when
They provide access to all functions of the software (research, prin- Heredis opens.
ting, exchanges, backups... They vary according to the screen in the
foreground (navigation and data input, indexes, editing of documents
or construction of tree charts). Personal data tab
The Personal Data tab displays all the information entered and
allows you to add or complete the events that concern the primary
Customize the toolbar
person or his/her union.
The Heredis toolbar is entirely modular.
You may access the Personal Data tab of any person shown on the
• Click the Customize button to display the content screen of the screen (Immediate Family tab, work or search panels) by double-
toolbar. All available buttons are displayed. clicking on the name.
1. Drag any new button or extra spaces to the desired location on
the Heredis toolbar. Family Group Data tab
2. Delete buttons by dragging them off the toolbar. The Family Group Data tab provides a summary of all the infor-
• Right-click the bar, then select one of the options from the local mation entered for the primary person and allows you to add all the
menu: members of his/her immediate family (parents, partners, children,
step-children) without having to exit this screen.
1. Change the display format of the icons: icon and text, icon only,
text only.
The Ancestors tab
2. Change the size of icons on the toolbar.
The Ancestors tab shows 4, 5 or 6 generations back from the
3. Hide the toolbar. To restore it, use the Window menu. primary person. Change the number of generations displayed by
clicking on the buttons at the bottom of the screen. Click the Print
Re-display the toolbar by default button to start printing the ancestry as it is displayed.
1. Click the Customize button.
This tree chart is dynamic and by clicking on the arrows at the right
2. Drag up the default toolbar of the software. of the tab, it will display following generations. It is used for naviga-
3. Click Done to close the content screen of the toolbar. ting but also for creating new ancestors, should this be necessary
.
Heredis for Mac 236.3 Removable panels 6.4 Adapt the workspace
The removable panels display data and tools. Menus and toolbar
The menus are displayed at the top of the screen as in all Mac
Display or hide the panels applications. The Heredis toolbar occupies the upper part of the dis-
played screen.
Click the Show/Hide (Left-Right) Panels icon at the bottom of
the panel columns, to the right and left of the navigation screen, The menus and buttons displayed give you access to all features of
choose Window > Show/Hide (Left-Right) Panels, or click the software: search, navigation, printing, exchanging, backups…
Option (⌥)-Command (⌘)-Right Arrow or Left Arrow.
Click the Close button of a panel to hide it. The panels
To display a hidden panel, click the Options button of the panels at The panels contain search tools for the file or management tools for
the bottom of the panel columns, and select it from the list. file data. You can add, hide and move panels as you wish.
Add a column of panels, to the right or left of the navigation screen
by using the Options button of the panels, and move the panels in Genealogy files
the two columns. Delete a panel column by using the same button. The genealogy file will open as a global screen. This screen can
either occupy all available space, or occupy only a part, or be ico-
nized.
Resize the panels
The space allocated to the display of panels may be altered: click
the separation line between two panels. The cursor changes to Display more than one genealogy file
a directional cross and you can extend or shrink the area shown Each file opened can display data differently: in Immediate Family
above. mode, in a data entry screen…
Click the separation zone between the panel columns and the file
display area to change the space allocated to the panels. Display more than one workspace
Different workspace screens may be open simultaneously for the
same genealogical file: Index screen, media screen, report editing
Arrange the panels screen, tree chart editing screen...
1. Move the panels by using drag and drop.
All the screens displayed for different files open are visible in the
2. Click the top bar of the panel and drag to the desired location for Window menu.
the panel in any panel column.
3. When the desired destination is highlighted by a blue line, release
the mouse.
Choose Open One Panel at a Time by using the Options panel
button. Heredis automatically closes the displayed panel when you
click the display triangle of another panel.
Heredis for Mac 247 Add, link and unlink persons Gender
Gender is automatically inserted by Heredis based on the given
name(s). If the given name is multiple, Heredis leaves a ?.
7.1 Link an existing person or create a new For gender selection, click the arrow or type M for Male, F for
individual? Female. Your choice will be stored for future use of the same given
name. If you want to change it later, you can do so in the Given
Names Index.
Create the first person
You have chosen to create a new genealogy: Heredis opens an Occupation
empty Immediate Family screen, which will fill up as and when you
Enter the occupation of the person. This section is for the sole or
enter data. Now create the first person to start your new file.
main occupation the person held. You may also enter Occupation
Click Create the First Person in the center of the screen or events, dated and detailed for any other activities. The list of reco-
choose Person > Add > Add Unrelated Person, or press Shift- gnized occupations with Heredis appears and is updated as you
Command (⌘)-F. type. When you see the desired occupation in the list, use the down
arrow to select it and tap the Enter (⌅) to select it.
The Entering New Person screen opens with the data boxes to
complete. To move from one box to another, press the Tab key or In the Occupation field, recognized occupations are underlined. If
click in the next box. you type a word that is not recognized as a occupation and want to
add it as a occupation, with the mouse select the word or group of
Heredis includes data entry aids which will save you time and avoid words and click the arrow to the right in the box. Heredis will create
errors. an occupation that is added to the Occupations Index. As you
leave the field, you will find that it is now a recognized occupation
Surname because it will be underlined.
Type the name of the first person without worrying about upper or
lower case. Each new name entered is integrated into the Surnames Child status
Index, making it available later for help with entering surnames. Scroll down the Child Status pop-up menu and choose the appro-
priate option.
Given Names
Type in the given names of the person. The list of given names Signature
known to Heredis appears and is updated as you type. Once you Scroll down the Signature pop-up menu and select Yes if the person
locate the given name in the list, use the down arrow to select it and knows how to sign, No if you have seen that he/she cannot sign, ? if
then press the Enter (⌅) key to select it. If the usual given name is you are not sure of the information.
not the first given name, it may be highlighted. To do this click the
arrow which appears to the right of the data input area, and select
from the list the usual name, or enter the usual name in quotes.
Heredis for Mac 25Flags Death
They can enter additional information relevant to your genealogy. 1. Click the Death event title to bring up the pop-up menu and
select Death or Burial.
• Click the Childless icon if you know this person had no offspring. 2. Proceed in the same way as for Birth.
• Click the No Partners icon if you know this person did not have a
partner. Further information
To display further data fields, use the Choose Data Fields option
• Click the Secondary Person icon to indicate that this person has
(indented wheel icon).
only a minor role in your genealogy. Secondary persons in your file
may be excluded from printouts, exports and publications. For exa-
mple you can declare as «secondary persons» all children who died Validate the creation of the first person
in infancy so that they will not appear in your tree charts. Click the Add button to validate the first person in your genealogy,
• Click the Marked Person icon to highlight the individual and apply or press the Enter (⌅) key. The person appears in the center of the
specific treatment to him/her. A marked person may be excluded Immediate Family screen.
when exporting the file, or highlighted in a search, or may or may This individual is the starting point of your genealogy, the person
not be printed in a tree chart or a list. called the Root Person and who will have the Ahnentafel num-
• Click the Confidential Person icon to prevent publication of infor- ber 1. Continue your genealogy by clicking on the Add Father, Add
mation on this person in your printouts, exports and publications. Mother, Add Partner links to complete the immediate family.
Main events Add a person
Heredis distinguishes main events (Birth - Death) from minor events Each person in the genealogy file may be linked to others by ties of
(Communion - Retirement - Will, etc..). The Entering New Person kinship, as a witness to an event, or as a person related in another
screen gives access to major events only. If necessary you can enter way.
minor events in the Personal Data tab at any time. Heredis allows you to link any individual already in the genealogy file
or create a new person with his/her kinship. In the Add or Choose…
Birth field, enter the surname and given name in the Personal Data tab.
1. Click the Birth event title to bring up the pop-up menu and select You will see in the Matching Persons column, appear a list of per-
Birth or Christening. sons already entered with that surname and given name. Step by
2. Enter the date. step, as you enter new letters, the list of corresponding persons will
mature.
3. To enter the Place field, type the name of the town of birth or
Christening. Once you enter the first letters of the place, Heredis Select a person from the list and check his/her details. This allows
proposes a list of places that may match your entry. Select a you to compare more effectively the different individuals found.
place using the mouse or use the up and down arrows and
confirm the location selected with the Enter (⌅) key. If there is If it appears that the person you want to add already exists, use the
no place relating to your entry, select New Place. Complete the person already created by clicking Choose.
various boxes for the new location to be saved and confirm its If you do not detect a possible duplicate, you can then create the
creation by clicking OK. new person by completing the other entry fields and click Add.
Heredis for Mac 26Delete a person Merge as a result of a search for duplicates
Heredis allows you to delete 1. Start a search for all duplicates in the file.
• Either the person, then the person will no longer exist in your file. 2. Select the pair of individuals that are obvious duplicates in the list
of potential duplicates.
• Or the links that bind the person to his family or to an event in which 3. Click Prepare Merger.
he played a role. In this case the individual will always remain in your
genealogy file.
Select the data to be merged
Review carefully all the data in the merge screen to retain all rele-
Info • The Root Person of the file, that is to say the individual num-
vant information.
bered Ahnentafel 1, cannot be deleted. To remove this person, you
must first re-assign the number to another person.
Organize the Merge screen
• Place the individual in the primary person position. The Merge screen contains four columns: the Fields Column, one
column for each of the two duplicates, the Merged Person column
• Click the X (Delete) button on the toolbar or choose Person > presenting the data to be stored.
Delete Primary Person to delete the link.
Move the columns by clicking on the headers and dragging with the
mouse to the desired location.
Merge two persons
If you find a duplicate in the genealogy file (the same individual ente- Select the data to be retained
red twice), merge the two persons to get a single person with all the Review carefully the Merged Person column.
information recorded.
The orange fields contain a question mark because they require your
arbitration. To indicate what data should be saved, click the item to
Merge the primary person with another person
keep.
1. Display one of two supposed duplicates as the primary person.
Heredis automatically transfers to the merged individual the identical
2. Choose Person > Merge with Another Person… or click the data or data that is contained in one only of two individuals. This
Merge button on the toolbar. data is displayed in green.
3. Select one of the potential duplicates proposed by Heredis.. When data is not to be saved, it is displayed in red. You can click
again on the heading to select it for transfer to the merged person.
If there are no duplicates proposed by the software,
Some fields allow you to retain both the data of person A and per-
• pull down the menu and select All Persons son B, such as given names, occupation or notes. To remove any
• enter a surname and/or a given name to search for corresponding merged data, click the item to be deselected.
persons throughout your genealogy file.
Certain other items cannot be added, such as signature or family
4. Click Prepare Merger. status. To change the data retained for the merged person, click
the data stored to deselect it or click the data not to be retained to
replace it with the other data.
Heredis for Mac 27Events and families may be selected or deselected in their entirety. 7.2 Parents
Click the header of the event or the family to change its status. The
color of the data changes.
Add a new person
Info • Remember to allow color codes to help you.
All tabs
• Orange = Heredis was unable to arbitrate, click one of the two 1. Place the person for whom you want to add parents, as the primary
persons to specify what data to keep. person.
• Green = The data will be stored in the merged person.
2. Create the link.
• Red = The data will be lost.
• Click the links in the empty boxes for the father or the mother.
When you are sure of your selection, and the Merged Person
column no longer contains orange fields, click Merge. • Choose Person > Add Father or Add Mother or press Shift-
Command (⌘)-F for the father or Shift-Command (⌘)-M for the
mother.
Check the merged person
• Click the + button (Add or link persons) on the toolbar and choose
Heredis open the Immediate Family tab of the merged person. Add Father or Add Mother.
If you were still in the Search for duplicates screen, you can conti- 3. Enter the new person.
nue the fusion of new duplicates.
In the Add or Choose Father or Add or Choose Mother field, com-
1. In the Immediate Family tab, check that the merged person has plete the entry fields with the information you have. Some items are
the right persons as parents, partners and children. pre-filled such as the father’s surname or gender of the father and
mother.
2. Click the Personal Data tab to check all the information retrie-
ved. Remember to click each event to check notes, sources, wit- • To change the surname, click in the field and enter another name.
nesses, media.
• To change the gender, click the Do not specify gender lock.
3. Click to verify the different families, and the identity of the
partners. Info • Click the indented wheel icon at the top right of the screen to
change the display mode if all desired fields are not displayed.
Info • If you are unsure and want to undo the merger, choose File >
Revert to Saved. Click Add. The parent is created as well as the link with the child.
Info • You can link the grandfather and grandmother in the same
way.
Heredis for Mac 28Family Group Data entry screen (Father or Mother box or Parent fields in the Family Group
Data tab). The parent is then linked.
1. Click the + button at the bottom of the Parents entry field.
2. Choose Add Father or Add Mother. Info • Creating a link to the Father and a link to the Mother will
automatically create a union between the father and mother, even if
3. Continue the data input with the information you have. To validate
no event has been entered.
the new individual, click outside the entry field.
Link an existing person Unlink a person and parents
When you detach a person from his/her parents, the individuals
During data entry concerned will always remain in your genealogy file.
1. Place the person for whom you want to add parents as the primary
person. Info • After you have removed the parent link, you can assign a
different mother or father to the primary person.
2. Create the link.
• Choose Person > Add Father or Add Mother or press Shift-
Command (⌘)-F for the father and Shift-Command (⌘)-M for the All tabs
mother. 1. Place the person as the primary person.
• Click the + button on the toolbar and choose Add Father or Add
2. Remove the link with the parents.
Mother.
• Click the links in the empty boxes for the father or the mother on • Choose Person > Delete > Father Link or Mother Link or press
the Immediate Family screen. Shift-Command (⌘)-F for the father and Shift-Command (⌘)-M
for the mother.
In the Add or Choose Father or Add or Choose Mother fields,
select the person to be linked from the list of Matching Persons to • Click the X (Delete) on the toolbar and choose Unlink Father or
the right of the screen. To limit the list displayed, you can enter the Unlink Mother.
given name in the Personal Data area. Click Choose or double-
click the name in the list. Family Group Data tab
1. Select the parent to be deleted in the Parents data entry fields.
Info • To access this screen from the Family Group Data tab, click
the red arrow that appears on the input line. 2. Click the - button at the bottom of the field, and choose Unlink
Father or Unlink Mother.
Drag and drop Info • If you select the Delete Father and All Links, or Delete
1. Place the person for whom you want to add parents as the primary Mother and All Links option, this will remove the person from your
person. genealogy, not just the link.
2. Drag the father or mother from one of the side panels (Persons,
Bookmarks, Relations…), and release on the display area of the
Heredis for Mac 29You can also read