Vehicle video guide - Auto Trader
←
→
Page content transcription
If your browser does not render page correctly, please read the page content below

Vehicle video guide

                      1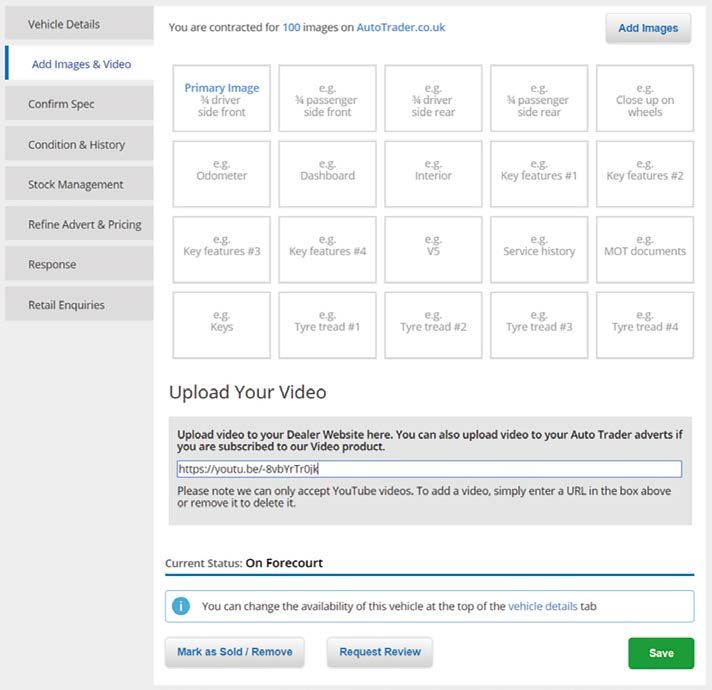
Vehicle video walkaround
Why video?                                                    4. Make it look its best: Ensure that both the exterior
                                                                 and interior of the vehicle is clean, in a suitable
As well as using lots of images to help create desire
                                                                 condition with no visible signs of damage and
amongst customers, today’s most successful
                                                                 all pricing and point of sale material has been
retailers are embracing video. Not only does it give
                                                                 removed. Remove paper mats and any other
consumers a detailed view of your stock, it also builds
                                                                 distracting items from inside the vehicle.
all important trust through transparency. It also helps
to present your dealership in a professional way. In          5. Follow interior best practice: Ensure that the
this step-by-step walkaround guide, we’ll share best             steering wheel is straight, all air vents are facing the
practice on how to create stunning videos of your                same way, the seats are aligned and any screens
stock, and show you how video can help you stand out             are switched on and displaying either a main menu
in an increasingly complex and competitive market.               screen or map. Avoid displaying local radio station
                                                                 settings on the screen. Best practice is to display the
                                                                 same screen setting for every vehicle.
Key points
                                                              6. Avoid reflections: Ensure all windows are down
1. Location, location, location: Ensure the location
                                                                 – this will enable the camera to capture interior
   chosen for the video walkaround is free of any
                                                                 detail during the video walkaround and also
   distractions and clutter.
                                                                 prevent any reflections of the videographer being
2. Stay consistent: It is good practice to use the same          shown in the glass as they move around the vehicle.
   location for every video to ensure consistency.
                                                              7. Keep the wheels aligned: Straighten the front wheels
3. Use a neutral backdrop: Ensure the vehicle has the            – if including a view of an alloy the image on screen
   most neutral area of the location behind it when in           should look the same as a still image of the alloy.
   the front three quarters position.

                                                          3
Beginning the walkaround
The objective of a vehicle video walkaround is to create a moving representation of the vehicle which replicates
the key still images that are taken during normal photography. Because the video moves both around and inside
the vehicle it enables much greater interaction than still images alone.

 • Each key feature of the vehicle should be                   • Take care to ensure that the camera movement is
   demonstrated during the walkaround.                           smooth and steady when moving between points
                                                                 of interest. Avoid sudden sharp movements when
 • ‘Hold’ the image for a second to show the key
                                                                 moving the camera from feature to feature.
   features during the walkaround. Count 2 seconds for
   interior features and 1 second for exterior features.
 • Imagine the customer has a live link to the video you
   are taking and use the walkaround to show the key
   exterior and interior features.
 • The key features of a vehicle are exterior and
   interior views.
 • Avoid moving too slowly between showing an
   exterior view and interior view – the objective is to
   demonstrate both the exterior and interior features
   – the movement from exterior point to interior point
   should be done at a steady pace and be smooth                         The complete walkaround
   but is of no interest to the customer.                               should take 1 minute in total

                                                           4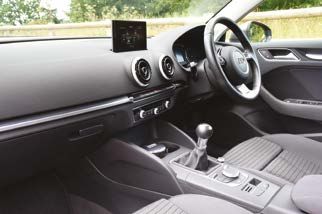
Starting from point A, as mapped on page 9, follow the guide below to create your perfect video.

  1                                    Front three quarters view
                                       • Ensure all windows are down.           • Press record and hold for 1 second
                                                                                  to show this view of the vehicle.
                                       • Frame the vehicle on the camcorder
                                         /phone screen in the same way as       • Walk towards the driver window to
                                         when taking a front three quarters       capture the next view – the front
                                         still image.                             seats.
                                       • Frame as illustrated.

 2                                     Front seats view
                                       • Hold the camcorder/phone still for
                                         2 seconds framing the front seats
                                         as illustrated.

 3                                     Driver interior view
                                       • Pan the camcorder/phone around         • Take care not to include any of the
                                         smoothly following the line of the       rear view mirror in the frame.
                                         bottom of the passenger window
                                                                                • Walk backwards to frame the rear
                                         sill, keeping the screen level. Come
                                                                                  three quarters exterior view.
                                         to a stop for 2 seconds when the
                                         dashboard is framed as illustrated.

                                                            5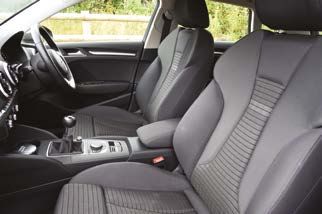
4   Rear three quarters view driver side
    • Stop moving backwards when the         • Walk sideways smoothly towards
      rear three quarters exterior view is     the centre of the rear of the vehicle
      the same as the image illustrated.       keeping the top of the camcorder/
                                               phone screen level with the top of
    • Hold the view for 1 second.
                                               the vehicle’s roof.

5   Rear view
    • Stop when the vehicle is framed as     • Continue walking sideways to show
      illustrated.                             the rear exterior three quarters
                                               view from the passenger side.
    • Hold this view for 1 second.

6   Rear three quarters view passenger side
    • Stop when the vehicle is framed as     • Begin moving towards the rear
      illustrated.                             passenger window keeping the
                                               camera straight and pointed
    • Hold for 1 second.
                                               towards the open window.

                           6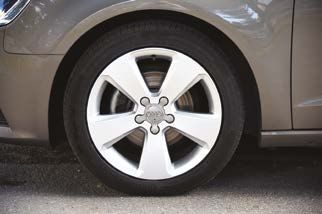
7   Rear interior view
    • When you have reached the                  the backs of the rear seats and hold
      open window turn the camera                this view for 1 second.
      so it is facing the driver’s side
                                               • Take 2 steps backwards and turn
      rear window. Hold this view for 2
                                                 the camcorder/phone so it is facing
      seconds.
                                                 in through the passenger front
    • Turn the camcorder/phone towards           window.

8   Passenger front interior view
    • Frame the interior dashboard
      as illustrated taking care not to
      include the rear view mirror.
    • Hold this view for 2 seconds.

9   Front seats passenger side view
    • Pan the camcorder/phone following        • Walk backwards lifting the
      the line of the bottom of the driver’s     camcorder/phone over the wing
      window sill to show the front seats        mirror and lower the screen until it
      from the passenger side.                   is facing the passenger side front
                                                 alloy wheel at the same height as
    • Hold the view as illustrated for 2
                                                 the centre of the wheel.
      seconds.

                         7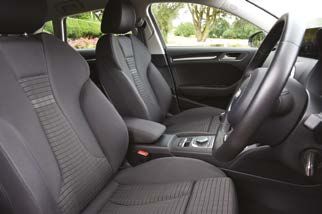
10   Alloy wheel
     • Frame the wheel as illustrated           vehicle to show the front three
       ensuring the whole tyre is included.     quarters view.
     • Hold this image for 1 second.
     • Stand up straight again and walk
       backwards turning to face the

11   Front three quarters passenger side view
     • Continue walking backwards until        • At this point ensure that you are
       the vehicle is framed as illustrated.     ready to press the video record
                                                 pause button to avoid any
     • Hold this view for 1 second.
                                                 additional movement when the
     • Walk towards the centre of the front      walkaround has been completed.
       of the vehicle keeping the screen
       level with the top of the windscreen.

12   Front head-on view
     • Stop when the vehicle is framed as
       illustrated.
     • Hold the view for 1 second then
       press pause.

                          8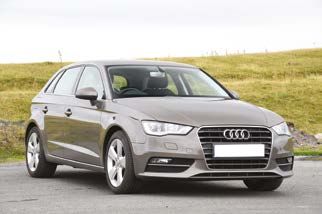
A video walkaround: step-by-step
                                                                                                                         Walk backwards turning
                   Move towards the open                      8 Passenger                                                 to face the vehicle to
                   rear passenger window                         front interior                                           show the front ¾ view

                                           7 Rear             9 Front seats           Walk backwards        10 Alloy wheel
                                                interior         passenger            to frame centre
                                                                                       of alloy wheel

     6 Rear ¾ view                                                                                                             11 Front ¾ view
        passenger side                                                                                                            passenger side

                                                                                                                                   Walk towards the
                                                                                                                                   centre of the front
    Walk sideways                                                                                                                    of the vehicle
    to rear ¾ view

                                                                                                                                   12 Front head
     5 Rear view
                                                                                                                                      on view

  Walk sideways towards
                                                                                                                               Start / End
  the centre of the rear of                                                                                                    0:00            1:00
        the vehicle

                                                           2 Front Seats view                              Walk towards the
                                                                                                           driver’s window
                              Walk backwards               3 Driver Interior view
                               to rear ¾ view

     4 Rear ¾ view                                                                                                              1 Front ¾ view
        driver side                                                                                                               driver side
                                                 Direction of camera              Path/direction of video walk

                                                                           9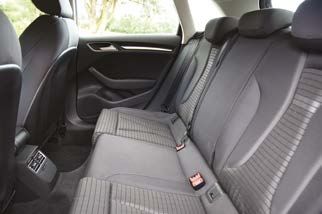
Vehicle video devices
 Devices       Video quality       Lens angle of view        Handling                Advantages /      Disadvantages              Optional extras

Video        Good quality          Wide enough for       Easy to use          High quality videos due to large sensor            Camframe
camcorder    sharp HD videos.      interior views        although set-up      Good battery life                                  – supports
             Built-in image                              menus can be         Good sound quality                                 camcorder to
             stabilisation is                            time consuming                                                          enable smoother
             effective                                   to navigate                                                             panning
                                                         through              1 minute video can be up to 250MB in size.         and more
                                                                              Can take time to upload depending on wifi          professional
                                                                              signal strength                                    looking results
    from
    £200                                                                                                                         (Approx. £45.00)

Mobile       Higher end            Wide enough for       Higher end           Easy to use and upload videos                      Electronic gimbal
phone        devices can           interior views        devices have         Sound quality is good                              – provides good
             produce good                                voice activated                                                         stabilisation to
             quality videos                              video control        Image quality can be noisy and focusing            mobile devices
             -especially those                           which is useful      struggles in low light areas e.g. rear interiors   (From approx. £200.00)
             with built-in                               but some devices     with tinted windows or videos taken inside in      Additional
             optical image                               are record start     insufficient lighting                              microphones can
             stabilisation (OIS)                         only and not stop    Screen can be difficult to view in bright          be plugged in
    Varies
                                                                              daylight

Tablets      Capable of            Angle of view         Location of start    Large screens can reflect too much light and       Tablet camera
             producing good        in video mode         and stop record      be difficult to view in daylight                   steady mounts
             video quality         can be narrow         button means it      Most have image stabilisation built-in to          (Approx £36.00)
                                   therefore difficult   can be difficult     the software which produces poor results           Additional
                                   to include all of     to hold steady       compared to optical image stabilisation            microphones can
                                   interior features     at the beginning                                                        be plugged in
                                   required whilst       and end
                                   inside the vehicle
    Varies

                                                                         10
Uploading your video to YouTube
To add your video to Dealer Portal, you’ll first have to upload it to YouTube to create a link.
To do so, follow the steps below.
Firstly, create a Google account: https://accounts.google.com/SignUp
Sign into YouTube: https://www.youtube.com/ using your new Google account details.
Before you can upload a video you need to create a Channel:
https://www.youtube.com/upload
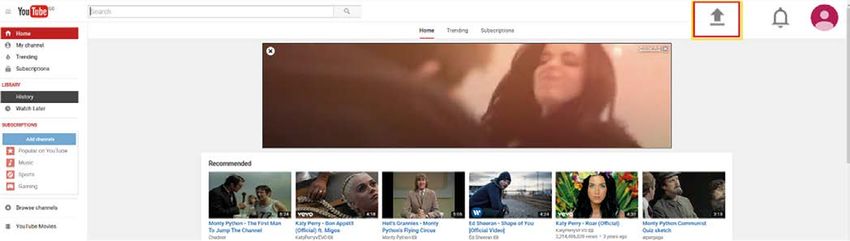
Click the Upload button (highlighted below) and choose your file. Ensure you select the
public video option.
11Once the video has uploaded, fill in the description and the tags that you want it to be searchable under
(e.g BMW 1 series, company name etc.) and press ‘Save changes’
12This will then create a
YouTube link.
This link can then be copied
into Dealer Portal and saved.
Your video will appear online
within 30 minutes.
13Auto Trader retailer education
Throughout the year we host a range of retailer education
events, including our free Auto Trader Masterclasses
and webinars. To keep up to date with new locations and
dates, as well as the latest news, views and insight for the
automotive retail community, please follow:
@ATInsight on Twitter and LinkedIn.
14You can also read