Vintage Dreaming FIVE PATTERNS TO CREATE BEAUTIFUL VINTAGE - ST YLE - Sew Over It
←
→
Page content transcription
If your browser does not render page correctly, please read the page content below

M Y C A P S U L E WA R D R O B E

       Vintage Dreaming

      FIVE
 PAT T E R N S
T O C R E AT E
BEAUTIFUL
  V I N TA G E
    ST YLE
M Y C A P S U L E WA R D R O B E

Vintage Dreaming
    F I V E PAT T E R N S T O C R E AT E
    B E A U T I F U L V I N TA G E S T Y L E
Introduction
       Last year Sew Over It celebrated our tenth birthday. Ten years of
    spreading the joy of sewing and of designing patterns. The first patterns
     we designed were very much vintage-inspired - the Betty Dress, our
    Ultimate Trousers, the Ultimate Shift Dress. It felt like the perfect time
      to celebrate our heritage with this special Vintage Dreaming eBook.

       In this collection we have paid homage to some of the most loved
    fashion icons – Marilyn Monroe, Audrey Hepburn and, more recently,
      the character Miriam from The Marvellous Mrs Maisel. It has been a
    labour of love for everyone at Sew Over It as our eBooks are, but it has
    been so worth it. We couldn’t be prouder of this collection of patterns.
     They are effortlessly stylish, work beautifully together and are so very
                                     flattering.

    Our Capsule Wardrobe collections are all about mixing and matching.
      This eBook features five core sewing patterns which you can adapt
     to make twelve variations, giving you endless possibilities to mix and
    match to create a stylish vintage capsule wardrobe. Not only does this
     give you great value but more importantly it gives you great choice.
    Choice to create your individual looks. And we love nothing more than
      seeing what you create with the patterns. It is the best part of the
                                    process.

      Peppered throughout the eBook, you will spot some of our original
      fabric designs. They were specifically created for these patterns, to
      give you that perfect vintage look. It’s the first time we’ve produced
           bespoke fabrics for an eBook, and we hope you love them!

6
We know you will enjoy sewing and wearing the patterns in this eBook
 and we hope you will share them and inspire us with what you make             KEYS
          using the special hashtag #soivintagedreaming

                                                                       KEY FOR LAYPLANS
                             Love
                                                                            Right side up
                      The Sew Over It Team x

                                                                            Wrong side up

                                                                       KEY FOR ILLUSTRATIONS

                                                                            Right side of fabric

                                                                            Wrong side of fabric

                                                                            Interfacing

                                                                            Right side of lining
                  For reference our models wear:

                            Lisa size 10                                    Wrong side of lining
                         Chantelle size 24
                         Janene size 12-14

                                                                                    9
Version 2

                             Marilyn
                              Dress
                     Inspired by the ultimate Hollywood icon Marilyn
                  Monroe, this revere dress is a classic fifties style with
                 collar detailing and a button front design. A shirt dress
                 is timeless, universally flattering and can be worn with
                                  and without a petticoat.

                    Mix and match the skirts from the Miriam Set to
                  choose the shape that suits you. We fell in love with
                 this revere bodice so much that we also adapted it into
                 a blouse to wear with separates. You can also make the
                                     skirt on its own.

10                                           11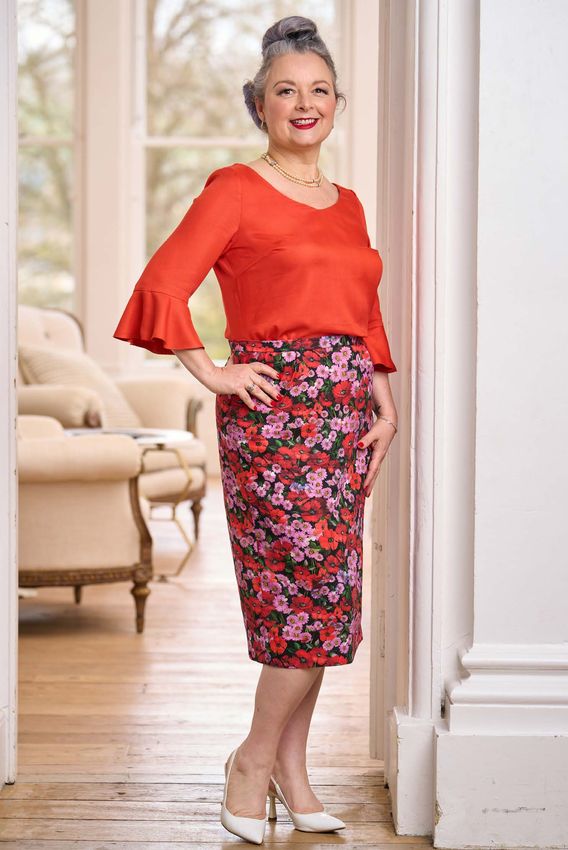
Wrap over bodice

     In seam pockets
44                     45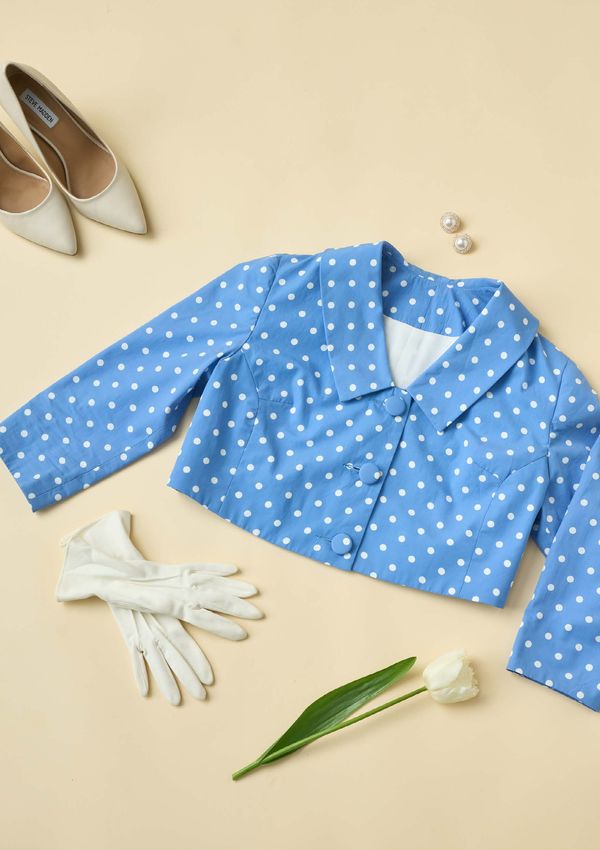
Version 3 with
     the Rita Trousers
                          83    83 Position another 25cm section
                               of ribbon just below the pressed fold
                               of the waistband, aligning it with the
                               seam allowance you just opened up.
                               Pin in place, and stitch the seam in
                               place once more.

                                84 Press the waistband in place
                               around the waist, so it just covers
                               the seam of the waistband. Pin in
                               place all the way around.

                                85 Slip stitch the waistband in
                         84
                               place.

                         85

56                             57
Miriam Set -
         Jacket
       The Miriam Set is inspired by the incredibly stylish
       Mrs Maisel from the iconic period comedy-drama,
                  The Marvellous Mrs Maisel.

       This cute jacket and dress set can be worn together
       or separately, perfect for that special occasion. The
      dress is waisted and comes with the option of pairing
      it with a pleated or darted straight skirt or with a full
     gathered or panelled skirt, giving you so many options.
              You can also make the skirt on its own.

66                              67
ASSEMBLING THE BODICE
10              09  Clip into the curve of the seam
                allowances of the side front and
                centre front panel at 1cm intervals.

                 10 Carefully press these seam
                allowances open. You may want to
                use a pressing ham here to help
                around the curve.

11
                   With right sides together, align
                    11
                the shoulder seam edges of the
                front and back pieces. Pin in place.

                    Stitch in place. Press the seam
                    12
                allowances open.

11

               78                                      79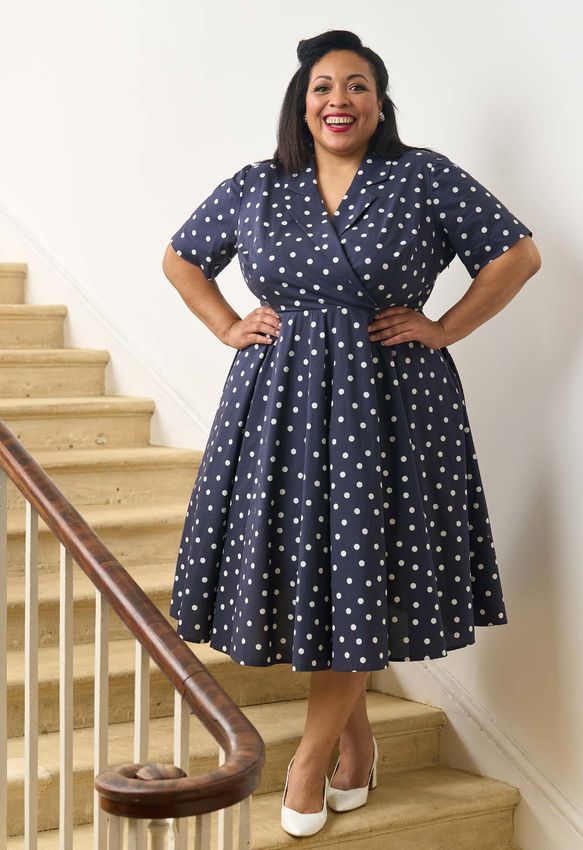
Statement collar

     Cropped length
84                    85
Miriam Set -
Dress
96 97Version 2
FA B R I C R E Q U I R E M E N T S
VERSION 1 VERSION 2 VERSION 3
FABRIC RECOMMENDATIONS
Medium weight fabric with some structure such as cotton, cotton poplin, wool suiting, brocade,
linen and denim. For the dress version, you will need a 16 inch invisible zip and 2x10mm strap
adjuster sliders/rings. For the skirt version, you’ll need a 9 inch invisible zip, 0.2m of lightweight
interfacing and a skirt hook and bar.
BODY MEASUREMENTS (IN INCHES):
6 8 10 12 14 16 18 20
Bust 31 33 35 37 39 41 43 45
Waist 24 26 28 30 32 34 36 38
Hip 34 36 38 40 42 44 46 48
FABRIC REQUIRED (IN METRES):
VERSION 1
115cm wide 1.9 1.9 1.9 2.9 2.9 2.9 2.9 2.9
140cm wide 1.5 1.5 1.6 1.6 2.0 2.0 2.0 2.0
VERSION 2
115cm wide 1.9 1.9 1.9 2.9 2.9 2.9 2.9 2.9
140cm wide 1.5 1.5 1.6 1.6 2.0 2.0 2.0 2.0
VERSION 3
115cm wide 1.8 1.8 1.8 1.9 1.9 1.9 1.9 1.9
140cm wide 0.9 0.9 0.9 1.9 1.9 1.9 1.9 1.9
FITTING TIPS FINISHED GARMENT (IN INCHES):
We recommend making a toile for the bodice. It’s Bust 31 33 35 37 39 41 43 45
designed to sit wide on the neckline and high on the Waist 241/2 261/2 281/2 301/2 321/2 341/2 361/2 381/2
underarm. You may wish to bring the straps further Hip 35 37 39 41 43 45 47 49
in - to do this, trace off the neckline and strap point of Back skirt length* 281/2 281/2 281/2 281/2 281/2 281/2 281/2 281/2
the bodice. Slide this over by the amount you want to
bring it in, and re-draw in the new neckline and true the *Centre back waist to centre back hem
armhole curve.
Note: the versions relate to the zip option. Version 1 has a side zip, versions 2 and 3 have a
98 centre back zip. 99Version 3 with FA B R I C I N S P I R AT I O N
version 3 of the
Vera Blouse
The Miriam Jacket and Dress work in a variety of fabrics, such as
cotton, brocade, wool suiting, cotton poplin and linen. Make the
jacket and dress in the same fabric for a Mrs. Maisel inspired set!
Pick something with structure for a beautifully crisp finish.
Lisa and Chantelle’s samples are made from cotton poplin and
viscose linen. We interlined these fabrics with a cotton voile for
structure. For the jacket, we cut the fronts, side front, back and
sleeves from the voile and machine tacked the two layers together
before we started sewing.
Our Middleton poplin is the Viscose linen works beautifully
perfect go-anywhere Jackie O for a breathable summer dress
powder blue or skirt.
The classic design of the Miriam If you’re ready to brave some
skirt looks really striking in a large pattern matching, we love a
vibrant print Miriam/Marilyn mash up in a
check!
140 141Vera Dress and
Blouse
This gorgeous dress can look like a Twiggy-inspired
1960s design or like a vintage style flapper dress
worthy of any Great Gatsby party. With countless
neckline and sleeve variations, you can adapt it
to create the perfect design for you. It also looks
beautiful as a top worn with one of the skirts.
142 143SLEEVES - VERSION 1 AND 3
27 Stitch two rows of gathering
27 32 32 With right sides together, align
stitches along the sleevehead, at the shorter curve of the frill piece
1cm and 1.4cm from the raw edge, with the hem of the sleeve. Match
between the notches. the seams and pin in place.
28
With right sides together, align 33 Stitch in place with a 1cm seam
the underarm edges of the sleeve, allowance. Overlock or zigzag the
matching the notches. Pin and stitch seam allowances together. Press the
in place. Overlock or zigzag the seam seam allowances towards the frill.
allowances together and press
towards the back. 34 Carefully overlock or zigzag the
raw hem edge of the sleeve frill. Try
28 29
Carefully overlock or zigzag the not to stretch it out at this stage -
33
short straight edges of the sleeve frill however you can always steam in
pieces. Make sure you’re using the back into shape if you need to.
correct frill piece for the sleeve you’re
making. 35 Press the hem edge up by 1cm
and pin in place.
30
With right sides together, align
the short straight edges of the frill 36Topstitch the hem in place using a
pieces. Pin and stitch in place. 7mm seam allowance.
31 Press the seam allowances open. 42
Skip to step for inserting the
sleeves.
29 34 35 36
30
31
168 169FA B R I C I N S P I R AT I O N
For the Vera Dress/Blouse we recommend lightweight woven
fabrics with plenty of drape. Think viscose, viscose blends, tencel,
crepe and crepe blends. These fabrics will hang beautifully and really
show off the fluid design of the dress. Avoid anything too heavy,
especially if you’re making a version with a frill - you want your
finished item to be floaty and light!
We made our samples in viscose, crepe and a viscose/crepe blend.
Viscose is ideal for all versions of Pick a fabric in a solid colour for
Vera. a classic blouse you’ll reach for
time after time.
Version 2
Vera is the perfect canvas for big Viscose twill is perfect for a long
prints! sleeve Vera you can wear through
autumn and winter.
172 173Rita Trousers
For those rockabilly lovers, these capri style pants
are a must-have. Close fitting with a super flattering
raised back, wear them with either the Vera Top or
Marilyn Blouse. These tight, three-quarter length
style trousers were worn by all the icons of the
1950s and 1960s and work on all sizes to give a sleek
silhouette.
174 175Ankle tabs
Shaped back waistband
194 195Version 2 with FA B R I C I N S P I R AT I O N
the Marilyn
Blouse
Make Rita in stretch cotton, denim, linen, wool suiting, wool
blends or cotton twill. Pick something with a close weave and some
structure for a sleek fit. Make sure not to pick something too bulky,
as you want to achieve a crisp finish on the back waistband shaping.
Chantelle’s trousers were made in stretch cotton, Lisa’s in a
polyester/viscose blend and Janene’s in denim.
Pick a classic black stretch cotton Make your Rita Trousers in denim
for wearability or polka dot for to get that vintage style capri
retro style jeans look
Make your Rita’s office ready Use a cotton twill for more casual
using a muted check Ritas
204 205Vivienne Coat
This coat was designed for the Mad Men lovers
out there. This Betty Draper inspired coat works
beautifully with all the other designs in this eBook,
creating the fit and flare look we love so much.
Choose to make your Vivienne with or without
pockets and with a tie belt or simple back belt.
206 20720 22
Push the pocket bag through to
20 23 Lay the coat out flat, wrong
the wrong side. If there’s any fabric sides up. Smooth everything out
bunching up in the corners, you may and check you’re happy with how it’s
need to snip a little bit closer to the looking. Keep a hand on the pocket
end of your stitch lines. You should section, and using the other hand,
have some little triangles either end - fold top half of the front towards
pull those through and flat. you. It should reveal the top edge of
the pocket bag and the welt seam
Press the pocket bag flat, rolling the allowances. Pin through this seam
seam towards the pocket bag. 23
allowance, through all the layers,
next to the seam. Make sure you’ve
Take your other pocket bag and
21 not caught the welt - keep it folded
align it right sides together with the down.
one attached to your coat front.
24 Stitch through all the layers,
21 If your main coat fabric is limp or thin, as close as you can to the original
you may want to cut the back pocket stitch line you pinned along. You
bag out of the main fabric to give it a may want to use a zip foot to get
bit more stability. close to it. Don’t stitch beyond it
24
onto the coat front.
Pin all the way around the pocket.
25 Turn the coat over to the right
22
Stitch around all edges of the side. Check the small triangles
pocket with a 1cm seam allowance. are folded flat and aren’t tucked
This can be tricky to do with the between the layers.
wrong side of the coat facing you, so
you may want to transfer the pins,
one by one, to the side of the pocket
bag against the coat. If you stitch 25
from this side, you can fold the coat
out of the way as you sew and the
pocket stays flatter.
224 225Covered buttons
Welt pockets
252 253M Y C A P S U L E WA R D R O B E
V I N TA G E D R E A M I N G
Copyright © Sew Over It 2022, Photography © Sew Over It 2022,
Photography © Jesse Wild 2022, Design © Sew Over It 2022
Sew Over It has asserted their right to be identified as the author of this Work in accordance
with the Copyright, Designs and Patents act 1988. First published by Sew Over It in 2022.
www.sewoverit.comYou can also read