5 Ways To Instantly Start
Shooting Cinematic Footage
     With An Iphone
←
→
Page content transcription
If your browser does not render page correctly, please read the page content below
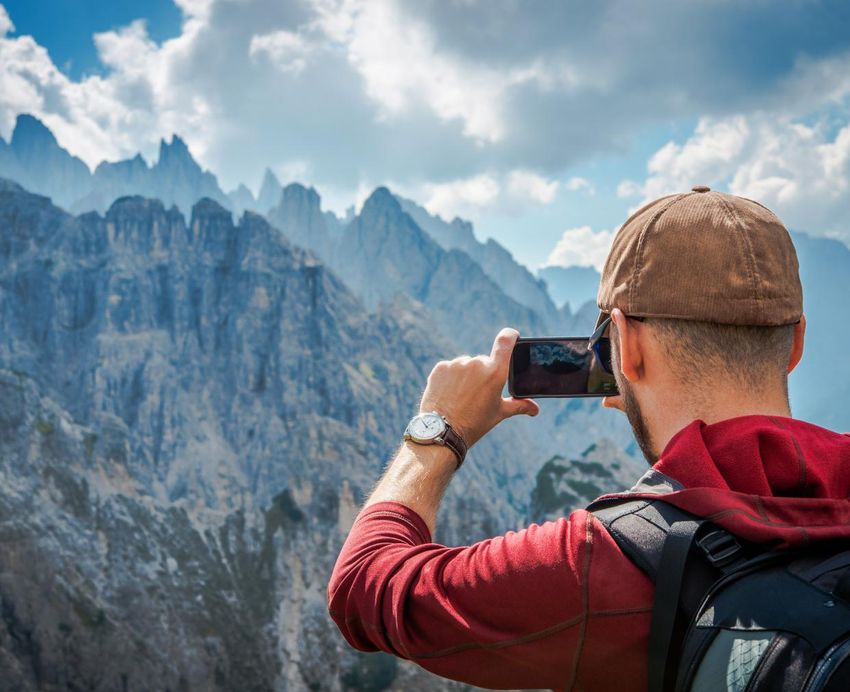
5 Ways To Instantly Start
Shooting Cinematic Footage
With An Iphone
We’ve put together 5 tips that will instantly make your iphone a cinematic-
footage-shooting-weapon. (PLUS a few bonus tips for you)
It’s no question, we are living in an advertising landscape that is dominated by content, and at the
forefront of that is video.

The only problem is, video has always been so expensive with most businesses forking out between
$3-10K for one video. Yes, it’s well produced. Yes, it’s well-lite and cinematic af. But, for many local
SME mum & dad businesses, it’s just broken the bank as well. You have to wait 6-12 months to
make a new one, not to mention sell bulk product/services to get a good healthy ROI. Add to that,
you’ve got hundreds of stories to tell which could all go for 2 minutes, and you’ve just done a video
trying to encapsulate everything which in turn has lost it’s true value on social media.

Video Domain has always prided itself on super cheap but high-quality video content. Not just the
video, but the video combined with a strategy produced specifically to reach targeted eye-balls,
and targeted again through paid ads. Well, we’ve decided we want to bring you real value, without
paying a single dollar. Take it to the next level, and show you how that thing in your pocket can
shoot footage that looks professional, and is super high quality. If you follow these steps, you will
save $1000’s with a professional videographer.

Tip Number One
Turn on the AE/AF lock control
                                       This is the lock that will stop your iPhone from auto-adjusting
                                       the lighting and focal point. Simply hold your finger down on
                                       what you want to be in focus for four seconds, and this AE/
                                       AF Lock will appear. Your lighting is now in your control. Use
                                       your thumb to swipe up and down - this will control your
                                       lighting, darker or brighter.

                                       Hold your finger down on what you want in focus until this
                                       yellow AE/AF lock appears. Your focal point and lighting is
                                       now manual. Use your thumb to control lighting by swiping
                                       up or down.

Bonus Tip
How to frame your talent.
Be sure to pick a well-lit room if filming a presenter
or interview, and make sure they’re not standing in
front of a window, or with a bright setting behind
them. You may have to look at a few locations before
finding something that’s perfect.

Tip Number Two
Shoot in landscape, not portrait/vertical
                                                                  Always shoot in landscape. Simply,
                                                                  turn your phone on the side and
                                                                  your iPhone will switch to filming
                                                                  in landscape. This automatically
                                                                  becomes the industry standard
                                                                  for shooting. Fear not, if you are
                                                                  looking for a portrait sized video,
                                                                  we can change that when we
                                                                  edit it. But for the raw footage,
                                                                  it definitely will look professional
                                                                  if shot landscape. Also, you’ll get
                                                                  a lot more detail into the frame,
                                                                  being wider.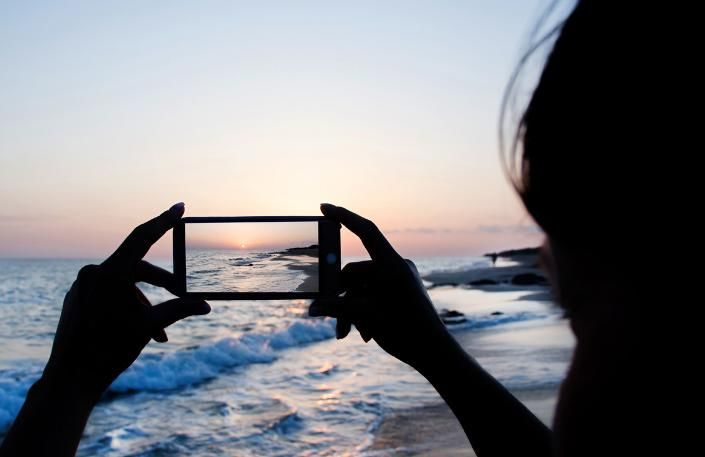
Tip Number Three
Make sure your shots a stable and not shaky!
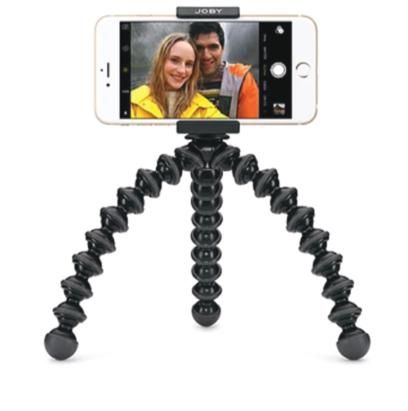
Buy a Tripod, or Gimbal (Around $30)
The most popular iPhone tripod is the Joby Tight Grip,
which is around $30AUD. It’s barely big enough to hold the
iPhone 7 Plus (or any plus sized models), but it definitely
does work.
If you are stuck shooting handheld, here are some tips to
help you stabilize your shot:
• Keep the phone close to your body.
• Rest your elbows on a nearby object.
• Use your body to absorb bounces and shakes.
Tip Number Four
Shoot your cinematic scenes in slow-motion
If your iPhone has slow mo, or use Time-lapse shots and please do not touch the digital zoom
button!!
First part - Slo mo! Slow motion
for your b-roll or overlay, is a
super cinematic touch that a lot
of professional video production
houses use to add an extra level
to their final product. In the edit,
you can speed up or slow down
the parts of your slo mo footage,
where suits. Remember not to
film any interviews in slow mo
as you will lose your audio, and
this cannot be undone. Anything
you want in real time, switch
back to video, anything you want
cinematic, switch over to slomo. Same landscape rules apply. The other benefit of slow motion
footage is it’s a cheeky way to stabilise your footage.
Second part -Time lapse shots. What an easy way to raise the quality of your video, by sitting
your iphone on a tripod and taking a time lapse of your office, the city, the river, the workshop, an
install, etc. Same way you select slo mo, is the same way you’ll find timelapse. Simply set it up, hit
record, and wait until the scene is finished before you touch the camera or end recording.
Third part - Never touch the digital zoom. Do not zoom in on a subject, move closer physically.
Digital zoom is an immediate way to downgrade the quality of your footage - instantly making it
look like a home movie. Just don’t zoom!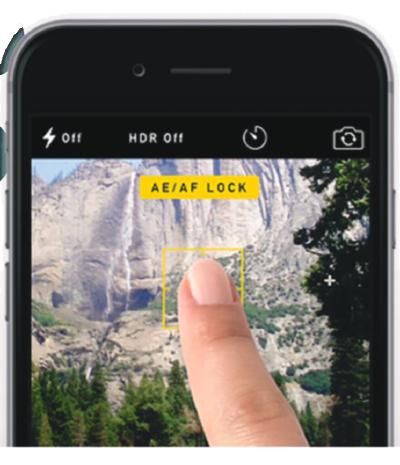
Tip Number Five
Capture your audio well
Audio is what separates home-made movies with professionally produced videos

                                                   Audio (in interviews, and presenting) is the
                                                   number one reason why people will either
                                                   watch, or switch off a video. Think about it, have
                                                   you ever sat through a video where the audio is
                                                   echoey, scratchy or muffled? Nope.
                                                   There are many ways to do audio professionally,
                                                   even with an iPhone, but below are the two most
                                                   affordable (or free) common ways to do it.

                                                   1. This is the only option that will cost you money
                                                   to buy, but once you’ve got it, you can use it
                                                   again & again. It’s the Rode Laval ‘SmartLav’
                                                   microphone, and they retail for about $79AUD.
                                                   If you’ve got an iPhone released in the last two
                                                   years, you’ll need the adapter as well which is
                                                   about $19. JB Hifi or VideoPro sells both, so
                                                   just ask the salesman to point you in the right
                                                   direction. This mic will run up through the talents
                                                   shirt, and will clip onto their collar or top button,
                                                   depending on what they’re wearing. It records
                                                   into a separate audio app that syncs up to your
                                                   video in the editing. You will need an iPhone to
                                                   shoot, and an iPhone to record the audio. It
                                                   seems tedious, however, your video will instantly
                                                   look as though it was shot by a professional
                                                   videographer you paid $1000 for.

2. FREE: Same principal with the 2 iPhone setup, however, you set up one iPhone with a voice
memo recording as close to the talent who is speaking as possible (without being in the shot). Now,
you could do this by mounting it on a Joby tripod and placing it closer to your talent, or if they’re
sitting down you could place it on their lap and face the microphone toward their mouth. Again -
sync it up in the edit afterwards.

BONUS TIP:
Edit from a computer - don’t use iPhone apps.
There are some handy editing apps available for the iPhone, but they still don’t come close
compared to editing on your computer. When you finish shooting, plug your phone in, offload your
footage, and import your videos into your editor of choice. That could Adobe Premiere Pro, iMovie,
Final Cut, Windows Movie Maker, Movavi etc.
The magic of this is the edit. So if you do want to pay Video Domain to edit your footage into a
super professional final product, simply email us a link to your Dropbox, Google Drive or WeTransfer
footage, and we can put something together from as low as $65/Hour. Note: Most 60 second
videos we can do within an hour.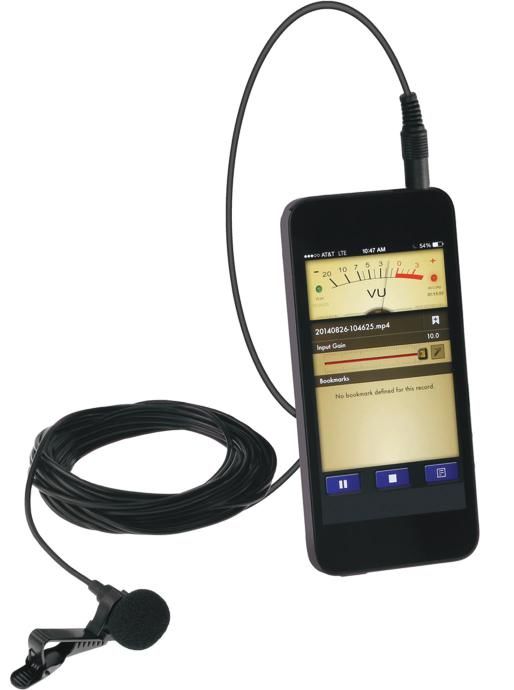
If you want to take it a step further, ask for help with putting
together your shot list by booking in a Domain Dive session. There
we will uncover your goals through a detailed video strategy
meeting. If you’re overseas, we can skype!

If you’re time-poor, do not hesitate to contact us for quotes on
the most affordable high-quality video production in Brisbane,
Australia.

We hope these tips help you! Please share if you think they can
help others as well.

                         Video Domain

                      138 Juliette Street
                          Greenslopes
                      Brisbane QLD 4120

                        1300 282 599
                  hello@videodomain.com.au
You can also read