DESIGN AND BUILD YOUR OWN WORKBENCH - Hardware Centre
←
→
Page content transcription
If your browser does not render page correctly, please read the page content below

DESIGN AND BUILD YOUR OWN WORKBENCH

POWERED BY
OTHER TOOL BRANDS DEMONSTRATED INCLUDES
WHO IS THIS WORKSHOP FOR?

• If you are interested in woodworking
• The complete novice
• The master craftsman
• You want to improve on your current workbench
• You want to build another workbench

WORKSHOP SCHEDULE - 2020
•   The workshop will run from 09:00
    to 13:00 on the following Saturdays:
      •   25th January 2020
      •   29th February 2020
      •   28th March 2020
      •   18th April 2020
      •   23rd May 2020
      •   27th June 2020
      •   1st August 2020
      •   29th August 2020
      •   31st October 2020
      •   5th December 2020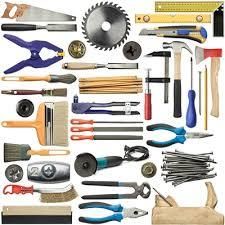
DATES WORTH REMEMBERING - 2020
• Hobby-X Jo’burg
   • 5th to 8th March 2020:

• Hardware Centre Randburg
  Woodworkers Expo:
   • 24th & 25th July 2020
   • 27th & 28th November 2020

• Hardware Centre Cape Town
  Woodworkers Expo:
   • 19th & 20th July 2020
   • 22nd & 23rd November 2020

LET’S TALK ABOUT SAFETY FIRST
• PPE – Personal Protective
  Equipment
    •   Eyes – Glasses, goggles, shields
    •   Ears – Ear defenders, ear plugs
    •   Nose/lungs – Dust masks,
        respirators
    •   Feet – Steel cap shoes/boots
    •   Hands – Gloves: Leather, cut
        proof, disposable
    •   Aprons – Leather, cloth
BASIC TOOLS 1

• Basic hand tools
    • Tape measure, steel ruler
    • Carpenter’s square, combination square
    • Hand saws – various TPI’s
    • Screw drivers – flat, Phillips, Robinson
    • Chisels, rasps
    • Hammer – claw, mallet
    • Clamps, clamps, clamps …..
    • Pencil and paper
BASIC TOOLS 2

• Basic electric tools
    • Drill(impact driver) dowels, pocket holes
    • Jigsaw – handheld bandsaw
    • Circular saw – ripping, crosscutting
    • Random Orbit Sander – 125mm
    • Router – dados, rabbets, roundovers
• Nice to have
    • Table saw
    • Sliding Compound Mitre Saw
WHY A WORKBENCH?

• Why would you need a workbench in the first place?
   • Because you need:
       • a steady and level space to work on
       • a place to easily reach for and access your tools
       • a place to build your project on
       • a place to assemble your project
       • somewhere to cut, drill, chisel, plane, sand, join, glue, nail, screw, file, varnish, paint

   • A workbench will help make your shop time more enjoyable
WHY SHOULD YOU BUILD YOUR OWN WORKBENCH? • Customization. Everyone has their own ideas of what the best workbench should be • Workbench Height. It is important that your bench suits you and the way you work • Workbench Size. Not all people have the same amount of space in their workshop • Workbench Design. Level of woodworking skills will determine your workbench • Bench Quality. You can make sure the workbench maintains a high standard • Workbench Materials. You can use the best wood to suit your budget • Techniques. By making it yourself, you can make sure that the workbench is stable and flat
WHY SHOULD YOU BUILD YOUR OWN WORKBENCH?

• Workbench Cost. It is often cheaper to build your own workbench than a manufactured workbench
• Practice. The point of woodworking is to increase your skill by making wooden projects. What better
  way to do this than to work on a project that you will use, and what project will you end up using more
  than a workbench? Not only will you pay close attention to your techniques and craftsmanship, but you
  are likely to learn a great deal about woodworking along the way
• Conclusion. Whether you want the workbench to be a simple one or you want to make sure that it is
  of high-quality, there are plenty of reasons to build your own workbench instead of buying a
  manufactured one.
 Remember: Build the bench for the woodworker you hope to become not the woodworker
                                 that you currently are.
WHERE TO BEGIN? 1
• Start by researching your design
• A good starting point is Christopher Schwarz’s
book: The Workbench Design Book: The Art &
Philosophy of Building Better Benches
• Google is your friend – or any other search
engine – but time spent researching your
workbench is really worth it in the long term
• Purchase a set of plans of a workbench that you
like.You can always modify the design to suit what
you wantWHERE TO BEGIN? 2
• Research the internet
• www.toolemera.com
• www.instructables.com
• www.workbenchdesign.com
• www.popularwoodworking.com
• www.youtube.comWHERE TO BEGIN? EXTRA
• Another recommended book
• Christopher Schwarz’s first book:
Workbenches, Revised Edition: From Design &
Theory to Construction & UseWHERE TO BEGIN? EXTRA
• Another recommended book
• Scott Landis’s book: The Workbench Book: A
Craftsman's Guide to Workbenches for Every Type
of WoodworkingPROTOTYPE
• Build a prototype of your workbench
• Use cardboard or wood
• Gives you a visualization of what your
workbench will look like
• It will help you to keep your focus
• Allows you to easily make changes to
your design
• Will it get through the door?
• Do not skip this step!MATERIALS AND HARDWARE 1
• What wood should I use for my workbench?
• Use whatever wood you like or can afford
• Workbenches are traditionally built from beech but can also be built from white oak, maple,
walnut, ash and many other woods but these are really expensive
• Pine makes for a good compromise and is both well priced and hardy
• You can mix woods for different parts of the table, i.e. pine legs, oak aprons, MDF or plywood
topMATERIALS AND HARDWARE 2
• What hardware should I use for my workbench?
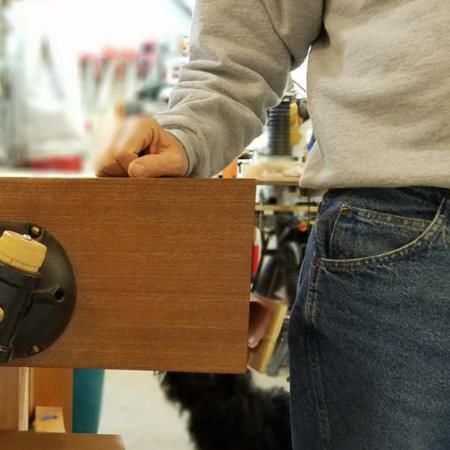
• The workbench should have at least one vice, the front vice mounted front, left
• A second vice is mounted as a side vice
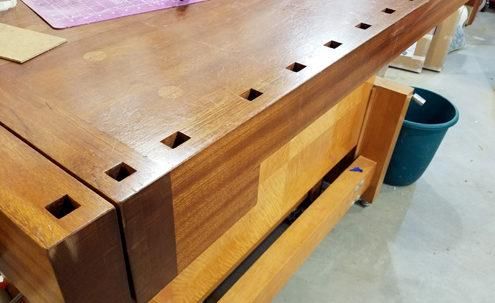
• A tool well can be designed permanently into the top or as a removable tool well
• The holes in the top will be 20mm diameter holes for the use of bench dogs and clampsDIY WORKBENCH MISTAKES 1
A few common mistakes you should avoid while
designing and building your workbench
• Height. Workbench height is critical. For
most operations, the height should be close to
waist height
• Wood Types. Don’t spend too much time
worrying about what type of wood to use,
when just about any type of wood will be fine.
You want wood that is affordable, heavy, and
easy to obtain. And dry!DIY WORKBENCH MISTAKES 2
• The Wrong Vice. You will get used to
whatever vice you have, but it is good to have
a high quality vice. Also aim to install an end
vice.
• Dog/Holdfast Holes. Think about your
specific end vice before deciding how far to
space your dog holes. Holdfast holes are
different. Put a few of them where you expect
to do most of your work, and drill a few more
later if you need them.DIY WORKBENCH MISTAKES 3
• Waiting For Just The “Right Time”. Stop procrastinating. Yes, your projects will go better
with proper planning, preparation and a set of plans. But just get on with it. Just do it!
• Needing to Think I Can’t Build it Without “XYZ” Tool. Similar to the previous point.
The tools available to us are absolutely amazing. As nice as these tools are, you don’t NEED
them to do great work. People have built great and sturdy workbenches for centuries. Before
Festool, before CNC’s, even before electricity. Yes, go get the best tools you can afford, but
you can do a lot with just an ordinary circular saw or even a jigsaw.
• Doing it All Alone. A nice bench can be a big project. Some of us have a tendency to do
everything by ourselves, and it is difficult for us to accept help. But sometimes asking for a
little help is the smart thing to do.DIY WORKBENCH MISTAKES 4
• Stressing about a “Nice” Bench. No matter how beautiful and nice your workbench is, it
is still a work bench. It is a place to make beautiful things, not “necessarily” your most beautiful
piece of work. Just relax and use it!
The bottom line is that a sturdy, reliable, and hopefully ergonomic workbench is the
start of your woodworking journey. Have fun and I hope your bench comes out
great!QUESTIONS AND GENERAL DISCUSSION
WHERE TO NEXT?

   Our second workshop will look at
  whether to sketch or to SketchUp our
           workbench design.
            We need a plan.
CONCLUSION
Thank you attending this first
workshop.
We look forward to seeing you all
again at the next workshop on
Saturday, 29 February, 2020.
thYou can also read