Get ready for photogrammetry - USC Bytes
←
→
Page content transcription
If your browser does not render page correctly, please read the page content below
UNITY FOR GAMES                                                                   E-BOOK

                                                           Image by Pete Mc Nally – Made with Unity

Get ready for
photogrammetry
A beginner’s guide to scan clean-up with Unity ArtEngine
Learn how you can use scanning workflows such as
photogrammetry to create stunning 3D assets that breathe
life into your game, movie or other creative projects.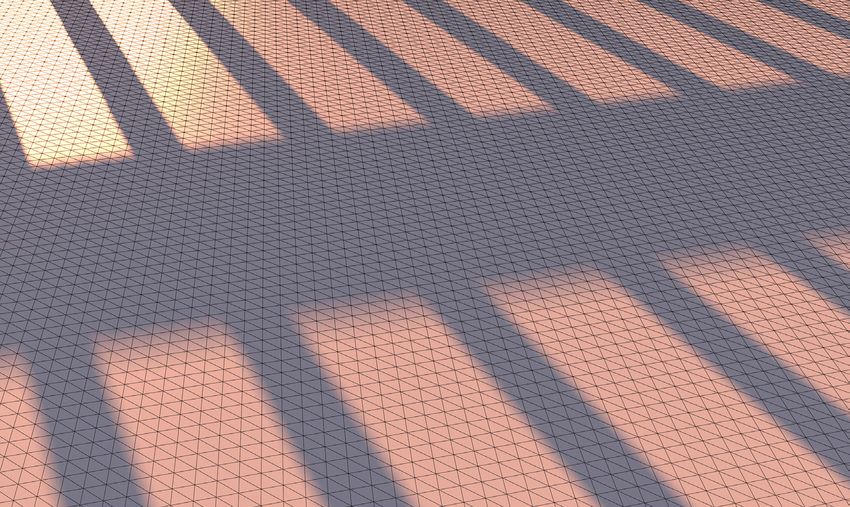
Contents

What’s inside . . . . . . . . . . . . . . . . . . . . . . . . . . . . . . . . . . . . . . . . . .  2

Surface photogrammetry. . . . . . . . . . . . . . . . . . . . . . . . . . . . . . . .  3

How photogrammetry powers creativity. . . . . . . . . . . . . . . . . . . .  5

Digitization tips . . . . . . . . . . . . . . . . . . . . . . . . . . . . . . . . . . . . . . . .  8

Let’s get (a little) technical. . . . . . . . . . . . . . . . . . . . . . . . . . . . . . . 12

Terms you should know. . . . . . . . . . . . . . . . . . . . . . . . . . . . . . . . . 18
What’s inside
                                 The word “photogrammetry” is intimidating at first
                                 glance. You can be forgiven for thinking it defines
                                 something complicated and uncomfortable,
                                 but the truth is that it can be an artist’s friend.

                                 Photogrammetry is the process of turning real-world objects
                                 and environments into digital assets from photographs.
                                 It’s been around since the mid-nineteenth century,
                                 nearly as long as photography itself, and was first used for
                                 mapping and topography. Since then, unsurprisingly,
                                 it’s evolved from a purely analog process to a digital operation.
                                 Its measurements, algorithms, calculations, and clean-up –
                                 all the complicated stuff – are now handled by applications
                                 like ArtEngine.

Grass leaves, by Pete Mc Nally

© 2021 Unity Technologies                                                                            2 of 20 | unity.com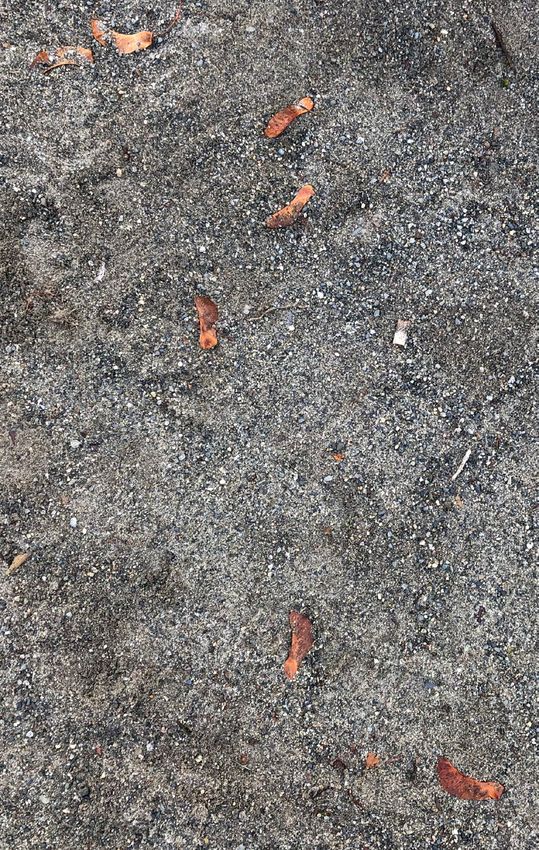
Chapter one

                                Surface
                                photogrammetry
                                Want to repurpose your cat’s fur into a digital shag carpet?
                                Well, now you can.

                                Getting started in photogrammetry, there are a few approaches
                                to creating high-quality digital assets using photos of real-world
                                objects. Surface photogrammetry refers specifically to the digitization
                                of a flat plane, such as a patch of forest floor or stretch of pebbly
                                beach, into a tileable material.

                                                                                                          Alexandre Rodrigue
                                                                                                          created environmental
                                                                                                          assets for
                                                                                                          Far Cry: New Dawn
                                                                                                          by leveraging
                                                                                                          photogrammetry.

Grass leaves, by Pete McNally

© 2021 Unity Technologies                                                                                       3 of 20 | unity.com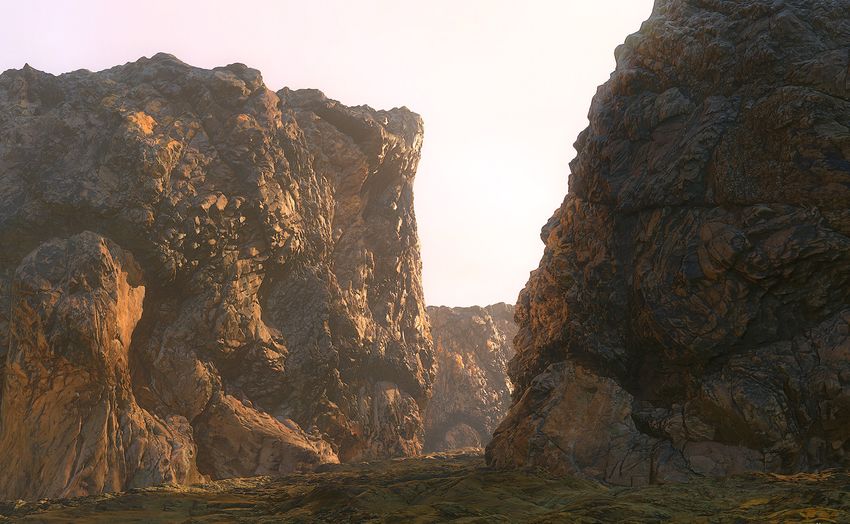
Unity ArtEngine is a tool that helps you create ultra-realistic materials
for your game, movie or any other digital art project. ArtEngine augments
surface photogrammetry workflows by leveraging AI to help you quickly
delight, remove seams, eliminate unwanted artifacts, and generate your
full PBR material for use in Unity or your 3D program of choice. And anyone
who has created 3D assets knows that less time spent fretting over
a material that won’t tile using traditional methods means more time
focusing on the creative and artistic threads of your workflow.
Photogrammetry can be complex, and this e-book only covers the tip
of the iceberg. But by its end, you’ll see how even amateur snaps taken on
your phone can yield slick, professional-looking results. If you’d like to dive
deeper, we invite you to head over to the Unity Photogrammetry Hub,
where you can read up on more advanced topics, such as those in this
detailed field guide, and learn how companies like NVIDIA are using
ArtEngine to digitize materials at scale.
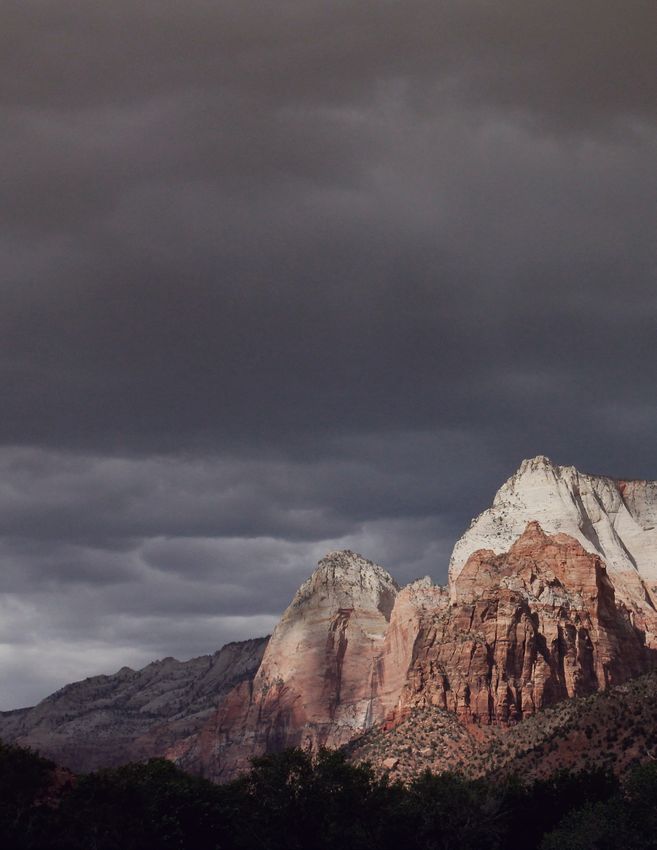
Pete Mc Nally made a tiling canyon rock material (left image) by scanning a boulder (right image).
© 2021 Unity Technologies 4 of 20 | unity.com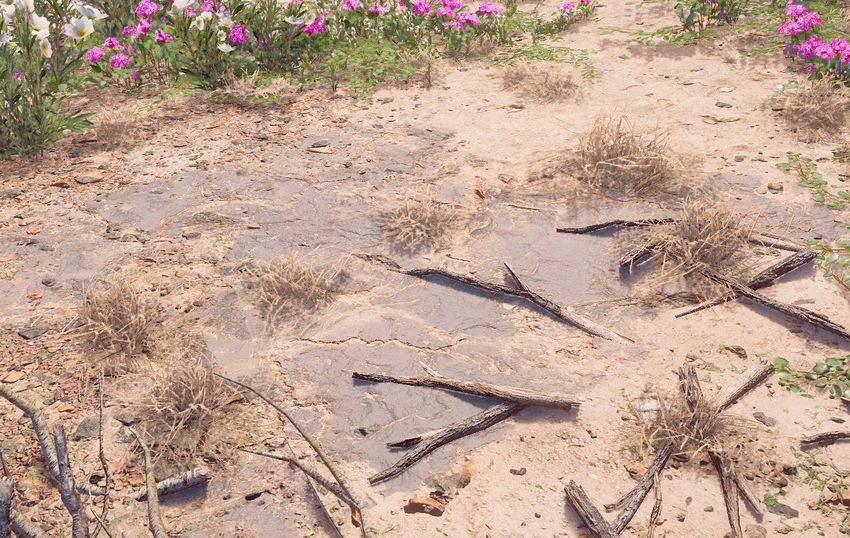
Chapter two

                            How photogrammetry
                            powers creativity
                            ArtEngine is designed for artists of all skill levels, from professional movie
                            editors to hobbyist game devs.

                            Dave Riganelli, a technical art director at Ubisoft Toronto, tends a digital garden
                            of the kinds of artistry achievable with photogrammetry and photometric
                            stereo scanning.

                            Riganelli is savvy about the versatility of photogrammetry. He explains how
                            the technique has quickly gained popularity in video games:

                                As recent as five years ago, photogrammetry wasn’t mainstream. It was
                                mostly reserved for characters, and it was done by specialized outsourcers.
                                The first game that used it on a large scale was Star Wars: Battlefront,
                                where they scanned all their terrain and organic assets. Battlefront was
                                proof you could use scanning in a production pipeline, and it became the
                                standard everyone looked up to. After that, more studios began adopting
                                photogrammetry, and now it’s pretty common.

                            But Riganelli also notes that photogrammetry isn’t reserved for AAA game
                            projects and blockbuster movies. “Scanning has never been easier to get into,
                            and you can start today with equipment you have at home right now,” he says.

© 2021 Unity Technologies                                                                                         5 of 20 | unity.com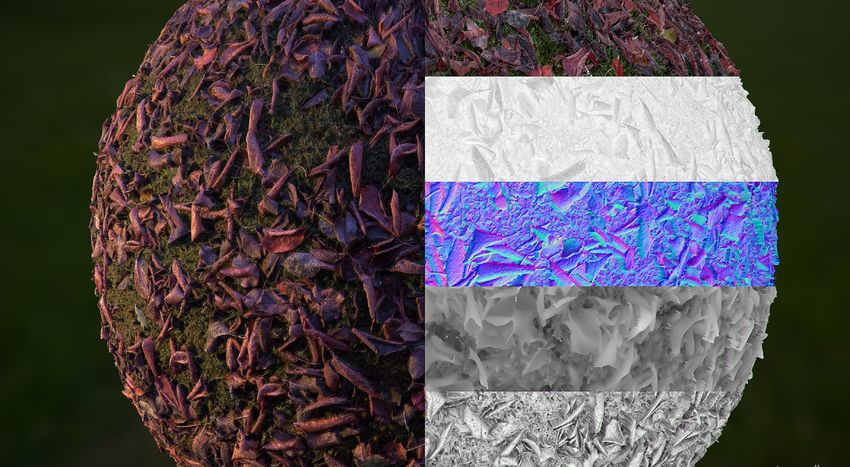
Pete Mc Nally, a 3D artist at Emmy Award-winning Havok
                                                                              (acquired by Microsoft several years ago), is another creator
                                                                              whose photogrammetry work inspires big ideas. From craggy
                                                                              stone textures to dry bark tiles that look realistic enough
                                                                              to give you a splinter, his gallery is a testament to the visual
                                                                              sorcery of photogrammetry.

                                                                              Mc Nally became interested in game development while
                                                                              making graphics for a game. At the time, creating game
                                                                              graphics, especially in 3D, wasn’t easy, and it wasn’t terribly
                                                                              accessible, either.

                                                                              “Back when I started, you were buying perpetual licenses for
                                                                              everything. There was quite a heavy cost to get started.
                                                                              You were looking at a couple of grand for 3ds Max or Maya,”
                                                                              he recalls. “You couldn’t really make a game without having
                                                                              a publisher on board to front some of the costs.”
     A digital twin of a hockey glove,
     created by Dave Riganelli using 110
     images taken around a turntable.

Inspired by the autumn colors, Pete Mc Nally used 48 photographs to create this leafy material.

© 2021 Unity Technologies                                                                                                                   6 of 20 | unity.com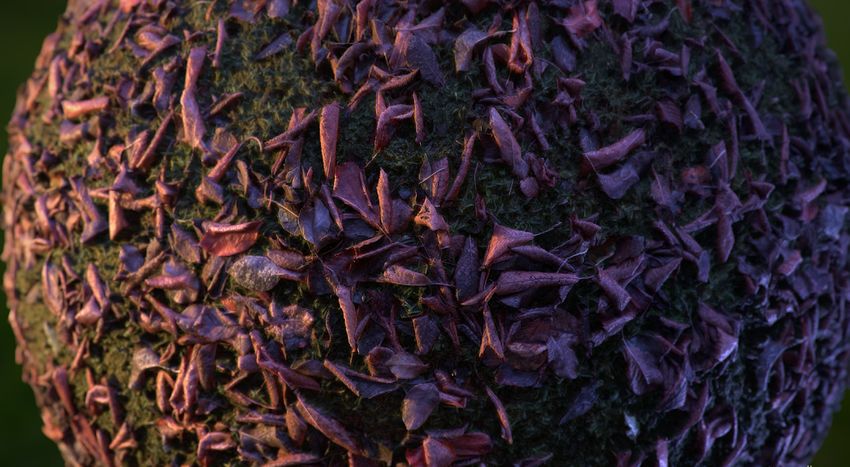
Mc Nally is also happy to see AI-based material authoring software like
                            ArtEngine gaining popularity. Developing graphics for games wasn’t just
                            expensive when he started out – it was also intensely time consuming.
                            AI-based artistry does away with much of that slow, tedious process.

                       “I’m for anything that frees me up
                         with more time to be creative,
                         I get twice as much work done
                         in one day by utilizing AI.”
                       — Pete Mc Nally, 3D artist, Havok

                            The ArtStation gallery belonging to Montreal-based Ubisoft artist Alexandre
                            Rodrigue showcases earthen textures like dirt, roots and pebbles. He used
                            some of these “dirty” textures when designing environments for the 2019
                            first-person shooter game Far Cry: New Dawn. Rodrigue’s gallery is a great
                            example of photogrammetry’s versatility – and, by extension, ArtEngine’s
                            ability to make this creative approach more accessible.

                            Rodrigue recalls how ArtEngine helped him process textures for Ubisoft’s
                            upcoming Far Cry 6, saying “it saved my life during that production.” He has
                            particular praise for ArtEngine’s seam removal node, which he says spared
                            him a great deal of work and tedium compared to making realistic landscape
                            textures without the aid of AI. “A job that usually takes a couple of months
                            was done in three weeks,” he explains.

                                                                                                           Part of the
                                                                                                           Far Cry: New Dawn
                                                                                                           biome team,
                                                                                                           Alexandre Rodrigue
                                                                                                           created environments
                                                                                                           using a hybrid approach
                                                                                                           that mixed scan
                                                                                                           data with procedural
                                                                                                           workflows.

© 2021 Unity Technologies                                                                                        7 of 20 | unity.com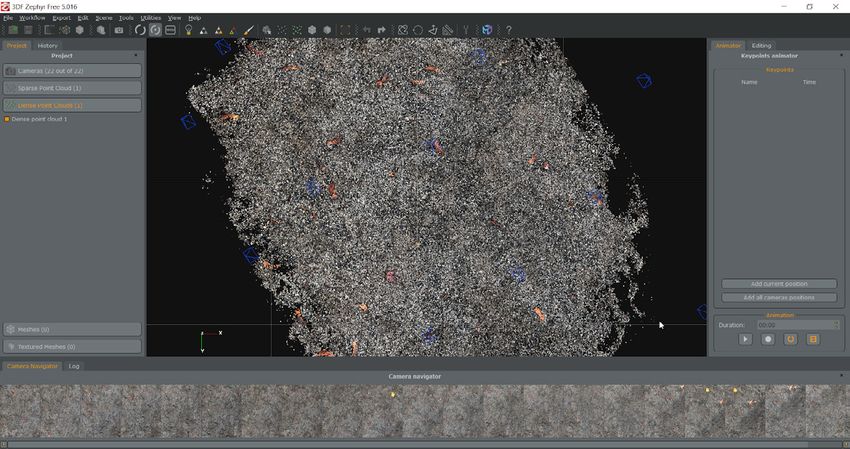
Chapter three

                               Digitization tips
                               The first step? Capturing your chosen surface in enough detail that
                               you can start on the digitization process. You don’t need a lot
                               of fancy samples and high-tech gadgets, but these rules of thumb
                               will help you achieve great results.

                               The steps below detail one possible, tried-and-true photogrammetry
                               workflow, but you can also use photometry or single images
                               to capture your subject before bringing it into ArtEngine.

A tessellated plane, necessary for displacement from a height map, by Pete Mc Nally.

© 2021 Unity Technologies                                                                            8 of 20 | unity.com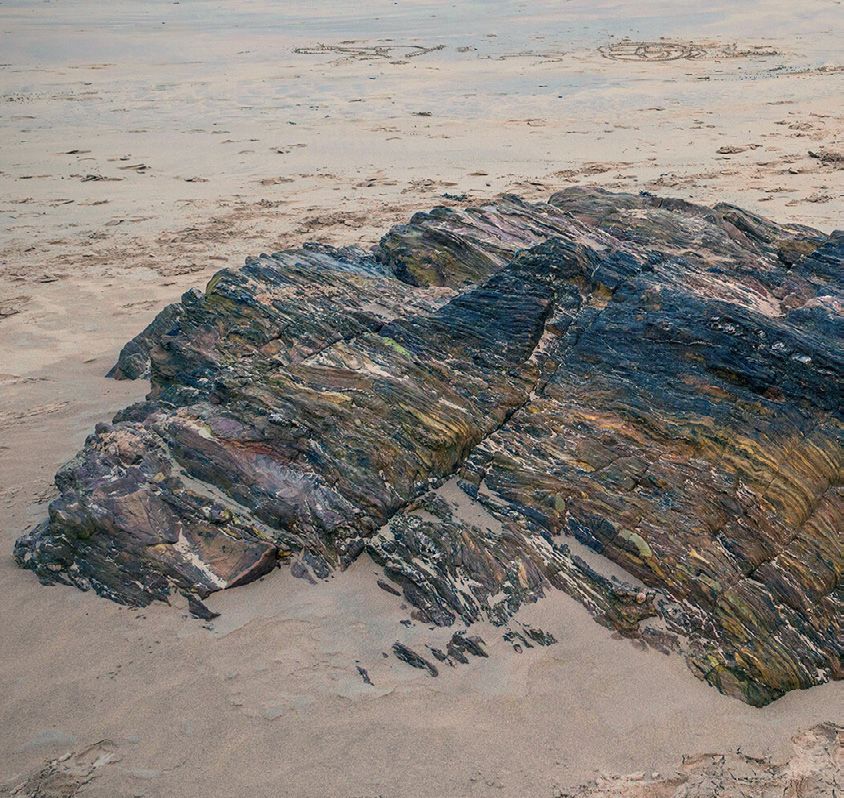
Game of phones
It might surprise you to learn that your
smartphone’s camera is sophisticated
enough to capture the materials you want
to bring to life. A better camera will yield
higher-quality results, but if you’re not
working on a blockbuster film, you can
take more-than-satisfactory pictures with
what’s already in your pocket. In the same
vein, while a professional studio might
need as many as 300 photos of a texture,
a smaller project can work with as few as
20 or 30 snaps.
Gloomy days rule
Creating 3D assets with photogrammetry
eliminates the need for a studio and special
lighting. It’s best to film on an overcast day so
harsh shadows don’t interfere with importing
and editing textures. Note that it’s also a good
idea to avoid photographing reflective textures,
including wet surfaces. Indoor photography
is also fine, as long as your photos aren’t taken
in direct lighting, which can create shadows
and reflections that make it hard to stitch the
final vision together.
Shoot to kill it
                                Scout the area with the texture you want to capture, and get to it.
                                Take photos that are perpendicular to the surface, and try to have
                                a 70% to 80% overlap with each snapshot. Grab as many pictures
                                as you need – again, more photos yield better output – but you
                                don’t have to go bananas if you’re not working on a top-tier
                                blockbuster project.

                                Any decent camera will give you perfectly usable images right off
                                the bat, so feel free to use your phone if that’s what you’re most
                                comfortable with. If you’re using a DSLR (digital single-lens reflex
                                camera) and want your digital asset to match the real-world object
                                and its colors as closely as possible, shoot in RAW mode and
                                consider using a ColorChecker Passport or white balance card.

                                                                                                       Image by Victor Kam

Grass leaves, by Pete McNally

© 2021 Unity Technologies                                                                                   11 of 20 | unity.com
Chapter four
Let’s get (a little)
technical
Once you’ve captured your textures, the digital twinning process begins.
With ArtEngine and a few other tools, you’ll be creating realistic
3D assets in no time (and maybe even have a little fun along the way).
1. Preparing your work: Reconstruction and baking
As an optional first step, you can color correct your photos using
software like Lightroom or PhotoLab.
Next, you’ll need to reconstruct the pictures you’ve taken using
photogrammetry software. In other words, you need to restore the
depth information that’s lost when you take a 2D picture of a 3D object.
Two good, free reconstruction options are the open source Meshroom
and 3DF Zephyr Free applications.
© 2021 Unity Technologies 12 of 20 | unity.comNext, you will need to create a baking plane. This involves outputting
your reconstructed mesh into a 3D graphics workspace and building
a simple surface onto which you can project details. Again, there are
many software toolsets for this purpose: Blender is a good choice that’s
free, while professional for-pay options include Maya and 3ds Max.
When your 3D reconstruction and baking plane are assembled,
you’re ready to bake. Load your reconstruction and plane into a baking
software (xNormal is one free option), and bake the required maps.
Pay special attention to your Albedo and Height maps. Albedo (i.e., color)
is difficult to recreate from scratch. Other maps, including Normal
and Ambient Occlusion, can be derived from your Height map
and recomputed in ArtEngine.
Creating a baking plane (top image), baking setup (left image), baking result (right image)
© 2021 Unity Technologies 13 of 20 | unity.com2. Delighting, removing seams and exporting to Unity
After importing your material into ArtEngine, the first step is delighting.
ArtEngine’s delighting nodes help you to modify lighting behaviors
in your material. Use one or more of the following nodes, depending on
your image’s characteristics:
• Albedo Generation: Levels out harsh highlights and dark spots
• Gradient Removal: Modifies gradients caused by lighting
• Hard Shadow Removal: Strikes out any direct shadows on your material
After delighting, use the Roughness Generation node to build a basic
Roughness map for use in the following steps.
Use the Compose Material node
to start working with a full texture
set. Since ArtEngine is node-based
software, you can go back and forth
between edits in a nondestructive,
nonlinear fashion. By contrast,
layer-based software only allows
for linear edits.
© 2021 Unity Technologies 14 of 20 | unity.comWhen you initially baked your data set, you likely noticed it doesn’t tile.
Applying ArtEngine’s Seam Removal node will correct this problem
across all your maps.
Before After Before After
Our original baked data set was full of seams. We can use the Seam Removal node and correct this across all maps.
At this point you have a fully tileable material that is ready to use.
© 2021 Unity Technologies 15 of 20 | unity.comUse the Mask Paint node to do further cleanup, such as painting out
undesirable areas, then use the node as the Ignore input into a new
Mutation node. Adjust the World Scale parameters in the Mutation node
to scale up to the real-world size of your material.
Node detail (top image), result (bottom image)
© 2021 Unity Technologies 16 of 20 | unity.comTa-da! You now have a fully tileable material that’s ready
to export to Unity. Visit the Unity Asset Store to grab the
plug-ins you’ll need to start playing with your art in Unity,
including the free ArtEngine Importer.
© 2021 Unity Technologies 17 of 20 | unity.comGlossary
Terms you
should know
If you’re new to ArtEngine and photogrammetry, you’re bound to run
into some strange vocabulary. Here’s a small cheat sheet to help
you find the information you’ll need to achieve amazing results.
Baking – Reprojecting data from one source onto another. In this
context, it means putting a high-resolution piece of geometry onto
a low-resolution target.
Color correction – Adjusting the colors of a photo to make them
reflect the source as accurately as possible.
Delighting – Removing shadow information (gradients, hard shadows,
etc.) from an image.
Node-based software – Lets you go back and forth between edits
in a nondestructive, nonlinear fashion.
Photogrammetry – Reconstructing a 3D real-world sample using
photographic data.
Physically based rendering (PBR) – Using realistic shading/lighting
models along with measured surface values to accurately represent
real-world materials. PBR is now the standard used by material
libraries, content authoring, scanning applications and more to
refer to realistic-looking digital materials.
© 2021 Unity Technologies 18 of 20 | unity.comEach PBR map, defined:
Albedo – Refers to the color of a texture.
Normal – Represents an approximation of surface depth. Used for
faking the lighting of bumps and dents, i.e., adds details without using
more polygons.
Roughness/gloss – Represents the microsurface detail of a surface.
The smoother a surface is, the more reflective (e.g., a mirror),
while rougher surfaces are less reflective (e.g., pavement).
Note: Unity uses a Smoothness map, which is equivalent to a Gloss map.
Ambient occlusion – Represents how objects and surfaces react
to ambient light.
Height – While both the Normal and the Height maps create an
illusion of depth, the height map actually creates depth and usually
displaces geometry (i.e., it moves polygons in 3D space), whereas
the Normal map only affects the lighting of the geometry.
White balancing – Adjusting the colors of a photo to make them reflect
the source as accurately as possible by making the colors that appear
white in-person display as white in the photo.
© 2021 Unity Technologies 19 of 20 | unity.comunity.com
You can also read