INTRODUCTION TO SOLIDS - Presented by: Dominique Schellenberg, RD BASc Registered Dietitian - Two Rivers Family Health Team
←
→
Page content transcription
If your browser does not render page correctly, please read the page content below
INTRODUCTION TO SOLIDS

 Presented by:
   Dominique Schellenberg, RD BASc
   Registered Dietitian

OUTLINE
!   Recommendations from WHO and Health
    Canada about breastfeeding and introduction of
    complementary foods

!   Learn about what and how to feed your baby/
    introduce solid foods

!   Food Safety

!   Questions/discussion

!   Group survey and wrap-up
WHO and Health Canada recommendations:

!   Infants are exclusively breastfed for 6 months; this means
     no other food or liquid including water

!   From 6 months or when baby is developmentally ready they
    should start eating safe and adequate complementary foods

!   Continue to breastfeed for up to two years of age or beyond
SIGNS YOUR BABY MAY BE READY FOR SOLIDS…

Generally babies can do these things by 6 months of age:
!   Hold her/his head up
!   Sit up in high chair and lean forward
!   Let you know when they are full
!   Pick up food and try to put it in their mouth

     Babies go through growth spurts around 3 weeks,
                 6 weeks and 3 months.
     This is NOT a sign that infant cereals are needed.
REASONS TO WAIT UNTIL 6 MONTHS

Physiological
  !   Infants digestive system and kidneys are immature
  !   More likely to develop food sensitivities and allergies
  !   Strong extrusion and gag reflexes
  !   Not able to sit up or hold up head

Nutrition
  !   Reduces intake of breast milk
  !   Nutritionally unnecessary before 6 months of age

WHY DOES YOUR BABY NEED SOLID
FOODS AROUND 6 MONTHS?

! Needs extra iron
! To introduce new flavours and textures
INTRODUCING SOLID FOODS

o   Introduce one new food at a time. New vegetables,
     fruit, meat and most grains can be introduced daily.
     Leave more time between new allergenic foods (will
     discuss more later.)
o   Work up to offering solids 3-4 times daily before 9mos
    and 4-5 times daily after that
o   Have baby sit upright (i.e. in highchair). Sit in front of
    and facing your baby.
INTRODUCING SOLID FOODS
o   Offer when baby is alert. Wait for baby to pay
    attention & open mouth.

o   Look at him/her. Talk to him/her in a kind,
    encouraging and quiet manner.

o   Offer solids from a spoon about a foot away so it
    can be seen.
o   Offer small amounts at first. Follow baby's lead.
o   Don't force new foods. Let baby decide how much
    /what to eat. Stop when baby loses interest.
INTRODUCING SOLID FOODS
o Feed the way baby wants to eat: a little or a lot, fast or
slow.
o Let baby self-feed from the beginning. A mess is OK!
More on baby-led weaning/feeding soon.
o Babies need to explore food to get more comfortable
with it. This may mean playing with it, touching
it, putting it in their mouth and spitting it
out...it’s all part of developing a normal and healthy
relationship with food!
o May see a change in bowel movements (colour, odour,
consistency and frequency). This is normal.BABY-LED WEANING/FEEDING
! What is it?
! Babies learn to eat by feeding themselves
! When is it NOT safe?
! Babies who are at higher risk of having a hard time
swallowing safely – cleft palate, tongue tie,
developmental delay or genetic disorders
! Babies at risk of anemia should be seen by a health
professional (MD, dietitian) – premature babies,
babies with low birth weight (BABY-LED FEEDING – Cont’d
! What’s Important?
! Babies should be sitting upright at 90 degrees
! Foods should be soft enough to mash against the roof
of the mouth and about the size of an adult pinkie
finger
! Offer one high-iron food and one high-calorie food at
each “meal” along with one easy to eat food (maybe
to provide Vitamin C.)
! You need to allow more time for eating and watch
your child closelyBABY-LED FEEDING – Cont’d
! Last bit of important info:
! Know the difference between gagging and choking;
learn what to do in case of choking (baby first aid
highly recommended)
! Avoid giving foods that babies are more likely to
choke on – hard round foods; sticky foods
! Iron-fortified baby cereal can be spread thickly on a
soft food like a toast strip or vegetable; it can also be
put onto a spoon and left for the baby to pick up; you
can also add baby cereal with iron to recipes like
home-made muffinsWHAT TO START WITH?
At 6 months babies need foods that are rich in iron because their
body stores of iron are starting to run out. Offer iron-rich foods
at least twice daily.
Iron-rich foods include:
! Iron-fortified baby cereals -start with single grain (rice, oat)
! Meat such as well-cooked chicken, beef, pork and fish
! Meat alternatives such as beans, lentils, cooked eggs
Good sources of vitamin C are also important because vitamin C
can help with the absorption of iron. Vitamin C-rich foods
include:
! Many types of vegetables and fruits including apples, pears, berries,
kiwi, mango, sweet potato, broccoli, peppers, cabbage, tomato, etc.
! These can be introduced once your baby is used to having a variety
of iron-rich foodsORDER OF INTRODUCTION
6 months- Iron-rich foods (i.e. iron fortified infant cereal +
meat & alternatives)
6+ months- Vegetables and fruits, grain products, meat &
alternatives, dairy products & alternatives (yogurt,
cheese)
12 months- fluid milk (whole or homogenized cow’s milk)
(can be started between 10-12mos. IF baby getting high
-iron foods at least 2x daily)
! Avoid added sugar, salt etc. during the first year
! Choose whole foods that are part of the food groups
! Fruits and vegetables, grain products, milk and alternatives,
meat and alternatives
! Do not give foods like chips, fries, fast food, sweets,
processed meats (hot dogs, bologna, deli meat) and dessertEXAMPLES OF FINGER FOODS TO GIVE
YOUR BABY
! Soft, ripe, peeled fruit – i.e. pears, cantaloupe, peaches,
bananas
! Strawberries, grapes, etc. should be cut into bite sized pieces
! Cooked vegetable pieces – i.e. cooked carrots, broccoli,
sweet potato
! Dry toast strips, bread crusts or unsalted crackers
! Pieces of homemade plain muffins
! Plain o-shaped cereals (not honey-nut)
! Small cheese cubes or grated cheese
! Cooked, tender meat – cut up or ground
! Cooked pasta
! Small tender-cooked beans like black beans or navy beans
or larger tender-cooked beans (like kidney beans) cut in
halfINTRODUCING ALLERGENIC
FOODS
! There is no evidence that delaying the introduction of allergenic
foods past 6 months, will prevent food allergies in healthy term
infants; you can give allergenic foods after 6 months of age
! For allergenic foods, allow 2 days between offering additional new
foods until tolerance is assessed; if no reaction on introduction,
offer a few times a week to maintain tolerance
! Watch for signs and symptoms of an allergic reaction i.e. hives or
rash, vomiting, diarrhea, swelling of mouth or face, blood in stool,
itchy watery eyes (runny nose and sneezing)
! High risk babies have a history of allergy or a biological sibling or
parent with history of eczema, food allergy, allergic rhinitis or
asthma; these infants should have early introduction of allergenic
foods at 4-6mos. by mixing with breast milk. Do NOT offer before
4mos.INTRODUCING ALLERGENIC
FOODS
! Common allergenic foods:
! Milk - yogurt
! Wheat – infant cereal
! Tree nuts - smooth almond butter
! Sesame seeds – tahini (sesame seed paste)
! Soy – silken tofu (bean curd)
! Seafood – fish, shellfish
! Mustard - dry mustard
! High risk infants r/t egg and peanut allergy:
infants with severe eczema > pediatrician
/allergist for testing and guidance re: early
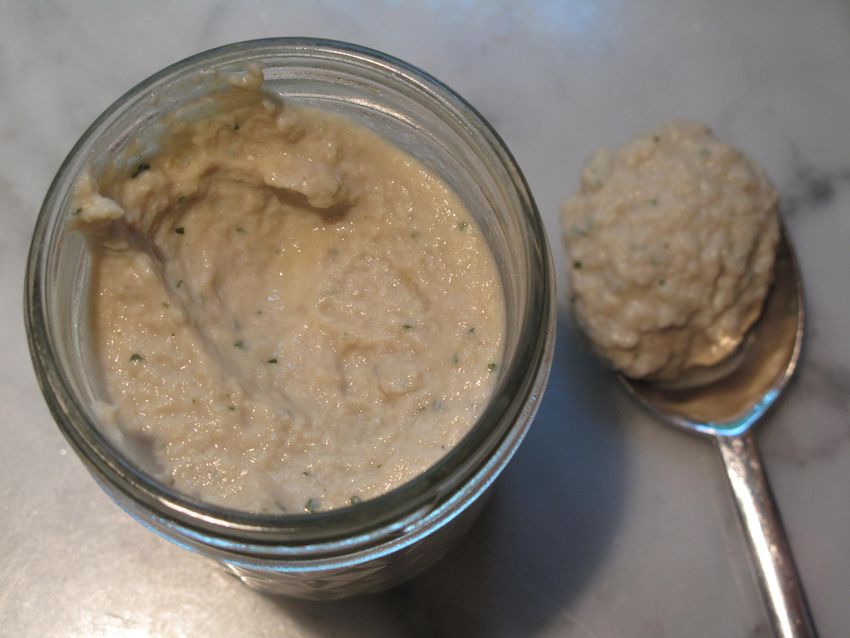
introduction (before 6 mos.)HOW MUCH?
! Hungry baby:
! Put hands in their mouths
! Open their mouth wide for a spoon
! Reaches for food
! Paying close attention to the food
! Upset when food is taken away
! Full baby:
! Slow down their eating; losing interest; more playing
than eating
! Keep mouth shut; lean back from food; turn their
heads when food is near their mouths; spit out food
or get upset
! Start with 1 tablespoon and work upBEVERAGES
! Only breast milk should be fed until around 6 months or when
your baby is ready to start taking solid foods
! If your baby is doing well with solids and taking foods
high in iron 2x daily, you can offer homogenized milk (3.25%)
starting between 10-12mos. from an open cup while
continuing to breastfeed
! Lower-fat milk (skim, 1%, 2%), almond milk and soy milk are not
recommended until at least 2 years of age because of their low
fat content
! After 6mos. offer small sips of water from an open cup to help
your baby develop mature feeding skills!
! Juice should be limited in the first year. After the first year, only
4 ounces (1/2 cup) per day.BREAST MILK STORAGE
! Store breast milk in containers that have been washed in
hot, soapy water and rinsed
! Store in small portions to minimize waste
! Do not fill container – leave room as breast milk expands
as it freezes
! Indicate the date that the milk was expressed
! Expect milk to separate during storage – before feeding
swirl the container of milk to mix the creamBREAST MILK STORAGE
! Milk may be stored in insulated cooler with ice packs for up
to 24 hours
! Milk may be safety refrigerated for up to 5 days (39°F or 4°C),
(store milk in back of fridge where temperature is coolest)
! Milk may be stored in the freezer of your fridge for 3-6
months (0°F or -18°C)
! Milk may be stored in a deep freezer that maintains ideal
temperature for 6-12 months (-4°F or -20°C)
*thaw milk by placing it in a refrigerator over night or in a container
under warm running water or in a bowl of warm water
*milk may be kept in the refrigerator 24 hours after it is thawedDIVISION OF RESPONSIBILITY Age 0-6 months Parent: What Infant: When, How Much Age 9-15 months and beyond Parent: What, When, Where Child: How Much, Whether
HOW YOU FEED YOUR CHILDREN IS AS
       IMPORTANT AS WHAT YOU FEED THEM

!   Children are very good at regulating their food intake.
    Trust them.

!   Parents can either play a positive role or negative role
    in their child’s food acceptance and food regulation.

!   Many children react negatively to new foods, but will
    usually accept them with time and positive
    experiences.
CHILDREN WILL LEARN TO LIKE A
VARIETY OF FOODS
! Research tells us that children may taste and remove
new foods from their mouth 10 or 15 times before
they swallow it.
! Most parents/caregivers give up after the child has
tried a food and refused it 3 times
! Keep offering a variety of foods from all 4 food groupsFOOD SAFETY
To prevent food-borne illness:
! Do not use honey in the first year (risk of botulism)
! Do not give raw/undercooked eggs
! Wash hands, utensils, cutting surfaces frequently
! Follow “best before” dates
! Wash raw vegetables and fruit well
! Can freeze baby food for 3-6 months; put dates on the food you
make and freeze
! If you’re interested in more info, you can follow the Canadian
Food Inspection Agency (CFIA) on social media
Health Canada, 2004FOOD SAFETY
Warming food and liquids:
! A hot water bath is the safest method.
! Test the temperature before serving.
! Be careful if you use the microwave. Microwaves can heat
unevenly and can create hot spots that can burn your baby.
Stir warmed food/shake liquids well.
! Sterilize water, bottles, nipples and caps until baby is 6 mo.
! No official safe age to stop sterilizing
! Throw out leftovers at the end of the feedingMEAT OR LEGUME PUREE
Ingredients Method
! Remove all fat and skin from 1. Place chopped meat or drained
meat before cooking legumes/lentils into a blender.
! 1 cup (250 ml) of cooked and 2. Add 2 tbsp (30 ml) of liquid and
chopped beef, wild game, start to puree. Slowly add
chicken, turkey, fish (no bones), another 1 to 2 tbsp. (15 to 30 ml)
legumes or lentils. liquid until you have a smooth
! 2 to 4 tbsp (30 to 60 ml) liquid. puree.
This can be breast milk, water,
3. Serve baby his/her portion and
or cooking liquid from
freeze the remaining puree. See
vegetables/fruit
Food Safety Tips, Chill.
4. As baby grows older, increase the
texture.
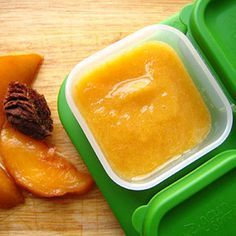
Recipe from: www.healthyalberta.comVEGETABLE AND FRUIT PUREE
Ingredients
! Fresh or frozen fruit or vegetables
Method
1. Wash, peel and cut up fresh or frozen vegetables or fruit.
2. Using the stove:
! Place the vegetable or fruit pieces into a steamer in a small amount of boiling
water and simmer until tender.
Using the microwave:
! Place vegetable or fruit in a microwave safe bowl with a small amount of tap
water and heat at a high setting until the vegetables are tender, about 3 to 5
minutes.
3. Drain the vegetables or fruit, saving the cooking liquid.
4. Puree the vegetable or fruit with a small amount of the cooking liquid.
5. Serve baby his/her portion and freeze the remaining puree.
Recipe from: www.healthyalberta.comFRUIT AND YOGURT SMOOTHIE
Ingredients
! 1/2 cup (125 ml) frozen fruit
! 1/2 cup (125 ml) plain yogurt**
! 1/2 cup (125 ml) whole fat milk (homogenized / 3.25% MF)
Method
1. Place all ingredients in a blender and puree until smooth.
2. Pour 1/4 cup (60 ml) to 1/2 cup (125 ml) into a cup for baby
Alternative suggestion
Frozen Fruit and Yogurt Pops
1. Place 1/4 cup (60 ml) of the fruit and yogurt puree into frozen treat molds
and freeze until firm.
2. Serve as a snack.
Recipe from: www.healthyalberta.comOTHER QUESTIONS?
" Handouts and information
provided
" regionofwaterloo.ca/ph
“Feeding your baby and
young child”
" “Trust me, trust my
tummy” – Toronto Public
Health video on-line
" Baby-led weaning on-line
info
" Book an individual
appointment with your
Registered DietitianTHANK YOU!
“Building positive eating attitudes
and behaviours starts at birth …
and lasts for a lifetime.”
Ellyn Satter, 2004You can also read