Ligna Plastered Riser door systems - Installation instructions - Selo
←
→
Page content transcription
If your browser does not render page correctly, please read the page content below
Ligna Plastered
         Riser door systems

Installation instructions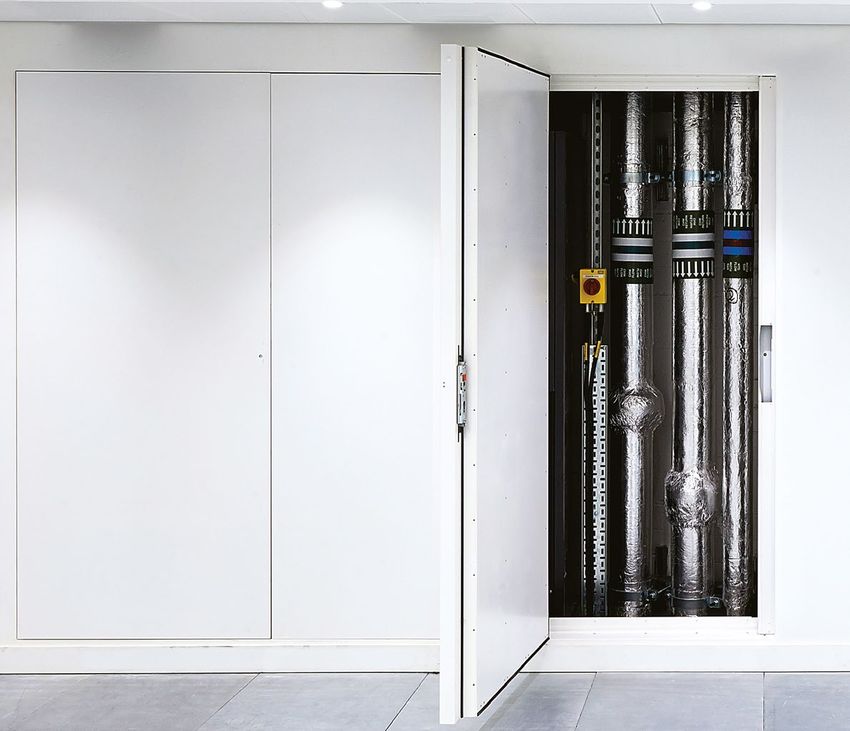
3

Thank you for choosing Ligna                                                                              Getting started
To ensure the installation process is simple and efficient we                                             Before installation, please ensure you have
recommended you read this guide in full before you begin.                                                 carried out the recommendations below.

Tools required                                                                                            Wall preparation

                                                                                                          The wall construction will need to be constructed
                                                                                                          to suit the fire rating specified. If using a steel stud
                                                                                                          partition then a timber insert on the four sides of
                                                                                                          the opening needs to be fitted to ensure sufficient
                                                                                                          purchase with the fixings.

    Laser lever            Spirit level       Cordless screwdriver
                                                                                                          IMPORTANT
                                                                                                          Some shaft wall partitions will not require the timber insert,
                                                                                                          please consult Selo for guidance and advice.

  Tape measure          Hex keys (metric)            Knife                                                Delivery

                                                                                                          The Ligna doorset will come fully protected with
                                                                                                          polystyrene corners and heat shrink wrapped
                                                                                                          in heavy duty polythene. Ensure the door
                                                                                                          specifications shown on the printed label
IMPORTANT - Fire rating notice                                                                            correspond with your project schedule.

                                                                                                          IMPORTANT
The fire rating of any doorset is subject to a number of factors, including:                              When fitting a single doorset the frame and
                                                                                                          doors will be supplied as one. On double
                  1. The design/workmanship of other work, in particular the partitions into which        and multi doorsets the frame and doors are
                     the doorset is fixed.)                                                               supplied separately.

                  2. The doorset being installed in accordance with the installation instructions.

                     The Ligna system can be fitted to either studwork or masonry walls, you will
                     need to ensure the wall itself meets the correct fire resistance performance.

                     Please consult Selo for advice and guidance to ensure the fire performance is met.

                     tel 020 3880 0339 email sales@selo-uk.com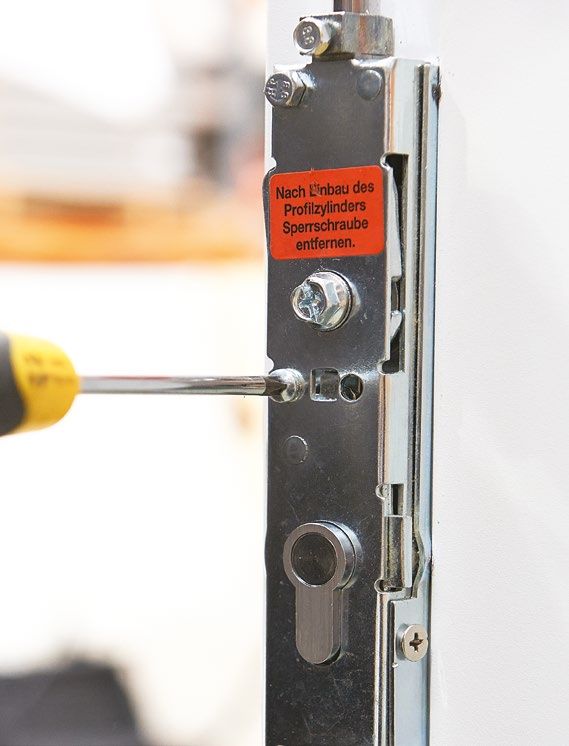
Ligna (Plastered) Installation instructions                                                                                                                                                                                               5

                                              1   Check opening
                                                                                                                                                                                4   First fixings

                                                  It is very important to ensure that the opening is                                                                                A Plumb the hinge side with a spirit or laser level
                                                  square, and level and the opening dimensions                                                                                      and fix into place through the perforated flange with
                                                  are correct. Use a laser level to achieve this.                                                                                   4-6 screws depending on the height of the door.

                                                  IMPORTANT
                                                                                                                                   A
                                                                                                                                                                                    B Ensure there is a consistent gap all the way
                                                  Use the structural opening dimensions supplied on the Selo

                                                                                                                                                        B
                                                  door schedule. If in doubt please call Selo on 020 3880 0339                                                                      around and fix through the opposite perforated
                                                  where we will be glad to assist!                                                                                                  flange in the same way.

                                              2   Prepare opening
                                                                                                                                                                                5   Check door operation

                                                  Remove material from the top of the frame to                                          TOP GAP = 3MM                               Open and close the door to ensure the frame
                                                  allow for the top pivot - Marked 1 on image.                                                                                      and door do not rub or catch anywhere.

                                                  Depending on the frame adjustment, you may                                                                                        Adjust frame if necessary by removing screws
                                                  need to remove a small amount of material for                                                                                     and re-fixing once adjusted.
                                                  the top and bottom lock bars as well as the
                                                  hinge side dog bolts - Marked 2 on image.

                                                                                                                                                            HINGE GAP = 4.5MM
                                                                                                                 LATCH GAP = 3MM
                                              3   Place doorset in opening

                                                  Place three or four 5mm packers on the threshold
                                                  at least 50mm away from the side studs.

                                                                                                                                       BOTTOM GAP = 3MM
Ligna (Plastered) Installation instructions 7
6 Frame fixings
8 Final frame fixing
EVERY 200mm
Finally, once the perforated flange has been secured
around the frame, fixings need to be made through
the frame. Ensure packing behind each fixing to
EVERY 200mm
EVERY 200mm
prevent frame distortion as the screw is tightened.
IMPORTANT
When packing the frame combustible and non combustible
packers are suitable. The packers need to be trimmed back to
allow them to be covered by the intumescent mastic (Step 15).
Fix at least every 200mm If the door gap is
Use 80mm long screw fixings. DO NOT use expanding foam to
around the frame too large / small - by
install the doorset unless approved by Selo.
through the perforated angling the screws
flange. Ensure to when fixing - this can
screw a fixing at each pull the profile in or out
9
corner of the frame. to adjust the door gap.
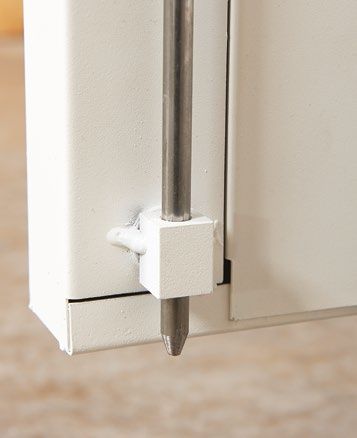
Fit door(s)
IMPORTANT
Use 80mm long screw fixings.
With assistance lift the door(s) up on its end and
locate the bottom socket over the pivot pin shown.
Take the weight of the door and wind the hex head
screw as far as it will go (clockwise) to allow the top
pivot to extend upwards into the head.
IMPORTANT
EVERY 200mm Check top pivot pin is engaged in the pivot hole in the frame
before fully winding the hex head screw.
7 Remove the door from the frame
10 Tape & Joint / Plaster
Open the door to 90⁰ and take the weight off Apply fibre tape to all four sides on the frame and
the pivot. Unwind the hex head screw as far as door leaf. The tape should be half on the perforated
it will go (anticlockwise) to allow the top pivot pin flange and half on the plasterboard face.
to drop flush into the door. Tap the hex head
screw down to free pivot pin if it is tight. Once the Ligna doorset is installed, plaster up to
the perforated flange concealing the frame.
With assistance lift the door up off the bottom
pin and remove.
IMPORTANT
Double/Multi doors are supplied separate to the frame
so do not require removal.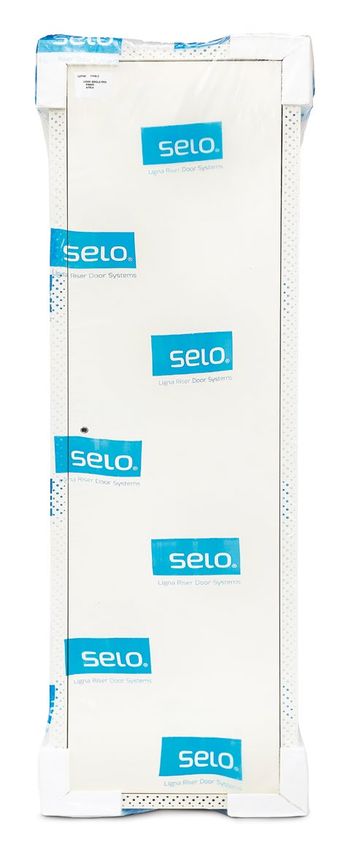
Ligna (Plastered) Installation instructions                                                                                                                                                                       9

                                              11   Sealing for fire rating

                                                   If a fire rating has been specified, ‘Mann
                                                   McGowan Pyromas A’ or an intumescent
                                                                                                              Operating the lock
                                                   mastic that has been tested in the same                    Ligna comes pre-fitted with a 3 point locking system.
                                                   situation should be applied all around the back
                                                   edge of the frame, as shown in the diagram.

                                                   IMPORTANT

                                                                                                                                                         1
                                                   If packers have been used they must be trimmed back to
                                                   enable them to be covered by the intumescent mastic.
                                                                                                                                                               Standard lock
                                                   DO NOT use expanding foam to install the doorset
                                                   unless approved by Selo.

                                                                                                                                                               The Ligna doorset uses a 3 point locking system
                                                                                                                                                               operated by a square drive key as shown. This is
                                                                                                                                                               provided already fitted to the door.

                                              12   Plaster around the lock
                                                                                                                                                               Ensure full engagement top and bottom of the
                                                                                                                                                               locking bars into the frame. Adjust if required.
                                                   A Remove the lock insert (if assembled) and
                                                   insert the plaster guide tube through the hole
                                                   in the plasterboard. Ensure it is fully inserted,
                                                   this will give you a hard edge to plaster up to.

 A
                                                   B Once plastered place the lock insert
                                                   through the plaster guide tube.

                                                   C Fix into the lock housing with the bolt
                                                   provided to complete the installation.

 B

                                                                                                            1.1 Centre lock mechanism   1.2 Base locking pin                   1.3 Head locking pin

 C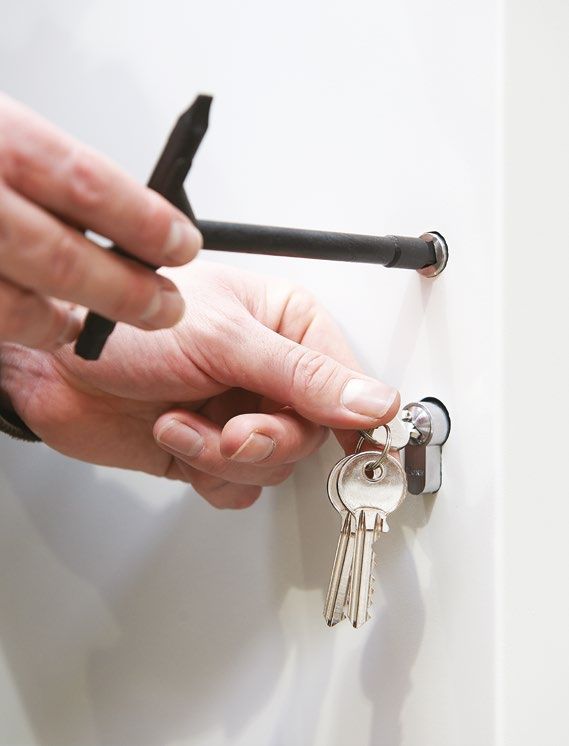
Ligna Installation instructions                                                                                                                             11

                                                                                                 3   Fitting the latch

Euro cylinder installation                                                                           To activate the cylinder the activation screw
                                                                                                     needs to be removed from the back of the
For high security situations the Ligna locking system                                                lock as shown.

can be provided with a provision for a euro cylinder.                                                IMPORTANT
                                                                                                     Only do this once ready to be used as the activation
                                                                                                     cannot be reversed.

                                     1      Select cylinder to suit your application

                                                           X               Y              Z

                                            Plaster        65mm            55mm           10mm

                                                                 X

                                                            Y                   Z

                                                                                                 4   Check operation

                                                                                                     The 3 point lock can only be operated while the
                                                                                                     key is turned in the cylinder.

                                     2      Fix the cylinder in place
                                                                                                     The key cannot be removed from the lock until the
                                                                                                     3 point lock has been turned to the lock position.
                                            The cylinder is held into place using the long
                                            location screw supplied with the cylinder.

                                            IMPORTANT
                                            The screw provided will need to be cut down
                                            by 20mm in length.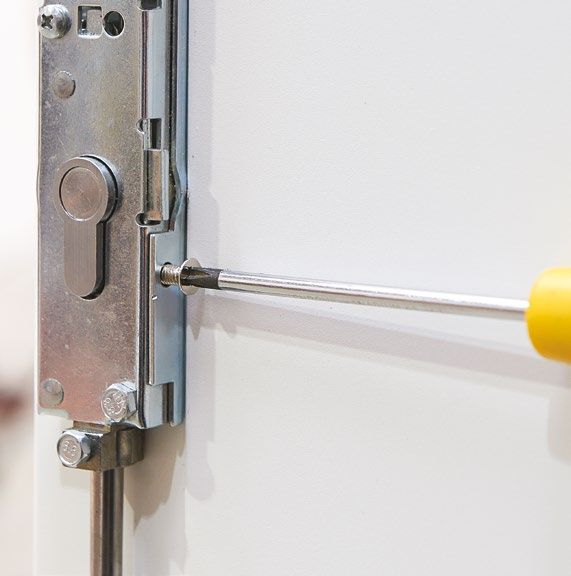
Ligna Installation instructions                                                                                                                                                                                                           13

Find out more
For help and advice with your installation contact our experienced team.
call 020 3880 0339 / email sales@selo-uk.com

Visit our website, loaded with the
content and features you want to see.
www.selo-uk.com

                                                                           © 2015 by Selo. All rights reserved.
                                                                           No part of this publication may be reproduced in any material form (including photocopying or storing it in any medium by electronic means
                                                                           and whether or not transiently, or incidentally to some other use of this publication) without the written permission of the copyright owner.
                                                                           Application for the copyright owner’s permission to reproduce any part of this publication should be addressed to Selo.
                                                                           Where colour and finish samples are shown within this document limitations in the reprographics process mean absolute colour accuracy
                                                                           cannot be guaranteed. Where colour matching is critical, a sample of the material can be provided on request.
www.selo-uk.com
                                                                           Selo reserves the right to alter specification and designs without prior notice.                                                                Revised - June 2021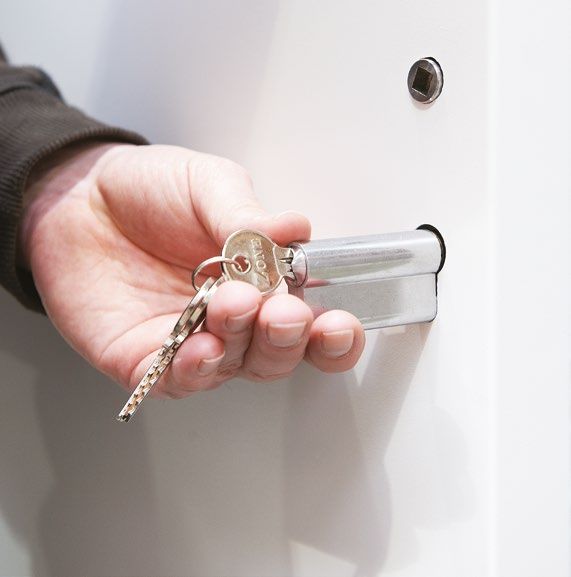
For help and advice with any Selo
product, call the support team on:
020 3880 0339

      call 020 3880 0339        Selo                                        Follow us on:
      email sales@selo-uk.com   K2 Kents Hill Business Park Timbold Drive
      www.selo-uk.com           Milton Keynes MK7 6BZ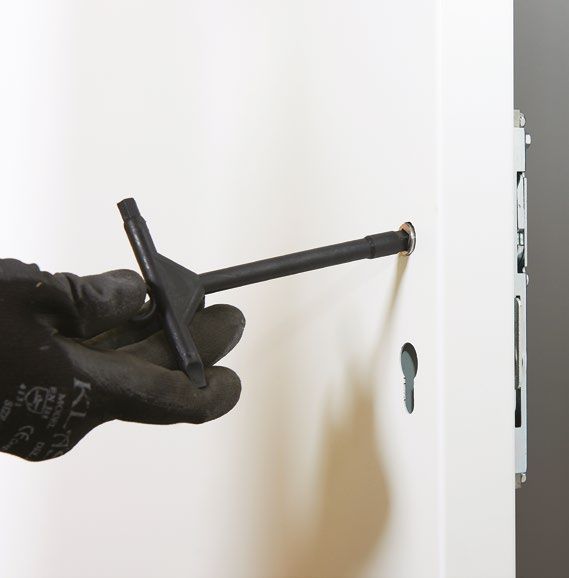
You can also read