Installation instructions for corner fridges - THE COOLING ROOM SPECIALIST-Quality made in Norway
←
→
Page content transcription
If your browser does not render page correctly, please read the page content below

THE COOLING ROOM SPECIALIST

 Installation instructions
    for corner fridges

     – Quality made in Norway –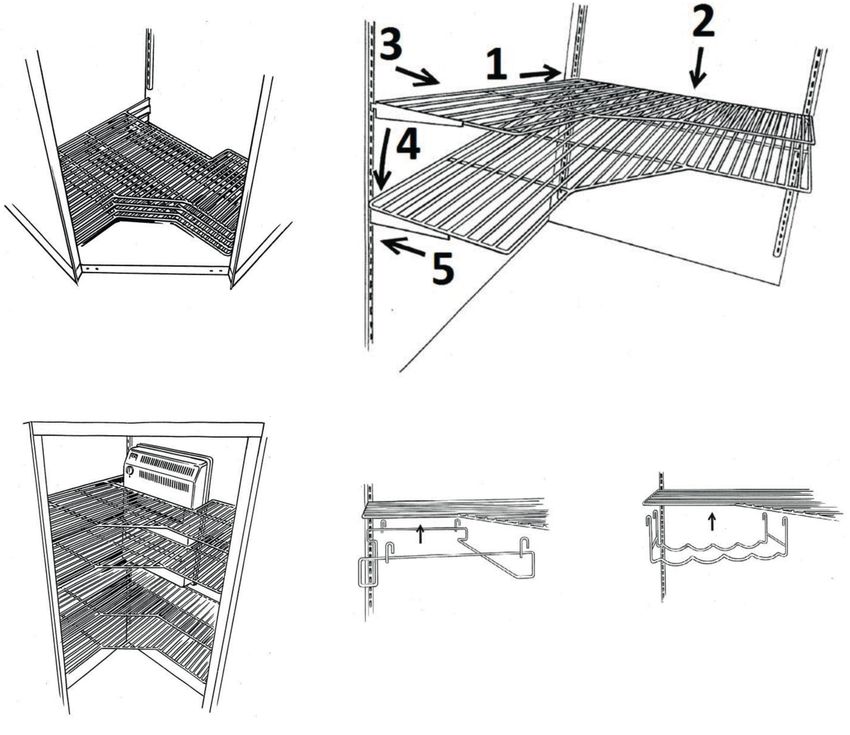
Use and maintenance
Setting the temperature                                       In the unlikely event that the drain becomes blocked,
THE THERMOSTAT is set to a central position, and the          a piece of wire can be inserted into the tube or it can
plug is placed in the socket. The cooling unit must           be blown clean with compressed air. Water will be
have reached stabile cooling periods after an ope-            produced in large quantities at extremely high
rating time of approx. 10 hours, and the thermostat           humidity, or if the cooling room door has been left
can be finely adjusted to the desired temperature of          open for some time.
2-9°C, as described below.
A steplessly variable thermostat button/switch                Cleaning
positioned on the front of the unit ensures the correct       It is the responsibility of the user to undertake clean-
temperature in the cooling room.                              ing of the unit, and this is important in order to be
                                                              able to invoke the guarantee in the event of a fault in
THE THERMOSTAT will normally be slightly above the            the cooling function.
central position. The cooling room temperature is             Thermolux 6 and 10 have an integral dust filter, which
checked with the help of a thermometer placed in a            must be vacuum cleaned every other month or more
glass of water to indicate the correct product                frequently if required. Remove the cover and pull out
temperature. Turn the dial anticlockwise for warmer           the dust filter. Vacuum clean the filter cloth. Replace
and clockwise for colder. Read the product                    the filter, and press in the cover.
temperature on the thermometer in the glass of                In order to prevent mould, it is also important to per-
water once stable periods have been reached.                  form regular cleaning in the cooling room.
The warning lamps for the thermostat indicate                 Clean using mild warm soapy water, and wipe with a
whether the power supply is connected (yellow lamp),          damp cloth.
and whether the cooler is in operating mode (green
lamp).                                                        Any condenser fins that are visible above the com-
                                                              pressor on the warm side of the Thermolux 16 should
MANUAL DEFROSTING is performed with the help of               be vacuumed/brushed/blown clean of dust. Take care
the thermostat, which is turned all the way back to           to ensure that the thin aluminium fins are not
the left, continuing until a resistance is felt and a click   damaged, as this will impair the cooling function.
is heard from the switch.                                     In order to prevent mould, it is also important to per-
                                                              form regular cleaning in the cooling room.
A quick coupling is applied to the top for connection         Clean using mild warm soapy water, and wipe with a
to a light, if required, with a door switch or photocell.     damp cloth.
The cooling unit emits heat into rooms next to the
room where the unit is located, and therefore this
room must be well ventilated.

Installation of refrigeration corner
We recommend that all joints are grouted
inside with silicone.

                                                Fig. 1.                                                     Fig. 2.

1.Lay the floor panel upside down and push the adjus-         2. Place the floor panel approximately in its perma-
   table plinth legs into the plastic cups until they are        nent position and level it by adjusting the plinth legs.
   fully home (Fig. 1).                                          There must be a clearance between the left-hand
                                                                 back wall and the house wall, and a free space of
                                                                 approx. 4-5 cm on the right-hand back wall to
                                                                 accommodate the air duct (Fig. 2).

2
Installation of refrigeration corner

3. Place the unit wall (large right-hand back wall) with the hole for the unit at the top left (Fig. 3).

                                                                                                           Fig. 3.

4. Tighten the lock to the floor with an Allen key (supplied). Then secure the other elements to one another in the
   same way, and finally fit the ceiling. If the hook fails to engage at the first attempt, it must be turned back fully
   until a click is heard before it can be turned again in the lock (Fig. 3).

                                                                                                                     3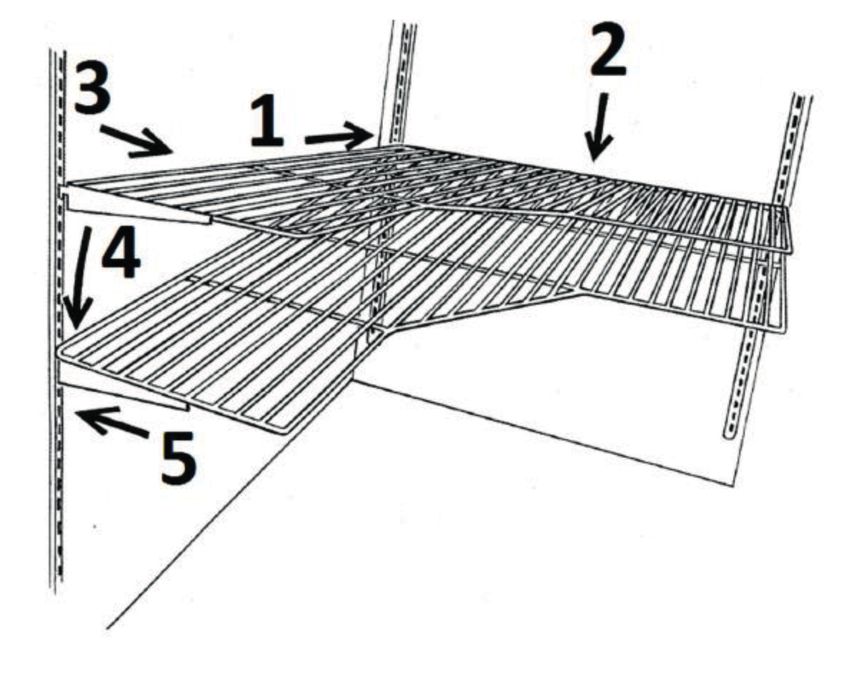
Installation of refrigeration corner
5. Select the hinge side on the door by rotating the        Position the door frame with the door, and screw
   door frame with the door. Trial fit the door with the    the door frame securely to the ceiling on the top
   frame in the opening to ensure a good fit. Take it out   side. Apply sealant around the entire frame from
   again and apply a thick bead of sealant (cartridge       the inside so that an airtight joint is made (Fig. 4).
   supplied) in the opening approx. 1 cm from the
   edge, continuing around the entire door opening.

                                                                                                                   Fig. 4.

6. Fit the long plastic profile with insulation into the
                                                                                            Viewed from above
   groove in the door frame, and push it into place so
                                                                          Plastic profile                       Side wall
   that the lip lies against the side wall on both sides
   (Fig. 5).

                                                                                             Door frame

                                                                                                Fig. 5.

4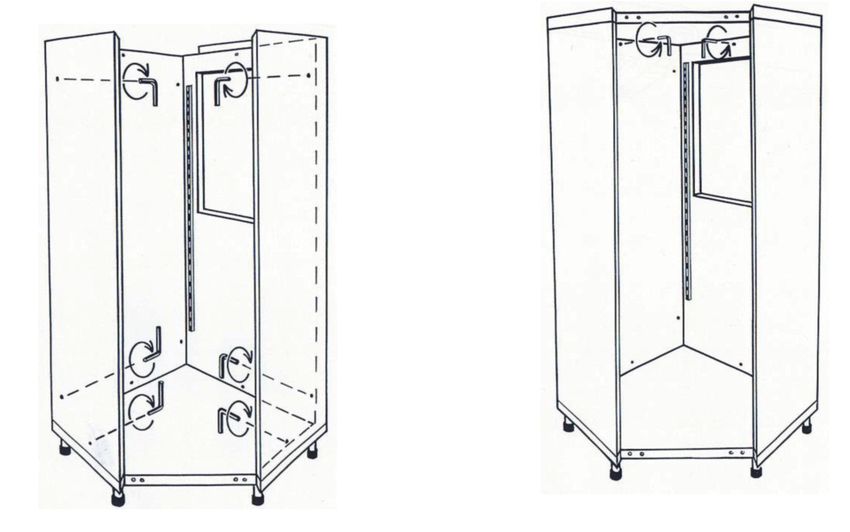
Installation of refrigeration corner
7. Remove the packaging from the compressor in the
   unit, and pull out the power cord. Lift the unit into
   the opening, at the same time pulling the power
   cord up between the cover on the rear side.
   Carefully screw the unit in place at each corner, so
   that the seal on the flange is pressed neatly against
   the element wall. Note: secure the power cord over
   the ceiling with the clips supplied, so that it is not
   able to drop down into the air duct and damage the
   fan (Fig. 6).

                                                                                             Fig. 6.

8. Screw the LED lamp securely to the ceiling at a point approx. 25 cm in from the door frame. Remove the
   protective tape from the cable trunking and press it firmly onto the ceiling as far as the female connector on
   the unit. Press the cable into the trunking and push in the plug.

                                                                                                               5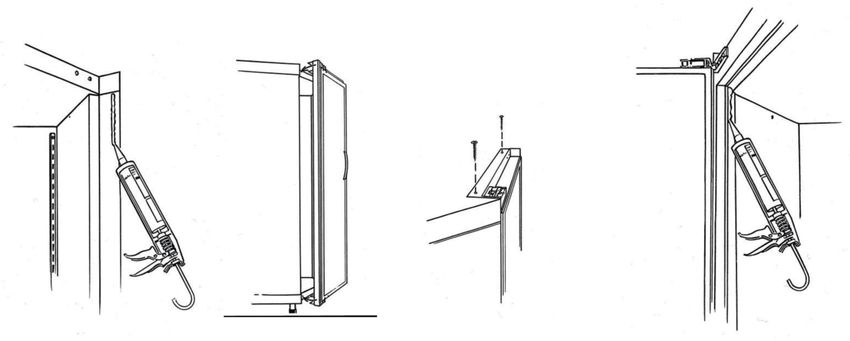
Installation of refrigeration corner
9. Place the shelves on the floor in the corner,               illustration in Figure 7 below). Continue in the same
   ensuring that those with a cut-out for the unit are         way with the other shelves. Keep a good distance
   at the top. Then secure the top shelf by tilting the        between the floor and the bottom shelf to permit the
   shelf upwards to the left, fitting it into the 2 uprights   storage of crates and the like. Make sure that the
   on the wall of the unit. Hold down the shelf and            second shelf from the top does not interfere with
   secure it to the uprights, while pulling it towards you     the dust filter tray on the unit. Hang up the holder
   at the other end so that it engages in the groove on        for bottles and the breakfast tray (Fig 7).
   the third upright at the same height (see the middle

                                                                                                 Fig. 7.

6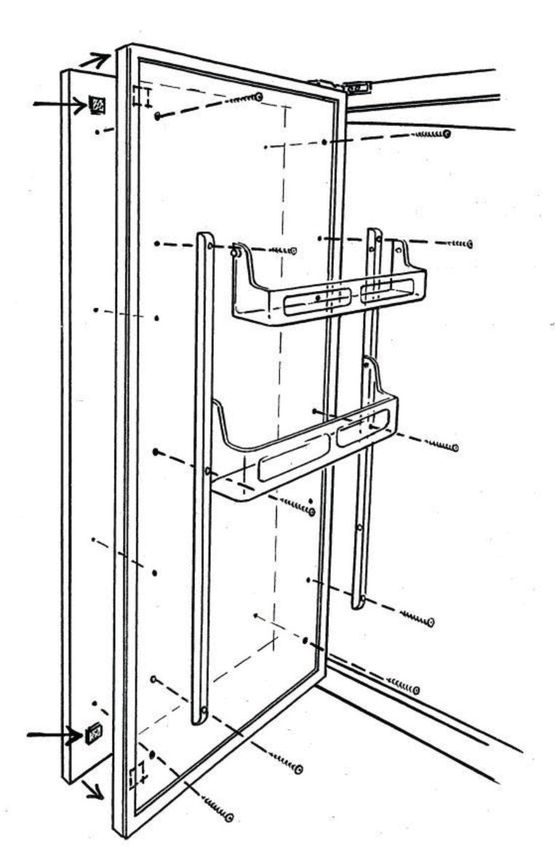
Installation of refrigeration corner
10.The cooling unit is equipped with a dust filter, which     position from the inside onto the cooling room door
  can be removed easily and vacuum cleaned approx.            in the corners using screws and plastic discs for
  every other month or as necessary. The thermostat           decorative cups. (Drill 3-4 mm holes for the fixing
  is steplessly variable and is set to a central position     screws). Then fit the cover panels so that the
  on start-up. The desired temperature is finely              spacing to the door is the same on either side.
  adjusted once stable cooling periods have been              Position the ventilation grille in the plinth panel
  achieved (see separate operating instructions for           under the door. Install the door shelf upright (Fig.
  the cooling unit).                                          9).
  The cooling unit is supplied with its own installation
  and operating instructions, which you can also find       NOTE. A seal with a foam strip must be provided be-
  on our web site: www.thermocold.no                        tween the corner fridge and the wall on the top edge,
                                                            except where the air duct from the unit comes up (this
  The depth of any cover panels and the work surface        must not be blocked). In the case of integration to the
  determine how far out from the wall the corner            full height of the ceiling, 2 ventilation grilles must be
  fridge must be positioned. First fit the matching         fitted over the corner fridge (Fig. 9).
  cabinet trim panel to the door in the correct position
  using the supplied Velcro tapes. Screw firmly in

                                 Fig. 9.

                                                                                                         Fig. 10.

                                                                                                                    7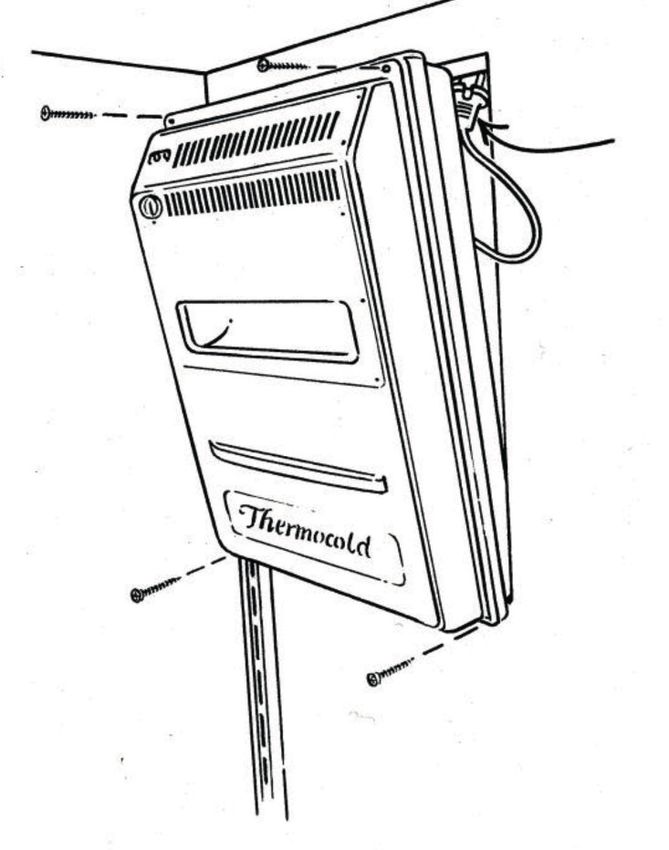
www.danders.no

                          Thermocold KFD AS
Torvlia 5,1739 Borgenhaugen | Telephone: 69102400 | E-mail: post@thermocold.no

                     www.thermocold.no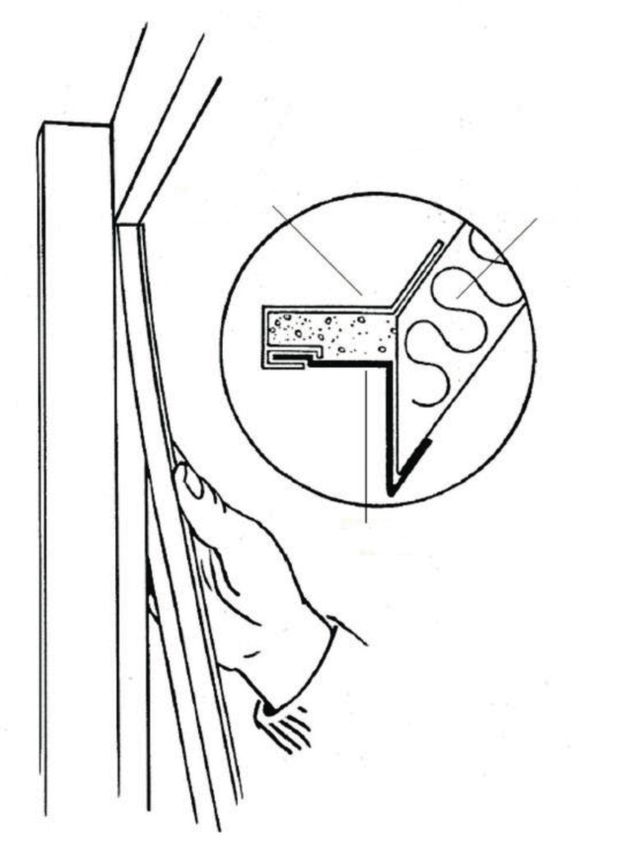

You can also read