MAGIC PHONERSET QUICK GUIDE - VERSION: 1.001 (18. MARCH 2020) 2020, AVT AUDIO VIDEO TECHNOLOGIES GMBH - AVT - AUDIO VIDEO TECHNOLOGIES GMBH
←
→
Page content transcription
If your browser does not render page correctly, please read the page content below
MAGIC PhonerSet
                             Quick Guide

                 Version: 1.001 (18. March 2020)
     © 2020, AVT Audio Video Technologies GmbH

                             © AVT Audio Video Technologies GmbH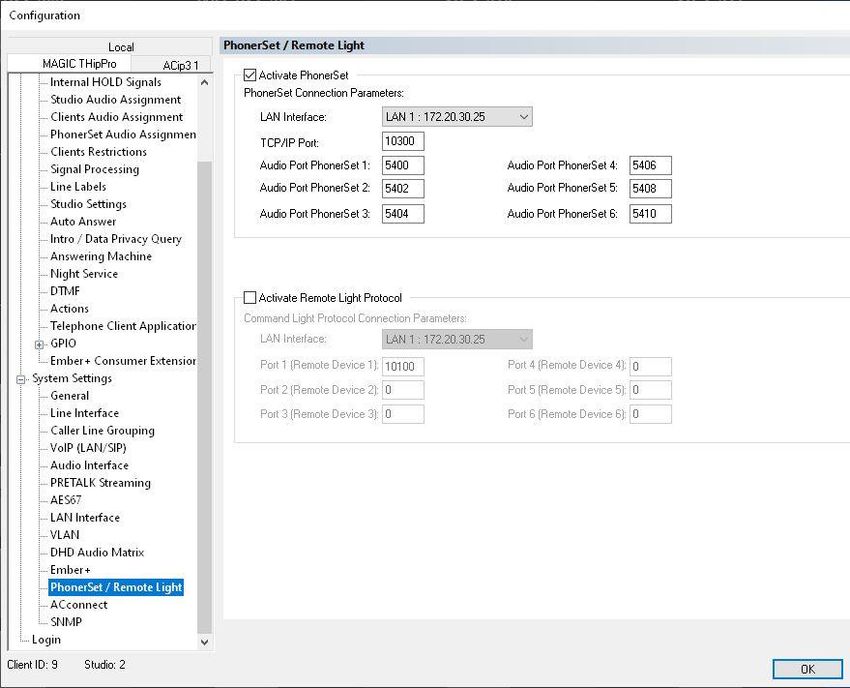
Overview
Configuration
▪ MAGIC TH2plus
▪ MAGIC TH6
▪ MAGIC THipPro
MAGIC PhonerSet
▪ Configuration
▪ Operation
▪ Update
Grandstream Telephone
▪ Language, Network, Screen Lock, Web GUI
Support
Content
2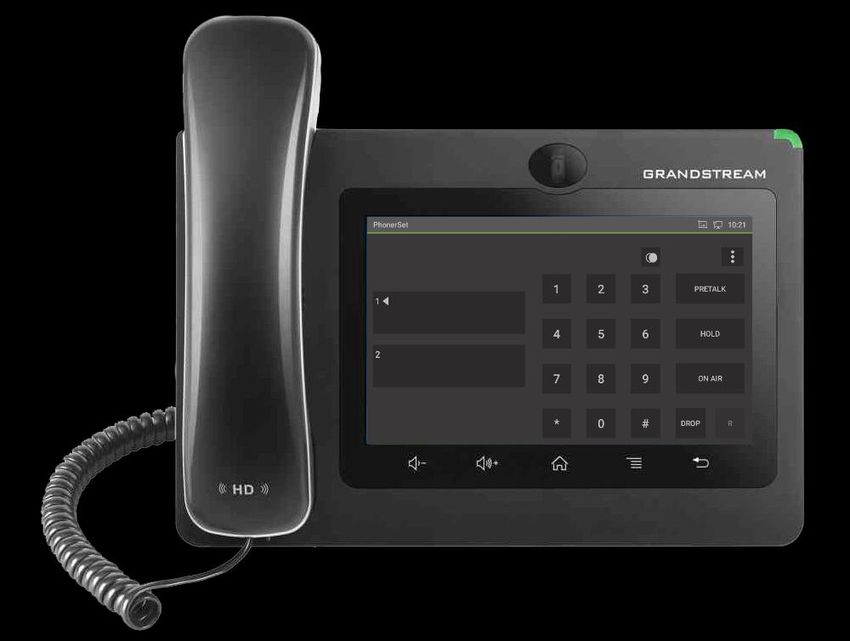
MAGIC PhonerSet
            Overview

                       3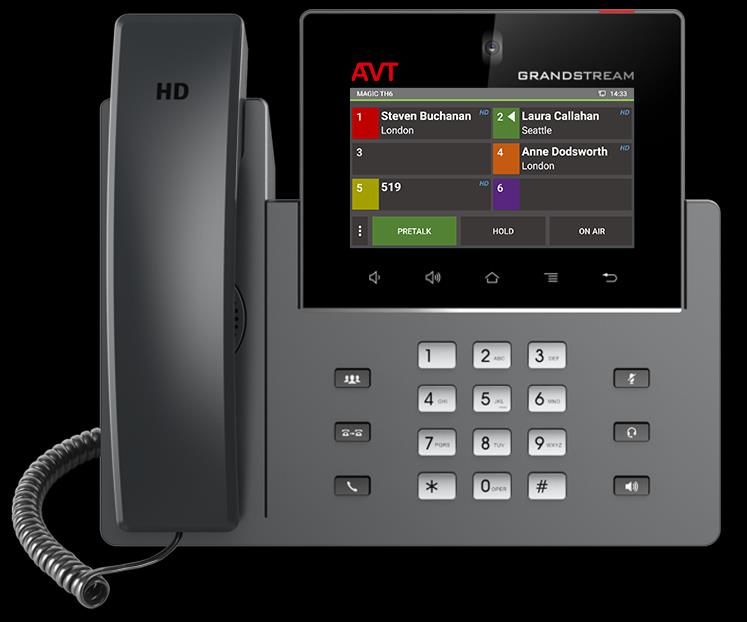
PhonerSet with MAGIC TH2plus PhonerSet with MAGIC THipPro
▪ Operation of 1 or 2 lines. ▪ Operation of up to eight lines of a studio.
▪ Up to two PhonerSet phones per device. ▪ Switching between studios in the App.
▪ Compatible with firmware versions from ▪ Up to six PhonerSet phones per device.
3.100 ▪ Compatible with firmware versions from
3.210
PhonerSet with MAGIC TH6
▪ Operation of individual lines.
▪ Operation of all lines of a studio.
▪ Coming soon:
Operation of all lines of two studios.
Switching between studios in the App.
▪ Up to six PhonerSet phones per device.
▪ Compatible with firmware versions from
3.110
Features
4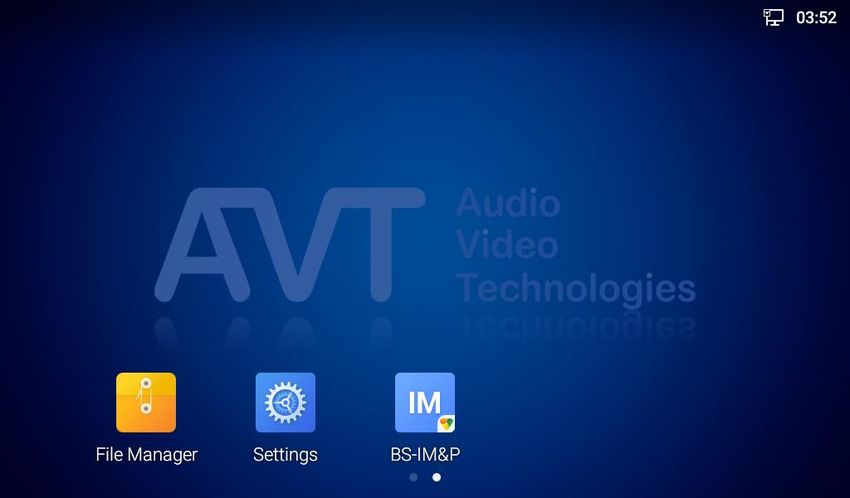
5" touchscreen.
Pretalk per:
▪ Telephone handset.
▪ Loudspeaker and
microphone.
Keypad beneath the
screen.
Status LED to display:
▪ Incoming calls.
▪ Active pretalk.
▪ Alarms of the hybrid.
Grandstream GXV3350
5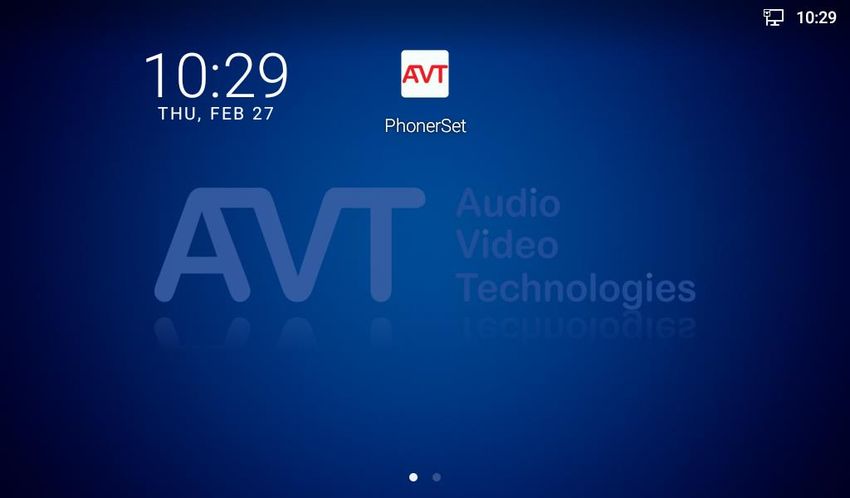
7" touchscreen.
Pretalk per:
▪ Telephone handset.
▪ Speaker and
microphone.
The dial pad is
permanently displayed
on the touchscreen.
Status LED to display :
▪ Incoming calls.
▪ Active pretalk.
▪ Alarms of the hybrid.
Grandstream GXV3370
6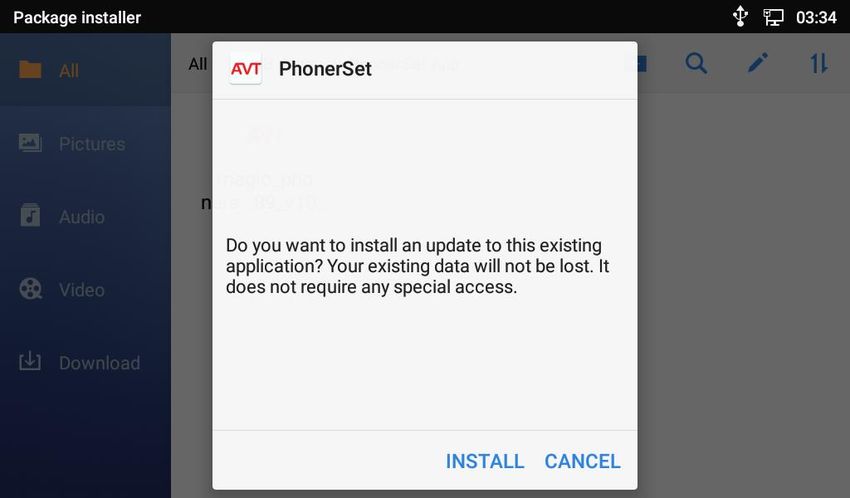
MAGIC PhonerSet
       Configuration MAGIC TH2plus

                                     7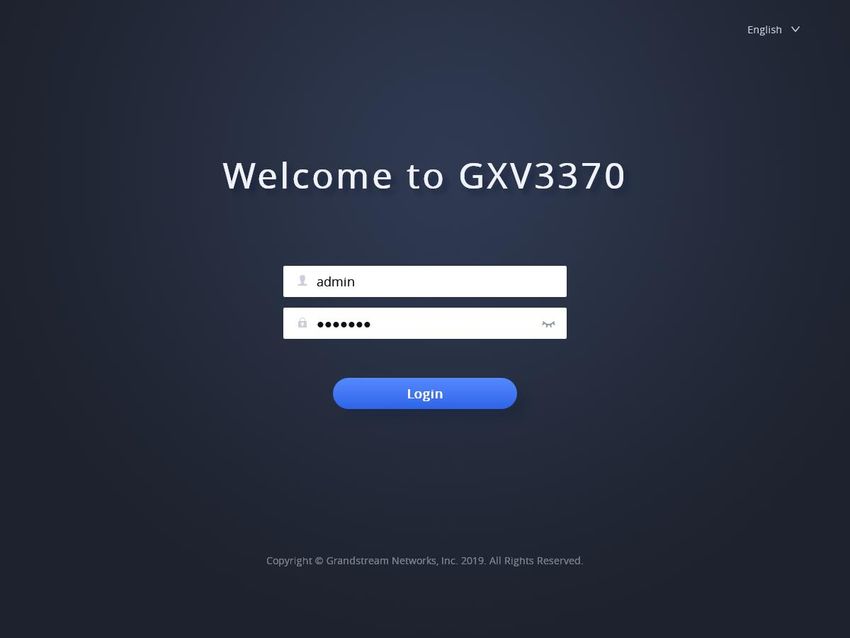
Open MENU – CONFIGURATION
– SYSTEM in the PC-software.
Select the PHONERSET /
REMOTE LIGHT page under
SYSTEM SETTINGS on the left.
Enable the PhonerSet feature via
ACTIVATE PHONERSET.
Select the LAN INTERFACE of
the device to which the PhonerSet
phones are connected.
Enter the local TCP/IP PORT to
which the PhonerSet phones
connect. (default: 10300)
Each PhonerSet phone
establishes an audio data stream
to the device. Enter a unique
AUDIO PORT for each PhonerSet
phone. (default: 5400, 5402)
TH2plus System Settings
8
Select the PHONERSET page
under OPERATION SETTINGS
on the left.
These settings are linked to the
PHONERSET WORKPLACE
setting in the PhonerSet App.
Select which phone lines
should be displayed on the
respective PhonerSet phone:
▪ ALL LINES
▪ LINE 1
▪ LINE 2
Activate ON AIR ACCESS if the
user should be able to switch
the call to ON AIR.
TH2plus Operation Settings
9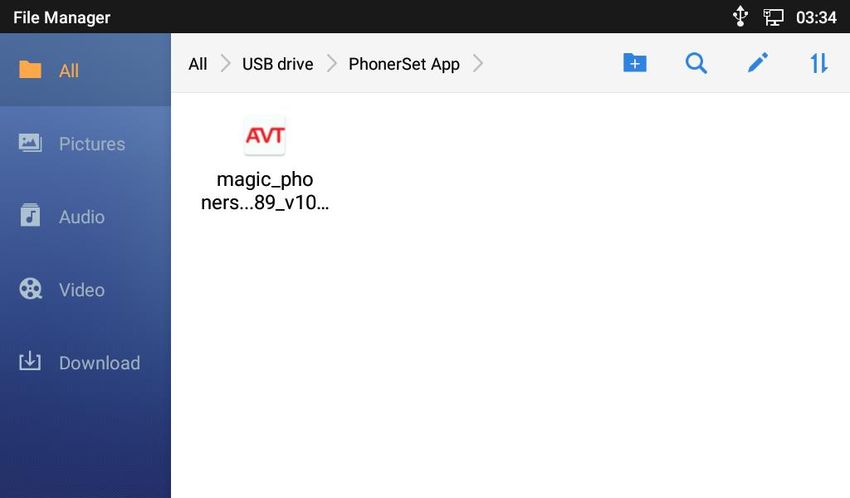
MAGIC PhonerSet
        Configuration MAGIC TH6

10 Open MENU – CONFIGURATION –
SYSTEM in the PC-software.
Select the PHONERSET / REMOTE
LIGHT page under SYSTEM
SETTINGS on the left.
Enable the PhonerSet feature via
ACTIVATE PHONERSET.
Select the LAN INTERFACE of the
device to which the PhonerSet
phones are connected.
Enter the local TCP/IP PORT to which
the PhonerSet phones connect.
(default: 10300)
Each PhonerSet phone establishes an
audio data stream to the device. Enter
a unique AUDIO PORT for each
PhonerSet phone. (default: 5400,
5402 , 5404 , 5406 , 5408 , 5410)
TH6 System Settings
11 Select the PHONERSET page
under OPERATION SETTINGS
on the left.
These settings are linked to the
PHONERSET WORKPLACE
setting in the PhonerSet App.
TH6 Operation Settings (1)
12 Select which phone lines
should be displayed on the
respective PhonerSet
phone:
▪ LINE 1...6: individual lines
▪ STUDIO 1: All lines of studio 1
in the 2-Studio mode.
▪ STUDIO 2: All lines of studio 2
in the 2-Studio mode.
▪ ALL STUDIO LINES: All active
lines in the 1-Studio mode.
Activate ON AIR ACCESS
if you want the user to be
able to switch the call to
ON AIR.
TH6 Operation Settings (2)
13MAGIC PhonerSet
Configuration MAGIC THipPro
14 Open MENU – CONFIGURATION –
SYSTEM in the PC-software.
Select the PHONERSET / REMOTE
LIGHT page under SYSTEM
SETTINGS on the left.
Enable the PhonerSet feature via
ACTIVATE PHONERSET.
Select the LAN INTERFACE of the
device to which the PhonerSet
phones are connected.
Enter the local TCP/IP PORT to which
the PhonerSet phones connect.
(default: 10300)
Each PhonerSet phone establishes an
audio data stream to the device. Enter
a unique AUDIO PORT for each
PhonerSet phone. (default: 5400,
5402 , 5404 , 5406 , 5408 , 5410)
THipPro System Settings
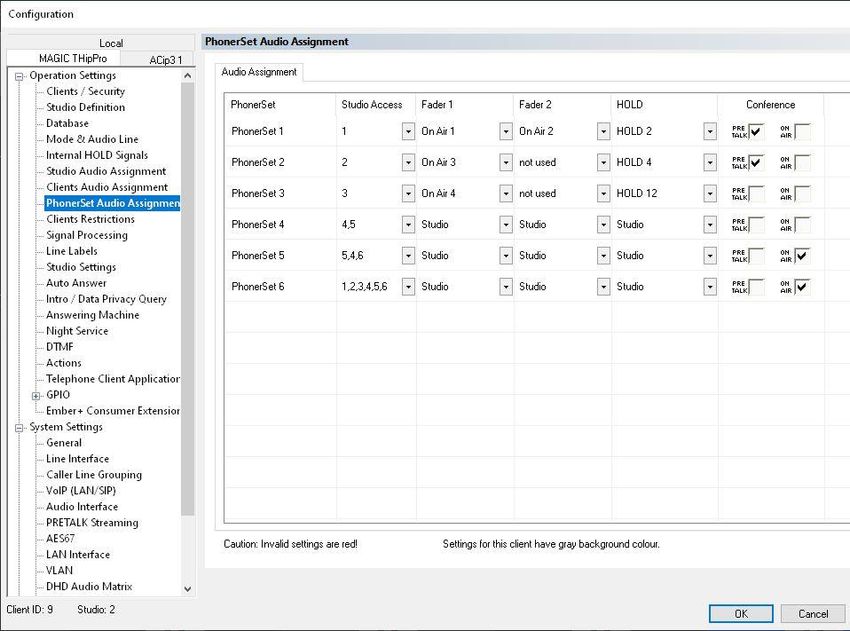
15 Select the PHONERSET
page under OPERATION
SETTINGS on the left.
These settings are linked
to the PHONERSET
WORKPLACE setting in
the PhonerSet App.
STUDIO ACCESS: The
PhonerSet App displays
the first eight lines of the
assigned studio. You may
also assign multiple
studios. Switching between
the studios is then possible
in the App.
THipPro Operation Settings (1)
16 FADER 1/ 2: Up to two buttons
for ON AIR are available in the
App. Each button can be
assigned an individual audio
line or the audio line of the
studio. The NOT USED setting
hides the button.
HOLD: An individual Hold
signal can be assigned to each
PhonerSet. The Hold signals of
the studios and PC clients are
available.
CONFERENCE: Check this box
to set several callers to
PRETALK or ON AIR at the
same time in the PhonerSet
App. All participants can then
talk to each other.
THipPro Operation Settings (2)
17MAGIC PhonerSet
Configuration MAGIC PhonerSet App
18 On startup, the phone
automatically starts the
PhonerSet app.
▪ If Screen Lock is
enabled, the password
must be entered first.
You may also start the
PhonerSet app from
the phone's Home
screen.
Start-up
19 Open the settings of
the PhonerSet app by
swiping the screen from
the left.
Press SETTINGS to
access the settings.
If there is no
connection to the
hybrid, CONNECTING
is displayed.
▪ Tap SETTINGS to
access the
configuration.
Menu
20 Select the DEVICE TYPE that
the App connects to.
▪ Depending on the DEVICE
TYPE, up to six workplaces
are available.
Enter the IP ADDRESS of the
device
Set the PHONERSET
WORKPLACE.
▪ Each workplace can only be
assigned once per hybrid.
▪ This setting links the app to
the corresponding PhonerSet
in the hybrid’s operation
settings.
The CONTROL PORT must
match the TCP/IP port set in
the device. (default: 10300)
Settings
21MAGIC PhonerSet
Operating the MAGIC PhonerSet App
22 Up to eight telephone lines
are displayed on the left
side.
The active line is marked
with an arrow symbol ( ).
With the keypad in the
middle you may enter
telephone numbers or
send DTMF tones.
The keys on the right side
control the active line.
Main Panel
23 Tap the DELETE icon ①
to delete the last digit
①
entered.
Tap and hold the DELETE
icon ① to delete the entire
number.
If no number has been ②
entered, the REDIAL icon
② will be displayed to
retrieve the last dialed
number.
If sending DTMF tones is ③
enabled, a KEYPAD icon
③ is displayed.
Input Field
24 The line card ① provides
a compact overview of the
status of each line:
▪ Color of the line number: ①
Red: The caller was ON
AIR.
Green: The call is ready
to be put ON AIR.
White: Standard color.
▪ The Arrow () marks the
active line.
▪ Background color:
Green: Call in PRETALK
Orange: Call in HOLD
Red: Call ON AIR
Yellow: Call ringing.
Purple: Line locked.
Line Presentation (1)
25 To the right of the line card,
additional information is
displayed during a
connection depending on
availability:
▪ Phone number or SIP
name of the caller.
▪ Name of the caller if
available in the phone
book.
▪ Caller's residence if
available in the phone
book.
▪ The HD icon is displayed
when the call is set up in
HD-Voice quality.
▪ Depending on the number
of lines displayed, some
information may not always
be visible.
Line Presentation(2)
26 With the buttons on the
right side you may answer
calls, set up calls and set
the audio line for the active
phone line.
▪ PRETALK: Conduct the
pretalk with the handset or ①
via the microphone and
speaker of the phone.
▪ An icon ① on the key
indicates whether
speakerphone mode is
active.
▪ Tap PRETALK to switch
between handset and
speakerphone.
Call Control (1)
27▪ HOLD: The caller hears
the HOLD signal, which
is configured in the
hybrid.
▪ Tap HOLD again to
signal that the pretalk is
done and the caller
may be switched to ON
AIR.
▪ The label of the button
then changes to HOLD
READY.
Call Control (2)
28▪ ON AIR: The caller is
switched to the ON AIR
audio interface set in
the hybrid.
▪ On ON AIR, it is not
possible to hang up or
forward the call.
Call Control (3)
29 End calls via the DROP
button.
Tap and hold the DROP
button to lock the line.
Use the R button to
forward a call.
Call Control (4)
30 Additional functions are
available via the three-
dots menu:
▪ DROP ALL LINES: All
lines will be hung up
except lines ON AIR.
▪ LOCK ALL LINES: All
lines are locked.
Incoming calls are
blocked.
▪ DTMF ON/OFF: Switch
the transmission of
DTMF tones on and off
during a call.
Use the keypad to
enter DTMF tones.
Call Control (5)
31 By tapping directly on the line, standard functions can be
performed more quickly:
▪ A phone number has been entered → Tapping an open line will start
the call in PRETALK.
▪ The line is in PRETALK → Tapping the line switches it to HOLD.
▪ The line is in HOLD → Tapping the line switches it to PRETALK.
▪ The line is in ON AIR → Tapping the line switches it to HOLD.
▪ An outgoing call is ringing at the remote station → Tapping the line
terminates the connection.
▪ An incoming call is ringing → Tap the line to answer it and set it to
PRETALK.
Quick Access
32MAGIC PhonerSet
Updating the App
33 The app is delivered by AVT as
a file and can be transferred to
the phone via USB stick.
The installation of an app from
a USB stick must first be
activated in the settings.
To do this, open the settings
and select the category
SECURITY SETTINGS in the
BASIC section.
In the DEVICE MANAGEMENT
section, activate UNKNOWN
SOURCES.
▪ Confirm the subsequent safety
warning.
▪ You may deactivate this option
again after installing the app.
Allow Installation
34 Find the current version of the
PhonerSet App in the download
area of our website https://avt-
nbg.de.
Copy the MAGIC PhonerSet
App
(magic_phonerset_430589_v
XXXX.apk) to a USB Flash
Drive.
Connect the USB Flash Drive
to the telephone.
▪ Grandstream GXV3350: The
USB connector is located on the
back. Connected extensions
must be unplugged first.
▪ Grandstream GXV3370: The
USB port is located behind the
flap on the right side of the
phone.
Current Version
35 Open the FILE MANAGER
from the phone's home
screen.
Navigate to the directory of
the MAGIC PhonerSet App
installation file and tap on
this file.
Confirm the message with
INSTALL.
When the MAGIC
PhonerSet App is installed
tap DONE.
Installation
36 At the first installation the
MAGIC PhonerSet App
must be set as default
phone app.
To do so, open the settings
and select DEFAULT
APPLICATIONS in the
APPS section.
Select the MAGIC
PhonerSet App under
PHONE APP.
Default Phone App
37 The first time you start the
MAGIC PhonerSet App you will
be asked to grant the App the
following permissions:
▪ MAKE AND MANAGE PHONE
CALLS: Is required to read the
status of the telephone lines.
▪ RECORD AUDIO: Is required to
access the microphones for
pretalk.
The MAGIC PhonerSet App
requires both permissions for
correct operation.
App Permissions
38MAGIC PhonerSet
Configuration Grandstream Telephone
39 The phone's home
screen consists of two
pages:
▪ Page 1 shows time,
date and the symbol of
the MAGIC PhonerSet
App.
▪ Page 2 provides
access to the settings
and the file manager.
Tap SETTINGS to start
configuring the phone.
Home Screen
40 The language of the
phone's user interface
can be configured.
To do this, select
LANGUAGE &
KEYBOARD in the
BASIC section.
Language (1)
41 Select LANGUAGE on the
LANGUAGE & KEYBOARD page.
All installed languages are
displayed.
Tap and hold the icon to the right
of the desired language and drag
it to the top to select the language.
Tap the pen icon in the upper right
to delete unnecessary languages.
If the desired language is not
listed, you may install additional
languages by selecting ADD A
LANGUAGE.
Language (2)
42 Open the settings and
select ETHERNET
SETTINGS in the
NETWORK section.
Network (1)
43 Select IPV4 SETTINGS
on the ETHERNET
SETTINGS page.
It is recommended to
assign a static IP
address to the phone.
▪ To do so, select
STATIC IP as IPV4
ADDRESS TYPE.
Tap on the addresses
to change them.
Network (2)
44 On the following pages you will
find the settings to display the
PhonerSet App exclusively on
the screen.
To start other apps, or to
access the settings, you will be
required to enter a password.
When the phone is restarted
the PhonerSet App will not be
displayed until the password is
entered.
Select SECURITY SETTINGS
in the BASIC section to start
the configuration.
Screen Lock (1)
45 Select DISPLAY LOCK
on the SECURITY
SETTINGS page.
For secure access
protection, it is
recommended to set up
a PASSWORD.
The phone will guide
you through the
password setup.
Screen Lock (2)
46 Screen pinning means that an
app remains permanently in the
foreground.
A password must be entered to
exit the App or to open the
notification bar.
On the SECURITY SETTINGS
page, select SCREEN
PINNING.
Enable SCREEN PINNING.
Enable ASK FOR PASSWORD
BEFORE UNPINNING.
Screen Lock (3)
47 It is important to prevent the
display from being turned off or
the screen saver from being
activated, as this will lock the
screen.
The MAGIC PhonerSet App
would only be available again
after entering the password.
Select DISPLAY in the BASIC
section.
Set SCREEN TIMEOUT to
NEVER.
Set the SCREENSAVER
PERIOD to NEVER.
Screen Lock (4)
48 The PhonerSet App must be
pinned after each start.
To do so, tap the menu key (≡)
of the phone below the screen).
Tap MANAGEMENT on the
right.
A stack of running apps is
displayed.
Close the apps until the
PhonerSet app is displayed on
top.
Tap the pin icon.
Screen Lock (5)
49 The PhonerSet App is
now pinned to the
screen.
To unpin the PhonerSet
App, tap and hold the
BACK icon below the
screen until the lock
screen appears to enter
the password.
Screen Lock (6)
50 The Grandstream
GXV3370 also offers a
web page for configuring
some basic functions.
The credentials for
preconfigured phones are:
▪ User: admin
▪ Password !admin1
If the phone is reset to
factory settings, the
credentials for the first
access are:
▪ User: admin
▪ Password: admin
Web GUI – Grandstream GXV3370
51 The Grandstream
GXV3350 also offers a
web page for configuring
some basic functions.
The credentials for
preconfigured phones are:
▪ User: admin
▪ Password !admin1
If the phone is reset to
factory settings, the
credentials for the first
access are:
▪ User: admin
▪ Password: The password is
printed on the nameplate of
the telephone.
Web GUI – Grandstream GXV3350
52MAGIC PhonerSet
Support
53Web: www.avt-nbg.de
E-mail: support@avt-nbg.de
Phone: +49 911 5271-110
Support
54You can also read