Specialized Business Solutions - Installing the KeyMail Service - Keystroke POS
←
→
Page content transcription
If your browser does not render page correctly, please read the page content below
Specialized Business Solutions – Installing the KeyMail Service

Installing the KeyMail Service
In a typical installation, the Keystroke Mail Module Service (“the KeyMail Service”) will be installed in the
same location as the Keystroke POS program. This is usually on the Keystroke Server (C:\Keystrok).

Use the Keystroke Update Installer to install KeyMail:
   1) In Windows, go to the Start Menu and locate the Keystroke POS shortcut folder, and run the Keystroke
       Update Installer.

   2) In the Keystroke Update Installer, select Keystroke Extensions.

   3) Select Keystroke Mail Module as a Windows Service to download and start the KeyMail installer.

February 26, 2020                                                                                         Page 1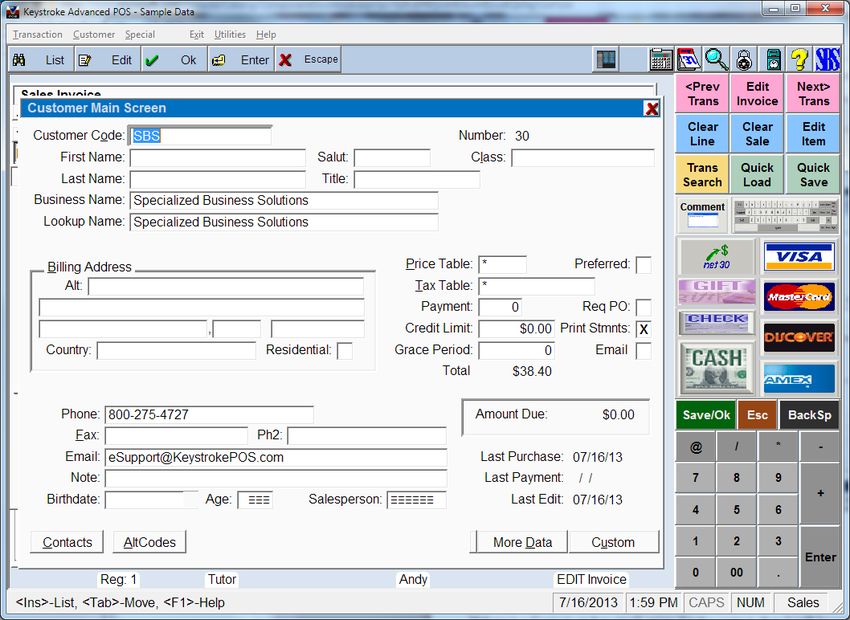
Specialized Business Solutions – Installing the KeyMail Service

When the Keystroke Mail Module Service Installer is downloaded, it will start automatically.

   1) Click Next on the Welcome Screen.

   2) Agree to the Terms of the License Agreement and select Next.

   3) Verify the install location, typically C:\Keystrok, and select Next.

   4) Verify the shortcut folder, typically Keystroke POS. Make Shortcuts Available to All Users should be
      enabled. Select Next.

   5) Confirm the install settings and select Next.

February 26, 2020                                                                                    Page 2
Specialized Business Solutions – Installing the KeyMail Service
   6) During the Installation, a prompt to enter the KeyMail Settings is displayed. Select OK.

   7) A prompt for password is displayed. The default Password is blank.
      So just leave the Password Blank, and select OK.

February 26, 2020                                                                                Page 3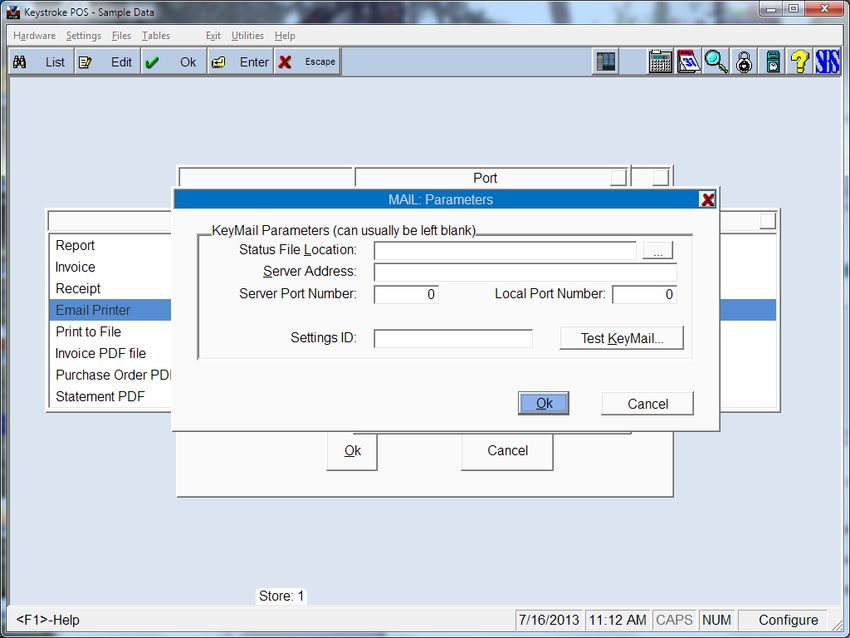
Specialized Business Solutions – Installing the KeyMail Service

   8) The settings screen for the Keystroke Mail Module is displayed.
      Email settings are applied here (see the last page of this document for Common Settings).

      KeyMail settings:
         a) Settings ID: Usually left as Default.
         b) Process through is set to Email.
         c) SMTP Server: This is the outgoing mail server. (See “Common Email Provider Settings” at the
            end of this document).
         d) Port #: Normally a port number will be assigned by KeyMail based upon the server SMTP name
            (i.e. SMTP=smtp.gmail.com will use Port # 465 and turn on “This server requires a secure
            connection (SSL)”. KeyMail should recognize your SMTP server and select an appropriate port.
         e) Account Name/Password: The credentials used to log into your email.
         f) From Name/Email: This information will appear in the email header. Note that some email
            providers will always use your account information and not use the KeyMail settings.
         g) Data/Status Directories: These directories will usually be set to the working data directory on the
            Keystroke server (c:\keystrok\data\).
         h) The Remaining settings such as IP Address and IP Port Number, and Check for NIC Changes
            can typically be left blank.
         i) Select Save to save your settings.

February 26, 2020                                                                                       Page 4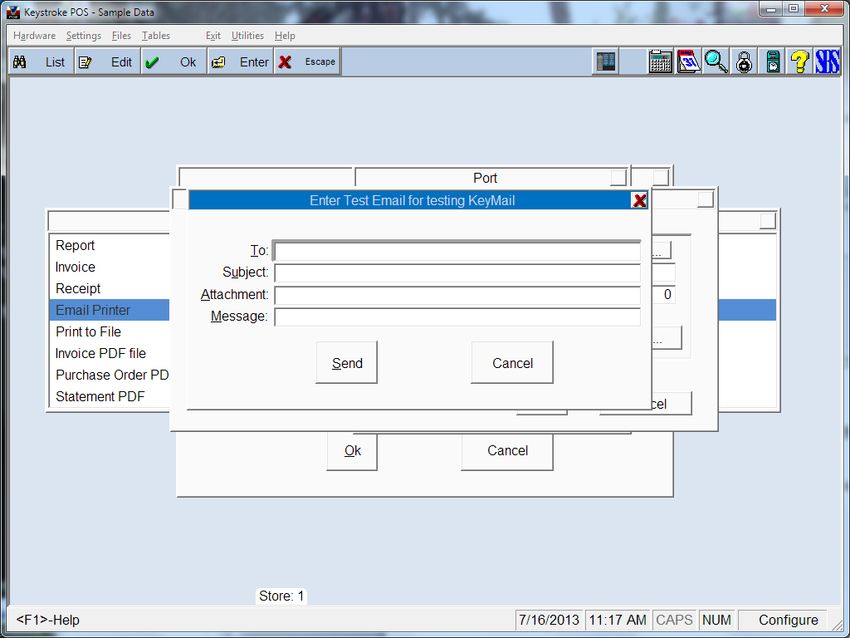
Specialized Business Solutions – Installing the KeyMail Service

   9) The KeyMail installer will indicate that the service was installed successfully.
      Select Finish.

      You are now ready to setup PDF Printers and Email Print Buttons in Keystroke POS.

February 26, 2020                                                                         Page 5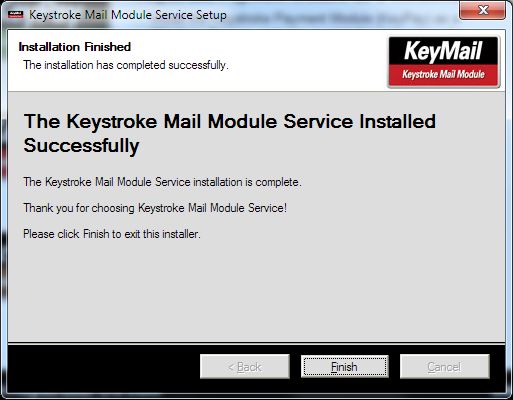
Specialized Business Solutions – Installing the KeyMail Service

Emailing forms as PDF attachments in Keystroke
Emailing from Keystroke requires setting up printing to a PDF file, and then sending the PDF as an email using
the KeyMail Module.

Add a printer in Keystroke to print forms to PDF file:
  1) In Configuration Manager, under Hardware, Printers, add a new printer by hitting INS.

   2) Name the printer “Invoice PDF File” (will be used for emailing Sales Invoices).

   3) Set driver to WINPDF and set the Port to PDF and assign the filename “Invoice&.pdf“
      Note: Use Order&.pdf, Statement&.pdf, etc. for printers used to print other forms to PDF files.

February 26, 2020                                                                                       Page 6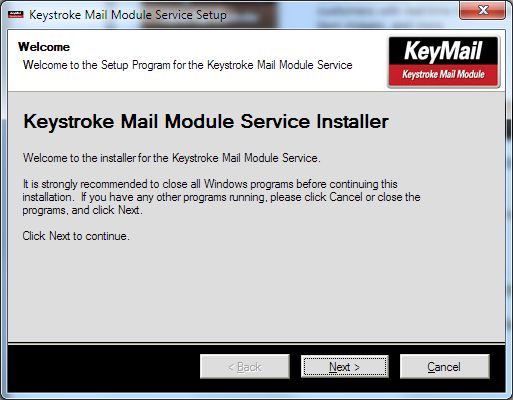
Specialized Business Solutions – Installing the KeyMail Service

Add a printer in Keystroke to send the Email.
  1) In Configuration Manager, under Hardware, Printers, add a new printer by hitting INS.

   2) Name the printer Email Printer.

   3) Set the driver to Windows and set the Port to Mail. The Mail: Parameters screen is displayed. In a
      typical installation, all of these parameters can all be left blank.

   4) Select the Test KeyMail button. This function will first verify communication between Keystroke and
      the KeyMail module then prompt you to enter a test email. If you get errors at this point, it might be
      related to your Firewall (Keystroke POS uses TCP/IP to send requests to KeyMail). You might try
      turning off the Firewall for testing purposes. If needed, add KeyMail.exe, KMailSvc.exe, and
      Keystrok.exe to your “allowed applications”.

February 26, 2020                                                                                      Page 7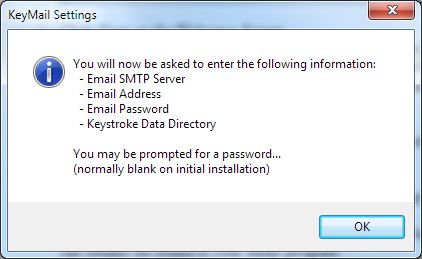
Specialized Business Solutions – Installing the KeyMail Service

   5) Enter an email address, subject, and message and select Send to verify that Keystroke can send an email
      through the KeyMail Service.

February 26, 2020                                                                                      Page 8
Specialized Business Solutions – Installing the KeyMail Service
Create a Print Button for Emailing Invoices as PDF Attachments
1) In Configuration Manager, go to Tables, Print Buttons.
2) Select SM: Sales and then hit enter on Add New Button.
3) Assign a name to the button like “&Email Invoice”.
4) Select Form 1.
5) Select File and select forms like INVGREEN.NVC (other forms are similar).
6) Select Printer and then select the “Invoice PDF File” printer setup above.
7) Select OK
8) Select Form 2.
9) Select File and select the form EMATT-TN.NVC.
10) Select Printer and then select the “Email Printer” setup above.
11) Select OK, and then select OK again to save this print button.
12) F10 one last time to save all of the Print Buttons.
13)
Setup Form Messages in Configuration Manager (Settings-Form Messages):
Form Messages are used to customize the body section used when Emailing Forms
Email Body (Sales): Lines 40, 41, 42, 43, 44, and 45
Email Body (Purchasing): Lines 50, 51, 52, 53, 54, and 55
Email Body (AR Statements): Lines 60, 61, 62, 63, 64, and 65
Email Body (ROA Payments): Lines 70, 71, 72, 73, 74, and 75
Email Body (Time Clock Receipts): Lines 80, 81, 82, 83, 84, and 85
February 26, 2020 Page 9Specialized Business Solutions – Installing the KeyMail Service You are now ready to do a test in Sales Manager. 1) Create a new Sales Invoice. 2) Create a customer for yourself, with your own email address on it. 3) Add this customer to the transaction 4) Enter some line items 5) Tender a payment February 26, 2020 Page 10
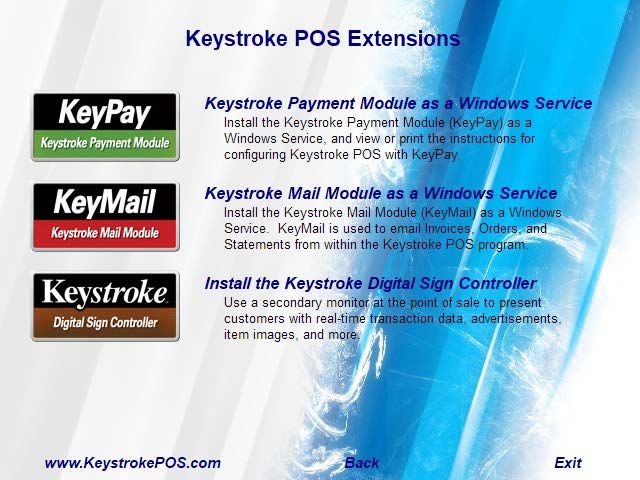
Specialized Business Solutions – Installing the KeyMail Service
   6) Select the Email Invoice print button.

If all is setup correctly, you should receive an email from your company with the attached PDF file.

Notes:
The Customer Email on the transaction will be used. If there is a Customer Contact, and an email exists for the
Customer Contact, then it will be used instead of the Customer Email.

February 26, 2020                                                                                      Page 11
Specialized Business Solutions – Installing the KeyMail Service

KeyMail Settings – Common Email Provider Settings
During the KeyMail Installation (or using the KeyMail Settings icon), you will be asked to enter various email
information regarding the email address, username, and password of the email account that you want KeyMail
to process emails through. The values for these settings can usually be found in the email program you are
currently using. Below are default settings for common email providers.

Gmail settings:
· Gmail SMTP Server Address: smtp.gmail.com
· Gmail Port: 587 or 465
· Gmail Secure SSL Required: Yes/On
· Gmail User Name: your full Gmail email address (e.g. myemail@gmail.com)
· Gmail Password: your Gmail password
NOTE: You must turn ON “Less Secure App Access” in Google Settings
Open Google Chrome - https://myaccount.google.com/security

Outlook / Windows Live Mail settings:
· Windows Live SMTP Server Address: smtp.live.com
· Windows Live Port: 587
· Windows Live Secure SSL Required: ON
· Windows Live User Name: your full Outlook/Windows Live email address (e.g. myemail@live.com)
· Windows Live Password: your Outlook/Windows Live password

MSN settings:
· MSN SMTP Server Address: smtp.live.com
· MSN Port: 587
· MSN Secure SSL Required: ON
· MSN User Name: your full MSN email address (e.g. myemail@msn.com)
· MSN Password: your MSN password

Yahoo! Mail settings:
· Yahoo! SMTP Server Address: smtp.mail.yahoo.com
· Yahoo! Port: 587
· Yahoo! Secure SSL Required: ON
· Yahoo! User Name: your full Yahoo! email address (e.g. myemail@yahoo.com)
· Yahoo! Password: You must use “Manage App Passwords” at Yahoo.com.
Select Settings, Account Security from: https://login.yahoo.com/account/personalinfo
Then select Other App and generate a code. Use this code as your KeyMail password and test.

· Hotmail settings:
  This now uses Outlook/Windows Live Mail. See above.

February 26, 2020                                                                                      Page 12
Specialized Business Solutions – Installing the KeyMail Service

Troubleshooting KeyMail – Common Errors and Fixes
Below is an unsorted listing of possible errors and fixes:

Error #-1: The Operation has timed out.
Review the KMERR.LOG file in the program folder (i.e. C:\Keystrok).
Some Email providers have changed their Port and SSL Requirements over the years.
       Try Port 587 with SSL checked.
       Try Port 25 with SSL checked.

Error #5: System Security Authentication.AuthenticationException…The Operation has timed out.
Followed by other .NET information.
       Uncheck SSL (turn off) and try other ports like 2525 which some providers use.
       Contact your Internet Mail Provider for exact Port and SSL requirements.

Error #530 – The SMP server requires a secure connection or the client was not authenticated.
This is seen using Gmail. You need to turn on the “Allow less secure apps” setting in Gmail.
        On a web browser, open Gmail.
        Click the Gear in the top right corner and select Settings.
        Click on the Accounts and Import tab.
        Under Change Account Settings, click on Other Google Account Settings.
        A new tab will open. Under Sign-in and Security, choose Connect Apps and Sites.
        At the bottom of the page, enable Allow Less Secure Apps.
        Note: Less Secure Apps means Username and Password

Attachment not sent, but the Email is sent.
   - Use the form EMATT-TN.NVC instead of EMATTACH.NVC if printing Invoices, Orders, and Quotes
      using the same Keystroke Email Printer.
   - Review the KMERR.LOG file in the program folder (i.e. C:\Keystrok).
      This will give you information on the attachment that KeyMail is looking for.
      It is possible that the location is incorrect, or that the file is not found.

February 26, 2020                                                                               Page 13
You can also read