PICO: the how-to guide to Presenting Interactive COntent - EGU
←
→
Page content transcription
If your browser does not render page correctly, please read the page content below
European Geosciences Union
 General Assembly
 http://www.egu.eu/meetings/general-assembly/

PICO: the how-to guide to Presenting Interactive COntent

 Scientists discussing a PICO presentation in front of the interactive screens (Credit: EGU/Stephanie McClellan)

Introduction

PICO – Presenting Interactive COntent – is a type of scientific presentation that combines the advantages of
oral and poster presentations. First, PICO authors orally present the highlights of their work to session at-
tendees. Afterwards, attendees have time to view each presentation and additional materials, have discus-
sions with the authors, and to network at interactive screens. PICO was first introduced at the 2013 General
Assembly of the European Geosciences Union (EGU) and has been growing in popularity ever since. The for-
mat was created by Copernicus, who are in charge of the logistical organisation of EGU General Assemblies.

PICO scientific sessions start with a series of two-minute long presentations, one from each presenting
author. They can feature traditional PowerPoint slides, a movie, an animation, or simply a PDF showing your
research on a large screen. After the two-minute talks, the audience can explore each presentation on touch
screens, where authors are available to answer questions and discuss their research in more detail. Further-
more, the presentations remain available after the end of a PICO session and can be viewed on the touch
screens throughout the day of the session. This gives the opportunity to later discuss your research with
colleagues who were not able to attend your session.

A PICO block is one and a half hours long and consists of ca. 20 presentations. Authors are asked to prepare
one presentation file fulfilling both needs: the introductory two-minute presentation, as well as the fol-
lowing viewing and interactive discussion session. Authors should, therefore, include the summary of, or
an advert for, their work in the first slides (to be shown during the two-minute introduction) followed by a
series of slides going into more detail to be used during the discussion stage.
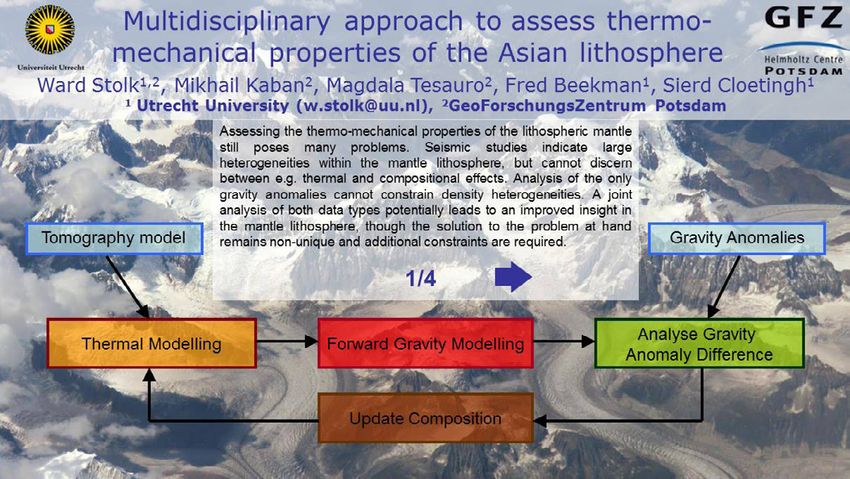
EGU General Assembly PICO Guide – Page 2

Practical tips for preparing a PICO presentation

Two-minute introduction
The oral part of the PICO presentation should work
as a hook to get the audience interested in finding
out more by visiting your PICO screen. There is no
need to explain everything about your research
in the two minutes you are given (if for nothing
else, because you should avoid overrunning). We
strongly recommend not showing more than a
couple of slides. You only have to present the main
conclusions, most exciting results or set the scene
for your research: just enough to get others to want
 Scientist presenting their PICO during the two-minute introduction
to discuss your science with you in more detail fol- (Credit: EGU/Stephanie McClellan)
lowing the two-minute introduction.

Since you are presenting with about 20 others, the audience needs to remember your presentation without
getting lost in the details straight away. Make it memorable, and remember it’s better to be undertime than
rushing to finish in time, or running overtime. In the couple of slides you show, it can be useful to include
an eye-catching ‘home page’ slide so the audience will more easily recognise your presentation on the PICO
screens. If you show results in the two-minute introduction, make sure they are simple and clear as you will
not have much time to explain them.

Finally, there is room to be more imaginative with PICO. You could have a single slide with a short video or a
colourful animation that helps people remember your presentation and be tempted to check further details
on the interactive screens.

Discussion at the interactive screen
This is your chance to provide more detail about your research. Since PICOs can be viewed by anyone at any-
time of the day of your presentation, even after your PICO session has ended, you should make sure your
presentation is self-contained and clear if someone is not there to talk it through. This is similar to what you
would do if you were presenting a poster, but here you have the added advantage of being able to include
videos and animated visualisations, as well as lots of figures and diagrams.

It is useful to include a navigation slide in your
presentation that helps you or others jump to a
particular part the viewer is interested in, as well
as navigation buttons on the various slides. For
example, if someone viewing your work is familiar
with the methods, they can jump directly to the
results from the navigation slide. In addition, each
PICO screen will automatically come with 3 naviga-
tion buttons: Forward, Backward, and Home (see
‘Technical details’ section below).

One of the easiest ways of creating additional/ Example of a home slide (which also doubles as navigation slide) that
custom navigation buttons (and other interactive can be used during the two-minute introduction to help the audi-
 ence recognise your presentation once the discussion moves to the
content) is with hyperlinks in Microsoft PowerPoint. interactive screens. From: Stolk et al. (2013)

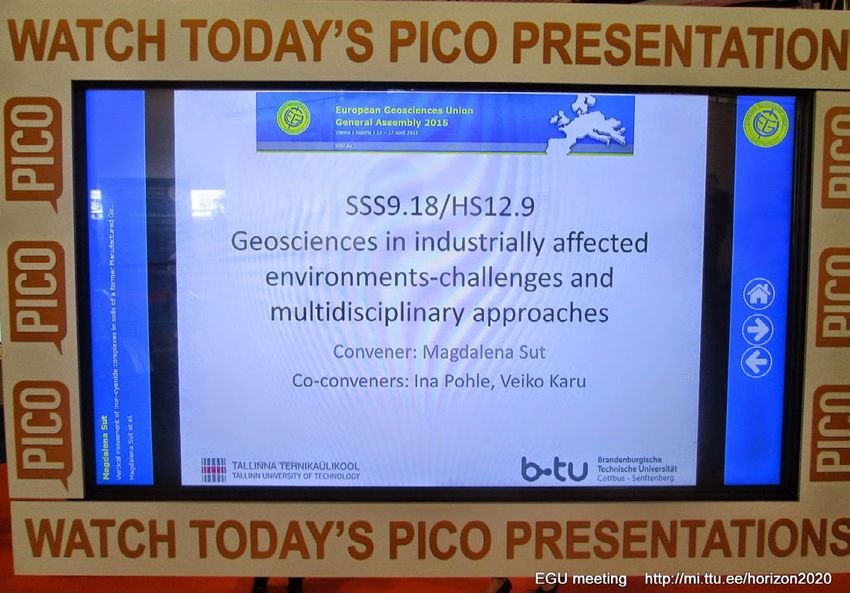
EGU General Assembly PICO Guide – Page 3 You can create clikable buttons from shapes or images and link these to other slides within the same Power- Point slideshow: see these online tutorials as examples (1, 2). In your PICO, it is useful to include navigation buttons that bring the viewer back to your main menu or navigation slide. Since there is no limit to the number of slides you can have (within reason!), you can include slides with addi- tional explanations for anyone who would like more detail or clarification about your work. The fact that you can customise what slides you present depend- ing on who is viewing them is a clear advantage of PICO over orals, as well as over posters. Make the presentation more than a collection of slides by making it interactive: you can add some animations or zoom-ins to details of results, or overlay a shape on a figure to highlight a specific part of it, for example. Be imaginative, but don’t overdo it so as not to clutter your presentation with Example of a navigation slide, including interactive buttons to move animations, which could distract the viewer. to other parts of the presentation. From: Canli et al. (2015) Outstanding Student Poster and PICO (OSPP) Awards As of the 2016 EGU General Assembly, eligible participants presenting PICO can apply for an Outstanding Student Poster and PICO (OSPP) Award. The aim of the award is to promote poster and PICO presentations and most importantly, to foster the excitement of early career scientists in presenting their work. To be con- sidered for the OSPP award, you must be the first author and personally present the PICO at the conference, as well as satisfy one of the following criteria: • being a current undergraduate (e.g., BSc) or postgraduate (e.g., MSc, PhD) student; • being a recent undergraduate or postgraduate student (conferral of degree after 1 January of the year preceding the conference) who are presenting their thesis work. Entering couldn’t be easier! Make sure you nominate yourself when you submit your abstract online. You’ll receive a letter, known as letter of schedule, confirming your presentation has been accepted, which will also include a link by which to register for the award. Before the conference, make sure you include the OSPP label (which you can find on the EGU website) to your PICO presentation header so that the judges of the OSPP award know where to find your presentation. Technical details At the EGU General Assembly, the PICO presentations are organised centrally. Therefore, authors are asked to upload their presentation files (one per author plus assets) at the PICO Preview Centre onsite. You will be informed about the location of the preview centre and its opening hours by email before the conference. The upload service is available throughout the meeting but authors should upload their presentations by 08:00 of the day of their session. After the upload, the PICO Preview Centre provides touch screens identical to the ones at the PICO Spots where authors can make sure that their presentation is running smoothly. A PICO session takes place at a PICO Spot, which is a combination of an audience sitting in front of a screen together with a number of touch screen displays (PICO screens). The touch screens have a size of 42”, the operating system is Windows 7 and they have internet access. Each PICO screen can have a Forward (),

EGU General Assembly PICO Guide – Page 4 Backward (), and Home ( ) button built-in for user navigation, though how exactly these display on the screen depends on the format of your pres- entation and what navigation buttons you already included in your slides. Although the screens are in the 16:9 widescreen format, we recommend producing PowerPoint or PDF presentations (please note that Prezi is not supported) in the classic 4:3 format, especially if you don’t include navigation buttons in your pres- entation. Once they receive your presentation file, the Copernicus PICO team will customise the PICO screen to suit your slides. For example: PICO screen at the EGU 2015 General Assembly showing the naviga- tion buttons on the side (Credit: Mäe Meedia) • If your PICO is in 4:3 format, they use the empty space on the side to feature the EGU logo and buttons on the right, and information about the presentation (title, author, screen number) on the left: see figure. • If the viewer can move forward/backward through your slides using links embedded in the presenta- tion (best practice), the Copernicus PICO team can cancel the buttons completely. • If the format is 16:9 and the author has no navigation buttons or links included in the presentation, they have to be added on top of the slides, either at the top or at the bottom of the screen (wherever they interfere the least with the presentation). • If you’d like to use LaTeX to prepare a PDF PICO presentation, you might find this template by Anselm Köhler useful. Please note that no external software can be installed in the PICO screens. Each PICO presentation is trans- ferred to a large number of screens so any new applications would have to be installed dozens of times. More information • http://www.egu2018.eu/pico.html – the PICO page on the EGU 2018 General Assemby website, which includes examples of past PICO presentations and a video of a PICO session • http://blogs.egu.eu/divisions/sm/2016/06/02/boost-the-pico-sessions-egu/ – two early career scien- tists discuss their experience presenting a PICO, including tips on how to make the best of it • http://blogs.egu.eu/geolog/2017/11/03/try-something-different-at-egu-2018-choose-a-pico-session/ – a blog post highlighting the benefits of PICO PICO – Presenting Interactive COntent® is a registered Community Trade Mark (CTM) of the Copernicus Gesellschaft mbH, registered at the Office for Harmonization in the Internal Market (OHIM) of the European Union under No. 012837985. This guide was drafted by EGU Media and Communications Manager Bárbara Ferreira, with help from Susanne Buiter, Sarah Connors, Philippe Courtial, Shaun Harrigan, Laura Klement, Martin Rasmussen, Laura Roberts, and Kathrin Spieker. Last updated in October 2018.

You can also read