Pre-Installation Check List - V2 LÜ pre-installation form V1.4 English - Interactive Playground
←
→
Page content transcription
If your browser does not render page correctly, please read the page content below
Pre-Installation
Check List
V2

LÜ pre-installation form V1.4     English

Revision                        May 2021
Pre-Installation Check List

Note that all these requirements must be completed before the installation. Failure to do so could compromise
your warranty and/or might lead to additional installation fees.

01     The system requires one (1) dedicated 20 amp electrical breaker through two (2) outlets installed      through
       the ceiling.

       • The first outlet must be positioned at the junction of the ceiling and the projection wall, centered above
         the projection area.

       • The second outlet must be positioned 16 ft away from the projection wall, right above the position
         of the lighting module.

02     A wired internet connection must be installed for the system to work properly. This cable will be connected
       in the computer located in the heart module. We recommend that you place a request to your IT department
       as soon as the purchase order is sent.

03     Complete the installation form located at the end of this document and send it to us.

04     Please refer to the installation guide for more technical details.

  01                                02

                                                                                                               Page 1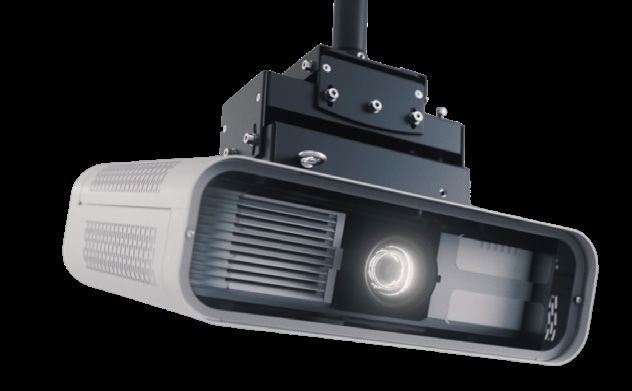
Technical information
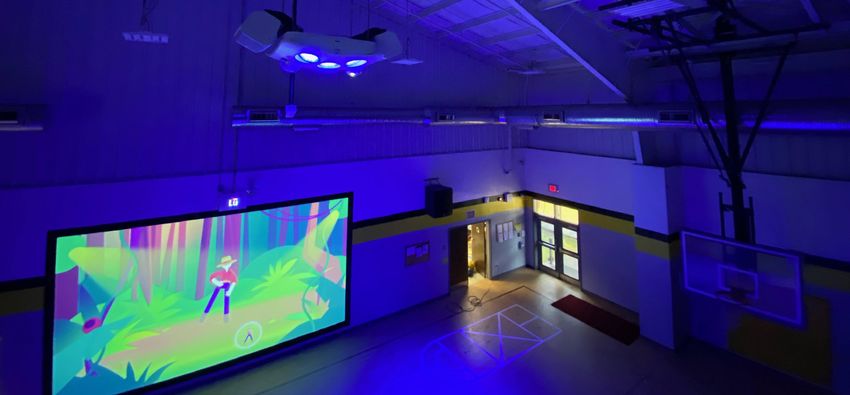
The screen
01 The interactive screen size is 19 ft x 11 ft and should be positioned between 8 in and 16 in
from the floor. The wall surface should be painted in mat white for better quality projections.
02 The screen must be free of obstacles. For example, there should be no basketball nets,
clocks, alarm systems, beams, etc. These objects could interfere with the 3D detection of
the camera. Low-profile objects can be fine, but please send us pictures if you are unsure so
we can tell you if they’ll be an obstacle.
03 The camera detection is also sensitive to sunlight that might come in through windows, so
you must contact us if there are any windows in your gym. Curtains are a potential solution
to block the sunlight.
04 The playground should be approximately 30 ft x 30 ft in front of the screen.
IMPORTANT : The two computers must be connected on the same network for the DÜO system to work.
Only one DÜO system per network.
Page 2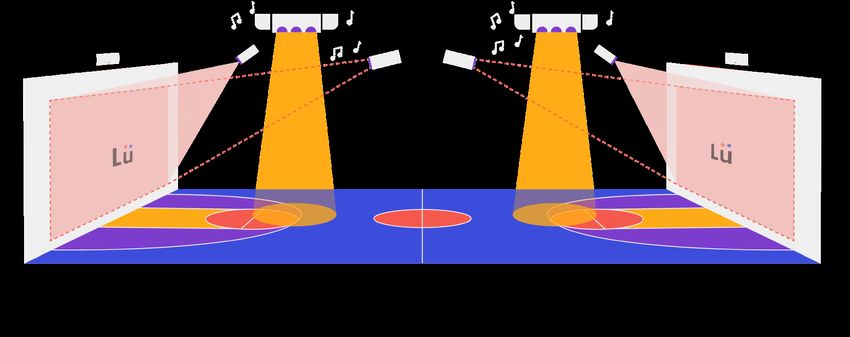
Installation configuration
ÜNO & DÜO
Lü can be sold in two different configurations. The ÜNO configuration broadcasts on an interactive wall while the
DÜO configuration includes two ÜNO units projecting on two interactive walls face to face or side by side. All it
takes is a few minor tweaks and additional connections to allow for a synchronized experience occupying the
entire gym.
A B C D
ÜNO
A B C D D C B A
DUÖ
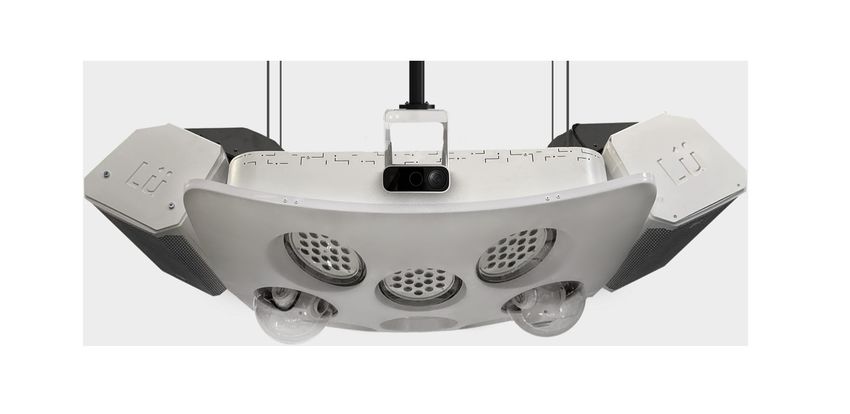
A Heart module
B Camera module
C Light and sound module
D Projector module
Page 3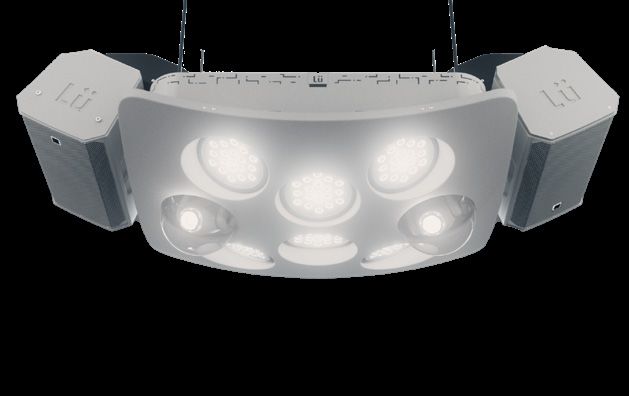
Installation configuration
Side view

All units must be mounted to the ceiling and aligned according to the projection surface. The diagram below
shows the optimal position. Some exceptions for special environments can be made, within the flexibility margins
(maximum tolerance).

  Optimal position                Max projection surface
  Flexibility margin              19’ (5.8 m) wide
  (maximun tolerance)             10’ 7” (3.3 m) high

                                                                                                          Page 4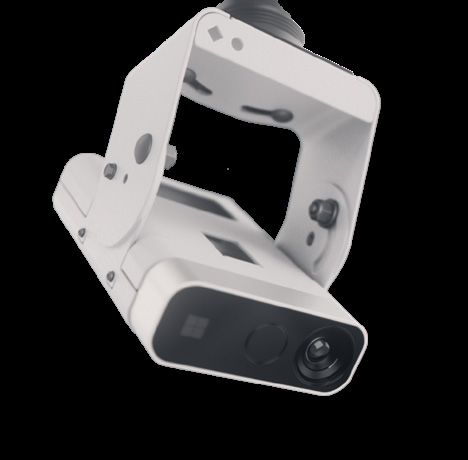
Recommendations

Technical specifications
ÜNO configuration

                                              Camera module                       Projector module

  Installation position*                15’ from the wall / 18’ high          28’ from the wall / 20’ high

  Size (L x W x H)                      6” x 4” x 5”                          22” x 20” x 16”

  Weight                                3.05 lb (1.38 kg)                     37 lb (16.78 kg)

  Rigging                               1.5” pipe mounting bracket            1.5” pipe mounting bracket
                                        or screw to ceiling

  Power consumption                     110-240 V – 36 W (0.3 amp)            110-240 V – 470 W

      IMPORTANT : The installation parameters in this guide are optimal recommendations. These may change
      or vary depending on the installation context or space. Contact us for more information on the matter.

                                                                                                         Page 5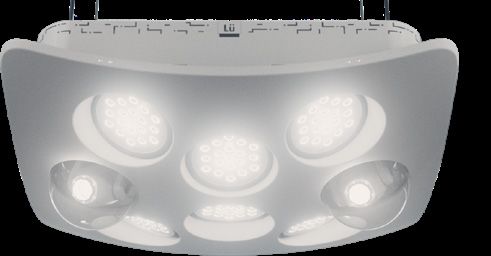
Technical specifications
Light and sound module

                                               With speaker                         Without speaker

  Installation position*                16’ from the wall / 20’ high          16’ from the wall

  Size (L x W x H)                      37” x 76” x 15”                       37’’ x 46” x 15’’

  Weight                                178 lb (80.74 kg)                     99 lb (44.91 kg)

  Rigging                               4 hanging points                      Screw to ceiling

  Power consumption                     110-240 V – 1106 W (9.21 amp)         110-240 V – 674 W (5.62 amp)

      IMPORTANT : The installation parameters in this guide are optimal recommendations. These may change
      or vary depending on the installation context or space. Contact us for more information on the matter.

                                                                                                       Page 6
Technical specifications
Heart module

                                             Heart module

  Installation position*               12” over the projection (centered)

  Size (L x W x H)                     14” x 23” x 5”

  Weight                               18 lb (8.16 kg)

  Rigging                              Screw to wall

  Power consumption                    110-240 V – 216 W (1.8 amp)

     IMPORTANT : The installation parameters in this guide are optimal recommendations. These may change
     or vary depending on the installation context or space. Contact us for more information on the matter.

                                                                                                      Page 7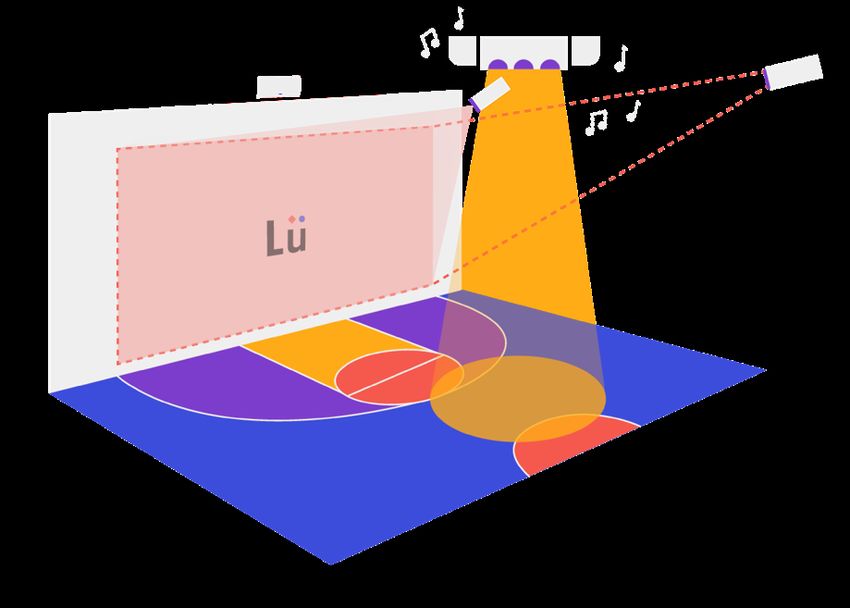
List of domains for Lü
List of domains that Lü needs to access to work properly and domain details

   Domains                              Details

   amazonaws.com                        Amazon web services are used for Lü updates, for the Lü Community
                                        content, to download specific apps content and to send push
                                        notifications to users.

   zoho.com                             Zoho is our platform for technical support. You can create support
                                        tickets from the help center section in Lü.

   mixpanel.com                         Mixpanel is our platform that gathers data about Lü usage. If Lü can
                                        access this domain, we’ll be able to collect data and improve the
                                        overall experience for all our users. No personal data is collected.

   youtube.com                          If you want to use the YouTube app in Lü

   teamviewer.com                       With TeamViewer, we can log into the unit and troubleshoot a technical
                                        issue remotely. Doing so greatly improves our troubleshooting and
                                        problem-solving capacity.

   airsquirrels.com                     You may need to have your IT department allow TCP ports 7000,
   Reflector 4                          47000, 7100, 49228, 50259 and UDP 62572, 54780 to be open to
                                        communicate. The network must also be allowed to run
                                        Bonjour and mDNS in Multicast mode. Unless special steps have been
                                        taken, Reflector will likely not work across subnets or VLANs.

                                                                                                         Page 8
Installation Form
Date
Billing address
Installation address
Expected installation date
Gym dimensions (floor size – length x width)
Floor to ceiling height (feet)
Floor to structure height (feet)
Type of rigging structure
Distance between truss
Does your gym have double door access to
allow entrance of large crates (90” x 40” x 40”)
Do you have a lift (scissor lift) that can be
used in your gym for installation (please
provide brand and model)
Primary user contact information
IT department contact information (if possible)
Please provide
01 Pictures of every wall, projection surface, ceilings (area over the playground) and access to the gym
02 School and/or gym plans if available
03 Pictures of the electric outlets required for the installation
Signature of the person in charge of planning Date
Page 9You can also read